DIY Plaid Christmas Tree Skirt with Satin Binding

DIY Plaid Christmas Tree Skirt with Satin Binding

DIY Plaid Christmas Tree Skirt with Satin Binding

I’ve always adored the classic look of plaids during the holidays. And plaid combined with satin is just lovely. We recently moved to a new house and I’ve been doing Christmas on a budget this year. I knew I wanted a plaid Christmas tree skirt but also knew I needed to be frugal. Here’s how I accomplished both.

Fabric first!

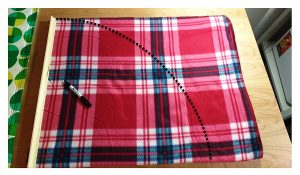
I picked up this plaid fleece throw blanket at K-Mart for $1.99. To create a perfect circle, I folded the blanket into quarters and then measured the shorter height of the rectangle it formed. On this blanket, that was 28″. I, randomly, had a stick that measured exactly 28″. You could do this with a long ruler, or just measure out the length you need on any stick or piece of wood and do the same.

DIY Plaid Christmas Tree Skirt with Satin Binding

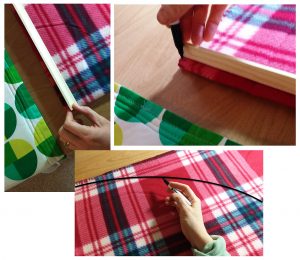
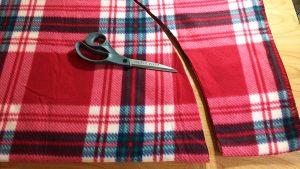
Once you’ve marked the length on both sides of the rectangle, hold the stick at the corner of the folded blanket, and then draw an arc from point to point, moving only the top of the stick.

Making the cut

DIY Plaid Christmas Tree Skirt with Satin Binding

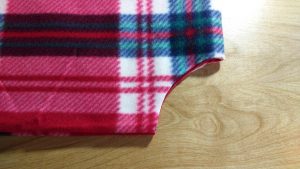
Now cut out that lovely quarter circle. Before you unfold the blanket, cut out the interior circle (the part that will wrap around the trunk of the tree.) To do this, determine your desired circumference, which will allow you to find the diameter, and thus the radius. If you need the formulas, they are: d = C/π and r = D/2

DIY Plaid Christmas Tree Skirt Satin Binding

Once you know your radius, do the same thing you did to mark out the larger arc but this time at the corner where the blanket is folded into quarters.

DIY Plaid Christmas Tree Skirt Satin Binding

Wash away those wrinkles

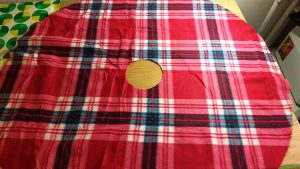
At this point I unfolded everything but the fleece was far too wrinkly. One of the great things about fleece is that it doesn’t fray, so I took the opportunity to wash a few of my daughters’ blankets and threw them, and this tree skirt, into the wash on the cold, delicate cycle. I added white vinegar as fabric softener, and then dried on low. It significantly reduced the wrinkles of the fleece.

DIY Plaid Christmas Tree Skirt Satin Binding

Binding it all together

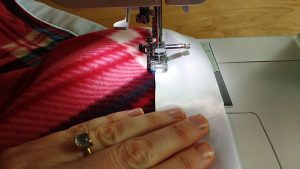
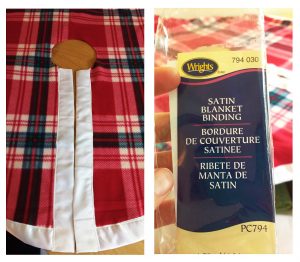
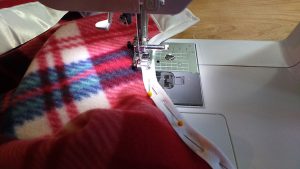
For a tree skirt that is 56″ wide like mine, you will need two packages of satin binding. I used a satin applique stitch and worked my way around the skirt. Pre-packaged satin blanket binding is NOT cut on the bias, so you will need to pay careful attention as you go around the curve of the skirt.

DIY Plaid Christmas Tree Skirt Satin Binding

Some skirt tutorials will tell you to cut a line up to the interior circle before you add binding; I like to cut my line afterwards.

DIY Plaid Christmas Tree Skirt Satin Binding

Looking at the fabric, I followed the lines of the plaid to cut a straight line from the outside of the skirt to the inside and then used more of the satin binding to trim each edge.

DIY Plaid Christmas Tree Skirt Satin Binding

Welcome to the inner circle

When it comes time to bind the interior circle, do yourself a huge favor and switch to binding that is cut on the bias. When fabric is cut on the bias it is much easier to curve it, which makes binding circles, especially interior circles tremendously easier.

DIY Plaid Christmas Tree Skirt Satin Binding

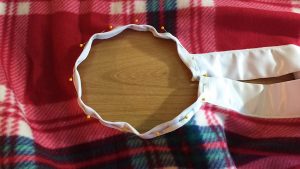
Here I switched to prepackaged white bias binding and though pinning is not my favorite, thing, for this project I pinned everything carefully in place.

DIY Plaid Christmas Tree Skirt Satin Binding

Pro tip: think ahead before you pin and place your pins in the direction that you sew. This will it easier to pull them out as you go around the circle.

DIY Plaid Christmas Tree Skirt Satin Binding

Tie it off

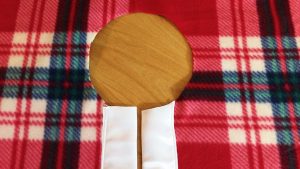
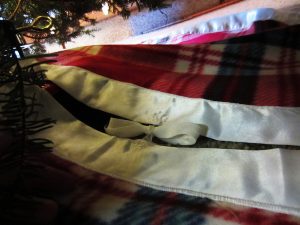
Lastly, don’t forget the ties! I used four pieces of the binding tape that I used on the interior circle to create ties, two at the top of the circle, and two 12 inches down the cut edges.

DIY Plaid Christmas Tree Skirt Satin Binding

Here is my tree before the plaid tree skirt.

DIY Plaid Christmas Tree Skirt Satin Binding

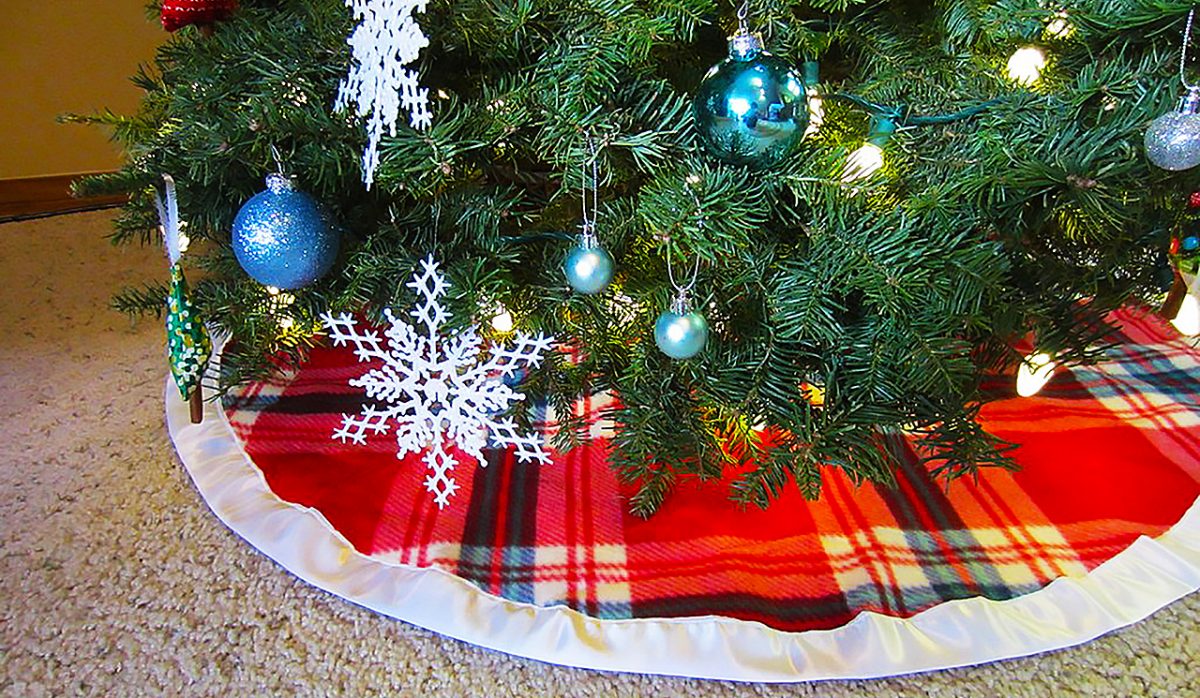
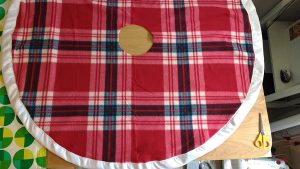
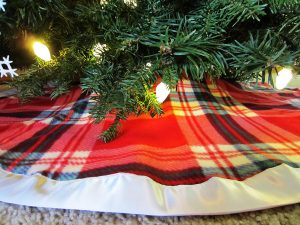
And voilà, the finished product!

DIY Plaid Christmas Tree Skirt Satin Binding

The combo of fleece, plaid, and satin just warms my heart.

DIY Plaid Christmas Tree Skirt Satin Binding

What are you DIYing this holiday season? Let us know and happy sewing!

—————————–
Charlotte Kaufman is a writer and sewist in Mammoth Lakes, California. She specializes in marine and home interiors and continues to fall more and more in love with quilting. You can follow her at charlottekaufman.com.
A Pleating Problem

A Pleating Problem

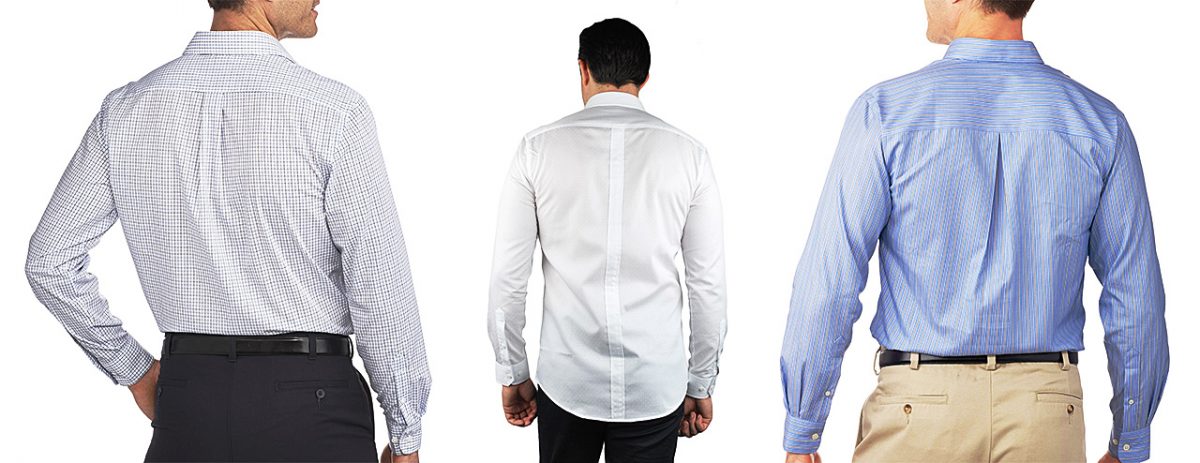
You know the back pleats that are almost always present on the back of button front dress shirts? The ones that are sewn into the shirt body where it attaches to the yoke? Sometimes there are two, one on each side and sometimes, often on women’s shirts, there is a single big one at the center back. They exist for the purpose of ease, or freedom of movement but, what they really do, is just create a whole lot of extra unruly fabric and make a shirt look as if it is too big.

The camera adds ten pounds…

It’s basically true that the camera adds ten pounds so most things in film and television are fit without extra (usually un-needed) fabric mucking up the svelte look.

I spend a lot of time taking these pleats out of shirts, partially because they seem to be in almost all shirts except for ones specifically called ‘slim fit’ and, truth be told, it’s a rather complicated alteration if done correctly.

Step One:

Take things apart. Separate the shirt back from the yoke. If you have two side back pleats, you don’t have to take the whole thing apart. You can stop after the pleats are free on either side and leave the center part still attached. If you have a center pleat, you’ll have to take the whole seam apart. Note how much fabric is in the pleat or pleats. This will tell you how much to take out of the side seam.

Step Two:

Take more things apart.

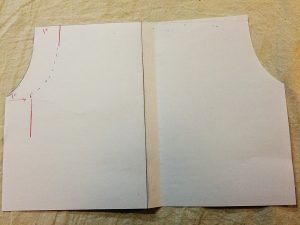
Take apart the back arms eye. I usually go an inch down from the shoulder seam to the underarm side seam. Then take apart the side seams. Basically, the entire shirt back needs to be free so you can recut it.

Paper diagram illustrating marking new arms eye and side seam lines on the shirt back piece.

Paper diagram illustrating marking new arms eye and side seam lines on the shirt back piece.

Step Three:

Redraw the arms eye and side seam lines.

Lets say your shirt had a center pleat that 1” on either side, or two ½” folds on each side. From this, you know that you want to take an inch out of each side the entire way down the back piece.

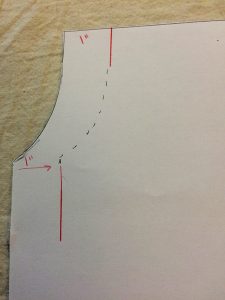
Slice up of new arms eye line.

Slice up of new arms eye line.

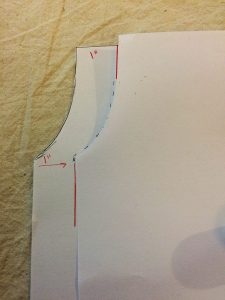
To redraw the armhole, mark 1” in at the top of the armhole curve and 1” in at the top of the side seam. Then fold your back piece, using the opposite side as a guide as to where to draw the curve.

Mark the side seam line 1” in all the way down through the hem.

Folding one side over to use as guide for redrawing the arms eye seam.

Folding one side over to use as guide for redrawing the arms eye seam.

Step Four:

Sew the back piece to the yoke, lining up the centers first and pinning out from there.

Step Five:

Sew the back armseye along your newly marked seam line.

Step Six:

Sew the side seam. You should use the original line on the front piece and your new line on the back piece.

Step Seven:

Give everything a nice press and you’re done.

Sometimes, designers like to make a shirt even more fitted by having their tailors add side back darts. This is extremely common in the film business. If you ever watch Hawaii Five-0, check out the button front shirts that Scott Caan wears. They are altered to within an inch of their life. They fit him like a glove. And they all have side back darts. Whenever I see them, I think, “Oh, a tailor got a hold of that shirt.” If they’re not custom made for him, then they have definitely been through the back pleat extraction/side back dart procedure.

Next time you’re watching your favorite show, pay close attention to the button front dress shirts. You’ll start to notice side back darts everywhere!

Seeking Inspiration

Seeking Inspiration

You ever have one of those moments when you want to sew something, but you’re not sure what to make? You don’t have anything on your “to make” list and there’s no upcoming events that inspire you to make something special for the occasion? Despite the lack of need, though, your fingers are tingling with desire to sew something. Here’s some suggestions to find some inspiration and fill your need to sew.

Think About Gifts

Is there a holiday, birthday or other occasion coming up? Would any of the people involved in the celebration appreciate and handmade gift? Even if the idea of what you’d like to make them isn’t something you’ve made before, give it a shot. Not only will you fill your urge to sew, you’ll have a unique, special gift to give to someone you care about – and you might learn something in the process.

Ponder Your Wardrobe

Perhaps it’s time to donate some items…

Seeking Inspiration

Seeking Inspiration

When you get dressed in the morning, do you feel like you simply “have nothing to wear?” Perhaps it’s time to donate some items you’re not as in love with as you once were and make yourself some new items? Donating clothing to make room for something you make not only fills your sewing urge, it helps those less fortunate fill out their wardrobes.

Learn a New Skill

Is there a new skill you’ve been wanting to learn? Something you’ve been afraid to take on for a project you can’t afford to mess up? Use this urge to sew without a specific outlet as your opportunity. Whether it’s a specific stitch style, a larger skill like making buttonholes or making something you’ve never attempted before this gap could be a great time to take on that challenge.

Have a Sewing Circle

Oftentimes, being in the presence of other sewers can lead to inspiration. The conversations that occur in a sewing group frequently lead to that “lightbulb” moment for your next project. In other cases, they can inspire you to pick up a project you’d given up on when you wouldn’t otherwise revisit working on it. Also, hosting a sewing circle gives you a chance to connect with like-minded crafters and maybe make some new friends.

Next time you’re struggling to fill a sewing urge, try one or more of these ideas. Then let us know how it went and what you wound up making.

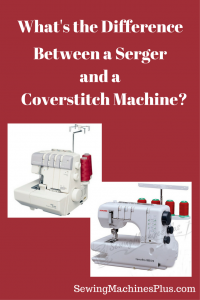
Overlocker / Serger Vs Coverstitch Machine -- What's the Difference?

Overlocker/ Serger Vs Coverstitch Machine — What’s the Difference?

Overlocker/ Serger Vs Coverstitch Machine -- What's the Difference?

Overlocker/ Serger Vs Coverstitch Machine — What’s the Difference?

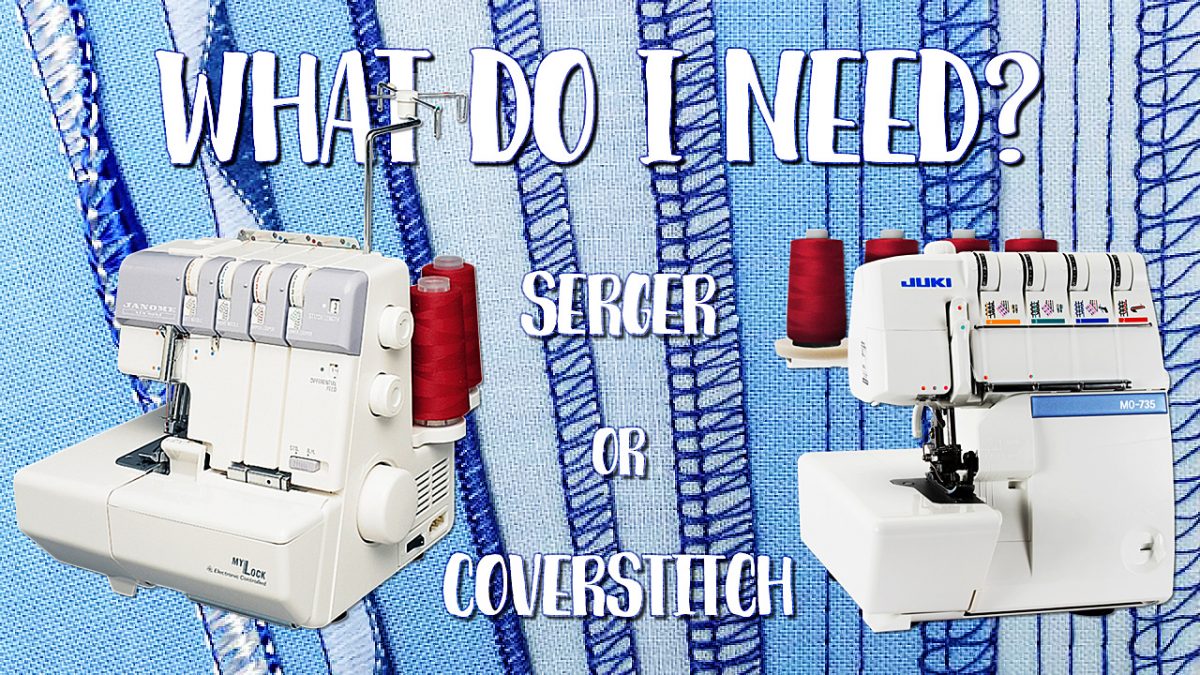
Serger vs. Coverstitch Machine — Do you need both?

What is the difference between a serger, an overlocker, and a cover stitch machine?

Serger vs Coverstitch: The Serger / Overlocking Machine

A serger and an overlocker are different names for the same machine. Americans generally refer to these as sergers, and nearly everyone else refers to them as overlockers. A serger performs an overlocking stitch, which is really more like knitting than sewing.

Overlocking, or serging, trims and binds seams so that the fabric can not unravel. It professionally finishes the insides of garments. There are rare occasions when one might use a serger to embellish outside seams or to finish hems, such as with rolled hemming, but in general the serger or overlocker is used in construction rather than finishing.

The serger is quite a different machine than a sewing machine, and requires threading of three or four pathways, including two loopers. These loopers accomplish the knitting involved in the overlock stitch. A serger also has knives, which cut seam allowances as it serges them. This machine does not replace the sewing machine, but works beside it accomplishing tasks no sewing machine can do.

The Janome 634D is my choice recommendation for the serger to buy. Here is my review of this model.

Serger vs Coverstitch: The Coverstitch Machine

A coverstitcher really takes all the trouble and error out of this otherwise tricky task.

The coverstitch machine is the star of the machine line-up for finishing tasks. A coverstitch machine beautifully finishes hems on most types of garments, especially knits. Many would-be seamstresses shy away from sewing knit garments because sewing stretchy fabrics using a sewing machine alone is decidedly tricky. While a serger is certainly helpful (some would say essential) in sewing with knits, nothing is as helpful for working with knits as a coverstitch machine. These sweeties allow knits to be turned and hemmed beautifully and quickly, with a stretchy seam that will not break.

For me, hems are perhaps the most difficult task in garment sewing, but the only reason I feel this way is because my machine arsenal has not previously included a coverstitch machine. A coverstitcher really takes all the trouble and error out of this otherwise tricky task. And speaking of tricky tasks, a coverstitch machine can also attach lace, elastic, or other trim to any garment in a hurry, again with a stretchable seam that will not break. It can even take the trouble out of attaching bindings.

When looking at the serger vs coverstitch machine, a coverstitch machine looks more like a sewing machine than a serger does. And a coverstitch machine is similarly uncomplicated. A coverstitcher only has one looper, and it doesn’t have any knives. This makes the threading of a coverstitch machine straightforward and easy to do. You may leave the coverstitch machine threaded and waiting to perform its hemming whenever you need it. I love the simplicity of a machine that can sit patiently waiting to perform its job beautifully and quickly. Having a coverstitch machine waiting to hem garments means you will actually make garments, rather than being daunted by the trouble of hems!

Coverstitch Machines: Simple yet Versatile

A coverstitching machine is versatile, despite its simplicity. With most, you can use one, two, or three needles. There are also a couple of different configurations that you can use with two needles, to make narrow or wide rows of hem stitches. A single needle can be used to knit the chainstitch, which is a beautiful stretchy seam. A chainstitch can be used for both utility and decorative effects.

I recommend the Janome 1000CPX CoverPro as the best coverstitcher to buy. As I have said before, I really trust Janome. I prefer this brand as being the best value for user-friendly, high-quality machines.

You can begin using your coverstitch machine immediately, and use it often, without ever needing to buy attachments or extra feet. However, you can get the most from your coverstitcher and do lots of things with different attachments.  A clear foot is nice to have. You can get a binder attachment which will neatly attach binding to most any project. You can also buy cording and gathering feet, a pintucking bar, a feller, belt looping folder, and more. None of these are necessary, although you will really appreciate having a clear foot.

Serger vs Coverstitch: Combo Models

One choice when thinking about the serger vs. coverstitch machine is to buy one machine to perform both functions. For folks without the room for multiple machines, there are combination models that will perform both overlocking and coverstitching.  This may be a sensible choice for you, rather than buying two machines.

I recommend this choice only for someone with quite limited space or budget; my preference is to have separate serger and coverstitch machines if possible. That’s because it is more expedient to have each machine set up and ready to do its job. Then you can just move back and forth quickly between the two machines as you need each. This is easier than having to reconfigure a complicated serger when moving back and forth between tasks. I’m told it really only takes a moment and is an easy chore to do, however. I know many sewists love their combo serger/ coverstitch machine and use it regularly for both tasks.

A combo model is a good budget choice for people who want to make garments and need both overlock and coverstitch capability, without spending a lot of money.

Be aware that this choice is a compromise. A serger with coverstitching capability won’t have a free arm. This feature makes a separate coverstitch machine a useful joy for hemming. Nor can combo machines perform as perfect an overlock or coverstitch as separate machines will. To get the best of both worlds, buying a separate serger and coverstitch machine is the way to go.

Serger vs Coverstitch: You Need Both!

So now you know that it is not a question of which machine to choose, serger vs. coverstitch machine. To beautifully and professionally produce and finish quality garments, you need both. You can choose to satisfy this need with a complicated serger that performs both functions. Or you can satisfy both needs with a separate serger and coverstitch machine. Either way, upgrade your machine arsenal and uplevel your sewing by including overlock / serging and coverstitch capabilities to your lineup. You and your wardrobe will be glad that you did!

Overlocker / Serger Vs Coverstitch Machine — You want both!