Storing Your Fabric

As I wind down in the steps for making my quilt, I’m finding that I have fabric scraps left over from the endeavor that I really don’t want to toss. One of the problems though is that I have a very lacking fabric storage setup. In fact, it consists of stuffing fabric into a remarkably unprofessional Hello Kitty pail (Note: I don’t even like Hello Kitty). Once that happens, I put the pail into my closet. Since said closet kind of overflows at times, the method is even more lacking than it would otherwise be.

I want to keep this fabric, but I’d like to have a better strategy of doing so. That idea had me browsing some possibilities online, and some of the options I saw were pretty basic.

Simple Solutions

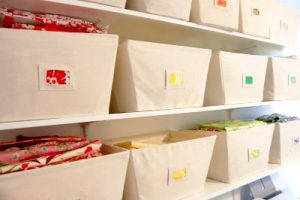
For instance, clear storage bins or canvas bins.

For instance, clear storage bins or canvas bins.

For instance, clear storage bins or canvas bins. While these are simple and efficient ideas for keeping my fabric in order, the truth of the matter is that they’re also, at the moment, things that would probably end up getting stashed away in my closet. As one of the qualms is that my fabric is stored in my closet, neither option fixes that detail.

At least, not alone. If I had a method of storing those bins out in the open, they’d work fine. In any event, the insufficiency could certainly lead to more searching in regard to the best (complete) fabric storage option.

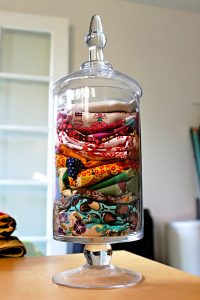
The most fitting right now is the notion of keeping excess fabric pieces in a jar.

The most fitting right now is the notion of keeping excess fabric pieces in a jar.

So during my search, did I have find the perfect one? That might be a complex question since I’m not sure there is a perfect one, but I did find some that are worth mentioning. The most fitting right now is the notion of keeping excess fabric pieces in a jar. I’m not sure I’d ever considered using my extra fabric in a way that actually makes it decorative even before I use it for a sewing project, but I like this concept. Most of the fabric that I have remaining is block-ish, and that smallness of leftovers seems spot-on for the store-in-a-jar method. All I’d have to do is get a jar, fold up my scraps nicely, and let the storage add accent to a room before the pieces potentially add accent to a future project. A similar idea is to store those scraps in kitchen bowls or strainers, like you can find here, or maybe a flower vase.

A similar idea is to store those scraps in kitchen bowls or strainers, like you can find here, or maybe a flower vase.
A similar idea is to store those scraps in kitchen bowls or strainers, like you can find here, or maybe a flower vase.

One is to take the drawers out of a dresser, and once the furniture has been treated so that it looks finished and ready, fabric can be stashed where the drawers used to be.

One is to take the drawers out of a dresser, & once the furniture has been treated so that it looks finished and ready, fabric can be stashed where the drawers used to be.

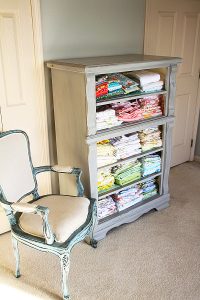
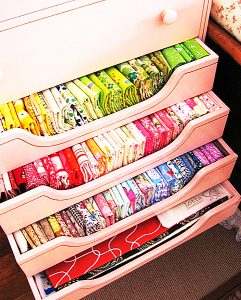
Two of the more intriguing fabric storage options I found might be more suitable for a time when/if I have more room and/or extra cash. One is to take the drawers out of a dresser, and once the furniture has been treated so that it looks finished and ready, fabric can be stashed where the drawers used to be. I adore this idea, but it’s a project itself! Be aware though that if you don’t want to go through all the sanding and painting to prepare the furniture, you could still use a dresser, drawers intact.
Be aware though that if you don’t want to go through all the sanding and painting to prepare the furniture, you could still use a dresser, drawers intact.

Be aware though that if you don’t want to go through all the sanding and painting to prepare the furniture, you could still use a dresser, drawers intact.

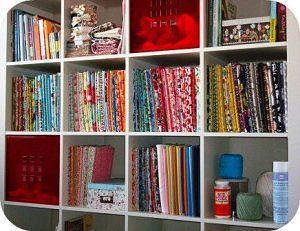
Another option is this square shelf idea that hangs on the wall. This one is particularly of interest if, like me, your bedroom, sewing room, etc. is already pretty full of furniture. When that’s the case, going upward seems like a reasonable option, and that’s exactly what this shelf would do! Being the nerd I am, this square setup appeals to me more than a different shelf idea might because it’s comic-book-ish, but that’s not to say that squares are the only possibility for this method. In fact, you might find that you have some kind of old furniture around your house that can be repurposed for this prospect — like a headboard. There might be plenty of possibilities if you spread your imagination to find them!

Another option is this square shelf idea that hangs on the wall.

Another option is this square shelf idea that hangs on the wall.

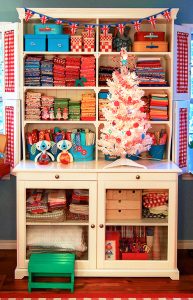
Another option is a lot simpler, but might cost more — and that’s to buy a piece of furniture that’s specifically for this purpose. This hutch, for instance, makes a wonderful and aesthetically pleasing storage area for fabric, and other than price and space, I wouldn’t hesitate to have one of these in my home.
This hutch makes a wonderful storage area for fabric, and other than price & space, I wouldn’t hesitate to have one of these in my home.

This hutch makes a wonderful storage area for fabric, and other than price & space, I wouldn’t hesitate to have one of these in my home.

But as breathtaking as these furniture options are, the truth of the matter is that I’ll probably have to start with something easier and more money-friendly. Given that the majority of my current fabric collection is scraps and/or block-ish pieces, my best bet for advancement might be the jar or strainer method, which I’m okay with!

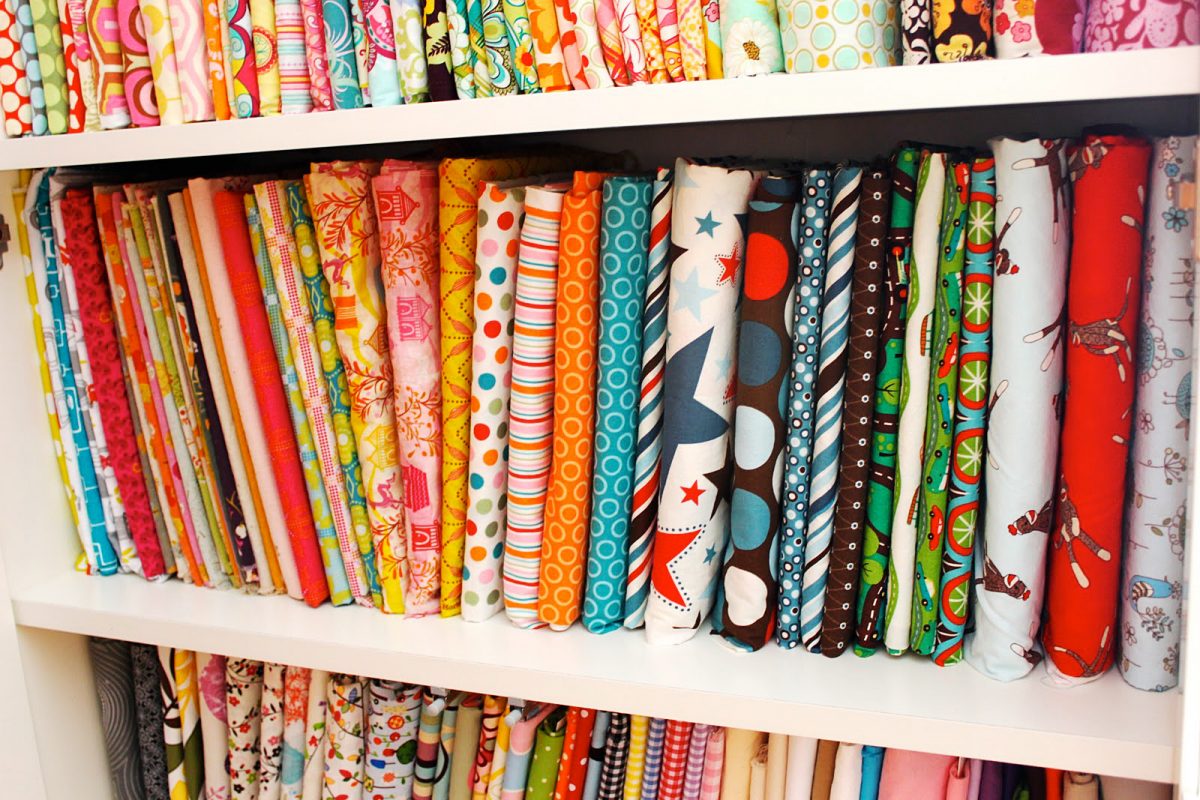
Still, someday, that hutch, that shelf, or that dresser would be a wonderful addition to my sewing life!

Keep Warm with These Fleece Projects

Keep Warm with These Fleece Projects

These Fleece projects will keep you cozy and warm

I don’t know about you, but if you ask me, this Winter can’t end soon enough. I’m dreaming of warm weather and beach trips, but the reality is that it is cold outside. On cold winter days, there is nothing cozier than fleece. So I’ve scoured the net to round up some fun fleece projects for you to sew.

Tips for Sewing with Fleece

Fleece projects are generally easy to sew, but only if you know some tricks for working with this unique fabric:

Needles – Some folks prefer to use a universal point needle when working with fleece. If you choose this type of needle, be aware that fleece will dull these quickly and you will need to change needles often. I find a stretch or ball point needle works better and use these instead for sewing fleece projects. Regardless of needle type, I use use size 14 for fleece.

Foot selection – A roller foot or an even-feed foot (also known as a walking foot) will be most helpful. Reduce presser foot pressure to allow for the extra bulk.

Stitching – I prefer to sew with a stretch stitch for fleece. If your machine does not have a stretch stitch, you can use a narrow zig-zag stitch instead. For straight stitching, use a slightly longer stitch length, about 3.5mm, to prevent skipping.

Thread – Fleece is not only tough on needles; it can also be tough on thread. Don’t try sewing fleece projects with cotton or cotton/poly thread, as this may ravel or break. To prevent breakage, use 100% polyester thread.

Other tips 

  • Don’t use an iron on fleece, as it has a very low melting point.
  • To know which side is which, pull the selvedge taut; fleece will roll slightly on the wrong side.
  • It is difficult to undo stitches from fleece, so work slowly and carefully to avoid mistakes.
  • Clean your machine frequently when working with fleece, as it has a tendency to shed fibers.

And now, for my favorite fleece projects:

Fleece Projects: Hats and Headbands

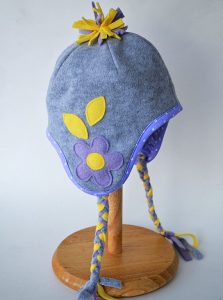
A U.S. Army survival manual from 1957 claimed we lose 40-45 percent of heat from our heads. There is some controversy about this figure, and this may be overestimated. Regardless, you lose less heat from your head when it is covered!  There are many cute ways to cover heads with fleece, here are just a few.

Delia shows how to embellish a simple ear warmer headband with a huge fleece flower.

Delia shows how to embellish a simple ear warmer headband with a huge fleece flower.

Fleece Projects: Scarves

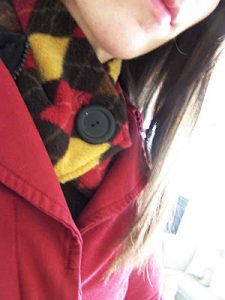
A fleece scarf can help keep you warm and fashionable, too. You can make one in mere minutes.

Scarflette, courtesy of Leafy Treetop.

Scarflette, courtesy of Leafy Treetop.

Fleece Projects: Mittens and Gloves

  • Make It and Love It shows how to make a pattern for adjustable mittens to fit anyone.
  • These fleece mittens are even easier to make and feature two layers for extra warmth.
  • Here’s how to make fleece gloves with gussets.
  • Ruffled fingerless gloves couldn’t be cuter. These only look complicated; they are actually easy to sew.

Fleece Projects: Footwear

  • This instructable shows how to make fleece socks from a blanket. If you’d rather not cut up a blanket, you could use fleece yardage instead.
  • Here’s a video tutorial for making dainty, ladylike slippers from fleece.
  • These fleece slippers will keep your ankles warm, too.

Fleece Projects: Pants

Nothing is more comfy and cozy than fleece pajama pants. Simply Modern Mom shows to make them using your favorite pants as a pattern. The tutorial is for child’s pants, but you can use this method to make them in any size. If you don’t have a favorite pair to use for making your pattern, of course you can make fleece pajama pants using most any pajama pattern in your stash.

Fleece Projects: Sweater

Here is a tutorial for making a lovely cowl-necked sweater from fleece that is as impressive as it is comfortable. The cowl neck is quite versatile. This can be worn in different ways, depending on the temperature outside.

Fleece Project: Caftan

When it’s really cold and all you want to do is stay cozy indoors, you’ll appreciate this easy fleece caftan. This is even better than the popular snuggies, as it covers both your front and your back sides.

Fleece Projects: Coats and Capes

Fleece outerwear is great because it’s warm, comfortable, and even repels water on wet and drizzly days. You can choose something easy and unstructured, such as a poncho or cape, or go with something more detailed, like a jacket or coat.

  • This instructable shows how to make an easy poncho that’s also pretty.
  • Here are several ways to make a beautiful long cape, with hood or without.
  • This little girl’s cape includes a collar and dressier design details.
  • Craftsy has collected 6 different jacket patterns. This link has something for everyone.
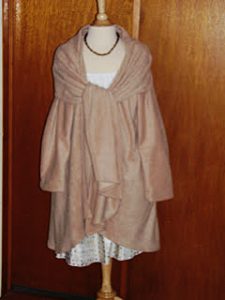
My personal favorite fleece coat is McCall’s pattern 5987. This coat includes a built-in scarf that can be styled several different ways.

My personal favorite fleece coat is McCall’s pattern 5987. This coat includes a built-in scarf that can be styled several different ways.

My personal favorite fleece coat is McCall’s pattern 5987. This coat includes a built-in scarf that can be styled several different ways.  It has an attractive rounded hem that looks great with both skirts and pants. I have made this coat in camel, in charcoal, in navy, and one in red as a gift for my mother. I get lots of compliments on these coats every time I wear them. While they are fashionable outerwear, they are also so cozy that I wear them as an extra layer in the house all the time. Maybe I should make a fleece robe, because I don’t have any robe that feels near as nice over my nightgown as these coats do.

Fleece Projects are Fun

Don’t be afraid of fleece. It is different than other fabrics, but nothing compares to the comfort fleece offers. I also think of this fabric as being more environmentally friendly than many others, since it is often made from recycled plastic bottles. Sewing on fleece is easy if you know the tips and tricks shared here. I hope you will try some of these fleece projects this season and enjoy them for many winters to come.

Should you buy an Industrial Machine?

Should you buy an Industrial Machine?

One of the questions I often get when I tell people that I sew for a living is: What sewing machine do you like the best?

I usually respond that it all depends on what I’m doing and I use different machines for different things. Which is mostly true. But if I’m being completely honest, I do have a favorite. Well, actually two favorites.

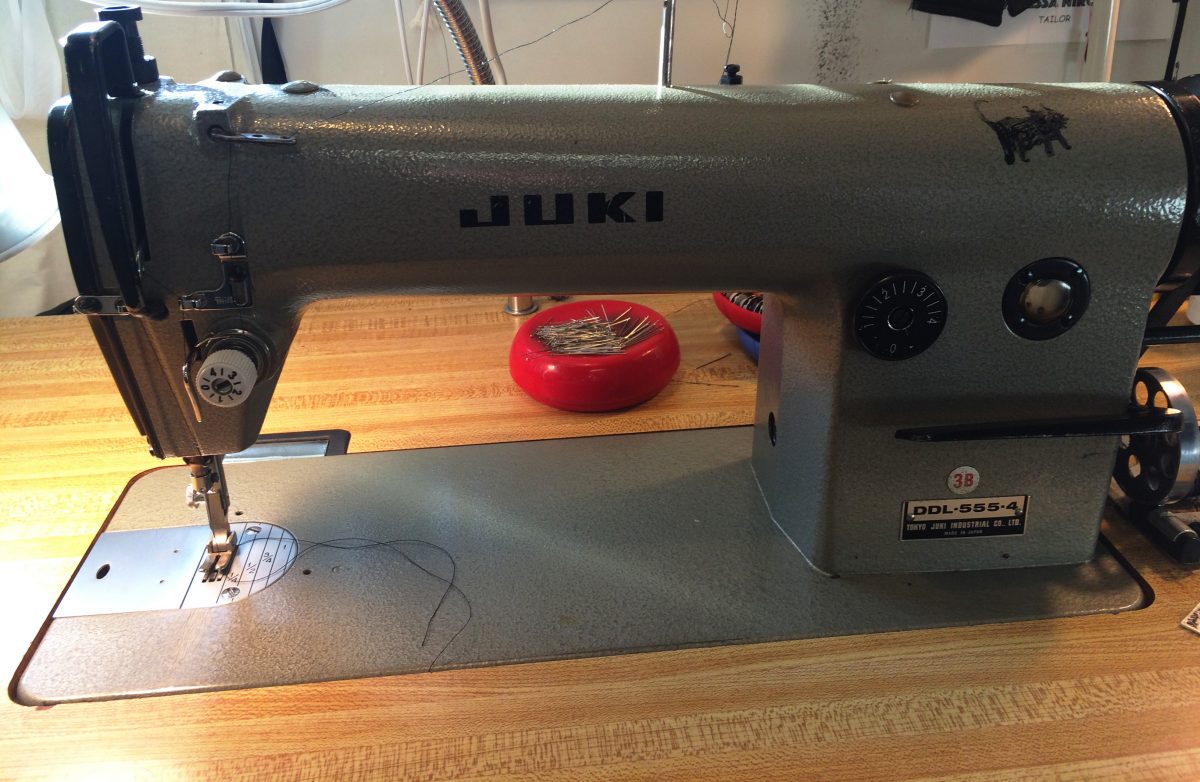
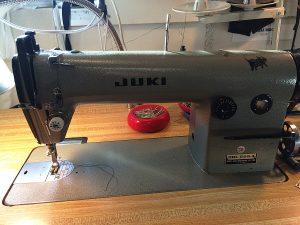
The first is my Juki straight stitch industrial. Mine is an older model, the DDL-555-4, which is no longer made.

The first is my Juki straight stitch industrial. Mine is an older model, the DDL-555-4, which is no longer made.

The first is my Juki straight stitch industrial. Mine is an older model, the DDL-555-4, which is no longer made. Juki does though, of course, still make straight stitch industrial machines (the updated models for mine are the DDL-8700 and DDL 5550-N).

Many people are a bit hesitant about buying an industrial machine. Lots of people have told me that industrials frighten them because they’re so fast. Well, these days, a lot of industrials come with a speed setting so you can control how fast it goes (even if you accidentally push all the way down on pedal the machine will not ‘take off’ if you have the speed set to ‘slow’). Nothing to fear. You can start out slow and, as you gain confidence, crank up the speed.

It is important to note, though, that the older models, like mine, do not have this feature. And each machine is a bit different in how it responds to the pressure of your foot.

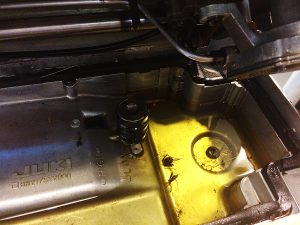
One of the most crucial things to know about using an industrial machine is that, unlike the majority of domestic machines these days, it does indeed need oil to run properly. Once your machine is all assembled, with the machine head sitting securing in the table, simply tip the machine backwards. Underneath, you’ll see a metal bed. Fill it with machine oil.

Underneath, you’ll see a metal bed. Fill it with machine oil.

Underneath, you’ll see a metal bed. Fill it with machine oil.

I think the new models have a line indicating how much oil you should put in. Mine does not but I fill it so that the deeper part of oil pan (the right side) is about half full.

The next thing to remember is that, if you ever have to transport the machine, you need to drain the oil first. Or you’ll end up with quite the mess. On the right side there will a black screw in plug you can loosen and take out (make sure you have a bowl or plan positioned underneath to catch the oil) to drain the oil from the bed.

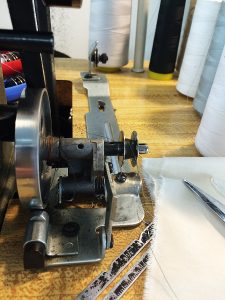
One of my favorite things about industrial machines is that you can wind a bobbin while sewing. Most industrial come with a two spool thread stand and the bobbin winding mechanism is separate from the machine on the right side. Place a spool in the thread stand, then thread from back to front through the bobbin stand tension. Pull the thread to the front and around the bobbin. You’ll need to engage the bobbin by pushing it backwards so that the wheel connects with the belt of the machine.

You’ll need to engage the bobbin by pushing it backwards so that the wheel connects with the belt of the machine.

You’ll need to engage the bobbin by pushing it backwards so that the wheel connects with the belt of the machine.

Unlike, domestic machines, there is no disengaging of the machine needle when bobbin winding so if you are winding a bobbin while not sewing make sure you take the bobbin case out and unthread at least to the pick up thread pick up lever.

The beauty of the industrial machine is that, once you are comfortable with it, they are so much faster than domestic machines. You’ll get a lot more done in a shorter amount of time. They also sew through many layers of fabric without complaining. I find that I never have to mess with the tension on my Juki, it’ll sew through light weight chiffon and six layers of denim without needing any adjustment. Brilliant.

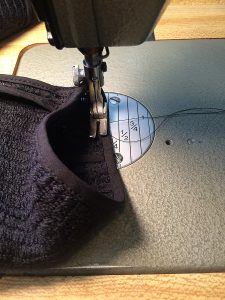
Sometimes people are concerned about the lack of a free arm but I can confidently say that you don’t need one. If you need to sew a small circumference like a sleeve hem, turn it the opposite way out you would if you were using a free arm: meaning if you want to stitch on the wrong side or inside of the hem, leave the sleeve right side out, then position it under the presser foot like so:

If you need to sew a small circumference like a sleeve hem, turn it the opposite way out you would if you were using a free arm.

If you need to sew a small circumference like a sleeve hem, turn it the opposite way out you would if you were using a free arm.

See, easy!

If you’ve been debating about getting an industrial, debate no more! Take the plunge. You won’t regret it.

PS: I’ll tell you all about my other favorite machine next week: a vintage Sing