Butterfly Bag, Small and Large, and Blue Patchwork Purse

Butterfly Bag, Small and Large, and Blue Patchwork Purse

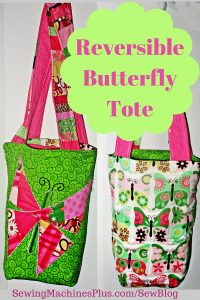
Reversible butterfly tote.

Reversible butterfly tote.

I have been making lots of bags lately, and I have a few tutorials and different bag patterns coming up here soon. This week, though, I’m showing a couple examples of butterfly bag and another variation of a simple tote bag purse.

First, I used my crazy patch butterfly appliqué blocks to make two different sizes of bags recently.

I made a butterfly bag tote as a gift for my niece’s sixth birthday. It’s a reversible tote big enough to carry coloring books and crayons to the ball park, where her brother plays nearly every day. There’s also room for a small quick quilt I made that she can use to sit on the bleachers or the ground while she’s there.

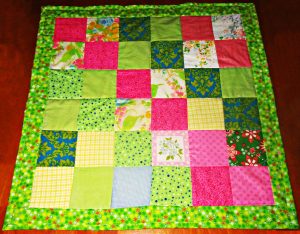
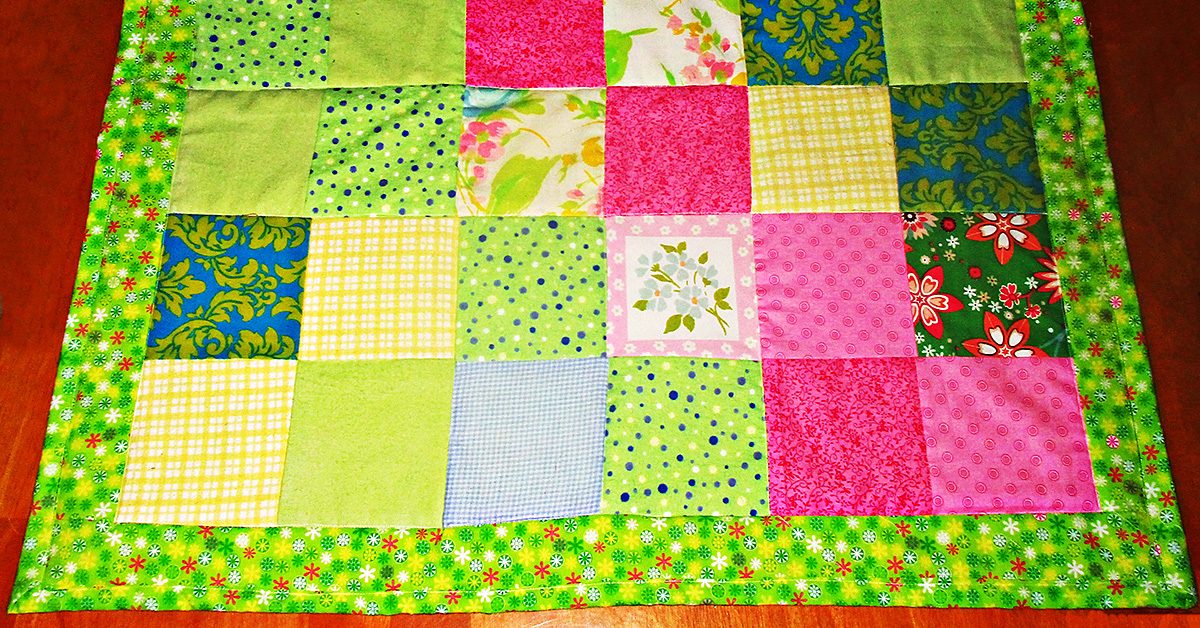
Baylee quilt, caption, I made this quick scrap quilt in only about an hour & a half.

Baylee quilt, caption, I made this quick scrap quilt in only about an hour & a half.

Here are the step-by-step instructions for making a reversible tote like this. You can use the strip piece method linked as a video below for making the patchwork straps.

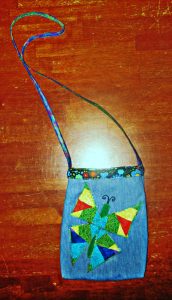
Butterfly bag small purse

Then I found a single stray rainbow strip pieced block at the bottom of my scrap bin and I decided to make a small denim bag with a butterfly, too.

This will be a gift for a teenage girl.

This will be a gift for a teenage girl.

I used a rainbow variegated thread in the needle for the butterfly appliqué and also the strap and topstitching for this bag. This is probably my favorite decorative thread, and I have used it in a lot of projects.

To show off the lining fabric, I sewed the bag and lining together without straps, then folded over the top. I sewed the strap to the outside, with the raw edges under the fold. Then I used two rows of topstitching around the whole bag. I made the strap with a wider blue and narrower green piece of bias tape, covered by wide zigzag stitches up and down about five times.

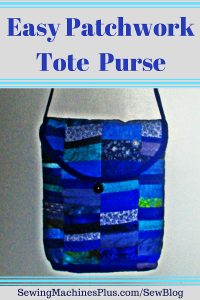
Blue patchwork tote purse

Here is a purse I made for myself last week. It is just a simple tote with the addition of a curved, bias- edged flap at the top. I quilted the patchwork using horizontal rows of a wavy decorative stitch that reminds me, like these blue fabrics, of the ocean.

This one is mine.

This one is mine.

To make the flap, just quilt together a rectangle of patchwork with batting and your lining fabric. Make it about an inch narrower than one side of the bag. Then you can fold it in half and cut the corners into curves. Then bind the curved edge and short ends with bias binding.

I used half of a thick turquoise ponytail elastic and a half-ball style button for a closure. I just sewed down the elastic to the lining side of the flap when I attached the bias edging. It also has a large zippered pocket inside, with patch pockets for cards inside that larger pocket.

Just baste the flap to the bag, and then tuck it between the bag layers when you sew the bag and lining together.

If you don’t know how to make this strip style patchwork, which I also used for the straps on the large butterfly tote above, here’s a video of me explaining how to do this.

I actually made this piece of patchwork some time ago. The blue quilt pattern I showed here was for my baby’s crib, and I made bumper pads, too. We didn’t really use these, so I decided to reuse the patchwork to make bags. This is the first one I have done; I plan to do a bigger laptop tote or backpack with the next one.

Like Amish quilts, these bags include mistakes!

I have to say that each one of these bags includes some little issue that I am not happy with. For example, the lining I chose for my blue bag is a gorgeous midnight blue print. But, especially with the flap, too, it is pretty impossible to see what’s in my bag without shining a light. It’s not a huge issue, since I usually just stick my hand in my bag and grab what I need by feel, anyway.

I boxed the corners too deeply on my niece’s butterfly tote and gave it a different shape than I intended. But this worked out, because the unintended bucket shape of the bag is what inspired me to make the quilt that I otherwise might not have included with this gift. And while I probably won’t ever make a strap like the one I made for the rainbow butterfly bag again, it is interesting and different looking and it works just fine.

The Amish include mistakes in their quilts on purpose. My mistakes were more accidental. The thing is though, all these little issues are lessons learned. I’ll never use a dark fabric as a bag lining again. Maybe I’ll make a post about more of these kinds of lessons I have learned the hard way soon. I’d be happy to save someone from making some of these mistakes.

In the meantime, I hope you will join me in bag making. Happy sewing!

How to Sew a Zippered Outdoor Pillow Cover with Sunbrella

How to Sew a Zippered Outdoor Pillow Cover with Sunbrella

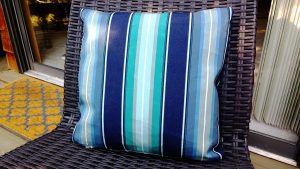
I made those pillows with an envelope-style close on the back.

I made those pillows with an envelope-style close on the back.

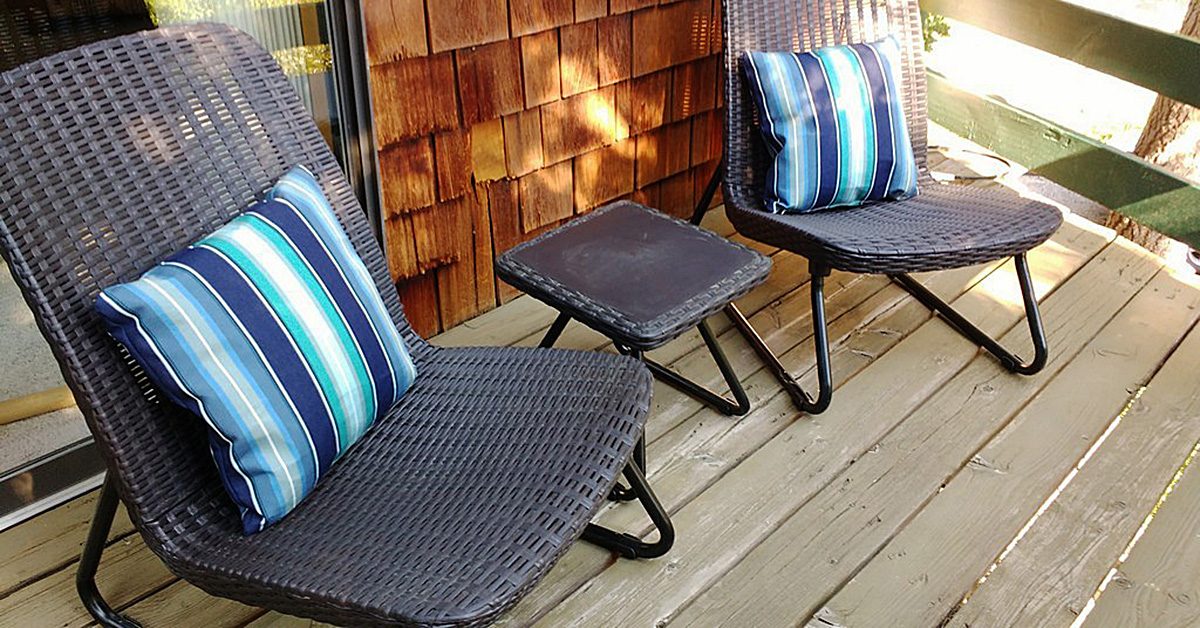
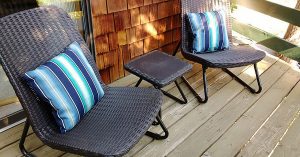
Last week I shared how I made outdoor pillows out of Sunbrella fabric for my front porch chairs. I made those pillows with an envelope-style close on the back. The pillows on the front porch do not get as much direct sun exposure as the chairs on the back deck. For those chairs I wanted to use the same fabric, but to make pillows with a zippered close so I could flip the pillows between the front and the back to evenly distribute sun exposure over time to the fabric.

For pillows with a zipper close you will cut out the same size of front & back panels.

For pillows with a zipper close you will cut out the same size of front & back panels.

For pillows with a zipper close you will cut out the same size of front and back panels. I was making two pillows for 18” x 18” pillow forms so I needed four 17” x 17” panels. With ½” seams, the finished covers would be 16” x 16”, perfect for stuffing a slightly larger pillow in to make the pillow case fluff up and fill out nicely.

Pro Tip: plan ahead when working with stripes or patterns and cut out your panels to match on all sides (if this is important to you).

Plan ahead when working with stripes or patterns & cut out your panels to match on all sides.
Plan ahead when working with stripes or patterns & cut out your panels to match on all sides.
Like a hot knife through butter

Sunbrella is perfect for cutting with a hot knife. It seals the edges for you. Just watch out as the edges can be sharp.

Sunbrella is perfect for cutting with a hot knife.

Sunbrella is perfect for cutting with a hot knife.

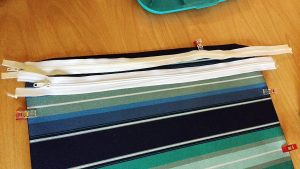
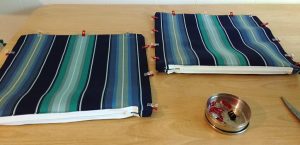
Sunbrella outdoor fabric has no right or wrong side. I clipped two panels together and the other two panels together using my Wonder Clips. They are available at SewingMachinesPlus.com and I love them!\

Pro Tip: if you are working with stripes or a pattern, make sure you place the panels together correctly to match the stripes or pattern.

Round off your corners. I talk about the importance of rounding your corners in this post. Not everyone does it but I think it makes for a more beautiful pillow. On dark fabrics, I use my Clover Chaco Liner pen.

Round off your corners.

Round off your corners.

Zippers!

I’m using two different zippers from my stash. They are both long enough to fit the 18”x18” pillows and that’s all that matters.

I’m using two different zippers from my stash.

I’m using two different zippers from my stash.

Determine what side is the bottom of your pillow. This might depend on how you want your stripes to run or your pattern to be displayed. I’m working with ½” seams all around the pillow. On the side where you will place the pattern, mark about 2” in on both sides and sew and back-tack on both ends along that 2” line.

Determine what side is the bottom of your pillow.

Determine what side is the bottom of your pillow.

Now your seam will look like this, with an opening in the middle.

Now your seam will look like this, with an opening in the middle.

Now your seam will look like this, with an opening in the middle.

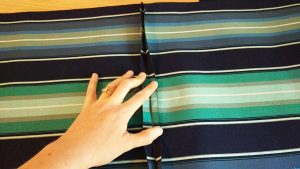
Sunbrella is perfect for finger creasing. Crease down both seams. Here you could stick the seam down with basting tape if you didn’t feel super confident going forward to the next step.

Sunbrella is perfect for finger creasing.

Sunbrella is perfect for finger creasing.

With my Clover Chaco Liner pen, I mark on both sides of the seam where the stitching ends. This will show me where I’m going to start and stop my zipper (just past that stitching on either end).

Pro Tip: make sure you place your zipper with the zipper pull facing down so it can be accessed from the right side of the pillow.

You zipper is marked up – so let’s sew it on!

I mark on both sides of the seam where the stitching ends.

I mark on both sides of the seam where the stitching ends.

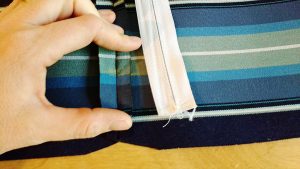
I started at the bottom of the zipper and sewed it down just past the yellow mark I’d made. Then I roll up both sides of the fabric and use Wonder Clips to hold the fabric in place so I don’t have fabric all over the place as I’m sewing in the zipper.

I started at the bottom of the zipper & sewed it down just past the yellow mark I’d made.

I started at the bottom of the zipper & sewed it down just past the yellow mark I’d made.

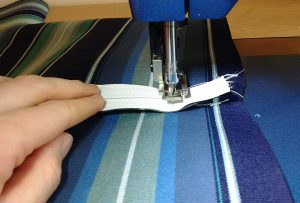
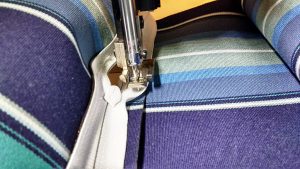
Next I carefully sewed the zipper to either side of the folded seams. When you get to the zipper pull, leave your needle down and lift up the foot, then slide the pull past and away from where you’re sewing. Back tack thoroughly at the top and bottom of the zipper.

I carefully sewed the zipper to either side of the folded seams.

I carefully sewed the zipper to either side of the folded seams.

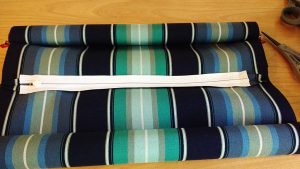
Now the two pieces are fully joined with the zipper in the middle.

Now the two pieces are fully joined with the zipper in the middle.

Now the two pieces are fully joined with the zipper in the middle.

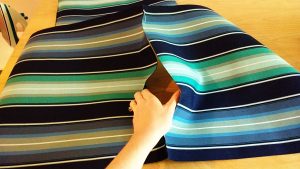
Next, unroll your fabric and clip the panels right-sides together. Sew all around the other three sides.

Pro Tip: unzip your zippers enough to be able to fully unzip them once you’ve sewn the other seams shut.

Unroll your fabric and clip the panels right-sides together.

Unroll your fabric and clip the panels right-sides together.

Before you turn your pillows right sides out, always, always, always check your work. Go over all the sewn seams and corners to make sure you didn’t miss anything.

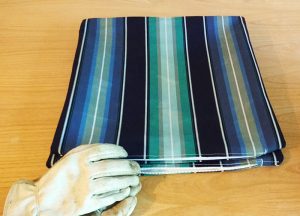
Then turn! Watch out because Sunbrella cut with a hot knife can be a bit sharp. I use my leather garden gloves to turn them right sides out.

Watch out because Sunbrella cut with a hot knife can be a bit sharp.

Watch out because Sunbrella cut with a hot knife can be a bit sharp.

Use something sharp but not too sharp, like a Sharpie marker with the lid on to poke and fully round the edges of your pillow. Now you have a Sunbrella pillow case with a zippered close!

Now you have a Sunbrella pillow case with a zippered close!

Now you have a Sunbrella pillow case with a zippered close!

Walk it in

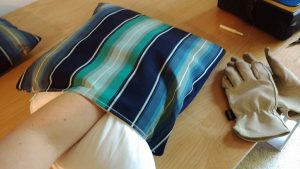
Add your pillow form. Remember, your pillow is bigger than your pillow case. You need to move the pillow in gently but firmly. You are in charge! I call this action ‘walking it in.’ Just keep moving it until it’s fully in the case. Then grab each corner and really match it corner to corner.

You need to move the pillow in gently but firmly.

You need to move the pillow in gently but firmly.

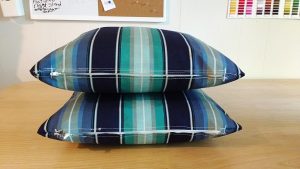
And there you have it. Two puffy pillow cases with zippered closes that are the same front and back. Perfect for distributing sun exposure on a deck.

Two puffy pillow cases with zippered closes that are the same front & back.

Two puffy pillow cases with zippered closes that are the same front & back.

Ready for its close up!

Ready for its close up!

Ready for its close up!

Do you have any tips for working with Sunbrella? Tell us about them in comments!

Do you have any tips for working with Sunbrella? Tell us about them in comments!

Do you have any tips for working with Sunbrella? Tell us about them in comments!

———————————————————————————–
Charlotte Kaufman is a writer and sewist in Mammoth Lakes, California. She specializes in marine and home interiors and continues to fall more and more in love with quilting. You can follow her at charlottekaufman.com.

Strip Piecing for a Postage Stamp Quilt

Strip Piecing for a Postage Stamp Quilt

It seems the more I dig into the world of quilting, the more things I find that I never knew about it in the first place. The brand of creativity is like a well of opportunities, or a garden that you can browse until you find the right flower to plant in your yard. Each project and possibility is its own type of craft, and the quilter has to figure out which of them is intriguing enough to try a hand at.

This idea is essentially what I’m doing for this blog when I explore new quilt types. I look at new possibilities, and when one catches my interest, I dig deeper!

For this blog post, that’s exactly what I’ll do for what’s known as a postage stamp quilt.

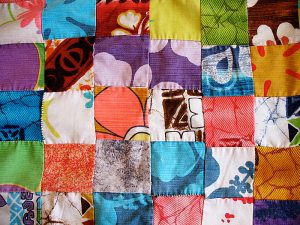
Postage stamp quilt

A postage stamp quilt.

A postage stamp quilt.

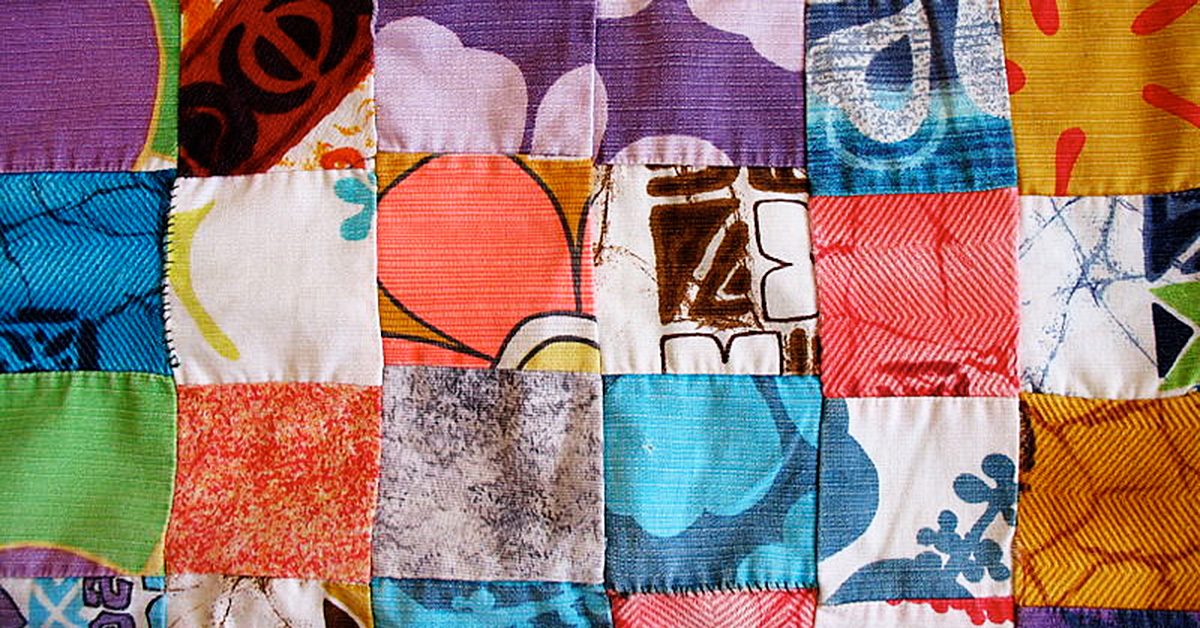
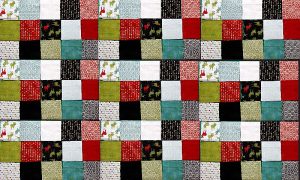
If you’re wondering what a postage stamp quilt is, it’s actually not that complicated of a style to explain! Think of a roll of postage stamps waiting to be applied to envelopes, and you’ll have a good grasp on what they can look like. It’s one small block of fabric after another, like the patchwork quilt I invested time in, but with much smaller pieces. In fact, that seems to be the main difference in the top layer of a postage stamp quilt and one for a general patchwork quilt if they’re both basic block formats. For the stamp quilt, the blocks are smaller—potentially only a couple of inches!

When I was first introduced to this concept, I was a little intimidated. The reason for that intimidation was that I know by experience how much time can be spent assembling the outer layer of a larger-block quilt (something closer to ten inches), so the idea of putting together pieces that are this small felt overwhelming. Taking the process one piece at a time would require a long, long time for me, and the strategy would be so focused on such a smaller area that it would almost have to be tedious. As intrigued as I was, I figured it would be a frustrating task!

Strip piecing

Then I did a bit more research, and I realized you don’t have to sew these pieces one at a time. Another strategy is to strip piece them together.

All strip piecing means is that, rather than focusing on one square block of fabric, you’re using longer sections to sew together  — rectangles in place of squares.

All strip piecing means is that, rather than focusing on one square block of fabric, you’re using longer sections to sew together
— rectangles in place of squares.

All strip piecing means is that, rather than focusing on one square block of fabric, you’re using longer sections to sew together—rectangles in place of squares. For example, if you choose to use two-inch blocks of fabric for your stamp blocks, make sure the width of each strip of fabric is two inches, but don’t worry about creating the two-inch length yet. Rather, keep those strips longer!

As one source pointed out, how long the strips are can depend on you, what you’re able to handle, and how long you can keep cutting in a straight line (Quilt Videos, 2016). If you can go from the top to the bottom of three feet of fabric, you can have three-foot strips of fabric to work with. But if you find that you tend to get shaky or swerve-prone with extended cutting, you might want to keep those strips smaller. For me, I probably wouldn’t go beyond ten or twelve inches, but if you’re a more advanced quilter, you can try for more.

Time to put these pieces together

Once you have your strips, line them up side-by-side and sew them together in a chain fashion, two strips at a time.

Once you have your strips, line them up side-by-side and sew them together in a chain fashion, two strips at a time.

Once you have your strips, line them up side-by-side and sew them together in a chain fashion, two strips at a time. Begin with your first two strips, sewing them along their long sides so that they’re linked with both of their primary images being showcased, and then do the same with one of those linked pieces and a new strip. Once you finish, you should have a series of fabrics connected in long strips that are small enough, width-wise, to embrace the postage stamp quality in a quilt.

Once you finish, you will have a series of fabrics connected in long strips.

Once you finish, you will have a series of fabrics connected in long strips.

From strips to squares

After you’ve sewn a number of strips together—again, it can depend on how much you’re comfortable with working on at a time—it’s time to make those rectangles into squares! If your fabric strips were two inches in width, measure and cut across your connected fabric strips at every two-inch interval from top to bottom, length-wise. At that point, you should have a series of new strips, though these will be made of a series of smaller blocks of fabric—as many blocks as fabric types that you used.

If your fabric strips were two inches in width, measure & cut across your connected fabric strips at every two-inch interval from top to bottom, length-wise.

If your fabric strips were two inches in width, measure & cut across your connected fabric strips at every two-inch interval from top to bottom, length-wise.

You should repeat this process through all of the fabric you plan to use for your quilt until all of it has been transformed into these multi-fabric strips. From there, it’s time to start piecing them together into the top layer of your quilt. All you need to do is arrange them together in a way that looks appealing to you until you reach the width and depth you were looking to achieve in your quilt.

All you need to do is arrange them together in a way that looks appealing.

All you need to do is arrange them together in a way that looks appealing.

The process might sound a bit complicated, but once you get the hang of it, you might be surprised at how quickly your stamp quilt comes together!


References
Quilt Videos. (2016, March 24). Quilt Monkey – Episode 301 – Easy, Strip Pieced Postage Stamp Quilt Block [Video File]. Retrieved from https://www.youtube.com/watch?v=j3N7al2V8C8
Witherby, S. (2011, October 27). Dead Simple Christmas Quilt mock up [Electronic Image]. Retrieved from https://www.flickr.com/photos/inkyswot/6285898784
Picking the Right Sundress Pattern

Picking the Right Sundress Pattern

Picking the Right Sundress Pattern

The hot weather means flowing, loose clothes that keep you cool while flattering your body. For me, it also means it’s time to sew! Sundresses are some of my favorite things to make. I’ve lost count of how many I’ve made over the years – most of them I still wear! The key to success with making a sundress is choosing the right pattern. The right sundress pattern will flatter your body.

Think About What You Want to Accentuate

We all have things about our bodies we like…and things we don’t. Start by thinking about the things you like about your body. Great legs? Go with a shorter length dress. Love your flat stomach? Make sure the dress is fitted at the waist. Adore your curves? Don’t be afraid to show them off with some well-placed darts. Keep all of these things in mind as you search for your sundress pattern. It’s easy to get pulled into a pattern that looks great on the package or model, but by keeping in mind what flatters YOUR body, you’ll be able to set aside any that won’t work.

Figure Out What You Want to Cover Up

Now, think about those parts of your body you want to cover up. Tummy not as flat as it used to be? Try an empire waist to accentuate other curves and avoid the cling around your stomach. Wish you were a little less curvy? Try something loose and flowy with material to match. Wish your legs were longer or skinnier? Go with a long sundress.

Pro tip: If you don’t like your arms, add a sheer shawl to the ensemble. Some patterns even come with the shawl included.

Match Your Skill Level

Picking the Right Sundress Pattern

When you’ve determined the style of sundress you want to make based on your body and what you like and dislike about it, look at patterns that match your sewing skill level. You’ll find that using these three factors it’s easy to narrow down your sundress pattern options to a manageable number. Then, pick the one you like best and hit the fabric aisles!

Every sundress I’ve made from a pattern chosen this way is one I still wear. Sundresses where I picked the pattern simply because I liked it and didn’t think about my body or my abilities were worn once, at best, and discarded. No one wants to see that happen after the effort of making a sundress. Instead, make a sundress you’ll love to wear using these simple steps to pick your pattern.

Grain Line? What Grain Line?

Grain Line? What Grain Line?

Last week, I spent a couple days making six silk dresses for a freelance client. I did the work at home, in my fifth floor walkup apartment in New York City. I only mention this because the dresses were made from silk charmeuse and I don’t, interestingly enough, have a proper cutting table at home. This really isn’t so much interesting as it is unfortunate and slightly annoying. Because, as anyone who has ever cut silk charmeuse knows, it’s a slippery sliding thing.

I cut the first dress out on the floor. Not ideal but it does work, as long as you use enough weights to keep it from shifting around. I usually cut things on the double with the fabric folded, selvedge edge to selvedge edge, which is how most consumer patterns instruct you to cut. Silk charmeuse can be a bit woodgy (yes, that’s a technical term) but the weave tends to be tight enough that you can confidently cut on the fold.

Some fabrics with an especially loose weave where it’s hard to keep the lengthwise grain line (and cross grain) straight are best cut in a single layer.

Shall we

Grain Line? What Grain Line?

To begin cutting, I tear a straight cross grain so I have a right angle to work from. Almost all fabric can be torn in this way. The cross grain of a fabric is made from the yarns woven over and under the lengthwise fabric grain at a 90 degree angle. The over under weaving provides less tension so crosswise grains have a tiny bit more stretch than the lengthwise grain. They normally run around a person’s body.

The lengthwise grain is the one that runs parallel to the selvedge edge and is the grain marked by the arrow on every pattern piece.

After tearing the the cross grain so I have a straight line, I fold my fabric in half right sides together, selvedge to selvedge. Once I have the fabric relatively flat and smooth on my cutting surface, I place a long metal ruler about an inch or two from my torn crosswise edge. I use a metal ruler because they’re heavy enough to act like a weight.

I line up the edge of the ruler perpendicular to the selvedge edge and across the full width of both layers of fabric. Then I make sure that the edge of the fabric that extends past the ruler is even. I do this to ensure that my cross grain is lined up correctly and not sloping down or up in relation to the selvedge.

I cut the next five dresses out on my old wood dining room table. It has leaves that fold up to make it almost six feet wide. At about 39” high, my cutting tables at work are higher than a standard dining room table. This height means I don’t have to bend so far over a table when cutting and, ultimately saves my back from hurting. If you don’t spend entire days cutting out garments, a dining room table usually works just as well.

You can also buy one of the cool folding style cutting tables available.

Grain line

So, what about grain line? Do you need to always pay attention to it?

That depends. At Boardwalk Empire, we would sometimes jest (when we didn’t have enough fabric and had to get creative with our cutting layouts), “Grain lines are for suckers.”

What we really meant, though, was “As long as you know what you’re doing, you can manipulate and vary the placement of your pattern pieces.”

If you happen to have a striped fabric, playing with the grain line can be fun. Thomas Pink, who makes high end men’s dress shirts will sometimes cut one side of the front on the lengthwise grain and the other on the cross for a quirky asymmetrical look.

Striped fabrics will also naturally chevron at the side seams if you match them up correctly when cutting and sewing.

You can also turn collars, cuff pieces, and/or pockets of striped fabrics on a different grain to add an interesting design effect.

All of these things are most easily done with a fabric that doesn’t have a lot of give, like a tightly woven cotton.

Measure up

If you’re interested in getting a little creative with your next project, you may want to invest in a quilter’s ruler. These rulers have 45 and 30-degree angles marked which is helpful when adjusting grain lines.

If you’re matching stripes or other patterns, you’ll find it much easier to cut in a single layer so you see everything clearly.

This may seem obvious, but if you’re experimenting, it’s always good practice to test things out first. If you have plenty of fabric, you can use some of it to do a little practice run. If not, you can use muslin or something similar to try out your idea. If you’re using a striped fabric, you can mark lines on your muslin before cutting to show you how everything will line up.

Bias

Bias is the diagonal angle across your fabric. The bias grain has quite a bit of stretch. A dress that clings to the body closely without having multiple seams is very likely cut on the bias. When you’re making a bias garment, especially a dress or slip, you’ll want to let the bias hang out for a while if possible as it will stretch out. You’ll notice that the bottom edge of your pieces will end up uneven if you do this, which is exactly what you want. You’ll need to remark your hemline after you’ve put together the garment.

I usually stay stitch my arm and neck holes, then pin my cut pieces on a form and, if time permits, let them hang over night. It’s also beneficial to then pin the seams together while they are hanging on a form to help alleviate any puckering.

Once you have a good understanding of grain lines, there’s no reason why you can’t try different things. Get creative (just remember that bias does stretch a lot more than something on the straight so you may need to stabilize with a lightweight fusible interfacing).