DIY pillowcase for Sea to Summit Aeros Ultralight Pillow

Hero Sea To Summit Pillowcase

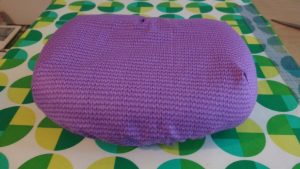
This past weekend my family went on an overnight backpacking trip near our home in the Eastern Sierra. When you are carrying all of your gear on your back you want your items to be as light as possible so I picked up this inflatable Sea To Summit Aeros Ultralight Pillow.

1

Of course I’ve never met a pillow that didn’t deserve a handmade pillowcase, so I set to work making one for this uniquely shaped fellow.

2

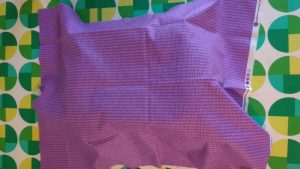
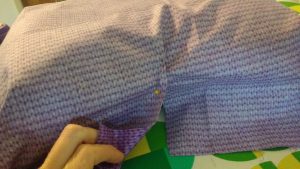
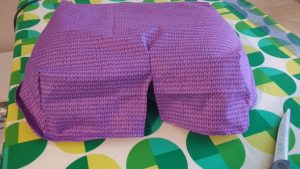
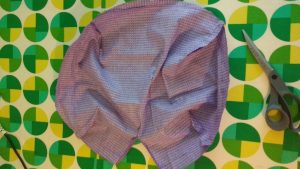
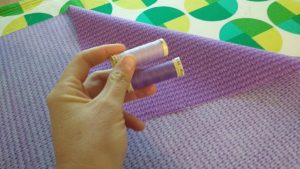
Fully inflated the pillow is approximately 16″ x 12″ x 4″ with an interior curve on the neck side and an exterior curve on the opposite side. The top and bottom edges are all rounded as well. I used matching fabric from the DIY bandana I sewed in this post and draped it over the pillow to see if it would fit.

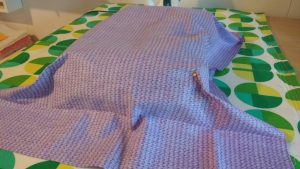
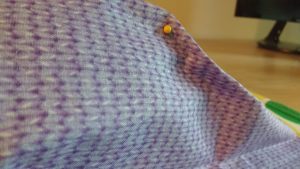
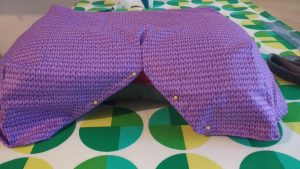
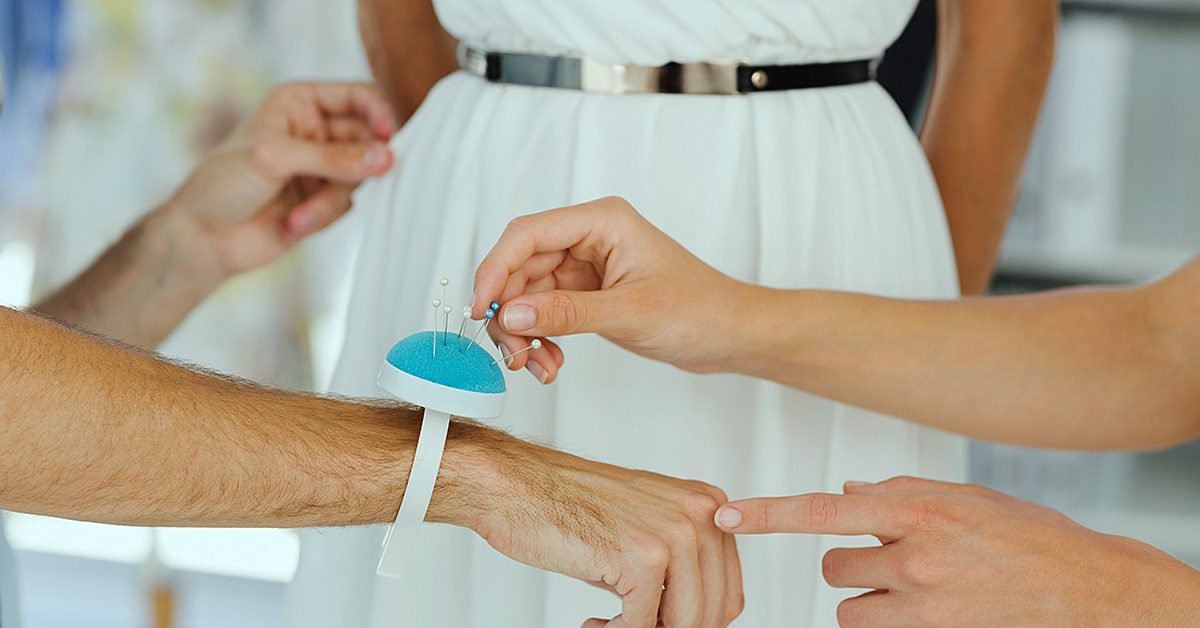
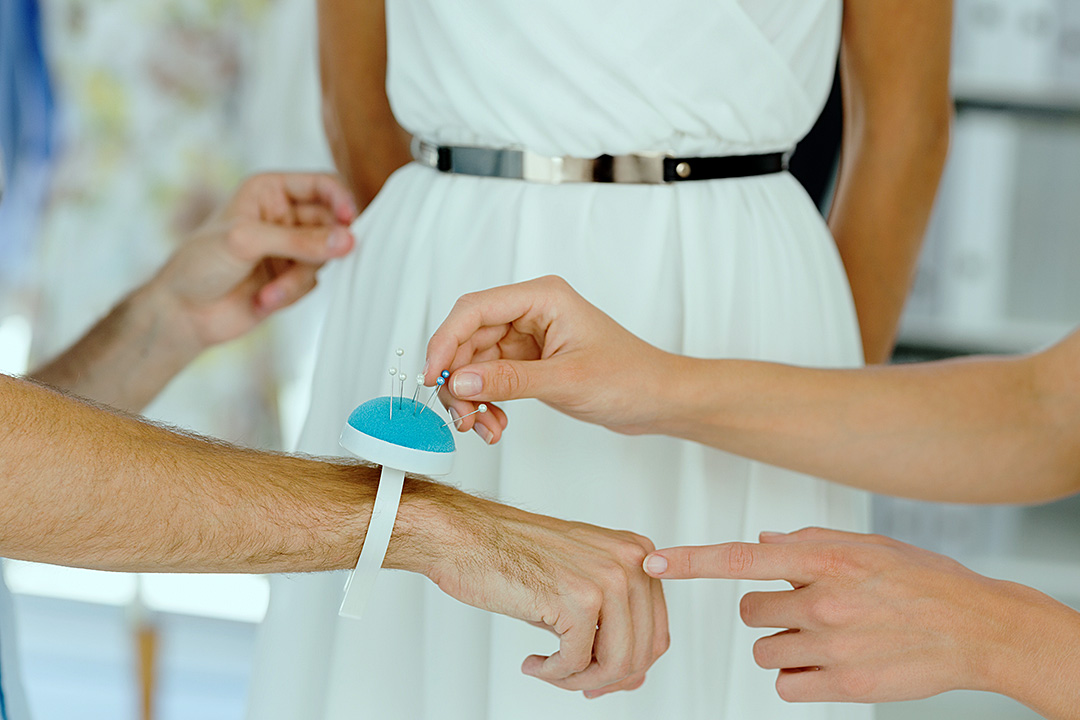
Once I knew the fabric would fit, I turned the fabric wrong sides up and used pins to mark the four curved corners. Be careful, you don’t want to puncture your brand new backpacking pillow!

3

4

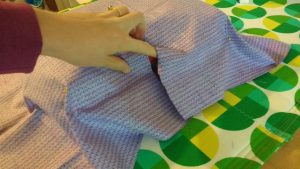
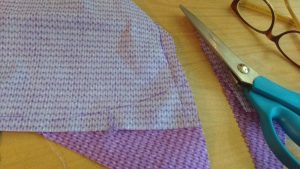
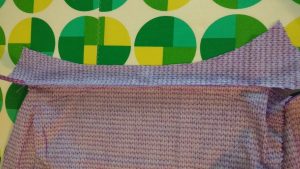
On the interior curve, I found the approximate center and cut the fabric up a ways.

5

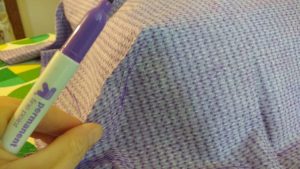
Then I used pins to tighten up the fabric around the top of the curve.

6

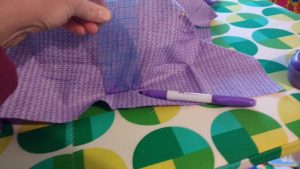
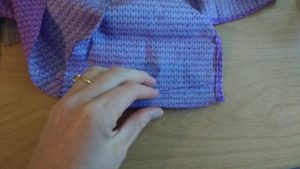
Once everything looked right, I used a marker (but you could use a pencil if a marker would show through your fabric choice) and marked the corner seams and the portion of the interior curve I had pinned.

7

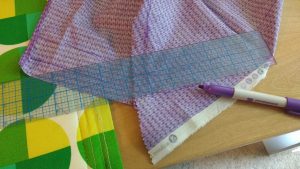
Then I used a sturdy ruler and placed it against the sides of the pillow, marking the approximate edge all the way around.

8

Carefully, I slipped the case off of the pillow, making sure not to disturb any of my pins. I only removed the pins corner by corner as I sewed following my marks.

9

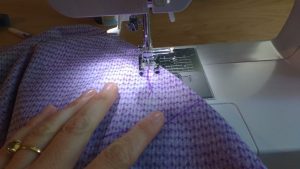
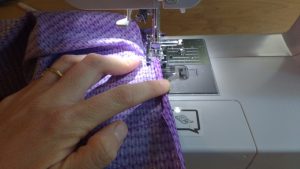
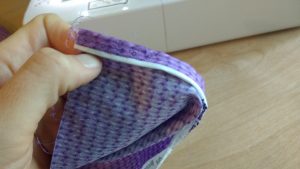
For the interior curve, I sewed the small section I had pinned to cinch the fabric around the corner, then finger pressed the raw edges of both sides of cut fabric over twice and sewed a hem.

10

Here I took a moment to turn the pillowcase right side out and placed it over the pillow, just to double check my sizing. I would be adding elastic to bring the loose fabric under the case, but this was good to see before cutting the excess fabric off of the corners.

11

Once I knew it was correctly sized, I turned the pillow case wrong side out and trimmed off the excess fabric on the sewn corners.

12

Then I marked a 1″ hem all around the case using the line I’d created earlier as a guide.

13

At this moment I realized I didn’t have enough fabric on the side opposite where the neck would lie. I took a spare piece and sewed it onto that side, pressed the seam down, and then continued drawing my 1″ hem.

14

Once the 1″ hem was drawn I cut out the fabric. Now you could really see the shape of the case coming together.

15

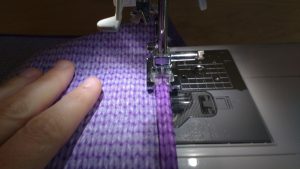
I finger pressed the hem over ½” and then another ½” and sewed my hem as I folded and pressed.

16

Then it was time to finish the interior curve. I fit the pillow case on right side out and pinned each flap from the center so the fabric hugged each curve. I sewed the flaps.

17

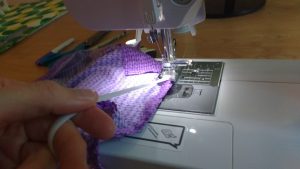
Now it was time to add elastic. I used ¼” elastic.

18

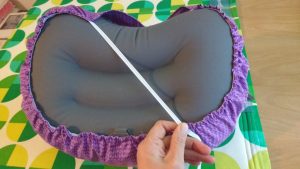
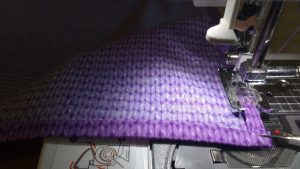
When I had fully sewn around the hem, I drew the elastic across to a point on the opposite side of the pillow and sewed the elastic in place.

19

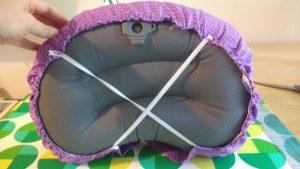
I then repeated on the opposite side with a separate piece of elastic, creating a crisscross pattern on the bottom of the pillow.

20

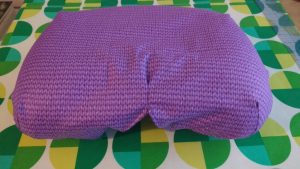
As long as you don’t sew the elastic too taught, you can absolutely slip the inflated pillow into the case. Take a few moments to work the case into the shape you’ve sewn and then flip it over to enjoy your handiwork.

21

For backpackers who weigh everything that goes in their pack, this pillowcase weighs 1.4 oz. Happy backpacking!

22

———————————————————————————–
Charlotte Kaufman is a writer and sewist in Mammoth Lakes, California. She specializes in marine and home interiors and continues to fall more and more in love with quilting. You can follow her at charlottekaufman.com.

Sewing for Harvey and Irma

September has REALLY been a month for Texas and Florida so far! Mother Nature has once again chosen to fill the lakes and streams, and even the streets and houses with her life sustaining water, wind and rain. Unfortunately, it has left many, many thousands of people stranded without power, water, food and many families with lost animals and family and worse than that, the roof over their heads is gone.

Such devastation is certainly overwhelming even to those with a strong purpose to ride out the storm. My prayers go out to all affected.

image1

Andrew

I was living in Florida through Hurricane Andrew, and it had to be was one of the most stressful events in my life. I was about 90 miles from Homestead, but the weather forecaster reports were very certain it would make landfall on my community. It did not, however, but the fear was still strong.

Also, in many areas of California, from time to time, dry land and fires ravish the wonderful trees and expensive homes. It simply occurs out of our control. We have to survive and rebuild.

As the reality of these catastrophes hit our homes, and friends and families, my heart hurts to see people’s possessions on the curbs of streets, ruined and wet and unsalvageable. But, there has been an awesome power of giving and helping and a true blessing to my fellow Texans and those in Florida.

How to help

So, to make this article a positive one, rather than a stark reality check, I have been brainstorming ways that one can make a difference to help these people in distress.

Of course, there are agencies that help people with the general necessities, such as water, and food, and shelter in these areas.

But.. most want donors to send cash. But with short notice to evacuate, many people with small children have little chance to gather baby things and comfort items for themselves and even their pets. They won’t have transportation to go shopping either in many cases until the water lowers enough to leave shelters.

I was happy to hear that pets were included in the evacuations; however, some were transported to separate shelters with other displaced pets. I hope their families will be able to retrieve them once they are able to return home or find a new home. But they need comfort too! After all, they are our families.

Anyway, I am researching companies that will take handmade clothes, blankets, hats, burp cloths and other things that I have made for my online shop. I have discovered several charitable agencies and particularly church groups, classes at schools, some women’s shelters, hospitals, even families of our neighbors who may be located in the Houston or Florida area. Check online for these groups. If there is not one, form one from your sewing circles and sewing class students!  Form a group and make small packages together. Include paper diapers, and other essentials, and a handmade toy perhaps.  Sew small things, make sweet surprises and you will make a huge difference for a family and their children.

“It takes a whole village to raise a child” – H.R. Clinton

Here are some suggestions that came to mind:

  • Small blankets
  • Bib cloths
  • Bibs
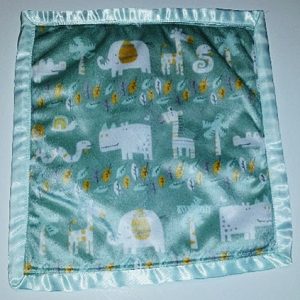
  • Snuggle blankets (small blankets with satin edging) or Minky fabric
  • Swaddles
  • Diapers
  • Dog mats and blankets – don’t leave them out! (Dallas Animal Shelter is temporarily boarding Houston animals)
  • Soft towels, perhaps small ones, sewn together
  • Soft flannel sheets for the crib
  • Sewn hats or capes
  • Small toys for babies (or dogs) made of soft, safe materials

Use fabric you find on sale, and then you can use other leftover scraps from previous projects (SewingMachinePlus.com now sells fabric in their brick and mortar store. One day, I hope to shop there).

Confetti Quilt-Art for Your Walls

Confetti Quilt-Art for Your Walls

Speaking of fall projects, I’ve recently come across a quilting technique that would be fantastic for creating a beautiful piece of autumn to use for wall décor. The problem, though, is that the technique used to build this work is a bit advanced, so it’s something I’m going to have to put on the back-burner for a bit until I potentially get the hang of more intricate workings of specific sewing processes.

The overall idea is out of my comfort zone right now, but it’s still something that seems like a great enough idea to share with those reading this blog post. Maybe you’re more advanced than I am in the sewing world, and this would be a simple project to you to bring fall coloring to your home’s interior. If so, gather your fabric and tulle, and get to working!


Project: Confetti-Quilted Wall Hanging


Tools and Supplies:

Sewing machine, scissors or rotary cutter, fabric (some for shredding purposes), tulle, and straight pins

The Idea:

Creating a work of art from bits of fabric
Mulberry Patch Quilts

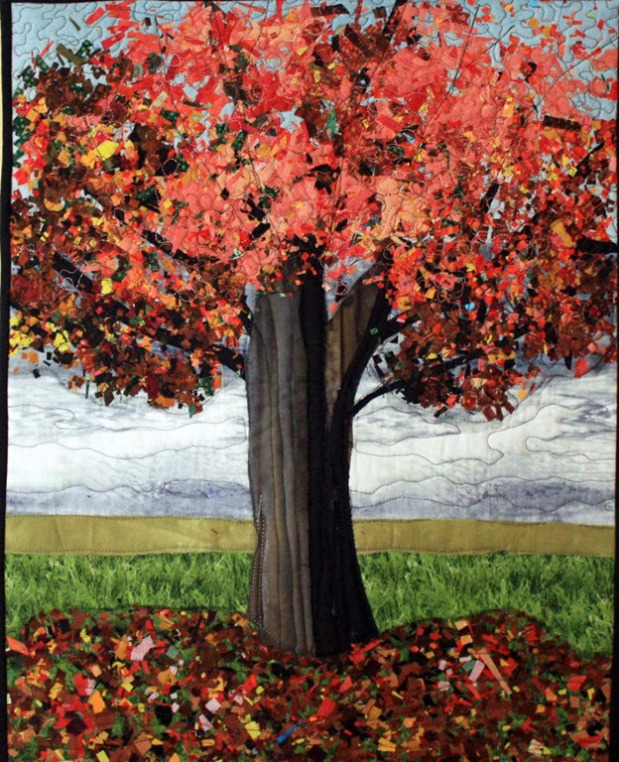
See all of these leaves? Those are tiny bits of fabric placed on the piece, or confetti fabric!

It would be easy to label this a mosaic-type project, and in a way it is because it’s a bigger picture that’s being constructed by smaller pieces. But the incredibly small sizes of these pieces are tiny enough to compare to confetti being tossed in the air, so the confetti name is actually more fitting than the mosaic title—especially since the confetti can bunch up and overlap on your design in contrast to the side-by-side nature of a mosaic piece.

This is an idea that can be put in practice to make a full quilt, but the number of times you’d have to go through the process to create enough blocks for a quilt sincerely escalates the amount of time you spend on a project. Considering fall is so close, using the one-block notion for a wall hanging is more reasonable—and it’ll create a one-of-a kind piece to show off to your home’s guests.

The advantage of confetti

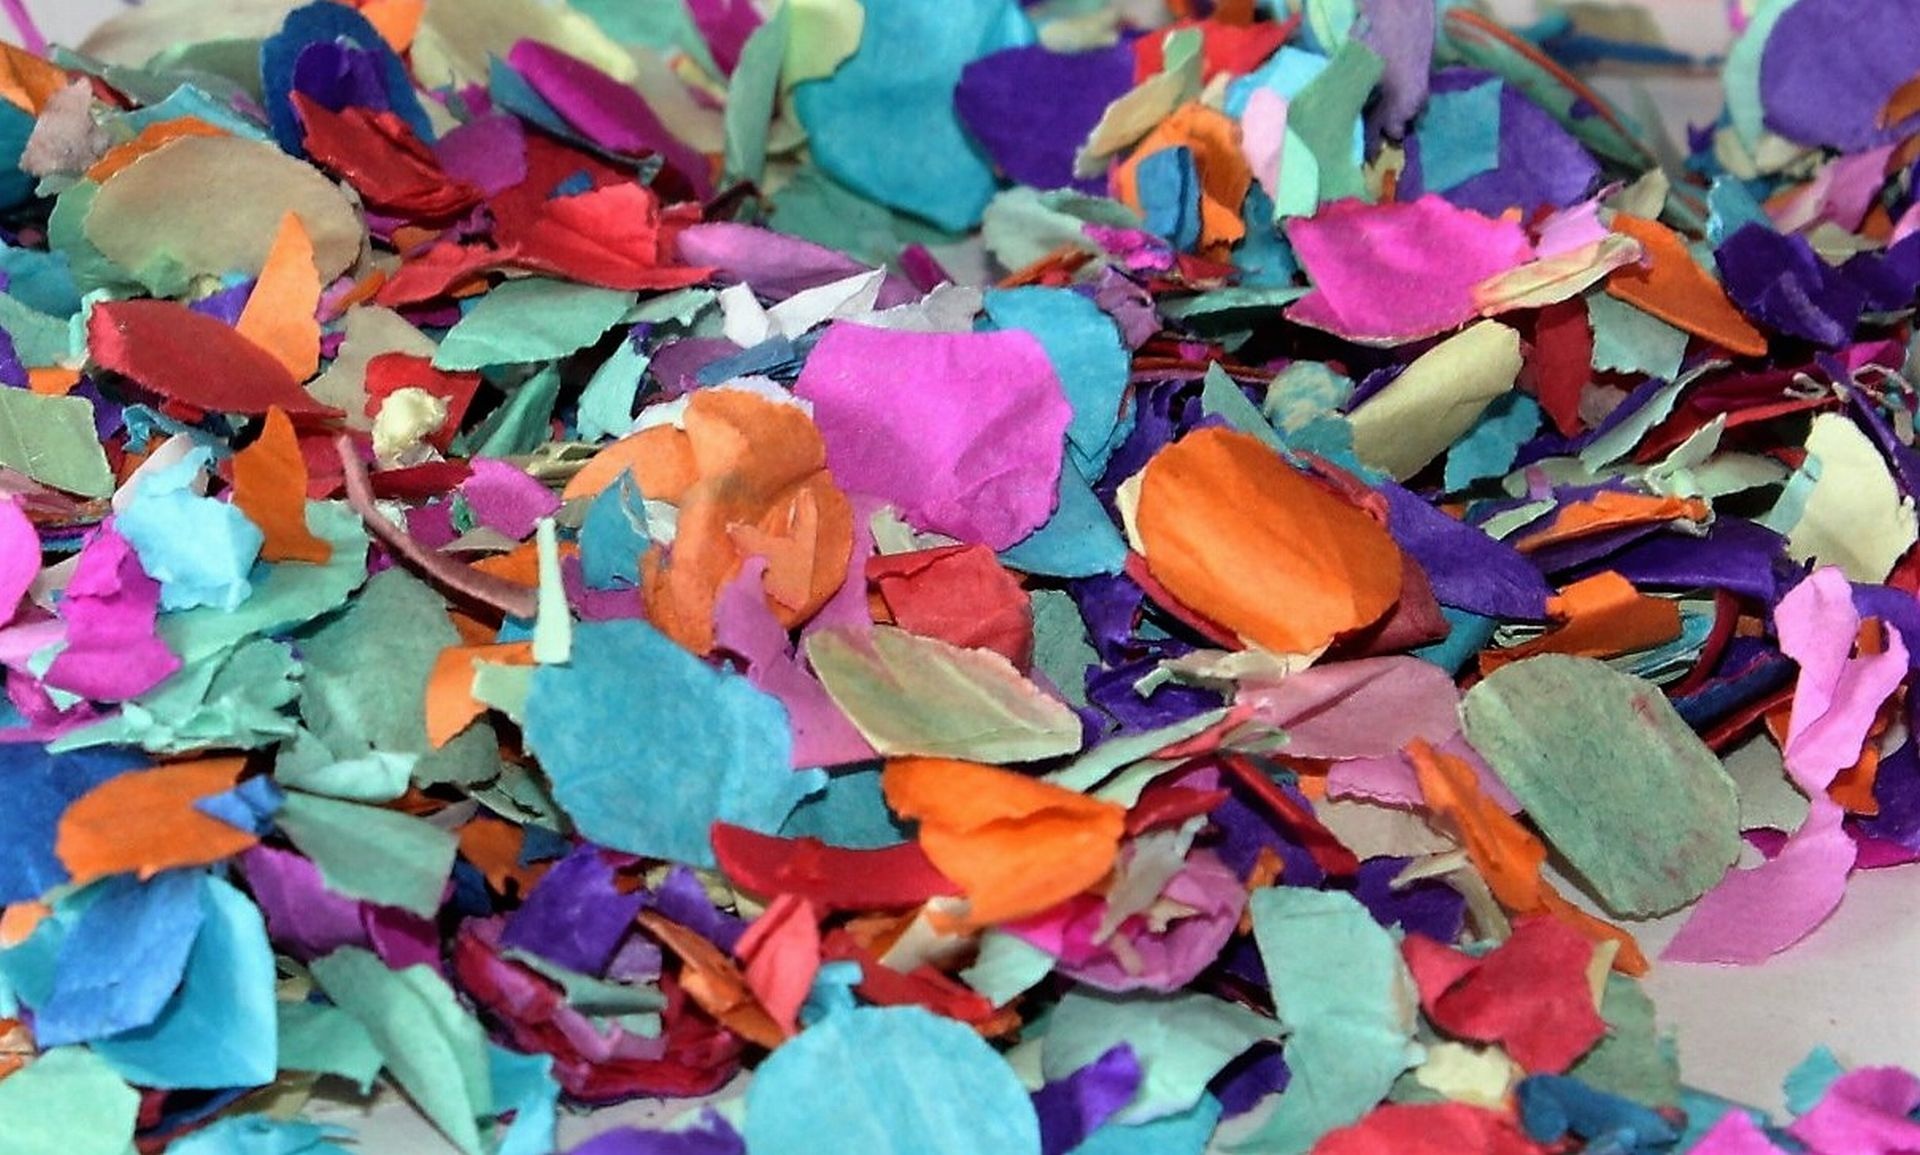
The beauties here are that you can pick the size of the confetti art work, you can choose the image you want to depict, and you can even use scrap material from other projects that have little to no value for other concepts. These confetti dots are tiny, so it doesn’t take extended amounts of fabric to create them. You might want to keep that in mind as you trim up your fabric for other projects and stash away the scraps and remainders in some kind of a confetti-quilt container. That way, you can build your supply for a confetti project that pops in your head, giving you the ability to start constructing immediately rather than having to search for fabric bits.

plant-leaf-flower-petal-decoration-red-830896-pxhere.com

For a fall project, this is a good option because autumn comes with a great deal of outdoor imagery, like trees filled with colorful leaves or pumpkins placed in front of haystacks. Through the outdoor elements comes the prospect of movement and wind, so having the confetti scraps present to drizzle across your project can give the viewer that sense of movement in a display that’s random enough to highlight the notion.

Working with layers

You can layer the colors and fabrics to boost that realism until you have a strong tree covered in a series of leaves that are dropping to the ground and flying away, a pumpkin patch with dust and leaves blowing past it, a scarecrow that’s caught up in seeds that are breaking away from crops and sailing by… Lots of ways exist to put this idea into practice, and each has a look of intricate realism that’s sparked from the confetti approach.

tree-light-bench-night-photography-sunlight-1234-pxhere.com

The process to perform this task seems basic, if intricate, and so long as you keep the confetti pieces in their places with straight pins, tulle, and early sewing, you can make sure everything stays close enough to the arranged order to highlight the scene as you intended it above your mantle or over your couch—or wherever you choose to place the finished work!

Inspiration is key

If you want to find inspiration for what to depict in your confetti project, try going for a nature walk to look for signs of autumn’s approach, and when something particularly seasonal catches your eye, freeze that memory in your mind (or snap a photo) to remember it. As the month rolls on, nature itself can give you plenty of sights to choose from to be the main scene of your confetti project!

hand-screen-man-person-technology-camera-948351-pxhere.com

So, if your skills allow you to handle this intricate of a project, start looking for that autumn image to commit to a wall hanging!
Price of Fashion

The Price of Fashion

As a tailor for film and television, I often work with a lot of really high-end designer clothing. Sometimes I look at a price tag on something I’m in the process of taking apart and think, “That’s an awful lot of money for an article of clothing.” As a person who spends a lot of time taking things apart and putting them back together, I’ve got a pretty good idea of long it takes to make things. I wholeheartedly believe in paying tailors, pattern makers, and the like a respectable wage (as I’ve said before it is very skilled labor and deserves to be paid just as much as you would pay a plumber or someone to fix your car).

However, we all know that most mass produced clothing is made in factories where the workers aren’t getting much more than minimum wage (if they’re lucky). But what about the really expensive, designer stuff? Is it worth the extra money? Is it justified?

To a certain point, I think it is. If a brand uses high quality fabrics and notions, some of the extra cost makes sense. I try and think about how long it would take me to make a certain thing like, for example, a pair of pants. Not including patterning or cutting and if I were sewing at a pretty brisk pace and had made a bunch more of the exact same pants before, I’d say it’d take me anywhere from two to four hours (depending on how many pockets, if there’s top stitching anywhere, if they have a lining, and so on.) If a person working in a factory actually made a reasonable wage, that would certainly put the price point of those pants at somewhere between $80.00 and $200.00. You’d also need to factor in the time needed to cut out the pants, and pattern them, as well as the design process. So maybe then, you’d end up with a $150.00 to $400.00 pair of pants. Fairly reasonable, I’d say. It’s when you get up into the $1,000.00 range for a single pair of pants that I start to wonder.

I get that, when it comes to designer clothing, much of what you’re paying for is the name, or the design. And I’m ok with that but, is that label really worth $600.00 or more?

Again, I think it depends.

Boris Bidjan Saberi

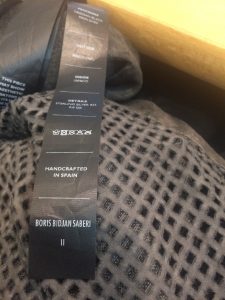
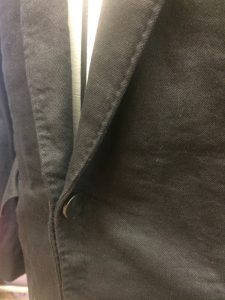
I’ve done quite a few alterations lately on Boris Bidjan Saberi men’s clothing. I just shortened the sleeves on one of his suit jackets. The jacket is very well made and the fabrics of a really high quality. The ‘buttons’ are cool metal cufflinks – real metal, not plastic. The label says the jacket was handcrafted in Spain. A big part of Boris apparel is that each piece is supposedly a ‘one-off’, which means it’s unique and no one will have exactly the same one as you. That’s pretty cool, I think. The suit jackets are priced starting at around $1,100.00. This price seems quite reasonable to me if it really is a handcrafted garment (which it certainly seems to be).


'hand crafted in spain'

‘Hand crafted in spain’.

metal cuff link style buttons

Metal cuff link style buttons.

What would you pay?

I guess my point in all of this is that there are some clothing brands and designers that may very well be ‘worth’ the high price, especially if their manufacturing processes align with your own ideas of ethics and sustainable businesses. If you care about these kinds of things, it is important to do your own research and make your own decisions (as it is with most things in life, I suppose).

There’s an interesting fashion show event happening this week called Wear Your Values. The event, on September 14th, will showcase 15 ethical fashion clothing brands and portray the life cycle of a garment to show how, when, and where human rights abuses take place in apparel manufacturing. There will also be a film on a day in the life of a garment worker. The show is presented by the Oslo Freedom Forum, an annual conference hosted by the Human Rights Foundation and Remake, a group of fashion enthusiasts that strive to inspire consumers to research the brands they buy (something I think is really important).

If you happen to be in New York City, try and go check out this event yourself.

Sewing Baby Toys

Sewing Baby Toys

I just learned that a dear friend of mine is pregnant. After the announcement and our subsequent celebratory lunch, my mind starting thinking about what I could make to welcome her child into the world. It’s too early on to know if it will be a boy or a girl, which also means I’ve got plenty of time to make something by hand and from the heart. Here’s a few of the baby toys I’m thinking about making. I’d love to hear your thoughts on them!

adorable-20374_640

Two-Sided Baby Blanket

I love this idea. I used to love my two-sided comforter because I could flip it around based on my mood (and also based on which side had less cat hair…) My friend and her man are super unique, so I know their baby’s room is going to have flair and style. A reversible baby blanket would be right up their alley. Of course, I’d want it to match the colors they choose for the nursery, so I’ll have to check about that before I start.

Super Soft Receiving Blanket

Like all babies, I’m sure my friend’s bundle of joy is going to want to be held A LOT. And I know my friend is up to the task. She’s going to be an amazing mom! The new arrival is due in the February/March timeframe, so it will still be cool where we live. It makes me think that a super soft, and warm receiving blanket will help new mom and baby snuggle and bond.

Crunchy Jellyfish

It won’t be long before that new bundle of joy is putting everything in his or her mouth. (By the way, I’m certain it will be a girl.) Between teething and the need to understand the world using all her senses, her mouth is going to be full of all sorts of stuff. I love this crunchy jellyfish pattern because it will give her something safe to mouth on and it’s so cute!

Sun Toy

Along the same lines as the crunchy jellyfish, this sun toy is super cute and great for littles ones putting everything in their mouths. It’s got loads of textures too, making it entertaining in many ways. And when baby decides it’s time to throw her toys, it’s soft and won’t hurt or damage anyone or anything.

So, if it was your friend having a baby, which of these cool baby gifts would you make?

Sew your own Bandana

hero

This weekend my family is going backpacking. It’s the first time all four of us, my husband, myself, and our two daughters, ages 7 and 4, will go on an overnight backpacking trip together. My husband, Eric, compiled a detailed list of the things I’d need to bring (he is taking care of the girls’ packs. Rad guy, right?).

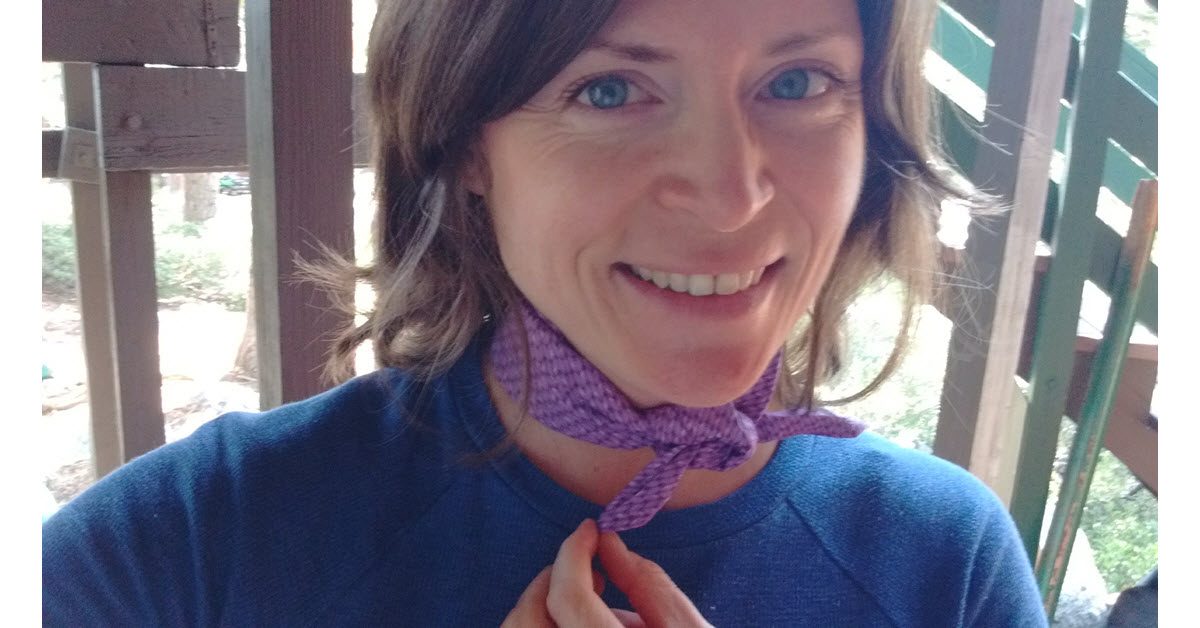
On that list was a bandana. It’s been awhile since I had a bandana but I remember how useful they were when I used to go backpacking. They can be used as sweat catchers, scarves, headbands, face masks, pot holders, to keep the sun off your face or neck, and even to tie a tourniquet. Honestly, their uses are endless. I just didn’t have one and darned if I was going to buy a bandana off of Amazon when I have a wall full of fabric bins and a sewing machine.

Getting started…

1

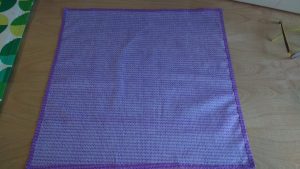
I grabbed a ½ yard of fabric which was a little over 18″ tall. If you have a bigger neck than me (that’s me in the photos) or want a larger bandana, grab 3/4 of a yard of fabric.

I cut out an 18″ x 18″ square. Again, size up if you want a larger finished piece. Once you’ve cut the square, roll it up and test it out unhemmed. Does it fit around your neck? Around your head? If you want it big enough to create a possible tourniquet, around your thigh?

2

Key step

Now is the most important part. Press and starch that sucker, especially around the unfinished edges.

3

You can make your hems as large or as small as you like. I like bandanas with TINY hems, so I rolled mine over even smaller than ¼”, pressing and starching all the way around. Then I doubled that over again, pressing and starching.

4

Start pinning

Done! At this point, you could pin the pressed and started hems but I have a feeling that if you used enough starch they are going to stay put while you sew.

5

Pick your thread. For this project I went with a purple that matched but once it was finished I wished I had gone with the lighter purple just for a fun contrast. You live and you learn.

6

If you are going to use a decorative stitch, make sure you have enough thread in your bobbin.

7

I tested out this decorative stitch on a separate piece of fabric first. I wanted a stitch that would look good and keep my hem nice and flat.

8

Easy-peasy

Start sewing a square. This is the easiest part after your prep work to get there.

9

If you have a shallow hem, use a seam ripper to hold down the corners as you go.

10

Admire your creation

Look that beauty! And you didn’t spend $12 on Amazon for it.

11

Try it on and enjoy. Happy camping!
12

———————————————————————————–
Charlotte Kaufman is a writer and sewist in Mammoth Lakes, California. She specializes in marine and home interiors and continues to fall more and more in love with quilting. You can follow her at charlottekaufman.com.
The Problem with Over Fitting

The Problem with Over Fitting

In my almost 30 years in the film and television business, I’ve worked with a lot of different designers. Every designer has a specific way they like things to fit, at least in the film and television world. Tailors at men’s suit stores like Brooks Brothers, or department stores like Nordstroms, have standard fit and length parameters they follow.

They’ll tell you that a suit jacket hem must end at a certain point on the wrist and the proper length of the jacket is determined by whether or not you can curl your hand around the hem in a certain way. They’ll also tell you that a pant hem needs to have a specific amount of break over the front of the shoe (the amount the hem buckles in when you’re standing straight up).

In television and film, these things can vary depending on what designer you’re working with. I have five or six different designers I work with fairly regularly and they all have specific ways they want things to fit. I’ve worked with them enough to know what each of them like. One of them likes suit pant hems on the short side but lots and lots of ‘stack’ when it comes to jean hems. Another always wants a rake in the hem because they hate to see an actor’s socks showing in the back when he walks. One likes the shirt sleeves to show a ¼” below the suit jacket. Another tends to want things very slim fitted.

One size fits all

As a tailor, one of the most annoying fit attributes is when a designer wants you to, essentially, over fit something (none of the designers I work with regularly do this). By over fitting I mean, they want me to fit something so tightly that there are absolutely no wrinkles present anywhere at anytime. The main problem with this is that it’s only achievable if the actor or actress happens to be a non-moving, stationary dress form or mannequin. And, as I’m sure you know, most are not.

Actors move, clothing wrinkles. If you fit a dress too tightly, it’s going to ride up at the slightest provocation. If you fit a man’s suit jacket within an inch of its life, the actor won’t be able to lift his arms.

There are a lot of wrinkles I can fix, but I can’t get rid of them all. An over fitted garment looks just as bad on camera as one that isn’t fitted enough. Unless you start putting all kinds of extra seams into a thing, you’ll never be able to get something that isn’t spandex, completely wrinkle free all the time. Wrinkle free-ness is only completely achievable when the actor stands in one specific way and doesn’t move at all, ever.

Oxygen is overrated

I can’t tell you how many times a designer has insisted I take something in so tightly that after it’s done, the actor complains about not being able to breathe. I usually don’t take anything in as much as I pinned in a fitting if I’m working with a designer like this. I honestly find it ridiculous that there are costume designers who don’t understand that when humans move, the clothes they are wearing also move. Sometimes there are wrinkles, and this does not mean that the garment is not fitted correctly.

Stylists who dress people for print or short shoots like commercials tend to fit things more tightly because they’re not used to dressing people for realistic scenarios and situations that involve actual movement.

Stylists who dress people for print or short shoots like commercials tend to fit things more tightly because they’re not used to dressing people for realistic scenarios and situations that involve actual movement.

Stylists who dress people for print or short shoots like commercials tend to fit things more tightly because they’re not used to dressing people for realistic scenarios and situations that involve actual movement. In a photo shoot for print, there is no movement so you can over fit to your heart’s content. That’s why clothing never fits you like it does the model in the catalogue or on the website. And this is not a bad thing.

I’ve also worked with designers who do this thing where they grab a whole wad of fabric center back to demonstrate how something should be taken in. Well, first, when you do that, you’re pulling the side seams into a weird place that they shouldn’t be. Unless its men’s pants, I rarely take something in just from the center back, especially if it’s a wad-full of fabric. One reason is that I like to avoid having to reset the zipper if possible and secondly, it probably needs to come in from the side seams and the side back seams anyway. Or, if it’s four to six inches, it might make sense to purchase the garment in a smaller size. If I were building the garment from scratch, I’d want to recut it if possible.

Stress fractures & signs you are doing it wrong

I don’t know if other people notice this but when I see a dress with side seams that swing backward instead of hanging straight, I think that someone who didn’t really know what they were doing did that alteration. Costume Designers don’t necessarily need to know all the nuances of fit and balance but they should know enough to trust a good tailor when they have one.

Sadly, it normally doesn’t do any good to try and explain yourself to a designer who tends toward over fitting. They’ll just assume you don’t know what you’re talking about.

When I find myself in a situation with a center-back-wad-pulling designer, I just nod and pin it, then alter it in the way I think is best.

Because, as any tailor who’s been in the television and film business for awhile knows, “alter as pinned” is simply a suggestion (and a way to appease an over zealous fitting designer).

Sewing with Cats

Sewing with Cats

You’ve seen posts about sewing projects for cats. I think I might’ve even written one. The thing is, I don’t know about you, but my cats would never tolerate most of those projects. Not ever! What they will do, quite gleefully, is attempt to help me while I’m sewing. Clawing fabric while I’m trying to lay it out, stealing pins (which terrifies me because they could choke or worse), and running away with the tissue paper pattern pieces just as I was about to grab them. Sound familiar? And heaven forbid I close them out of the room! With four of the fluffy babies running around, that’s a losing battle. So, instead, I’ve learned to sew with cats. Honestly, I think living with four of them and giving meds, special food, etc. only to those who need it qualifies me as an official cat herder!

cat-468232_640

The secret to sewing with your cats is to make other things more interesting than what you’re doing. I’ve learned, the hard way, that that’s not always as easy as it sounds. Throwing catnip toys for them provides a short-term distraction for them, but it also means I have to stop what I’m doing. Not ideal by any means. I’ve gotten more creative with my solutions.

Play time

Tissue paper pieces are great! They think they’re getting the pattern pieces, only they’re not. The deal here, though, is you have to let them steal it so they think they’re getting away with something. Simply handing them the scrap of tissue paper is great for about 30 seconds until they see you’ve got a “better” piece. When you let them steal it, it’s a much more exciting, and long lasting, distraction for them.

And laser lights. What cat doesn’t love to chase the red light? I know, you’re probably wondering how I can play red light with them and still sew. Simple – I hang the light from the ceiling and give it a push. If I had a ceiling fan, I’d hang it off there. Just put a piece of masking tape over the button to hold it down and use a piece of string or an elastic to hang it. You’ve never seen cats this confused and excited. I love when they sit and look up at it with their head moving the same direction and speed as the light. Hilarious!

Fabric scraps. My cats love to make themselves a bed out of the fabric I’m trying to use. Super annoying! I deal with this by pretending like I’m using a large scrap piece and then letting them steal it from me. Just like with the tissue paper, letting them think they got what they want is key. Once they’re settled in on the fabric scrap, I can move on to my project without their interference.
Sewing with cats is challenging, but using these few distraction methods, it’s quite possible – and fun for both you and your furry friends.

Bringing the Autumn Vibe into Your Home

Bringing the Autumn Vibe into Your Home

Out of all four seasons that we experience throughout the year, my absolute favorite in regard to nature is autumn. A part of the reason for that is I live in mountain territory, and when the leaves start changing colors, it’s hard to find something that compares to how beautiful that is. It’s enough to try and think of ways to embrace the same visual within my home so that the beauty of fall can decorate my inside world as well.autumn-1072827_960_720

Because of my love of the season, I took to the Internet to find projects that would create that autumn vibe, and my initial thoughts about it seem to be backed up again and again through other sites.

All you need to do is to make sure you’re bringing the right elements into your sewing projects to represent fall. Sure, there are more specific notions of pumpkin-shaped pillows, but even something as basic as choosing the right fall traits to add as embellishments can make an ordinary throw pillow, blanket, or wall hanging represent the season.

Color pallet

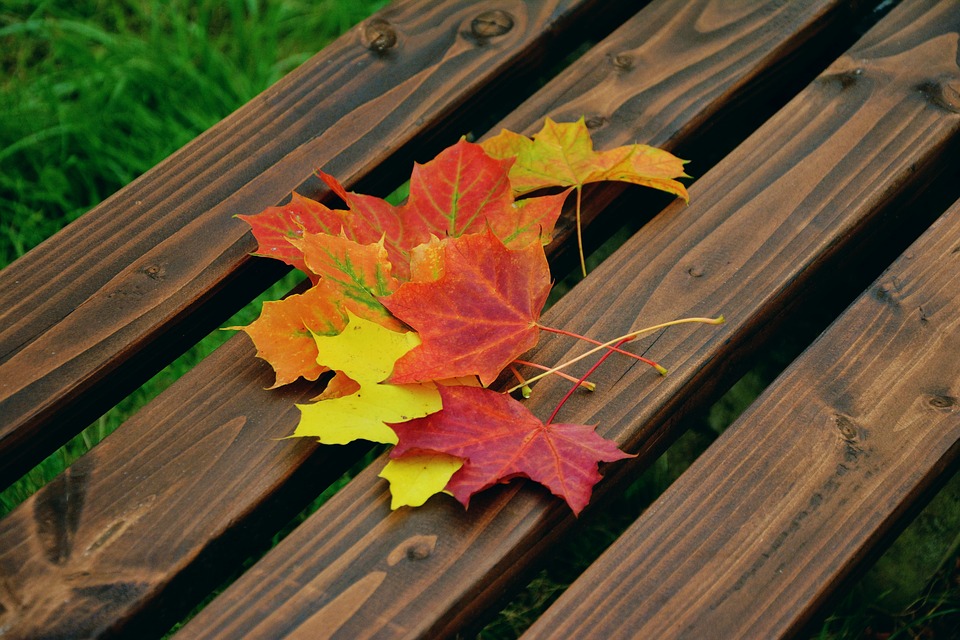
For one thing, you should definitely consider your colors for fall projects since those bright, vivid hues melded together are synonymous with the season. Orange, yellow, red, and remnants of green are all a part of the typical fall-grasped leaf, so make sure you choose fabrics and embellishments that showcase those colors. Remember that fall leaves are often a series of these hues, so mix and match them in your projects to have a full autumn experience with your sewing project.fall-foliage-1740841_960_720

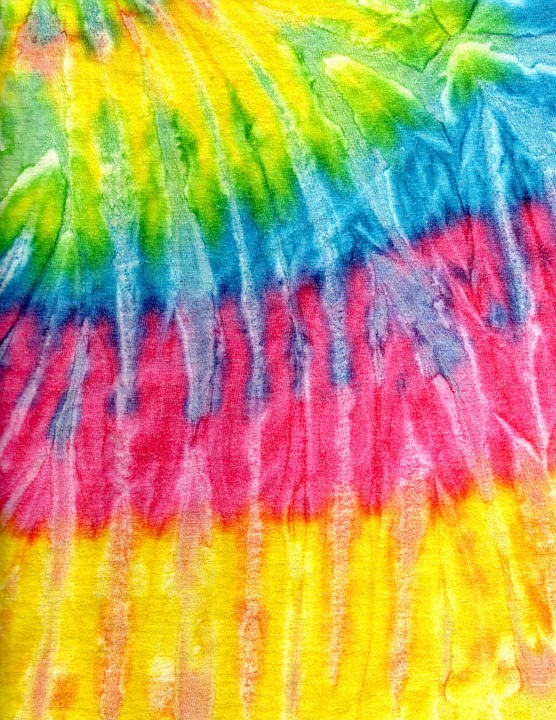
If you only have white fabric, try dying it to create the autumn theme. Anyone who has seen the final product of a tie-dye shirt knows the process leads to a series of patterned and blended colors, so you can use that general idea to mingle autumn colors on your fabric. You can blend the tips of orange in with the beginnings of the yellow, with little spots of green throughout, and the inconsistent spacing of the colors can really drive home the look of fall leaves.tie-dye-510230_960_720

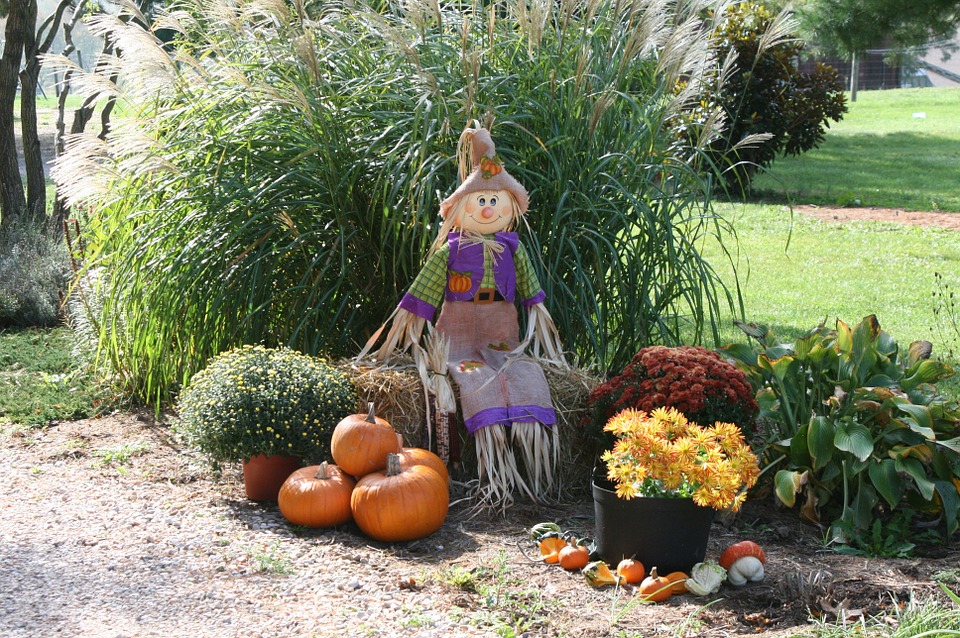
Beyond your color choices, think of other seasonal elements that you can use to display autumn throughout your home. Pumpkins, candy corn, acorns, haystacks—all of these things can be used as inspiration for your projects through finding ways to represent their likenesses in sewing projects. A new quilt could look lovely with a scene that’s covered in fall elements, like pumpkins lining the area where haystacks and classic barrels are stationed. If you ground that setting in fall colors and embellishments of candy corns and acorns surrounding it, you’d have a creation to bring out of storage every fall to embrace the season.pumpkin-991825_960_720

You can shape your throw pillows, as mentioned, like pumpkins—or candy corn, acorns, fall leaves—and these little additions of autumn can boost the fall vibe in your home.

Reason for the season

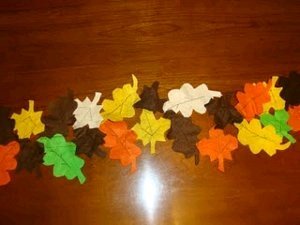
One specific fall project is this leaf table runner. All you’d need to do is cut out fabric with a leaf pattern using fall colors—maybe dying them for that mixed feel—then sew them as individual leaves. You can add in the details of lines and spots of variation with fabric pens to give your leaves a more realistic feel than just a series of plain fabric. From there, you can sew them together in this slanted pattern to bring a bit of fall from one side of your table, mantle, or shelf top to the other. With the right skill and effort, this project could be finished well before the official beginning of fall later this month!Felt-Leaves-Table-Runner_Medium_ID-456743

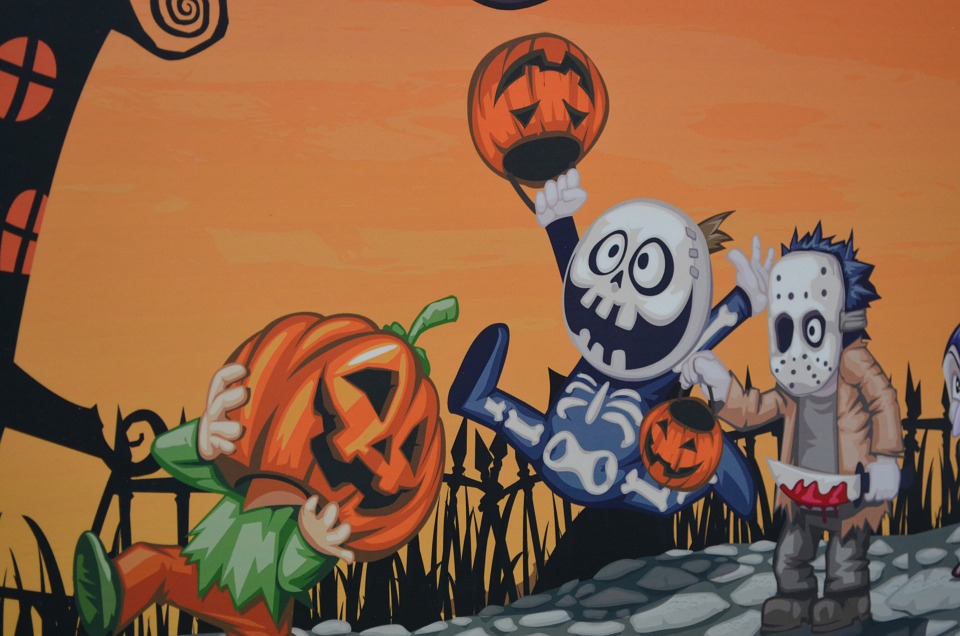
This idea of embracing fall in your home can be applied to your kitchen as well by thinking of fall themes for potholders, in your bathroom through an autumn-inspired wall hanging, and any other room where a fabric splash of fall goodness would be fitting. Just let your imagination run with you, and you can come across a way to embrace the beauty of autumn in every single room of your home through the right colors and right embellishments!halloween-72937_960_720

Better still, once it’s time to put away your fall decorations, you can be clearing space to make room for your Christmas decorations, meaning you can trade one seasonal method of décor for another without having to do much rearranging. Keeping with the seasons by using beautiful, self-made details—with little fuss—equals a great situation from beginning to end!

Be sure to start brainstorming what elements represent fall to you, and go get the right fabric and supplies for bringing those projects to life!