DIY Tent & Gear Repair

diy tent hero image

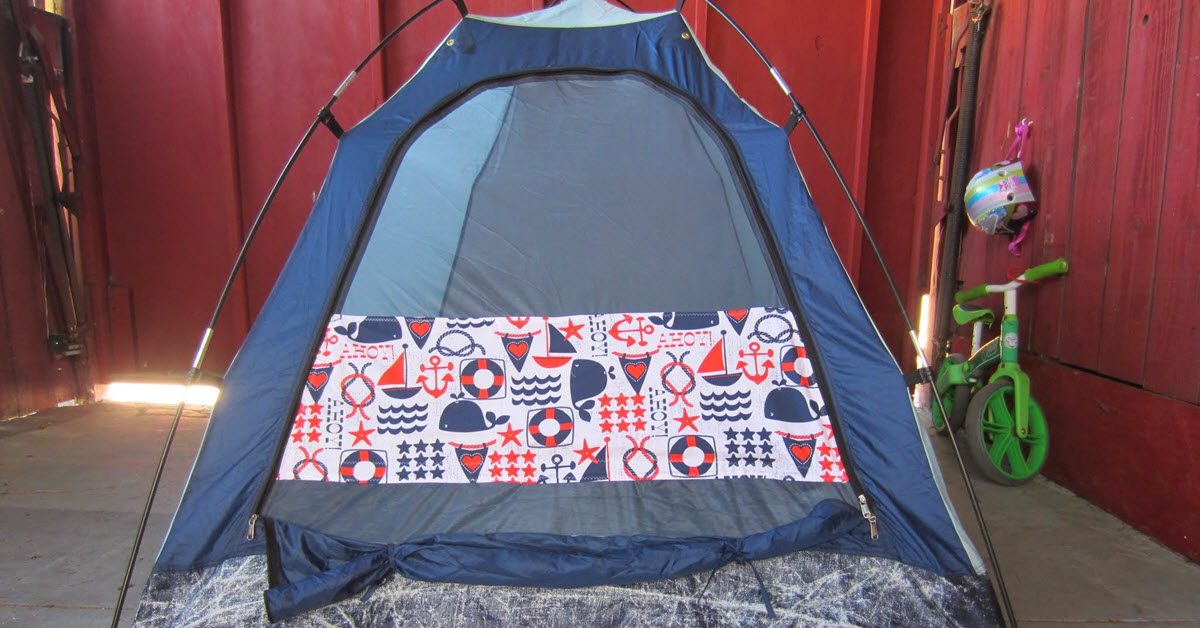
My brother recently picked up this tent at an estate sale and gave it to us for camping with kids. It could easily sleep our family of four but the front screen was ripped.

1

To fix this, I cut two matching fabric panels in the shape of a rectangle, and planned to fold under the edges and pinned them in place on the front of the tent and one on the inside. This would sandwich the rip in between the fabric.

2

I sewed on the front fabric piece first, sewing right across the netting and then cut away the ripped netting up to the seams. Then I placed the back fabric panel to the front one, wrong sides together and followed the seams of the first piece.

3

Here’s a view from the inside looking out.

4

Next up was the bag to hold the rain fly and the smaller bags for the tent poles and stakes. They were falling apart.

5

I used scraps of canvas to make new rectangular bags for both the tent poles and the stakes.

6

Huge improvement, no?

7

8

The bag for the rain fly was split almost perfectly around the top.

9

To fix this rip I used a zig zag stitch and followed it around the tear.

10

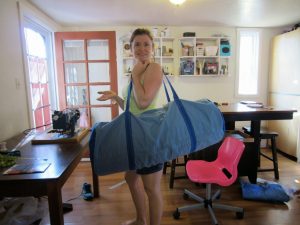
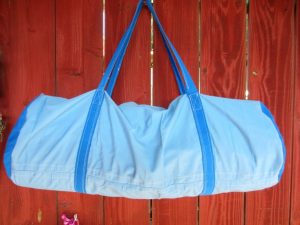
The last part of this DIY project was creating a duffel bag to hold the tent, the rain fly and the tent and stake poles. For this I dug into my pile of scrap canvas.

11

I drew two circles for the ends of the bag and then a large rectangle for the body piece.

12

Before I sewed the circle pieces to the body I measured out straps for the handles and attached the handles from one side of the rectangle to the other.

13

I used Velcro to close the seam and then I was ready to go.

14

A perfect storage solution and a quick way to grab a family-sized tent and head out camping.

15

———————————————————————————–
Charlotte Kaufman is a writer and sewist in Mammoth Lakes, California. She specializes in marine and home interiors and continues to fall more and more in love with quilting. You can follow her at charlottekaufman.com.
Cleaning Your Sewing Machine

Cleaning Your Sewing Machine

Clean Machine Lead

Keeping your sewing machine clean is an important part of producing beautiful things with fabric and thread. After enough projects, there will be an accumulation of fluff from thread and fabric in the inner workings of your machine. If you leave that to accumulate for too long, your machine will start to perform poorly.

Anytime I start to get skipped stitches or a sluggish machine I think back and ask myself when the last time was I cleaned it; it was usually too long ago.

Read the manual

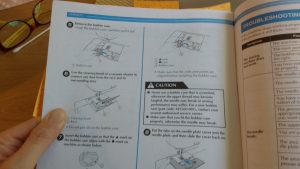
I talk a lot about getting to know your manual. I’ve put little sticky notes all over mine so I can quickly find what I’m looking for. Get your out manual (or locate a PDF online) and go to the section on ‘How to clean your machine.’

1

Some machines will tell you to oil certain parts. Others won’t. My top advice is to always follow the manufacturer’s recommendations on cleaning.

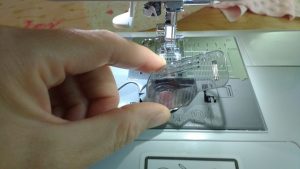
For my Brother cs6000i I need to remove the bobbin cover on the needle plate cover.

2

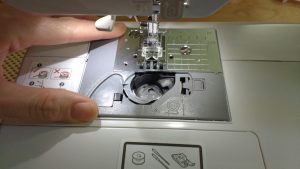
Then I follow the instructions to remove the needle plate cover itself.

3

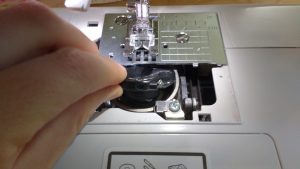
Next I remove the bobbin case.

4

Vacuums and cotton swabs

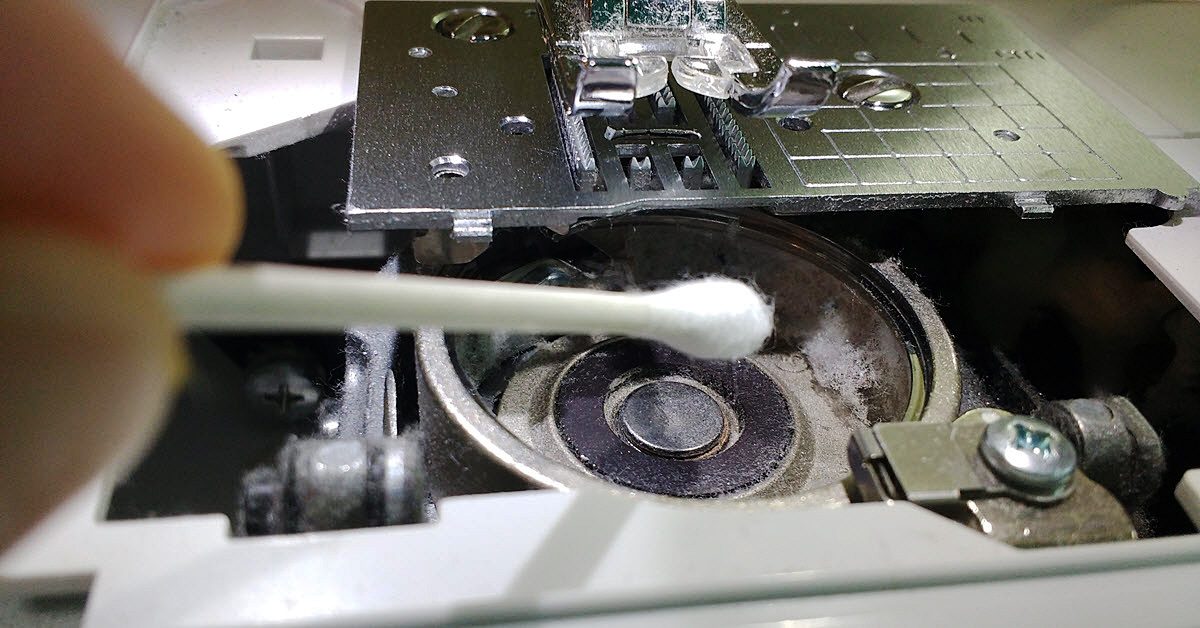
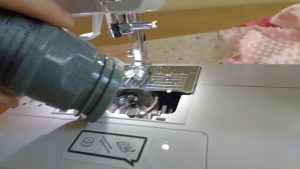
Now I have unfettered access and can get to cleaning. Step one, vacuum!

5

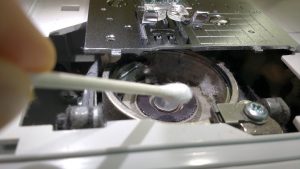
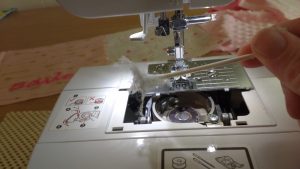
I also use cotton swabs to gather up the fuzz that my vacuum can’t reach.

6

Look at all that fabric and thread fuzz!

7

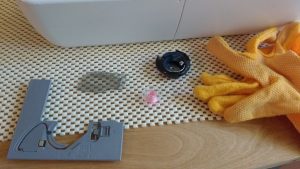
Once the inside of the machine is clean, you need to also clean the parts you removed.

8

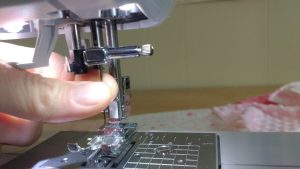
After you’ve reassembled the parts you’ve removed, I also suggest changing out to a new needle. It’s better to start fresh and new after a cleaning.

9

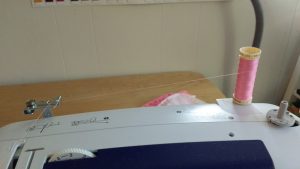
Re-thread in your desired color.

10

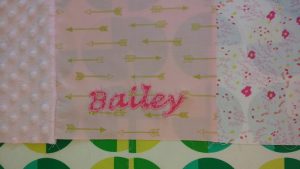
Now do some practice stitches. Here you can see how clean my embroidery stitch looks after cleaning my machine and switching out to a new needle.

11

With a clean machine I was able to do some beautiful embroidery for a friendship quilt I’m making.

12

Happy cleaning and happy sewing!

———————————————————————————–
Charlotte Kaufman is a writer and sewist in Mammoth Lakes, California. She specializes in marine and home interiors and continues to fall more and more in love with quilting. You can follow her at charlottekaufman.com.

DIY pillowcase for Sea to Summit Aeros Ultralight Pillow

Hero Sea To Summit Pillowcase

This past weekend my family went on an overnight backpacking trip near our home in the Eastern Sierra. When you are carrying all of your gear on your back you want your items to be as light as possible so I picked up this inflatable Sea To Summit Aeros Ultralight Pillow.

1

Of course I’ve never met a pillow that didn’t deserve a handmade pillowcase, so I set to work making one for this uniquely shaped fellow.
2

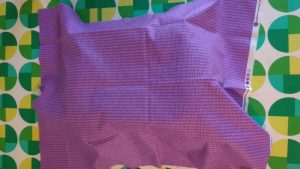
Fully inflated the pillow is approximately 16″ x 12″ x 4″ with an interior curve on the neck side and an exterior curve on the opposite side. The top and bottom edges are all rounded as well. I used matching fabric from the DIY bandana I sewed in this post and draped it over the pillow to see if it would fit.

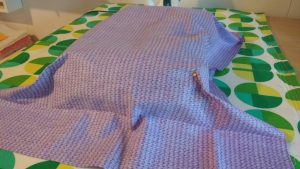
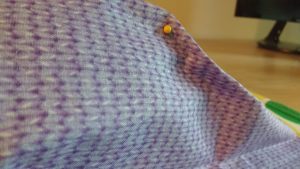
Once I knew the fabric would fit, I turned the fabric wrong sides up and used pins to mark the four curved corners. Be careful, you don’t want to puncture your brand new backpacking pillow!
3

4

On the interior curve, I found the approximate center and cut the fabric up a ways.
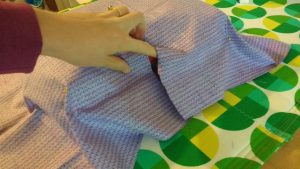
5

Then I used pins to tighten up the fabric around the top of the curve.
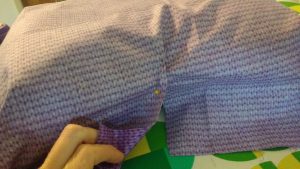
6

Once everything looked right, I used a marker (but you could use a pencil if a marker would show through your fabric choice) and marked the corner seams and the portion of the interior curve I had pinned.
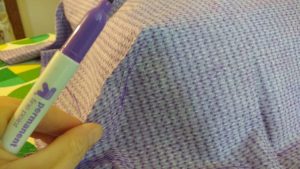
7

Then I used a sturdy ruler and placed it against the sides of the pillow, marking the approximate edge all the way around.
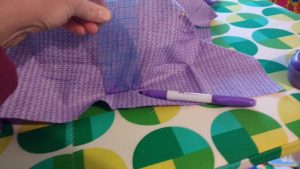
8

Carefully, I slipped the case off of the pillow, making sure not to disturb any of my pins. I only removed the pins corner by corner as I sewed following my marks.
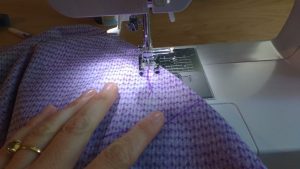
9

For the interior curve, I sewed the small section I had pinned to cinch the fabric around the corner, then finger pressed the raw edges of both sides of cut fabric over twice and sewed a hem.
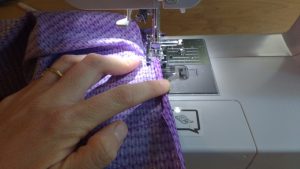
10

Here I took a moment to turn the pillowcase right side out and placed it over the pillow, just to double check my sizing. I would be adding elastic to bring the loose fabric under the case, but this was good to see before cutting the excess fabric off of the corners.
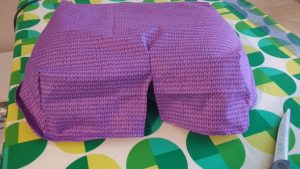
11

Once I knew it was correctly sized, I turned the pillow case wrong side out and trimmed off the excess fabric on the sewn corners.
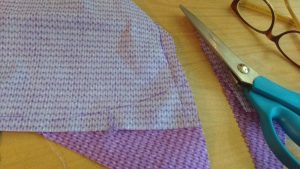
12

Then I marked a 1″ hem all around the case using the line I’d created earlier as a guide.
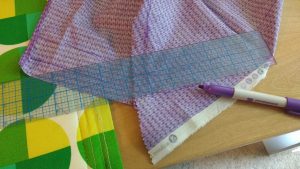
13

At this moment I realized I didn’t have enough fabric on the side opposite where the neck would lie. I took a spare piece and sewed it onto that side, pressed the seam down, and then continued drawing my 1″ hem.
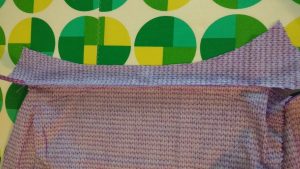
14

Once the 1″ hem was drawn I cut out the fabric. Now you could really see the shape of the case coming together.
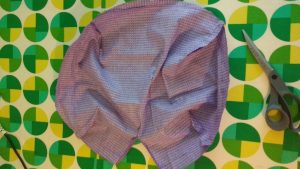
15

I finger pressed the hem over ½” and then another ½” and sewed my hem as I folded and pressed.
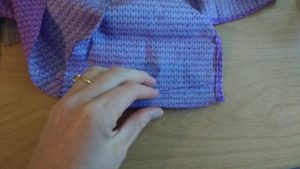
16

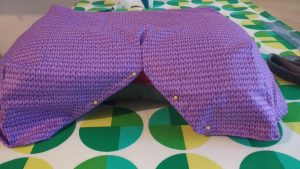
Then it was time to finish the interior curve. I fit the pillow case on right side out and pinned each flap from the center so the fabric hugged each curve. I sewed the flaps.
17

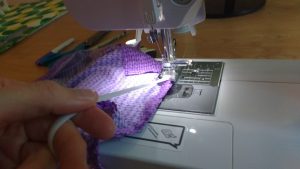
Now it was time to add elastic. I used ¼” elastic.
18

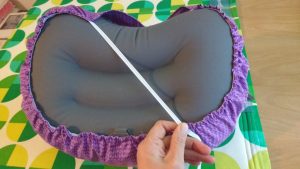
When I had fully sewn around the hem, I drew the elastic across to a point on the opposite side of the pillow and sewed the elastic in place.
19

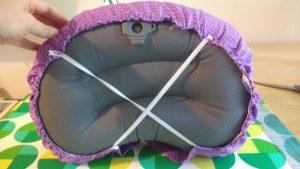
I then repeated on the opposite side with a separate piece of elastic, creating a crisscross pattern on the bottom of the pillow.
20

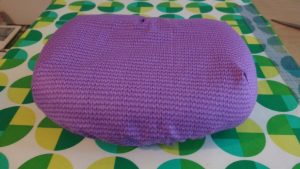
As long as you don’t sew the elastic too taught, you can absolutely slip the inflated pillow into the case. Take a few moments to work the case into the shape you’ve sewn and then flip it over to enjoy your handiwork.
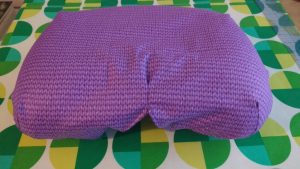
21

For backpackers who weigh everything that goes in their pack, this pillowcase weighs 1.4 oz. Happy backpacking!
22

———————————————————————————–
Charlotte Kaufman is a writer and sewist in Mammoth Lakes, California. She specializes in marine and home interiors and continues to fall more and more in love with quilting. You can follow her at charlottekaufman.com.

Sew your own Bandana

hero

This weekend my family is going backpacking. It’s the first time all four of us, my husband, myself, and our two daughters, ages 7 and 4, will go on an overnight backpacking trip together. My husband, Eric, compiled a detailed list of the things I’d need to bring (he is taking care of the girls’ packs. Rad guy, right?).

On that list was a bandana. It’s been awhile since I had a bandana but I remember how useful they were when I used to go backpacking. They can be used as sweat catchers, scarves, headbands, face masks, pot holders, to keep the sun off your face or neck, and even to tie a tourniquet. Honestly, their uses are endless. I just didn’t have one and darned if I was going to buy a bandana off of Amazon when I have a wall full of fabric bins and a sewing machine.

Getting started…

1

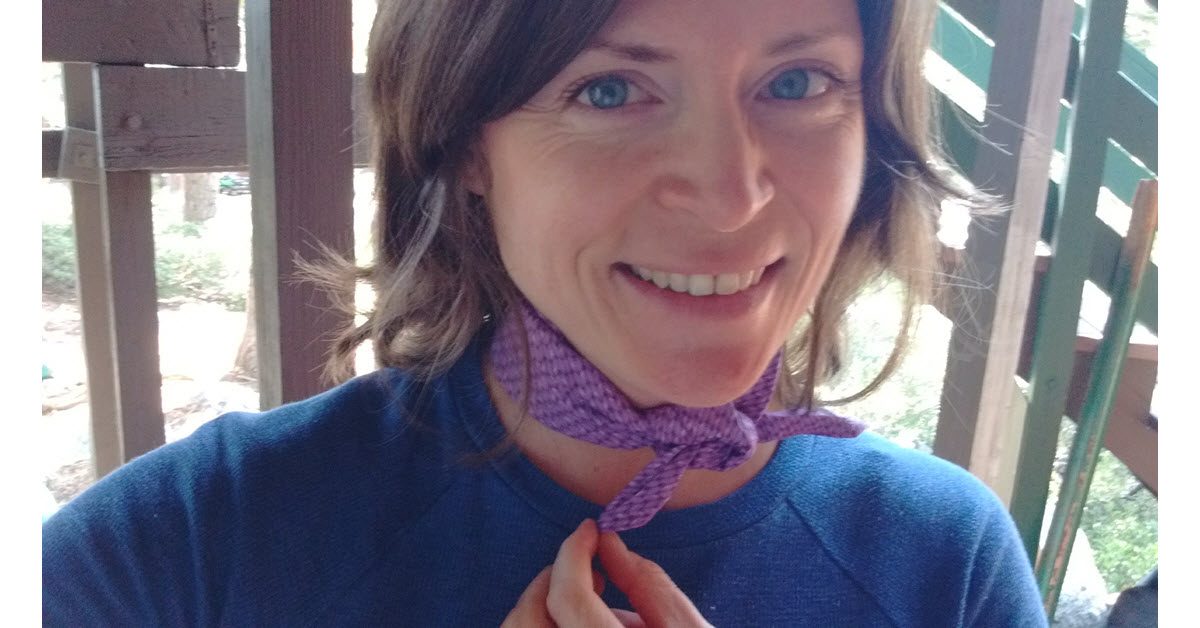
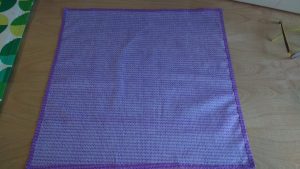
I grabbed a ½ yard of fabric which was a little over 18″ tall. If you have a bigger neck than me (that’s me in the photos) or want a larger bandana, grab 3/4 of a yard of fabric.

I cut out an 18″ x 18″ square. Again, size up if you want a larger finished piece. Once you’ve cut the square, roll it up and test it out unhemmed. Does it fit around your neck? Around your head? If you want it big enough to create a possible tourniquet, around your thigh?

2

Key step

Now is the most important part. Press and starch that sucker, especially around the unfinished edges.

3

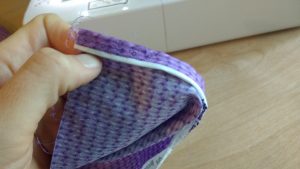
You can make your hems as large or as small as you like. I like bandanas with TINY hems, so I rolled mine over even smaller than ¼”, pressing and starching all the way around. Then I doubled that over again, pressing and starching.

4

Start pinning

Done! At this point, you could pin the pressed and started hems but I have a feeling that if you used enough starch they are going to stay put while you sew.

5

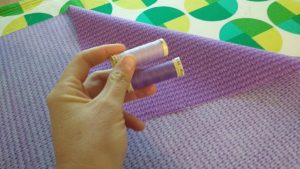
Pick your thread. For this project I went with a purple that matched but once it was finished I wished I had gone with the lighter purple just for a fun contrast. You live and you learn.

6

If you are going to use a decorative stitch, make sure you have enough thread in your bobbin.

7

I tested out this decorative stitch on a separate piece of fabric first. I wanted a stitch that would look good and keep my hem nice and flat.

8

Easy-peasy

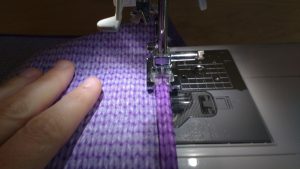
Start sewing a square. This is the easiest part after your prep work to get there.

9

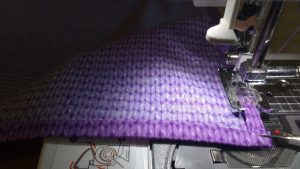
If you have a shallow hem, use a seam ripper to hold down the corners as you go.

10

Admire your creation

Look that beauty! And you didn’t spend $12 on Amazon for it.

11

Try it on and enjoy. Happy camping!

12

———————————————————————————–
Charlotte Kaufman is a writer and sewist in Mammoth Lakes, California. She specializes in marine and home interiors and continues to fall more and more in love with quilting. You can follow her at charlottekaufman.com.
How to Sew a French Seam

hero image - french seams

French seams are a way to finish a seam so there are no raw or exposed edges of fabric on the seam. They work great for thin or delicate fabric, or any project where you want both the outward showing and inward showing seams to look good.

1

Some people balk at trying them and I think it’s because it feels like you are sewing in reverse. To start a French seam you have to sew a seam on the right side of the fabric, and that just feels wrong. I get it, I do. But if you trust the process, you’ll love how it all turns out.

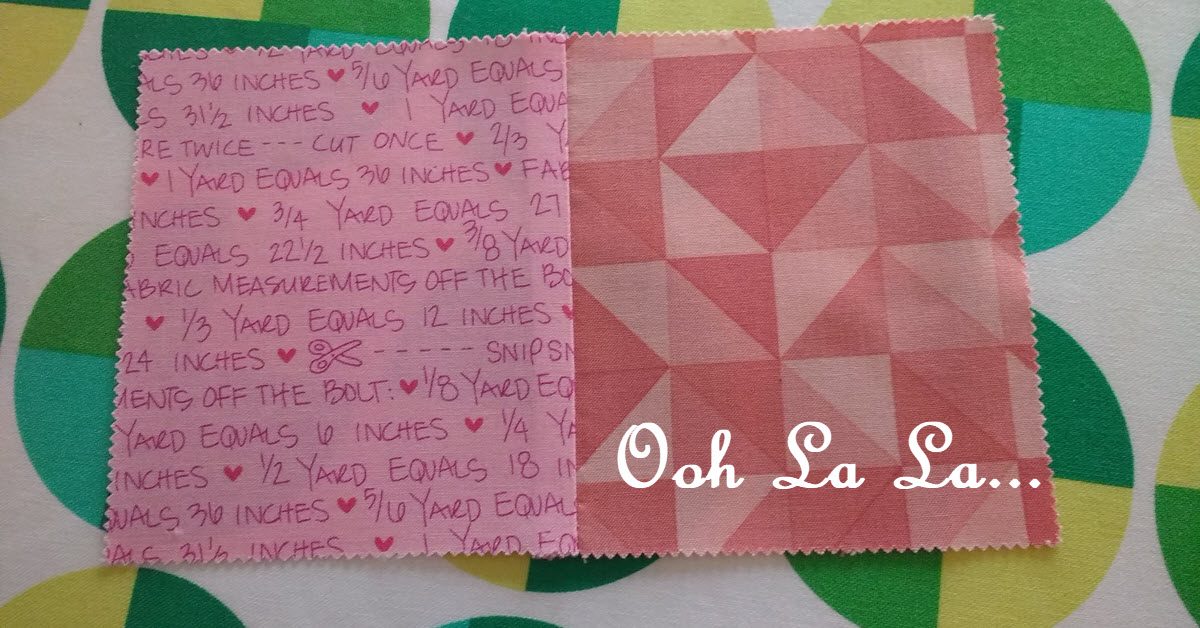
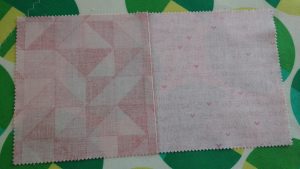
Here is an example on two pre-cut fabric squares. I’m going to join these together with no exposed seams by using the French seam method. First, place the fabric WRONG sides together.

2

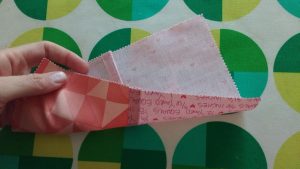
Now sew your seam. Your seam allowance will depend on the fabric you are using and the type of project. For ease of explanation I did a ½” seam.

3

Next, cut down the excess fabric a bit and then head to your ironing board. Do NOT skip ironing when sewing French seams. As with most sewing projects, ironing can make all the difference.

Iron the seam to one side. Flip the fabric over and iron the seam on the reverse as well.

4

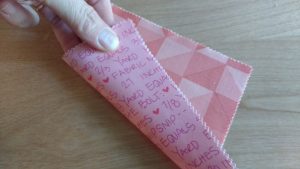
Now fold the fabric on the seam you’ve created. I like to iron this too. For good measure, you can pin the fabric in place so it doesn’t move when you sew again.

Take the fabric over to your machine and sew another seam, this time on the wrong side of the fabric. You want to sew a seam that is wide enough to fully enclose the raw seam on the inside portion. I sewed ½” again (remember I had trimmed down my previous raw edge to about ¼”.)

5

Voilà! Now your seams are completely encased. Très bien.

6

The last and important step is to press once again. Open up your seam and press on the front AND back of your fabric.

7

You’ve done it! THAT is a French seam. The applications are endless, just trust the process and don’t worry about starting a seam on the right side of fabric. Happy sewing!

8

———————————————————————————–
Charlotte Kaufman is a writer and sewist in Mammoth Lakes, California. She specializes in marine and home interiors and continues to fall more and more in love with quilting. You can follow her at charlottekaufman.com.

DIY Embroidered Pencil Case

Recently I saw this set at Costco that includes 50 colored pencils, a pencil sharpener and a plain zippered pouch. I nabbed two but I think I’ll go back and grab some more because I turned them into something cool and I want to do it again.

1

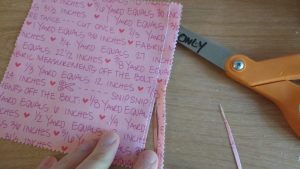
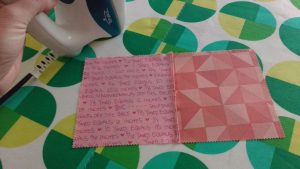
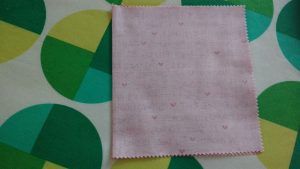
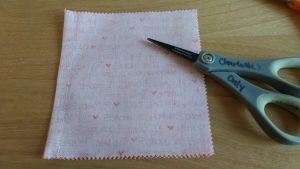
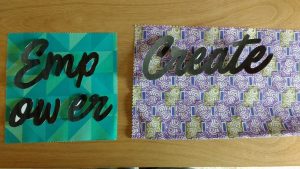
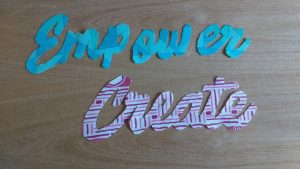
Here’s what I did. I printed out two words, one for each case, and then used them as patterns to draw the words onto fabric. The font is a free font I downloaded from dafont.com called Painted Paradise.

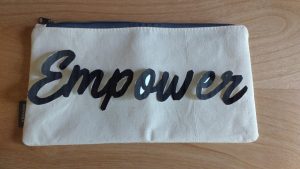
2 3

Empower printed out in three sections and I was able to place them on a charm square from my fabric stash. Create printed out as one word so I used a layer cake precut for it.

4

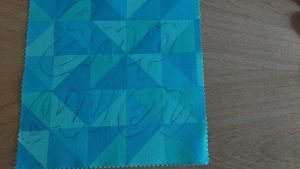
I used a freshly sharpened pencil and held the paper down as I traced.

5

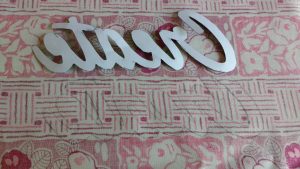
For this fabric, it was easier to flip the words upside down and draw on the backside of the fabric (I eventually chose a pink fabric instead of the purple you see above).

6

Use some sharp scissors, and patience, and cut out the words.

7

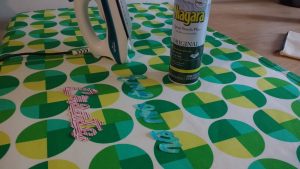
I ironed and starched the words to get them very crisp.

8

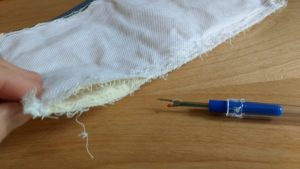
Next up: taking out the seams of the pencil case. This actually went pretty fast as I ran my seam ripper along the serged seams and then opened the fabric and pulled out the inner seams.

9

I did this to both cases and then took a moment to pull out as many of the remaining threads as possible to create a clean working space on the fabric (and my table).

10

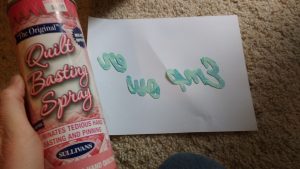
This is my handy quilt basting spray. I placed the words wrong sides up on a piece of paper and then sprayed fabric glue on them. Then I positioned the words on each pencil case where I wanted them.

11

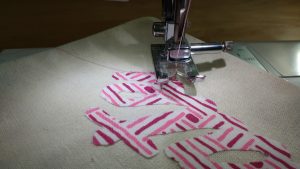
My plan was to basically embroider the words onto one side of the pencil cases. I learned a great embroidery stitch, called a satin stitch, on my machine. You create this look by selecting a zig zag stitch and then reducing the stitch length to almost zero. You can play with the numbers/look to find what you like.

12

I practiced on some scrap fabric and then got to work.

13

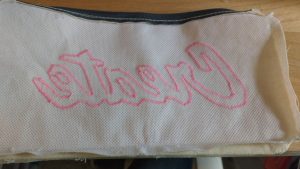
Here’s what it looked like from the back when I was done. It even looks cool inside out!

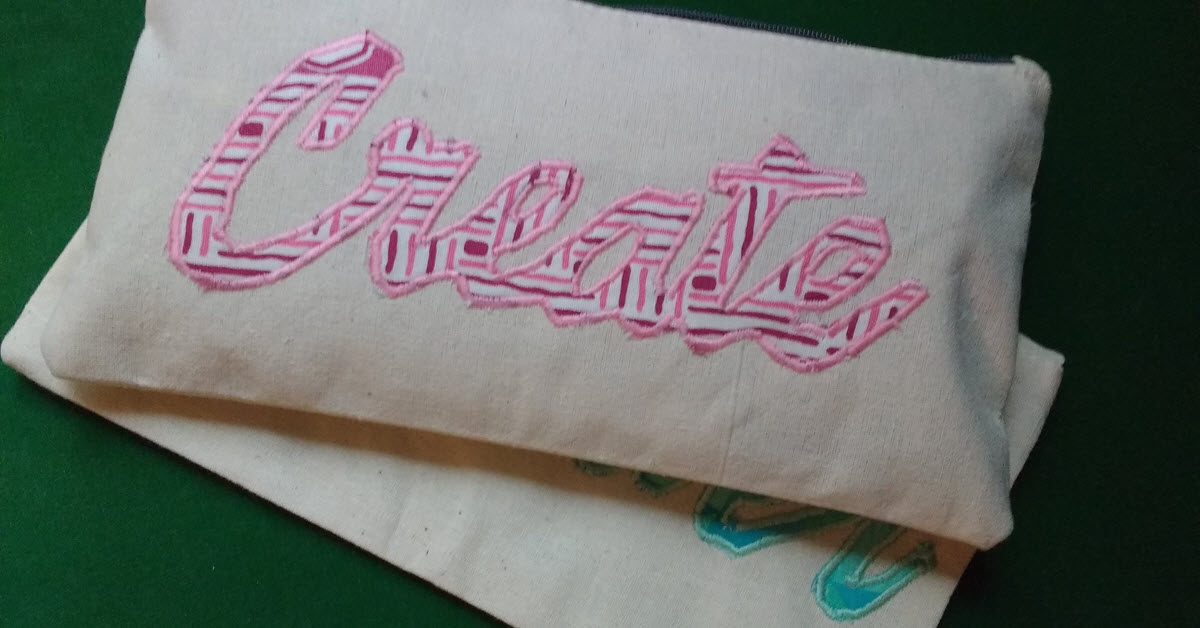
14

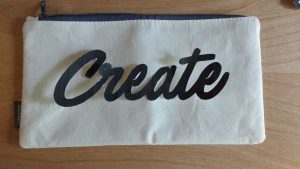
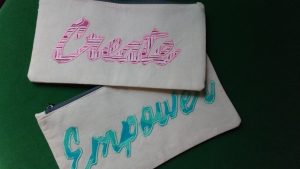
After I finished embroidering each case, I pinned each one closed and resewed the cases back up. Then I turned the cases right side out, pressed them, and look at these beauties!

15

The Create case is for me. It’s rare I make something for myself and I’ve been in a really creative mood lately so I thought it appropriate. The Empower case is for my friend, Kate, who empowers other women. I definitely think I’ll be making more of these personalized cases in the future.

16

———————————————————————————–
Charlotte Kaufman is a writer and sewist in Mammoth Lakes, California. She specializes in marine and home interiors and continues to fall more and more in love with quilting. You can follow her at charlottekaufman.com.

Make a Set of Sheets from a Duvet Cover

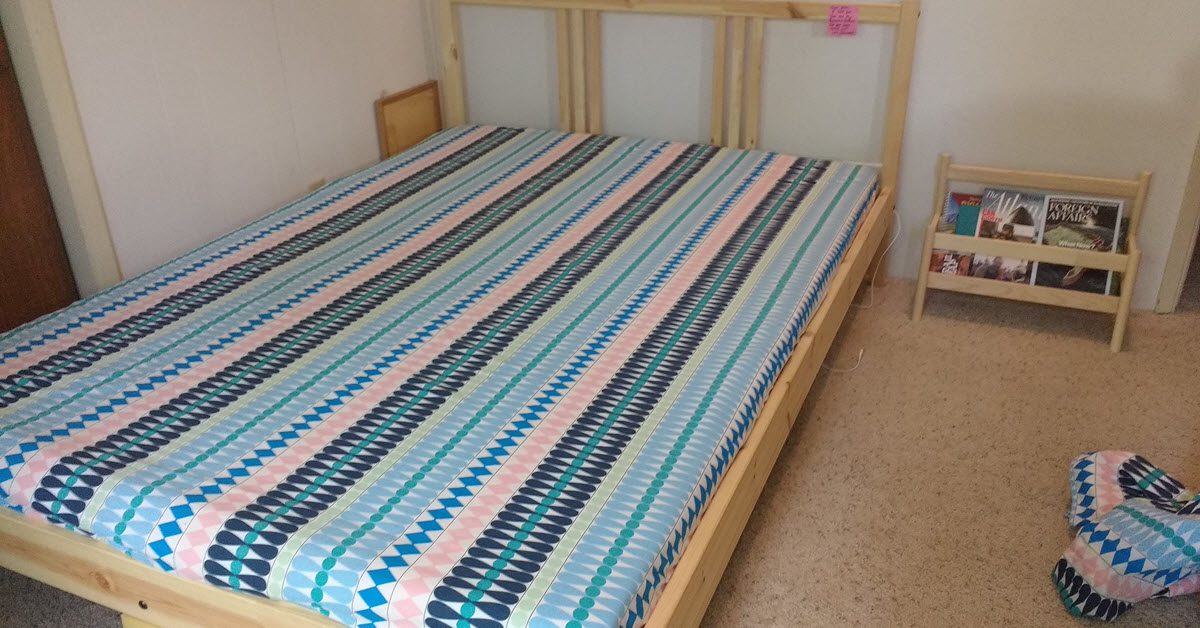
I’m a huge fan of custom bedding. In this post I’d like to show you how to turn a duvet cover into a set of fitted bed sheets. You will need a duvet cover that is the size of your mattress or larger. Our mattress is a queen and so is this duvet cover from Ikea. First, I prewashed the cover and then turned it inside out.

2

I don’t waste time trying to unpick the seams of the covers. I take my scissors and simply cut off all the seams around the three sides that are sewn.

3

Iron the large rectangular piece of fabric that you’ve created by chopping away the seams.

4

You should have a nicely ironed and very long piece of fabric now. Turn to your mattress and find its length and width. My mattress is a custom size. It’ dimensions are 53” x 75”.

The width is 4”. I add an extra 2” for a fitted sheet to wrap under the mattress and an additional 1” for seams (½” plus ½” for turning). To find the total length and width I need for a fitted sheet then, I add 7” + (width or length) + 7” = total width or length needed. In my case I needed a large rectangle 67” x 89”.

5

First I mark the shorter side of the sheet and cut the long strip of extra fabric away. Then I mark the length of the first sheet and then the length of the second sheet. For the second sheet you will often be a few inches short. If this happens I take fabric from the long side piece I discarded and sew it onto the ends to elongate it.

6

Now cut out 7” squares (or whatever your measurement is which will depend on the depth of your mattress). If you did your math right, the rectangle formed between those cut out squares will equal the same length/width as your mattress.

If you want to make the second sheet right away, then sew any fabric you need to make it long enough, and then repeat the process, cutting out the 7” squares. I made two fitted sheets because we don’t use top sheets but you could make the second sheet a top sheet.

7

Take your fabric to your sewing machines and sew the corners together. I sew first a straight stitch and then finish with a zig zag. Do this for all four corners.

8

There are many ways to finish the edges of a fitted sheet. I like to finger fold over the fabric by ½” then another ½”, then place the elastic on top. I move that over to the machine and begin sewing a zig zag stitch.

9

Once I’ve secured the elastic, I begin to hold it taught (but too tightly) and sew around the entire sheet this way. I finger fold over the fabric, hold the elastic taught, sew and repeat over and over until I’ve made it completely around.

10

Soon the seams will look like this as you keep working.

11

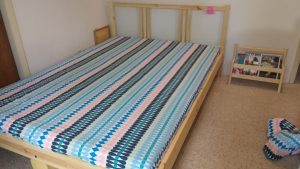
And here’s what it will look like when you are done.

12

Take it over to the bed and try it out. If you’ve done your math right, and not pulled your elastic too tightly, it will fit like a dream. Make the other sheet now and you’ll have a spare.

13

———————————————————————————–
Charlotte Kaufman is a writer and sewist in Mammoth Lakes, California. She specializes in marine and home interiors and continues to fall more and more in love with quilting. You can follow her at charlottekaufman.com.
DIY Drawstring Fabric Bag

DIY Drawstring Fabric Bag

I use fabric drawstring bags to organize everything. My girls have a set I created for them for traveling; the bags hold their socks, underwear, and toys. I used a separate set for my own travels and also have a bag I use to transport my gym shoes in my backpack (so the shoes don’t get the interior of my bag dirty.)

Any time I have a new need, I whip up a bag or some bags for the job. For this project, I wanted a small pouch to hold my ear plugs and eye mask. I’m a writer and I spend a lot of time writing in coffee shops and libraries (yes, sometimes libraries can be loud). And when I travel overnight, I also bring my sleep mask.

Don’t throw that away!

This is a piece of scrap fabric a girlfriend sent to me. “I bet you could use this,” she said. And she was right.

I drew a rectangle 15.5”x 5.5” (centering the pattern.)

2

I cut out the long sides of the rectangle with pinking shears and regular fabric scissors on the shorter ends.

Next, I folded the fabric over, right sides together and drew a ¼” seam on each side. (If you can eyeball this, go ahead). The seam stops on each side 1.75” from the top. Start at the bottom and sew to that spot, back tacking at the end of the seam (on both sides.)

3

I snipped just a tiny bit on all four sides of the bag and then folded the seams in all four sides. First I finger pressed, then I ironed and starched them down.

4

Let’s straighten this out

Next I folded the top of the front and back down ¼” inch and ironed and starched as well.

5

Now I did a supporting seam starting at the side seam and going around the top of the fabric to the other seam. Do this on both sides.

6

Now fold each top down to meet the top of the sewed side seam. You should see how the drawstring casings will be formed now. Iron and starch each folded side down.

7

8

Sew across each side from the side seam across to the other side seam. I used the stitching I did prior as a guide for where to sew. Make sure you don’t catch the other side of the bag while you sew.

9

Lovely! Look how nice it looks inside out. Imagine how great it will be when you turn it right sides out! First I zig zag stitch the sides and trim the bottom corners before turning.

10

Now to tie it all together…

Whoohoo! Give it one more iron and starching to take it to the next level. Then measure out enough ribbon for a double drawstring.

11

I used a safety pin to feed the ribbon through each side and around.

12

Tie a not on the end of each piece of ribbon, use pinking shears on the end of the ribbon, and you are finished!

13

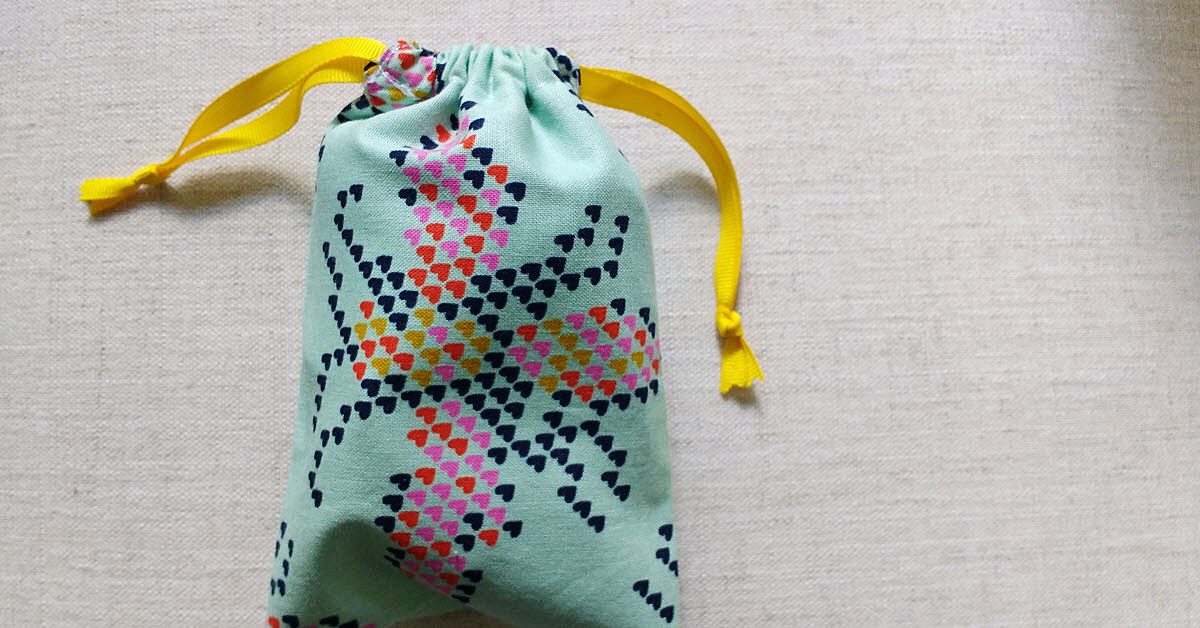
This is perfect for slipping in my bag when I’m going out to write.

14

And my eye mask fits in beautifully too.

15

———————————————————————————–
Charlotte Kaufman is a writer and sewist in Mammoth Lakes, California. She specializes in marine and home interiors and continues to fall more and more in love with quilting. You can follow her at charlottekaufman.com.
DIY Colored Pencil Rolls

DIY Colored Pencil Rolls

Have you joined the adult coloring mania that is sweeping the nation (possibly the whole world?) You know what I mean right, the movement of grownups using coloring books to Zen out, get calm, and relax? I for one am fully into doing more coloring and less stressing in life.

1

If you want to join the movement, but need a place to store your coloring utensils, then here is a quick DIY for a colored pencil or marker or pen roll.

Supplies

1. Fabric for back of pencil roll
2. Fabric for front of pencil roll
3. Thin batting (for in between the front and back fabric)
4. Fabric for front panel
5. Interfacing (for front panel)
6. Twine
7. A pretty bead

Pick your fabric

2

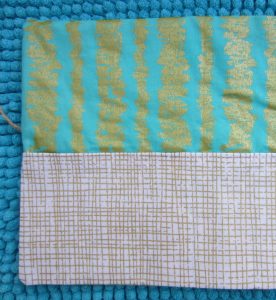
The amount fabric you’ll need for supplies 1-4 depends on how big you are making your roll. I wanted to include a good assortment of colored pencils (or markers, pens, etc) in mine. Here are the measurements I used (seams are ¼”).

1. Fabric for back of pencil roll: 15.5″ x 9″
2. Fabric for front of pencil roll: 15.5″ x 9″
3. Thin batting piece: cut slightly larger than front/back pieces
4. Fabric for front panel: 15.5″ x 4.75″
5. Interfacing (for front panel): 15.5″ x 4.75″

3

Iron out the details

I ironed the interfacing to the back of the smaller front panel of fabric and then folded the top of the fabric over ¼” and then again ¼”, pressed, and then finished the seam. This is the top of the fabric where the pencils will slip in and out of the roll.

4

Pins and sandwiches

Then I pinned the smaller front piece to the larger front fabric piece, marked out 1 ¾” spaces and sewed up the front of the smaller panel, back tacking at the top of each line, until I had nine sections.

Next I sandwiched all the parts in this order:

1. Batting
2. Top, front fabric piece (right side up)
3. Back panel piece (wrong side up)

I pinned the layers together and then inserted the twine into the bundle, placing it so it would extend out on the side where the front panel fabric joined the main front panel. I sewed around leaving a section at the top for turning.

Pro Tip: heavily stitch back and forth over the twine so it is not easily pulled out.

5

The final stretch

Trim your corners and trim off excess fabric, then turn your piece and use your finger or a seam ripper (with the lid on) to massage out the corners so they pop nicely. Then topstitch. Don’t forget to topstitch!

6

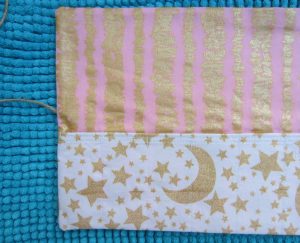
Plan ahead and cut out a lot of a fabric because when your friends see these, they are going to want some.

7

Lastly, slip a bead on the long end of the twine and tie a knot on the end so the bead can’t slip off.

8

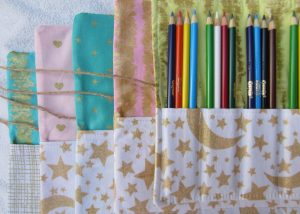
Enjoy and happy coloring!

9

———————————————————————————–
Charlotte Kaufman is a writer and sewist in Mammoth Lakes, California. She specializes in marine and home interiors and continues to fall more and more in love with quilting. You can follow her at charlottekaufman.com.
Keep Fabric and Thread Samples in Your Sewing Space

Keep Fabric and Thread Samples in Your Sewing Space

Hero Lead Image

Location is everything

If you haven’t considered keeping samples of the fabrics and threads you work with on a frequent basis, I’m here for advocating that you start. I live in Mammoth Lakes, California, which is a small, out of the way town at 8,000ft altitude in the Eastern Sierra Mountains. The nearest sewing/fabric stores to me are a one hour drive south in Bishop, California. And If I want the convenience of larger, more well-known establishments, I have to drive 2.5 hours north to Carson City, Nevada. Needless to say, I do a lot of shopping online. This is my first argument for keeping a collection of samples in your sewing space. If you can’t readily get to a store, then being able to look at what you need and order online is a life saver.

1

Make exactly what they want

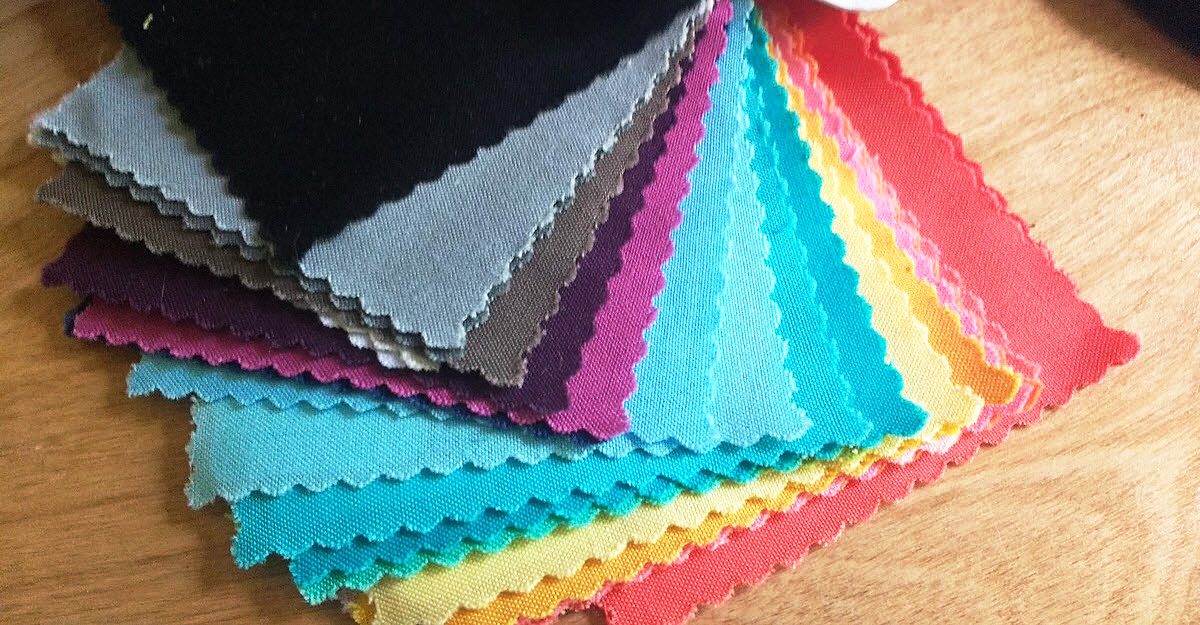
Sample swatches and cards are helpful for showing to both customers and friends and family that you may be sewing for. I try to never sew gifts as surprises. Sometimes I break this rule when I’m fairly certain the gift recipient will like what I’m making, but usually I don’t chance it. Why spend time and money on a handmade gift that someone may not like? I use my sample swatches of minky, for example, when I make gifts for my daughters or their friends. The kids can touch and feel the fabric, read the names of each color, and fall in love with the gift before it’s even finished.

2

How does it feel?

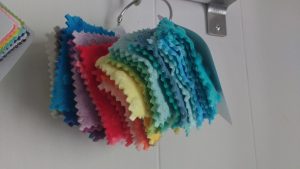
Speaking of feeling, many sewists I know don’t like to order fabric online because they like to feel the fabric in the store before buying. I understand where they’re coming from, but usually have to order online. Because of this, I’ve ordered samples of the brand of solids I like to use (Hawthorne Threads) because I already know how their fabric feels, looks, and washes. If you have a brand you love, look into getting sample cards or even buying charm packs of a line of fabric that you tend to buy over and over.

3

Samples versus supplies

A supply can be a sample, but a sample can’t be a supply. I keep a lot of supplies on hand in my fabric stash and my thread wall and I often will check my supplies to see if they will work in an upcoming project as well. I can’t, however, keep EVERY color of thread on hand, nor can I buy ALL THE FABRIC, like I want to. When the colors I don’t already have on hand won’t work, then I turn to my thread sample card to see what I need to order.

4

What kind of samples do you keep on hand to make your sewing life easier?

———————————————————————————–
Charlotte Kaufman is a writer and sewist in Mammoth Lakes, California. She specializes in marine and home interiors and continues to fall more and more in love with quilting. You can follow her at charlottekaufman.com.