Bunk Bed Privacy Curtains

Bunk Bed Privacy Curtains (part 2)

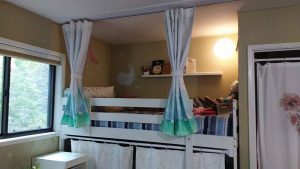
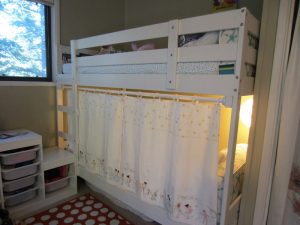
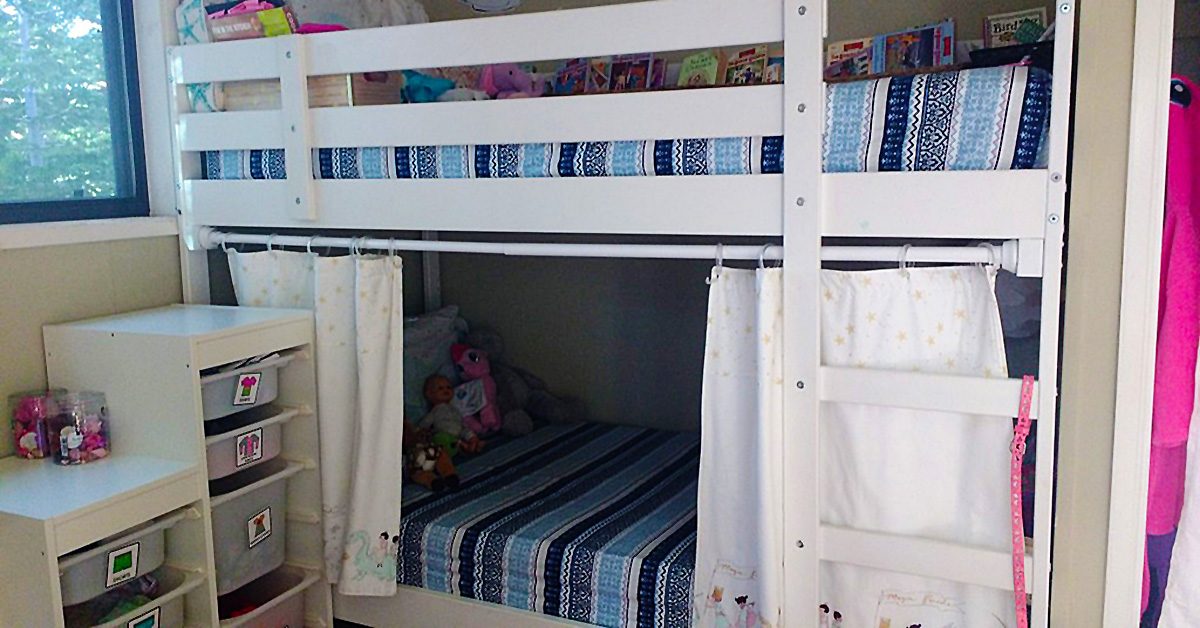
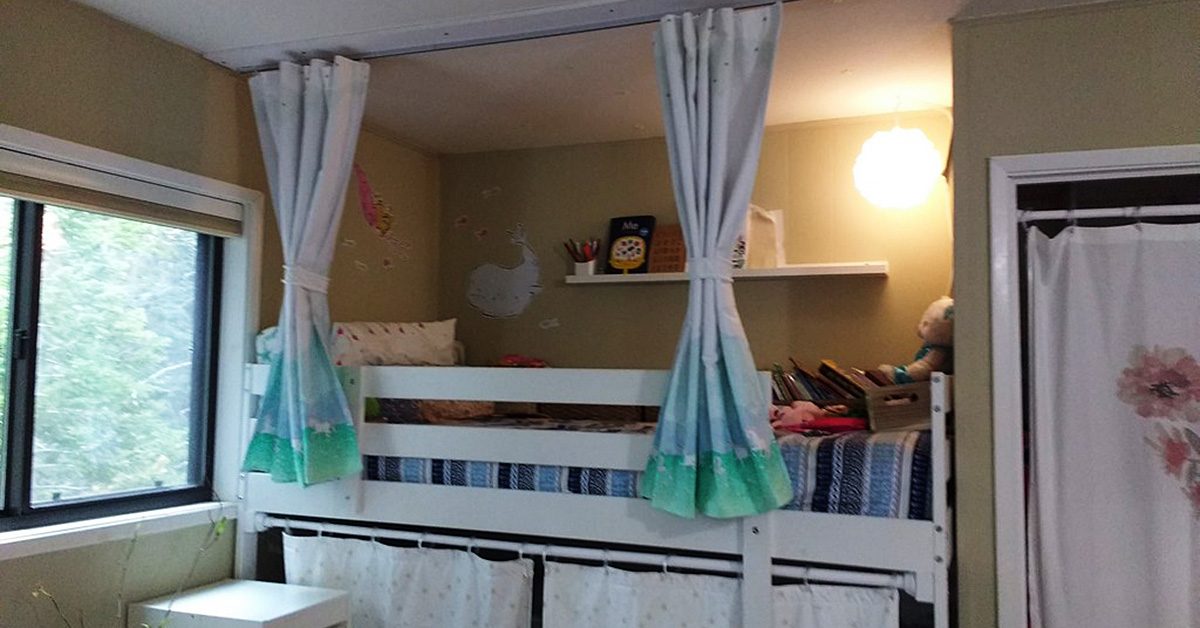
Last fall I wrote a post about the bunk bed privacy curtains I created for my youngest daughter for her bottom bunk.

Last fall I wrote a post about the bunk bed privacy curtains I created for my youngest daughter for her bottom bunk. You can read that post here.

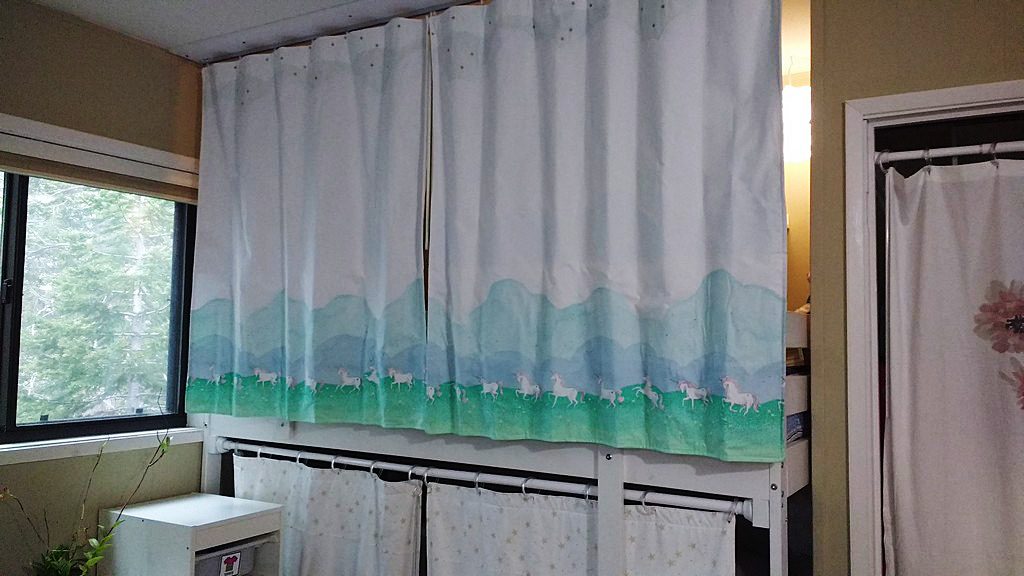
They turned out amazingly well; here’s a picture.

They turned out amazingly well; here’s a picture.

They turned out amazingly well; here’s a picture.

It’s only fair…

I also promised my older daughter, who sleeps on the top bunk, that I’d make her a pair too. Her curtains, I knew, would take a lot more work. First I bought ceiling curtain track and used a hacksaw to cut it to size. Then I asked my husband to drill in the holes for the screws.

While he worked on the track, I painted a thin board white to match their ceiling. We attached the track to one side of the board and then attached the board to the ceiling, drilling holes in the side of the board that didn’t have the track, right into a stud in the ceiling.
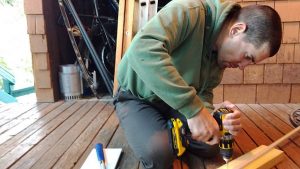
Drilling holes in the side of the board that didn’t have the track, right into a stud in the ceiling.

Drilling holes in the side of the board that didn’t have the track, right into a stud in the ceiling.

Unicorns and stars

Next up was the curtains themselves. She said she wanted ‘unicorns and stars,’ and for a theme like that you can always count on Sarah Jane Fabrics for something good. The only problem was the space the curtains took up was much larger than the width of a yard of fabric.

Undeterred, I cut the clouds and the stars from the grass and the unicorns and did the math on how to baste the fabric onto white canvas fabric to elongate the scene.
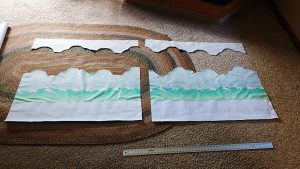
Undeterred, I cut the clouds and the stars from the grass and the unicorns & did the math on how to baste the fabric onto white canvas fabric to elongate the scene.

Undeterred, I cut the clouds and the stars from the grass and the unicorns & did the math on how to baste the fabric onto white canvas fabric to elongate the scene.

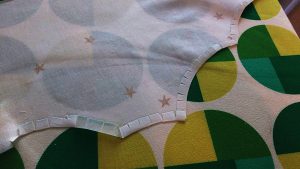
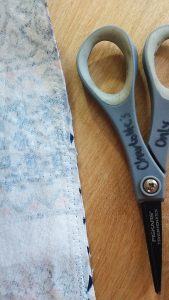
I painstakingly snipped around the curves of the clouds and the grass on the bottom and top pieces and then finger folded them over and ironed. I used starch to help the little pieces stay down. This was time consuming because I had to do it for four panels (two front, two back) and the top and bottom pieces of all four.

I love it when a plan comes together

My trouble paid off however.

My trouble paid off however.

My trouble paid off however. I diligently pinned the pieces to the main panel fabric of the top and bottom curtains and then sewed them in place with a decorative stitch.
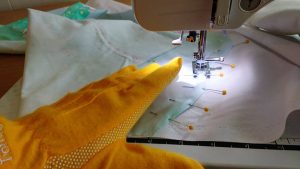
I diligently pinned the pieces to the main panel fabric of the top & bottom curtains & then sewed them in place with a decorative stitch.

I diligently pinned the pieces to the main panel fabric of the top & bottom curtains & then sewed them in place with a decorative stitch.

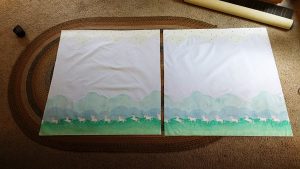
Here are the two front panels. Gorgeous, no?

Here are the two front panels. Gorgeous, no?

Here are the two front panels. Gorgeous, no?

For the back panels, I raised the grass & unicorns up higher and added a strip of white on the bottom so the unicorns wouldn’t be hidden from my daughter’s view by the bunkbed railing.
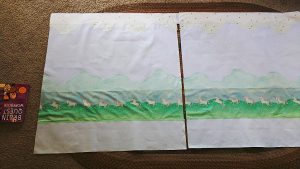
For the back panels, I raised the grass & unicorns up higher and added a strip of white on the bottom so the unicorns wouldn’t be hidden from my daughter’s view by the bunkbed railing.

For the back panels, I raised the grass & unicorns up higher and added a strip of white on the bottom so the unicorns wouldn’t be hidden from my daughter’s view by the bunkbed railing.

Putting it all together

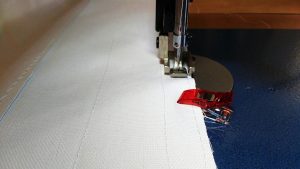
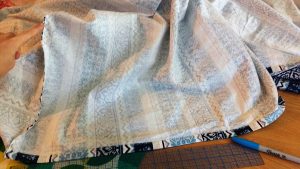
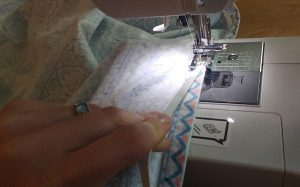
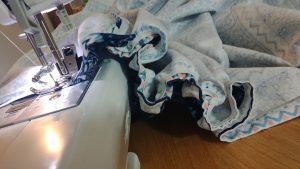
On the back panel, I then sewed drapery tape to the top of each panel. Then I sandwiched the top and bottom panels, right-sides facing, and sewed them together. Next I turned the panels and pressed everything neat and flat. I finished by top stitching the panels, and the opening where I’d turned them, closed.

On the back panel, I then sewed drapery tape to the top of each panel.

On the back panel, I then sewed drapery tape to the top of each panel.

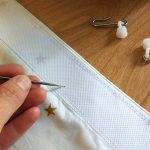
Now it was time to puncture some holes in the drapery tape so I could add the hooks that feed into the curtain tracks. For this, I used my handheld sailmaker needles to pierce a hole in the tape but not through to the front of the fabric.


And voila! The curtains fed onto the track perfectly. But I wasn’t done yet.
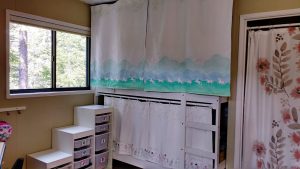
For this, I used my handheld sailmaker needles to pierce a hole in the tape but not through to the front of the fabric.

For this, I used my handheld sailmaker needles to pierce a hole in the tape but not through to the front of the fabric.

Train your curtains

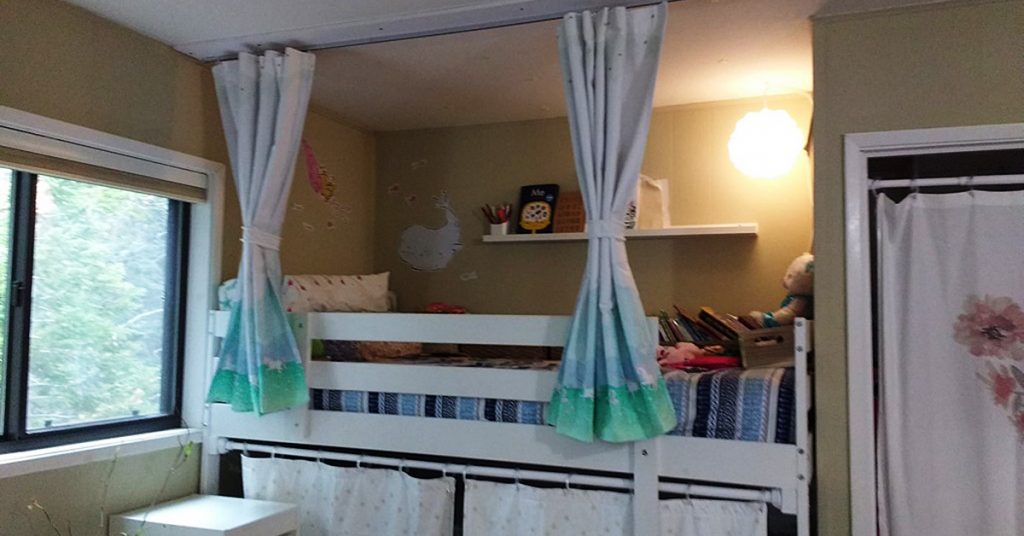
My daughter wanted to be able to block out the light of the night lights we use in the room, but also wanted to easily be able to open and shut the curtains too. I took the time to carefully fold the curtains into the bunched position, using ribbon and clothespins to maintain them in that shape while I sewed curtain tie backs. I call this ‘training’ my curtains.
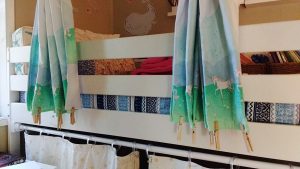
 

I took the time to carefully fold the curtains into the bunched position, using ribbon & clothespins to maintain them in that shape while I sewed curtain tie backs.

I took the time to carefully fold the curtains into the bunched position, using ribbon & clothespins to maintain them in that shape while I sewed curtain tie backs.

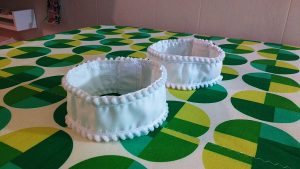
Then I sewed two curtain tie backs and added some mini pompoms for a bit of whimsy.

Then I sewed two curtain tie backs & added some mini pompoms for a bit of whimsy.

Then I sewed two curtain tie backs & added some mini pompoms for a bit of whimsy.

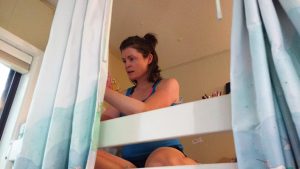
I knew that my daughter would lose them if I didn’t think of a way to keep the tie backs attached to the curtains so I sewed a buttonhole onto each tie back (you can read my post about how to sew buttonholes here). Next I climbed up into her bed and hand sewed a button onto the back panel of each curtain.

Then I connected the tie backs to the curtains via the button hole. Now she can bunch the curtains to open them, wrapping the tie back around them and securing them with the Velcro I sewed on the tie backs. And when she wants to close them for privacy or to shut out the light, she just releases the Velcro and the tie backs remain attached to the curtains.
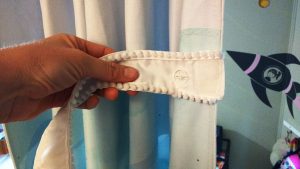
When she wants to close them for privacy or to shut out the light, she just releases the Velcro & the tie backs remain attached to the curtains.

When she wants to close them for privacy or to shut out the light, she just releases the Velcro & the tie backs remain attached to the curtains.

And I have a very happy six year old! Have you made your own bunk bed curtains? Tell us about it in comments!

 

———————————————————————————–
Charlotte Kaufman is a writer and sewist in Mammoth Lakes, California. She specializes in marine and home interiors and continues to fall more and more in love with quilting. You can follow her at charlottekaufman.com.
Sew a DIY Sunbrella Table Cloth with Insul-Brite

Sew a DIY Sunbrella Table Cloth with Insul-Brite

I would need a place to serve the hot lasagnas we had ordered.

I would need a place to serve the hot lasagnas we had ordered.

This weekend I hosted 17 women at my home for a women’s writing workshop with bestselling author, Amy Ferris. We had lunch each day and we ate outside on my lower deck. Lunch was catered and I knew I would need a place to serve the hot lasagnas we had ordered.

Enter my daughter’s art table: I thought it would be perfect for staging food on the deck but it’s covered in marks and squiggles and I didn’t want hot food to hurt its surface. I’ve been on a role using up my Sunbrella stash (you can read about the outdoor Sunbrella pillows I recently made here and here.) So I dug into my Sunbrella stash again.

Enter my daughter’s art table.

Enter my daughter’s art table.

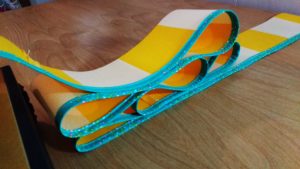
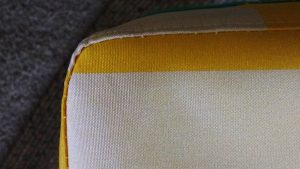
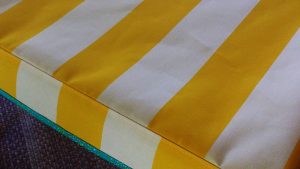
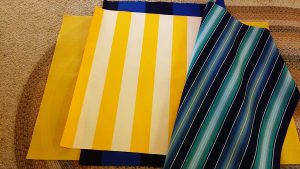
This wide striped yellow Sunbrella fabric was a perfect choice. Sunbrella is water resistant and stain resistant. I also had some Insul-Brite batting in my stash too. Insul-Brite is amazing and is what home sewers use to make DIY pot holders and ironing boards.

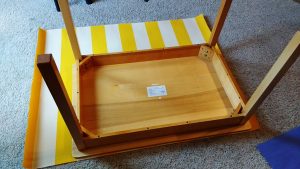
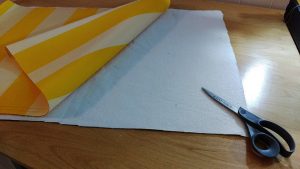
To get started, I turned the table over and used it to make a pattern on the fabric.

This wide striped yellow Sunbrella fabric was a perfect choice.

This wide striped yellow Sunbrella fabric was a perfect choice.

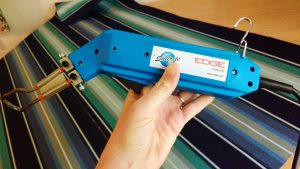
I used a ½” seam around the pattern. I also only had one yard of the fabric so on the remaining portion I had to do some math to make sure I had enough left to make strips for the sides of the table cloth. I figured out that I could do three strips at 4.25” each. I cut out the tablecloth top and the strips with a hot knife.

I used a ½” seam around the pattern.

I used a ½” seam around the pattern.

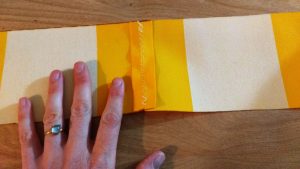
Next I joined the three strips together, opening the seams and finishing them with a zig zag stitch to help keep the joins as flat as possible.

Next I joined the three strips together.

Next I joined the three strips together.

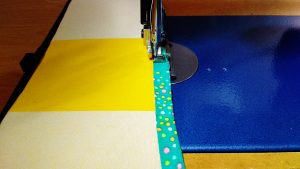
I really wanted to add pom pom trim but I didn’t have enough to go around the table cloth so I used some of this handmade trim I had from a quilt I made earlier.

I used some of this handmade trim I had from a quilt I made earlier.

I used some of this handmade trim I had from a quilt I made earlier.

How beautiful is that?

How beautiful is that?

How beautiful is that?

Now that the side fabric had the trim attached, I busted out the Insul-Brite. You want to put the shinier side of the fabric toward the heat source. I cut out a piece that was slightly larger on all sides of the top of the tablecloth.

I cut out a piece that was slightly larger on all sides of the top of the tablecloth.

I cut out a piece that was slightly larger on all sides of the top of the tablecloth.

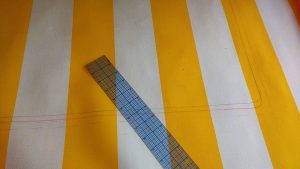
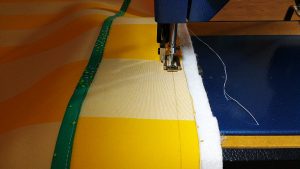
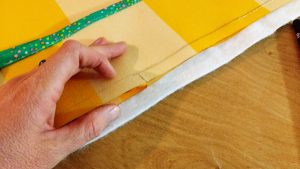
To attach the side piece to the top I made a sandwich of first the Insul-Brite, and then the Sunbrella top. The side piece went on top of the table cloth top, right sides together. Before I started I drew a ½” seam on the side piece so I knew I was sewing correctly to the pattern I’d created for the tablecloth top.

Before I started I drew a ½" seam on the side piece so I knew I was sewing correctly to the pattern I’d created for the tablecloth top.

Before I started I drew a ½” seam on the side piece so I knew I was sewing correctly to the pattern I’d created for the tablecloth top.

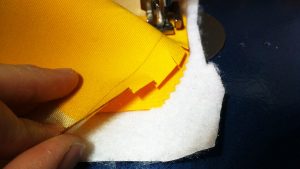
Cut snips into the fabric as you go around the corners.

Cut snips into the fabric as you go around the corners.

Cut snips into the fabric as you go around the corners.

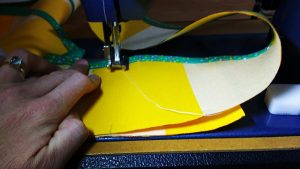
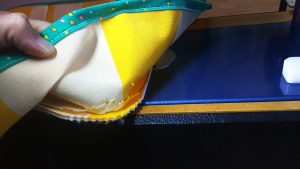
When you get close to the other end of the trim, pull it off of the machine, join the two pieces and fold them back and forth, marking where they should be sewn together.


When you have those marks, bring the top over to your machine and sew the join on the side piece.

When you have those marks, bring the top over to your machine & sew the join on the side piece.

When you have those marks, bring the top over to your machine & sew the join on the side piece.

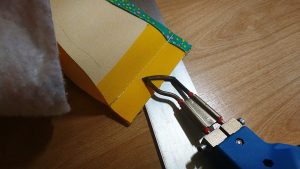
Use your hot knife to trim the join. Then sew the rest of the side piece down to the tablecloth.

Use your hot knife to trim the join.

Use your hot knife to trim the join.

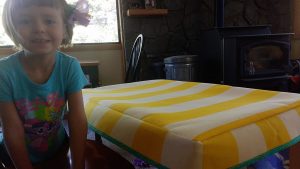
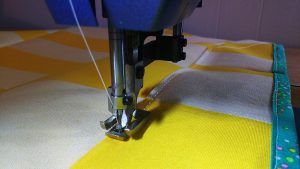
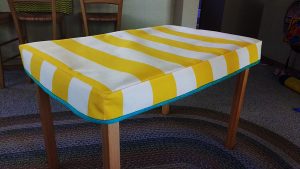
Next I tried it on the table to make sure I had it correctly sized. I had not yet trimmed any excess Insul-Brite. Here you can see both my darling daughter and that the tablecloth fits. What it is missing is topstitching. Topstitching is magical, not just for the finishing touch it gives but because it helps give support and structure.

Here you can see both my darling daughter & that the tablecloth fits.

Here you can see both my darling daughter & that the tablecloth fits.

I chose to topstitch on the side piece versus the top and fold the Insul-Brite down toward the sides.

I chose to topstitch on the side piece versus the top & fold the Insul-Brite down toward the sides.

I chose to topstitch on the side piece versus the top & fold the Insul-Brite down toward the sides.

That nice, clean line is exactly what will take this project to the next level.

That nice, clean line is exactly what will take this project to the next level.

That nice, clean line is exactly what will take this project to the next level.

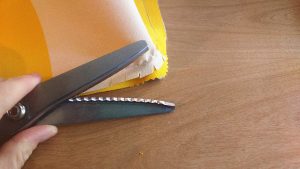
Finally, I trimmed the Insul-Brite to match up with the seams and then used pinking shears on the corners where I had made snips to help prevent fraying.

I trimmed the Insul-Brite to match up with the seams & then used pinking shears on the corners where I had made snips to help prevent fraying.

I trimmed the Insul-Brite to match up with the seams & then used pinking shears on the corners where I had made snips to help prevent fraying.

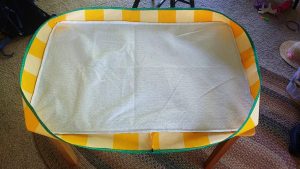
Here’s what the finished piece looks like on the underneath.

Here’s what the finished piece looks like on the underneath.

Here’s what the finished piece looks like on the underneath.

Flipped over and on the table, you can see how much more snugly the tablecloth fits because of the topstitching.

Flipped over & on the table, you can see how much more snugly the tablecloth fits because of the topstitching.

Flipped over & on the table, you can see how much more snugly the tablecloth fits because of the topstitching.

How darling is this?

How darling is this?

How darling is this?

This is a quick pic of it inside.

This is a quick pic of it inside.

This is a quick pic of it inside.

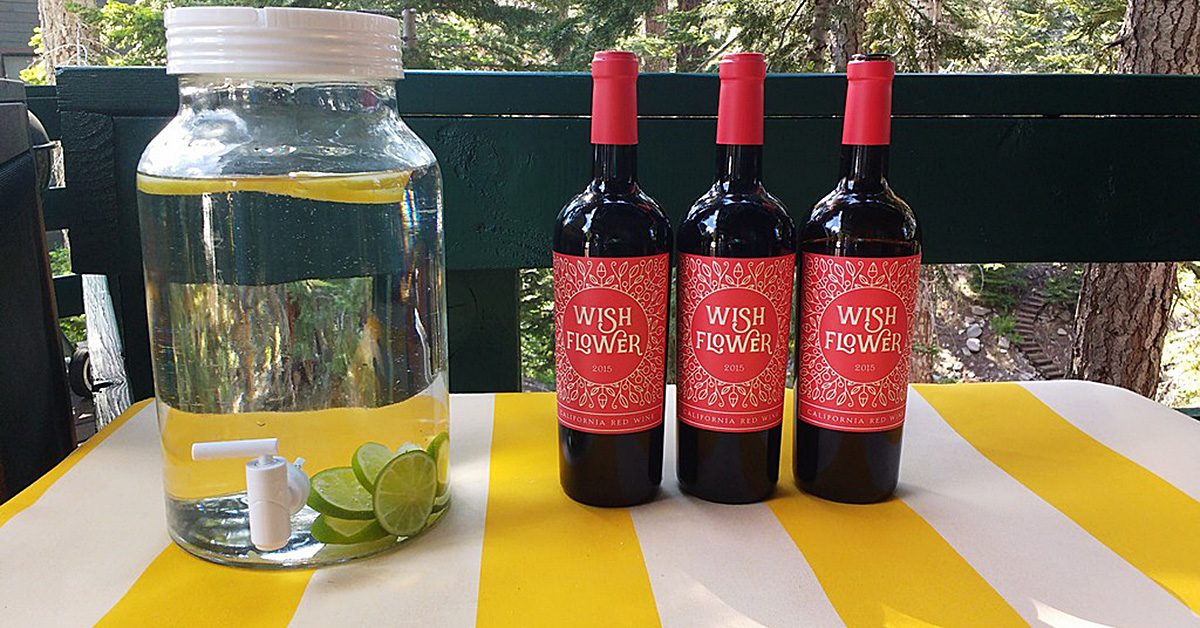
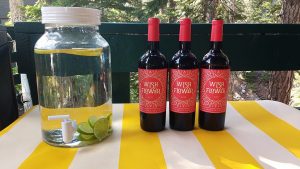
And at last, my idea worked out great on the deck where I served lasagna for my guests and later, cheese and wine. I love it when a project works out!

I love it when a project works out!

I love it when a project works out!

———————————————————————————–
Charlotte Kaufman is a writer and sewist in Mammoth Lakes, California. She specializes in marine and home interiors and continues to fall more and more in love with quilting. You can follow her at charlottekaufman.com.
How to Sew a Zippered Outdoor Pillow Cover with Sunbrella

How to Sew a Zippered Outdoor Pillow Cover with Sunbrella

I made those pillows with an envelope-style close on the back.

I made those pillows with an envelope-style close on the back.

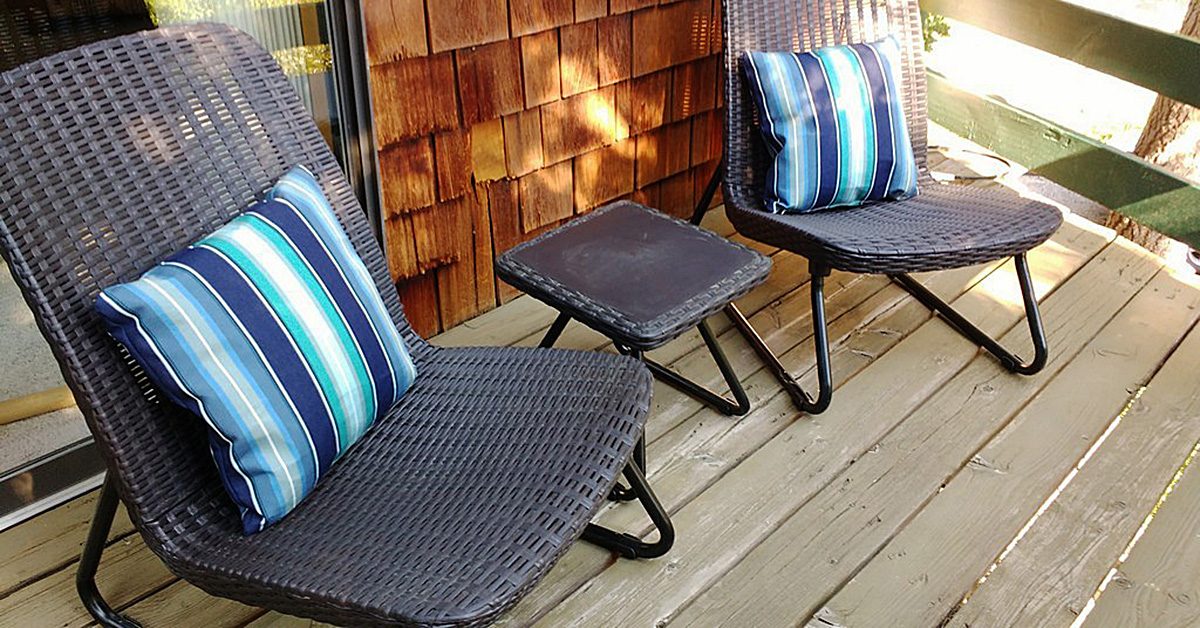
Last week I shared how I made outdoor pillows out of Sunbrella fabric for my front porch chairs. I made those pillows with an envelope-style close on the back. The pillows on the front porch do not get as much direct sun exposure as the chairs on the back deck. For those chairs I wanted to use the same fabric, but to make pillows with a zippered close so I could flip the pillows between the front and the back to evenly distribute sun exposure over time to the fabric.

For pillows with a zipper close you will cut out the same size of front & back panels.

For pillows with a zipper close you will cut out the same size of front & back panels.

For pillows with a zipper close you will cut out the same size of front and back panels. I was making two pillows for 18” x 18” pillow forms so I needed four 17” x 17” panels. With ½” seams, the finished covers would be 16” x 16”, perfect for stuffing a slightly larger pillow in to make the pillow case fluff up and fill out nicely.

Pro Tip: plan ahead when working with stripes or patterns and cut out your panels to match on all sides (if this is important to you).

Plan ahead when working with stripes or patterns & cut out your panels to match on all sides.

Plan ahead when working with stripes or patterns & cut out your panels to match on all sides.

Like a hot knife through butter

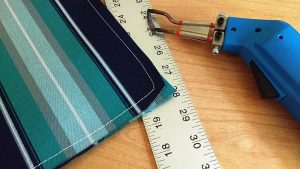
Sunbrella is perfect for cutting with a hot knife. It seals the edges for you. Just watch out as the edges can be sharp.

Sunbrella is perfect for cutting with a hot knife.

Sunbrella is perfect for cutting with a hot knife.

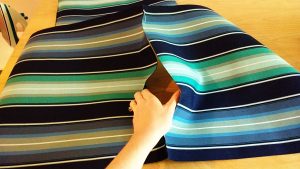
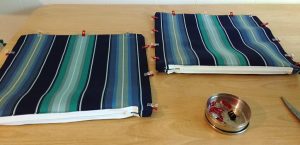
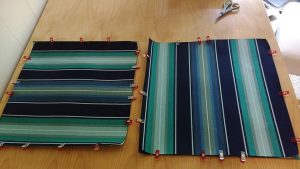
Sunbrella outdoor fabric has no right or wrong side. I clipped two panels together and the other two panels together using my Wonder Clips. They are available at SewingMachinesPlus.com and I love them!\

Pro Tip: if you are working with stripes or a pattern, make sure you place the panels together correctly to match the stripes or pattern.

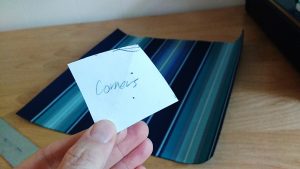
Round off your corners. I talk about the importance of rounding your corners in this post. Not everyone does it but I think it makes for a more beautiful pillow. On dark fabrics, I use my Clover Chaco Liner pen.

Round off your corners.

Round off your corners.

Zippers!

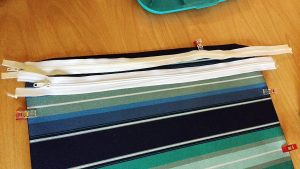
I’m using two different zippers from my stash. They are both long enough to fit the 18”x18” pillows and that’s all that matters.

I’m using two different zippers from my stash.

I’m using two different zippers from my stash.

Determine what side is the bottom of your pillow. This might depend on how you want your stripes to run or your pattern to be displayed. I’m working with ½” seams all around the pillow. On the side where you will place the pattern, mark about 2” in on both sides and sew and back-tack on both ends along that 2” line.

Determine what side is the bottom of your pillow.

Determine what side is the bottom of your pillow.

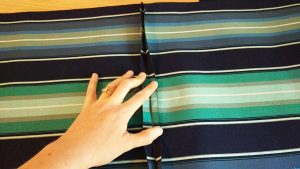
Now your seam will look like this, with an opening in the middle.

Now your seam will look like this, with an opening in the middle.

Now your seam will look like this, with an opening in the middle.

Sunbrella is perfect for finger creasing. Crease down both seams. Here you could stick the seam down with basting tape if you didn’t feel super confident going forward to the next step.

Sunbrella is perfect for finger creasing.

Sunbrella is perfect for finger creasing.

With my Clover Chaco Liner pen, I mark on both sides of the seam where the stitching ends. This will show me where I’m going to start and stop my zipper (just past that stitching on either end).

Pro Tip: make sure you place your zipper with the zipper pull facing down so it can be accessed from the right side of the pillow.

You zipper is marked up – so let’s sew it on!

I mark on both sides of the seam where the stitching ends.

I mark on both sides of the seam where the stitching ends.

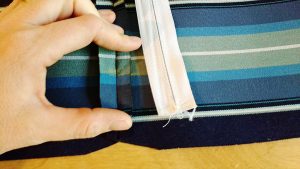
I started at the bottom of the zipper and sewed it down just past the yellow mark I’d made. Then I roll up both sides of the fabric and use Wonder Clips to hold the fabric in place so I don’t have fabric all over the place as I’m sewing in the zipper.

I started at the bottom of the zipper & sewed it down just past the yellow mark I’d made.

I started at the bottom of the zipper & sewed it down just past the yellow mark I’d made.

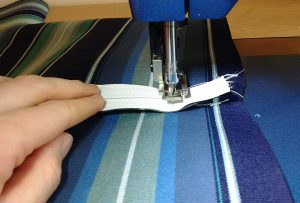
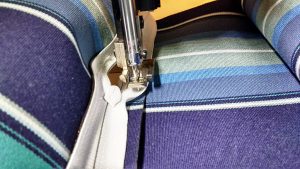
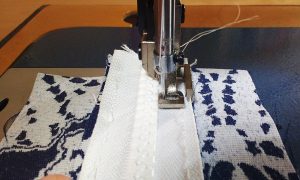
Next I carefully sewed the zipper to either side of the folded seams. When you get to the zipper pull, leave your needle down and lift up the foot, then slide the pull past and away from where you’re sewing. Back tack thoroughly at the top and bottom of the zipper.

I carefully sewed the zipper to either side of the folded seams.

I carefully sewed the zipper to either side of the folded seams.

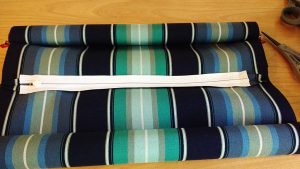
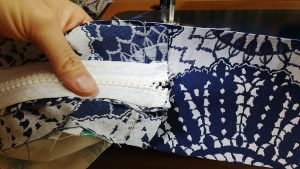
Now the two pieces are fully joined with the zipper in the middle.

Now the two pieces are fully joined with the zipper in the middle.

Now the two pieces are fully joined with the zipper in the middle.

Next, unroll your fabric and clip the panels right-sides together. Sew all around the other three sides.

Pro Tip: unzip your zippers enough to be able to fully unzip them once you’ve sewn the other seams shut.

Unroll your fabric and clip the panels right-sides together.

Unroll your fabric and clip the panels right-sides together.

Before you turn your pillows right sides out, always, always, always check your work. Go over all the sewn seams and corners to make sure you didn’t miss anything.

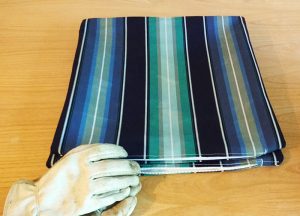
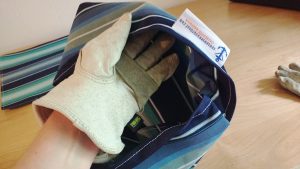
Then turn! Watch out because Sunbrella cut with a hot knife can be a bit sharp. I use my leather garden gloves to turn them right sides out.

Watch out because Sunbrella cut with a hot knife can be a bit sharp.

Watch out because Sunbrella cut with a hot knife can be a bit sharp.

Use something sharp but not too sharp, like a Sharpie marker with the lid on to poke and fully round the edges of your pillow. Now you have a Sunbrella pillow case with a zippered close!

Now you have a Sunbrella pillow case with a zippered close!

Now you have a Sunbrella pillow case with a zippered close!

Walk it in

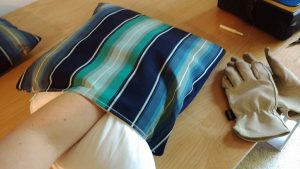
Add your pillow form. Remember, your pillow is bigger than your pillow case. You need to move the pillow in gently but firmly. You are in charge! I call this action ‘walking it in.’ Just keep moving it until it’s fully in the case. Then grab each corner and really match it corner to corner.

You need to move the pillow in gently but firmly.

You need to move the pillow in gently but firmly.

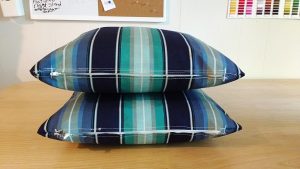
And there you have it. Two puffy pillow cases with zippered closes that are the same front and back. Perfect for distributing sun exposure on a deck.

Two puffy pillow cases with zippered closes that are the same front & back.

Two puffy pillow cases with zippered closes that are the same front & back.

Ready for its close up!

Ready for its close up!

Ready for its close up!

Do you have any tips for working with Sunbrella? Tell us about them in comments!

Do you have any tips for working with Sunbrella? Tell us about them in comments!

Do you have any tips for working with Sunbrella? Tell us about them in comments!

———————————————————————————–
Charlotte Kaufman is a writer and sewist in Mammoth Lakes, California. She specializes in marine and home interiors and continues to fall more and more in love with quilting. You can follow her at charlottekaufman.com.

How to Sew Sunbrella Fabric Outdoor Pillows

How to Sew Sunbrella Fabric Outdoor Pillows

How to sew Sunbrella fabric outdoor pillows.

How to sew Sunbrella fabric outdoor pillows.

After a record amount of snowfall this year and the ensuing snow melt and run off, my new home town of Mammoth Lakes, California is in full summer swing. We live at 8,000ft elevation. This means that while we’re high up amongst mountains and the trees, we’re also closer to the sun. UV exposure increases about 4% for every 1000 ft. (305 m) gain in elevation (source). So at my house, we are 32% more exposed to UV rays than at sea level.

I mention this because I recently made some outdoor pillows for our patio furniture. I immediately chose Sunbrella fabric as my go-to because of its incredible sun resistance and durability (among many, many other factors. Seriously, read up on Glen Raven’s Sunbrella fabric and see why it’s the number one choice in marine environments).

Sunbrella

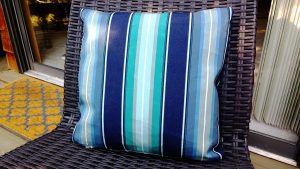
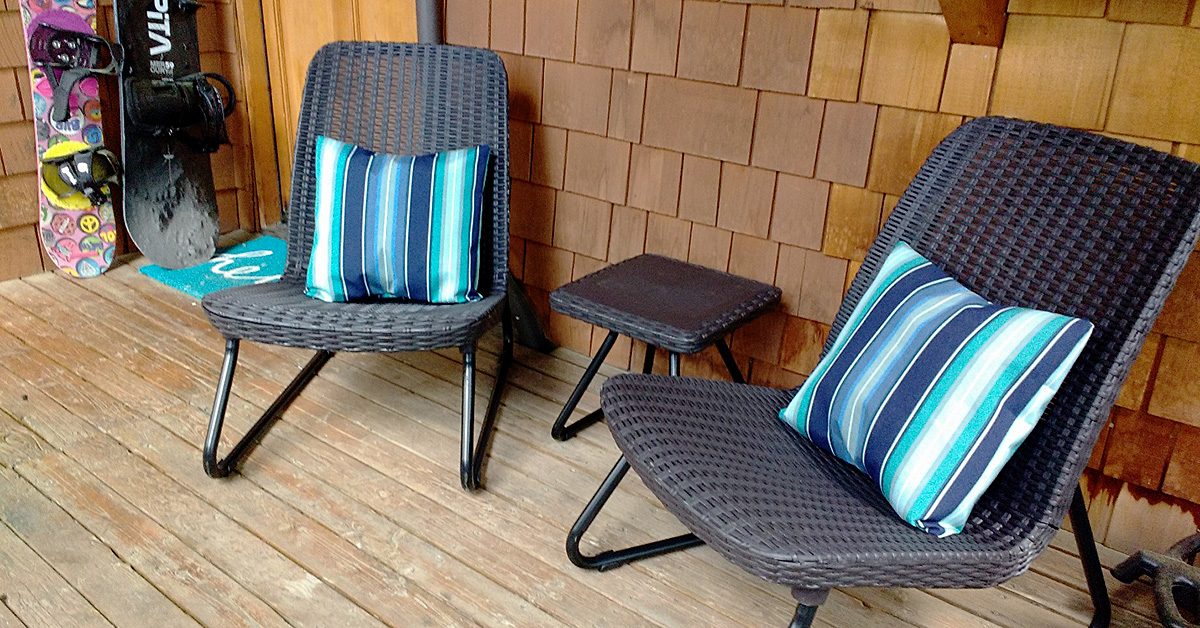
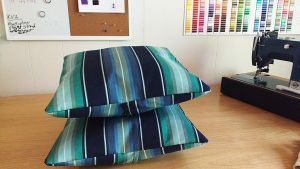
I dug through my stash of Sunbrella which is currently three yards of fabric. I settled on Sunbrella Saxon Cascade, both because I liked the pop of turquoise and how it matched with my welcome door mat, and because the other two pieces’ stripes were too big for the 18″ x 18″ pillow forms I planned to use.

Sunbrella is an acrylic fabric & hot knives cut through it like butter.

Sunbrella is an acrylic fabric & hot knives cut through it like butter.

Sunbrella is an acrylic fabric and hot knives cut through it like butter. I love to use hot knives when I cut out my pieces because the knife seals the edges to prevent unraveling.

I love to use hot knives when I cut out my pieces because the knife seals the edges to prevent unraveling.

I love to use hot knives when I cut out my pieces because the knife seals the edges to prevent unraveling.

Clover Chaco Liner pen

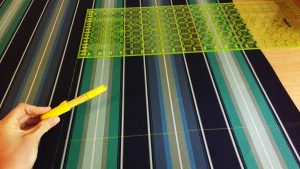
I planned to do envelope closes for these pillows so I marked out my two front pieces and four back panel pieces. For navy or black-colored fabric I use my Clover Chaco Liner pen in Yellow which is available from SewingMachinesPlus.com.

For navy or black-colored fabric I use my Clover Chaco Liner pen in Yellow.

For navy or black-colored fabric I use my Clover Chaco Liner pen in Yellow.

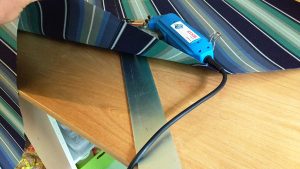
It’s super important that you put metal or ceramic, or something safe under the marked lines you’ll be using the hot knife on. I flip my 48” Starrett ruler over and cut on that.

It’s super important that you put something safe under the marked lines you’ll be using the hot knife on.

It’s super important that you put something safe under the marked lines you’ll be using the hot knife on.

Rounded corners

Next, I like to slightly round the corners of the pillow fronts (I’ll do it to the back pieces too once everything is sewn together.) I went over this method in my post here on how to sew square pillows with piping.

I like to slightly round the corners of the pillow fronts.

I like to slightly round the corners of the pillow fronts.

Now it’s time to finish the seams on your back panels. Sunbrella is great for finger folding over, plus working with stripes often makes marking your seams easy.

Tip: when you use a hot knife it can make the finished edges of Sunbrella fabric a little sharp. Be careful when finger folding that you don’t hurt your fingers!

Now is the time to sew in a tag if you have one.

Now is the time to sew in a tag if you have one.

Now is the time to sew in a tag if you have one.

Wonder Clips

Putting a regular sewing pin through Sunbrella is almost impossible. I use Wonder Clips on projects this small to hold my pieces together. SewingMachinesPlus.com has them available here.

I use Wonder Clips on projects this small to hold my pieces together.

I use Wonder Clips on projects this small to hold my pieces together.

Once sewn, I use the hot knife to round the corners of the back panels to match the top panels.

I use the hot knife to round the corners of the back panels to match the top panels.

I use the hot knife to round the corners of the back panels to match the top panels.

Now it’s time to turn. This will be crinkly!

Tip: use leather gloves or gardening gloves while turning your fabric to avoid getting your skin cut or scratched from the hot-knifed edges of fabric.

Use leather gloves or gardening gloves while turning your fabric.

Use leather gloves or gardening gloves while turning your fabric.

Fluff time!

Slip in your pillow forms and enjoy!

Slip in your pillow forms and enjoy!

Slip in your pillow forms and enjoy!

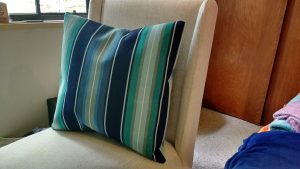
How gorgeous is that fabric? Truly!

How gorgeous is that fabric? Truly!

How gorgeous is that fabric? Truly!

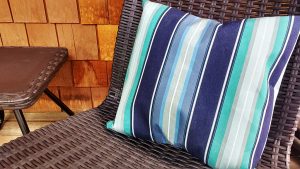
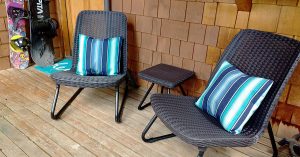
And an outside view.

And an outside view.

And an outside view.

Do you make your own outdoor furniture accessories? Tell us about it in comments!
Do you make your own outdoor furniture accessories?

Do you make your own outdoor furniture accessories?

———————————————————————————–
Charlotte Kaufman is a writer and sewist in Mammoth Lakes, California. She specializes in marine and home interiors and continues to fall more and more in love with quilting. You can follow her at charlottekaufman.com.
How to Sew a DIY Mattress Cover

How to Sew a DIY Mattress Cover

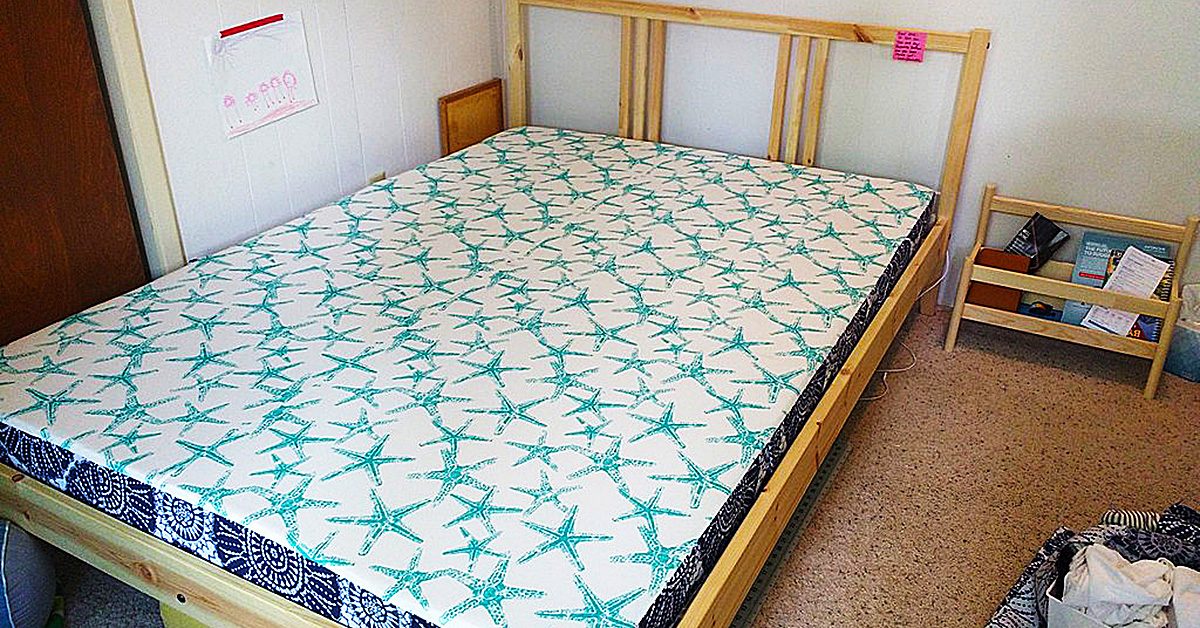
My husband and I sleep on a full-sized bed on 4” of high density foam that we bought from Keyston Brothers, a store that specializes in auto and marine foam and fabric (We use density type Q41 for anyone interested in doing the same). We find the foam lasts about five years before we need to replace it and for a full-sized mattress’ worth, it costs about $250. That is loads cheaper than a fancy mattress and we sleep like babies.

Sweet dreams!

Sweet dreams!

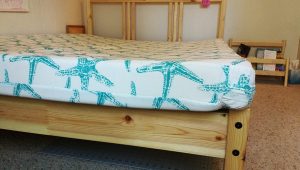
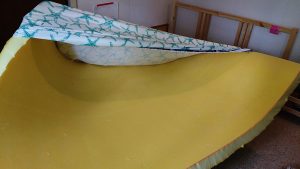
We discovered this foam when we were replacing the cushions in the v-berth of our sailboat. We lived aboard for almost eight years and slept amazingly. When we moved on land we decided to cut costs and stick with the foam. I made a custom cover for it but this frame we recently got from Ikea is smaller than the foam. See how it curves down into the bed and up and over the edges? My husband and I were getting rolled into each other at night so I knew I was going to have to take matters into my own hands.

See how it curves down into the bed and up and over the edges?

See how it curves down into the bed and up and over the edges?

Let’s get started

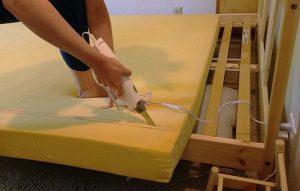
I took off the cover I had made and measured the foam to a size that would fit in the frame. Then I got out my $20 electric cutting knife from Walmart and got to slicing.

Take a deep breath. We're about to slice into our bed. Ready? Let's go!

Take a deep breath. We’re about to slice into our bed. Ready? Let’s go!

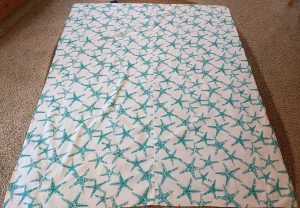
Upstairs, I cut the side piece (zipper piece) off of the top and bottom of the cover. Here are the two main panels laid out.

Here are the two main panels laid out.

Here are the two main panels laid out.

Zipper time!

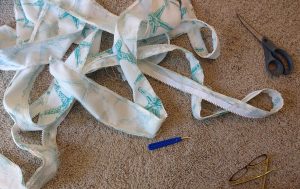
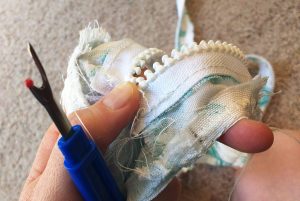
I had finished all my seams with zigzag stitches and there was no way I wanted to take out all those stitches. Instead I saved the zipper by just taking out the straight stitches holding it to the cover.

I saved the zipper by just taking out the straight stitches holding it to the cover.

I saved the zipper by just taking out the straight stitches holding it to the cover.

Zipper saved! Now I didn’t have to buy another one for the smaller sized cover.

Zipper saved!

Zipper saved!

Let’s sketch this out…

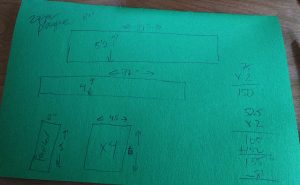
Math time! Here I had to work out the new size of the zipper plaque and the rest of the side facing. Plus I wanted to add handles this time so I measured out those too. I also cut the top and back panels to the same size as the foam that now fit in the bed frame.

Math time!

Math time!

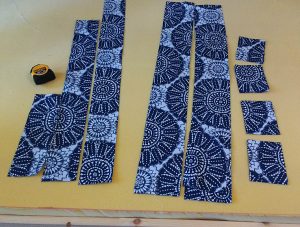
I was all out of the original fabric I had used to make the mattress cover so I used some leftover Sunbrella scraps I had from another project. Here are the parts I’ll need to piece together for the zipper plaque, the rest of the sides and the handles.

Here are the parts I’ll need to piece together for the zipper plaque, the rest of the sides, & the handles.

Here are the parts I’ll need to piece together for the zipper plaque, the rest of the sides, & the handles.

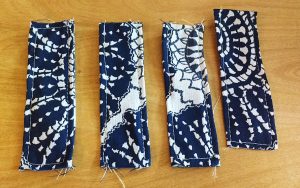
I made quick work of the four handles and top stitched them for strength. The ends are unfinished as they’ll be sewn inside the cover.

I made quick work of the four handles & top stitched them for strength.

I made quick work of the four handles & top stitched them for strength.

Next I sewed the zipper plaque and side pieces together. I also made sure to zig zag stitch each join to prevent the fabric unraveling.

Next I sewed the zipper plaque & side pieces together.

Next I sewed the zipper plaque & side pieces together.

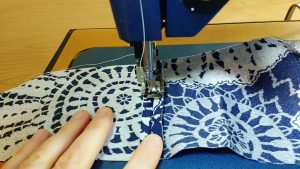
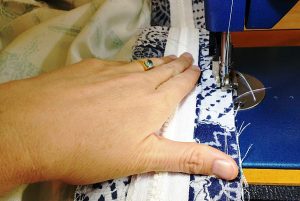
Making the zipper plaque is my favorite part. It means I’m getting close to being done. Here I’ve switched to a zipper foot so I can get super close to the zipper.

Making the zipper plaque is my favorite part.

Making the zipper plaque is my favorite part.

Next I sewed on the handles to one of the large panels.

Next I sewed on the handles to one of the large panels.

Next I sewed on the handles to one of the large panels.

Side facing

Now it was time to add on the side facing. Yes! I joined one end of the side panel to the zipper plaque and started sewing on the zipper plaque portion first. Then I just transitioned to the side piece and kept going all the way around.

Now it was time to add on the side facing.

Now it was time to add on the side facing.

I stopped several inches before I got back around to the beginning and joined the two ends. Then I trimmed off the excess, zig zag stitched the join, and then sewed that piece onto the bottom panel completely.

I stopped several inches before I got back around to the beginning & joined the two ends.

I stopped several inches before I got back around to the beginning & joined the two ends.

Pro tip: make sure you open up your zipper enough right now that you can get your hand through it to open it completely when turn this right sides out in a few more steps.

You are so close now!!!

You are so close now!!!

You are so close now!!!

Before you begin sewing on the top panel there are still two important things you need to do.

Create match up marks.

Create match up marks.

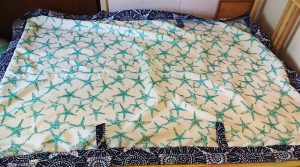
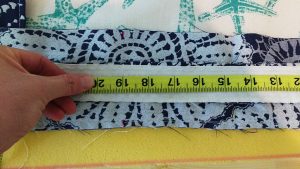
  1. Create match up marks. When you are working with large pieces of fabric, things have a tendency to shift. These marks will let you know you are joining the two pieces together where you should. If you look carefully you will see pink marks on either side of the fabric at the 19” mark. I marked the side pieces and then the top piece so everything should match up when I sew.
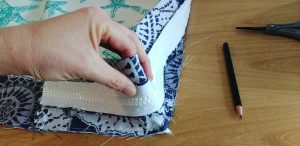
  2. Do your corners!!! This is crucial. Go to each corner and fold it down and back until you are sure the piece is square with each side. Then mark that spot so you know you’re at the actual corner when you get there.
Do your corners!!!

Do your corners!!!

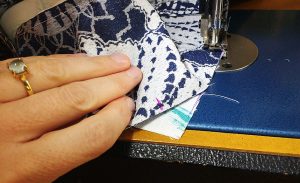
Begin sewing your final panel to the cover. I like to put the panel that is being sewn on the bottom. Here you can see I’ve matched my corners perfectly.

Here you can see I’ve matched my corners perfectly.

Here you can see I’ve matched my corners perfectly.

When you’ve sewn all the way around you are ALMOST done but not quite. There are two things to be done first.

  1. Take the time to carefully inspect ALL seams, fronts and backs. Sew anything you might need to.
  2. Then you need to zigzag stitch both seams in order prevent the fabric from unraveling.
You may think you have finished the hardest part, but the worst is yet to come.

You may think you have finished the hardest part, but the worst is yet to come.

Pat yourself on the back

You may think you have finished the hardest part, but the worst is yet to come. It’s time for cushion Olympics. Yes, wrangling foam into cushions should be an Olympic sport.

Here’s what you need to know:

  1. Go slowly. Do not pull the fabric or you will rip your seams and pop your zippers.
  2. Rather, walk the foam into the cover. I like to fold it on the ends and walk it a little sideways.
  3. Patience, patience, patience. Fit your foam into the pattern just the way you designed it. It you did your math right, it WILL fit.
Go slowly.

Go slowly.

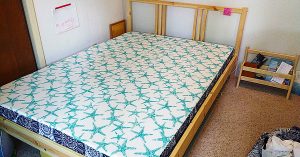
After burning some calories (always a good thing), you will have your new mattress with custom fitting mattress cover that actually fits into your bed frame. Now you may rejoice.

Now you may rejoice.

Now you may rejoice.

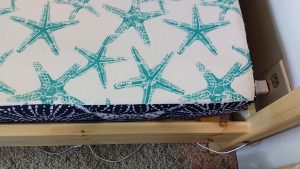
Look at those clean lines!

Look at those clean lines!

Look at those clean lines!

Do you make your own bedding, including mattresses? We’d love to hear about your work.

———————————————————————————–
Charlotte Kaufman is a writer and sewist in Mammoth Lakes, California. She specializes in marine and home interiors and continues to fall more and more in love with quilting. You can follow her at charlottekaufman.com.
How to Sew Buttonholes

How to Sew Buttonholes

Have you been avoiding learning how to sew buttonholes?

Have you been avoiding learning how to sew buttonholes?

Have you been avoiding learning how to sew buttonholes? If you have, I don’t blame you, they used to freak me out too. I had a friend once who lightly scoffed at how averse I was to learning how to sew them. “They’re easy!” she admonished me and I tucked that away and kept reminding myself that they were easy.

What type do you need?

Finally, I couldn’t avoid it any longer. I had a project that I really needed to sew a buttonhole on. It was time to learn.

I had a project that I really needed to sew a buttonhole on.

I had a project that I really needed to sew a buttonhole on.

My machine has seven different buttonhole options. I read the manual and I watched a lot of how-to videos before I determined the hole I wanted to use for this project. This is a car seat poncho I made for my daughter to keep her warm in the car during the winter. You can read about it here.

This is a car seat poncho I made for my daughter to keep her warm in the car during the winter.

This is a car seat poncho I made for my daughter to keep her warm in the car during the winter.

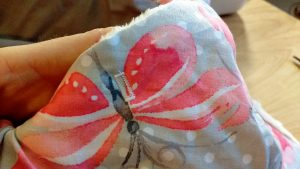
I also used the buttonhole option on my machine to make these openings for curtains in one of my girl’s bunk beds. Once I figured out how to use my buttonhole foot, truly I was unstoppable, and now I am the friend who can gently laugh and say, ‘buttonholes? They’re easy!’

I also used the buttonhole option on my machine to make these openings for curtains in one of my girl’s bunk beds.

I also used the buttonhole option on my machine to make these openings for curtains in one of my girl’s bunk beds.

Use a buttonhole foot

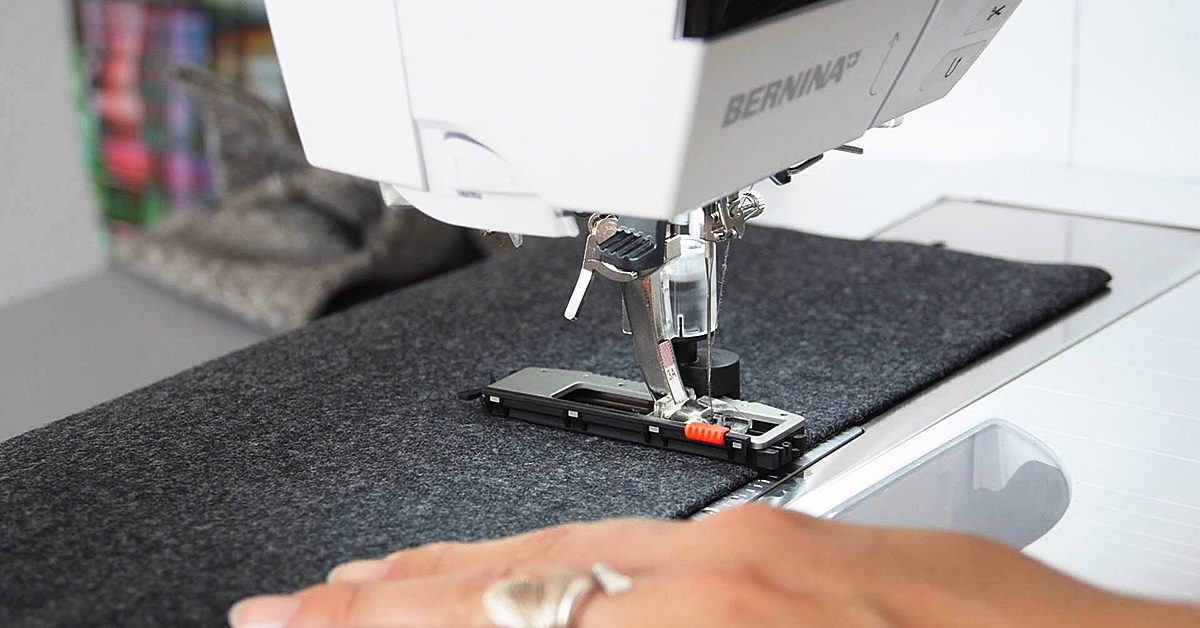
Most machines come with a buttonhole foot attachment. It is the long, weirdly shaped one.

Most machines come with a buttonhole foot attachment.

Most machines come with a buttonhole foot attachment.

The adjustable part in the back is where you’ll place the button you’ll be using on your project. It is there to sew the buttonhole to the correct size that the button can fit through. Genius, eh?

The adjustable part in the back is where you’ll place the button you’ll be using on your project.

The adjustable part in the back is where you’ll place the button you’ll be using on your project.

Your sewing machine manual is your friend

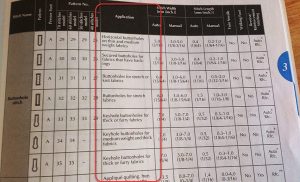
At first, you’re going to need your manual, or a really great how-to video. Your manual will tell you how to determine which buttonhole stitch to use. Pay careful attention to the Application portion. Is your fabric knit? Stretchy? Heavyweight?

Your manual will tell you how to determine which buttonhole stitch to use.

Your manual will tell you how to determine which buttonhole stitch to use.

Practice, practice, practice

Before you try a buttonhole for the first time, make sure you practice first! Don’t let your precious project be your battleground. Practice making the buttonhole on scrap fabric several times before you try on the real thing.

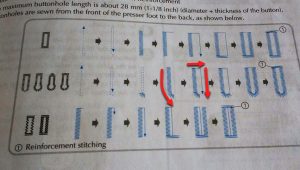
My manual even includes a visual of the way the buttonhole stitch will form with each stitch option. The most important thing I learned was to know exactly where I wanted the stitch to go and then to hold my foot down and not let it back up until the machine stopped itself. With modern machines, they do all the work for you. You just need to nail the placement and be patient.

My manual even includes a visual of the way the buttonhole stitch will form with each stitch option.

My manual even includes a visual of the way the buttonhole stitch will form with each stitch option.

Keyhole buttonholes

See the stitches that have little circles at the bottom instead of being perfect rectangles? Those are stitches for keyhole buttonholes. They are perfect for when you are using large, or heavy buttons; the circular shape at the bottom gives the button a place to rest in. Likewise, they are used for thick or furry fabrics, again to give the button more room to get through the hole.

Happy sewing. If you sew some buttonholes today, let us know!

———————————————————————————–
Charlotte Kaufman is a writer and sewist in Mammoth Lakes, California. She specializes in marine and home interiors and continues to fall more and more in love with quilting. You can follow her at charlottekaufman.com.
Printed Fabric Project Panels and Ideas

Printed Fabric Project Panels and Ideas

Have you looked into the world of printed fabric panels yet? If you are someone who wants to sew, but doesn’t want to take the time to do detailed, intricate work, a printed fabric project might be more your speed. With pre-printed fabric you can easily sew up gifts for babies and new mothers, teacher and holiday gifts, and so much more.

Kids and New Moms

Making a gift for an expectant mother or little kid in your life? Now you can piece together quiet books, soft books, plushies, play cubes, and toys by buying fabric panels, cutting out the patterns, stuffing, and sewing. Here are a few darling examples.

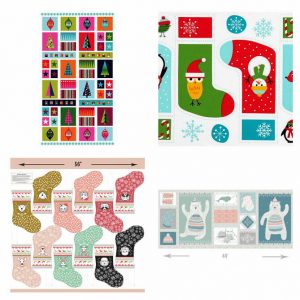
Tara Lilly’s Whimsical Storybook, Sea Urchin Studio’s Forest Fellows 2, Ed Emberley’s Happy Drawing, and Dr. Seuss Enterprises’ What Pet Should I Get?

Tara Lilly’s Whimsical Storybook, Sea Urchin Studio’s Forest Fellows 2, Ed Emberley’s Happy Drawing, and Dr. Seuss Enterprises’ What Pet Should I Get?

Housewarming and Hostess Gifts

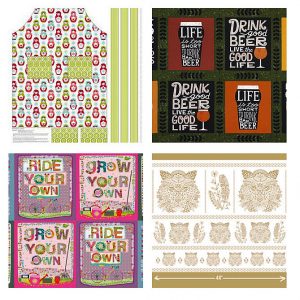
The next time I sew an apron, I’m going to buy a pre-printed fabric panel and just cut and sew. Likewise, there are fabric panels available out there for every type of friend and host or hostess gift you may need. I especially like the two highlighted below for beer lovers and DIYers.

Carly Griffith’s Merry Matryoshka, Robert Kaufman’s Cheers, Maia Ferrell’s Home Grown, Hawthorn Thread’s Bengal Panel.

Carly Griffith’s Merry Matryoshka, Robert Kaufman’s Cheers, Maia Ferrell’s Home Grown, Hawthorn Thread’s Bengal Panel.

Make Your Own Pillows

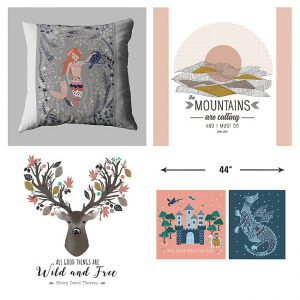
Never buy store bought decorative pillows again. Now you can cut out and sew any size panel with an endless array of patterns, designs, and quotes by inspirational people. I’ve got the John Muir quote one in my shopping cart.

Hawthorne Thread’s Calypso in Aegean, Redwood Panel with John Muir quote, Autumn Fawn with Henry David Thoreau quote, and their Brave Panel in Valor.

Hawthorne Thread’s Calypso in Aegean, Redwood Panel with John Muir quote, Autumn Fawn with Henry David Thoreau quote, and their Brave Panel in Valor.

Full-sized Quilt Panels

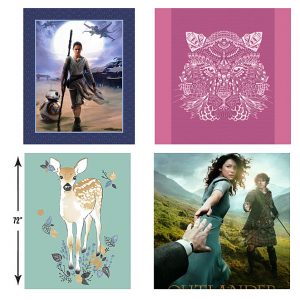
That’s right. Now you can buy an entire fabric panel ready to quilt. You don’t have to piece these beauties together. Just add batting and a backing and start quilting. For my Star Wars and Outlander fan friends, yes, you can now get your favorite heroines in full-sized quilts!

Camelot Cotton’s Rey and BB8, Hawthorne Thread’s Bengal Quilt Panel, and their Fawn Quilt Panel in Aspen, and Kathy Hall’s Outlander Panel.

Camelot Cotton’s Rey and BB8, Hawthorne Thread’s Bengal Quilt Panel, and their Fawn Quilt Panel in Aspen, and Kathy Hall’s Outlander Panel.

Season’s Greetings

Holiday decorating and seasonal teacher and co-worker gifts are much easier now that fabric comes in these printed panel projects. Make a stocking for everyone in your kids’ class or just make them all for you and deck the walls at home.

Makower UK’s Wrap it Up Hanging Panel, Ann Kelle’s Jingle 4 Stockings, and Hawthorne Thread’s Oh What Fun Stockings cut outs, and Hawthorne Thread’s Fairisle Panel in Multi.

Makower UK’s Wrap it Up Hanging Panel, Ann Kelle’s Jingle 4 Stockings, and Hawthorne Thread’s Oh What Fun Stockings cut outs, and Hawthorne Thread’s Fairisle Panel in Multi.

This is Halloween

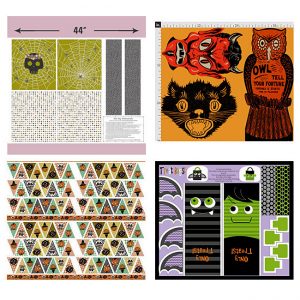
I had to spotlight Halloween printed fabric panels because I know a lot of my friends struggle to find Halloween crafts. No more! Make your own trick or treat or gift bags and spooky buntings and pillows.

Hawthorne Thread’s Nocturne Trick or Treat Bag panel, Halloween Pillows, Halloween Bunting, and Halloween Treat Bags by Heidi Kennedy on Spoonflower.

Hawthorne Thread’s Nocturne Trick or Treat Bag panel, Halloween Pillows, Halloween Bunting, and Halloween Treat Bags by Heidi Kennedy on Spoonflower.

What a Doll

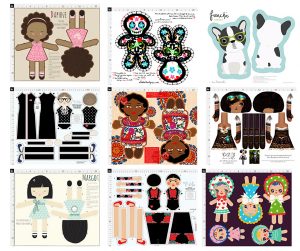
Full fabric quilt panels and doll patterns are where I think preprinted fabric panels really shine. Both categories are a lot of work when you make everything from scratch. These cut-out-and-sew doll patterns will have you finished in no time, and the gift recipients are guaranteed to love what you make.

Daphne by stacyiesthsu, Cute Dia de Los Muertos Doll by elladorine, Frenche by ewa_brzozowska, Ruth Bader Ginsburg by nicoleporter, Angelina Cut N Sew Doll by tiffanyhoward, Cut and Sew Doll Pattern Steampunk Princess by selinafenech, Margo by stacyiesthsu, Frida Kahlo by nicoleporter, and Cut N Sew Bunka Dolls by heidikennedy.

Daphne by stacyiesthsu, Cute Dia de Los Muertos Doll by elladorine, Frenche by ewa_brzozowska, Ruth Bader Ginsburg by nicoleporter, Angelina Cut N Sew Doll by tiffanyhoward, Cut and Sew Doll Pattern Steampunk Princess by selinafenech, Margo by stacyiesthsu, Frida Kahlo by nicoleporter, and Cut N Sew Bunka Dolls by heidikennedy.

Do you use preprinted fabric panels? What are your favorite projects to make from them?

———————————————————————————–
Charlotte Kaufman is a writer and sewist in Mammoth Lakes, California. She specializes in marine and home interiors and continues to fall more and more in love with quilting. You can follow her at charlottekaufman.com.
How to Manage your Works in Progress (WIPs)

How to Manage your Works in Progress (WIPs)

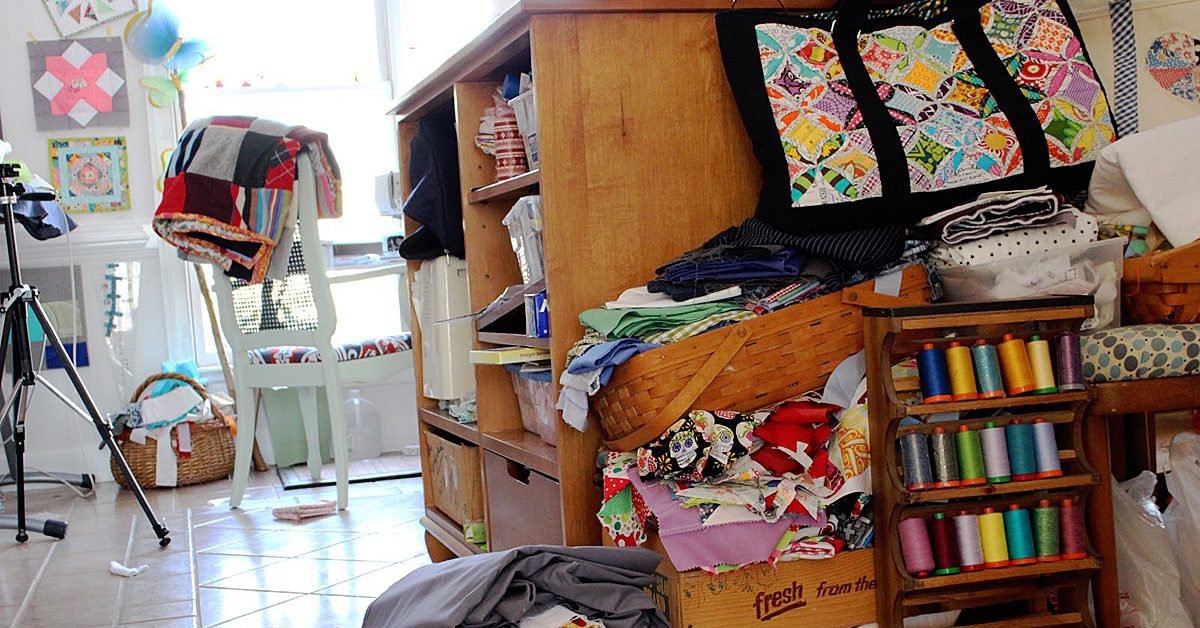
I currently have at least a dozen WIPs in one stage or another.

I currently have at least a dozen WIPs in one stage or another.

If you are like me and many other creative people, you have a long list of projects you are working on, planning, and just getting started. In the quilting community the term for these are WIPs, or ‘works in progress.’ I currently have at least a dozen WIPs in one stage or another (and not just quilts, but other sewing projects as well). Here’s how I manage the materials for each one.

Decorate

Remember that fabric is beautiful. Don’t hesitate to post photos of your ideas on a design board, or, like I’ve done here, with fabric samples that not only keep me motivated to work on my project, but look beautiful on my wall too.

Remember that fabric is beautiful.

Remember that fabric is beautiful.

Front and Center

Sometimes it’s best to keep your current WIP exactly front and center. I make a point of only keeping one project at a time on my work table. My mental message with this is that the only thing I’m working on is the project in front of me. This keeps me focused on the task at hand. If I truly want to work on something else, I put away the other project first.

Sometimes it’s best to keep your current WIP exactly front & center.

Sometimes it’s best to keep your current WIP exactly front & center.

Next Up

The small shelf to the left of my work table is where I keep my iron and my ‘next up’ project. This way I know what I have in my pipeline and can easily get to it once I’ve cleaned up the main table WIP.

I know what I have in my pipeline & can easily get to it.

I know what I have in my pipeline & can easily get to it.

Special Sections

Some projects are so large that I keep them in their own shelves, away from my main fabric stash. The assortment you see here is allotted for my 2017 Temperature Quilt, which will feature 26 different fabrics to map out the daily high temperatures of my city.

The assortment you see here is allotted for my 2017 Temperature Quilt.

The assortment you see here is allotted for my 2017 Temperature Quilt.

Keep it Hidden

This is the view under my work table. Unless you pull out my chair, you can’t see these large pieces of batting, quilt tops, and backing fabrics I have sitting in wait. Sometimes your WIPs are big. Finding a place to tuck them away until you get to them will help keep your workspace clean and ready to use.

This is the view under my work table.

This is the view under my work table.

Fabric Stash

Sometimes my WIPs are tucked directly into my fabric stash. The top bin on the right is fabric I have pegged to become new bedding for the full-sized mattress in my room. It folded neatly and fit right in with the rest of the stash and no one is any more the wiser that I have it in my list of WIPs.

Sometimes my WIPs are tucked directly into my fabric stash.

Sometimes my WIPs are tucked directly into my fabric stash.

Deep Storage

Sometimes you see a screaming deal on a quilt kit (or two) or you have WIPs that you know you won’t be able to get to for months or even years. I tuck these away in deep storage in my closet. I have a friend who stores them in bins under her guest bed.

I tuck these away in deep storage in my closet.

I tuck these away in deep storage in my closet.

Computer Files and Pinterest

Don’t forget that some WIPs are still just dreams and plans. Keep these twinkles in your eye safely organized in a documents folders on your computer that has patterns you plan to make or designs you want to pursue. Likewise, Pinterest is a great visual repository for storing images that link to websites with projects you are currently working on or plan to.

How do you manage your works in progress? Let us know what works for you.

———————————————————————————–
Charlotte Kaufman is a writer and sewist in Mammoth Lakes, California. She specializes in marine and home interiors and continues to fall more and more in love with quilting. You can follow her at charlottekaufman.com.
How to Sew a Fitted Sheet

DIY: Sew a Fitted Sheet (from a flat sheet)

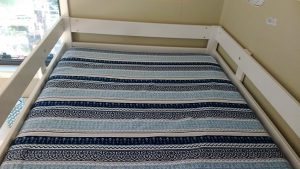
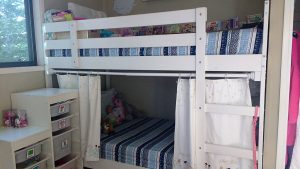
My daughters have bunk beds and I like them to have at least two sets of sheets (per bed) in the event of accidents, sickness, or just in general because kids get dirty.

Our family doesn’t use flat sheets. I always feel claustrophobic when I sleep with one and I end up pulling the sheet out of the bottom of the bed and using it more like a blanket. It’s also a pain to remake the bed every morning. Instead, we used fitted sheets and loose blankets and we wash them all frequently.

Because of this, I can buy one set of sheets, a fitted one and a flat one, and turn the flat sheet into another fitted sheet. That gives me two matching fitted sheets which is perfect for when you have bunk beds.

Measure twice, cut once

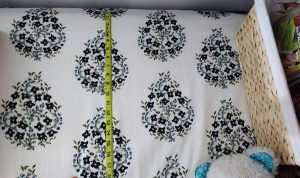
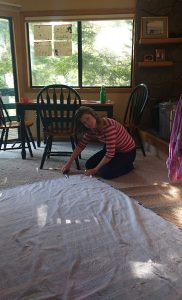
To make your own fitted sheet you need to measure the length and the wide of the top of the mattress you are using. You’ll also need to measure the sides.

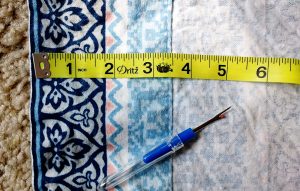
This mattress is 38” x 75” and the sides are 7”.

To make your own fitted sheet, first measure the sides, length & width of the top of the mattress you are using.

To make your own fitted sheet, first measure the sides, length & width of the top of the mattress you are using.

To determine the rest, you need to add enough fabric to wrap around under the mattress plus seam allowance. I like anywhere between 3-4” for the bottom fabric (it may depend on the size of flat sheet you are working with) and I allow 1” on all sides for seam allowance. I fold the fabric over ½” and then again another ½”.

Your final equation to determine the size of rectangle you’ll need is:

Seam allowance + bottom fabric + length of side + width (or length) of top of mattress + length of other side + bottom fabric on other side + seam allowance on other side.

Repeat the same process for the length if you started with the width.

I had to take out the top folded seam in order to have a large enough rectangle to meet my measurement requirements.

I had to take out the top folded seam in order to have a large enough rectangle to meet my measurement requirements.

For this flat sheet, I had to take out the top folded seam in order to have a large enough rectangle to meet my measurement requirements. After I took out that seam, I ironed (after having prewashed before I got started).

I had to take out the top folded seam in order to have a large enough rectangle.

I had to take out the top folded seam in order to have a large enough rectangle.

I love it when a plan comes together

Sometimes I love how the universe works. The particular measurements on this flat sheet made it so I didn’t need to calculate seam allowance, other than for the one side I had to take the seam out of. I used all the pre-sewn hems and the measurements worked out perfectly.

I used all the pre-sewn hems & the measurements worked out perfectly.

I used all the pre-sewn hems & the measurements worked out perfectly.

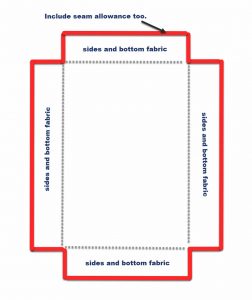
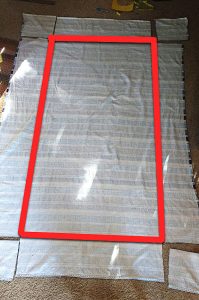
The one part that people might find tricky is cutting out the corners. Here you are going the exact measurement of where the fabric would rest on the top of the mattress, so you take into account: seam allowance + fabric on the bottom + fabric on the sides, on each corner of the square. Make the squares on all corners of your fabric and then cut.

Make the squares on all corners of your fabric & then cut.

Make the squares on all corners of your fabric & then cut.

The red box shows you the exact measurements of the top of the mattress.

The red box shows you the exact measurements of the top of the mattress.

The red box shows you the exact measurements of the top of the mattress.

On your mark.. Get set.. SEW!

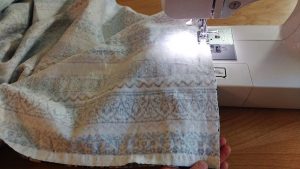
Now it’s time to sew! If it’s easier for you to pin the corners, go for it. This isn’t my first rodeo, so I just sew and go.

If it’s easier for you, just pin the corners.

If it’s easier for you, just pin the corners.

These corner seams ARE unfinished, so make sure you finish each of the four corners with a zigzag stitch to prevent unraveling.

Finish each corner with a zigzag stitch to prevent unraveling.

Finish each corner with a zigzag stitch to prevent unraveling.

The next step would be to create a hem all along the sheet. I’m skipping this part because I’m using the pre-sewn ones from the flat sheet. Normally I would finger fold the fabric over a ½”, and then another ½”, and sew all around the sheet.

After you have a hem, it’s time to add elastic. Some tutorials have you create a casing when you sew the hem and then you feed the elastic through. This method has never spoken to me. I just sew my hem and then sew the elastic directly on.

Making it stretch

If I had enough elastic I would sew it on the entire hem, all the way around. I didn’t in this case so I measured out 16” from each corner and sewed my elastic around each corner.

I measured out 16” from each corner & sewed elastic around each.

I measured out 16” from each corner & sewed elastic around each.

Be careful not to pull your elastic too taught. You want it to have enough give that you can get it over the corners of your mattress without snapping any of your threads.

Be careful not to pull your elastic too taught.

Be careful not to pull your elastic too taught.

Looking good.

Looking good.

Looking good.

You’ve made your bed – now sleep on it

Moment of truth. Here it is on the top bunk. It looks great!

Here it is on the top bunk.

Here it is on the top bunk.

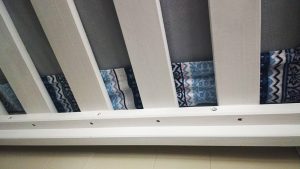
It even looks good from the bottom bunk looking up at the bottom of the mattress.

It even looks good from the bottom bunk looking up.

It even looks good from the bottom bunk looking up.

Added value

The best part is that these two fitted sheets are now interchangeable between the bottom and top bunk and I only had to buy one set of sheets to get matching bedding!

The best part is that these two fitted sheets are now interchangeable.

The best part is that these two fitted sheets are now interchangeable.

Do you make your own fitted sheets? What is your favorite method?

———————————————————————————–
Charlotte Kaufman is a writer and sewist in Mammoth Lakes, California. She specializes in marine and home interiors and continues to fall more and more in love with quilting. You can follow her at charlottekaufman.com.
How to Hang a Quilt

How to Hang a Quilt

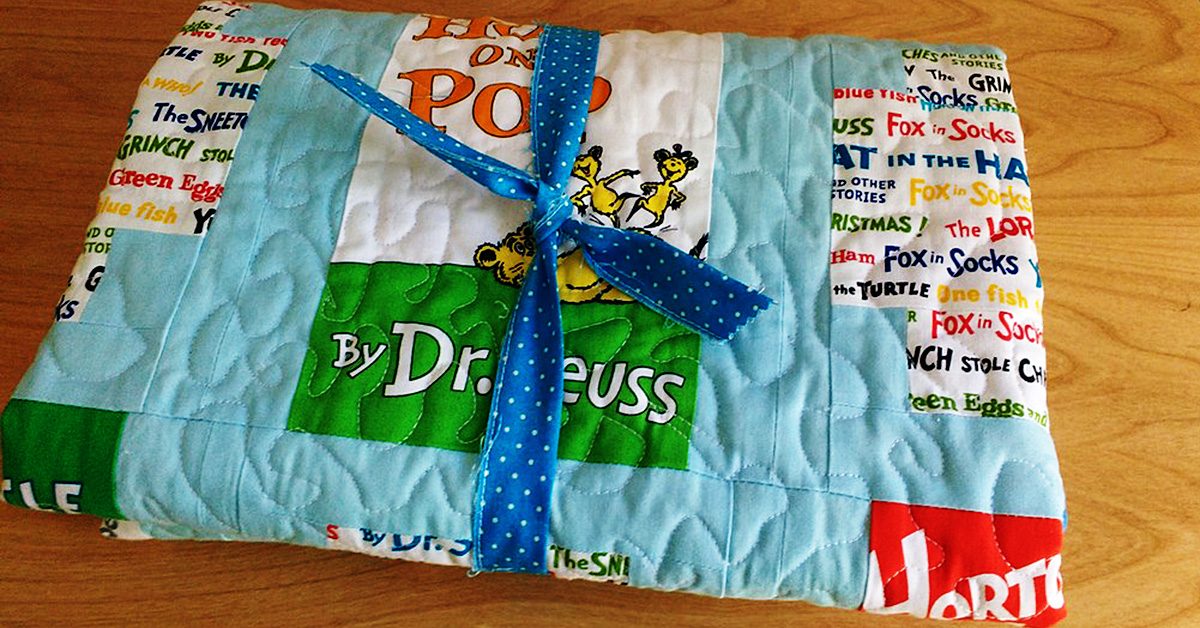
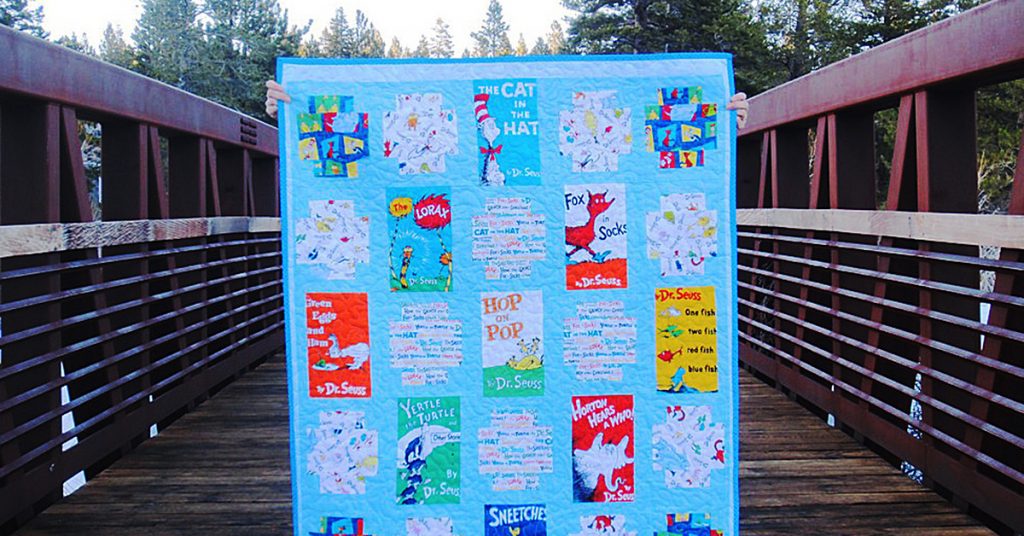
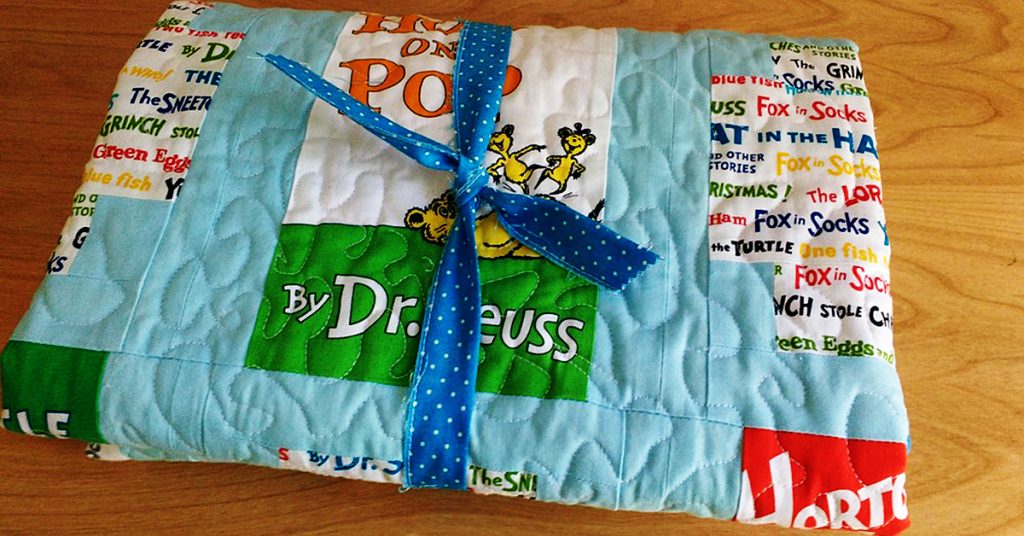
I recently wrote about this Dr. Seuss Quilt I made to donate to our local elementary school’s annual gala. Most of my donations have been made online so I hadn’t thought in advance about hanging or displaying the quilt at an event.


Dr. Seuss Quilt

Dr. Seuss Quilt

I poked around the internet and looked at the best way to consider hanging a quilt after it had been made. Many showed how to sew triangle pouches or hanging sheaths during the process of adding on the back of the quilt but not many talked about what to do after the fact. Here is what I decided on.

Let’s get started

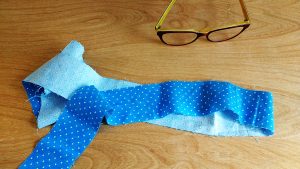
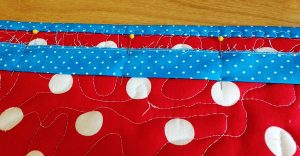
There were still a few strips of my binding fabric on hand because I always tend to make too much.

There were still a few strips of my binding fabric on hand because I always tend to make too much.

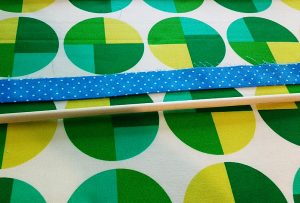
I headed to our local hardware store and bought a small dowel. I was pretty sure that if I doubled over the binding strip, the dowel would slip in perfectly to the tube I created.

I was pretty sure that if I doubled over the binding strip, the dowel would slip in perfectly to the tube I created.

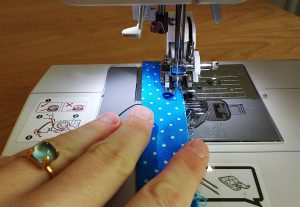
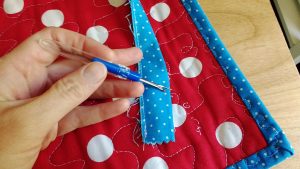
I sewed the top of the tube in advance of sewing it onto the quilt.

I sewed the top of the tube in advance of sewing it onto the quilt.

OK, easy part is over…

This part was the trickiest. I really didn’t want a super visible stitch on the quilt’s front so I measured front and back to align the fabric tube as perfectly as I could with a main seam on the front.

This part was the trickiest.

This part was the trickiest.

I pinned it and double checked on the front to see if I had gotten it right.

I pinned it and double checked on the front to see if I had gotten it right.

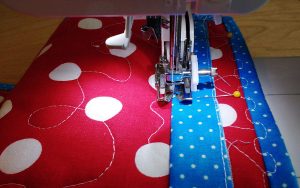
Then I used a basting stitch and sewed the bottom of the tube to the back of the quilt.

Then I used a basting stitch & sewed the bottom of the tube to the back of the quilt.

Nicely done

Moment of truth! And I nailed it almost perfectly. The seam is pretty invisible on the front.

The seam is pretty invisible on the front.

The seam is pretty invisible on the front.

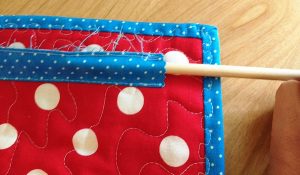
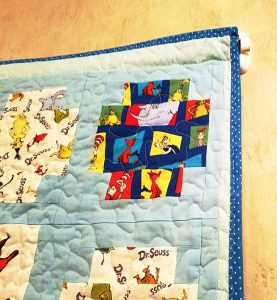
Next up I slid the dowel into the fabric tube and voilà, it fit in just right.

Next up I slid the dowel into the fabric tube & voilà, it fit in just right.

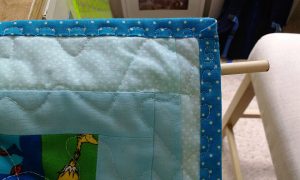
Here’s how it looked from the front.

Here’s how it looked from the front.

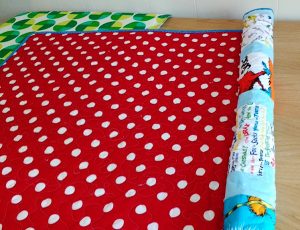
With the dowel in place, I could roll the quilt for easy transportation.

With the dowel in place, I could roll the quilt for easy transportation.

Showtime

I contacted the hotel where the event would be happening and went in advance to see where exactly I could hang the quilt. The management let me know I could use Command Hooks on the wall so I brought the hooks, some rubbing alcohol and a cloth wipe (to clean where I’d be placing the hooks), a level to make sure I hung them evenly, the quilt, and some scissors to trim any stray threads.

I contacted the hotel where the event would be happening & went in advance to see where exactly I could hang the quilt.

The hooks needed an hour after being hung to attain their full strength so I brought the quilt back home until the actual event.

The hooks needed an hour after being hung to attain their full strength so I brought the quilt back home until the actual event.

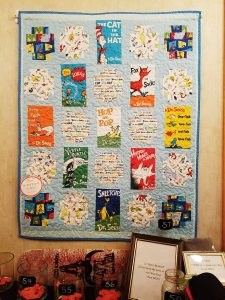
And here is the finished product hanging at the gala that night. Lovely, no?

Here is the finished product hanging at the gala that night.

After the gala I brought the quilt back home to remove the fabric tube on the back. The basting stitch I had used made it quick work to take off.

The basting stitch I had used made it quick work to take off.

I then recycled the tube of fabric and used to wrap up the quilt for gifting.

How to Hang a Quilt

Have you ever donated something you’ve sewn to benefit an organization you cared about? Let us know in comments!
———————————————————————————–
Charlotte Kaufman is a writer and sewist in Mammoth Lakes, California. She specializes in marine and home interiors and continues to fall more and more in love with quilting. You can follow her at charlottekaufman.com.