Cross Stitch Panel Pillows with Mitered Fabric Framing

Cross Stitch Panel Pillows with Mitered Fabric Framing

My sister, Sariah, and I are both talented sewists, though we tend to focus on sewing different types of things.

My sister, Sariah, and I are both talented sewists, though we tend to focus on sewing different types of things.

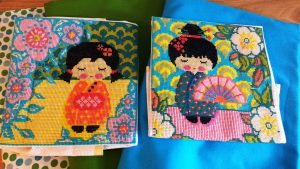
My sister, Sariah, and I are both talented sewists, though we tend to focus on sewing different types of things (however we both are unified in our love of quilting!). While my sister can sew entire outfits in mere hours, I don’t have the handmade clothing gene. Instead, I do pillows, cushions, drapes and other marine and home décor. Because our talents diverge, sometimes we collaborate. I will often send fabric to her and she will sew Halloween costumes for my girls, whereas, she will send me something like these two beautiful cross stitch panels, and I will turn them into decorative pillows.
Because cross stitch fabric is fairly sturdy, I used white canvas duck to match the fabric thickness.

Because cross stitch fabric is fairly sturdy, I used white canvas duck to match the fabric thickness.

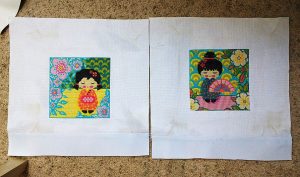
Sariah had purchased 16″ x 16″ pillow forms for these so I needed to add some fabric onto the bottom of each cross stitch panel to make them into large enough fabric squares for the pillows. Because cross stitch fabric is fairly sturdy, I used white canvas duck to match the fabric thickness.

Next up was taking a look at the fabric she had sent.

Next up was taking a look at the fabric she had sent.

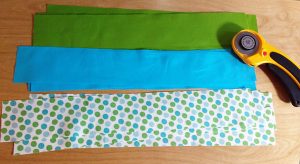
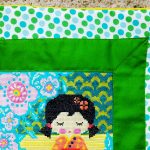
Next up was taking a look at the fabric she had sent. She told me I could be as creative as I’d like and as soon as I saw her talented cross stitching, I knew I wanted to frame each one and to make sure the corners were mitered.

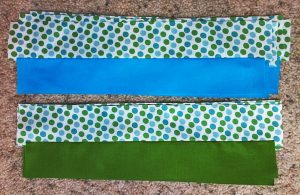
I assigned green to one of the dolls and blue to the other.

I assigned green to one of the dolls and blue to the other.

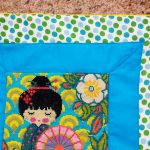
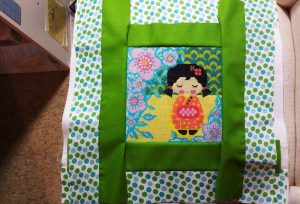
I assigned green to one of the dolls and blue to the other. Both panels got dots for the outer edging. Once I’d sewn the dots and blue and the dots and green into cohesive strips, I meticulously sewed the strips around all four sides of the dolls’ squares.
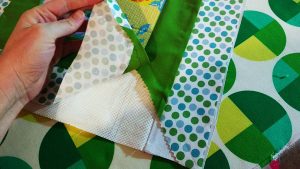
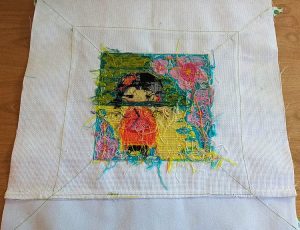
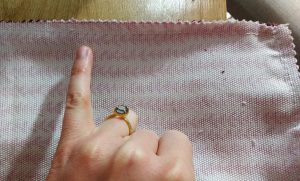
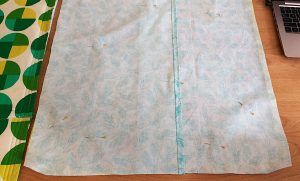
I only stitched around the actual cross stitching, leaving the rest of the fabric loose on all four sides like this.
I only stitched around the actual cross stitching, leaving the rest of the fabric loose on all four sides like this.

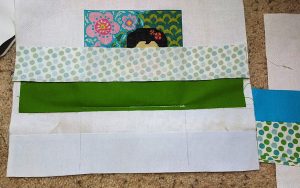
I only stitched around the actual cross stitching, leaving the rest of the fabric loose on all four sides like this.

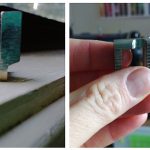
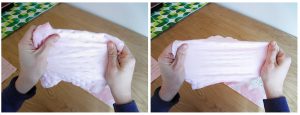
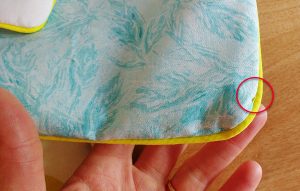
Next I hand folded the top and bottom panels back, using my fingers to crease the fabric exactly on the mitered corners, where each fabric strip met the next one.
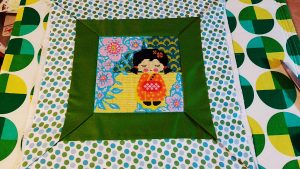
Next I hand folded the top and bottom panels back, using my fingers to crease the fabric exactly on the mitered corners, where each fabric strip met the next one.

Next I hand folded the top and bottom panels back, using my fingers to crease the fabric exactly on the mitered corners, where each fabric strip met the next one.

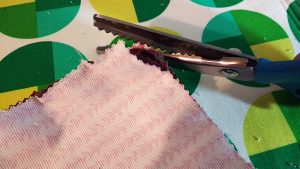
Once I was sure I’d nailed it, I ironed the panels and then trimmed off the extra fabric from all the strips.

Once I was sure I’d nailed it, I ironed the panels and then trimmed off the extra fabric from all the strips.

Once I was sure I’d nailed it, I ironed the panels and then trimmed off the extra fabric from all the strips.

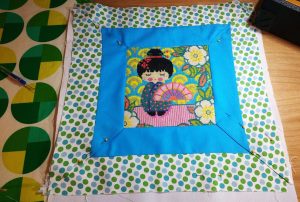
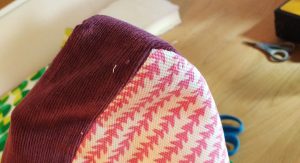
The pieces were pinned until I could topstitch the mitered corners in place.

The pieces were pinned until I could topstitch the mitered corners in place.

The pieces were pinned until I could topstitch the mitered corners in place.

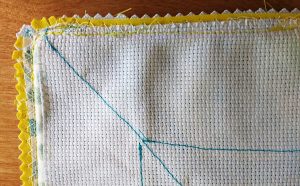
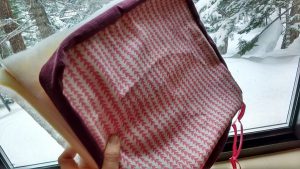
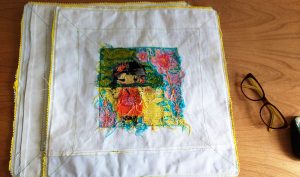
I love this shot from the wrong side of the fabric.

I love this shot from the wrong side of the fabric.

I love this shot from the wrong side of the fabric. The chaos of the underside of the cross stitching is very beautiful, and you can perfectly see the backside of the top stitching.

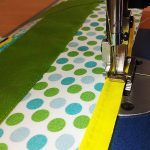
Once the panels were top stitched it was time to add piping.

Once the panels were top stitched it was time to add piping.

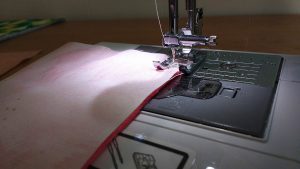
Once the panels were top stitched it was time to add piping. If your machine comes with a piping foot, now is when you would add one. I have two machines and I generally use my industrial one, a Sailrite LSZ-1 for piping and cording. Its standard foot has a built-in arch that makes sewing piping a dream.

https://www.sewingmachinesplus.com/4130971-45.php

When you come to corners, don’t forget to trim your piping right up, but not into, the stitching of the finished piping. This will help it to lay flat as you turn.
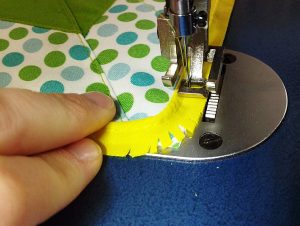
When both front panels were piped, I cut out four back panels to create an envelope close on their backs.

When both front panels were piped, I cut out four back panels to create an envelope close on their backs.

When both front panels were piped, I cut out four back panels to create an envelope close on their backs.

Here are the pillows fully sewn, but not yet turned right sides out.

Here are the pillows fully sewn, but not yet turned right sides out.

Here are the pillows fully sewn, but not yet turned right sides out. Before you turn your pillows out always double, and triple check your seams.
I like to reinforce each corner with additional stitching and often will sew around twice for added stability.

I like to reinforce each corner with additional stitching and often will sew around twice for added stability.

I like to reinforce each corner with additional stitching and often will sew around twice for added stability. I also zig zag stitch the very edge of the fabric to prevent future unraveling or fraying.

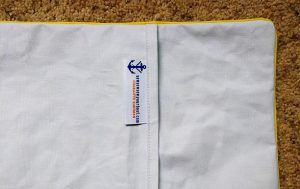
Here is a shot of the back of one of the pillows.

Here is a shot of the back of one of the pillows.

Here is a shot of the back of one of the pillows. Don’t forget to add your handmade tags!

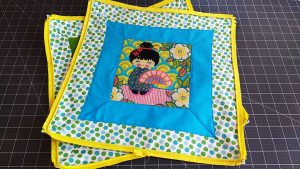
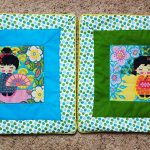
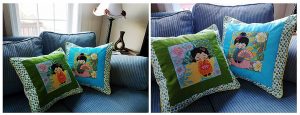
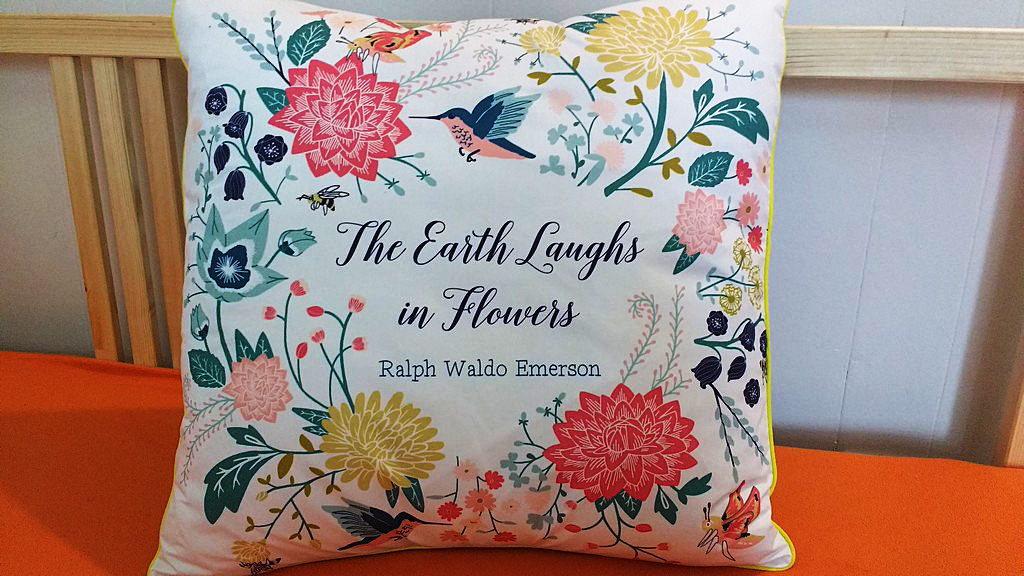
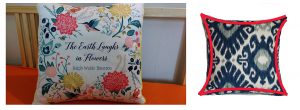
Ta-da! What a gorgeous, collaborative project.

Ta-da! What a gorgeous, collaborative project.

Ta-da! What a gorgeous, collaborative project.


I put these in the mail right away so she could get them on her couch and today while writing this post, I got pictures of the final product!

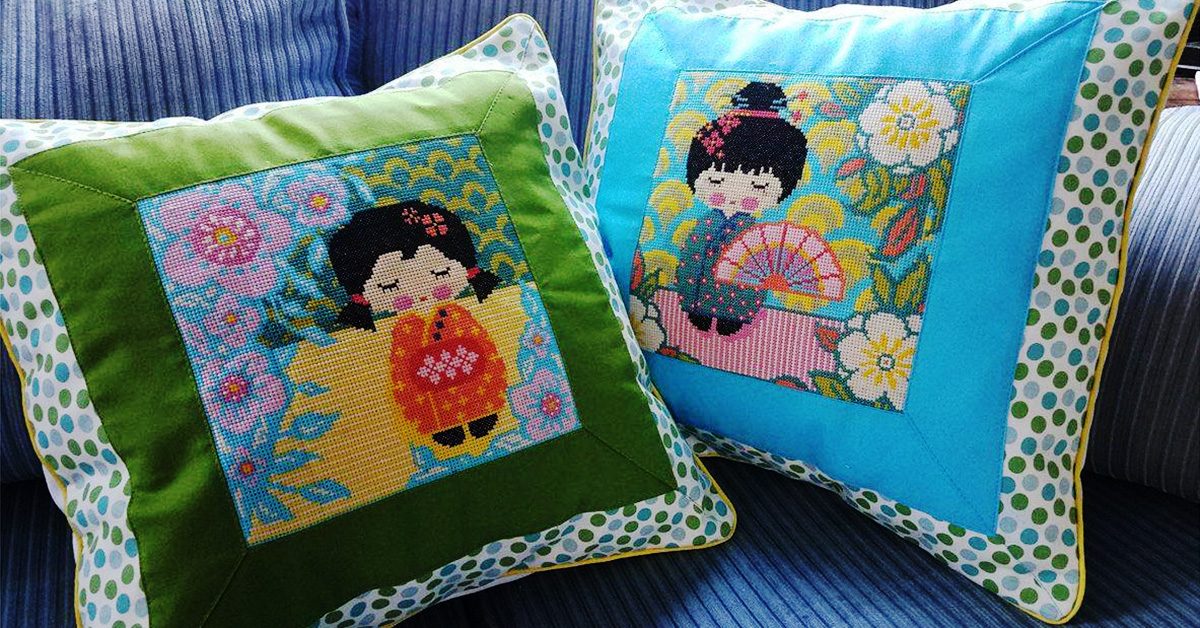
I put these in the mail right away so she could get them on her couch!

I put these in the mail right away so she could get them on her couch!

Do you ever collaborate on sewing projects? Tell us about your work in the comments!

———————————————————————————–
Charlotte Kaufman is a writer and sewist in Mammoth Lakes, California. She specializes in marine and home interiors and continues to fall more and more in love with quilting. You can follow her at charlottekaufman.com.
How to Store Your Fabric Scraps

How to Store Your Fabric Scraps

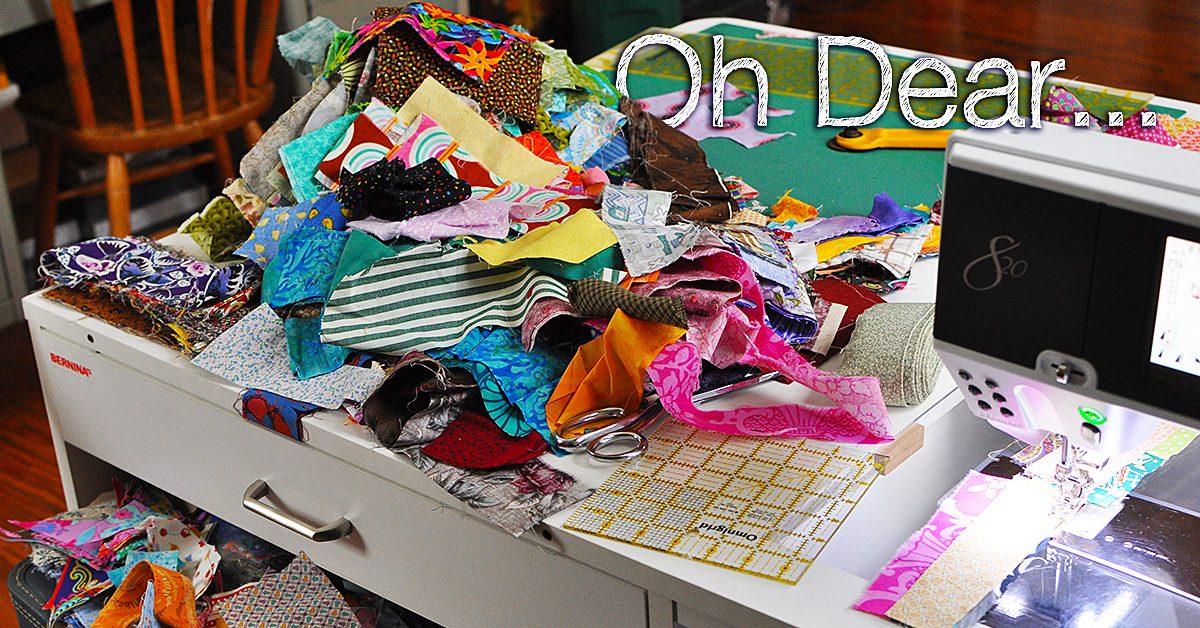
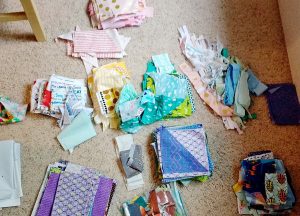
It only took me six months, but I finally organized my fabric scraps after our move.

It only took me six months, but I finally organized my fabric scraps after our move.

It only took me six months, but I finally organized my fabric scraps after our move to this new town and new house. When we made the move, I dumped my two huge bins of scraps into a few shopping bags and tucked them away until this glorious moment when they would not only be sorted, but have a place to reside.

Bits and pieces

Why should one keep & organize fabric scraps?

Why should one keep & organize fabric scraps?

Why should one keep and organize fabric scraps? Here are some reasons to consider.

  1. Fabric is expensive. Long sized strips, and smaller pieces can be reused for a vast amount of projects. The internet is a trove of fabric scrap project ideas.
  2. Out of sight, out of mind. The reverse of this is true as well. When you have your scraps visible, you are much more likely to use them and be aware of what you have available.
  3. Have a favorite color? It probably shows in the types of fabric you buy. Take a look at your pile of scraps and try to use up more of that color before you buy a few more yards.
  4. Many people cut their scraps to standard sizes. If you have a size of fabric you constantly seem to go to, make your life easier by making your own pre-cuts out of scraps.

Scrap bags

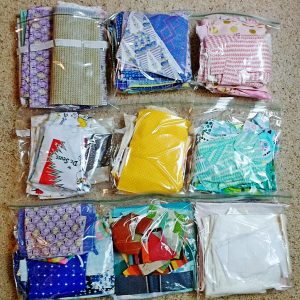
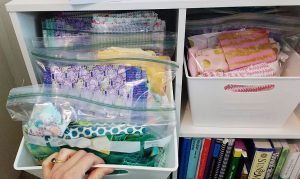
I ultimately made 9 bags of folded scraps.

I ultimately made 9 bags of folded scraps.

I ultimately made 9 bags of folded scraps. They included the following (from left to right):

  1. All of my precut Layer Cakes (10” x 10” squares)
  2. All of my other-sized precuts
  3. Pinks
  4. Whites
  5. Yellows, tans and oranges
  6. Greens, teals and aquas
  7. Blues and purples
  8. Heavy duty fabric scraps (canvas, Sunbrella, etc)
  9. Utility fabric scraps (batting, white out fabric, mesh, etc.)

One of these things is not like the others…

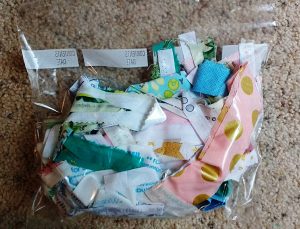
Bag #10 holds all of my selvage edges & very thin strips of fabric.

Bag #10 holds all of my selvage edges & very thin strips of fabric.

There is also a 10th bag (but it didn’t fit well in the group photo above). This holds all of my selvage edges and very thin strips of fabric. I have a huge wish list of projects to make from selvage edges. Perhaps I’ll write a post soon showing you the world of possibility with saving those thin strips!

A place of and for my own making

Welcome to my fabric corner.

Welcome to my fabric corner.

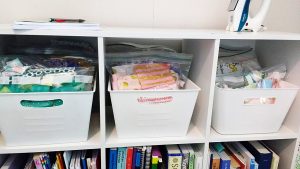
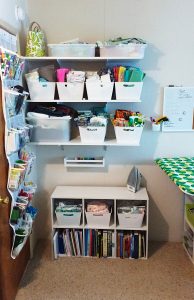
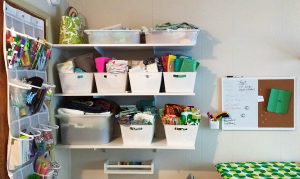
This is my fabric corner. The upper shelves hold my larger stash of fabrics, so pieces that are a fat quarter size or larger. The lower shelves hold my iron on top, and my fabric scraps in the bins below.

Dirty little secret: I just tuck larger pieces in wherever I find room.

Dirty little secret: I just tuck larger pieces in wherever I find room.

I’d love to tell you that I have my larger pieces organized in some kind of fancy way, but I really don’t. I just tuck them in wherever I find room.

Behold! A place for everything & everything in its place.

Behold! A place for everything & everything in its place.

Can you see how lovely the organization of these scraps is? The easy access and keeping them visible by my work space means I’m often including them in my daydreaming when it comes to new sewing projects.

Do you store your fabric scraps? If so, tell us where or how you do!

———————————————————————————–
Charlotte Kaufman is a writer and sewist in Mammoth Lakes, California. She specializes in marine and home interiors and continues to fall more and more in love with quilting. You can follow her at charlottekaufman.com.
DIY Chair Cushions for Kids

DIY Chair Cushions for Kids

DIY Chair Cushions for Kids

DIY chair cushions for kids.

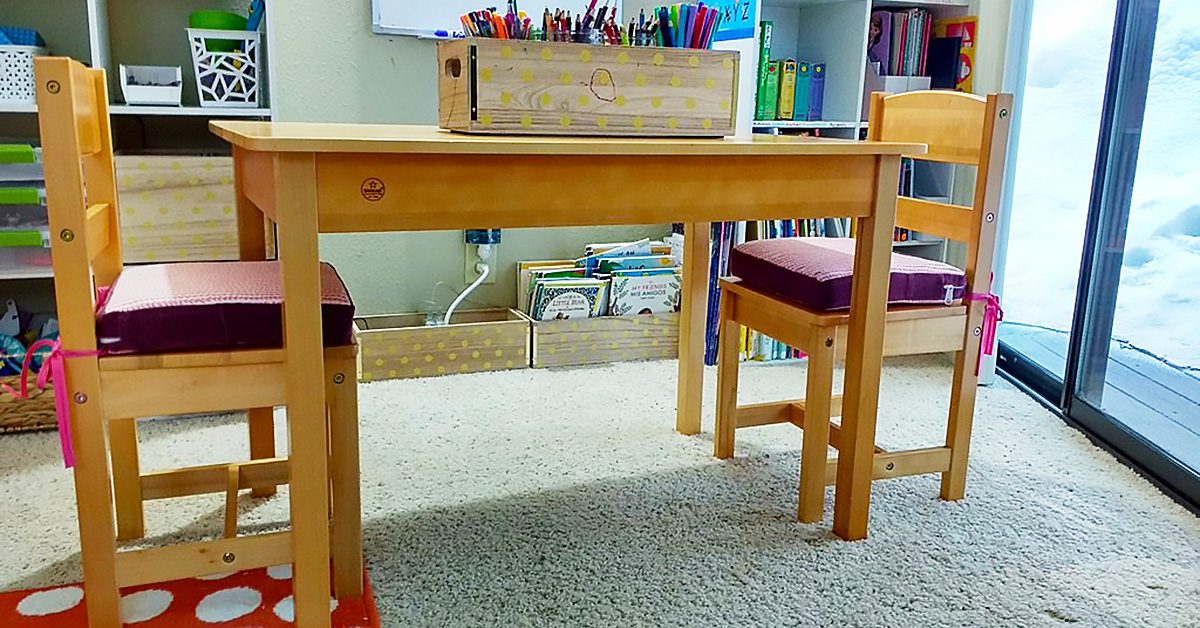
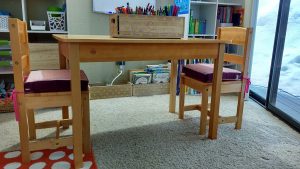
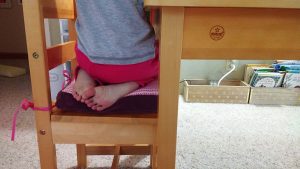
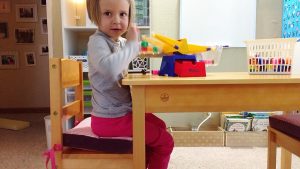
I’ve been wanting to make cushions for the art table chairs in our girls’ room for a while and I finally made it down to a craft store that sold foam this week to get started on the project.

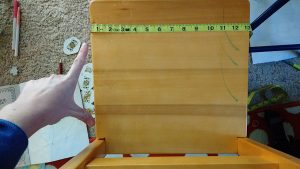
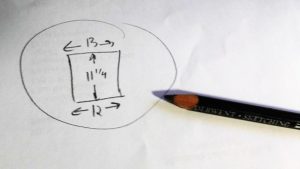
The first step in making custom cushions is accurate measurements. Notice how the chairs are not true squares? The front measurement was 13” and the back 12”. The distance between the front and back was 11 ¼”.

The first step in making custom cushions is accurate measurements.

The first step in making custom cushions is accurate measurements.

Want to know a trick with cushions? Cut your fabric to the exact size of the foam. I know this sounds counter-intuitive. ‘But what about seam allowance?’ you’re thinking. The thing is, foam compresses. If you cut your fabric to the size of the foam, and then sew ¼” seams (or ½” if using heavier duty fabric), the compression of the foam once it is in the cushion cover will more than cover the seam allowance you are used to providing on other sewing projects.

Want to know a trick with cushions? Cut your fabric to the exact size of the foam.

Want to know a trick with cushions? Cut your fabric to the exact size of the foam.

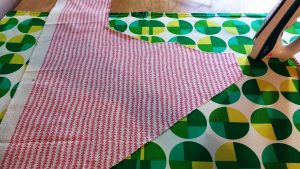
I’m trying to use up my fabric scraps this year, so I pulled out a few larger, odd-shaped scraps I had from this fabric and was able to cut out four top and bottom panels for the two chairs.

I’m trying to use up my fabric scraps this year, so I pulled out a few larger, odd-shaped scraps.

I’m trying to use up my fabric scraps this year, so I pulled out a few larger, odd-shaped scraps.

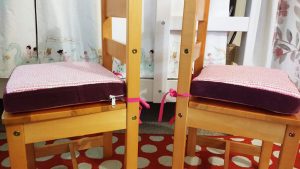
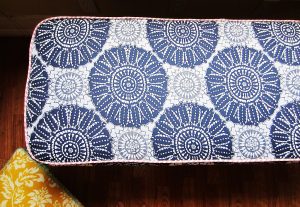
I used this fabric to make custom piping for a bench seat for the girls’ godmother. I like that they’ll have a small piece of the project I made for her in their own room. See the pink trim on the cushion below? That’s the same fabric.

See the pink trim on this cushion? That’s the same fabric.

See the pink trim on this cushion? That’s the same fabric.

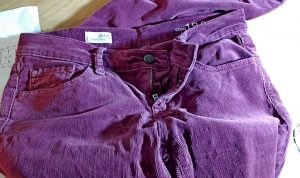
For the side panels I decided to use corduroy from an old pair of pants I’d been saving for just this kind of project. They’d developed holes along the belt loops so I had held onto them just for the pretty fabric.

For the side panels I decided to use corduroy from an old pair of pants I’d been saving for just this kind of project.

For the side panels I decided to use corduroy from an old pair of pants I’d been saving for just this kind of project.

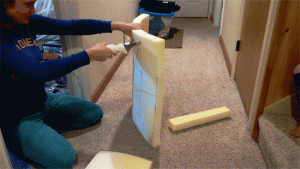
After marking the measurements with a Sharpie, I used an electric bread knife to cut the foam. It cuts through that stuff like butter. Here’s a gif as proof.

My electric bread knife cuts through the foam like butter.

My electric bread knife cuts through the foam like butter.

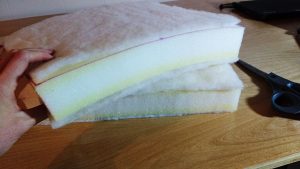
Another make-your-cushions-super-great secret is to use batting!! Wrapping them in batting or putting a layer on the top and bottom will improve how the puff up in your cushion covers. I used an adhesive spray to affix the batting to the top and bottom of each one.

I used an adhesive spray to affix the batting to the top and bottom of each one.

I used an adhesive spray to affix the batting to the top and bottom of each one.

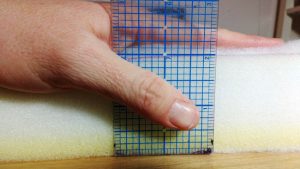
Don’t measure the height of your sides until you’ve added batting. While the foam is 2”, adding the batting made the total measurement just under 2 ¼” (I should know what that measurement is, but I don’t. I just mark to the line under that ¼”).

While the foam is 2”, adding the batting made the total measurement just under 2 ¼”.

While the foam is 2”, adding the batting made the total measurement just under 2 ¼”.

Grab your zippers and zipper pulls, or, if you aren’t like me with spares on hand, plan ahead and order them before you begin.

Grab your zippers and zipper pulls!

Grab your zippers and zipper pulls!

I like to sew the zipper plaques first. Use whichever technique you like. I generally use the first method shown in this video by Sailrite.

I like to sew the zipper plaques first.

I like to sew the zipper plaques first.

If you need to attach extra fabric to the side panels, consider adding it to the ends in small amounts so the joins don’t show on the front of the cushion.

If you need to attach extra fabric to the side panels, consider adding it to the ends in small amounts.

If you need to attach extra fabric to the side panels, consider adding it to the ends in small amounts.

Attach the zipper plaque to the side fabric and then sew onto the bottom fabric piece.

Before you begin sewing the top piece on, make sure to mark your corners accurately. Fold them to each seam to make sure they match (the yellow mark in the photo below is my matching point.)

Fold the corners to each seam to make sure they match (the yellow mark in the photo below is my matching point).

Fold the corners to each seam to make sure they match (the yellow mark in the photo below is my matching point).

Next, make sure to slide on the zipper pulls BEFORE you sew the top piece onto the final assembly or you’ll be sad.

Next, make sure to slide on the zipper pulls BEFORE you sew the top piece onto the final assembly or you’ll be sad.

Next, make sure to slide on the zipper pulls BEFORE you sew the top piece onto the final assembly or you’ll be sad.

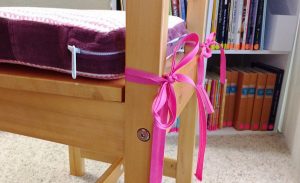
And finally, do not forget to sew your tie backs in between the seams as you go.

Do not forget to sew your tie backs in between the seams as you go.

Do not forget to sew your tie backs in between the seams as you go.

Whoohoo, you’re done! But, before you start celebrating, go over every seam to make sure they are secure.

Whoohoo, you’re done! Now, go over every seam to make sure they are secure.

Whoohoo, you’re done! Now, go over every seam to make sure they are secure.

Then take your scissors and round the corners so they turn prettier. I used pinking shears on the fabrics in this project. Check out my post from January to learn about their benefits, along with other important cutting tools for your sewing room.

Take your scissors and round the corners so they turn prettier.

Take your scissors and round the corners so they turn prettier.

When you turn the covers right-sides out, use your fingers to pop out each corner.

When you turn the covers right-sides out, use your fingers to pop out each corner.

When you turn the covers right-sides out, use your fingers to pop out each corner.

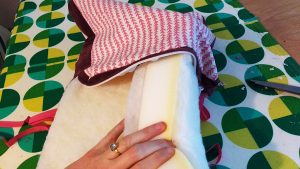
If you’ve done this right, your finished cover is going to look smaller than your foam; that’s because it is! Now is the time to put the cover on the cushion and here is where you’ll see how foam compresses to fit your new cover.

Now is the time to put the cover on the cushion & here is where you’ll see how foam compresses to fit your new cover.

Now is the time to put the cover on the cushion & here is where you’ll see how foam compresses to fit your new cover.

I’m going to use caps lock here to get across how important this next step is: DO NOT TUG OR PULL ON YOUR FABRIC TO GET IT ONTO YOUR CUSHION. I promise you, if you do that, your seams will pop. Instead, fold the cushion to slide it into the cover, and then slowly work the foam into the fabric, NOT the other way around. Just keep thinking ‘move the foam, not the fabric.’ Don’t be afraid to really get your hands deep into the cover and use them to maneuver the foam in place. Adjust, adjust, and adjust, until the cushion sits perfectly in the cover, with the lines of the foam matching the lines of the cover.

DO NOT TUG OR PULL ON YOUR FABRIC TO GET IT ONTO YOUR CUSHION!!!

DO NOT TUG OR PULL ON YOUR FABRIC TO GET IT ONTO YOUR CUSHION!!!

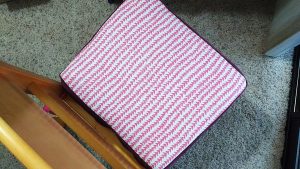
Ta-da!!!

Ta-da!

Ta-da!

This project turned out just darling. The corduroy almost looks like velvet and I love the effeminate touch it brings to the room.

The corduroy almost looks like velvet and I love the effeminate touch it brings to the room.

The corduroy almost looks like velvet and I love the effeminate touch it brings to the room.

These cushions will inevitably get marks on them. That’s okay, they have zippers so they can be washed, AND, they are reversible. I can just flip them over if I need to.

I can just flip them over if I need to.

I can just flip them over if I need to.

My daughters loved these and immediately hopped on and got cozy.

My daughters loved these and immediately hopped on and got cozy.

My daughters loved these and immediately hopped on and got cozy.

What DIY projects have you made for your home lately? Let us know in comments!

What DIY projects have you made for your home lately? Let us know in comments!

What DIY projects have you made for your home lately? Let us know in comments!

———————————————————————————–
Charlotte Kaufman is a writer and sewist in Mammoth Lakes, California. She specializes in marine and home interiors and continues to fall more and more in love with quilting. You can follow her at charlottekaufman.com.
Do NOT iron minky directly!

Tips for Sewing with Minky Fabric (Cuddle or Plush Fabric)

Tips for Sewing with Minky Fabric (Cuddle or Plush Fabric)

I know a lot of people that shy away from sewing or quilting with minky but I’m here to tell you that minky is not the bogey-woman some people make it out to be, as long as you follow some important tips to make your sewing with it a success.

1. Pre-washing is not needed. Well, at least for the minky that is. Plush fabrics are made from polyester so they don’t shrink. If you’ll be pairing with fabrics that do shrink, then pre-wash the other fabrics in advance.

Minky bumps

2. Nap! Minky has a nap. Nap is the raised or fuzzy/bumpy parts you find on certain fabric (think velvet). If you brush your hand one way on minky, it will be soft, if you brush it the other way, it will be rougher. Take the direction of the nap into the consideration when cutting out your project.

Take the direction of the nap into the consideration when cutting out your project.

Take the direction of the nap into the consideration when cutting out your project.

3. Minky can STRETCH! But only from one direction. Take a piece of the fabric you are working with and stretch it one direction and then the other. You’ll find the stretchy side very quickly. I make sure to not ever leave my hole for turning on the super stretchy side.

Minky can STRETCH! But only from one direction.

Minky can STRETCH! But only from one direction.

4. Use the right needle and correct sewing foot. A lot of guides will recommend a universal needle size of 12. I prefer size 14, but find what works for you. Additionally, if you have a walking foot, use it! If you are too lazy to use your walking foot (or don’t have one), I find minky sews better when you place it on the bottom and the regular fabric on the top.
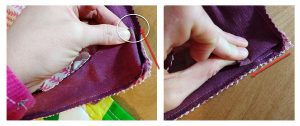
Use a walking foot. I find minky sews better when you place it on the bottom and the regular fabric on the top.

Use a walking foot. I find minky sews better when you place it on the bottom and the regular fabric on the top.

5. Seam allowance and stitch length – I tend to give myself more room with minky and usually use a 1/2” seam allowance. I also use a longer stitch length, around 4.

6. DO NOT IRON MINKY DIRECTLY. It will melt. I promise you. You need to even be careful ironing with another fabric placed on top as pressing too hard or with too much heat will ruin the nap or little bumps of the minky underneath.

7. Pins, clips and washable basting spray or this Wash-A-Way Wonder Tape are your friends with minky. Use them excessively and you’ll get much better results.

https://www.sewingmachinesplus.com/tacony-BT14.php

Pins, clips and washable basting spray or this Wash-A-Way Wonder Tape are your friends with minky.

Pins, clips and washable basting spray or this Wash-A-Way Wonder Tape are your friends with minky.

8. Top stitch!! Top stitching minky will really help to remove bulk, keep the seams in line and make your project look more professional.
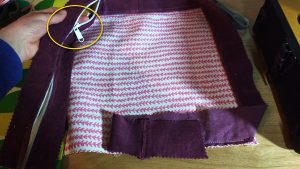
Top stitching minky will really help to remove bulk, keep the seams in line and make your project look more professional.

Top stitching minky will really help to remove bulk, keep the seams in line and make your project look more professional.

9. Use a rotary cutter and a vacuum. Rotary cutters help make very exact cuts with minky. I also suggest having your vacuum nearby to clean up after cutting and to clean out your machine as you sew. SewingMachinesPlus.com has a variety of vacuum cleaners for your sewing room.

https://www.sewingmachinesplus.com/tacony-fb-gim.php

10. Practice! You’ll get better the more you use it. Soon, you’ll be wondering what all the fuss is about when others say they shy away from sewing with plush fabrics.
Do you have any tips for making sewing with cuddle fabrics a success? Let us know what works for you in comments!

———————————————————————————–
Charlotte Kaufman is a writer and sewist in Mammoth Lakes, California. She specializes in marine and home interiors and continues to fall more and more in love with quilting. You can follow her at charlottekaufman.com.
How to Sew a Square Pillow with Piping

How to Sew a Square Pillow with Piping

While conceptually the idea of sewing a square pillow case sounds easy, there are several things to consider when you undertake this task.

While conceptually the idea of sewing a square pillow case sounds easy, there are several things to consider when you undertake this task.

Go smaller

The cardinal rule of making your own pillow cases is to make them approximately an inch smaller than the pillow form you want them to cover. If you have a 22” x 22” pillow, you need to make the case 21” x 21”. Of course, don’t forget your seam allowances. If you use ¼” seam allowances, than you would cut a piece of fabric that is 21.5” x 21.5”.

The cardinal rule of making your own pillow cases is to make them approximately an inch smaller than the pillow form you want them to cover.

The cardinal rule of making your own pillow cases is to make them approximately an inch smaller than the pillow form you want them to cover.

Fussy cut

I normally wouldn’t advocate for drawing your lines on the front of your fabric, but this fabric by Hawthorne Threads needs to be cut to the size of the panel you want for your pillow case. When fussy cutting, sometimes drawing on the front of the fabric is necessary to ensure correct sizing. Haven’t heard of the term ‘to fussy cut?” It means to carefully cut out a piece of fabric for a specific purpose.

It means to carefully cut out a piece of fabric for a specific purpose.

It means to carefully cut out a piece of fabric for a specific purpose.

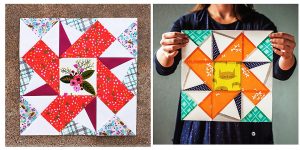
See the center pieces of these quilt blocks by Amy Gibson of The Cookbook Quilt Along? These are prime example of taking the time to fussy cut your fabric.

These are prime example of taking the time to fussy cut your fabric.

These are prime example of taking the time to fussy cut your fabric.

Choose your pillow back

Once you’ve cut your front panel, you’ll need to cut your back. You can finish pillows many ways. Check out my post from last fall on different options for pillows. I chose to do an envelope close, so I made cut two panels the same height as my pillow, but each was 13.5” wide. That allows for a folded, sewn hem on each of the ‘opening’ portions of the back panel.

That allows for a folded, sewn hem on each of the ‘opening’ portions of the back panel.

That allows for a folded, sewn hem on each of the ‘opening’ portions of the back panel.

Consider interfacing

For added pop, I fuse lightweight interfacing to the front panel fabric. It has such a gorgeous design that I want it to stay crisp and firm while it sits on my bed looking fabulous.

Curve your corners

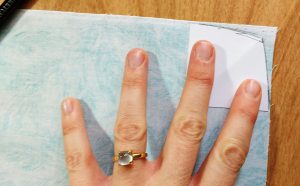
This step is so important!! I have a small piece of cardstock that I’ve cut to help me round the corners of my square. Why would I do this, you ask? Because pillows are 2-3. They are big and fluffy and when you attempt to sew straight sides of a square you often end up with starfish points instead of nice, square corners.

I have a small piece of cardstock that I’ve cut to help me round the corners of my square.

I have a small piece of cardstock that I’ve cut to help me round the corners of my square.

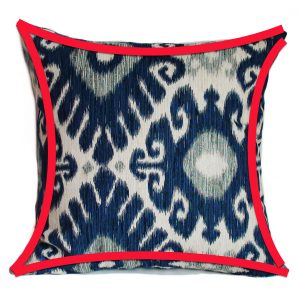
This is an example of a pillow cover that didn’t have rounded corners before it was sewn. Trust me on this, it makes all the difference!

This is an example of a pillow cover that didn’t have rounded corners before it was sewn.

This is an example of a pillow cover that didn’t have rounded corners before it was sewn.

To pipe or not to pipe?

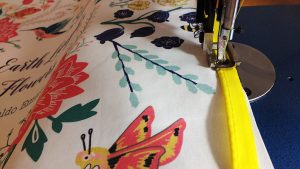
That is indeed the question. I love the contrast that piping gives pillows. If your machine has a piping foot, now is the time to install it.

If you are new to this step, consider pinning the piping in place. This is not my first rodeo, so I just sew and go.

Consider pinning the piping in place.

Consider pinning the piping in place.

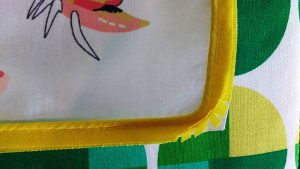
Make sure your piping follows those slightly rounded corners. Don’t forget to snip the piping edge just up to the seam so that if folds nicely around each corner.

Don’t forget to snip the piping edge just up to the seam so that if folds nicely around each corner.

Don’t forget to snip the piping edge just up to the seam so that if folds nicely around each corner.

Now place your two backing pieces on top of the front panel, right sides together. Pin, and sew.

Now place your two backing pieces on top of the front panel, right sides together.

Now place your two backing pieces on top of the front panel, right sides together.

Not so fast

Once you’re done, YOU ARE NOT ACTUALLY DONE. No. Unpin everything and flip the cover right sides out. Carefully inspect all along the seams and make sure no thread is showing from the piping like you see here. If you find anything that needs to be tightened up, flip the pillowcase inside out again and resew the hem, making sure to sew just to the edge of the piping for a nice clean finish.

Carefully inspect all along the seams and make sure no thread is showing from the piping like you see here.

Carefully inspect all along the seams and make sure no thread is showing from the piping like you see here.

Flip the pillow right sides out and again carefully inspect it. If all looks good, turn it inside out AGAIN and then then trim the edges, especially around the corners so that the corners will fully turn out when you flip the pillow cover to the front again.

If all looks good, turn it inside out AGAIN and then then trim the edges.

If all looks good, turn it inside out AGAIN and then then trim the edges.

Finishing touches

Once you’ve turned your pillow case right sides out, run your fingers along the inside of the seams and fully push out the piping and corners, then iron to get out any wrinkles from the sewing process. Slip it onto your pillow form and voilà, you’ll have a wonderfully plush and SQUARE pillow case.

See the difference rounding those corners made?

See the difference rounding those corners made?

See the difference rounding those corners made?

Do you have any secrets for making the perfect pillowcase? If so, share them in comments!

———————————————————————————–
Charlotte Kaufman is a writer and sewist in Mammoth Lakes, California. She specializes in marine and home interiors and continues to fall more and more in love with quilting. You can follow her at charlottekaufman.com.
Fabric Trend: Cats and Things Cats Love

Fabric Trend: Cats and Things Cats Love

Galaxy Cat fabric by Timeless Treasures

Galaxy Cat fabric by Timeless Treasures

Last October, I highlighted three lines of cat fabric for you including From Porto with Love, Cat Lady, and Meow or Never.

I should be honest however, and not call cat fabric a trend because our love for cats will never go away. To prove this, here are more cat fabric lines for you, including fabrics with things cats love.

Maker Maker by Andover Fabrics

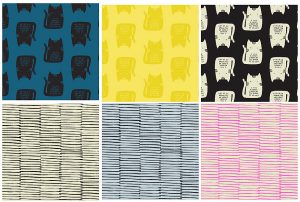
From Andover Fabrics, you’ll find cats in blue, black and yellow. Along with their coordinating cat scratches.

From Andover Fabrics, you’ll find cats in blue, black and yellow.

From Andover Fabrics, you’ll find cats in blue, black and yellow.

Flower Shop by Alexia Marcelle Abegg

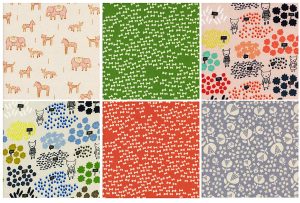
Inspired by walks through Mexico’s outdoor flower markets, Flower Shop brings you cats amongst flowers, bow ties, thistle, and cats with foxes, elephants & donkeys.

Flower Shop brings you cats amongst flowers, bow ties, thistle, and cats with foxes, elephants & donkeys.

Flower Shop brings you cats amongst flowers, bow ties, thistle, and cats with foxes, elephants & donkeys.

Smarty Cats by Maria Carluccio

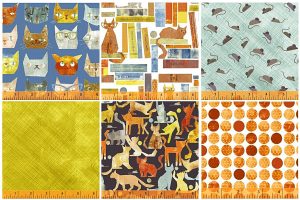
Maria Carluccio’s Smarty Cats fabric line is for the true lover of traditional fabrics and traditional cats. You’ve got cats on books, playful cats, smarty cats, and mice, string and balls.

Maria Carluccio’s Smarty Cats fabric line is for the true lover of traditional fabrics & traditional cats.

Maria Carluccio’s Smarty Cats fabric line is for the true lover of traditional fabrics & traditional cats.

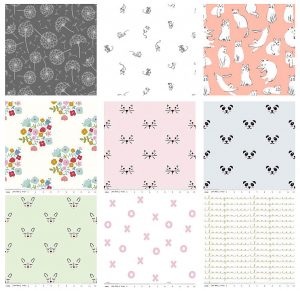
Whisper by Dear Stella and Riley Blake’s Double Gauze

These two fabric lines seem to coordinate seamlessly. Add a dash of Dear Stella with Riley Blake and you have the quilting cottons of Dear Stella on the top row in cats, mice, and dandelions, and the double gauze dreaminess of Riley Blake, featuring delicate cat, deer, and panda faces, with tiny Xs and Os and I Love You’s.

These two fabric lines seem to coordinate seamlessly.

These two fabric lines seem to coordinate seamlessly.

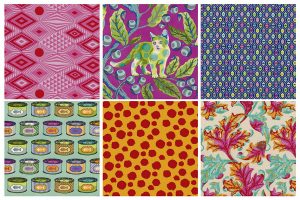
Tabby Road by Tula Pink

Tula Pink takes their coolness to the next level by combining cats + The Beatles. This psychedelic fabric line will arrive in most stores by March and perfectly blends your feline friends with the some of the trippiest nods to Abbey Road. Fabric names include: Tangerine, Strawberry Fields, Fur ball, Lucy, Cat Snacks, Blue Bird and Disco Kitty.

Tula Pink takes their coolness to the next level by combining cats + The Beatles.

Tula Pink takes their coolness to the next level by combining cats + The Beatles.

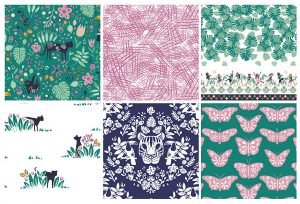
Pura Vida by Hawthorne Threads

Hawthorne Threads Pura Vida line is reminiscent of a Central American jungle and features wild cats and their surroundings.

Hawthorne Threads Pura Vida line is reminiscent of a Central American jungle & features wild cats.

Hawthorne Threads Pura Vida line is reminiscent of a Central American jungle & features wild cats.

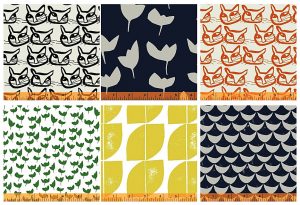
Hemma by Lotta Jansdotter

For the lovers of all things Scandinavian, Lotta Jansdotter fabric line, Hemma, combines cat faces, tulips, lemons, half-moons, and clean & classic colors to give you a modern twist on cat fabric.

For the lovers of all things Scandinavian, Lotta Jansdotter fabric line, Hemma.

For the lovers of all things Scandinavian, Lotta Jansdotter fabric line, Hemma.

Do you have any cat fabric lines you love? Please share them with us in comments!

———————————————————————————–
Charlotte Kaufman is a writer and sewist in Mammoth Lakes, California. She specializes in marine and home interiors and continues to fall more and more in love with quilting. You can follow her at charlottekaufman.com.
Different Types of Thread and When to Use Them

Different Types of Thread and When to Use Them

Have you ever gone to the fabric store and been overwhelmed looking at the vast assortment of thread for sale? If so, then fear not, for I will help to break down the mystery of thread and how to use it in all its various types.

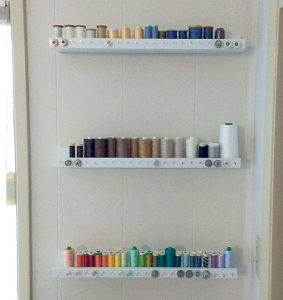
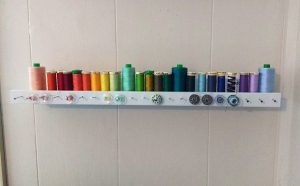
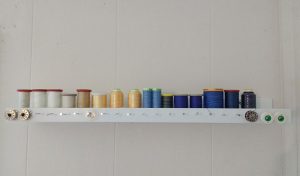
To start, consider where you are going to store your thread. I’m a highly visual person and I like to see what I have on hand. I also find looking at thread to sometimes motivate me or inspires me to begin on new projects. I created this thread display in my sewing room using Ikea picture frame shelves (Ikea Ribba) and I added small nails to hang my bobbins by the corresponding color of thread.

I added small nails to hang my bobbins by the corresponding color of thread.

I added small nails to hang my bobbins by the corresponding color of thread.

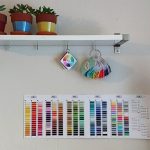
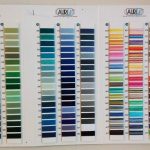
I live in a rural area, three hours from the nearest Joann Fabrics. Because of that I keep an Aurifil Thread Color Card so I can easily order the exact shade of thread I need. It also looks beautiful too, no?

Thread Weight

When choosing thread, consider the thread weight. A quick breakdown of Aurifil’s brand thread weights (and their many great brands of thread, including Guterman and Coats & Clark) looks like this:

12wt: Use it for sashiko & red work stitchery. This is the thickest thread in the Mako’ range.

28wt: It is strong enough to withstand the stress of hand quilting without needing to be glazed or waxed.

40wt: Favorite thread for machine quilting and all-purpose sewing. A little heavier to show off the quilting stitches.

50wt: Quilters love it for its piecing and quilting. A staple for every sewing studio.

80wt: This is the finest Egyptian cotton, for use by hand or machine. Your new ‘go to’ thread for applique and much more.

~ Thread descriptions from Hawthorne Threads

Buying at a fabric store is actually a little easier than sussing things out online because they divide thread into sections so you can quickly scan for ‘quilting’ or ‘embroidery’ or ‘heavy duty/jeans.’

I keep my standard, quilting cotton weight threads organized by ROYGBIV (red, orange, yellow, green, blue, indigo, violet).

I keep my standard, quilting cotton weight threads organized by ROYGBIV (red, orange, yellow, green, blue, indigo, violet).

ROYGBIV: red, orange, yellow, green, blue, indigo, violet.

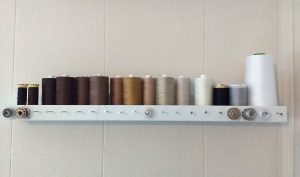
I also keep my neutrals and browns organized by gradient.

I keep my neutrals & browns organized by gradient.

I keep my neutrals & browns organized by gradient.

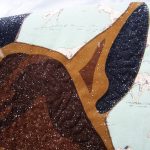
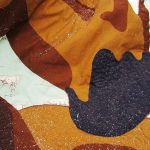
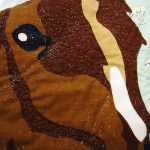
Buying a lot of shades of one color can greatly help when working on projects with a ton of variation in the same tone, like in this quilt I recently finished. I used five different shades of brown and black to finish the horse.


Utility/Novelty Threads

These are threads you reach for when you need to pull out the big guns or you are just doing something different. I use some of these heavy weight threads for upholstery, corduroy, vinyl, or very thick or unique fabrics.

I use some of these heavy weight threads for upholstery, corduroy, vinyl, or very thick or unique fabrics.

I use some of these heavy weight threads for upholstery, corduroy, vinyl, or very thick or unique fabrics.

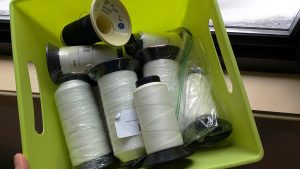
This is my tub of very heavy duty threads. I use them on marine projects and with my industrial sewing machine.

This is my tub of very heavy duty threads.

This is my tub of very heavy duty threads.

Variegated Thread

I saved these threads for last because they are my favorite. If you haven’t tried sewing with them yet, I encourage you to start today. The richness of their color variation is an absolute delight to the eye and often can take your projects to a whole other level.

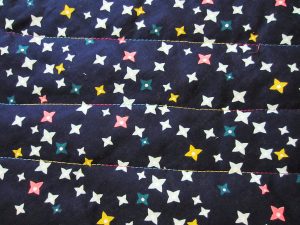
I used two spools of variegated thread on this quilt. The blue/rainbow you can see here.

The blue/rainbow you can see here.

The blue/rainbow you can see here.

And the gorgeous bright yellow here.

You can see the gorgeous bright yellow here.

You can see the gorgeous bright yellow here.

Of course, with different threads you will need different needles, but I’ll save the topic of needles sizes and shapes for another post. What are your favorite types of threads? Let us know in comments!

—————————–
Charlotte Kaufman is a writer and sewist in Mammoth Lakes, California. She specializes in marine and home interiors and continues to fall more and more in love with quilting. You can follow her at charlottekaufman.com.
9 Cutting Tools for your Sewing Room

9 Cutting Tools for your Sewing Room

Do you know the difference between scissors and shears? I didn’t so I looked it up and now I can edify us all. Scissors usually have equal-sized finger holes and are under 6″ in length. Shears have one hole that is bigger than the other and their blade lengths are normally longer than 6″. The terms scissors and shears are often used interchangeably and for the purposes of this article, I flip back and forth between them.

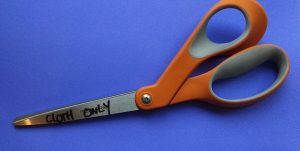
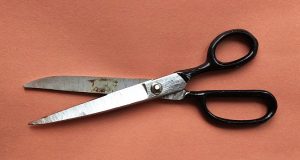
Fabric scissors

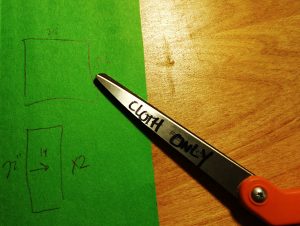
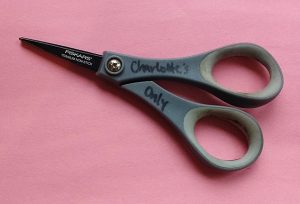
These are the scissors you hide. Or keep locked away. Or you write in Sharpie on them. DO NOT USE. CLOTH ONLY. MOVE AWAY FROM MY SCISSORS. If you haven’t convinced your family to stay away from your fabric scissors, then move to the second pair below.

These are the scissors you hide.

These are the scissors you hide.

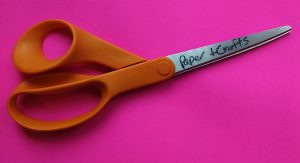
All purpose scissors

THESE are the pair you hand people who want to use your fabric scissors. Keep them sharp so no one is ever tempted to grab the pair you keep for working on your stash.

THESE are the pair you hand people who want to use your fabric scissors.

THESE are the pair you hand people who want to use your fabric scissors.

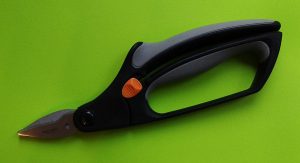
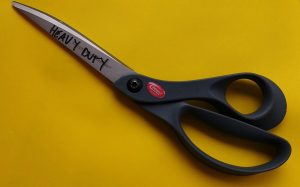
Heavy duty shears

When your regular fabric scissors won’t cut it. I’ve used these to cut canvas, Sunbrella, and leather. Don’t let your friends or family use these for everyday use. They’re heavy duty. Emphasize that by saying it in a low voice, “Sorry, these are heavy duty.”

Don't let your friends or family use these for everyday use.

Don’t let your friends or family use these for everyday use.

Snipping scissors

Snipping scissors, or scissors with very short, sharp blades are genius for cutting threads as you sew.

Snipping scissors, or scissors with very short, sharp blades are genius for cutting threads as you sew.

Snipping scissors, or scissors with very short, sharp blades are genius for cutting threads as you sew.

Pinking shears

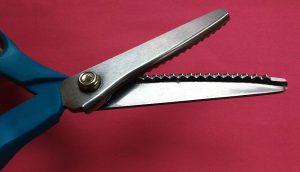
Pinking shears are what you need if you are working with fabric that ravels or if you plan to leave a cut edge exposed. Pinking shears do what zig zag stitching or serging does, they stop fabric from unraveling. They are genius. You should get a pair.

You should get a pair.

You should get a pair.

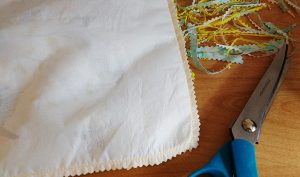
Herb cutters, fringe scissors

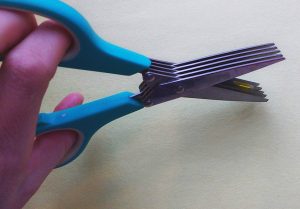
Yes, bring the kitchen into the sewing workshop. These scissors are frequently used to quickly chop up herbs, but in the sewing room they create fringe.

Bring the kitchen into the sewing workshop.

Bring the kitchen into the sewing workshop.

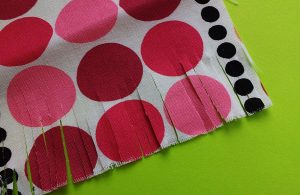
Perhaps you want to make some fringe-cut garland? These would be your tool. They work best when you put the fabric back towards the center of the scissors and stop cutting before you reach the tips. If you have a LOT of tiny snips like this to make, however, you’ll want to see the next pair of scissors.

If you have a LOT of tiny snips like this to make you'll want to see the next pair of scissors.

If you have a LOT of tiny snips like this to make you’ll want to see the next pair of scissors.

Rag quilt scissors

For when you aren’t messing around. Rag quilt scissors have short, sharp blades that let you snip through chunks of fabric to create the famous look of rag quilts.

For when you aren't messing around.

For when you aren’t messing around.

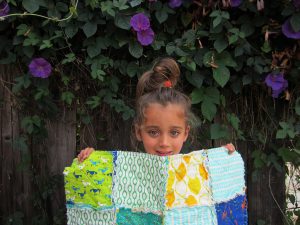
Pro Tip: If you get a pair, make sure to get them spring loaded. Your hands will thank you!

My oldest made this rag quilt with and I snipped it right up with rag quilt scissors. Just put on a TV show you can zone out to and start clipping.

My oldest made this rag quilt with and I snipped it right up with rag quilt scissors.

My oldest made this rag quilt with and I snipped it right up with rag quilt scissors.

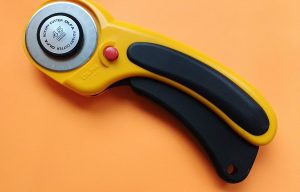
Rotary cutter

Rotary cutters are becoming more and more popular. Once you learn how to cut fabric with them, your fabric scissors may start to see a lot less use.

Goodbye fabric scissors!

Goodbye fabric scissors!

Ye olde kitchen drawer scissors

Also known as ‘household scissors’ or ‘the scissors you can do just about anything with and mom won’t get mad.’ They are the unsung hero of your scissors quiver because they keep the rest of your tools safe.

The scissors you can do just about anything with and mom won't get mad.

The scissors you can do just about anything with and mom won’t get mad.

What types of cutting tools do you use in your sewing room? Let us know in comments!

—————————–
Charlotte Kaufman is a writer and sewist in Mammoth Lakes, California. She specializes in marine and home interiors and continues to fall more and more in love with quilting. You can follow her at charlottekaufman.com.

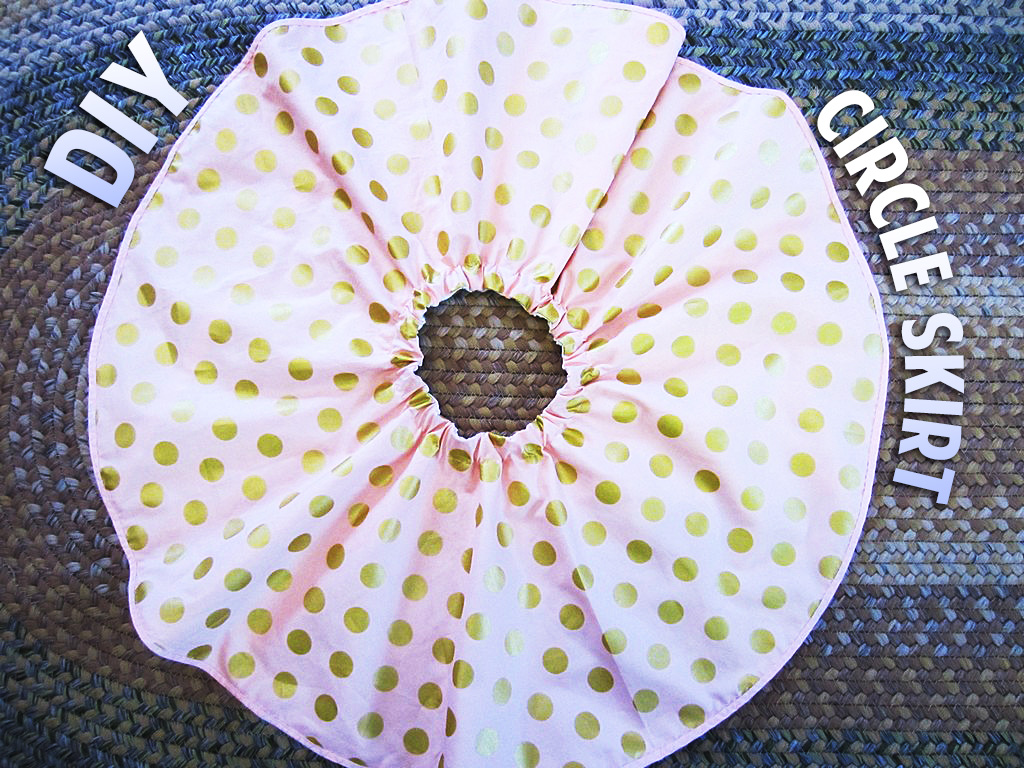
DIY Reversible Circle Skirt

My littlest loves in skirts.

My littlest loves in skirts.

My littlest loves in skirts. In cold weather she puts them over pants and sometimes she even wears them over her pajamas. While I normally am not drawn to making clothes, I knew when her passion for skirts didn’t fade I’d want to start making some for her.

This skirt is reversible, so two skirts in one, though I think she is so in love with the top fabric that she’ll never switch it to the one underneath.

I think she is so in love with the top fabric that she’ll never switch it to the one underneath.

I think she is so in love with the top fabric that she’ll never switch it to the one underneath.

To begin making a DIY reversible circle skirt (or a non-reversible one for that matter), you’ll need to do some math. I take the width of the waist + 2. For her it was 19″ + 2 = 21″. Then I divide by 6.28 (or twice pi.) That gives me the radius of the circle for the waist, 3.34″.

Then I divide by 6.28 (or twice pi.) That gives me the radius of the circle for the waist, 3.34".

Then I divide by 6.28 (or twice pi.) That gives me the radius of the circle for the waist, 3.34″.

Next measure from the waist to the length you want. I went just above the knee, which was 10″. Cut your fabric into a square and then fold into quarters. From the bottom left corner, start drawing first your waist circle, and then the outer, skirt circle (this is the same process I showed you for the DIY tree skirt in one of my December posts).

Cut your fabric into a square and then fold into quarters.

Cut your fabric into a square and then fold into quarters.

From the bottom left corner, start drawing first your waist circle, and then the outer, skirt circle.

From the bottom left corner, start drawing first your waist circle, and then the outer, skirt circle.

If you are making this reversible (and you don’t have to, one sided is great too), do the same for the other side of fabric. In my case, I had to join two pieces together to make a square big enough for the circles.

Pin the circles right sides together and sew around the waist circle. Once sewn, make tiny cuts all around the fabric, taking care not to cut into your sewing. This will help the fabric turn smoother. Flip the skirts so they are wrong sides together and go iron the seam. Ironing is everything in sewing. Don’t skip this step.

Once you’ve ironed, sew a casing big enough to fit the width of elastic you’ll be using for the waist. My elastic was .75″ so I sewed a 1″ casing. Leave about 1.5″ for inserting the elastic.

Once you've ironed, sew a casing big enough to fit the width of elastic you'll be using for the waist.

Once you’ve ironed, sew a casing big enough to fit the width of elastic you’ll be using for the waist.

Put a safety pin through one end of the elastic and feed it through the casing (you’ll find the entrance for the casing hole between the two layers of skirts). Sew the two ends of elastic together and then sew each tail end flat so there is no bulk from the elastic’s sewn seam. Then sew the casing shut, completing the waistband of the skirt.

Sew the casing shut, completing the waistband of the skirt.

Sew the casing shut, completing the waistband of the skirt.

To finish the skirt, you could use a serger and serge the two layers together, and then press them to one side and sew a hem. I chose to add bias tape.

I chose to add bias tape.

I chose to add bias tape.

I used a decorative stitch to complete the look.

Boom! A darling, reversible circle skirt.


And a very happy three year old.


Do you sew clothing for your children or grandchildren? What are your favorite things to make them?

—————————–
Charlotte Kaufman is a writer and sewist in Mammoth Lakes, California. She specializes in marine and home interiors and continues to fall more and more in love with quilting. You can follow her at charlottekaufman.com.

Five Household Items to Help with Sewing

While it is true you often need to acquire specific tools to take your sewing to the next level, there are also items you will find around your house that easily make sewing and quilting a breeze. Each of the following items were truly an “ah-ha!” moment when I discovered them. I hope they help you too.

Shelf Lining

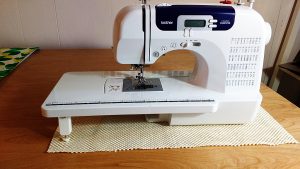
I used to have the infuriating problem of my machine slipping as I tried to quilt. Short of cutting a hole in my desktop to fit the machine level with the table, I wasn’t sure what to do to remedy the problem, until I saw shelf lining used under a sewing machine. Genius!!! Now I put a piece underneath where I work and my machine stays put every time.

Now I put a piece underneath where I work and my machine stays put every time.

Now I put a piece underneath where I work and my machine stays put every time.

Hairspray

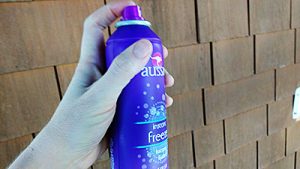
I’m far-sighted, which means threading a needle can be difficult. It gets worse the longer I’ve been sewing, if I’m really tired, or the lighting is poor. Hairspray fixes that. Spray a little bit onto the end of the thread and it will glide through the smallest needle hole like magic.

Spray a little hairspray onto the end of the thread and it will glide through the smallest needle hole like magic.

Spray a little hairspray onto the end of the thread and it will glide through the smallest needle hole like magic.

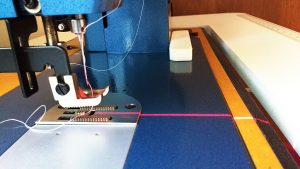
A Laser Marker

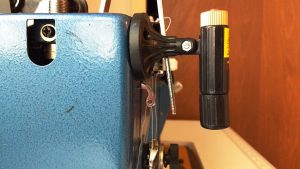
This little tool is currently all the rage in quilting circles. I bought mine at Harbor Freight. It has multiple ways it can attach to your machine, including magnets, sticky back, and screws.

The laser marker is currently all the rage in quilting circles.

The laser marker is currently all the rage in quilting circles.

Just look how far it extends the straight line you need to sew. Plus it makes you feel like a high-tech ninja when you use it.

Just look how far it extends the straight line you need to sew.

Just look how far it extends the straight line you need to sew.

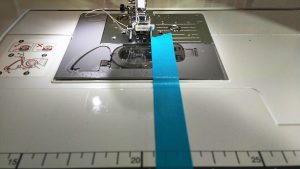
Don’t want to get a laser to extend that line? You can also use washi tape or painter’s tape to do the same.

You can also use washi tape or painter’s tape to do the same.

You can also use washi tape or painter’s tape to do the same.

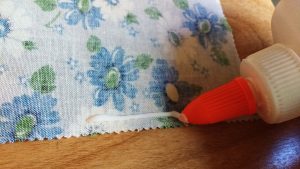
Elmer’s Glue (the washable kind)

It’s time to raid your stash of school supplies and bring the Elmer’s Glue over to the big kids’ table. Like the Laser Marker, quilters are currently gaga for glue. The genius of washable Elmer’s is that you can apply a tiny amount, heat set it with an iron, and it holds beautifully. You can sew through the heat set glue without a problem and when your project is complete, it washes out without leaving any marks or stains. If you ever wonder how people achieve perfect corners, they are probably using Elmer’s Washable Glue.

If you ever wonder how people achieve perfect corners, they are probably using Elmer’s Washable Glue.

If you ever wonder how people achieve perfect corners, they are probably using Elmer’s Washable Glue.

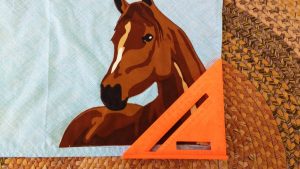
A Square

My whole life I’ve called the carpenter’s tool called a Square, an L, because that is what it looks like. These giant L-shaped tools make squaring your quilts or larger projects very easy. Pictured is a smaller, triangle version, which I use for corners that need to be evenly squared.

A smaller, triangle version, which I use for corners that need to be evenly squared.

A smaller, triangle version, which I use for corners that need to be evenly squared.

What other common household items do you use as part of your sewing and quilting took kit? I’d love to hear in the comments!

—————————–
Charlotte Kaufman is a writer and sewist in Mammoth Lakes, California. She specializes in digital patterns, marine and home interiors, and continues to fall more and more in love with quilting. You can follow her at charlottekaufman.com.