Posts by Vanessa Nirode

Vanessa is a writer, solo traveler, cyclist, and runner based in New York City. In her spare time she works as a tailor and pattern maker for television shows and movies. Follow her on twitter @exsetgirl.
All I Want for Christmas

All I Want for Christmas

There’s not all that much I need these days. Often, I feel as if I have entirely too much stuff. A year and half ago, I bought my apartment in New York City moved from Brooklyn (where I had lived for fifteen) up to Harlem.

There’s not all that much I need these days.

There’s not all that much I need these days.

I had accumulated a lot of stuff in those fifteen years and almost half of it seemed to be sewing related. This wasn’t even counting the storage space I had. Storage spaces are quite common in NYC as the apartments are notoriously small and no one ever seems to have enough room to keep all their stuff.

I literally had more fabric than I could ever, ever, use in my lifetime.

I literally had more fabric than I could ever, ever, use in my lifetime.

It’s not a problem

I decide that instead of moving all of my stuff, I was gong to get rid of some of it and I was going to empty my storage space so that everything I owned actually fit in one 800 square foot apartment.

I managed to get everything I owned to fit in one 800 square foot apartment.

I managed to get everything I owned to fit in one 800 square foot apartment.

It took some doing but I managed to accomplish this task. The biggest challenge was figuring out what to do with all the sewing related things. I really didn’t need fifteen pairs of scissors, four bins of bias tape, an entire box of rick rack and eight foot by ten foot cubicle packed to the ceiling with box after box of fabric.

Good places to donate fabric to are universities or schools with arts’ programs or assisted living homes.

Of course, I kept some things. I do, after all, possess that fabric-hoarding tendency that most tailors and pattern makers do. But I literally had more fabric than I could ever, ever, use in my lifetime – even if all I did for the next thirty years was sit in my apartment and make things. I kept the truly special stuff, the pieces that I might never be able to find (or afford) again. But the bulk of it I donated.

Giving back

Good places to donate fabric to are universities or schools with arts’ programs or assisted living homes. Even some prisons accept fabric donations.

One of the best organizations like this in New York City is Material For the Arts. They accept unneeded items from businesses and individuals, and make the donations available for free to nonprofit organizations with arts programming, government agencies and public schools. If you have a large donation (like an entire SUV full), call ahead to schedule a time to drop off.

Some other places that accept fabric donations are GrowNYC and Quilts of Valor.

The Humane Society and the ASPCA will take linens and clothing for bedding and bathing animals – especially towels.

GrowNYC used to take bags of fabric scraps of any size (that’s where most of the small scraps from Boardwalk Empire ended up) but their website now says they only want large usable pieces.

Quilts for Valor makes quilts for service members and will take most remnants as long as they are clean and free from oil stains & the like.

A few companies that offer take back and reuse options are:

  • Design Tex can provide ship-to information for recycling or reclamation of many of their upholstery, panel and drapery fabrics.
  • The Nike Reuse-A-Shoe Program recycles the rubber, foam and fabric from any brand of used sneakers into padded flooring.
  • The Patagonia Common Threads Garment Recycling Program recycles Polartec fleece, Patagonia organic t-shirts and Capilene Performance Baselayers into new Patagonia clothing.

If you’re doing some clearing out of your fabric stash this season, there are lots of opportunities to send your unwanted textiles somewhere they’ll be wanted. Please donate.

I do have to confess though, that there is one sewing related thing I’m hoping to purchase in the next year: A Juki MF 7923 Coverstitch Machine.

I figure I’ve donated just about enough fabric and other supplies to make room for a new machine.

And so the cycle continues 🙂

We Can Be Heroes

We Can Be Heroes

Growing up, my Mom had one of those metal Singer sewing machines that lived in a cabinet, the kind that folded in on itself where the machine dropped down underneath so that when not in use, the whole shebang was just an unassuming small wooden table.

That’s the machine I learned how to sew on, downstairs in the basement laundry room of my parent’s ranch style house in rural Ohio. Shoved against a wall right next to the furnace closet that, somehow, also contained the laundry shoot, there was barely room for the machine table. When you unfolded the top, it blocked the doorway. Clothes lines stretched across the ceiling of the room and the air space above the sewing machine was most often occupied by my father’s button down dress shirts either waiting to be ironed or just fresh off the board. I would bend over the machine with only its tiny little internal light to see by, trying to keep my stitches straight while the sleeves of my father’s shirts brushed against the top of my head.

Oldie but a goodie

It’s a wonder I ever completed a garment. But somehow I did. I constructed quite a few. Sometimes, I think that those early years of sewing with inadequate lighting next to a furnace room in the basement among men’s dress shirts perfectly prepared me for a career as a film and television tailor. If you can sew on a tiny table wedged into a rack of clothes on the back of a wardrobe truck and still create a well fitting and properly constructed garment while six different people ask you how long its going to take, you are well suited to be a film tailor. Cut out a perfect circle skirt with no pattern in five minutes or less on the tailgate of the same truck, and you will likely be a hero – at least for that day.

Tradition

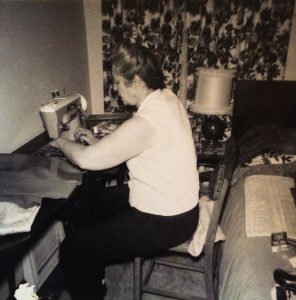
Growing up, my Mom had one of those metal Singer sewing machines that lived in a cabinet, the kind that folded in on itself where the machine dropped down underneath so that when not in use, the whole shebang was just an unassuming small wooden table.My maternal Grandmother, my Nana, also sewed a lot. She had a whole room allotted for sewing, though it also held a bed and dresser. She sewed in the narrow space between the bed and the wall, only able to push her chair out so far. There are quite a few pictures of her at the machine. She made dresses for my Mom when she was a girl and later, jumpers and pants for me. She had a Singer 401 – the tan and cream model, the kind with the decorative stitch black cams that you insert into the top. The cabinet is long gone, but I still have the machine.

At that time in history, when I was young and my mom was young, the 1940s through the 1970s, sewing machines were common in most households. A lot of those machines were lodged into corners and narrow pathways. People laid their patterns out on wood floors, or the dining room table, or even the bed. Prom dresses and bridal gowns and Sunday bests were created in small, dimly lit spaces across the world by women and girls and boys (yes even boys), all of them heroes.

What about you?

Do you have a young person in your life who has discovered the joy of creation and sewing? If so, perhaps this might be the year to get them their very own machine – if you haven’t yet.

I’ve written before about the wonderful lightweight affordable machines Brother makes like the CS-5055 and the PC-210.

Either of these machines would make an excellent gift for that young dressmaker and tailor in your life. They are the perfect size to jockey into an unused corner with no light and launch the next generation of resilient, adaptable and creative sewers.

A Pleating Problem

A Pleating Problem

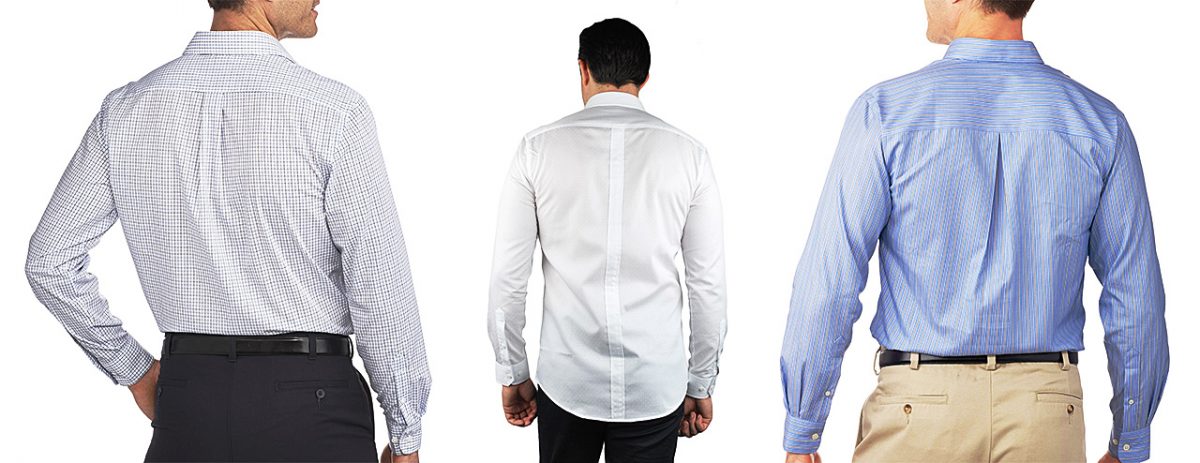
You know the back pleats that are almost always present on the back of button front dress shirts? The ones that are sewn into the shirt body where it attaches to the yoke? Sometimes there are two, one on each side and sometimes, often on women’s shirts, there is a single big one at the center back. They exist for the purpose of ease, or freedom of movement but, what they really do, is just create a whole lot of extra unruly fabric and make a shirt look as if it is too big.

The camera adds ten pounds…

It’s basically true that the camera adds ten pounds so most things in film and television are fit without extra (usually un-needed) fabric mucking up the svelte look.

I spend a lot of time taking these pleats out of shirts, partially because they seem to be in almost all shirts except for ones specifically called ‘slim fit’ and, truth be told, it’s a rather complicated alteration if done correctly.

Step One:

Take things apart. Separate the shirt back from the yoke. If you have two side back pleats, you don’t have to take the whole thing apart. You can stop after the pleats are free on either side and leave the center part still attached. If you have a center pleat, you’ll have to take the whole seam apart. Note how much fabric is in the pleat or pleats. This will tell you how much to take out of the side seam.

Step Two:

Take more things apart.

Take apart the back arms eye. I usually go an inch down from the shoulder seam to the underarm side seam. Then take apart the side seams. Basically, the entire shirt back needs to be free so you can recut it.

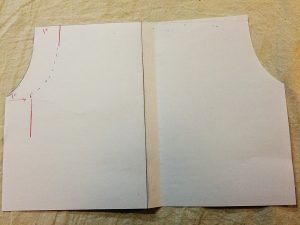
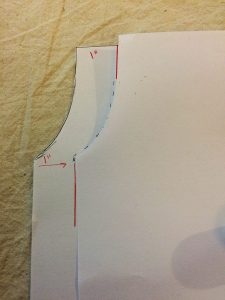
Paper diagram illustrating marking new arms eye and side seam lines on the shirt back piece.

Paper diagram illustrating marking new arms eye and side seam lines on the shirt back piece.

Step Three:

Redraw the arms eye and side seam lines.

Lets say your shirt had a center pleat that 1” on either side, or two ½” folds on each side. From this, you know that you want to take an inch out of each side the entire way down the back piece.

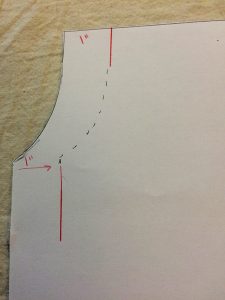
Slice up of new arms eye line.

Slice up of new arms eye line.

To redraw the armhole, mark 1” in at the top of the armhole curve and 1” in at the top of the side seam. Then fold your back piece, using the opposite side as a guide as to where to draw the curve.

Mark the side seam line 1” in all the way down through the hem.

Folding one side over to use as guide for redrawing the arms eye seam.

Folding one side over to use as guide for redrawing the arms eye seam.

Step Four:

Sew the back piece to the yoke, lining up the centers first and pinning out from there.

Step Five:

Sew the back armseye along your newly marked seam line.

Step Six:

Sew the side seam. You should use the original line on the front piece and your new line on the back piece.

Step Seven:

Give everything a nice press and you’re done.

Sometimes, designers like to make a shirt even more fitted by having their tailors add side back darts. This is extremely common in the film business. If you ever watch Hawaii Five-0, check out the button front shirts that Scott Caan wears. They are altered to within an inch of their life. They fit him like a glove. And they all have side back darts. Whenever I see them, I think, “Oh, a tailor got a hold of that shirt.” If they’re not custom made for him, then they have definitely been through the back pleat extraction/side back dart procedure.

Next time you’re watching your favorite show, pay close attention to the button front dress shirts. You’ll start to notice side back darts everywhere!

Getting In

Getting In

Whenever I tell people what I do for a living (Tailor and Pattern Maker for film and television) they inevitably say one of two things.

“Wow. How did you get into that?” or “What a cool job!” Sometimes acquaintances will ask me if I can talk to their niece or son or daughter’s friend or cousin or something and give them advice on how to ‘break into’ the business.

I’m never entirely sure what sort of advice to give. As Hunter S. Thompson said (or maybe didn’t say depending on who you ask),

The TV business is a cruel and shallow money trench, a long plastic hallway where thieves and pimps run free, and good men die like dogs. There is also a negative side.

There is some truth in that Hunter quote. Especially now when the major networks are increasingly concerned with cost and ratings and everyone wants to do more (and more) with less money. Period television is quite popular right now. The only problem with that is that period television is hard, perhaps the hardest genre.

“But, why?” you may ask, “It looks like so much fun!”

The Devil is in the details

Here’s the thing: period TV is expensive. You have to dress every single background actor and actress as well as the principals. On shows such as Law and Order, often the background (BG) performers are wearing something selected from their own personal closet. What generally happens is that the BG will come to work with a few clothing options. An assistant designer will usually pick which of these options is best and that’s what the actor will wear. Most people don’t have closets full of 1920s or 1880s clothing so, on a period show, the entire costume is provided, fit, and altered. This takes more time and manpower which, in turn, takes more money.

TV is also fast – faster than filming a movie. Most shows shoot an episode in 8 to 10 days, with at least a day or two when they are shooting two episodes at once. (We call those tandem days.) Because of this, you never really get any down time. On a movie, there is most always a point where you’re over the hump – you’ve established all the costumes needed. Or you’re working on something where all the action takes place on the same day and no one changes their clothes. Then, all you need to worry about is multiples and the rest of the work is up to the set costume crew who keep track of continuity and make sure everyone looks how they should in front of camera.

Do your thing & do it GREAT

I guess if I were to give one piece of advice I would say to become really good at the thing you want to do. Then, figure out how to do it very quickly if needed. I may have said this before (I say it a lot) but there are lots of good tailors and pattern makers out there. What there isn’t a lot of are exceptional tailors and pattern makers who can also work really fast. If you want to work in TV and film that will definitely give you an advantage.

As far as finding TV and film jobs, talk to people, contact your city’s (or state’s) film commission. Word of mouth is still the best way to find a job in this business.

Mind your manners

And be nice to everyone, even if you think they have no ‘influence’ or are looking for the same kind of job as you are. You never know who knows who and you never know when someone might need help because they have more work than they can handle on their own.

Oh, and that “What a cool job!” comment… Some days it is and some days it isn’t. I can assure you there is nothing glamorous about it but, at the same time, it is also rarely boring.


Thankful

Thankful

***Disclaimer: this blog post was written a few days after taking a spill on my bike and hitting my head while coming down a mountain in Spain. It may be a wee bit disjointed (But, don’t worry! I’m completely ok).

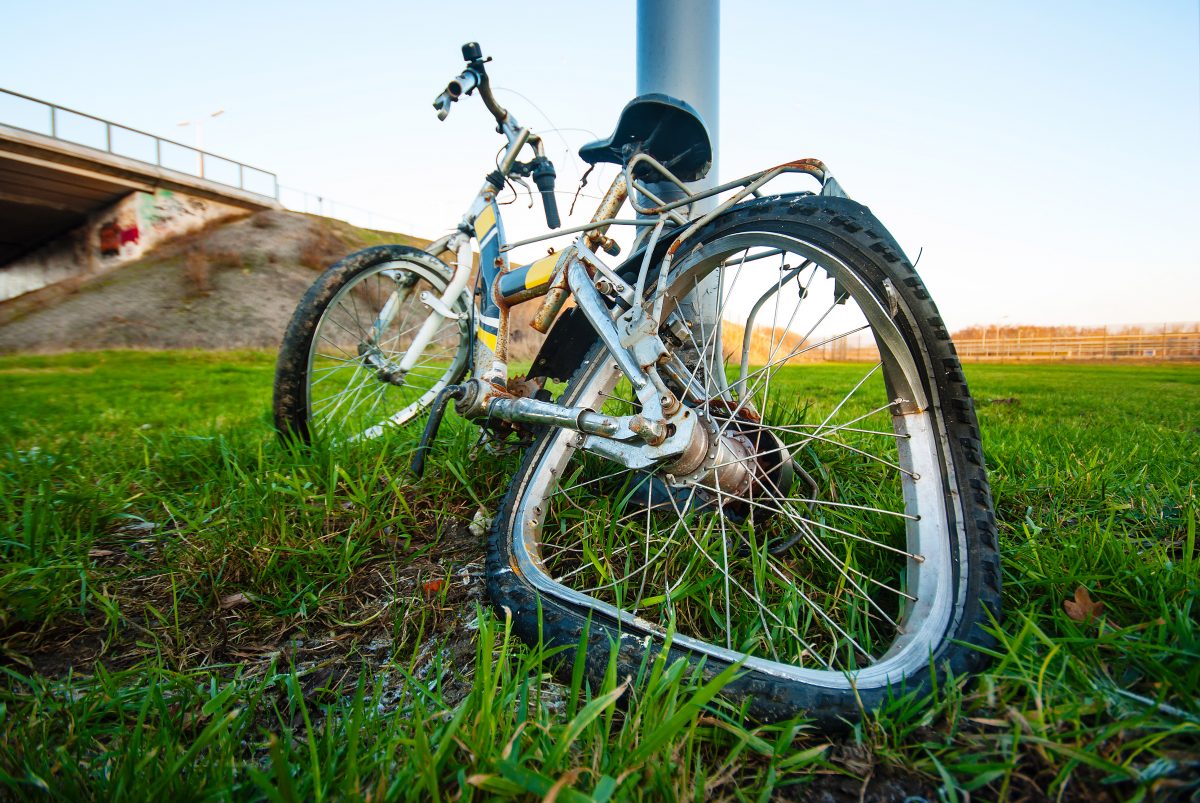
This year for Thanksgiving I decided I was going to avoid the whole thing, take the #optoutside to whole new level and go to Mallorca, Spain to cycle around the island for four days. All was going as planned: the weather was holding out, I was feeling good, pedaling up and down mountains, the scenery was as lovely as always… Until, suddenly, with no warning, in the last two kilometers of a fourteen kilometer descent, my bike and I were both on the ground.

Things can change so quickly. I’m fine. I was fine. The guide for the cycling tour I was on magically appeared on the road literally seconds after I fell. He picked me up, put me in the van and off we went to the emergency clinic in Palma. A couple hours later, with five stitches in my head, I was back in the van eating a sandwich on the way to the hotel.

Recovery

Now, I suppose you’re all wondering what this has to do with sewing. I’m getting there – I think (I do have five stitches in my head after all).

Taking a spill like that – one that could have resulted in very dire results if I hadn’t been wearing a helmet – makes a person thankful for a lot of things – like helmets and hand/eye coordination and muscles that heal, and functioning limbs and digits. I was very lucky, with only slight occasional dizziness resulting.

What I’ve rediscovered in the past few days is that the two activities that I find the most comfort in, biking and sewing, are also very therapeutic. I knew that before but sometimes I forget and need a reminder.

Therapy

Both biking and sewing are repetitive activities that I’m able to do without really thinking (as long as I’m sewing something straight forward).

Both biking and sewing are repetitive activities that I’m able to do without really thinking (as long as I’m sewing something straight forward). Sewing (and biking) are forms of meditation. I can lose all sense of time when doing both of them. Psychologist Mihaly Csikszentmihalyi explained that sometimes when your brain is busy creating something, it doesn’t have enough attention left over to think about other problems and ends up in a state of meditation that quiets the fight or flight reflexes caused by stress. Interesting, right?

Also, when you do something pleasurable, your brain releases dopamine that acts as an anti depressant. Both sewing and cycling do this for me. I certainly wouldn’t necessarily recommend everyone hopping right back on the bike after knocking their head but for me, it was the right thing. I had people to ride with and keep an eye on me and I was able to enter a quiet space of meditation with sun and sky all around me.

Stimulation

Sewing may also help protect your brain against some symptoms of aging. Neuroplasticity means that our brains can adapt to the environment. Activities such as sewing stimulate the brain and may improve neuroplasticity which in turn, can ward off early dementia.

Sewing has also been said to promote lower blood pressure. So many good things can come from sewing. What are you waiting for? Go forth and sew something today. 🙂

Miter Me This

Miter Me This

One of the alterations I did last week for the television show Blindspot was lengthening the sleeves on a woman’s suit jacket for one of our actresses – a straight-forward and fairly simple task.

Or so it should be

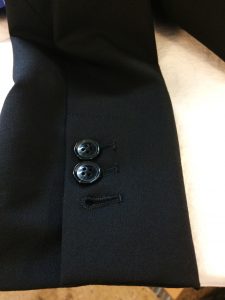
Functional, cut buttonhole, unless you need to lengthen the sleeve.

Functional, cut buttonhole, unless you need to lengthen the sleeve.

This time, though, the alteration gods (and the clever designers at Banana Republic) were against me. The suit jacket had cut, functional buttonholes (three of them) on the sleeves. Not that big of a problem. I just needed to lengthen the sleeves 3/4″ and could get away with leaving the buttonholes as they were as the first hole was only an inch and ¼ from the hem.

No biggie

So, no big deal, I could still re-miter the corner 3/4″ below the original hem and not have to mess with the buttonholes. I might have to cut some of the seam allowance free from the bottom hole but it shouldn’t matter. I would still have enough fabric to do the miter properly.

I pulled both sleeves inside out to find the one with the top stitched opening. Women’s jackets normally just have one sleeve with the lining opening and the entire thing can be pulled through that hole and inside out. This is because, in most cases, the armhole lining isn’t attached all around the seam allowance as it is in men’s suit jackets.

I pulled my two sleeves inside out through the opening and started taking the hem apart. Much to my annoyance, I discovered that the miter corner had been trimmed so it was impossible to redo the miter at a longer length. I also needed to add more seam allowance to be able to lengthen the sleeve the amount I needed.

Take a step back

A simple alteration just got a bit more tedious. First, I dug into my fabric stash to find a wool similar to that of the jacket. In this particular case, the jacket I was working on was a dark brown and black tweed. The jacket was paired with black wool pants so I decided I could get away with using a black wool for my corner and added seam allowance.

I cut two pieces of black wool 2″ wide ( ¾+ ¾+ ¼ for each seam allowance. you need ¾ twice because you need the length for both the lining and the face fabrics) and 10″ long (this length doesn’t matter except it needs to be longer than the sleeve hem) on the bias (or diagonal). I also cut an addition 2″ wide by 6″ long bias piece for the corners.

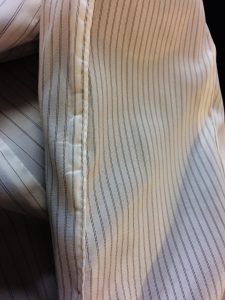
Sleeve lining with topstitched seam (open up from here and pull everything through).

Sleeve lining with topstitched seam (open up from here and pull everything through).

The next thing to do after opening the entire sleeve hem up (don’t press, you’ll want to see the original seam creases) is to sew the black wool to the miter edge. Follow the stitching line from the original miter and make sure to leave additional fabric on both ends. Then, open the sleeve hem up so you can see the straight angles of the bottom and side edges. Draw straight lines to connect those edges, then trim.

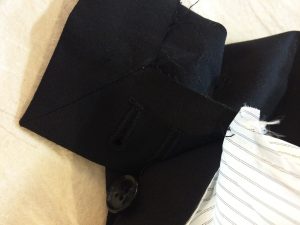
The mitered corner.

The mitered corner.

Next, attach the 2″ piece to hem edge and trim any excess off the ends. At this point, I redraw my miter line. Measure down ¾ from the original hemline exactly on the fold line – that’s your cross line for miter. Use your old miter line as a guide for the proper angle. Sew the miter, press, and turn. Don’t cut. I use a wooden tailor point pressing block, a simple point turner, and generous steam.


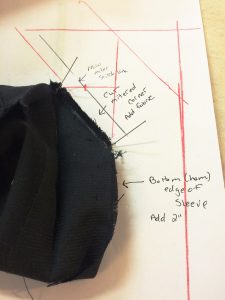
Diagram on where to add fabric and redraw miter seam line.

Diagram on where to add fabric and redraw miter seam line.

Wash, rinse, repeat

Mark the ¾ down on the un-mitered corner and any sleeve underarm seams into your fabric extension so that you can match up the lining properly. Then, pin together your hem edges and sides. Sew. Repeat for the other sleeve, turn everything back right side out, and sew the opening closed in the sleeve lining.

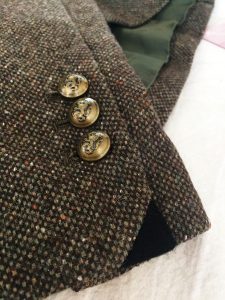
The finished contrasting corner miter: (note: the suit jacket will be worn with black pants so the corner coordinates nicely).

The finished contrasting corner miter: (note: the suit jacket will be worn with black pants so the corner coordinates nicely).

Done. I now have a jacket with a cool little detail. Most people probably won’t notice it but if you happen to watch Blindspot and see it, let me know! I like it and my designer and actress like it, if only for the reason that the sleeves are the proper length.

The Safety Pin

The Safety Pin

I try to collect them all in one drawer, but they escaping & disburse themselves all about the apartment.

I try to collect them all in one drawer, but they escaping & disburse themselves all about the apartment.

Almost every pocket in every article of clothing I own, there are a couple of safety pins. I can also usually find at least three of four of the little buggers on the bedroom floor. Sometimes they end up outside my apartment door because I reached for my keys and pulled out a fistful of safety pins instead. I try to collect them all together in one drawer but seem intent on escaping and disbursing themselves all about the apartment.

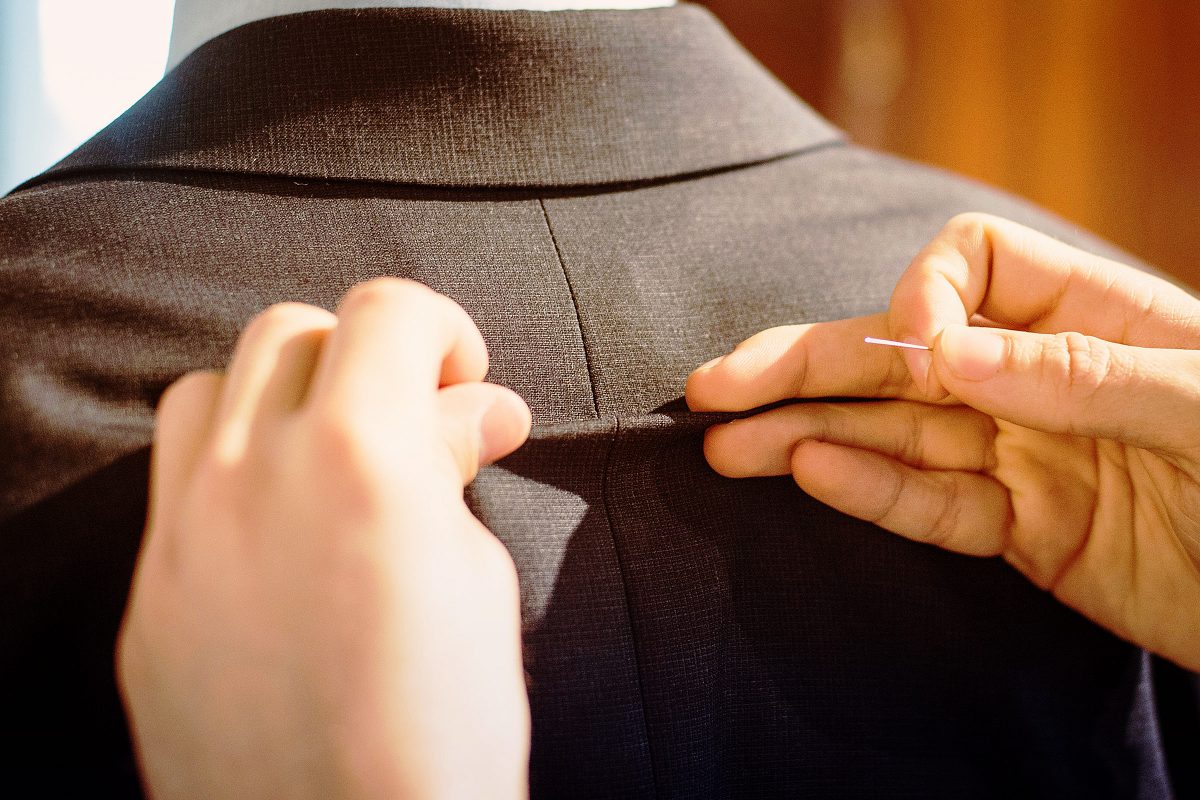
I use safety pins for fitting clothing, for hanging patterns, to attaching notes to things. Of course, there are different sizes and flavors of safety pins.

Size matters

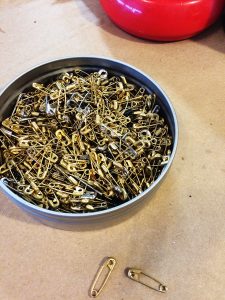
I use the tiny gold ones when I’m fitting something very delicate like silk or gauze so that they don’t make an unsightly pin hole.

I use the tiny gold ones when I’m fitting something very delicate like silk or gauze so that they don’t make an unsightly pin hole.

I use the tiny gold ones when I’m fitting something very delicate like silk or gauze so that they don’t make an unsightly pin hole. For some reason, someone thought that gold pins without the end spiral were good idea. I suspect because sometimes things snag on the little coil but, without that coil, the pin is free to slide about so it’s hard to know exactly where/what the mark is.

I use the big number 3s for the majority of my fitting needs. And the number 2s if I need a thinner pin.

History Hunt

Walter Hunt invented the safety pin in 1849. He was the first one to create a pin with the coiled spring on one end and the clasp or catch on the other end to keep the pointy bit safe from tender fingers. Hunt sold his idea outright for $400.00 so never collected any royalties or anything from it. Legend has it that he needed to pay off a debt and thus invented the safety pin and sold the rights within a few hours.

I use safety pins for fitting clothing, for hanging patterns, to attaching notes to things.

I use safety pins for fitting clothing, for hanging patterns, to attaching notes to things.

Selling his safety pin idea wasn’t Hunt’s only unfortunate business decision though. He was also the first one to invent many of the significant parts of the sewing machine, including a curved needle and a shuttle. Hunt created the first sewing machine prototype in wood, which didn’t work all that well so he ended up selling his idea to Elias Howe and Isaac Singer.

Hunt invented a plethora of other things including a streetcar bell, a knife sharpener, paper collars, and an antipodean walking device – or suction cup shoes!

Alas, Hunt didn’t seem to have much business savvy or any true idea of what his inventions could be worth, and just how wide spread and common place they would become.

A modern twist

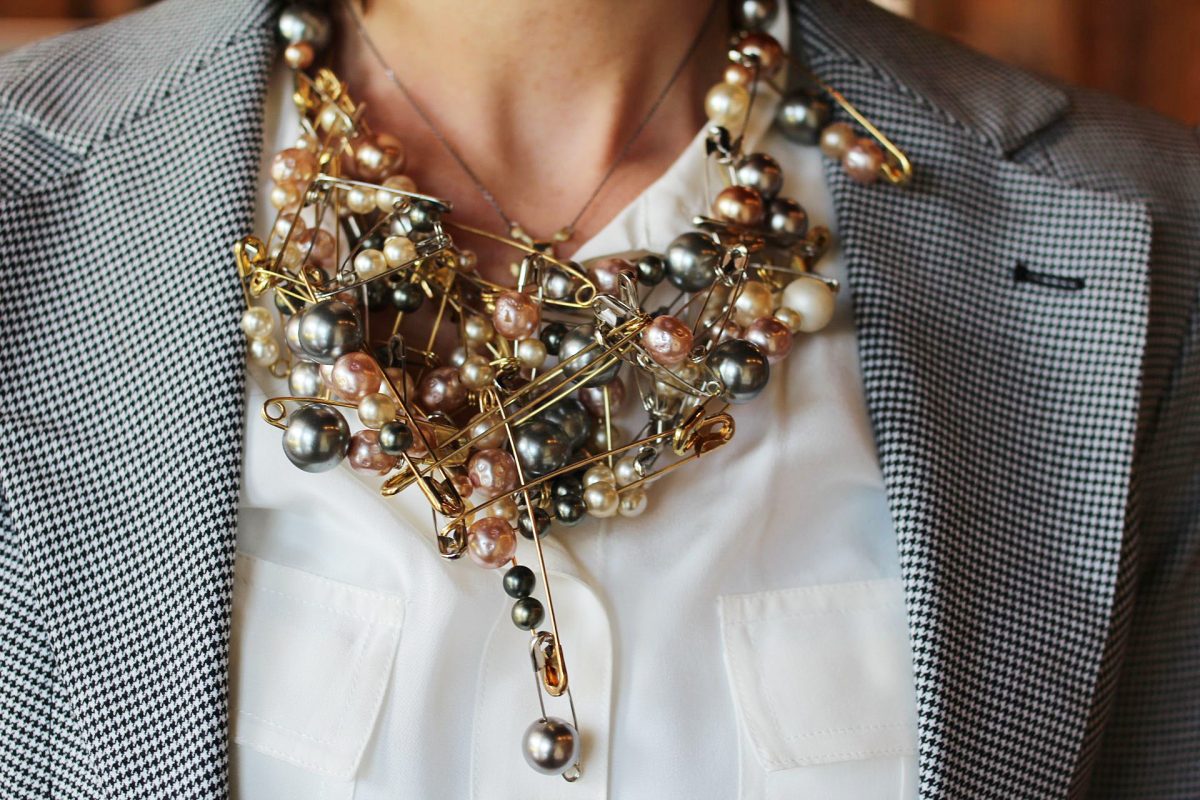
The safety pin has found its way onto the catwalk and into high fashion with decorated, embellished safety pin broaches and large dangling safety pin earrings.

The safety pin returns as punk becomes more relevant than ever – via Independent.

The humble safety pin also has a rich symbolic history and significance. Punk culture has long used the safety pin as an expression of individual freedom and DIY culture. In the wake of the UK’s Brexit and the US presidential election it has come to symbolize tolerance and unity with all people.

Wonder what Walter Hunt would have sold his idea for back in 1849 if he had been able to foresee even a small fraction of what his pin would become.

As Pinned: Sewing Alterations in the Film Biz

As Pinned: Sewing Alterations in the Film Biz

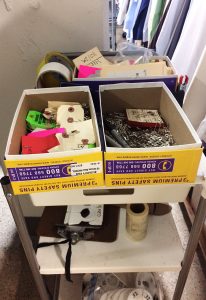
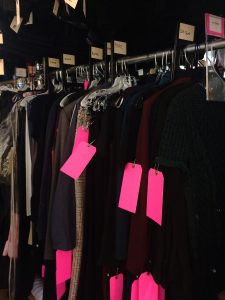
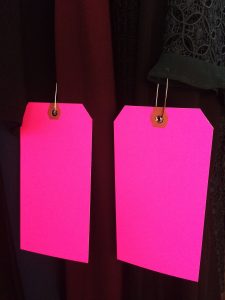
Most film and television costume departments in New York City use bright pink oak tags to identify a garment as needing an alteration.

Most film and television costume departments in New York City use bright pink oak tags to identify a garment as needing an alteration.

Most film and television costume departments in New York City use bright pink oak tags to identify a garment as needing an alteration. Larger (and usually period) shows, like Boardwalk Empire, The Deuce, The Get Down, have two or three Costume Fitters who run the fittings for the background actors. They keep everything organized in the fitting rooms, take measurements and photos, assist the designers, do a lot of the pinning (unless something really wacky is going on, then they’ll usually call the Head Tailor in to check it out), and write the alteration notes on the tag.

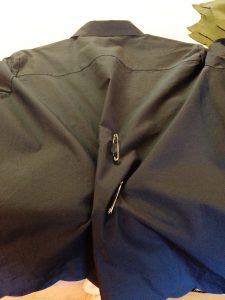
Inevitably, a high percentage of alteration notes will read something like: “Take in as pinned” or “CB as pinned”. ‘CB’ means center back if you didn’t know. And ‘AP’ is the abbreviation for ‘as pinned’.

So, anyway: “Take in as pinned.”

Measure twice, cut once.

Take in as pinned

Here’s the thing, even if I pinned the alteration myself in the fitting room, ‘take in as pinned’ shouldn’t necessarily be followed literally. Seriously. It is indeed true that humans in general are not always symmetrical but it’s rare that you honestly need to take in one side more than the other. I also cannot tell you how many times an initial, “he has one arm longer than the other” turned out to be a jacket not sitting evenly upon the shoulders.

The garment can, of course, be lopsided to begin with – always a possibility if you’re dealing with vintage clothing. Measuring is always a good idea. As my Dad always says, “Measure twice, cut once.” He was talking about lumber and carpentry but the same advice applies to sewing as well.

I usually mark (or just measure) the pinned out alteration with chalk or wax on the wrong side of the garment. Then I take the pins out and assess the situation. If two side back seams were pinned in and one is considerably larger than the other, even them out. Do the same thing on both sides.

This is actually one of the top five laws of sewing – if there are laws of sewing.

I just pin everything out in through the center back then figure out later the best place to take it out.

I just pin everything out in through the center back then figure out later the best place to take it out.

I often only pin one side of a thing. More often, I just pin everything out in through the center back then figure out later the best place to take it out. A large amount will look better if you distribute it through more than one seam.

For example, if you pinned out 5 inches at the center back waist of a shirt or jacket, split the amount up between the center back, side back and side seams. The end result will look much better.

An alteration I do a lot is taking in the backs of men’s button front dress shirts. Unless it’s a slim cut John Varvatos, most men’s dress shirts are excessively roomy in the back. The quick and easy solution to this is to add side back darts.

If I have time, and the shirt has back pleats going into the yoke, I’ll take the whole back off and take out the pleats – re-cutting the bottom part of the armseye and the side seams. This can take quite a bit longer, especially if you are dealing with a shirt by Brooks Brothers, who insist on gluing their side seams as well as sewing them.

Take in as pinned.

Take in as pinned.

Speaking the same language

At Blindspot, since I’m the Head and only tailor, we just put blank pink tags on the garments as indications that they need altering. If I pinned it, I don’t need any notes. The Costume Designer for the show is also an excellent tailor (which is rare) so if I wasn’t in a fitting for some reason, he can easily tell me what needs to happen – often without pinning.

He’ll come to me and say, “I threw this on so and so, it just needs to be taken in about this much in the back.” Then he’ll show me by pinching an amount out with his fingers.

Tailoring and patterning is indeed a language all its own and it’s a beautiful thing when you work with someone who speaks it as well as you do.

Shopping in the New York City Garment District

Fabric Shopping in the New York City Garment District

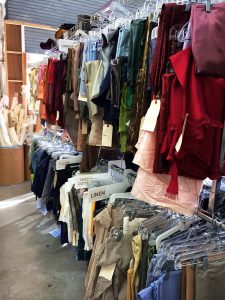
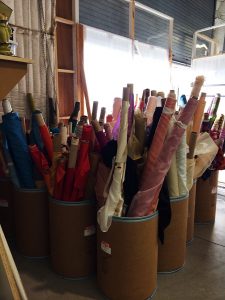
Shopping in the New York City Garment DistrictWhen I first moved to NYC a lifetime ago, I worked for very little money as an assistant to a crazy hat designer in the heart of the garment district. The only upside to the job was that I spent a good part of every day out on the streets gathering fabric swatches and button and trim samples. There was another assistant who had been there for almost a year already and she took me around with her and introduced me to all the people and stores. The two of us had a great time digging through bins of buttons, wandering deep into the back corner of NY Elegant Fabrics, and convincing the nice people at Mood to let us into their “secret” warehouse (it really does exist).

I only stayed at that job for about a month, though it felt like a year, and the other assistant (who has since moved back to Korea to head up a fashion company there) and I still keep in touch. I don’t go to the garment district as often as I once did but I do have a list of must visit favorite places.

Mood – 225 West 37th Street

I’ll get this one out of the way first since most people at this point have heard of Mood which lucked into some amazing advertising when it became the fabric store featured on Project Runway. One of the coolest things about Mood is the building its in and the old elevator, still manned by an actual man, that you have to take up to the 3rd floor. Once up there, the rows and rows of fabric reach from floor to ceiling. Things are pretty well organized, the selection is large, and most bolts have swatches already cut and attached to the ends that you can take.

One little note about swatching in most all the stores in New York City: If someone asks if you are a student, say no. They’re asking because most stores have specific hours for student swatching and won’t allow you to do so if its not during those hours.

Also of note: Mood has a public restroom in the back right corner. 😉

NY Elegant – 222 West 40th Street

I love NY Elegant for its selection of light weight cottons, organdies, and batistes. NY Elegant is a family run store and is the last standing fabric store on 40th St. They also get a lot novelty fabrics – fake furs and things with glitter and sparkly threads.

Paron Fabrics – 257 West 39th Street

This is one of my absolute favorite family run fabric stores in the city. Sadly, they closed their doors for good just last month. I’m only including it to remind everyone to try and support their local fabric stores and if, you have the chance, come to NYC and shop in the garment district. You really can find almost any kind of fabric there by visiting the larger stores and just wandering down 39th street and stopping in to the small stores that still remain.

B & J Fabrics – 525 7th Ave #2

B & J is your best bet for high end linens, lace, and silks. The store is extremely well organized and always seems extraordinarily well lit in comparison to other garment stores. They are a little pricier than some of the other stores but the quality of the fabrics they stock is superb.

Lou Lou Buttons – 69 West 38th St

Lou Lou Buttons sells only buttons. They have bins and drawers and barrels full of buttons. They have wood buttons, shell buttons, mother of pearl buttons, and every funky, unique kind of button you could imagine. The people who work there are helpful and friendly and don’t seem to mind if you spend hours looking.

M & J Trimming – 1008 6th Ave

There are a lot of small trim stores in the garment district with beautiful things but M & J has by far the largest selection of trims in the city. And, unlike a lot of the garment district stores, they’re open on Sunday (you know, for those weekend trim emergencies.)

Tinsel Trading – 828 Lexington Ave

Shopping in the New York City Garment DistrictTinsel Trading recently moved out of the garment district to this new location on Lexington. They stock the most amazing unique vintage and new trims you’ll find (unless you’re shopping in India or Southeast Asia). Their stuff is expensive but much of it really is one of a kind. If you like metallic thread, fabrics, and fringes, this is the place to go.

If you’ve never had the chance to shop for fabric in New York City, I encourage you to plan a trip if possible – you won’t regret it. And, if you come during the month of December, you can also go visit the holiday windows at the retail stores along 5th Avenue – Bergdorf’s (always my favorite), Saks, etc.

Scissors, scissors, scissors

Scissors, scissors, scissors

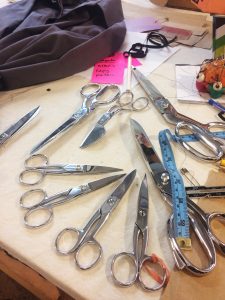
Partial scissor collection.I have a bit of a scissor problem, as in, I have a lot of them. I’m not always good about getting them sharpened, or sharpening them myself and often will just order a new pair – which isn’t necessarily very economical but, often, much more fun. This photo is of the scissors that are currently in my shop at Blindspot. It doesn’t include the scissors I have at home or the scissors that are in my sewing kit on the wardrobe truck or the scissors I probably forgot about that are at the bottom of a bag somewhere in a closet.

In New York City, you can have someone come to your shop and sharpen all your scissors with an electric grinder. There’s also a scissor and knife sharpening truck that still trolls the streets of Brooklyn (like the Mr. Softee ice cream truck). I never have any scissors on me when I see the truck though I always want to flag it down. You can, of course, sharpen your own scissors using a sharpening stone but I never seem to get around to doing that.

Most tailors have a favorite pair or a preferred model that they own more than one of.

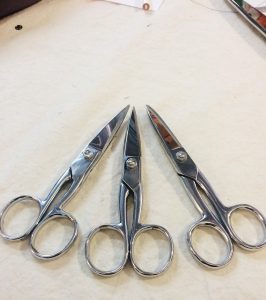
My absolute best loved are Gingher’s original 5” tailor points, the ones that are actually pointy on the end. For some reason, when Fiskar acquired the Gingher brand, they altered the 5” tailor points. Now they have more rounded blades and a blunter end and are often called ‘craft’ scissors. The pair on the left in the following photo is the oldest pair. See how much narrower and pointier the blades are?

Evolution of Gingher’s 5” tailor points.

Evolution of Gingher’s 5” tailor points.

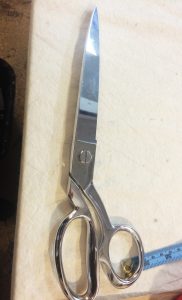
I do quite a bit of cutting. I never really took to the mat and rotary blade camp though I can understand how it can be an efficient and accurate way to cut. Probably because I started my whole tailoring/pattern making career before cutting mats and rotary blades were prevalent. Or maybe I’m just old. At any rate, my favorite scissors to cut with are Gingher 11” knife edge shears.

Cutting shears.

Cutting shears.

Other scissors that I use on a daily basis are:

Gingher 8” straight blade shears

– For trimming seam allowances, though you can cut with them. I just like a longer blade.

Gingher 7 ½” pinking shears

– I usually pink the hems in men’s suit pants as opposed to serging, mainly because a serged hem will leave a ridge if someone (drycleaner or otherwise) gets over zealous with the hem pressing.

Gingher 6” applique scissors

– I use these when I need to trim something very close the edge, or when I’m cutting around an applique (obvi.)

Gingher 7” straight blade scissors

– I use a pair of these as my paper scissors when patterning.

One of the sacred sewing laws is to never use someone’s fabric scissors to cut anything but fabric. Ever.

One of the sacred sewing laws is to never use someone’s fabric scissors to cut anything but fabric. Ever.

Excuse me… What are you cutting?!

Speaking of paper scissors. One of the sacred sewing laws is to never use someone’s fabric scissors to cut anything but fabric. Ever. The standard response from someone who sews to the question, “Can I borrow your scissors?” is “What are you cutting?”

The reason why is fairly simple: try cutting fabric with a pair of craft or paper scissors and you’ll find your edge looks as if it were chewed off by some sort of extremely hungry wild animal.

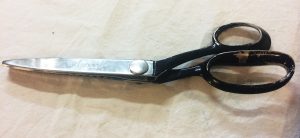
Wiss pinking shears.

Wiss pinking shears.

A few years ago, I acquired some old scissors for a mens’ tailor in the city who was retiring. I love this pair of old Wiss pinking shears. Despite the knicks and scratches on the exterior, they still cut very well.

What’s your favorite pair?