Posts by Vanessa Nirode

Vanessa is a writer, solo traveler, cyclist, and runner based in New York City. In her spare time she works as a tailor and pattern maker for television shows and movies. Follow her on twitter @exsetgirl.
Families, Mentors, Legacies and Sewing

Families, Mentors, Legacies and Sewing

My first long-term professional job in a Costume Shop was at The Alley Theatre in Houston, TX. The Alley has two stages and puts on a creative and diverse season of plays, often mounting the regional premieres of new productions. I certainly never intended to live in Texas for as long as I did but I spent my 20s at The Alley. The Alley is where I grew up and where I learned the basis for pretty much everything I know about sewing and pattern making.

Family

Years later, I was having a conversation with some friends and co-workers about our professional backgrounds. One of them asked me if I was still friends with the people I knew when I worked there.

“Friends?” I said, “They’re family.”

Then I got to thinking about family and home, mentors, and the sense of ‘belonging’ somewhere, of finding your people. Sewing is often a solitary activity. In fact, I spend most of my time these days in my little windowed corner at Steiner Studios sewing and patterning by myself. Some days, I miss being in a shop with others, everyone working and creating together.

There were days at The Alley when we would all be bent over our machines or projects, working diligently and quietly. Sometimes there was music playing, sometimes NPR (there weren’t podcasts yet), then suddenly, from the silence, someone would say, “Ummm…do we have any more of this fabric?” And everyone would burst out laughing. Ha. Tailor humor.

Nothing Beats Experience

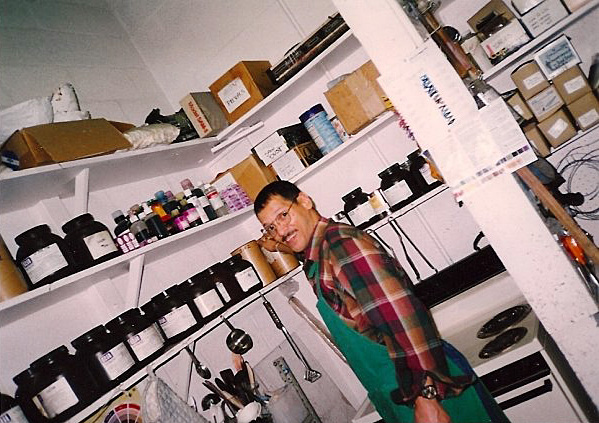
The thing, or person, I miss most from those years in theatre, though, was my mentor, Jorge, the man who taught me patterning, millinery, and gave me to courage and tools to think outside the box and trust my instincts.

I don’t have a degree in any sort of Costuming or Fashion Design and I only ever took one sewing related class at college. Lots of people I know follow patterning or draping guidelines from a particular book. I don’t dispute that many of these books are extremely useful with their formulas and precise calculations (I own and reference many of them) but I always like to say that I pattern from the heart. I know that sounds dorky but that’s the way I work. Pretty much ten times out of ten I end up at the same result as I would if I had followed some directions in a book.

And, yes, I have tested this theory many times.

The point, I think, that I’m trying to make is that the books are useful but they only tell you the how, not the why. I always want to know the why. I believe that once you figure out why something needs to be done a certain way or why that curve should look like that, the how easily follows. I also believe wholeheartedly in mentors. I think our country and society is sorely lacking in that arena. Here’s a great paper about the importance of mentors.

My Mentor

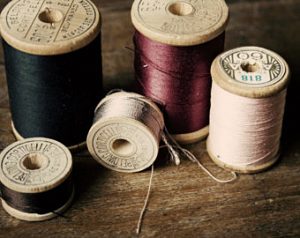
“Are you going to save that thread?”

“Are you going to save that thread?”

One of the best and lasting gifts I’ve ever received was Jorge’s knowledge. I am his legacy. I hope that in my approaching old(er) age I will be able to give back and share his knowledge which has become my knowledge to someone young and just starting out. In this way, he, and eventually me, will continue to live on. How humbling to think that I might have a legacy to leave.

Teach someone, even if it’s just one someone, the things you know and have learned through the years. Before books and computers, people passed their stories and knowledge to their children who passed them to their children and so on and so forth. Create your own legacy. The knowledge and talent you have so worth passing on.

Jorge has been gone from this world for over ten years now but every single time I am unwinding a bobbin because I need an empty one and its less than halfway full, I hear his voice in my head, “Are you going to save that thread?”

And often, I do. I wrap it around a manila card because you never ever know when you might need a bit of bright green thread.

The Pressing Matter of Irons

The Pressing Matter of Irons

There is something sort of Zen and comforting about it for me.

There is something sort of Zen and comforting about it for me.

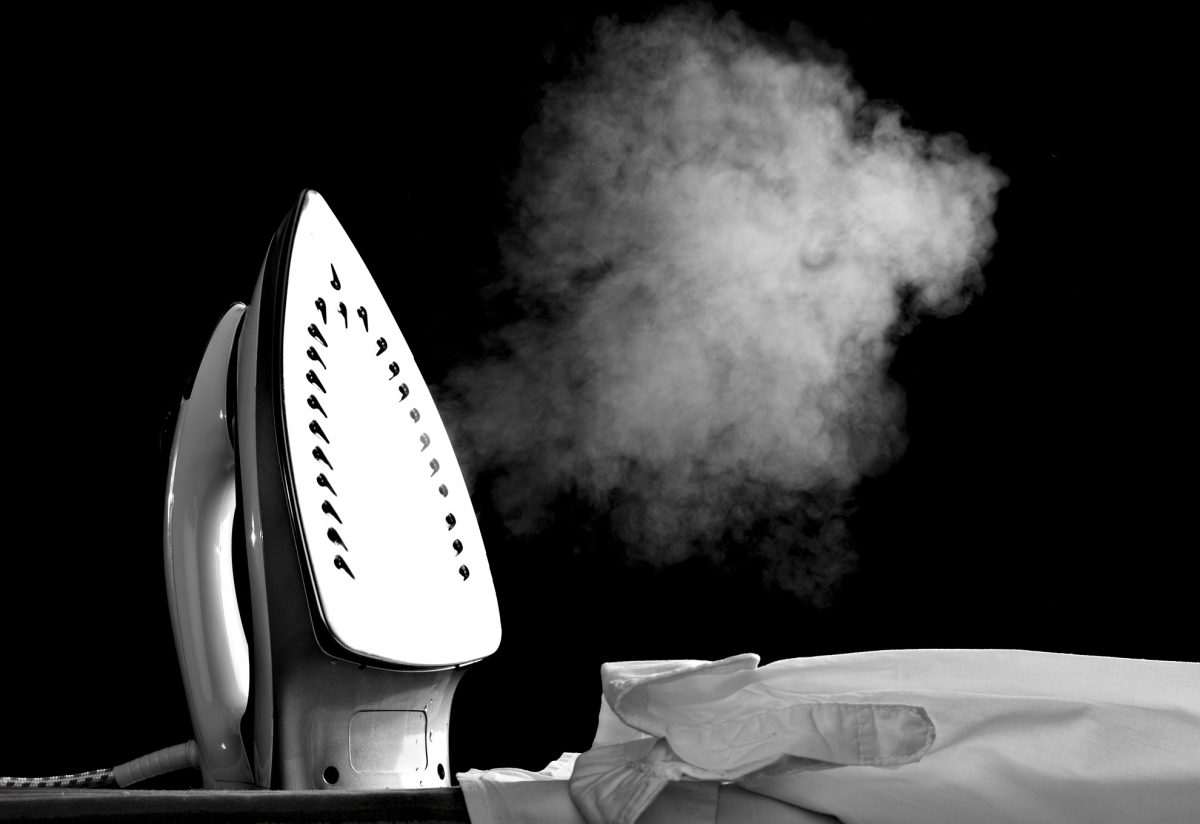
I actually kind of like ironing. There is something sort of Zen and comforting about it for me.

One of my first jobs in a professional theatre setting was as a dresser at the Alley Theatre in Houston, TX. Being a backstage dresser means helping actors get dressed (obviously), laundering actors’ costumes, assisting actors in changing their clothing really quickly, seeing in the dark, and a whole lot of steaming and pressing. The Alley does an annual production of A Christmas Carol every holiday season. Almost every main male character in the production wore a white cotton shirt that needed to be ironed before every show. One of my responsibilities was to iron the pile of white cotton shirts every day. Anyone who has ever spent a significant amount

I pretty much always use a sleeve board.

I pretty much always use a sleeve board.

of time ironing shirts has developed their own little system, order.

I do yoke, front, back, sleeves (no creases), collar. I pretty much always use a sleeve board. And a proper iron makes all the difference – whether you are simply ironing to get the creases out or sewing. Everything looks better with a good press.

A gravity feed iron is the one with the plastic water bottle you suspend from above to feed water into to iron that heats it and converts it to steam. I’ve worked places that had nice custom wood ironing tables complete with a wood arm/pole on one corner to hang the water bottle from but an IV stand works just as well.

Reliable

Reliable makes a system of steam irons and ironing boards with reservoirs and poles attached that I’ve heard are very good though I’ve never used them.

Gravity feed irons are heavier than other irons and made from actual metal. And they produce lots of steam. (I’m a big fan of steam).

Goldstar

makes an excellent, very reasonably priced, and durable iron. The thing about industrial irons is that they don’t have that annoying automatic shut off feature and are made to remain on for a full day. They tend to last for a long time (like 20-30 years) though you may have to replace the water tube that extends from the bottle to the iron (a $5.00 or so repair).

Pacific also makes a nice model.

The first professional shop I ever worked in had two gravity feed steam irons and, to this day, they are still my favorite iron.

The first professional shop I ever worked in had two gravity feed steam irons and, to this day, they are still my favorite iron.

Gravity feed irons usually come with blue de-mineralizing crystals that you put in the bottom of the water bottle. You can forgo the crystals though and simply use distilled water. I wouldn’t necessarily recommend using tap water but I will say that I’ve been putting New York City tap water through my industrial irons for years without issue.

The crystals, on the other hand, have been known to occasionally work themselves into the water feed tube and cause havoc. Just saying.

So what if you want a good steam iron but don’t have room, or the means, to hang a water bottle? The prevailing iron of choice on most wardrobe trucks I’ve worked on is the Rowenta Professional Steam iron.

It provides a strong burst of steam without the assistance of gravity: the iron rest and water reservoir are all in one. It does, though, have the automatic shut off feature which can be annoying when you have an ironing emergency (don’t laugh, it happens!) and you run to the iron only to find it cold as ice.

The Rowenta is also self-cleaning and flushes minerals and the like out so you can use tap water without thinking twice.

The Rowenta is a fairly durable iron but they do wear out if you use them ten hours a day every day for months and months on end. We may have killed about four of them the first season of Boardwalk Empire until we finally bought gravity feed ones.

As for portable, domestic irons, I have an old Rowenta of some kind that I dropped once and inadvertently broke the automatic shut off. It’s the one I drag along with me if I’m just doing a short one or two day job.

What’s your favorite iron?

Costume Shops I Have Known

Costume Shops I Have Known

I’ve worked in a variety of costume and tailor shops over the past twenty-five years – some of them very permanent spaces, others makeshift and temporary. Some of them have been hellholes, some of them heavenly, and most of them somewhere in between.

One of the worst “shops” I’ve worked in actually happened this past summer. I was working on a new period Netflix show that was going to be filming for a few weeks in Savannah, GA. Now, Savannah itself is a very lovely city with a beautiful historical district, a properly chilling Ghost Tour and interesting & welcoming people. Sadly though, the space that I was told was mine to work in was an inner room of a sprawling low industrial type building. There were no windows, the air conditioning vents in the room didn’t work (think Georgia summer humidity), and none of the overhead lighting was functional. The room was essentially a hallway, providing the only path between the front and back of the building.

You Can’t Touch This

Long ago, in Houston, TX, I worked on a VH1 movie about MC Hammer (Yes, we made many pairs of Hammer pants). The Costume Shop was housed in a vault (as in a bank vault). We had so many lights rigged up in the space that I was sure one day we were going to start an electrical fire. That never happened but Tropical Storm Allison did. The Friday when the storm began, we were doing iron on letter transfers on t-shirts and sweatshirts – the kind where you peel off the backs and then stick the letters to the fabric. The Monday after the storm we opened the vault door to find about a foot of water and all the letter backs floating around like some giant pot of alphabet soup.

I spent most of my twenties at The Alley Theatre in Houston, TX. The original Costume Shop there was deep in the basement. As far as underground shops went, it was actually a very nice one with adequate lighting, three huge cutting tables, and lots of floor space. Sadly, that shop didn’t fare so well during Allison as the entire basement floors of the Alley filled with water when some underground bayou retaining walls broke.

All Washed Up

The only real ‘good’ thing about Tropical Storm Allison is that it hit late on a Friday night so most of downtown Houston was empty of people. The Alley was dark that night (meaning no show was scheduled). A few of the actors had been out and decided to stop in to The Alley on their way home. They were the first to discover that something had gone horribly awry in the underground tunnel system of Houston. Water was almost to the top of the steps and ramps that led down to the tunnel and shops. They immediately called the Production Manager who was sound asleep and had no idea yet what was going on. Her response, which since then has been immortalized in a very exclusive, limited run t-shirt, was, “Just put some towels down.”

It took a few years but, after the storm, The Alley built one of the best Costume Shops I’ve seen in my life. My friend Alice, who ran the shop for many years, called it “The Costume Shop in The Sky.” The shop (along with the rest of production) is up on one of the two top floors of the parking garage attached the theatre. There are huge windows and tons of space. It is truly a spectacular thing.

Another exemplary shop is the one at Troublemaker Studios (Robert Rodriguez’s studio) in Austin, TX. Again, it has large windows all along one wall. The windows are especially cool because they are the kind that, although the people inside can see out, folks outside can’t see in (perfect spy conditions).

Boardwalk Empire Refugee Camp

The Boardwalk Empire Shop was in a quanset hut – one of those dome shaped metal buildings – and essentially (no matter how hard we tried) always looked like a refugee camp. It was in the back of the ‘hut’ near a big rolling metal garage door. In an effort to provide sunlight and some sort of energy efficiency, the set construction guys made us wooden frames stretched with plexiglass that we set up in the doorway. We’d raise the rolling garage door to just above our “windows”. I saw lots of beautiful sunsets over the East River from those rickety plexiglass windows.

Brooklyn Blindspot

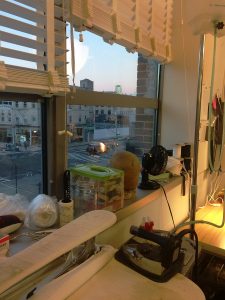
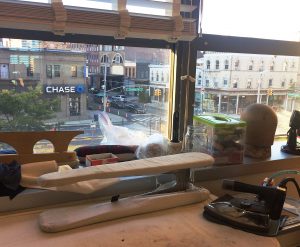
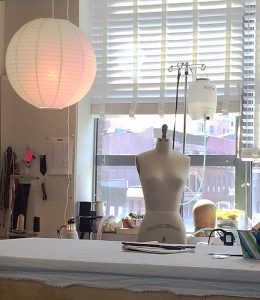
One of my favorite shops is the one I have now at Blindspot, mainly because of the big windows that look out over a busy Brooklyn intersection. For me, natural light and windows are one of the key things that make a good shop. If I have that, I can usually make the space work. The second thing would be proper electricity/power. I like to be able to plug all the things in at the same time without blowing a breaker.

What is the one essential thing for your dream shop?

The Zen of Making

The Zen of Making

I’ve been a professional tailor and pattern maker for twenty-five years. Some days I love my job. Some days I hate it. Some days everything goes together without mishap. Other days needles break, threads knot, seams bunch, the sewing machine makes crazy bobbin art for no reason, and garments with alteration tags that read, “drop a lining in” hang on the to-do rack. (please see ‘drop a lining’ rant at the end of this post). All of these things sometimes make me forget that I actually really do like to sew, to make things, to create from a pile of fabric a new complete garment.

The hard part about ending up in a career that involves doing something you love is that, every once awhile, you end up hating the very thing that you know you love.

Which is a shame. Thankfully, I always get over it. Sometimes the getting over it as easy as finishing an annoying project and moving on to something new. Occasionally, I need to have a little talk with myself, take a deep breath, and slow down (even if there are three people asking me when I’m going to be done.) I have to block out outside distractions and focus fully on what I am doing. That is when the ‘flow’ happens.

…my alterations motto is: leave no trace.

Currently I’m working on a show that, though it involves endless multiples (lots of stunts so actors usually need four to five of the same outfit plus one for their stunt double), never really sends me to the “I hate sewing” place of darkness.

One of the characters, new to this season, wears high-end clothing that usually requires quite a bit of alteration. I love taking apart a designer dress and figuring out the best way to alter it without anyone being the wiser. As in hiking, my alterations motto is: leave no trace. I can get happily lost in such a project.

Go with the Flow

The same goes for when I’m patterning or building something from scratch. I find that I’m in the flow of making. I forget about everything else going on and just concentrate on the thing I am doing.

Psychologist Mihaly Csikszentmihalyi says that Flow is the secret to happiness — a statement he supports with decades of research. During a 2004 TED talk, he said “When we are involved in (creativity), we feel that we are living more fully than during the rest of life. You forget yourself.”

A study titled, The Neurological Basis of Occupation, found that music, drawing, meditation, reading, arts and crafts, can stimulate the neurogical system and enhance health and well-being. And this study concluded that computer activities; craft activities, quilting, playing games; and reading books were associated with decreased odds of having MCI (mild cognitive impairment).

What this all adds up to is probably what most of us who sew and create already know: making things is good for your psyche and your soul (and your memory!). However you do it, wherever you find your flow is important and necessary to your well being, to you being you.

Drop a Lining In Rant

“Just drop a lining in,” they said, “It’ll be easy. No big deal. Shouldn’t take you that long.”

Anyone who tells you this really doesn’t know much about sewing or patterning. “Dropping a lining in,” is no easy task and certainly not as simple as dropping, well, anything. Unless your garment is a true honest to god couple of rectangles sewn together (and believe me it very likely is not) there isn’t anything ‘just’ about it. To line a jacket, or skirt, or dress, or anything, you really need to make a pattern and it’s going to take more than a couple hours to do it correctly. On Boardwalk Empire, we would regularly end up with vintage dresses literally hanging on by thread with the note, “Drop a lining in!” attached. None of us wanted to do them. We’d shuffle them to the end of the rack until we couldn’t put it off any longer and finally someone would say, “Ok, ok, fine, I’ll do this one if you’ll do that one.”

A Few of My Favorite Things

A Few of My Favorite Things

I’m a bit of a dorky geek when it comes to sewing and pattern making (I’m actually probably a dorky geek when it comes to a lot of things). Here are a few of my favorite sewing related things.

The Double Needle

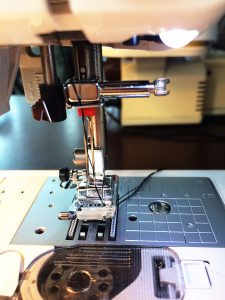
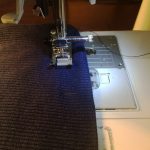
Twin needle in machine.

Twin needle in machine.

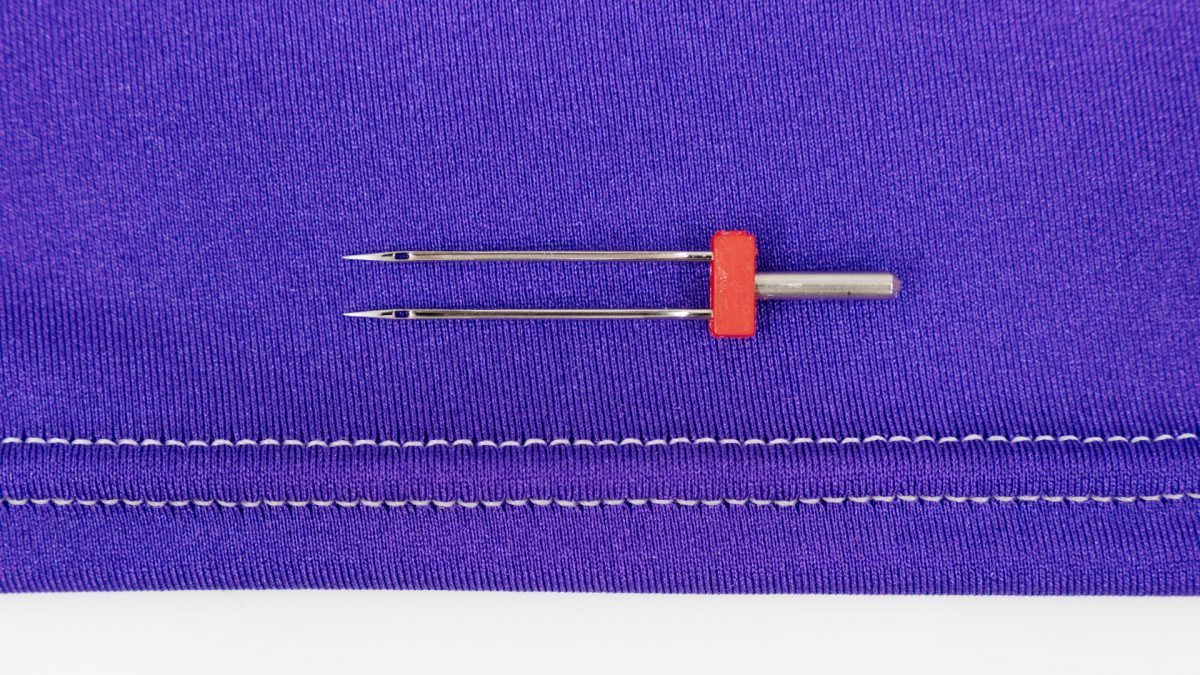
One of my favorite sewing related things is the Zwillings Nadel – or, if you prefer, the double needle. (Zwillings nadel is German for double needle.) A double needle is the perfect solution to hemming anything knit (or with any amount of stretch) if you don’t happen to own a machine that can do a cover stitch. I use them all the time to hem t-shirts, ribbed knit shirts, sweatshirts, sweaters, even jeans with an excessive amount of spandex.

Zwillings Nadel.

Zwillings Nadel.

Any domestic machine can use a double needle. How they work is with two top threads and one bottom thread. This creates a zig-zag in the bottom thread that allows for stretch. I often use a double needle and a stretch stitch at the same time. I find the stretch stitch produces a result with minimal puckering.
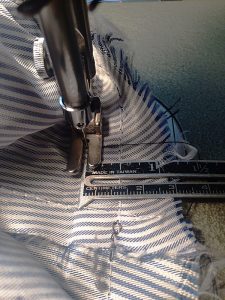
My trick for hemming most anything, but especially things that require a double needle, is to cut after I sew.

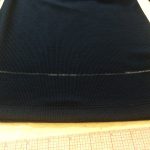
First, mark a nice clear line for your hem on the right side of your garment using wax or some kind of marking pen that will disappear when heat is applied. Press the hem along the line you have marked. Do not trim any excess away. Next, using a double needle, stitch up an inch from your pressed line, or whatever is your desired hem depth. Once you have sewn, trim the excess fabric away. Try to trim as close to your zig zag bobbin line as you can. The ziz zag will keep anything from raveling and fraying if that is a concern though many tightly knit fabrics won’t really fray (Sweaters and some loosely woven ribbed t-shirt knit will of course). I press the hem at this point as well to get rid of any puckering. If the hem is still a bit wavy, try spritzing with water and pressing dry with a press cloth.
Zwillings Nadels

come in varying widths, meaning the two needles can be further or closer together. I keep a variety of widths around. They are also sized like regular needles, 12/80, 14/90, etc.

Bias Tape Makers

Bias tape makers are one of the most brilliant inventions in ‘modern’ sewing. If you don’t own any, buy a set now. They are these cool little devices that you feed a strip of fabric into on one end and get a beautifully uniformly pressed bias tape out the other end. They come in varying sizes – ¼” ½” 3/8”, and on. I use bias to bind necklines and armholes. Pretty much every single slip we made on Boardwalk Empire has a bias bond neck and armhole.

Loop Turner

Ever tried to turn a very thin spaghetti strap? It can seem virtually impossible. Unless, you have this really cool thin metal rod with a hook on one end. Insert the loop turner all the way through your strap and hook the little crochet hook into the seam allowance at the very end of your strap. Then pull gently from the other side, turning the strap inside itself. Once you are able to pull the hook through the other end, you can hand turn the remaining part of the strap.

Wooden Dowel

A simple, 1/8” or ¼” round wooden dowel is very useful for pressing belts, straps, and ties that you are bagging out. Put the dowel inside your strap or tie before you have flipped it so you can press open your seam allowances from the wrong side. This will give you much nicer and crisper finished edge when you turn them right side out.

These simple, inexpensive tools will not only help you achieve cleaner more professional looking results, but will also (I think, anyway) make your sewing life a little easier.

Do you have a simple, favorite tool you think others would benefit from knowing about? Write about in the comments section.

What I Do at Work All Day (Part 2)

What I Do at Work All Day (Part 2)

(As promised) The Dart and Drop

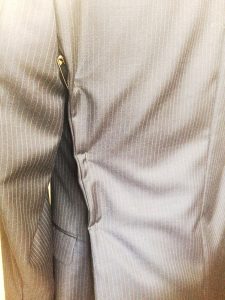
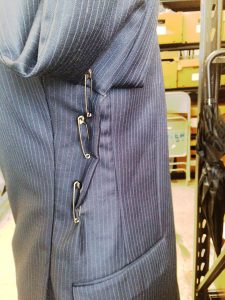
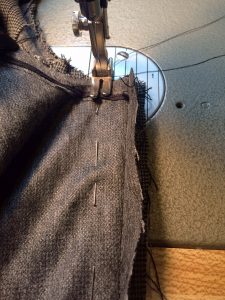
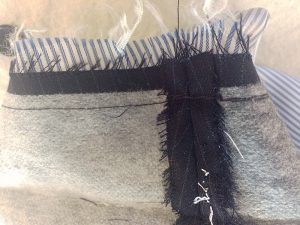
Pinned side back seam.

Pinned side back seam.

I do a lot of suit alterations. Sometimes I alter up to eight suits in a single day.

Often, suit jackets fit well in the shoulders but are a bit too roomy in the body. Because of the inner canvas and the inevitable front pocket, you can’t really successfully alter the front of a suit jacket. You need to take in at the center back or side back seams. While pinning, you’ll usually notice that you need to take in the side back seam all the way into the armseye.

This presents the conundrum of:

  1. Should I also take in the sleeve so it will still fit?
  2. Do I need to get into that seam at all?
  3. Do I really need to take the sleeve out?

The answers are no, yes and yes. Do not take in the sleeve. Do take the bottom part of the sleeve out.

Men’s suit jackets are traditionally cut without an actual side seam. The place where you really want/need to take a jacket in, though, is often in that invisible side seam. The way to accomplish this is by using the dart and drop method.

The Dart

Dart pinned into side seam.

Dart pinned into side seam.

Take the lining out and the underarm sleeve apart from the side back seam to a few inches in the front of the side seam. There should be a notch in the jacket to indicate where the side seam would be if there were one. If no notch is present, lay the jacket flat on a table, buttoned up. Where the jacket naturally folds will indicate basically where that side seam is. Mark with chalk on the wrong side of the fabric in the coat body and in the sleeve.

Next, from the wrong side of the fabric, fold on the notch. At the top, measure in the amount you need to take in (as you determined by pinning your side back seam). Then draw a dart from that point down about 3 or 4 inches (or until you run into the top of the pocket). Sew the dart. You can put the same dart in the lining or you can simply do a tuck. Either is fine.

The Drop

The next step is to redraw your underarm seam. The armseye should remain the same size as it originally was. To do this, drop the underarm seam. I suspect there may be some actual formula for this but I’m more of an intuitive sewer. Dropping an inch is usually a good place to start. Use a curved ruler

to draw the new line making sure the connections are smooth. Pin your sleeve at your new side seam an inch below the original seam line. Then pin the rest. You might have to undo more of the original seam if the sleeve isn’t fitting. Do this in the back until you can easily fit the sleeve back in without any excessive easing.

Don’t Worry

Pinned underarm seam.

Pinned underarm seam.

If you end up having to undo part of the shoulder pad and sleeve header, that’s fine. Just reattach them once you have put your sleeve back in.

You can apply the same principle to jackets (or really anything) that have side seams. Unless you want to narrow the sleeve, dropping the armseye is a more accurate way to accomplish this alteration.

At this point I also want to add a little something about the idea of ‘a right way’ to do something. I don’t believe there is only one right way to do things.

Sewing jacket with side seam.

Sewing jacket with side seam.

I ran the costume building shop for Boardwalk Empire for four years. It was a shop full of talented tailors from all sorts of backgrounds and places (Russia, Uzbekistan, Turkey, Tunisia & various U.S. states). We had a running joke about people who insist that their way of doing things is the only way (We even had a little song called, “There’s only one right way to do things. The other ways are wrong…”).

Walk Your Own Path

You need to figure out the way of doing things that works best for you while accomplishing the desired result. Sometimes someone can show you a whole new way of doing something that makes it easier for you. Sometimes not.

The tips and tricks I write about are the things I’ve learned work best for me over the years. Hopefully they will prove to be useful to someone else as well.

Missed Part 1? Check it out here!

What I Do At Work All Day (Part 2)

What I Do At Work All Day (Part 1)

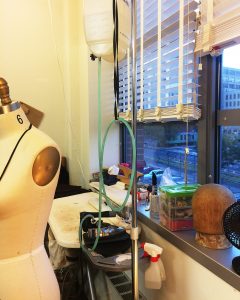
Just a view of my shop.

Just a view of my shop.

I’m currently the Key Tailor on a New York City based major network crime-procedural drama television show (Blindspot on NBC). I work mainly out of one of the Brooklyn studios with occasional on-set last minute fittings. Most of the work I do each day is for things that need to be ready for the actors to wear the next day on camera. What this means is that, over the years, I’ve become pretty fast at doing a variety of alterations (as well as patterning and constructing from thin air). In my industry, there are certainly a lot of excellent tailors but there aren’t all that many excellent and fast tailors. Here are a few of the tricks I’ve discovered along tQuhe way that help speed up some common alterations.

Shortening the Sleeves of a Men’s Suit Jacket (without fancy functioning buttonholes)

Topstitching on sleeve lining.

Topstitching on sleeve lining.

First, just go ahead and remove all the buttons. They’ll just be in your way. Turn the sleeve inside out and find the topstitching along the sleeve-lining seam. This is how the sleeve was originally put together. Open up that seam and turn your sleeve inside out. Take apart the mitered and straight corners but do not undo the lining from the rest of the hem. (Go ahead and release any stitching holding the actual hem up though.) Undo any fake buttonhole stitching that you need to. These should be on a chain stitch and easy to undo.

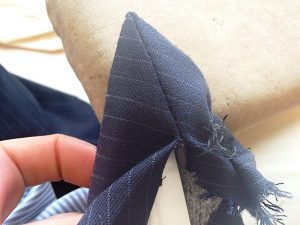
Press miter corner with point turner inside out.

Press miter corner with point turner inside out.

Measure up or down the distance you want to shorten or lengthen at your corners and redraw your miter line if you need it.

Re-stitch all corners at new hem marks. I flip everything back right side out at this time and press my corners and the new hemline. Use a handy point turner

Don’t undo original stitching at hem.

Don’t undo original stitching at hem.

and please don’t trim anything away from the mitered corner. If you press inside out first with the point turner inserted the fabric will go where it needs to. No need for trimming. One of the most annoying things is to go and alter a jacket sleeve only to find that someone has trimmed the miter corner, meaning I can’t lengthen the sleeve properly.

(Still don’t unattach the lining)

Redraw miter line.

Redraw miter line.

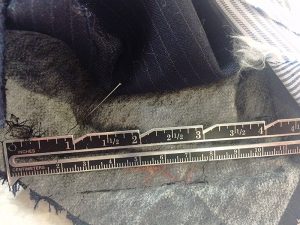
After pressing, turn inside out again. Then simply measure up or down (I use an old fashioned metal seam gauge) from the current stitching line the desired amount and sew along that line. If you are shortening, there is no need to undo the original stitching line. If you are lengthening, you will need to. Machine tack the seam allowances together at the seam to keep the hem up.

Sew new stitching line shortening hem.

Sew new stitching line shortening hem.

Turn everything back right side out and topstitch the seam of the sleeve lining closed, put your buttons back on and you’re done!

There are of course a few situations that will make this alteration a bit more challenging – such as functioning buttonholes or having to add fabric to the hem seam allowance because of lengthening. If I’m having a good day and nothing strange is going on inside the sleeve, I can usually do this alteration in 30 minutes.

Center Back or Side Back Alterations on a Suit Jacket

The time saving trick on this one is pretty simple. Open up the under vent seam and turn everything inside out through there. When done, just topstitch the vent closed again, no opening up the lining and sewing it back by hand.

Men’s Vest Alterations – Center Back or Side Seams

I’m a huge fan of bagging things out. Men’s vests are one of my favorite things because you can bag everything out through a mere 2 inches on one of the side seam linings. First, find the opening where the vest was bagged out originally, probably a small hand stitched couple inches on one of the inside side seams. If its not there (if the vest was bagged through the neck, make your own. Then pull the entire vest inside out through those two inches. It will fit.

Vest side seams are most usually put together with one stitching line through all 4 layers (fronts and backs with linings). On the side without the opening just stitch a new line taking in (or out, though most commercial vests don’t have a lot of seam allowance to let out) the desired amount. If the amount is significant, you may need to re-stitch the arms eye curve so that everything lines up properly under the arm.

If you need to take in the center back seams, undo at the neck and bottom hem, alter as desired, the re-sew what you released.

On the side with the opening, stitch in two sections, above and below the opening. In the 2 inch gap, sew through all layers except the back inside lining.

Pull everything back through your opening, press and voila!

I just topstitch my opening from the right side of the vest, hiding the stitches in the seam line.

Check out Part 2 here!

My next post will tell you about the one of the sneakier men’s suit alteration tricks – the old dart and drop! So keep a look out for the follow up and as always – keep sewing!

How Many Sewing Machines Do you Need?

How Many Sewing Machines Do you Need?

As a professional tailor and pattern maker in the film and television industry for about 25 years, I’m always on the lookout for a something that can make my job easier and more efficient.

As a professional tailor and pattern maker in the film and television industry for about 25 years, I’m always on the lookout for a something that can make my job easier and more efficient.

A subjective question, perhaps. In the cycling world, of which I am part, the number of bicycles is defined as x + 1 where x = the number of bikes you currently own. I suppose the same formula could be applied to sewing machine ownership. I’m continually fascinated by the scope and design of new machines and confess that, if I could, I would adopt one of virtually every machine I see.

As a professional tailor and pattern maker in the film and television industry for about 25 years, I’m always on the lookout for a something that can make my job easier and more efficient. I, as I suspect most tailors do, have a small collection of machines that I consider my “go-to’s”, that I can’t imagine doing my job without.

1. Juki High Speed Single Needle Straight Lockstitch Industrial Sewing Machine

I have an old model of this machine, the DDL-555-4. The beauty of this machine is that it only does one thing: sew in a straight line. And it does it exceptionally well. Even my old model is smoother and more sensitive than many domestic machines. Five layers of denim or a single layer of chiffon emerge from the presser foot with no complaint and straight, even, stitches. I rarely even have to adjust the tension. And the Juki is fast. The newer models have a speed adjustment on the motors so if you want to start out a little slower you can.


Check out the current models, the DDL-8700 and the DDL-5550N and go test drive one if you can. I think you’ll be able to tell right away that it’s a machine that will quickly pay for itself.

2. Brother lightweight Portable Machine

My SC9500, which is similar to the CS-5055, is the most incredible inexpensive machine I’ve come across in my twenty some years of sewing. Not only is it lightweight enough to put in a tote bag and carry on your shoulder but it also sews like a champ. I use it most often for its pre programmed buttonholes and stretch stitching. In my experience, a lot of domestic machines produce less than ideal buttonholes. The Brother never falters: each buttonhole is perfect and akin in quality to those in manufactured clothing (where they use a machine that does nothing but buttonholes).

3. Bernina

Everyone I know in the film business owns at least one Bernina.


Everyone I know in the film business owns at least one Bernina. For many, their Bernina is their prime machine, the one they use most often. I’ve yet to find a model, or hear of one, that doesn’t work well. I have an old mechanical model, which is still made in the form of a 1008. The advantages of a mechanical sewing machine lie in its durability and ease of use. I keep my old school Bernina mechanical on the wardrobe truck of whatever show I’m currently working on. I’ve had the same one for twenty years and its never ever failed me – despite years of being knocked around and asked to do impossible things like sewing through three layers of glued leather in an inordinate short amount of time.

4. Reliable Blind Hem Machine

A good blind hemmer that doesn’t snag or pull and is easily adjusted for varying fabric weights is essential to my tailoring work. The Reliable is just that, reliable. The setup is easy and the machine, though technically not a portable, does pack up nicely and can be transported to a work site.

5. Serger

There are so very many sergers to choose from. The first question to answer when choosing which one to buy is: what you will mainly be using the machine for? Do you need something to efficiently finish seams? Or will you be sewing entire garments with it? Do you want a machine that also does a cover stitch?

The automatic rolled hem feature is game changing.

My favorite is the Juki Garnet Line MO-623 1 needle 2/3 thread Serger. The machine is dependable, smooth, easy to thread, and fast. The automatic rolled hem feature is game changing. As opposed to many machines where you need to change the presser foot, with the Juki, you manipulate the fabric with built in fingertip control.

I Never Meant to Be a Tailor

I Never Meant to Be a Tailor

‘Tailor’ and ‘Pattern Maker’ never once made an appearance on my list of what I wanted to be when I grew up.

‘Tailor’ and ‘Pattern Maker’ never once made an appearance on my list of what I wanted to be when I grew up.

If someone had told me when I was young that I would end up making a career out of sewing, I would have told him or her they were being ridiculous. ‘Tailor’ and ‘Pattern Maker’ never once made an appearance on my list of what I wanted to be when I grew up. Not that any truly conventional careers were on my list – I wanted to be a professional musician, a flutist, or a writer, and maybe a fashion designer. I wanted to change the world, make it better. I wanted to be remembered.I come from a long line of talented seamstresses and tailors.

I come from a long line of talented seamstresses and tailors. My Mother, part of the Baby Boomer Generation, regularly made outfits for my brothers and me. When I visited my Nana, I slept in her sewing room next to the Singer machine in the brown wood cabinet. I don’t remember learning how to sew though I’m sure my Mother must have taught me. I just always could. Among numerous other projects, I made both my prom dresses in high school. Still, I didn’t consider sewing a marketable career skill.

I’m not even sure how it happened.

Sewing, and especially patterning, are now often, my escape from real life.

Sewing, and especially patterning, are now often, my escape from real life.

In college, I discovered the theatre and the costumes. I started working in the costume shop at Ohio University. Like most theatre costume shops everywhere, it was in the basement with only those small windows way up high on the walls that offered lovely views of feet passing by outside but little light. Then I got a paid summer internship helping two designers in Worcester, Massachusetts. The rest, as they say, is history, or my history at least. It’s all I’ve done workwise for the past 27 years.

The trick is knowing what to do when the fabric or garment or your machine throws you a curve ball.

The trick is knowing what to do when the fabric or garment or your machine throws you a curve ball.

Sewing, and especially patterning, are now often, my escape from real life. They are things that can be done fast or slow but never rushed. One of things I love most about building a garment, or even doing an alteration, is that it takes just as long as it takes. People hate that answer to the question, “How long will take you to x?” But that’s the neat thing about sewing: you just never know what might happen in the process.

The trick is knowing what to do when the fabric or garment or your machine throws you a curve ball.

To be happy in my life, I need both my hands and my mind to be busy. I need to make things. Flat patterning something I’ve never patterned before is my idea of a heavenly day at work. Looking at a picture of a dress in a magazine and working out how they made it do that, brings some of the best kind of joy. Figuring out a new technique that makes something I’ve done over and over easier and better calls for spontaneous furious dancing.

Sewing and tailoring and patterning are art forms, are skills that you can sustain you through life.

Sewing and tailoring and patterning are art forms, are skills that you can sustain you through life.

I think a lot can be learned with practice but I also believe that some people do just have an affinity for sewing and patterning. Some people speak the language of fabric. These are the people with callouses on their scissor fingers who know what an inch or a half inch or two inches looks like without measuring. These are the people who can look at a suit jacket and know exactly what alterations need to be done. My friend Anne and I often joke that we throw some pins in a thing just to make everyone else feel better. These are the people who find comfort in a plain old simple center back alteration and spend hours pouring over thread color charts. These are the people always looking for new ways to do and create things.

I worry that fewer and fewer young people are getting into tailoring and sewing. I think it’s a shame. Sewing and tailoring and patterning are art forms, are skills that you can sustain you through life. And the pride in creating something that you, or someone you love, or someone you don’t even know, can wear is simply priceless. I think it’s a pretty neat way to leave behind a bit of a legacy and be remembered

How Many Sewing Machines Do you Need?

How Many Sewing Machines Do you Need?

A subjective question, perhaps. In the cycling world, of which I am part, the number of bicycles is defined as x + 1 where x = the number of bikes you currently own. I suppose the same formula could be applied to sewing machine ownership. I’m continually fascinated by the scope and design of new machines and confess that, if I could, I would adopt one of virtually every machine I see.
Everyone I know in the film business owns at least one Bernina. For many, their Bernina is their prime machine, the one they use most often.

As a professional tailor and pattern maker in the film and television industry for about 25 years, I’m always on the lookout for a something that can make my job easier and more efficient. I, as I suspect most tailors do, have a small collection of machines that I consider my ‘go-to’s’, that I can’t imagine doing my job without.

1. Juki High Speed Single Needle Straight Lockstitch Industrial Sewing Machine

I have an old model of this machine, the DDL-555-4. The beauty of this machine is that it only does one thing: sew in a straight line. And it does it exceptionally well. Even my old model is smoother and more sensitive than many domestic machines. Five layers of denim or a single layer of chiffon emerge from the presser foot with no complaint and straight, even, stitches. I rarely even have to adjust the tension. And the Juki is fast. The newer models have a speed adjustment on the motors so if you want to start out a little slower you can.

Check out the current models, the DDL 8700 and the DDL 5550 N and go test drive one if you can. I think you’ll be able to tell right away that it’s a machine that will quickly pay for itself.

2. Brother lightweight Portable Machine

My SC 9500, which is similar to the CS-5055, is the most incredible inexpensive machine I’ve come across in my twenty some years of sewing. Not only is it lightweight enough to put in a tote bag and carry on your shoulder but it also sews like a champ. I use it most often for its pre programmed buttonholes and stretch stitching. In my experience, a lot of domestic machines produce less than ideal buttonholes. The Brother never falters: each buttonhole is perfect and akin in quality to those in manufactured clothing (where they use a machine that does nothing but buttonholes).

3. Bernina

Everyone I know in the film business owns at least one Bernina. For many, their Bernina is their prime machine, the one they use most often. I’ve yet to find a model, or hear of one, that doesn’t work well. I have an old mechanical model, which is still made in the form of a 1008. The advantages of a mechanical sewing machine lie in its durability and ease of use. I keep my old school Bernina mechanical on the wardrobe truck of whatever show I’m currently working on. I’ve had the same one for twenty years and its never ever failed me – despite years of being knocked around and asked to do impossible things like sewing through three layers of glued leather in an inordinate short amount of time.

4. Reliable Blind Hem Machine

A good blind hemmer that doesn’t snag or pull and is easily adjusted for varying fabric weights is essential to my tailoring work. The Reliable is just that, reliable. The setup is easy and the machine, though technically not a portable, does pack up nicely and can be transported to a work site.

5. Serger

There are so very many sergers to choose from. The first question to answer when choosing which one to buy is: what you will mainly be using the machine for? Do you need something to efficiently finish seams? Or will you be sewing entire garments with it? Do you want a machine that also does a cover stitch?

My favorite is the Juki Garnet Line MO-623 1 needle 2/3 thread Serger. The machine is dependable, smooth, easy to thread, and fast. The automatic rolled hem feature is game changing. As opposed to many machines where you need to change the presser foot, with the Juki, you manipulate the fabric with built in fingertip control.