Sewing News LIVE – Angela Wolf talking with Joanne Banko

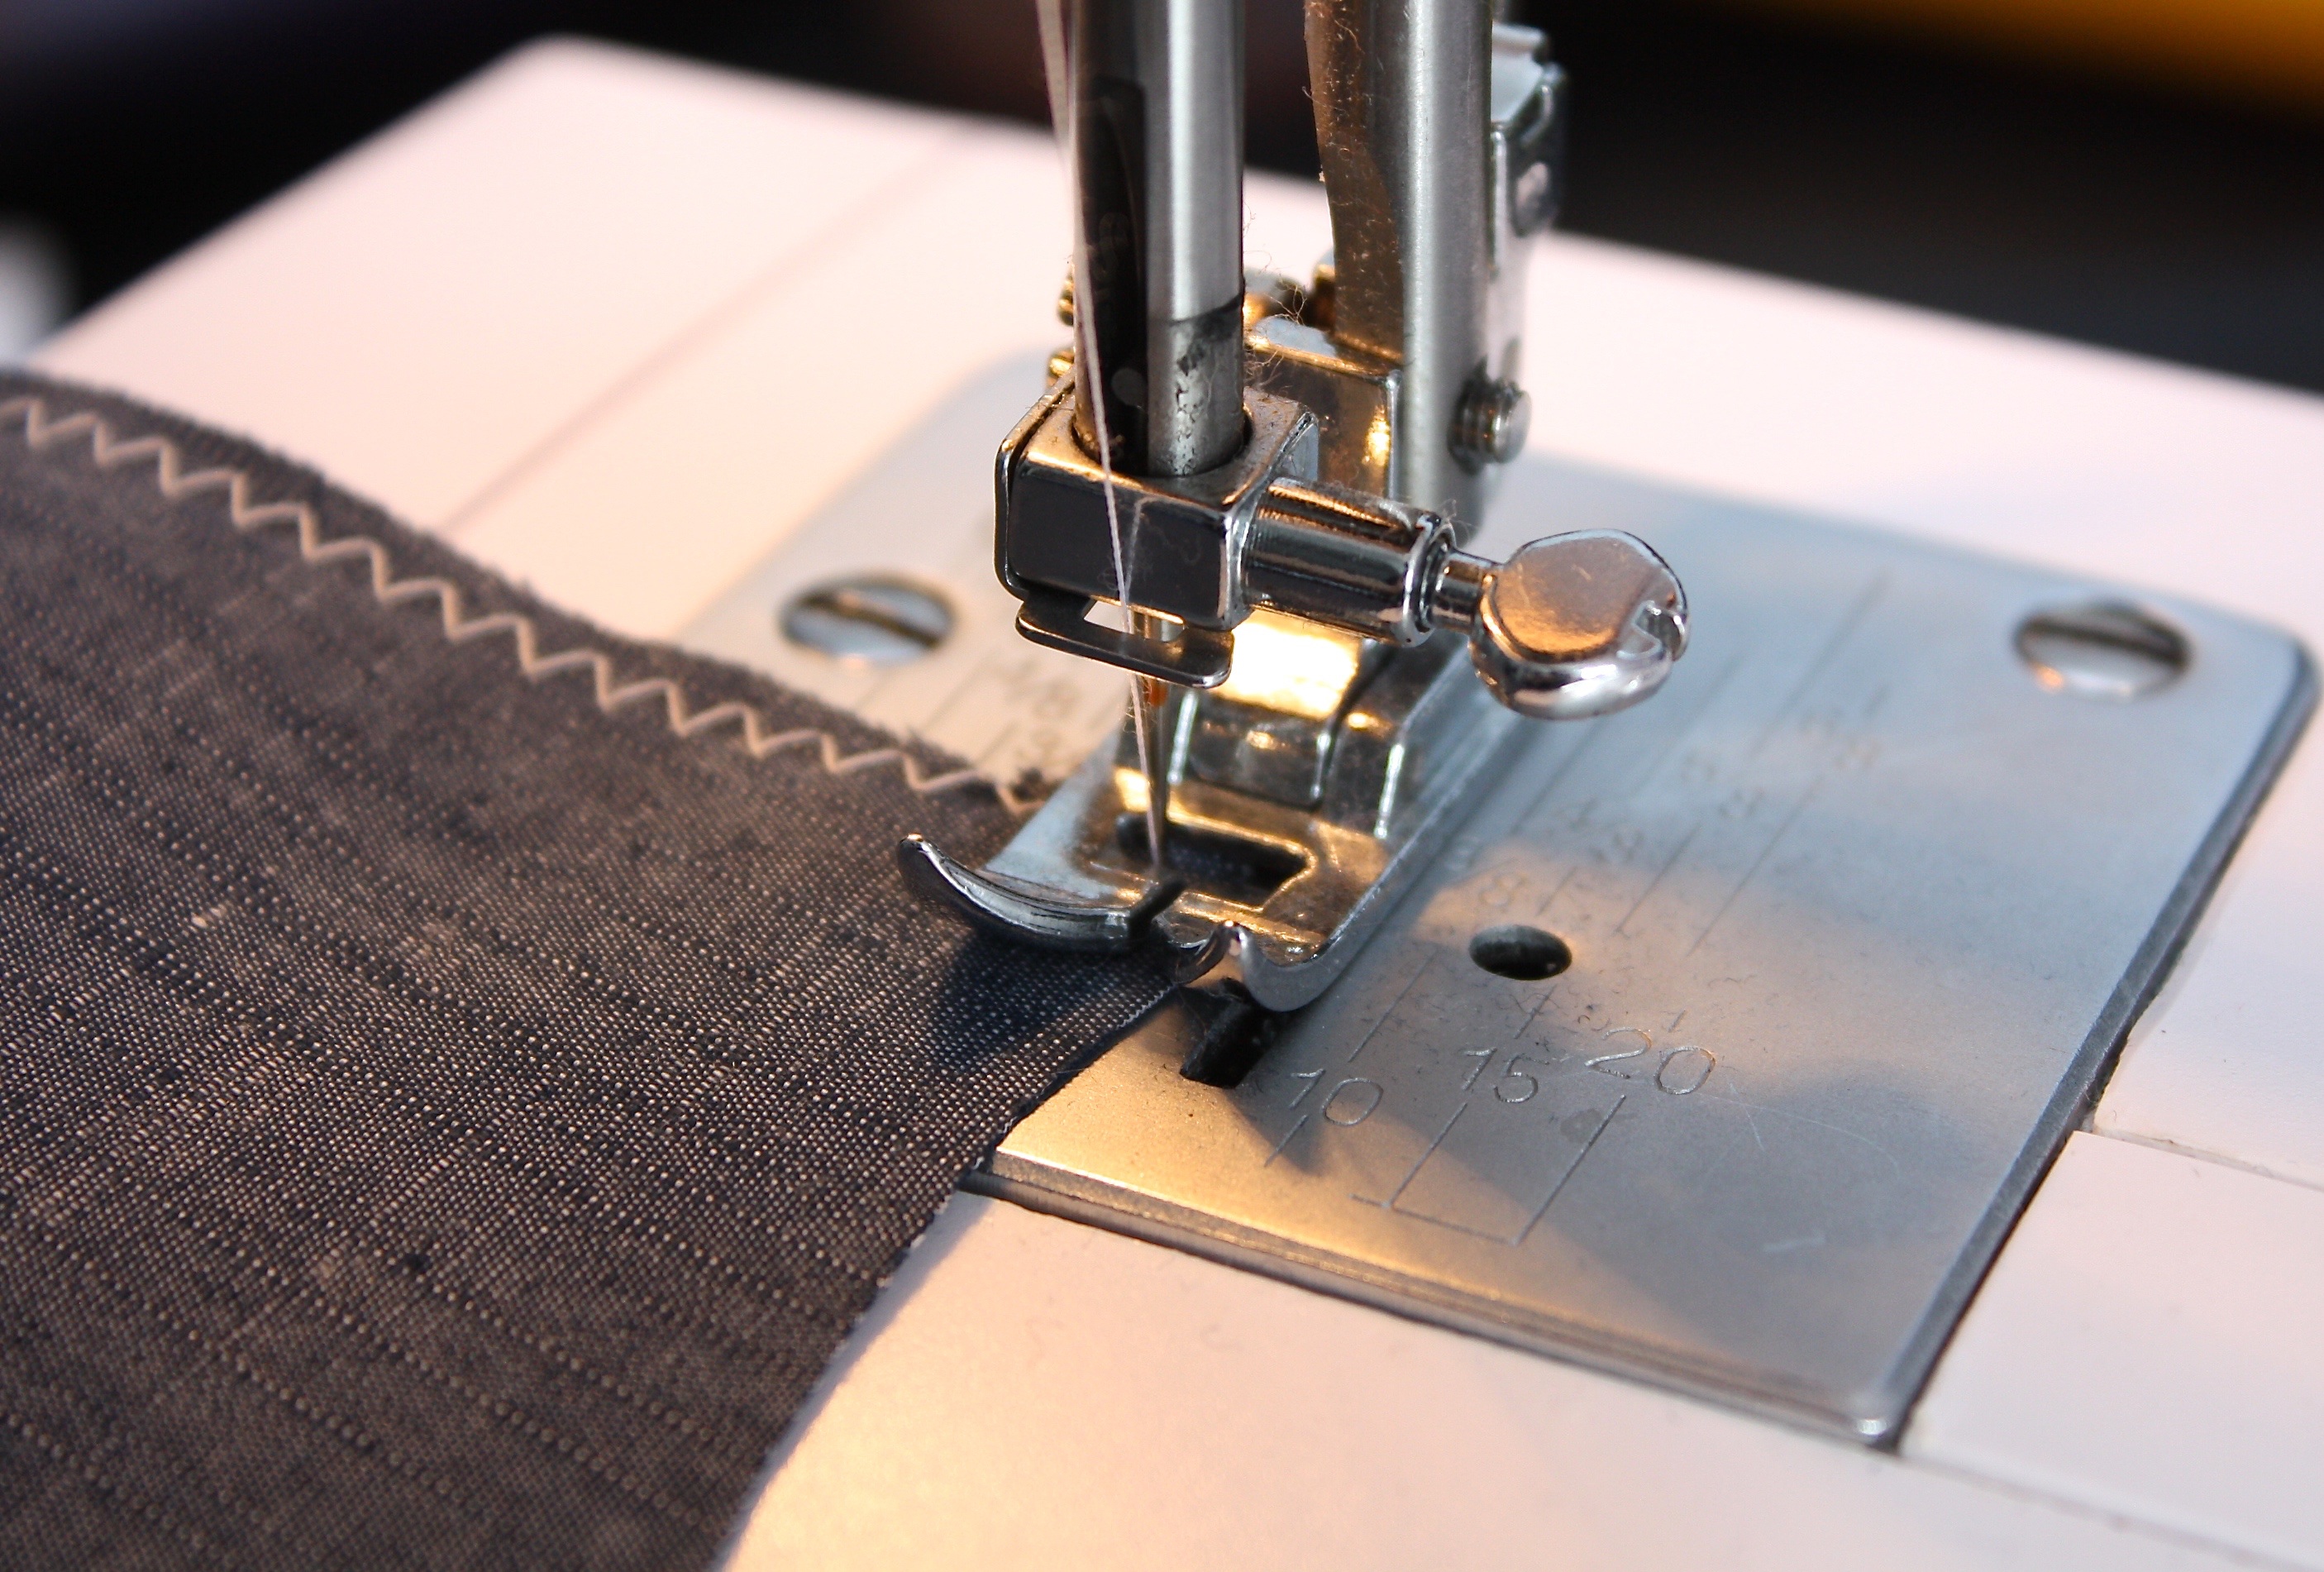
Sewing News LIVE 👗 Angela Wolf talking with Joanne Banko 👗She will share a couple of her favorite sewing machine feet, free project of the month, and It’s Sew Easy. Be sure to share this with your sewing friends and join us live 👗Sponsored by Brother Sews.

https://www.facebook.com/AngelaWolfCouture/videos/vb.146889375341519/212312786327513/?type=2&theater

After

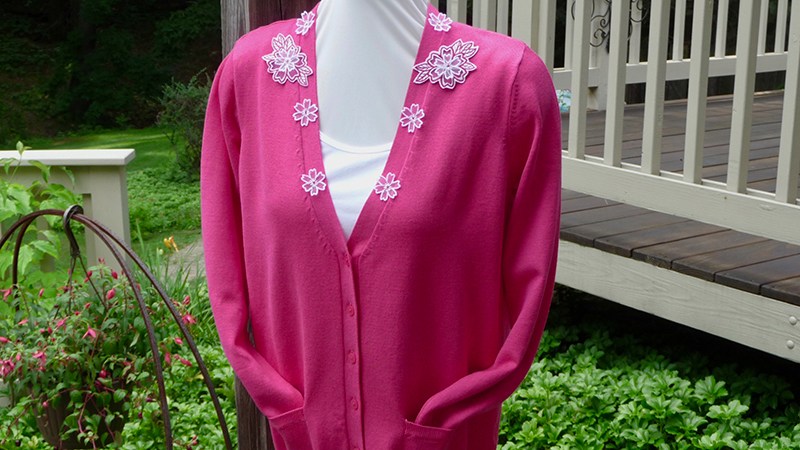
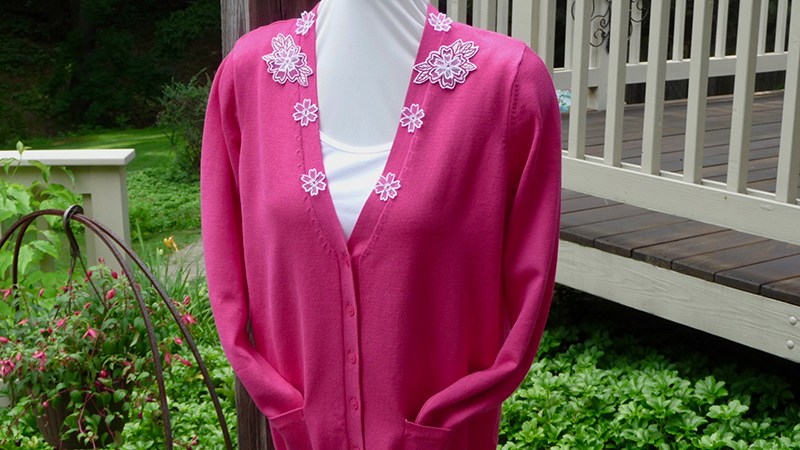
Embroidered Summer Sweater by Joanne Banko

jb_summer-sweater_feature

Getting dressed for summer often means sundresses and sleeveless garments like tank tops and camisoles. These are all quite comfortable in a warm setting but what happens when you enter the zone of chilly air conditioning? If you’re anything like me, you reach for a sweater! This sweater is designed to complement both casual and dressier garments. It’s trimmed with designs created as free-standing flowers easily tacked to the sweater with machine stitches. I chose this color scheme to wear with white, but you can shop for a sweater in any color you like and compliment it with contrasting or matching flowers to suit your own style. Freestanding flowers like these are a great way to make a plain sweater look extra pretty! Are you ready? Let’s go sew!

Materials and Supplies

  • Brother Sewing and Embroidery Machine with four-inch hoop. I used the Innov-ís NS1750D.
  • Brother Embroidery Thread in your choice of thread colors. Wind a bobbin to match each thread color you use for creating flowers, and for stitching them to your sweater.
  • SA540 Brother Pacesetter light weight water-soluble stabilizer. For each set of six flowers cut two pieces of stabilizer to fit hoop.
  • Closed Toe Clear View presser foot for sewing flowers to sweater.
  • Embroidery needle for embroidering.
  • Fine, sharp, curved tip scissors for trimming flowers.
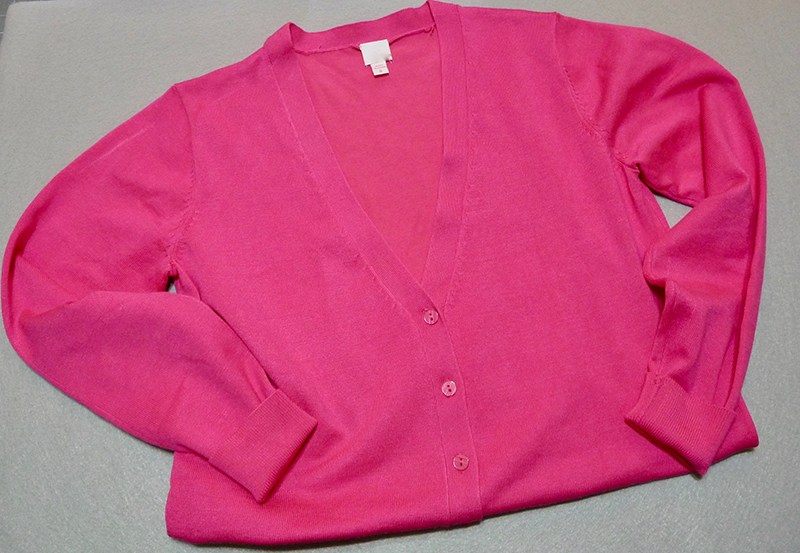
  • Pre-purchased V-neck sweater.

Materials for Flowers

  • Remnant of cotton or cotton polyester interlock knit fabric, backed with fusible lightweight interfacing to keep it from stretching. Cut this piece to fit your hoop
  • Netting, (also known as bridal tulle) in desired color for flowers. For each set of six small flowers cut two pieces of netting to fit hoop. For each set of two large flowers cut two pieces of netting to fit hoop.

Note: An 8-inch square of fabric is ample size for stitching in the 4-inch X 4-inch hoop.

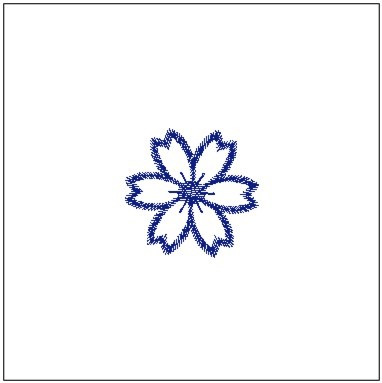
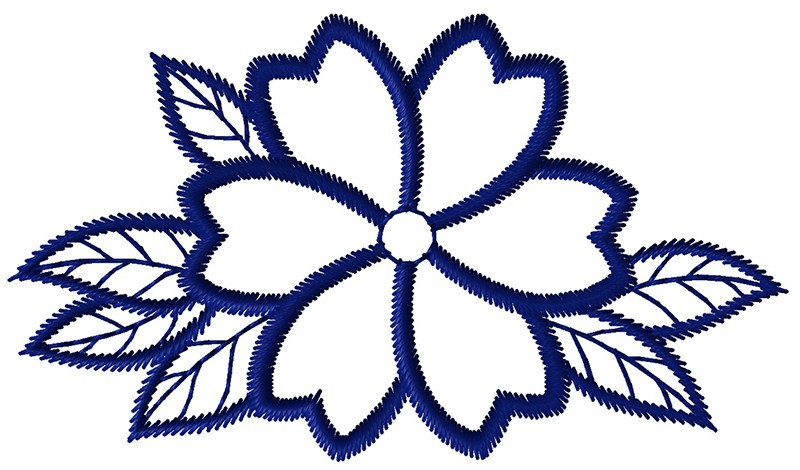
Featured Designs

Note: These two floral designs are delicate, making them ideal for lightweight accents on the sweater. Feel free to try similar floral designs if you have them in your repertoire. If you do choose alternative designs, be sure to test first to make sure they are suitable.
jb_Blog_Summer-Sweater_7_2018_iBroidery-Design-Pic
Note: Important information to read before you begin this project: Please take a look at the instructions for our Sandals with Machine Embroidery project featured for the month of July. You will follow the exact same process for stitching the little flowers for this project. Both floral designs used for this sweater will fit a 4-inch hoop. Supplies listed here allow you to create two large flowers from the knitted fabric, and six small flowers on netting, all in the 4-inch hoop. You will need two small flowers to layer with each large flower. I made lots of extra small flowers and played with different positions on the sweater before coming up with the final design layout. Cut as many pieces of fabric and netting as you need to decorate your sweater. White fabric and netting is featured in this example. I chose the embroidery thread color for the large flowers to match the sweater and then used white for all of the small flowers. Be sure top and bobbin thread match for all the flowers you create.

Steps to Create Flowers and Embellish Sweater

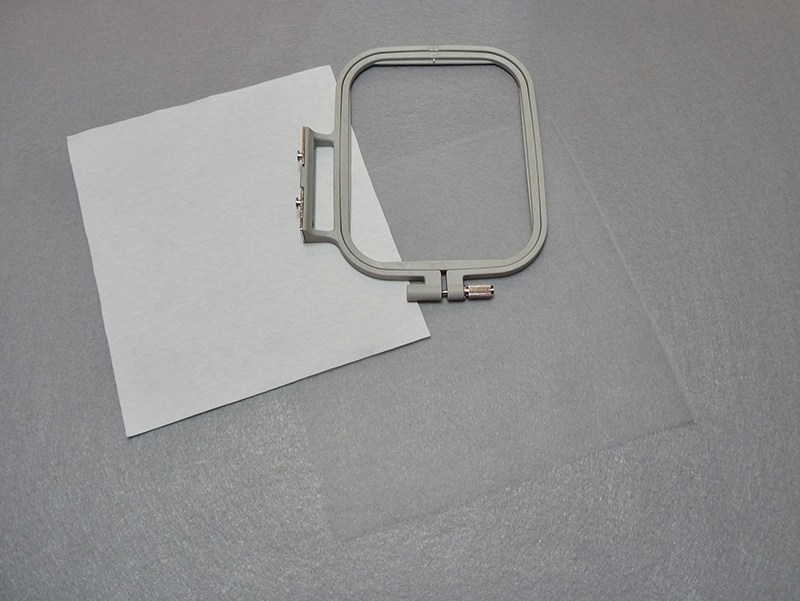
  1. Hoop two layers of netting sandwiched between the water-soluble stabilizer, with one layer of water soluble on top and one on the bottom. Transfer small flower design to machine and stitch enough flowers to decorate your sweater as desired. Set these aside temporarily.
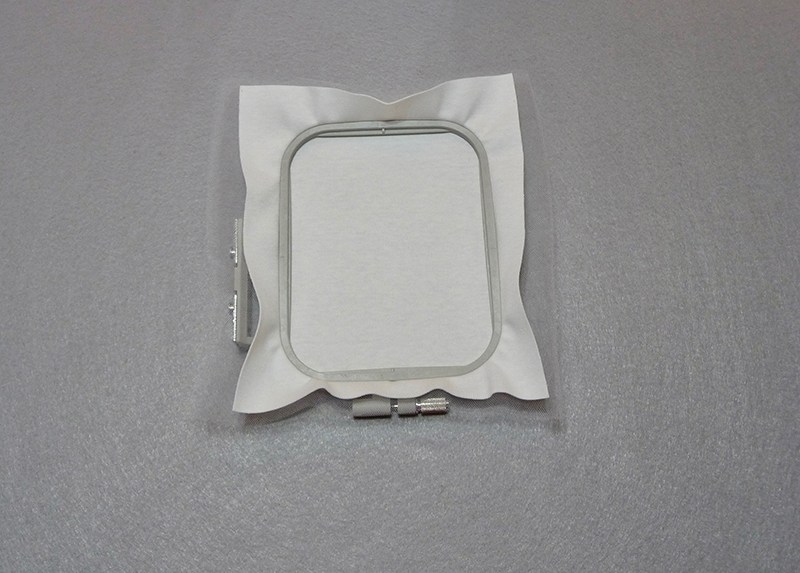
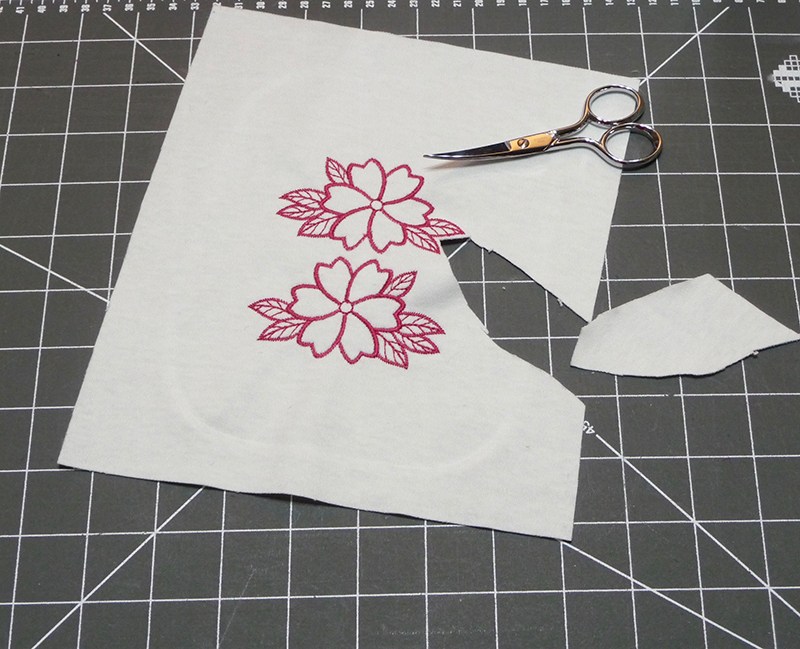
  2. Hoop knit fabric with two layers of netting against the wrong, (interfaced) side of fabric. See Figure #1a and Figure #1b.
    Figure #1a

    Figure #1a

    Figure #1b

    Figure #1b


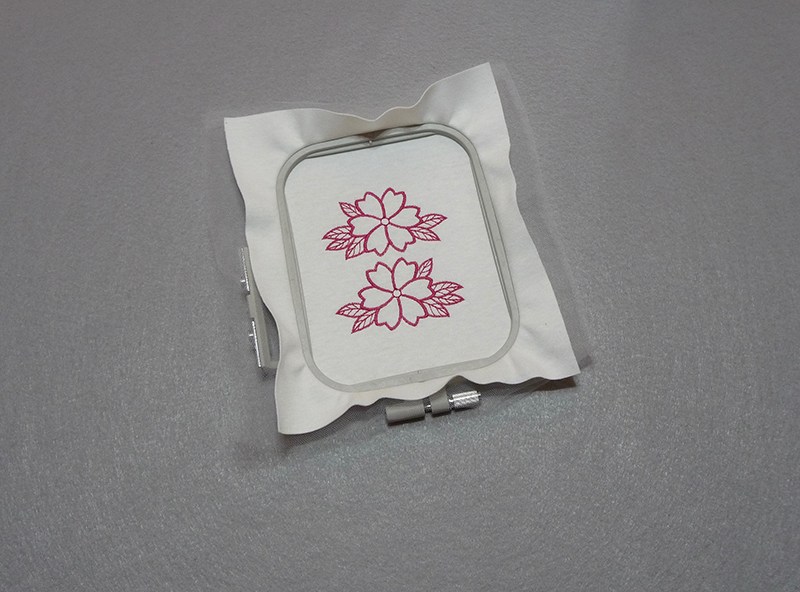
  3. Embroider two of the larger flower motifs, mirror imaging the second motif, so you have one right and one left flower. See Figure #2.
    Figure #2

    Figure #2


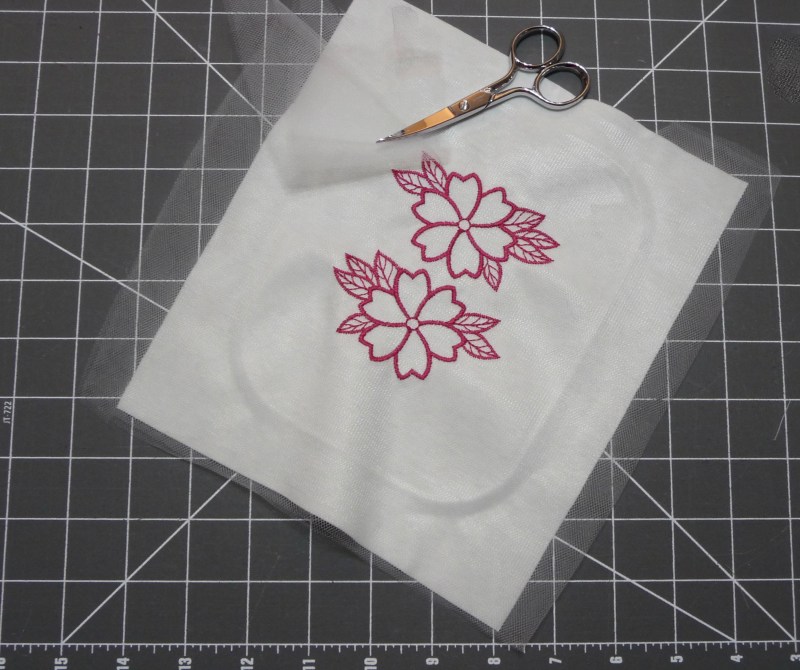
  4. Use small scissors to carefully cut outside stitching line of each small flower. Wash out stabilizer, let flowers dry, and press lightly with a low temp iron.
  5. To trim larger flowers, begin by trimming away excess netting all around outer edge of flowers on the wrong side. See Figure #3.
    Figure #3

    Figure #3

    Next, trim excess knit, leaving a small margin around each flower. See Figure #4.

    Figure #4

    Figure #4

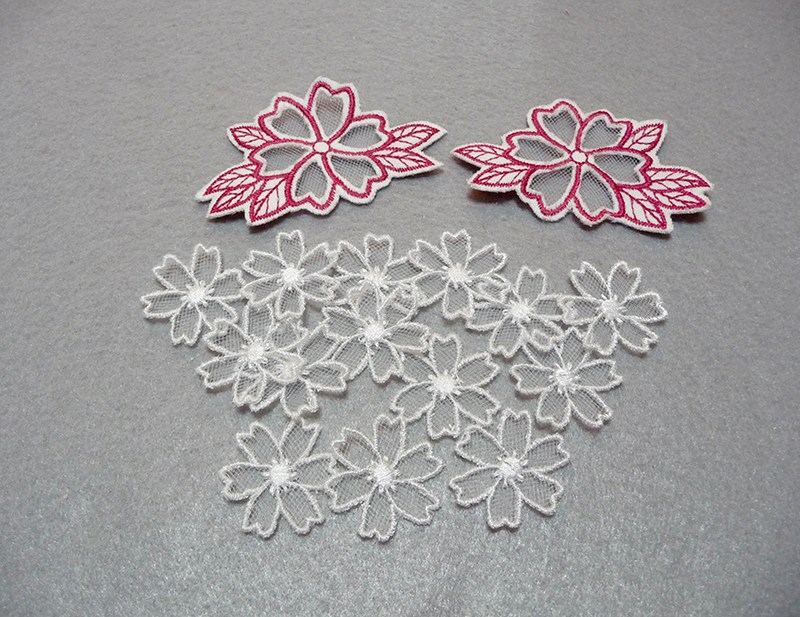
    As a final step, carefully trim the knit away from the inside of each flower petal as follows: Pinch the knit with your fingertips to pull it away from the netting, snip the knit only, and then continue to carefully cut away knit to expose netting underneath. See all completed flowers in Figure #5.

    Figure #5

    Figure #5


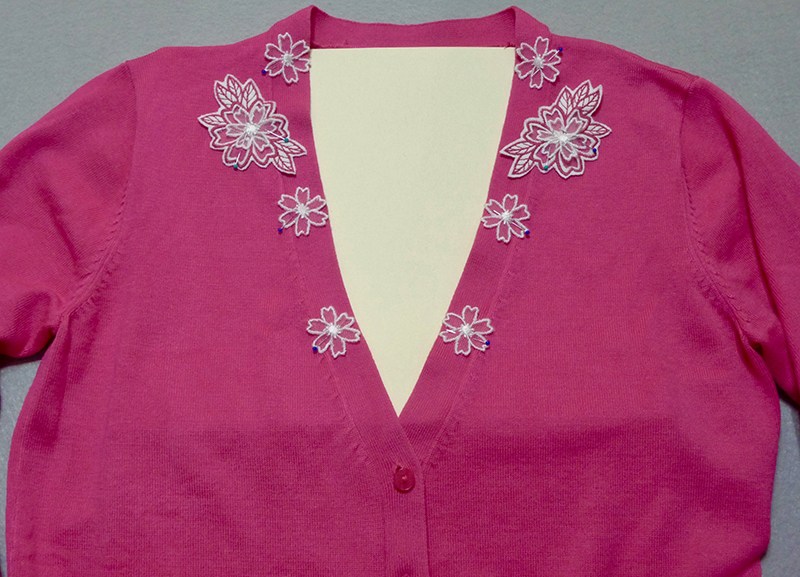
  6. Pin the flowers on your sweater, layering a small flower on top of each large flower and matching the position for the right and left by measuring for each one. Tip: Slip a piece of thin cardboard or a file folder between front and back of the sweater so you can easily pin without piercing both layers. See Figure #6.
    Figure #6

    Figure #6


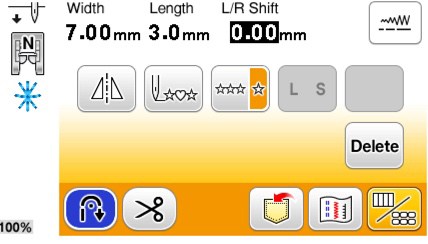
  7. Set up machine for sewing with the clear foot. Select a single star stitch using settings shown in Figure #7.
    Figure #7

    Figure #7


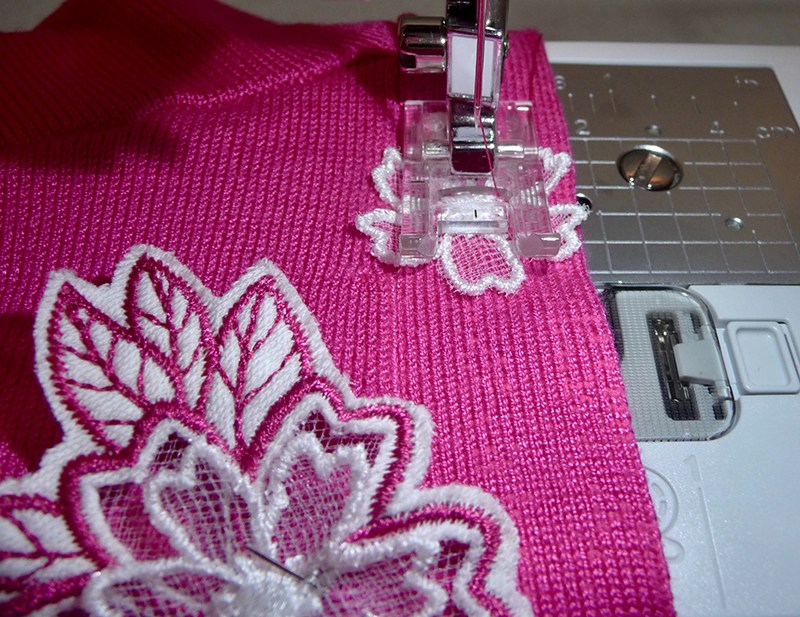
  8. Sew a star in the center of the small flower to attach each flower to the sweater, taking care to avoid sewing over pins. See Figure #8.
    Figure #8

    Figure #8


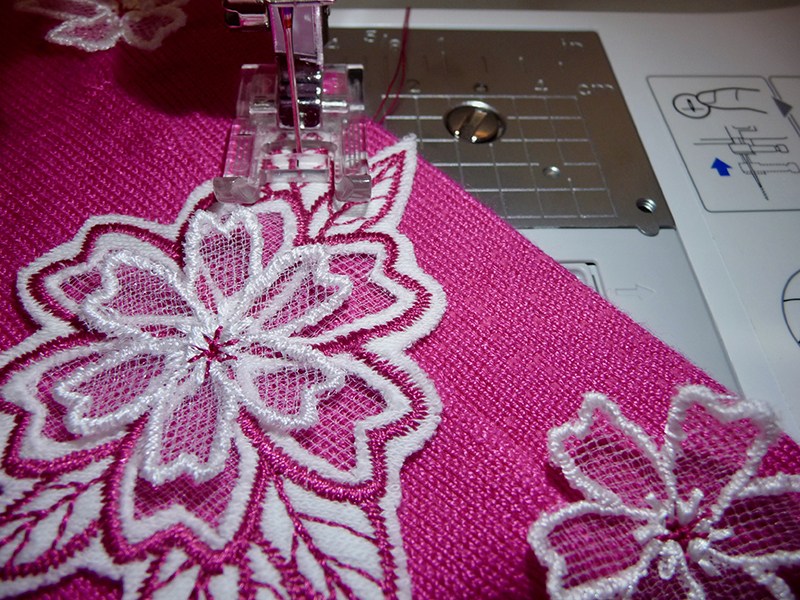
  9. Tack center of layered large flowers with start stitch and then tack down a few areas of the larger flowers by straight stitching along veins in the leaves. It’s fine to leave the majority of the large flower loose in the remaining sections. See Figure #9.
    Figure #9

    Figure #9


You are finished! Enjoy wearing your pretty new sweater this summer!

See photos of sweater before and after below:

Before

Before

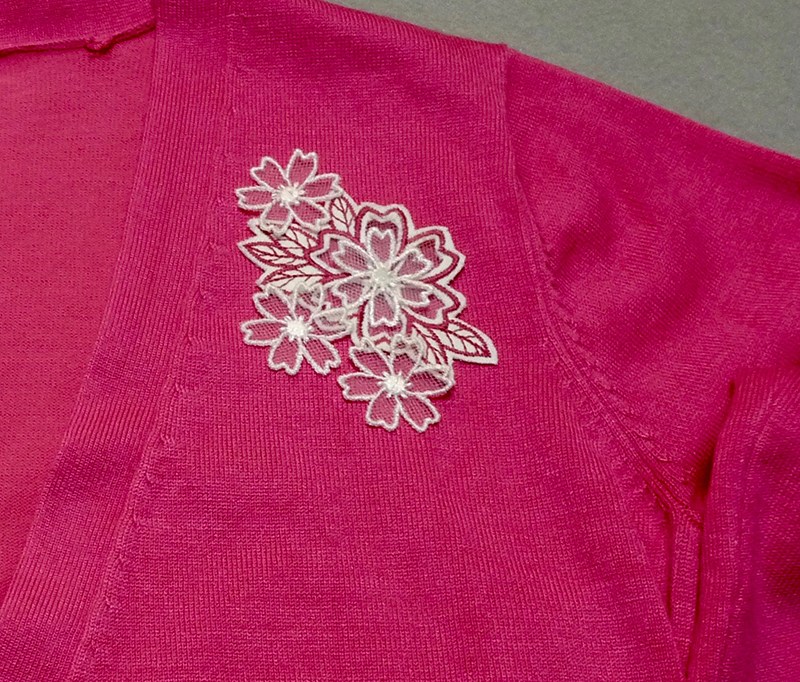
After

After

Options and Ideas

  • Netting is available in many different colors. Consider making flowers in a color close to your sweater fabric for a more subtle, tone-on-tone look.
  • Skip the netting on the larger flowers if you wish. Simply cut away the knit and when you apply flowers to the sweater, sweater fabric will show through.
  • Use the extra flowers on other projects when you need a three-dimensional accent. Don’t be surprised if you see my “leftovers” appear in a future project
  • Group one large flower with several small ones for a left chest decoration. See Figure #10.

    Figure #10

    Figure #10

Sew Blog Inspiration

Final Sew Blog Inspiration

The Sew Blog project at Sewing Machines Plus ends today!  I have really enjoyed sharing projects, ideas, and inspiration with you here, but now it is time for us to move on to new things. And so we will no longer post updates on this sew blog.
If you have been a loyal or an occasional reader here, thank you. If you are just now finding us, please read on! We’ve worked hard to pack this sew blog full of both easy and challenging projects, information, inspiration, and more. If you have a sewing question, we hope you will find the answer here.

Keep in touch

Follow Sewing Machines Plus on Facebook and on YouTube for info on what’s new at SMP.
For more from me, please join my email list at Sewing and Growing. There will be new posts there and I will also be releasing several bag and patchwork skirt patterns soon. These patterns will be available on Craftsy and some will be free.  Sign up for the newsletter at my sew blog to be notified as soon as these patterns are released, and for more sewing info and inspiration from me. I’ll look forward to seeing you there!
You can also follow me on Twitter and Pinterest.

margaret1

Printable patterns for my new projects will be at Craftsy soon

Final sew blog inspiration

I’d like to share a couple more fun and helpful ideas with you here before we go. These ideas are not my own, but I’ve been having a lot of fun playing with them lately, and one has been an absolute revolution in scrap management for me; I hope you’ll love these ideas as much as I do.

A scrap-busting revolution

Scrap management is always an issue for sewists and quilters. How do you manage yours?
I have to admit that I have tried many different ways, but mostly I end up stuffing scraps in boxes, bins,  baskets, or bags, and then dumping these out to pick through when I want to use them. This is messy for sure!
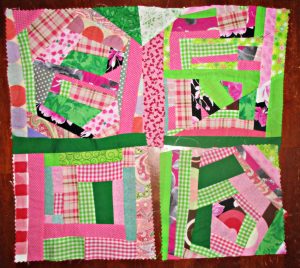
Recently I came across this post on Victoria Findlay Wolfe’s sew blog and tried her idea for “made fabric.” I fell in love with the idea, and now, instead of gathering my scraps from the floor and stuffing them somewhere, I sew them together at the end of the day and make patchwork fabric.

Sew Blog Inspiration

Start with your tiniest scraps and join them every which way.

I’ve been asked how this is different from crazy patchwork. Crazy patchwork uses a foundation fabric, and scraps are sewn down on top of this foundation. So, while crazy patch is a good way to use scraps, it is not “made fabric.” In this method of scrap busting, you sew the scraps to each other to make fabric. You don’t use any foundation behind them.

15 Minutes of Play

Victoria wrote a book, 15 Minutes of Play, which gives lots more inspiration for using her made fabric idea. This book has been on my wish list for a while now, but her sew blog also provides plenty of ways to work with made fabric. I find that it’s so much fun to make that I usually extend this playtime for more than just 15 minutes and make a few blocks, but you can complete one in just a quarter of an hour.

Sew Blog Inspiration

Finish one block in 15 minutes or work on 4 for an hour. I’ll use my square ruler to trim these.

I have a few ideas of my own for what to do with made fabric, too, and I’ll share some of them with you now:
Besides cutting it into blocks and making quilts, I plan to make different sizes of lined bags (with drawstrings) from them, to use as quilt and gift bags. I already made a lotus bag from a twelve-inch square—I’m sorry to say that I gave it away without snapping a picture. I might use several squares and make this kind of kinchaku bag.
I’ll also make a journal cover from some of my made fabric. I might even use the tiniest scraps to make small made fabric circles to cover Mason jar lids when I make bath salts or other gifts to give in a jar. And I think that a made fabric patchwork bear or bunny would be a ton of fun to create.
I bet you will come up with lots of ideas, too; this is such a fun thing to do that, like me, you might like to spend even more than 15 minutes each day playing with patchwork and scraps.

Scatterbrain quilts

You can incorporate both made fabric and leftover or UFO blocks in the fun quilts that Felice Regina calls scatterbrains. She says that she dislikes making the same block over and over, so she combines different blocks to make these gorgeous but informal sampler quilts. Check out Felice’s inspirational Scatterbrain quilts on her blog.
Whether you have a few random or leftover blocks taking up space in your sewing drawer, or a few blocks that you’d love to try without committing to making a whole quilt of them, you might like to make one of these fun quilts, too. I think all quilters will love to make at least one of these. I’ve just gotten started on my first one; if you’ll like to see photos of this when it’s complete, visit me at Sewing and Growing.

That’s all folks!

Thanks for reading this blog. Please follow us elsewhere for more info and inspiration, and shop SewingMachinesPlus.com for all your sewing machine and supply needs. Happy sewing!

DIY Tent & Gear Repair

diy tent hero image

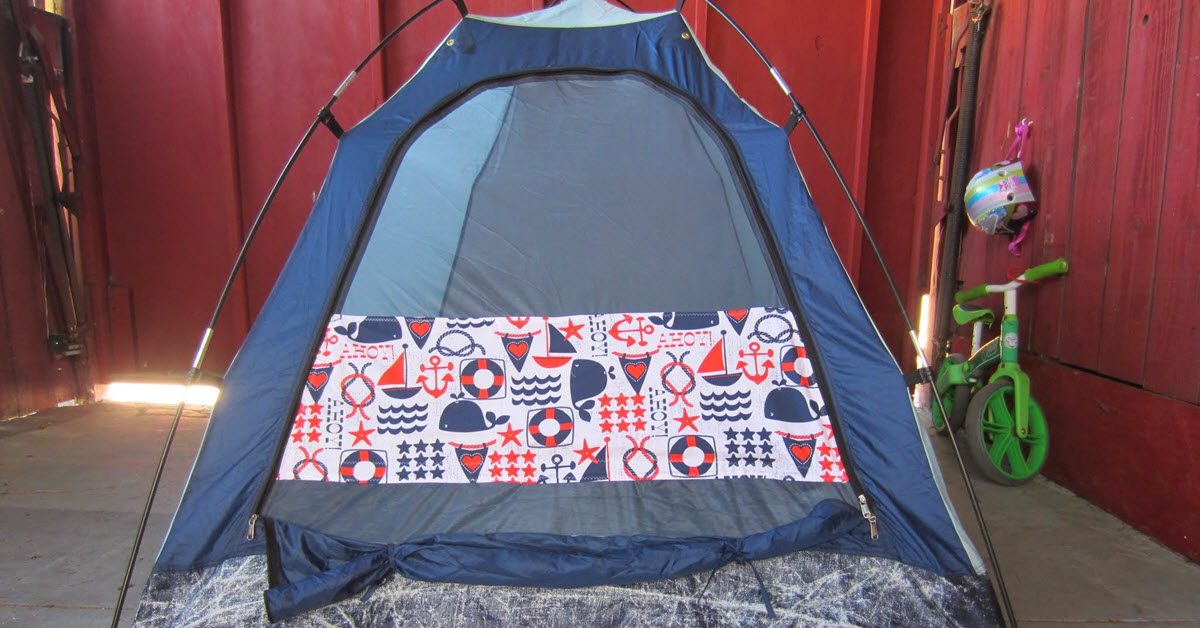
My brother recently picked up this tent at an estate sale and gave it to us for camping with kids. It could easily sleep our family of four but the front screen was ripped.

1

To fix this, I cut two matching fabric panels in the shape of a rectangle, and planned to fold under the edges and pinned them in place on the front of the tent and one on the inside. This would sandwich the rip in between the fabric.

2

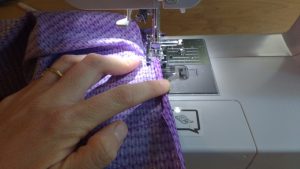
I sewed on the front fabric piece first, sewing right across the netting and then cut away the ripped netting up to the seams. Then I placed the back fabric panel to the front one, wrong sides together and followed the seams of the first piece.

3

Here’s a view from the inside looking out.

4

Next up was the bag to hold the rain fly and the smaller bags for the tent poles and stakes. They were falling apart.

5

I used scraps of canvas to make new rectangular bags for both the tent poles and the stakes.

6

Huge improvement, no?

7

8

The bag for the rain fly was split almost perfectly around the top.

9

To fix this rip I used a zig zag stitch and followed it around the tear.

10

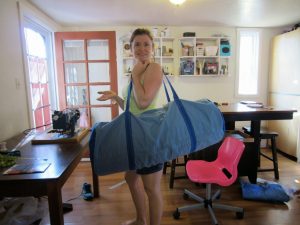
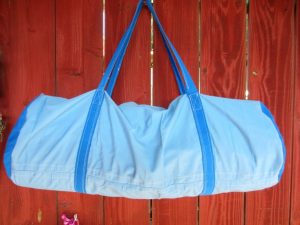
The last part of this DIY project was creating a duffel bag to hold the tent, the rain fly and the tent and stake poles. For this I dug into my pile of scrap canvas.

11

I drew two circles for the ends of the bag and then a large rectangle for the body piece.

12

Before I sewed the circle pieces to the body I measured out straps for the handles and attached the handles from one side of the rectangle to the other.

13

I used Velcro to close the seam and then I was ready to go.

14

A perfect storage solution and a quick way to grab a family-sized tent and head out camping.

15

———————————————————————————–
Charlotte Kaufman is a writer and sewist in Mammoth Lakes, California. She specializes in marine and home interiors and continues to fall more and more in love with quilting. You can follow her at charlottekaufman.com.
Authentic Japanese Boro, Boro Mending and Boro-Inspired Patchwork

Authentic Japanese Boro, Boro Mending and Boro-Inspired Patchwork

I have recently been fascinated with the historic Japanese textiles known as boro.
Authentic Japanese Boro, Boro Mending, and Boro-Inspired Patchwork

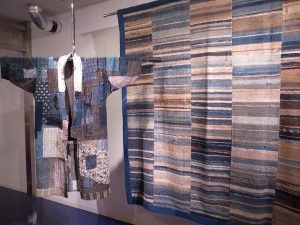
Boro exhibit at the Amuse Museum in Tokyo

Authentic Japanese boro

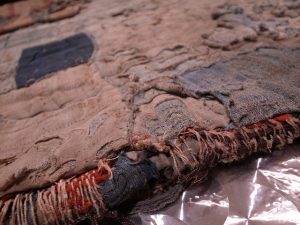
Boro means, literally, “tatters.” These were made by repurposing carefully saved garment pieces and other handspun and indigo-dyed fabrics. They were sewn together as a patchwork built up from many layers providing extra warmth.
Authentic Japanese Boro, Boro Mending,and Boro-Inspired Patchwork

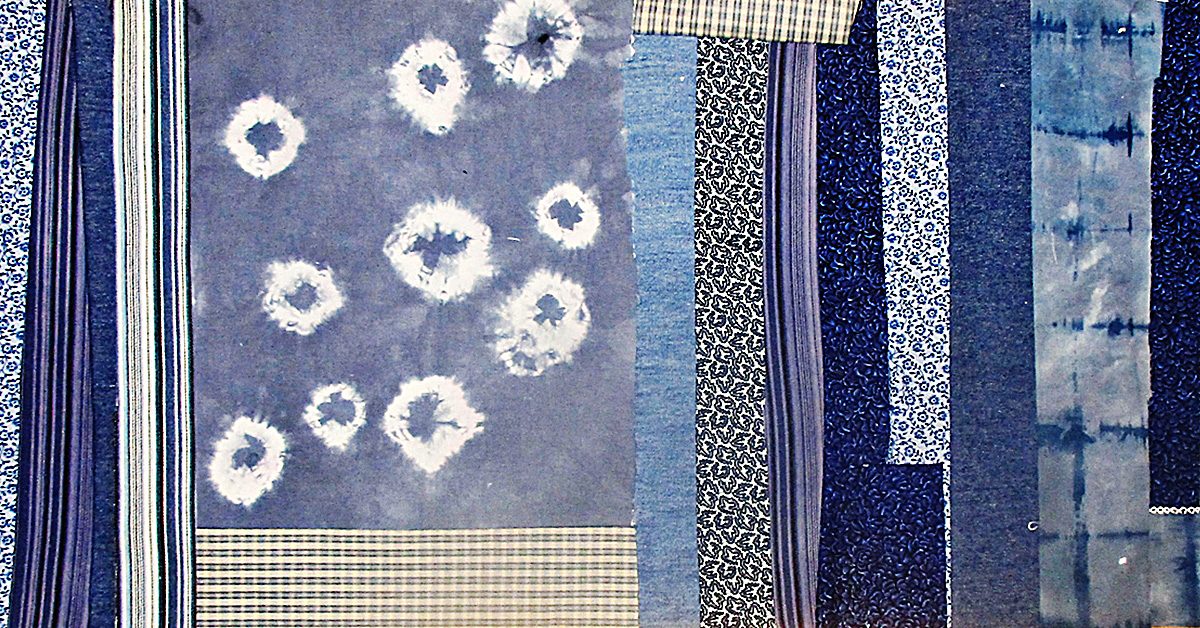
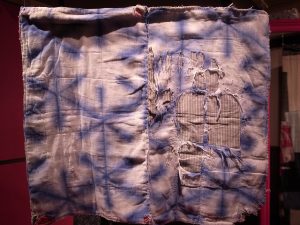
The example below was dyed using a simple shibori technique. I showed several ways to do shibori dying here recently.
Authentic Japanese Boro, Boro Mending,and Boro-Inspired Patchwork

If this example were still in use, it would have been patched with another fabric over the tattered right middle section.

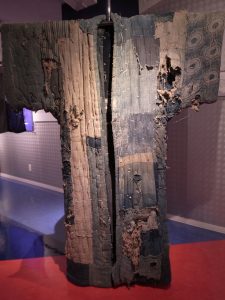
The Japanese used these unique textiles for utilitarian items such as futon covers, field clothing, sheets, and more. Including the interesting relics known as donja or yogi. These curious boromono were quilts constructed in a kimono shape and worn by parents and children together while sleeping.
Authentic Japanese Boro, Boro Mending,and Boro-Inspired Patchwork


Makers used careful patching and sometimes intricate stitching to craft these textiles, mending the same item many times over many generations.

Boro origins

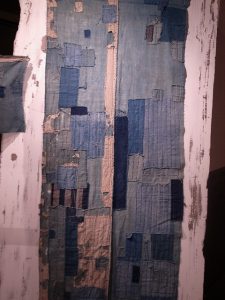
This accidental art form was born of necessity in Northern Japan. Peasants started making them during the Edo (1603-1868) period. Japan was closed to trade and under sumptuary laws at this time. These laws restricted clothing choices for the lower classes and forbade silk, bright colors, and large patterns.
Authentic Japanese Boro, Boro Mending,and Boro-Inspired Patchwork

In addition, as explained by Kat Siddle in the August 2016 issue of Seamwork Magazine:

“Industrialized fabric production didn’t reach Japan until the 1870s. Cotton, linen and hemp were spun, woven, and dyed by hand. Cloth was a precious resource that represented huge amounts of labor, and even scraps had value. Even after mechanized mills were built near Osaka, the fabric produced there was too expensive for many people to afford, and they continued to weave their own yardage for clothing and household items. Cotton was particularly scarce in northern Japan, where it was too cold for it to grow.”

So peasants pieced and patched their indigo-dyed fabrics and saved every usable scrap of cotton for reuse in these boro items and garments.

Generations of history

Since these pieces include fabrics saved and repaired over many generations, each piece is rich with family history and memories. The homespun and indigo-dyed patchwork acquired a specific patina with age and antique boro cloths can be awe-inspiring when seen up close and in person today.
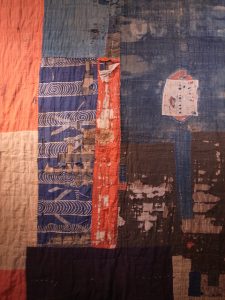
Authentic Japanese Boro, Boro Mending, and Boro-Inspired Patchwork

This special and breathtaking beauty and historical significance takes several generations and a great many years to develop. So you could say that it is not possible to create new, authentic boro today- at least, not without also waiting about a hundred years!

Sashiko stitching
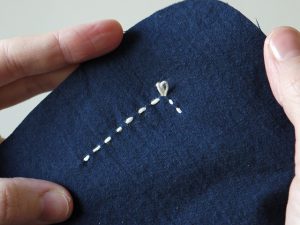
Authentic Japanese Boro, Boro Mending,and Boro-Inspired Patchwork

photo courtesy Sake Puppets

Japanese ladies began carefully piecing homespun and indigo-dyed natural fabrics together into boro during the Edo period using the distinctive and decorative stitches that later became known as sashiko. This art is still practiced today.

To work sashiko, you need a long needle and thick thread. You can order sashiko needles and sashiko thread from Japan, but if you don’t want to wait for long-distance shipping, you can make do with a long cotton darning needle.
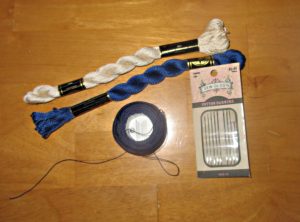
Authentic Japanese Boro, Boro Mending, and Boro-Inspired Patchwork

To substitute for sashiko thread, try perle cotton, which DMC makes in several thicknesses, both on spools and in skeins. Or you can just use regular embroidery floss.

Sashiko stitching can be as simple as straight and long running stitches, or it can be challenging and complex. It can be sparse or dense. There are many traditional patterns to choose from. But sashiko allows individual creativity, and you can invent your own sashiko patterns, too. Here’s a tutorial from Sake Puppets to help you.
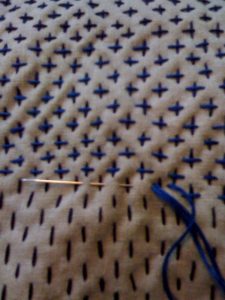
Authentic Japanese Boro, Boro Mending,and Boro-Inspired Patchwork

Simple crossed sashiko stitches, photo courtesy GinaPina
Authentic Japanese Boro, Boro Mending, and Boro-Inspired Patchwork

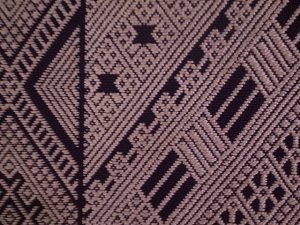
This antique piece at the Amuse Museum in Tokyo is a wonderfully dense and detailed example of sashiko stitching.

Boro mending

You can borrow from boro and use this style of mending today. Boro-inspired mending uses the same techniques and shares the same sentiment of mottainai, or “too good to waste.”
Authentic Japanese Boro, Boro Mending,and Boro-Inspired Patchwork

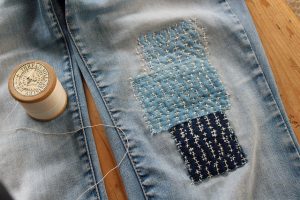
Boro mended jeans and photo by Heather, via Flickr

Boro jeans mending is currently popular right now, thanks in part to Ralph Lauren and other fashion designers who have featured several boro-inspired denim collections within the last decade. So if you have any torn jeans, you can use boro techniques to mend them into something more stylish. Here’s a nice tutorial that will help you to do this.

Feel free to feature your boro patches on either the inside or outside of your jeans; they look interesting and stylish done either way. Also, don’t limit yourself to jeans; you can use boro mending to repair canvas shoes, a bag, jacket, hat, or any other item of clothing you choose.
Authentic Japanese Boro, Boro Mending, and Boro-Inspired Patchwork

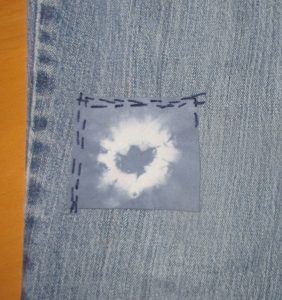
It’s not quite as easy as you’d think it would be. I’m not happy with these stitches at all and will rip them out and try again!

Boro-inspired patchwork

Yoshiko Wada, who popularized shibori in America, wrote an entire book about boro. I think that she would disagree with the notion that you can’t make new boro today.

She says that she uses the term “to define a new aesthetic and to bring new meaning to an alternative creative process, e.g., darning = healing, meditative action = marking time, reuse/repair = recording history. “Boro” represents the transformation of inconsequential material to something precious and valuable… This type of imperfect beauty possesses a power that resonates with people almost like an emotional barometer. It points to an alternative value of “beauty” slowly coming to surface in our social consciousness.”

In any case, you can certainly make boro-inspired patchwork now.
Authentic Japanese Boro, Boro Mending,and Boro-Inspired Patchwork

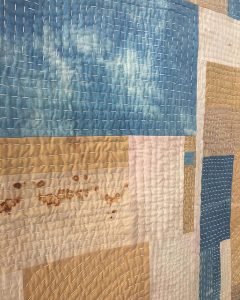
This modern day version of a boro quilt, photographed by GinaPina and made by Vessel Quilts, achieves an antiqued and authentic look through the use of rust and indigo dyes.

Choosing your palette

In making your own, you can choose to limit yourself to the authentic original palette of indigo-dyed natural fabrics.

Authentic Japanese Boro, Boro Mending, and Boro-Inspired Patchwork

Or you can add in more neutrals, browns, blacks, or even a few reds for an extra pop of color.
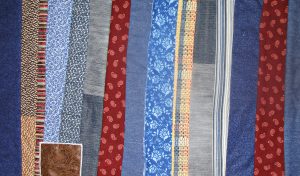
Authentic Japanese Boro, Boro Mending, and Boro-Inspired Patchwork

Machine sashiko

If hand stitching isn’t your thing, you can construct boro-inspired patchwork the same way you would make strip patchwork. Then you can embellish with machine stitching over these seams, using a simple zigzag or a more decorative stitch. You could even get amazing and more authentic looking results if you invest in a Baby Lock Sashiko sewing machine.

What will you make?

You could make a boro-inspired quilt, a pillow or cushion, or a small or large boro bag.
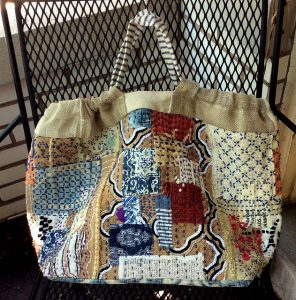
Authentic Japanese Boro, Boro Mending,and Boro-Inspired Patchwork

Boro bag with sashiko stitching by Jacque Davis
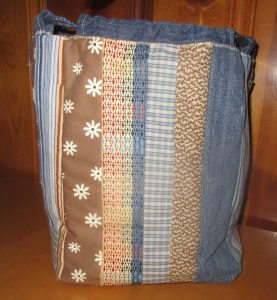
Authentic Japanese Boro, Boro Mending, and Boro-Inspired Patchwork

You could echo boro’s traditional uses by making a futon cover or coat. Or construct part of or an entire garment from your modern boro patchwork. Here’s my boro board on Pinterest, too, in case you’d like more info, inspiration, and ideas than I could fit into this post.

Authentic Japanese Boro, Boro Mending, and Boro-Inspired Patchwork

I made the pieces pictured above to sew a small kinchaku drawstring bag. I also think this kind of patchwork would look great as a bento, or azuma bukuro, bag. Both of these linked projects would be quick, useful, and satisfying ways to play with and use boro-inspired patchwork.

I’ll show you what I’ll make from my other panels soon. In the meantime, if you are even half as intrigued by this textile art as I am, then I recommend that you experiment and play with it because it’s fun! Happy sewing!

Thanks to na0905 for taking photos of the Boro exhibit at the amazing Amuse Museum in Tokyo, and for sharing these at Flickr with the lovely Creative Commons license. Thanks to GinaPina, Heather, and Jacque Davis for making their photos available this way, too.

Cleaning Your Sewing Machine

Cleaning Your Sewing Machine

Clean Machine Lead

Keeping your sewing machine clean is an important part of producing beautiful things with fabric and thread. After enough projects, there will be an accumulation of fluff from thread and fabric in the inner workings of your machine. If you leave that to accumulate for too long, your machine will start to perform poorly.

Anytime I start to get skipped stitches or a sluggish machine I think back and ask myself when the last time was I cleaned it; it was usually too long ago.
Read the manual

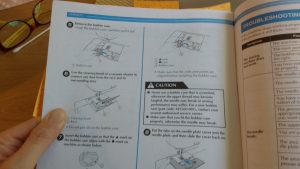
I talk a lot about getting to know your manual. I’ve put little sticky notes all over mine so I can quickly find what I’m looking for. Get your out manual (or locate a PDF online) and go to the section on ‘How to clean your machine.’
1

Some machines will tell you to oil certain parts. Others won’t. My top advice is to always follow the manufacturer’s recommendations on cleaning.

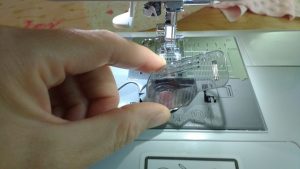
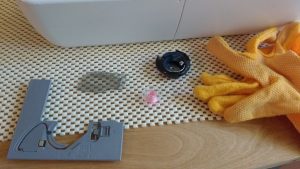
For my Brother cs6000i I need to remove the bobbin cover on the needle plate cover.

2

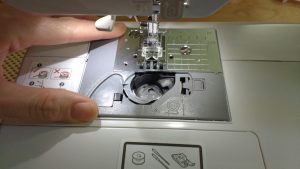
Then I follow the instructions to remove the needle plate cover itself.

3

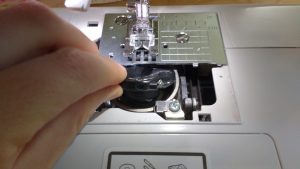
Next I remove the bobbin case.

4

Vacuums and cotton swabs

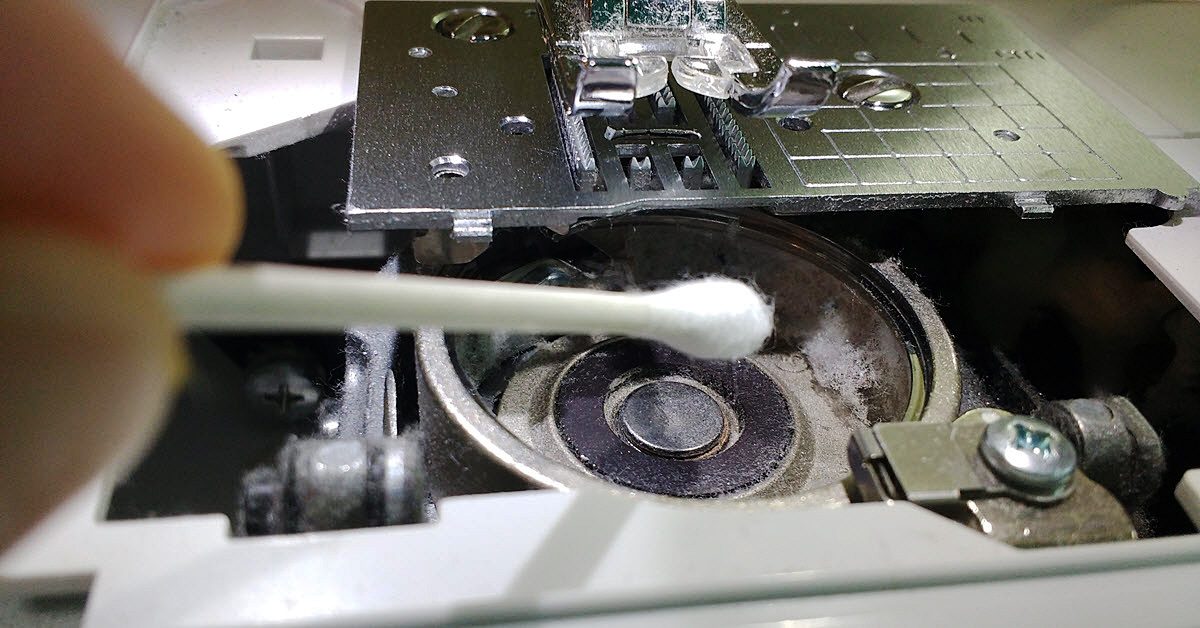
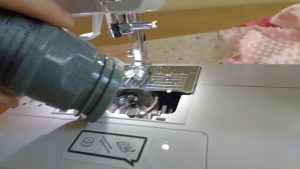
Now I have unfettered access and can get to cleaning. Step one, vacuum!

5

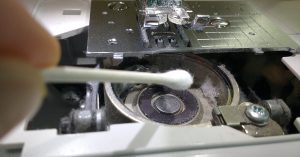
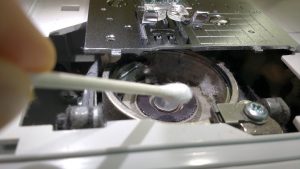
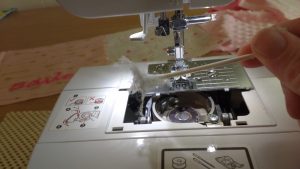
I also use cotton swabs to gather up the fuzz that my vacuum can’t reach.

6

Look at all that fabric and thread fuzz!

7

Once the inside of the machine is clean, you need to also clean the parts you removed.

8

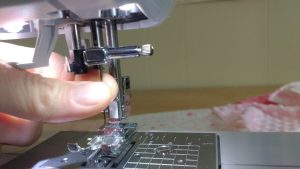
After you’ve reassembled the parts you’ve removed, I also suggest changing out to a new needle. It’s better to start fresh and new after a cleaning.

9

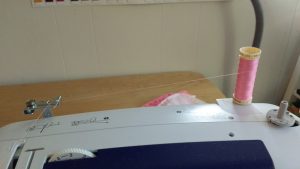
Re-thread in your desired color.

10

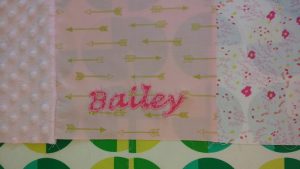
Now do some practice stitches. Here you can see how clean my embroidery stitch looks after cleaning my machine and switching out to a new needle.

11

With a clean machine I was able to do some beautiful embroidery for a friendship quilt I’m making.

12

Happy cleaning and happy sewing!

———————————————————————————–
Charlotte Kaufman is a writer and sewist in Mammoth Lakes, California. She specializes in marine and home interiors and continues to fall more and more in love with quilting. You can follow her at charlottekaufman.com.
Should Your Child Learn to Sew on a Machine or by Hand?

Should Your Child Learn to Sew on a Machine or by Hand?

Recently, more or less, my oldest niece has shown an interest in Chess, and it’s been a learning experience for me as well as I play games with her. Given how little I knew about Chess going in, honestly, I almost had to learn something along the way, but we’re both growing as players—which is fairly awesome. She’s come a long way from the girl who played with a toy phone in the kitchen floor, and now, she’s exploring more advanced hobbies.Sewing and Chess

Chess, as it happens, is just one of the latest. She’s also tried making stepping stones, baking, and sewing.

Once upon a time…

Sewing, like you might have guessed, is the topic of this particular post since once upon a time she found herself wanting to explore the territory as a hobby. That hobby was encouraged when she got a toy sewing machine, but what I assumed would be the case turned out to be accurate. Those toy machines aren’t good strategies to teach your children how to sew. Even with all of the hours that I’d spent sewing, I couldn’t get the toy to work right, and I ended up encouraging her to just forget the machine and sew by hand. That strategy actually led to her progressing a bit, and it turned out better than if I’d left her alone to the machine.

But that brings up an interesting question. Sure, this toy wasn’t a good machine for my niece to learn sewing, but what about a real machine? Essentially, which is the better strategy to teach your children to sew: on a machine or by hand?Sewing with Kids

By hand

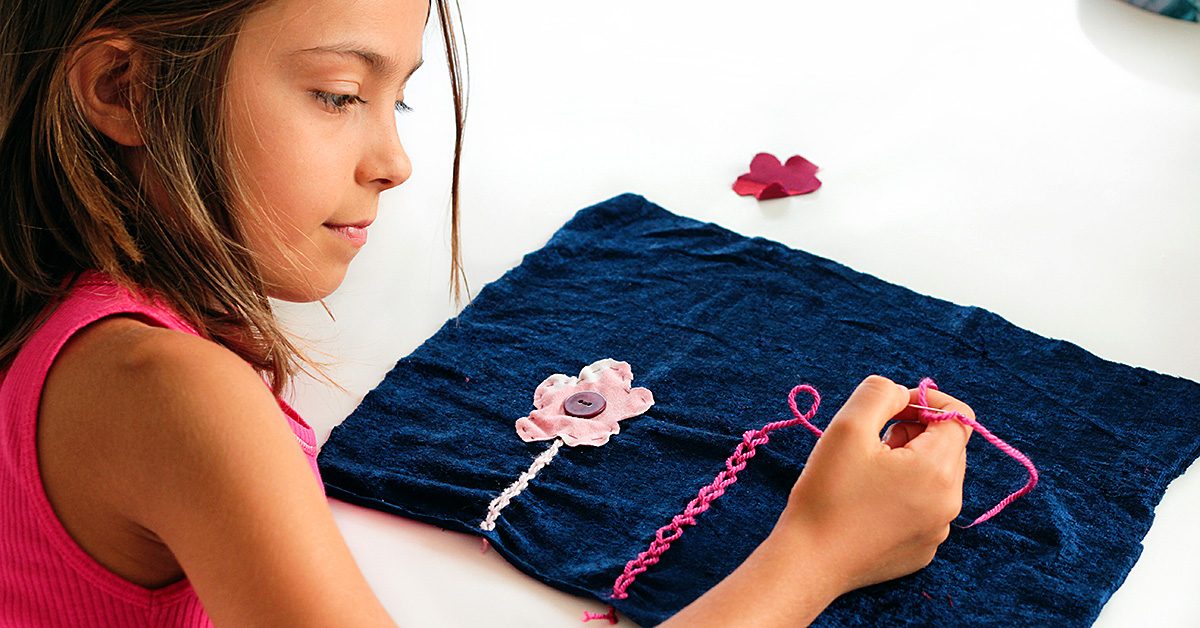
The answer, to me, is two-fold. If you want your child to finish an early project on a more individual basis, the sewing by hand method works better because there’s less chance for injury while working alone. Sure, the child might stick themselves with a needle, but it won’t be with the force and repetition that a machine can deliver. This would make the overall process safer, and even though you might argue that it could slow the project’s completion, keep in mind that if you were dealing with a child on a machine, you probably wouldn’t get the full speed that’s possible through using the machine because of safety and the child’s hesitance during the learning process.Sewing by Hand

Children can learn concepts that can benefit them later in life through this by-hand process, like how to tie off the thread or make consistent stitch sizes, and they’re doing so with less chance of serious injury. Still though, keep in mind that any needle can cause injury, so always supervise and only allow the child to try sewing in this method if they’re old enough—and mature enough—to handle it.

By machine

If you want your child to be at their safest rather than their most individual, it might be a good idea, believe it or not, to break out the sewing machine since the needle stays in the same vicinity during the process. Regardless, guidelines for these early sewing machine moments should definitely be in place to lessen the chance of serious injury. Although other people probably disagree, as an example, if my niece (who’s 12 now) sat down with full control of a machine and fed the fabric through, I’d be paranoid that she’d accidentally get her fingers caught under the needle because she’s never tried it.Sewing by Machine

There is a way to combat this complication, fortunately, and that’s a guideline to only allow your child to do certain things on the machine—as in either work the pedal or the feed the fabric through. This way, while your child is smaller, they can focus their attention on learning how the speed of the machine works through operating the pedal without getting near the needle. Once your child is older, you can switch places and let them feed the fabric through while you’re in charge of the pedal to make sure the fabric feeds slowly enough for their fingers to be in the right places every time the needles comes down. This keeps the child from learning to feed the fabric through at a too-fast pace and lessens the chance of injury. That’s a good combination to pass on sewing to your kids!Sewing Generations

If you choose not to decide – you still have made a choice

Basically, there’s room for both hand sewing and machine sewing. To make the call, you should consider child’s needs and capabilities, and always—always—think of safety first. Always supervise and guide your child through the process, whether it’s more individual-centered through a by-hand method or tag-team through dividing the sewing machine labor. If you plan these things right though, your child can blossom in the sewing world, and the roots to their success can trace back to these moments you shared over their early interests.

Traditional vs. Modern Quilts - What’s the Difference?

Traditional vs. Modern Quilts – What’s the Difference?

Do you understand the differences between traditional and modern quilts?

Let’s look and see just what sets these different styles apart.

Traditional quilts

Traditional quilts are tried and true. Folks have been piecing and quilting these familiar designs for hundreds of years. Traditional patchwork designs have names: Log Cabin, Courthouse Steps, Nine-Patch, Dresden Plate.  There are thousands of these traditional patterns, and these are based on blocks and a grid.

Traditional vs Modern Quilts-What's the Difference?

Traditional quilts use regularly repeating shapes and blocks, based on a grid.

Traditional patchwork can be simple or complex, but it is usually made up of many repetitions of the same block and orderly rows. These are frequently combined with uniform sashing between individual blocks and/or borders all around. They rely heavily on symmetry in both the patchwork and the quilting.

Traditional quilt patterns are still made and loved today, but we can say that these are our grandmothers’ quilts—and their grandmothers before them.

Traditional vs Modern Quilts- What's the Difference?

Modern quilts

As the name implies, modern quilts are something new. They are more experimental and rely less on rules and order.  Modern quilt designs began popping up in the last half of the twentieth century. But they really hit their stride just before the new millennium.

Modern quilts differ from traditional quilts in many ways. Traditional quilts rely on a grid of regularly repeating designs, symmetry, sashing, borders, often complicated patchwork, and simple quilting. In contrast, modern quilts go off the grid and use asymmetry, less fuss, minimalist designs, and a more improvisational style with unusual arrangements of blocks and settings.

Traditional vs Modern Qults- What's the Difference?

While there is a definite list of characteristics that categorize the modern quilt style, these are not rules. Most modern quilts will fulfill at least one but not usually all of them.  In general, modern quilt characteristics include a minimalist style; they emphasize negative space rather than intricate patchwork. They may feature bold colors and graphic designs that give high-contrast pop. And modern quilts often feature asymmetry and use unusual block placement and off-center motifs.

Traditional vs Modern Quilts- What's the Difference?

photo courtesy redheadwiththread

Modern colors and fabrics

Colors in modern quilts tend to be bold. High contrast graphic designs are created with brightly colored solid fabrics and striking modern prints. These are used more sparingly than in the more familiar repeating patterns which march across so many traditional quilts.  The focus is on the bold modern fabrics, rather than fussy technique.

Traditional vs Modern Quilts- What's the Difference?

Bold colors make modern quilts pop

Negative space and dense, innovative quilting

Negative space features heavily in modern quilts.  In traditional quilting, the repeating patchwork is meant to stand out. So traditional quilters most often construct backgrounds from neutral, receding colors. But backgrounds in modern quilts are brighter and more expansive. Whites and grays are popular choices to bring these negative spaces forward.

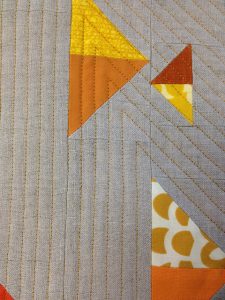
All this negative space highlights asymmetrical, alternate grid, or graphic modern quilting.  Simple piecing contrasts with dense quilting in innovative designs. Whereas patchwork commands attention in traditional quilts; on modern quilts, the quilting more often stands out.

Traditional vs Modern Quilts- What's the Difference?

Zig-zag modern quilting

No rules quilting

Traditional quilting stitches may be straight and simple lines, such as with “stitch in the ditch” lines that follow piecing seams. Or they can be elaborate curliques and designs which are deliberately and symmetrically placed to line up with wide borders. They may even meander as free-motion stipples, but these must follow rules, and not cross each other.

Modern quilters are free to abandon all these rules. Modern quilting lines may cross to form geometric patterns, irregular curlicues, or any other design an imaginative quilter can dream up. Quilters can even combine many varied stitches and feature each separately to break up a large expanse of negative space into different sections, for example.

Traditional vs Modern Quilts- What's the Difference?

Another quilt by Columbus Modern Quilt Guild member DanaK

Free-motion quilting is one way to let loose and experiment with fun and free modern quilting. To quilt in the free motion style, use your darning foot. You can either lower your feed dogs to guide your fabric by hand, or you can leave your feed dogs up and just set your stitch length to zero. Either way works!
Leah Day, who teaches free-motion quilting online, challenged herself to create a new filler design every day for a year. And her Free-Motion Quilting Project blog is an excellent resource and inspiration.
Off the grid layout

Patchwork in modern quilts can include off center or tessellated designs.  Modern quilts differ with much less reliance on uniform blocks and borders than is traditional and may feature irregular rows. Lack of borders and offset blocks create designs that continue beyond the quilt’s edge.  In general, both the patchwork and the quilting on modern quilts tends not to rely on a grid.

Traditional vs Modern Quilts- What's the Difference?

Example from Flickr user Gabrielle shows a modern, off-the-grid design

Modern quilts may make use of technology, such as computers for visualizing designs, and tools such as cutting machines or tessellating or other specialty rulers, to assist with cutting and design.

Traditional vs Modern Quils- What's the Difference?

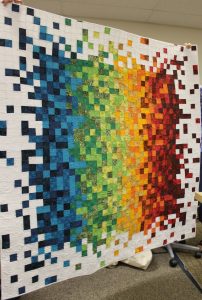
This quilt by Columbus Modern Quilt Guild member shows a fun take on pixelation.

Hybrid design: modern traditionalism

You don’t have to choose between these two styles, however! Modern traditionalism is a hybrid of both. These quilts marry the improvisational freedom in design, piecing, and quilting of modern quilts with the traditional patchwork designs that connect us to the many generations of quilters before us.

A modern traditional quilt may shrink a traditional pattern and sprinkle these sparsely as isolated individuals amongst a wide expanse of negative space. Other modern treatments of traditional patchwork include combining patterns or enlarging blocks to a single design. A quilter may then feature such blocks this off center, for example.

Traditional vs Modern Quilts- What's the Difference?

Modern traditionalism features new settings for traditional blocks. Photo courtesy of Trillium Designs

Which style do you prefer? I love them all!

For more modern and modern traditional inspiration, check out the gallery at the Modern Quilt Guild.
Flickr images licensed under Collective Commons.

DIY pillowcase for Sea to Summit Aeros Ultralight Pillow

Hero Sea To Summit Pillowcase

This past weekend my family went on an overnight backpacking trip near our home in the Eastern Sierra. When you are carrying all of your gear on your back you want your items to be as light as possible so I picked up this inflatable Sea To Summit Aeros Ultralight Pillow.

1

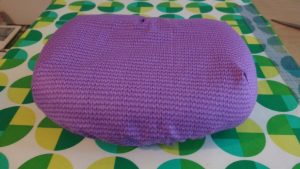
Of course I’ve never met a pillow that didn’t deserve a handmade pillowcase, so I set to work making one for this uniquely shaped fellow.

2

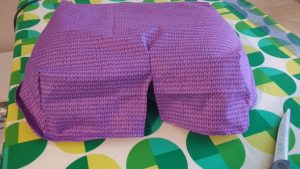
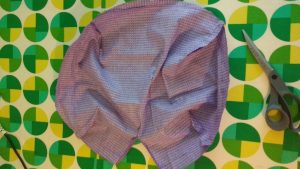
Fully inflated the pillow is approximately 16″ x 12″ x 4″ with an interior curve on the neck side and an exterior curve on the opposite side. The top and bottom edges are all rounded as well. I used matching fabric from the DIY bandana I sewed in this post and draped it over the pillow to see if it would fit.

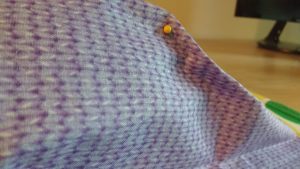
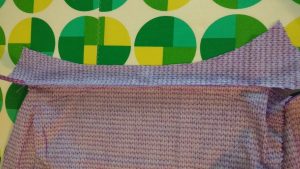
Once I knew the fabric would fit, I turned the fabric wrong sides up and used pins to mark the four curved corners. Be careful, you don’t want to puncture your brand new backpacking pillow!

3

4

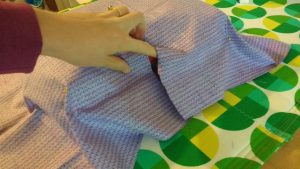
On the interior curve, I found the approximate center and cut the fabric up a ways.

5

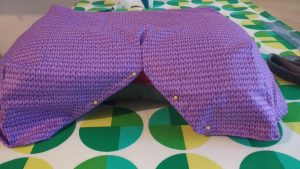
Then I used pins to tighten up the fabric around the top of the curve.

6

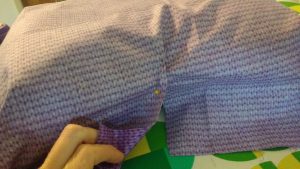
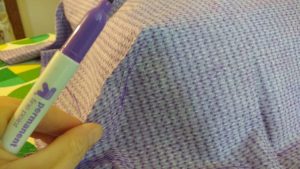
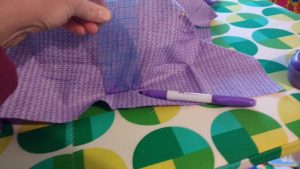
Once everything looked right, I used a marker (but you could use a pencil if a marker would show through your fabric choice) and marked the corner seams and the portion of the interior curve I had pinned.

7

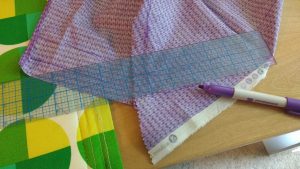
Then I used a sturdy ruler and placed it against the sides of the pillow, marking the approximate edge all the way around.

8

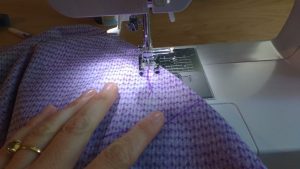
Carefully, I slipped the case off of the pillow, making sure not to disturb any of my pins. I only removed the pins corner by corner as I sewed following my marks.

9

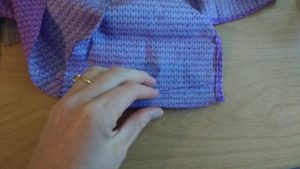
For the interior curve, I sewed the small section I had pinned to cinch the fabric around the corner, then finger pressed the raw edges of both sides of cut fabric over twice and sewed a hem.

10

Here I took a moment to turn the pillowcase right side out and placed it over the pillow, just to double check my sizing. I would be adding elastic to bring the loose fabric under the case, but this was good to see before cutting the excess fabric off of the corners.

11

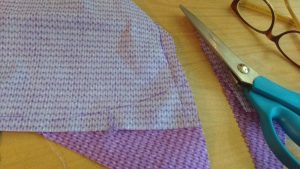
Once I knew it was correctly sized, I turned the pillow case wrong side out and trimmed off the excess fabric on the sewn corners.

12

Then I marked a 1″ hem all around the case using the line I’d created earlier as a guide.

13

At this moment I realized I didn’t have enough fabric on the side opposite where the neck would lie. I took a spare piece and sewed it onto that side, pressed the seam down, and then continued drawing my 1″ hem.

14

Once the 1″ hem was drawn I cut out the fabric. Now you could really see the shape of the case coming together.

15

I finger pressed the hem over ½” and then another ½” and sewed my hem as I folded and pressed.

16

Then it was time to finish the interior curve. I fit the pillow case on right side out and pinned each flap from the center so the fabric hugged each curve. I sewed the flaps.

17

Now it was time to add elastic. I used ¼” elastic.

18

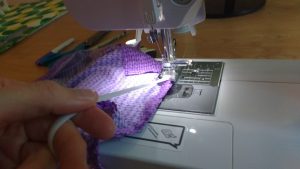
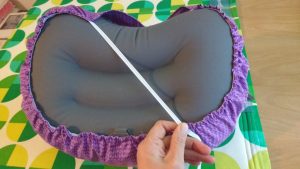
When I had fully sewn around the hem, I drew the elastic across to a point on the opposite side of the pillow and sewed the elastic in place.

19

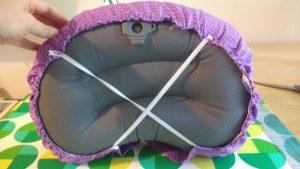
I then repeated on the opposite side with a separate piece of elastic, creating a crisscross pattern on the bottom of the pillow.

20

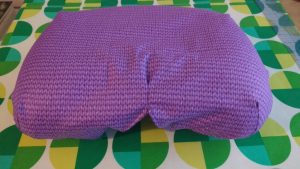
As long as you don’t sew the elastic too taught, you can absolutely slip the inflated pillow into the case. Take a few moments to work the case into the shape you’ve sewn and then flip it over to enjoy your handiwork.

21

For backpackers who weigh everything that goes in their pack, this pillowcase weighs 1.4 oz. Happy backpacking!

22

———————————————————————————–
Charlotte Kaufman is a writer and sewist in Mammoth Lakes, California. She specializes in marine and home interiors and continues to fall more and more in love with quilting. You can follow her at charlottekaufman.com.
Confetti Quilt-Art for Your Walls

Confetti Quilt-Art for Your Walls

Speaking of fall projects, I’ve recently come across a quilting technique that would be fantastic for creating a beautiful piece of autumn to use for wall décor. The problem, though, is that the technique used to build this work is a bit advanced, so it’s something I’m going to have to put on the back-burner for a bit until I potentially get the hang of more intricate workings of specific sewing processes.

The overall idea is out of my comfort zone right now, but it’s still something that seems like a great enough idea to share with those reading this blog post. Maybe you’re more advanced than I am in the sewing world, and this would be a simple project to you to bring fall coloring to your home’s interior. If so, gather your fabric and tulle, and get to working!


Project: Confetti-Quilted Wall Hanging


Tools and Supplies:

Sewing machine, scissors or rotary cutter, fabric (some for shredding purposes), tulle, and straight pins

The Idea:

Creating a work of art from bits of fabric
Mulberry Patch Quilts

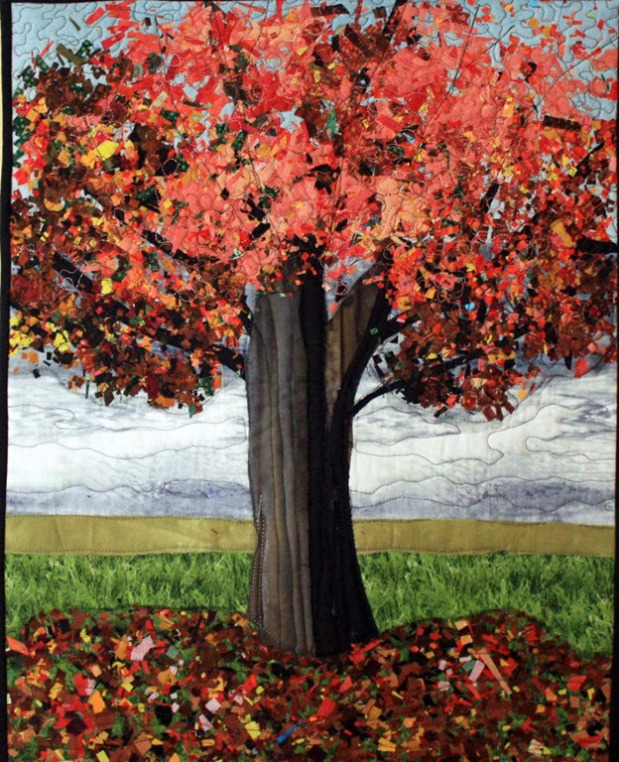
See all of these leaves? Those are tiny bits of fabric placed on the piece, or confetti fabric!

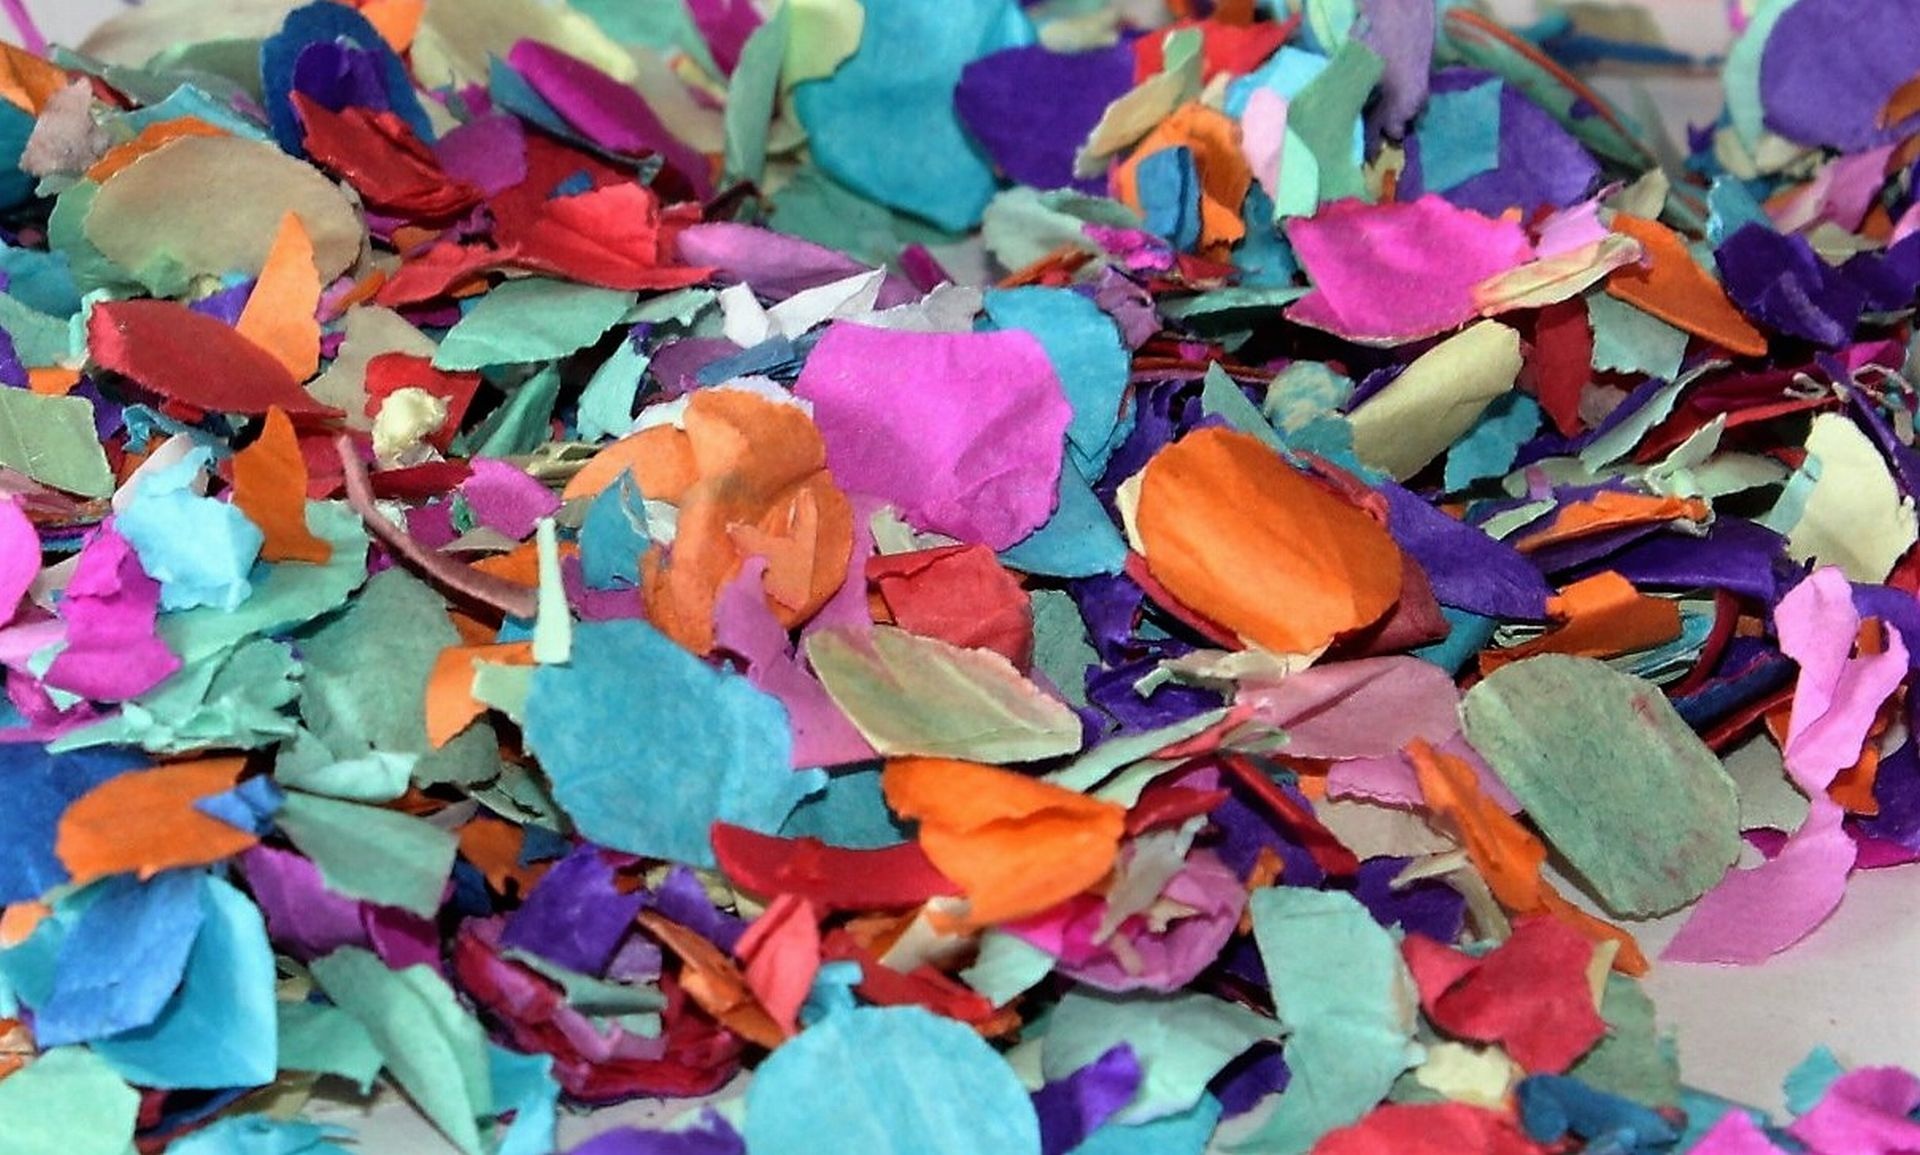
It would be easy to label this a mosaic-type project, and in a way it is because it’s a bigger picture that’s being constructed by smaller pieces. But the incredibly small sizes of these pieces are tiny enough to compare to confetti being tossed in the air, so the confetti name is actually more fitting than the mosaic title—especially since the confetti can bunch up and overlap on your design in contrast to the side-by-side nature of a mosaic piece.

This is an idea that can be put in practice to make a full quilt, but the number of times you’d have to go through the process to create enough blocks for a quilt sincerely escalates the amount of time you spend on a project. Considering fall is so close, using the one-block notion for a wall hanging is more reasonable—and it’ll create a one-of-a kind piece to show off to your home’s guests.

The advantage of confetti

The beauties here are that you can pick the size of the confetti art work, you can choose the image you want to depict, and you can even use scrap material from other projects that have little to no value for other concepts. These confetti dots are tiny, so it doesn’t take extended amounts of fabric to create them. You might want to keep that in mind as you trim up your fabric for other projects and stash away the scraps and remainders in some kind of a confetti-quilt container. That way, you can build your supply for a confetti project that pops in your head, giving you the ability to start constructing immediately rather than having to search for fabric bits.

plant-leaf-flower-petal-decoration-red-830896-pxhere.com

For a fall project, this is a good option because autumn comes with a great deal of outdoor imagery, like trees filled with colorful leaves or pumpkins placed in front of haystacks. Through the outdoor elements comes the prospect of movement and wind, so having the confetti scraps present to drizzle across your project can give the viewer that sense of movement in a display that’s random enough to highlight the notion.

Working with layers

You can layer the colors and fabrics to boost that realism until you have a strong tree covered in a series of leaves that are dropping to the ground and flying away, a pumpkin patch with dust and leaves blowing past it, a scarecrow that’s caught up in seeds that are breaking away from crops and sailing by… Lots of ways exist to put this idea into practice, and each has a look of intricate realism that’s sparked from the confetti approach.

tree-light-bench-night-photography-sunlight-1234-pxhere.com

The process to perform this task seems basic, if intricate, and so long as you keep the confetti pieces in their places with straight pins, tulle, and early sewing, you can make sure everything stays close enough to the arranged order to highlight the scene as you intended it above your mantle or over your couch—or wherever you choose to place the finished work!

Inspiration is key

If you want to find inspiration for what to depict in your confetti project, try going for a nature walk to look for signs of autumn’s approach, and when something particularly seasonal catches your eye, freeze that memory in your mind (or snap a photo) to remember it. As the month rolls on, nature itself can give you plenty of sights to choose from to be the main scene of your confetti project!

hand-screen-man-person-technology-camera-948351-pxhere.com

So, if your skills allow you to handle this intricate of a project, start looking for that autumn image to commit to a wall hanging!