Cross Stitch Panel Pillows with Mitered Fabric Framing

Cross Stitch Panel Pillows with Mitered Fabric Framing

My sister, Sariah, and I are both talented sewists, though we tend to focus on sewing different types of things.

My sister, Sariah, and I are both talented sewists, though we tend to focus on sewing different types of things.

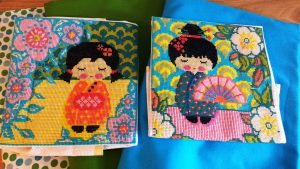
My sister, Sariah, and I are both talented sewists, though we tend to focus on sewing different types of things (however we both are unified in our love of quilting!). While my sister can sew entire outfits in mere hours, I don’t have the handmade clothing gene. Instead, I do pillows, cushions, drapes and other marine and home décor. Because our talents diverge, sometimes we collaborate. I will often send fabric to her and she will sew Halloween costumes for my girls, whereas, she will send me something like these two beautiful cross stitch panels, and I will turn them into decorative pillows.
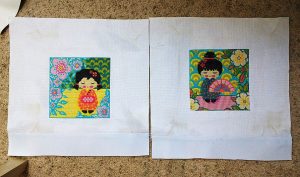
Because cross stitch fabric is fairly sturdy, I used white canvas duck to match the fabric thickness.

Because cross stitch fabric is fairly sturdy, I used white canvas duck to match the fabric thickness.

Sariah had purchased 16″ x 16″ pillow forms for these so I needed to add some fabric onto the bottom of each cross stitch panel to make them into large enough fabric squares for the pillows. Because cross stitch fabric is fairly sturdy, I used white canvas duck to match the fabric thickness.

Next up was taking a look at the fabric she had sent.

Next up was taking a look at the fabric she had sent.

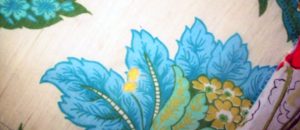
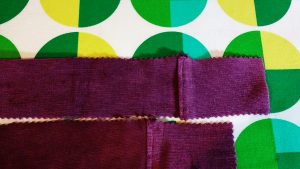
Next up was taking a look at the fabric she had sent. She told me I could be as creative as I’d like and as soon as I saw her talented cross stitching, I knew I wanted to frame each one and to make sure the corners were mitered.

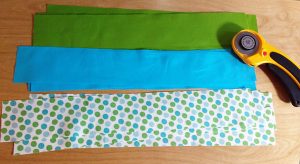
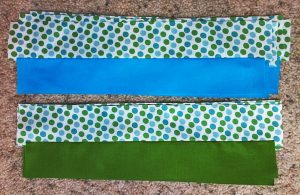
I assigned green to one of the dolls and blue to the other.

I assigned green to one of the dolls and blue to the other.

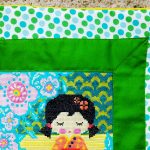
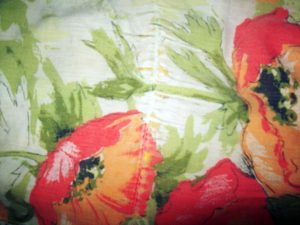
I assigned green to one of the dolls and blue to the other. Both panels got dots for the outer edging. Once I’d sewn the dots and blue and the dots and green into cohesive strips, I meticulously sewed the strips around all four sides of the dolls’ squares.
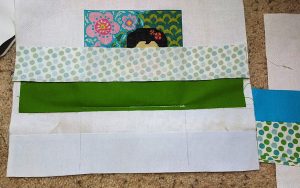
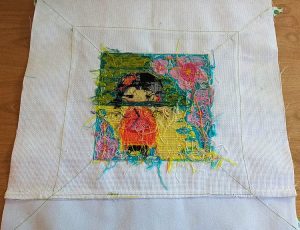
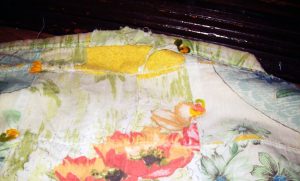
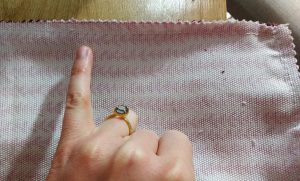
I only stitched around the actual cross stitching, leaving the rest of the fabric loose on all four sides like this.
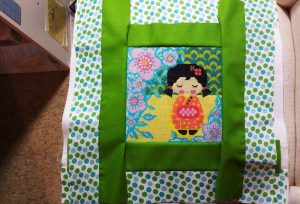
I only stitched around the actual cross stitching, leaving the rest of the fabric loose on all four sides like this.

I only stitched around the actual cross stitching, leaving the rest of the fabric loose on all four sides like this.

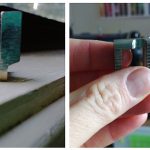
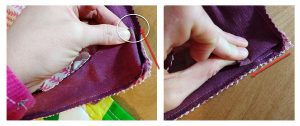
Next I hand folded the top and bottom panels back, using my fingers to crease the fabric exactly on the mitered corners, where each fabric strip met the next one.
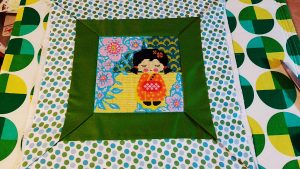
Next I hand folded the top and bottom panels back, using my fingers to crease the fabric exactly on the mitered corners, where each fabric strip met the next one.

Next I hand folded the top and bottom panels back, using my fingers to crease the fabric exactly on the mitered corners, where each fabric strip met the next one.

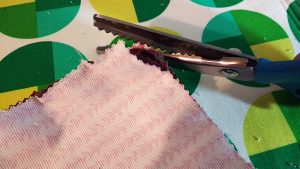
Once I was sure I’d nailed it, I ironed the panels and then trimmed off the extra fabric from all the strips.

Once I was sure I’d nailed it, I ironed the panels and then trimmed off the extra fabric from all the strips.

Once I was sure I’d nailed it, I ironed the panels and then trimmed off the extra fabric from all the strips.

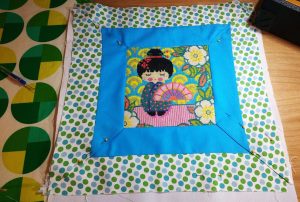
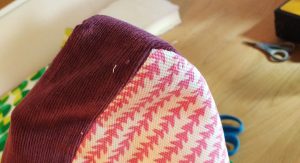
The pieces were pinned until I could topstitch the mitered corners in place.

The pieces were pinned until I could topstitch the mitered corners in place.

The pieces were pinned until I could topstitch the mitered corners in place.

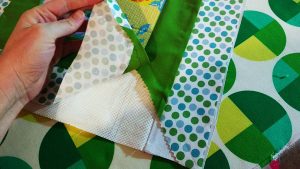
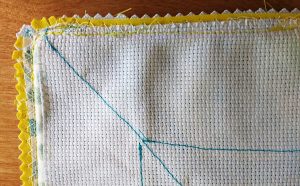
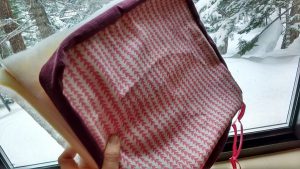
I love this shot from the wrong side of the fabric.

I love this shot from the wrong side of the fabric.

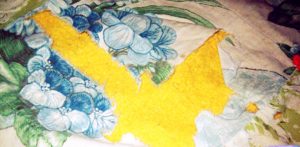
I love this shot from the wrong side of the fabric. The chaos of the underside of the cross stitching is very beautiful, and you can perfectly see the backside of the top stitching.

Once the panels were top stitched it was time to add piping.

Once the panels were top stitched it was time to add piping.

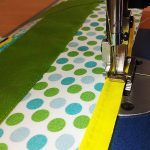
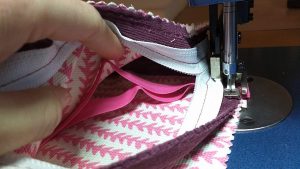
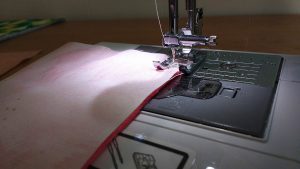
Once the panels were top stitched it was time to add piping. If your machine comes with a piping foot, now is when you would add one. I have two machines and I generally use my industrial one, a Sailrite LSZ-1 for piping and cording. Its standard foot has a built-in arch that makes sewing piping a dream.

https://www.sewingmachinesplus.com/4130971-45.php

When you come to corners, don’t forget to trim your piping right up, but not into, the stitching of the finished piping. This will help it to lay flat as you turn.
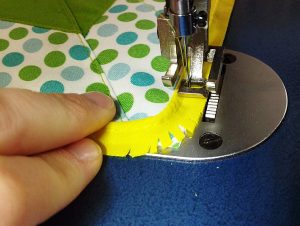
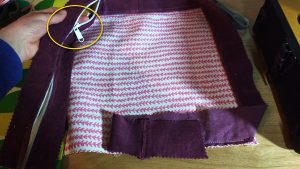
When both front panels were piped, I cut out four back panels to create an envelope close on their backs.

When both front panels were piped, I cut out four back panels to create an envelope close on their backs.

When both front panels were piped, I cut out four back panels to create an envelope close on their backs.

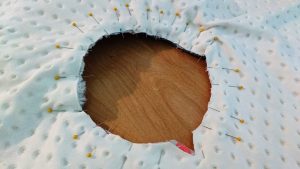
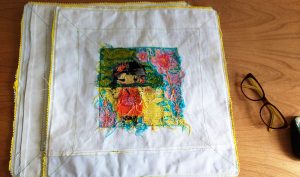
Here are the pillows fully sewn, but not yet turned right sides out.

Here are the pillows fully sewn, but not yet turned right sides out.

Here are the pillows fully sewn, but not yet turned right sides out. Before you turn your pillows out always double, and triple check your seams.
I like to reinforce each corner with additional stitching and often will sew around twice for added stability.

I like to reinforce each corner with additional stitching and often will sew around twice for added stability.

I like to reinforce each corner with additional stitching and often will sew around twice for added stability. I also zig zag stitch the very edge of the fabric to prevent future unraveling or fraying.

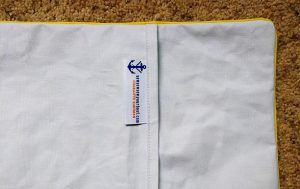
Here is a shot of the back of one of the pillows.

Here is a shot of the back of one of the pillows.

Here is a shot of the back of one of the pillows. Don’t forget to add your handmade tags!

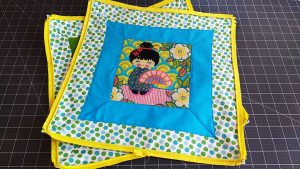
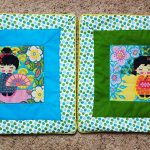
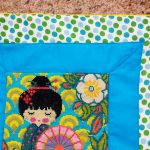
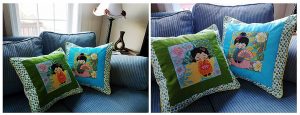
Ta-da! What a gorgeous, collaborative project.

Ta-da! What a gorgeous, collaborative project.

Ta-da! What a gorgeous, collaborative project.


I put these in the mail right away so she could get them on her couch and today while writing this post, I got pictures of the final product!

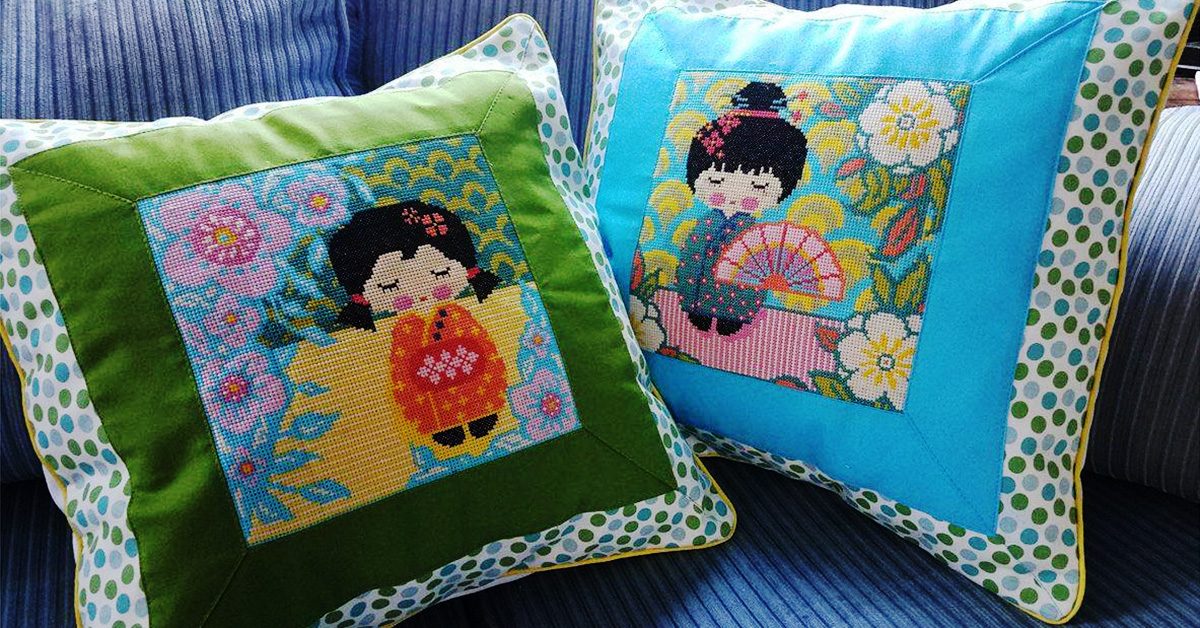
I put these in the mail right away so she could get them on her couch!

I put these in the mail right away so she could get them on her couch!

Do you ever collaborate on sewing projects? Tell us about your work in the comments!

———————————————————————————–
Charlotte Kaufman is a writer and sewist in Mammoth Lakes, California. She specializes in marine and home interiors and continues to fall more and more in love with quilting. You can follow her at charlottekaufman.com.

Basics of Quilt Maintenance

Maintenance. It can be a big deal in home, car and… quilt upkeep. That’s right. Just like letting your car go well beyond its oil change moment can snowball into a vehicle that isn’t budging without a major repair bill, not maintaining a quilt in the proper way could result in a sentimental treasure that’s good for little else than — maybe — scrap material. Sure, your quilt might not cost as much as, say, an engine to replace, but there’s more value in something handmade than a dollar sign. Maybe it was a wedding gift from a relative or a crib accessory that your mother started making before you slept your first night in said crib. Those types of belongings can have a lot of worth, so preserving them might be a big deal.

Wear, tear & time

Don’t break your own heart by letting this kind of damage happen to something close to it!

Don’t break your own heart by letting this kind of damage happen to something close to it!

One of the most important details about this preservation is to keep an eye on the products on a regular basis since smaller complications that come from wear, tear and time could be much easier to repair than those that have been expanding for some time. Other important details are to know how to fix the damage and determining if the damage is even fixable. As an example for these aspects, I’ll use a quilt that has some sentimental value to me, but a lack of maintenance has taken its toll. Don’t break your own heart by letting this kind of damage happen to something close to it!

Damage control

Let’s examine this first spot of damage, shall we?

Let’s examine this first spot of damage, shall we?

Let’s examine this first spot of damage, shall we? It looks fairly simple with just two simple holes in the top layer of fabric, so if I begin this examination with the basic question of whether or not it’s fixable, the answer would be yes! The smaller sizes here would allow a little bit of embellishment — maybe a patch — to be placed directly over the damaged area. Since this is a quilt that has a floral design, I could add something like a butterfly there so that it looks like it’s landing on the flower. Sure, it changes the design a bit, but it fits and is corrective. This issue, it seems, was detected in time!

Do away with the fray

The material is showing wear & tear around the seams and that’s not very surprising!

The material is showing wear & tear around the seams and that’s not very surprising!

Now, let’s try this one. The material is showing wear and tear around the seams and that’s not very surprising! The damage does extend a bit beyond the immediate area surrounding the seam, but it still seems to stem from that one line where the thread is running through. So, is it fixable? Yes! All I would need to do is add a border around the block to cover the issue, and if I did that for every block, the strategy would be replicated throughout so that this block wouldn’t look out of place. Again, it would change the design of the quilt, but not in a way that would necessarily make it look odd. I could match the border to the colors already present, and the addition could actually create a popping look for each block.

To fix or not to fix

This one is shredded, & the top layer isn’t covering as much material as it did in the prior pictures. But is it fixable? Believe it or not, yes!

This one is shredded, & the top layer isn’t covering as much material as it did in the prior pictures. But is it fixable? Believe it or not, yes!

How about this one? Well, the damage here is much more drastic than a simple tearing from stitching or tiny holes in the fabric. Instead, this looks more shredded, and the top layer isn’t covering as much material as it did in the prior pictures. But is it fixable? Believe it or not, yes! Since this area is at the end of the quilt, changing the size of the quilt could work. I would need to cut off enough material on this side of the quilt so that the damaged territory is done away with and redo the border work. It’s not as easy of a fix as sewing on a butterfly embellishment, and the appearance of the quilt would definitely be altered by the smaller territory. But, if pressed, this would be a fix!

Too far gone?

The fabric became too worn, whether from use, washing, time, or some other variable, & without the proper methods to fix the problem, it spread.

The fabric became too worn, whether from use, washing, time, or some other variable, & without the proper methods to fix the problem, it spread.

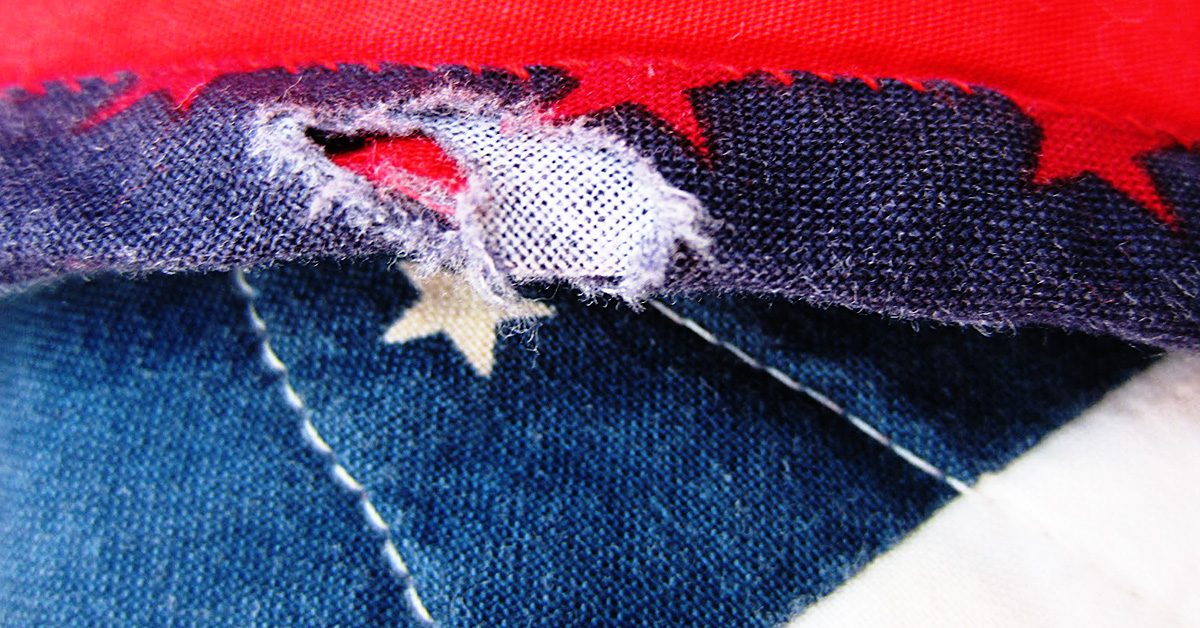
Now, we get to this one. Here, this looks as if the fabric became too worn, whether from use, washing, time, or some other variable, and without the proper methods to fix the problem, it spread. Of course, there could be another explanation for it. Perhaps someone ripped it, and the damage grew. Whatever the reason, the faulted block is in the midst of the quilt, and this fabric probably won’t go together at this point. This one, dear readers, doesn’t seem to be strategically fixable. In my defense, this damage could have happened before I got into sewing, but if I’d paid attention and caught a small hole in the fabric, I could have embellished it. If there was a tiny rip, I could’ve stitched it. As it stands though, the only ways I can see to fix this would be to add on an embellishment that would be too large to look natural or change the entire block — which would throw off the pattern of the quilt. This one, it seems, has gone too far.

And this is precisely why you should keep an eye out for damage! If you catch the smaller problems, you can fix them. If you let them escalate, you could be looking at a ruined quilt. So to preserve your works, keep tabs on them and — through borders, embellishments, and adjustments — tend to those issues as they show up!

How to Sew a Luck O’ the Irish Flag Quilt for Your Wall

VIDEO: How to Sew a Luck O’ the Irish Flag Quilt for Your Wall

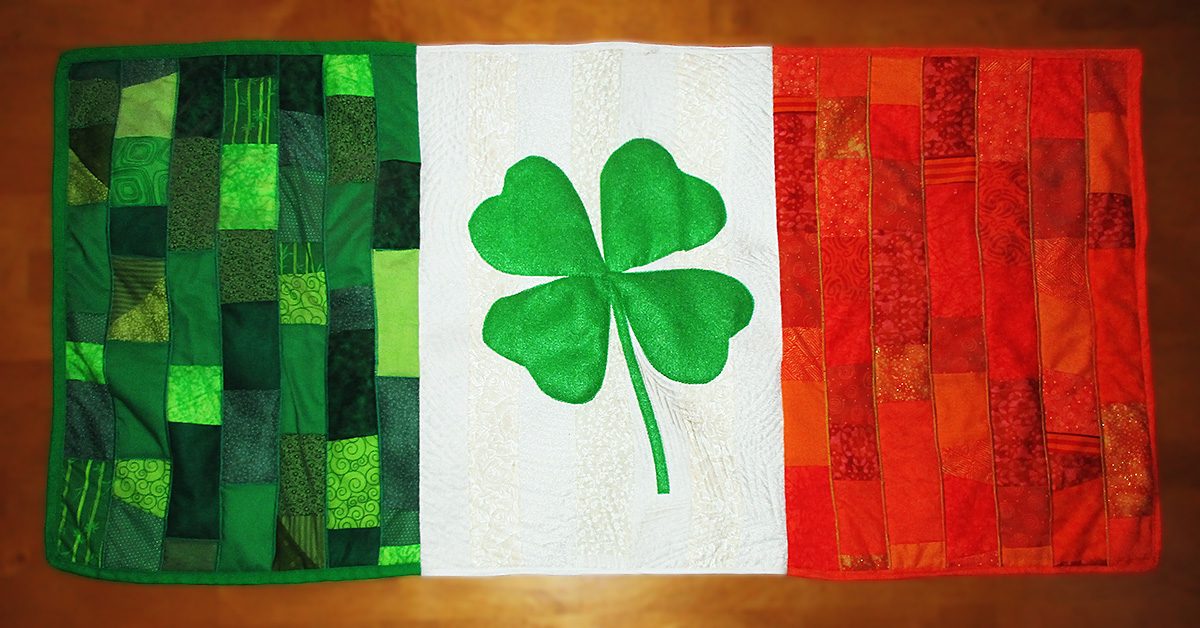
Celebrate St. Patrick’s Day or your heritage with an Irish flag quilt

Luck O' the Irish PIN

We always celebrate St. Patrick’s Day around my house because my dear is a bit obsessed with Ireland. He claims to be Irish, although his parents say his heritage is mostly English and Scottish. I guess he’s just Irish at heart.

So one year I decided to surprise him with a St Patrick’s Day present and I designed this Irish flag quilt for him. He loved it so much that he rearranged all the other décor in his man cave to give it a place of honor on the wall.

Of course the flag of Ireland does not feature a four-leaf clover, but I thought it would be a nice addition to the design.

Here’s how you can make an Irish flag quilt featuring a four-leaf clover for your wall or table, too.

Luck O’ the Irish flag quilt how-to

You will need:

  • Assorted green and orange quilter’s cotton scraps
  • White quilter’s cotton
  • Muslin
  • Green, white and orange bias binding, grosgrain or fabric to make binding
  • Green felt
  • White, green, and orange thread

Please note that this Irish flag quilt is designed to be the same ratio as the official flag of Ireland. So for an authentic look, use these exact dimensions when making this project.

Sew the patchwork sections

For the green and orange sections of this Irish flag quilt, you will need seven strips of muslin 2.5” x 20.5” per section. For the white section, you can do as I did and cut seven strips of white and off white quilter’s cotton, or you can do as I wish I’d done and simply cut one large rectangle 14.5” x 20.5”.

To make the patchwork strips, take one of the long muslin strips and lay a colored scrap right side up at the top of the strip. Then, take another scrap and place it right side down directly on top of the first scrap. Sew a quarter inch seam at the bottom, flip the second fabric down to face right side up, and press. Then repeat, placing the next scrap right side down atop the second, sewing across the bottom, turning, and pressing. Repeat until you reach the end of the strip. Place them right sides down and trim, then set aside.

Here’s a video of me showing how to do this step:

Complete seven green patchwork strips and join these together using quarter inch seams.

Then complete seven orange patchwork strips and join these in the same way.

For the middle section, I went with a patchwork of alternating white and off-white print strips. But I wish I had instead used a single piece of a plain white fabric or a white-on-white print. I think this would show off the echo quilting better. You could choose to do either.

Applique the four-leaf clover

I experimented with constructing the four-leaf clover from a patchwork of fabrics, but I decided it looked better done in a single color of green.

Make the clover from two pieces of green felt. Cut two leaves connected in the middle from each piece. You can freehand your design or you can print mine if you’d rather.

Download: Clover PDF pattern

For the stem, cut a long rectangle 9” x ½”

Layer the top end of the stem at the bottom with the two clover pieces crossed over each other on top of the stem in the middle of your white section. Pin in place and then stitch down. If you use felt, as I did, then you can use a straight stitch. If you use a green quilter’s cotton, you will want to appliqué this with a satin stitch.

Quilting

Because we are going to be using three colors of binding for this Irish flag quilt, we are going to quilt each section separately. Construct three “quilt sandwiches” by layering each section’s top over a piece of batting and then a piece of backing muslin. Make the batting and backing slightly larger all around than the top pieces.  Then pin.

For the orange and green sections, I quilted along the seams using a satin stitch. Satin stitch is just a zig zag with a wide width and a short length. I set my machine to a 3.0 width and a .5 length. This gives extra interest to this small quilt. Use green thread for the green section and orange thread for quilting the orange patchwork.

For the white section, we’ll do the quilting differently. Use white thread and echo the shape of the clover all around. Start close to the design and then make larger outlines. After you have gone around the shape a few times, you will start to run out of fabric on the edges of the design. Just pretend that you didn’t and pick back up on the fabric as the design continues around.

Triangles for hanging

Here is an easy method to prepare small quilts like this for hanging on a wall.

Cut two 4” squares from muslin and press them in half diagonally to make triangles.

Place one triangle on the back outer top corner of the green patchwork section with the raw edges aligned. Sew with a scant eighth inch seam along the top and side edges to attach.

Then do the same with the other triangle on the back upper outside corner of the orange patchwork section.

Once the quilt is assembled, you can insert a dowel into these triangles to hang the quilt flat on the wall.

Binding

We are going to bind each section separately so that we can use different colors of binding for each section. You will bind three sides of the green and orange sections and just the top and bottom of the white section.

When I made mine, I discovered at the last minute that I didn’t have any green binding. I’m all about using what I have, and I had plenty of green grosgrain ribbon, so I used this for the first time as quilt binding and it worked fine. If you have neither bias or grosgrain ribbon, make your own binding strips from fabric.

Sew the green binding continuously along the bottom, left side, and top of the green patchwork section. Sew the orange binding along the top, right side, and bottom of the orange patchwork section. Then sew two pieces of white binding on the white section, one along the top and another along the bottom.

Put it all together

Now sew the green section to the left side of the white section and the orange section to the right side of the white.

Now hang it on your wall.

Now hang it on your wall.

I used my serger to finish these seams neatly on the back.

If you don’t have a serger, you could use an overcast foot to neaten the back seams, or you could encase them in a bit of narrow binding.

Or you could decide that since it is the back of the quilt no one is looking and leave the seams raw if you want to.

The serger really makes them look nicely finished though, and if you don’t have a serger, I suggest you think about getting one. A serger can quickly boost your sewing to pro level.

Cut a dowel to 41” and pop it in the triangles on the back of your Irish flag quilt. Now hang it on your wall.

I hope you have fun making this project and that your Irish flag quilt blesses you with good luck!

How to Store Your Fabric Scraps

How to Store Your Fabric Scraps

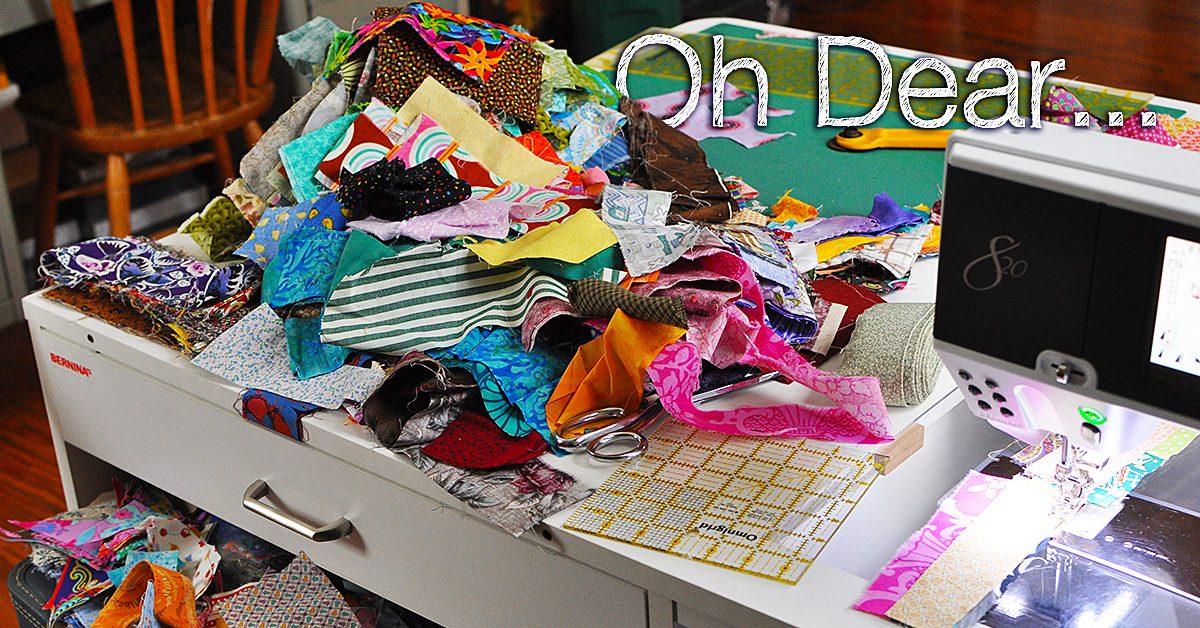
It only took me six months, but I finally organized my fabric scraps after our move.

It only took me six months, but I finally organized my fabric scraps after our move.

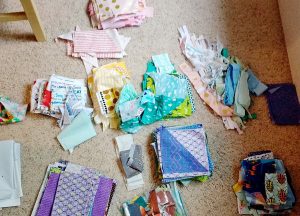
It only took me six months, but I finally organized my fabric scraps after our move to this new town and new house. When we made the move, I dumped my two huge bins of scraps into a few shopping bags and tucked them away until this glorious moment when they would not only be sorted, but have a place to reside.

Bits and pieces

Why should one keep & organize fabric scraps?

Why should one keep & organize fabric scraps?

Why should one keep and organize fabric scraps? Here are some reasons to consider.

  1. Fabric is expensive. Long sized strips, and smaller pieces can be reused for a vast amount of projects. The internet is a trove of fabric scrap project ideas.
  2. Out of sight, out of mind. The reverse of this is true as well. When you have your scraps visible, you are much more likely to use them and be aware of what you have available.
  3. Have a favorite color? It probably shows in the types of fabric you buy. Take a look at your pile of scraps and try to use up more of that color before you buy a few more yards.
  4. Many people cut their scraps to standard sizes. If you have a size of fabric you constantly seem to go to, make your life easier by making your own pre-cuts out of scraps.

Scrap bags

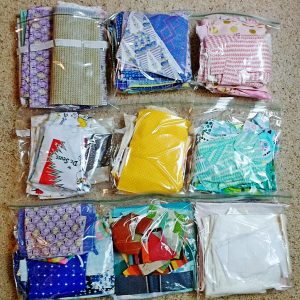
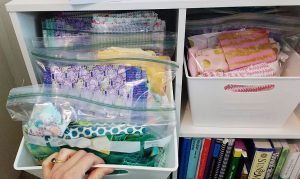
I ultimately made 9 bags of folded scraps.

I ultimately made 9 bags of folded scraps.

I ultimately made 9 bags of folded scraps. They included the following (from left to right):

  1. All of my precut Layer Cakes (10” x 10” squares)
  2. All of my other-sized precuts
  3. Pinks
  4. Whites
  5. Yellows, tans and oranges
  6. Greens, teals and aquas
  7. Blues and purples
  8. Heavy duty fabric scraps (canvas, Sunbrella, etc)
  9. Utility fabric scraps (batting, white out fabric, mesh, etc.)

One of these things is not like the others…

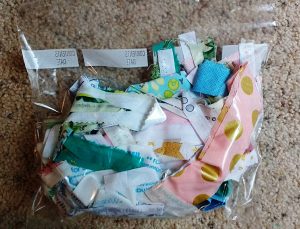
Bag #10 holds all of my selvage edges & very thin strips of fabric.

Bag #10 holds all of my selvage edges & very thin strips of fabric.

There is also a 10th bag (but it didn’t fit well in the group photo above). This holds all of my selvage edges and very thin strips of fabric. I have a huge wish list of projects to make from selvage edges. Perhaps I’ll write a post soon showing you the world of possibility with saving those thin strips!

A place of and for my own making

Welcome to my fabric corner.

Welcome to my fabric corner.

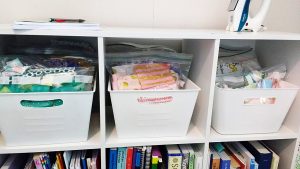
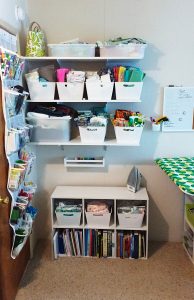
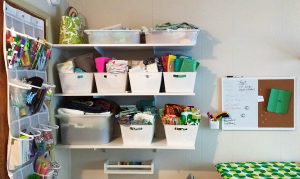
This is my fabric corner. The upper shelves hold my larger stash of fabrics, so pieces that are a fat quarter size or larger. The lower shelves hold my iron on top, and my fabric scraps in the bins below.

Dirty little secret: I just tuck larger pieces in wherever I find room.

Dirty little secret: I just tuck larger pieces in wherever I find room.

I’d love to tell you that I have my larger pieces organized in some kind of fancy way, but I really don’t. I just tuck them in wherever I find room.

Behold! A place for everything & everything in its place.

Behold! A place for everything & everything in its place.

Can you see how lovely the organization of these scraps is? The easy access and keeping them visible by my work space means I’m often including them in my daydreaming when it comes to new sewing projects.

Do you store your fabric scraps? If so, tell us where or how you do!

———————————————————————————–
Charlotte Kaufman is a writer and sewist in Mammoth Lakes, California. She specializes in marine and home interiors and continues to fall more and more in love with quilting. You can follow her at charlottekaufman.com.
DIY Chair Cushions for Kids

DIY Chair Cushions for Kids

DIY Chair Cushions for Kids

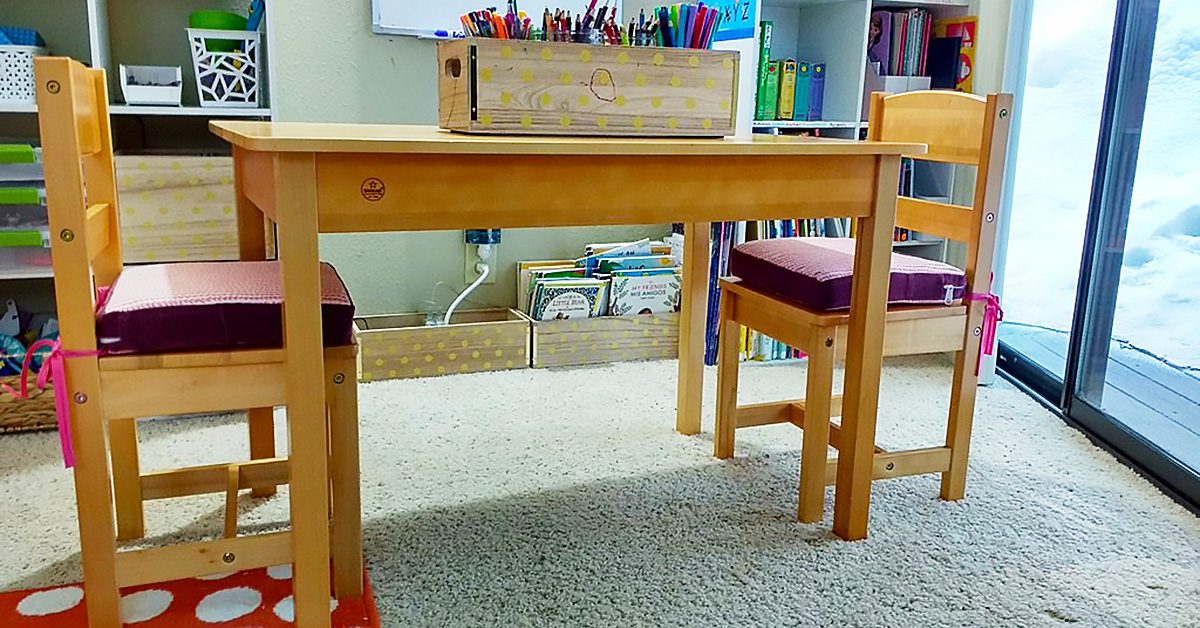
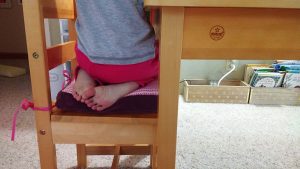
DIY chair cushions for kids.

I’ve been wanting to make cushions for the art table chairs in our girls’ room for a while and I finally made it down to a craft store that sold foam this week to get started on the project.

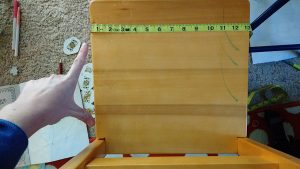
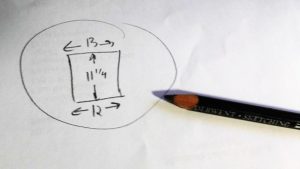
The first step in making custom cushions is accurate measurements. Notice how the chairs are not true squares? The front measurement was 13” and the back 12”. The distance between the front and back was 11 ¼”.

The first step in making custom cushions is accurate measurements.

The first step in making custom cushions is accurate measurements.

Want to know a trick with cushions? Cut your fabric to the exact size of the foam. I know this sounds counter-intuitive. ‘But what about seam allowance?’ you’re thinking. The thing is, foam compresses. If you cut your fabric to the size of the foam, and then sew ¼” seams (or ½” if using heavier duty fabric), the compression of the foam once it is in the cushion cover will more than cover the seam allowance you are used to providing on other sewing projects.

Want to know a trick with cushions? Cut your fabric to the exact size of the foam.

Want to know a trick with cushions? Cut your fabric to the exact size of the foam.

I’m trying to use up my fabric scraps this year, so I pulled out a few larger, odd-shaped scraps I had from this fabric and was able to cut out four top and bottom panels for the two chairs.

I’m trying to use up my fabric scraps this year, so I pulled out a few larger, odd-shaped scraps.

I’m trying to use up my fabric scraps this year, so I pulled out a few larger, odd-shaped scraps.

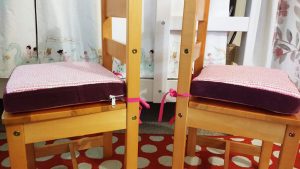
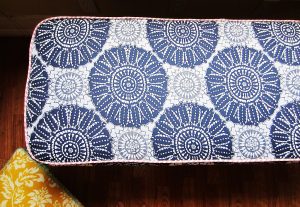
I used this fabric to make custom piping for a bench seat for the girls’ godmother. I like that they’ll have a small piece of the project I made for her in their own room. See the pink trim on the cushion below? That’s the same fabric.

See the pink trim on this cushion? That’s the same fabric.

See the pink trim on this cushion? That’s the same fabric.

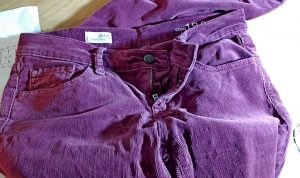
For the side panels I decided to use corduroy from an old pair of pants I’d been saving for just this kind of project. They’d developed holes along the belt loops so I had held onto them just for the pretty fabric.

For the side panels I decided to use corduroy from an old pair of pants I’d been saving for just this kind of project.

For the side panels I decided to use corduroy from an old pair of pants I’d been saving for just this kind of project.

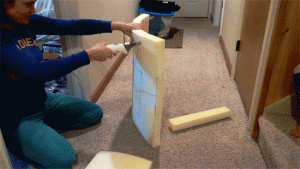
After marking the measurements with a Sharpie, I used an electric bread knife to cut the foam. It cuts through that stuff like butter. Here’s a gif as proof.

My electric bread knife cuts through the foam like butter.

My electric bread knife cuts through the foam like butter.

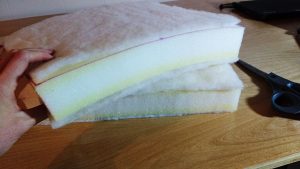
Another make-your-cushions-super-great secret is to use batting!! Wrapping them in batting or putting a layer on the top and bottom will improve how the puff up in your cushion covers. I used an adhesive spray to affix the batting to the top and bottom of each one.

I used an adhesive spray to affix the batting to the top and bottom of each one.

I used an adhesive spray to affix the batting to the top and bottom of each one.

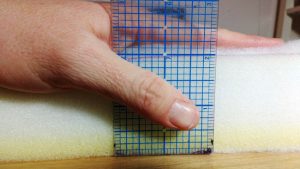
Don’t measure the height of your sides until you’ve added batting. While the foam is 2”, adding the batting made the total measurement just under 2 ¼” (I should know what that measurement is, but I don’t. I just mark to the line under that ¼”).

While the foam is 2”, adding the batting made the total measurement just under 2 ¼”.

While the foam is 2”, adding the batting made the total measurement just under 2 ¼”.

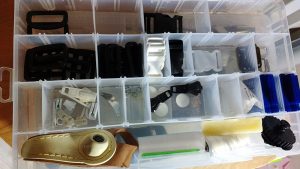
Grab your zippers and zipper pulls, or, if you aren’t like me with spares on hand, plan ahead and order them before you begin.

Grab your zippers and zipper pulls!

Grab your zippers and zipper pulls!

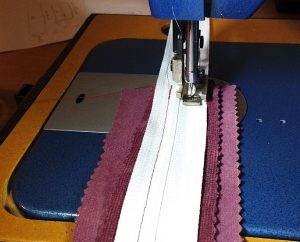
I like to sew the zipper plaques first. Use whichever technique you like. I generally use the first method shown in this video by Sailrite.

I like to sew the zipper plaques first.

I like to sew the zipper plaques first.

If you need to attach extra fabric to the side panels, consider adding it to the ends in small amounts so the joins don’t show on the front of the cushion.

If you need to attach extra fabric to the side panels, consider adding it to the ends in small amounts.

If you need to attach extra fabric to the side panels, consider adding it to the ends in small amounts.

Attach the zipper plaque to the side fabric and then sew onto the bottom fabric piece.

Before you begin sewing the top piece on, make sure to mark your corners accurately. Fold them to each seam to make sure they match (the yellow mark in the photo below is my matching point.)

Fold the corners to each seam to make sure they match (the yellow mark in the photo below is my matching point).

Fold the corners to each seam to make sure they match (the yellow mark in the photo below is my matching point).

Next, make sure to slide on the zipper pulls BEFORE you sew the top piece onto the final assembly or you’ll be sad.

Next, make sure to slide on the zipper pulls BEFORE you sew the top piece onto the final assembly or you’ll be sad.

Next, make sure to slide on the zipper pulls BEFORE you sew the top piece onto the final assembly or you’ll be sad.

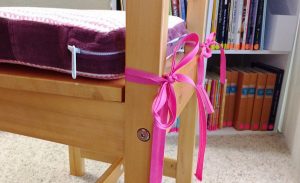
And finally, do not forget to sew your tie backs in between the seams as you go.

Do not forget to sew your tie backs in between the seams as you go.

Do not forget to sew your tie backs in between the seams as you go.

Whoohoo, you’re done! But, before you start celebrating, go over every seam to make sure they are secure.

Whoohoo, you’re done! Now, go over every seam to make sure they are secure.

Whoohoo, you’re done! Now, go over every seam to make sure they are secure.

Then take your scissors and round the corners so they turn prettier. I used pinking shears on the fabrics in this project. Check out my post from January to learn about their benefits, along with other important cutting tools for your sewing room.

Take your scissors and round the corners so they turn prettier.

Take your scissors and round the corners so they turn prettier.

When you turn the covers right-sides out, use your fingers to pop out each corner.

When you turn the covers right-sides out, use your fingers to pop out each corner.

When you turn the covers right-sides out, use your fingers to pop out each corner.

If you’ve done this right, your finished cover is going to look smaller than your foam; that’s because it is! Now is the time to put the cover on the cushion and here is where you’ll see how foam compresses to fit your new cover.

Now is the time to put the cover on the cushion & here is where you’ll see how foam compresses to fit your new cover.

Now is the time to put the cover on the cushion & here is where you’ll see how foam compresses to fit your new cover.

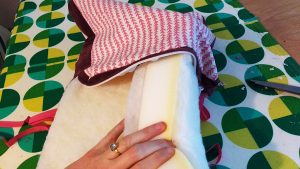
I’m going to use caps lock here to get across how important this next step is: DO NOT TUG OR PULL ON YOUR FABRIC TO GET IT ONTO YOUR CUSHION. I promise you, if you do that, your seams will pop. Instead, fold the cushion to slide it into the cover, and then slowly work the foam into the fabric, NOT the other way around. Just keep thinking ‘move the foam, not the fabric.’ Don’t be afraid to really get your hands deep into the cover and use them to maneuver the foam in place. Adjust, adjust, and adjust, until the cushion sits perfectly in the cover, with the lines of the foam matching the lines of the cover.

DO NOT TUG OR PULL ON YOUR FABRIC TO GET IT ONTO YOUR CUSHION!!!

DO NOT TUG OR PULL ON YOUR FABRIC TO GET IT ONTO YOUR CUSHION!!!

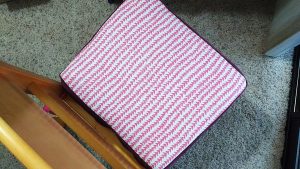
Ta-da!!!

Ta-da!

Ta-da!

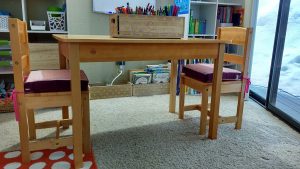
This project turned out just darling. The corduroy almost looks like velvet and I love the effeminate touch it brings to the room.

The corduroy almost looks like velvet and I love the effeminate touch it brings to the room.

The corduroy almost looks like velvet and I love the effeminate touch it brings to the room.

These cushions will inevitably get marks on them. That’s okay, they have zippers so they can be washed, AND, they are reversible. I can just flip them over if I need to.

I can just flip them over if I need to.

I can just flip them over if I need to.

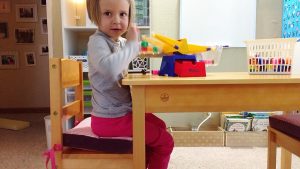
My daughters loved these and immediately hopped on and got cozy.

My daughters loved these and immediately hopped on and got cozy.

My daughters loved these and immediately hopped on and got cozy.

What DIY projects have you made for your home lately? Let us know in comments!

What DIY projects have you made for your home lately? Let us know in comments!

What DIY projects have you made for your home lately? Let us know in comments!

———————————————————————————–
Charlotte Kaufman is a writer and sewist in Mammoth Lakes, California. She specializes in marine and home interiors and continues to fall more and more in love with quilting. You can follow her at charlottekaufman.com.
How to Sew Faster

How to Sew Faster

My job as a tailor on a television show often requires me to complete an alteration in a seemingly impossible amount of time. Not to be overly cocky or self-congratulating but, I can be pretty fast when needed. People frequently ask me how I’m able to do something so quickly.

Don’t hesitate. Just, do.

Honestly, I don’t think so much about it anymore: its pretty much second nature at this point. But, I suppose if I were to break it down, the process would go something like this:

First, don’t panic. Whatever you do, don’t panic. If you do, you could find that suddenly you’re unable to thread a needle, or your needle breaks, or the thread tangles.

Second, don’t hesitate. Just, do.

As you’re working, think about the next step. Plan ahead.

Concentrate fully on what you’re doing. Don’t listen to the conversations going on around you. Pay no mind to whatever random chaos might be happening in another part of the room. Just focus your full attention on the one thing you are doing. That is all that is important.

Whatever you do, don’t thread mark. I know that’s what they teach in sewing school but there is no reason to have to thread mark a pant hem.

A few tips on how to sew faster:

Do as much as you can without stopping to iron.

If I’m really pressed for time, I tend to leave all the ironing until the very end (pun intended).

Learn how to eyeball measurements. Think about it, if you’ve been sewing long enough, you know what a ½” looks like. You honestly do not need to mark every single little line. If you want to measure, go ahead, put use your pins to mark the line. I often work with a metal seam gauge but rarely actually draw a new stitching line. One exception is if I’m re-mitering a suit jacket sleeve corner though I know lots of tailors that do not need to draw that line either.

Whatever you do, don’t thread mark. I know that’s what they teach in sewing school but there is no reason to have to thread mark a pant hem. I once had an additional tailor helping me on a show who insisted on thread marking the fold line on hems for cop pants. Buy some tailor’s chalk and use that to mark your hemline. It’ll disappear when ironed.

Unless you’re topstitching, you really don’t have to have your thread match exactly. Believe me. Whatever thread is in your machine is just fine. I cannot begin to tell you how many black garments I’ve altered quickly with red or yellow or whatever happened to be in the machine colored thread.

Learn how to undo a chain stitch. A lot of manufacturers use chain stitches in clothing construction. This makes it super easy to take them apart when needed. You can only unravel a chain stitch in one direction, the direction it was sewn in. Most of the time, all you need to do is insert a seam ripper and pull in that direction and all the stitching will come undone. The center back seam of men’s pants, often will have two rows of stitching so you’ll need to pull each row separately.

A couple other seam deconstruction tips:

To take apart a serged seam, use a nice sharp seam ripper and run it through the threads that wraps around the edge of a seam. After you do this, the rest of the threads will usually come apart rather quickly. Some serged seams are on a chain as well and you can undo them by pulling the thread on the straight stitch.

One of the fastest ways of taking apart a seam is to, again, use an extremely sharp seam ripper and insert it into the seam from the right side and just pull upwards through the seam. This technique takes a bit of practice (and bravery) though as the potential to accidentally slice through the fabric is ever present. There’s a knack to getting the angle of the seam ripper just right though and once you figure that out, you’re golden.

In the end, the one sure way of becoming a faster tailor is by practice. The more often you repeat the same task, the more efficient at it you become.

As you do an alteration, try to think of ways you could save time: do you really need to flip everything back right side out then inside out then right side out again? Probably not. If you sew this first, will it make it easier to sew this? Or visa versa? Experiment and try things multiple ways until you’ve figured out the quickest sequence of steps for yourself.

I love discovering a new, faster way of doing something I’ve done a million times. Sewing is kind of cool like that: there’s always something more to learn and fresh tactics to uncover.

Leftover Fabric: The Toss Across Edition

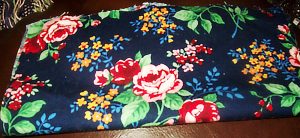
I think I’ve mentioned before that I have quite a bit of fabric leftover from the top layer of my quilt, right? Well, I do, and it’s interesting to come up with practical, usable projects that could give that fabric a purpose. This week, I did exactly that, and I’m going to share the idea that was a two-fold win for me: Using a little bit of fabric and creating something that I had a genuine reason for making.

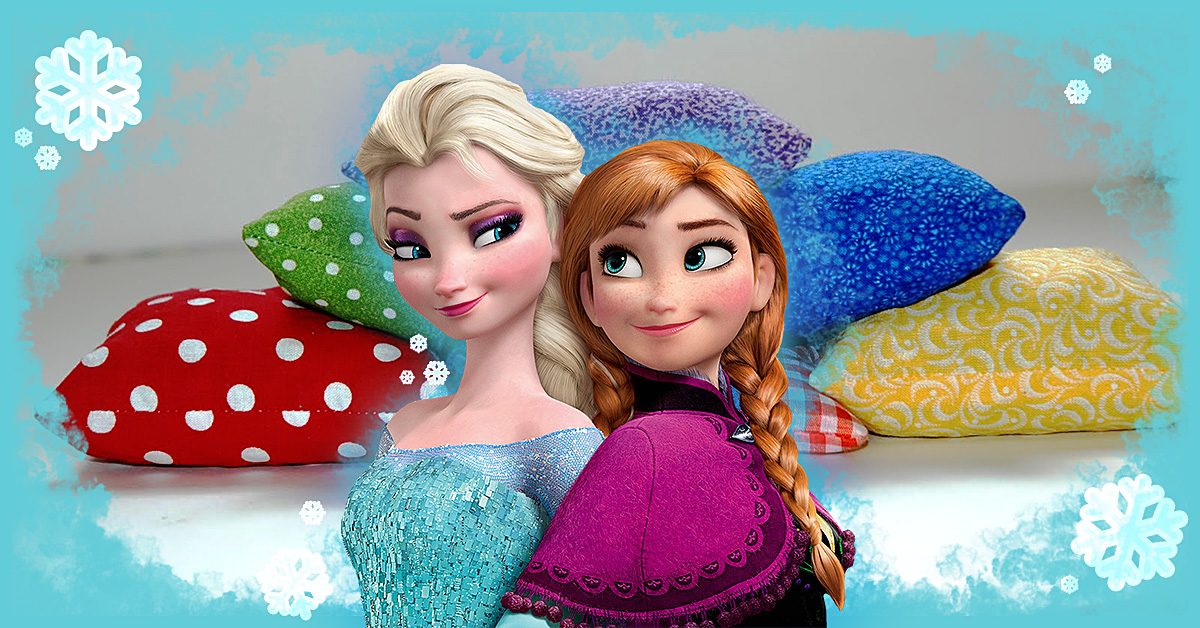
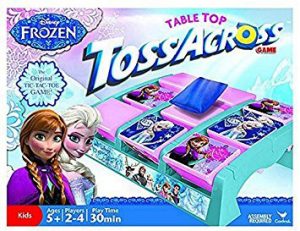
Frozen Toss Across set , and it comes with simple blue throwing bags.

Frozen Toss Across set , and it comes with simple blue throwing bags.

So, my niece has this Frozen Toss Across set , and it comes with simple blue throwing bags. The idea is to tic-tac-toe with Anna or Elsa (whichever character you are) to win, but the thing is that we currently only have three throwing bags out of the original set that we can use. What that boils down to is that the two of us would play the game one toss at a time, and we’d have to keep going over to the board to retrieve the bags for the next round. Sure, it’s doable, but it isn’t as convenient as only having to go bag-retrieving every third toss or so!

Get resourceful

Yesterday, it occurred to me that I have small pieces of material and fewer throwing bags than we used to have. Why not use some of that fabric to make new throwing bags?

It’s a simple idea, and the process was fairly to-the-point. All I needed beyond the sewing essentials of fabric, needles, thread, and pins was something to fill up the bag, which I honestly had to think on for a while — maybe until I was ready to fill the throwing bag. I thought about trying small rocks, but I was sewing at night. Since I didn’t want to wait until morning to finish my trial sewing bag or go rock hunting at night, I needed another option. At some point, it dawned on me that I have blue sand that could work, but you might find something just as fitting for the purpose around your house. Just think a little outside of the box, and the fillings might take shape!

Time to begin

I took one of the pieces of fabric & folded it in half since the fabric size was nearly ideal to make two separate throwing bags.

I took one of the pieces of fabric & folded it in half since the fabric size was nearly ideal to make two separate throwing bags.

Now that we have the list of supplies, it’s time to get into how all of them came together into a Toss Across throwing bag. First, I took one of the pieces of fabric and folded it in half since the fabric size was nearly ideal to make two separate throwing bags. These bags needed to be small enough to flip spaces on the board, after all! Once I cut the fabric in half, I again cut it in the opposite direction so that what started as one piece of material was now four individual pieces — two for each throwing bag.

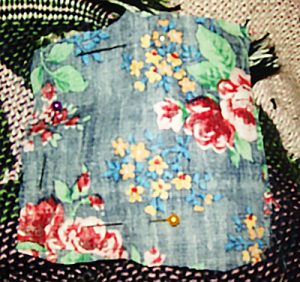
Luckily, these are small products, so I only needed about three pins to hold them!

Luckily, these are small products, so I only needed about three pins to hold them!

Then it was time to pin them. Luckily, these are small products, so I only needed about three pins to hold them! I took two pieces of the fabric and placed them together so that their printed sides were facing one another and pinned them on three sides to hold them steady. Note: This is also a good time to trim off any excess fabric on the ends if they’re terribly uneven with one another, though these seams will be inside the bag anyway. You don’t have to be too careful to make things perfect!
From there, it was time to sew, which was a pretty straightforward process! Three sides needed to be closed up completely, but I needed to keep that fourth side open to fill the sewing bag before I closed it as well. I simply sewed one side, then the next, and then the next. Then, it was time to flip the bag so that the printed fabric was now on the outside and add in what I decided would be blue sand to fill it. Again though, you can try a different tactic to fill the throwing bag — sand, beads, etc.

You can try a different tactics to fill the throwing bag — sand, beads, etc.

You can try a different tactics to fill the throwing bag — sand, beads, etc.

Be sure though while you’re filling the throwing bag that you don’t fill it too full. It’s important that it’s weighty enough to be able to turn one of the Toss Across spaces, but if it’s too full, you might have a hard time sewing that final side together. As it happens, I ended up towing the line, so for future projects, I might use a little less filling!

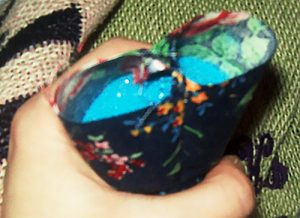
Once I’d finished with the filling, I sewed that final line together. I did this by folding the edges inward, kind of like I was wrapping a present, then folded the line downward to pin it in place. After that, I just had to sew what I’d pinned and cut the thread.

I did this by folding the edges inward, kind of like I was wrapping a present, then folded the line downward to pin it in place.

I did this by folding the edges inward, kind of like I was wrapping a present, then folded the line downward to pin it in place.

I have plenty of fabric to keep making these, but already with this one bag, I’ve evened up the throwing bag numbers so we can play two rounds at a time!

Do NOT iron minky directly!

Tips for Sewing with Minky Fabric (Cuddle or Plush Fabric)

Tips for Sewing with Minky Fabric (Cuddle or Plush Fabric)

I know a lot of people that shy away from sewing or quilting with minky but I’m here to tell you that minky is not the bogey-woman some people make it out to be, as long as you follow some important tips to make your sewing with it a success.

1. Pre-washing is not needed. Well, at least for the minky that is. Plush fabrics are made from polyester so they don’t shrink. If you’ll be pairing with fabrics that do shrink, then pre-wash the other fabrics in advance.

Minky bumps

2. Nap! Minky has a nap. Nap is the raised or fuzzy/bumpy parts you find on certain fabric (think velvet). If you brush your hand one way on minky, it will be soft, if you brush it the other way, it will be rougher. Take the direction of the nap into the consideration when cutting out your project.

Take the direction of the nap into the consideration when cutting out your project.

Take the direction of the nap into the consideration when cutting out your project.

3. Minky can STRETCH! But only from one direction. Take a piece of the fabric you are working with and stretch it one direction and then the other. You’ll find the stretchy side very quickly. I make sure to not ever leave my hole for turning on the super stretchy side.

Minky can STRETCH! But only from one direction.

Minky can STRETCH! But only from one direction.

4. Use the right needle and correct sewing foot. A lot of guides will recommend a universal needle size of 12. I prefer size 14, but find what works for you. Additionally, if you have a walking foot, use it! If you are too lazy to use your walking foot (or don’t have one), I find minky sews better when you place it on the bottom and the regular fabric on the top.
Use a walking foot. I find minky sews better when you place it on the bottom and the regular fabric on the top.

Use a walking foot. I find minky sews better when you place it on the bottom and the regular fabric on the top.

5. Seam allowance and stitch length – I tend to give myself more room with minky and usually use a 1/2” seam allowance. I also use a longer stitch length, around 4.

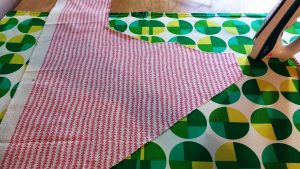
6. DO NOT IRON MINKY DIRECTLY. It will melt. I promise you. You need to even be careful ironing with another fabric placed on top as pressing too hard or with too much heat will ruin the nap or little bumps of the minky underneath.

7. Pins, clips and washable basting spray or this Wash-A-Way Wonder Tape are your friends with minky. Use them excessively and you’ll get much better results.

https://www.sewingmachinesplus.com/tacony-BT14.php

Pins, clips and washable basting spray or this Wash-A-Way Wonder Tape are your friends with minky.

Pins, clips and washable basting spray or this Wash-A-Way Wonder Tape are your friends with minky.

8. Top stitch!! Top stitching minky will really help to remove bulk, keep the seams in line and make your project look more professional.
Top stitching minky will really help to remove bulk, keep the seams in line and make your project look more professional.

Top stitching minky will really help to remove bulk, keep the seams in line and make your project look more professional.

9. Use a rotary cutter and a vacuum. Rotary cutters help make very exact cuts with minky. I also suggest having your vacuum nearby to clean up after cutting and to clean out your machine as you sew. SewingMachinesPlus.com has a variety of vacuum cleaners for your sewing room.

https://www.sewingmachinesplus.com/tacony-fb-gim.php

10. Practice! You’ll get better the more you use it. Soon, you’ll be wondering what all the fuss is about when others say they shy away from sewing with plush fabrics.

Do you have any tips for making sewing with cuddle fabrics a success? Let us know what works for you in comments!

———————————————————————————–
Charlotte Kaufman is a writer and sewist in Mammoth Lakes, California. She specializes in marine and home interiors and continues to fall more and more in love with quilting. You can follow her at charlottekaufman.com.
What to Consider When Purchasing a Sewing Machine

What to Consider When Purchasing a Sewing Machine

You’ve finally decided to make the leap and buy a sewing machine. The only problem is when you walk into the store there are so many choices and price ranges. You’re not sure what you need or how much you should really spend. Without getting into a bunch of technical details and specifications, there is a way to narrow down your options.

What to Consider When Purchasing a Sewing Machine

Usage

Think about what you’re going to be doing with the machine. Are you planning to quilt? Make basic clothing and home décor items? Embroider? What you’ll be making and how frequently are important factors. Some machines are more multi-purpose than others. For basic sewers with a few interests, these can be a good option.

Complexity and ease of use

The more settings and options a sewing machine has, the more complex it likely is to use. Unless you’re planning to use your sewing machine to start a business, you don’t need a machine with too many options, no matter how good they sound in theory. It’s far more likely that a sturdy, basic machine with easy to use and understand controls will be best for your needs.

Price

Many people shop by brand name. Singer is a long-standing reliable brand, but they can also be on the pricier side. Instead, I suggest you eliminate the cheapest and most expensive options. Make your selection from the ones remaining in the middle using the tips above.

Embroidery Software and Designs Guide

Embroidery Software and Designs Guide

There is a wide array of embroidery software and design choices available

Embroidery Software Pin

Embroidery Software Pin

When I shared an embroidery machine buyer’s guide last week, I did not touch on the subject of embroidery software and downloadable designs. That’s because you don’t need to buy any software or additional designs to start creating on an embroidery machine.

But once you have gotten comfortable with your machine, chances are you will want to expand your capabilities and design options by investing in more designs and/or software.

Without a good understanding of the different options, this subject can be just as confusing as choosing a machine. Let’s look at the different types of embroidery software and additional designs available in order to gain a clear view of the different types of software and other options available for extending your possible embroidery designs. Your choices include:

  • Design collections
  • Membership club
  • Digital downloads
  • Editing software
  • Lettering software
  • Digitizing software
  • Thumbnailers
  • Cataloging programs

Designs on disc

An easy investment to start building a larger library of embroidery designs is to purchase collections on CD-ROM. There are a ton of options to choose from in this category. Each will include many designs within a particular theme.

A great choice for these is Anita Goodesigns, which offers a huge collection of gorgeous designs. Sewing Machines Plus has fifteen pages of different Anita Goodesigns to choose from, including:

  • Baby designs, from vintage to cartoon-style, and everything in between
  • Holiday, seasonal, and religious motifs
  • Animal designs, both whimsical and realistic
  • Butterflies, dragonflies, and bugs
  • Fruits, vegetables, and baked goods such as cupcakes and donuts
  • Foliage and flowers galore
  • Faeries
  • Customizable designs for your sewing club
  • Mandalas
  • And plenty more
Anita Goodesigns Sun

Anita Goodesigns Sun

These collections work for many different machine formats: ART, DST, EMD, EXP, HUS, JEF, PCS, PES, SEW, SHV, VIP, and XXX.

You may also like to check out design collections from Amazing Designs, Dakota Collectibles,  Michelle’s Designs and Notcina.

VIP Club

Individual design collections on disc are an inexpensive way to start expanding your design library. But if you are like me, you will want them all! Buying all the individual collections separately would require a tremendous investment. But luckily, the folks at Anita Goodesigns realize that we will want them all, and so they made it easy for us to get them with their membership club.

The VIP club gives you ALL of the designs previously released, and then sends you the new designs that are released throughout the year. Plus, they include more member benefits, such as all the quilt and cutwork designs, as well. To read about all these benefits and extras, head over to the Anita Goodesigns Club page.

Digital downloads

You can find many designs online, through Etsy and elsewhere, available as digital downloads.

You need to know which file format your embroidery machine requires before downloading designs. Different machines require different formats and other formats are not compatible. For example, most Janome machines use .JEF files, Singer uses .XXX, Brother and Babylock generally use .PES format. Be sure to choose the correct format for your machine when downloading designs. However, if you own editing software, which we will discuss next, you can convert design formats.

You can find some free designs for digital download online. It is also possible to get premium designs for free. For example, Floriani includes a POP coupon code for a free design download on the label inside each package of their stabilizers. Once you collect ten of these codes, you can redeem them for ten design downloads. You will need stabilizer for all your embroidery designs. Floriani stabilizers are high-quality and are available in all types and weights. So the free download bonus packaged inside makes choosing these stabilizers a no-brainer.

You can also get five free Floriani downloads every month after you buy their Total Control software, which we will discuss soon.

Embroidery software for editing

Editing software will allow you to do many things, such as:

  • Resize designs and recalculate stitches
  • Merge designs
  • Convert thread brands
  • Colorize
  • Add lettering, including large letters
  • Convert design formats to the type your machine accepts
  • Overlap designs
  • Change or remove individual colors in a design
  • And more

Editing software is available in a wide range of prices. Embrilliance Essentials is an awesome option that is super affordable and will allow you to easily do all of the above, plus more. This program works on both Windows and MAC operating systems, too.

Embroidery software for digitizing

If you want to stretch your creativity further and make your own designs, then you need digitizing software. This type of software will take a piece of clipart, a vector drawing, or other image and convert it into an embroidery design.  Digitizing software will also convert fonts from your computer into letter embroidery. They can do lots of other amazing things, too; for example, you can use them to convert regular embroidery designs into cross stitch.

Many folks consider Floriani digitizing software to be the best. It is a super high quality all-in-one program which covers every possible editing and digitizing function. It also comes with the added benefits of having tons of tutorials and other help available online, and the five free design downloads a month that I mentioned previously here.

I prefer a different option, however.  I’ll be going with the Artistic Suite and Artistic Premium upgrade for my own embroidery software, and here’s why:

The Artistic Suite and Premium software costs less and includes more. This software goes beyond embroidery and includes a slew of helpful applications for quilting, appliqué, reverse appliqué, fabric cutting, heat transfer, and making elaborate rhinestone designs.  It is also useful for scrapbooking applications, and will make cut-outs from most anything, including paper, foam, and even balsa wood.

Artistic Suite does all these things as an editor, and the Premium upgrade adds digitizing capabilities. I’m amazed by everything I can do with these programs, and I can buy both of them without spending an arm and a leg! The Artistic program is available for both single needle and multi-needle machines.

Embroidery software: thumbnailers and cataloging

The Embrilliance thumbnailer is a little program that you won’t want to be without. And the price is so nice that there is no need not to pick this up right away.

This program collects all your embroidery designs into one place on your computer and lines them up as thumbnail images so that you can easily them all. Without it, you have to search and view every design individually, which can cost a lot of time and cause much frustration. But there is no need to waste any time or be frustrated at all when this solution is so simple. It is compatible with both PC and MAC.

There is another option for cataloging your designs into categories on your computer. That is Floriani’s My Design Album. This program is easy to install and will find all the various embroidery designs on your computer and compile them into one easy-to-find place. Then you can set up categories to find these designs more easily. The Design Album includes some editing capabilities as well.

Now is the best time to buy

February is National Embroidery Month, and Sewing Machines Plus is celebrating by offering big discounts on all embroidery equipment and supplies. So now is a great time to invest in additional embroidery designs and embroidery software. Take advantage of these great deals and expand your design library and capabilities today!