I’m barely over 5’ tall. It used to be that clothing companies made pants in “short” lengths to accommodate people of my stature. More and more often now, though, I’m finding that clothing companies, particularly jeans producers, make pants in “regular” and “tall.” I’m not sure why they think all the short (or as I prefer to call it, concentrated awesome) people no longer need pants, but there you have it. As you can imagine, this leaves me with the choice of either patching jeans and pants until there’s nothing left to them, or buying clothes that are too long and hemming them. Hemming something I’ve paid money for ticks me off, so I want to get it done and over with quickly. I developed a fast and easy way to hem jeans and pants.
First
Find a pair of pants that are a length you like. These will act as your template or guide. Lay them flat and smooth. If possible, I suggest pinning them down to keep them flat. Next, turn the pair of pants you’re going to hem inside out. Lay them on top of the pants that are the correct length.
Let’s begin
Choose a place on the leg of the pants where you’ll be okay with seeing a line. I often opt for the upper thigh. In that spot, pull the leg of the pants that are too long up, gathering the extra fabric in a straight fold that goes around the entire leg as you go. When the pants are the right length, pin this fold so that it comes directly out from the leg itself. Do this on both legs.
Almost done…
Sew around the fold to create your shortened pants, then cut off the extra fabric. Whip stitch around the cut edge for extra strength in the seam and reassurance that it won’t split apart while you’re wearing your new pants. Again, do the same thing on both legs.
Viola!
Hemmed pants, perfect for your height – no measuring or marking required. This is one of my favorite “sewing cheats” because it’s so quick and helps me buy pants and jeans affordably, even clothing companies no longer feel the need to cater to people my size. Give it a try next time you need to hem pants and let me know what you think!
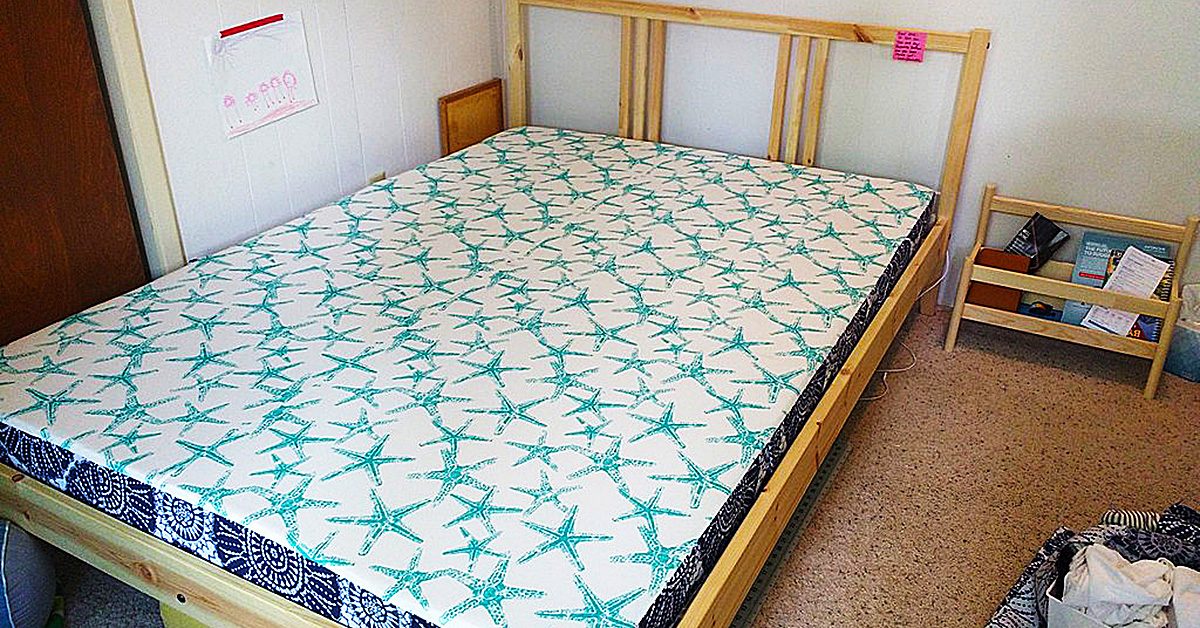
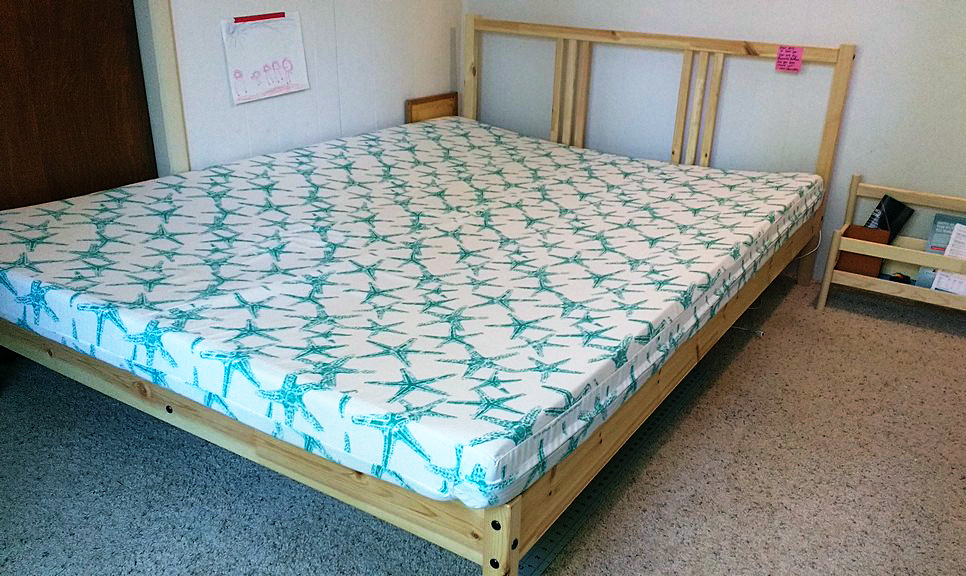
My husband and I sleep on a full-sized bed on 4” of high density foam that we bought from Keyston Brothers, a store that specializes in auto and marine foam and fabric (We use density type Q41 for anyone interested in doing the same). We find the foam lasts about five years before we need to replace it and for a full-sized mattress’ worth, it costs about $250. That is loads cheaper than a fancy mattress and we sleep like babies.
Sweet dreams!
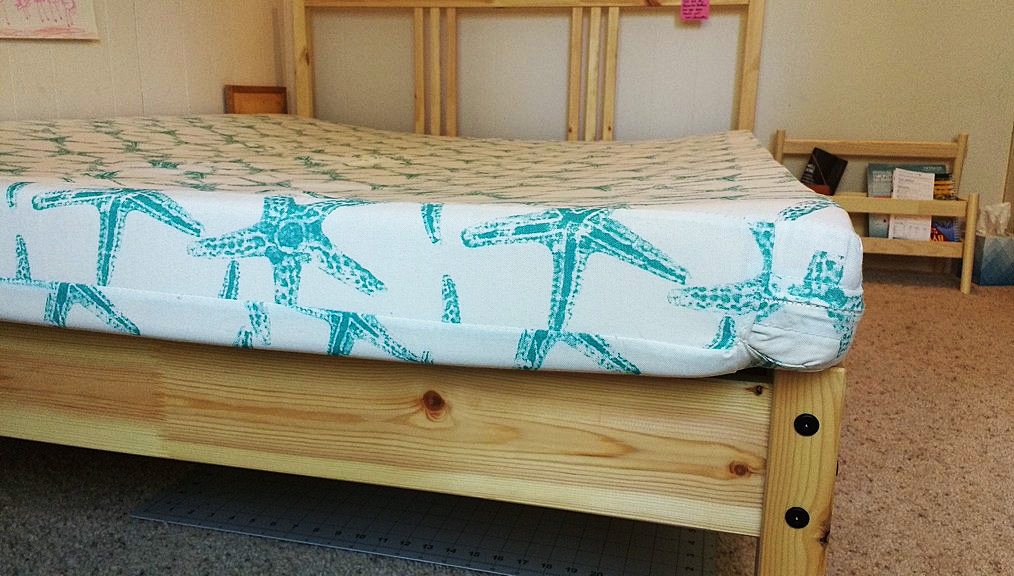
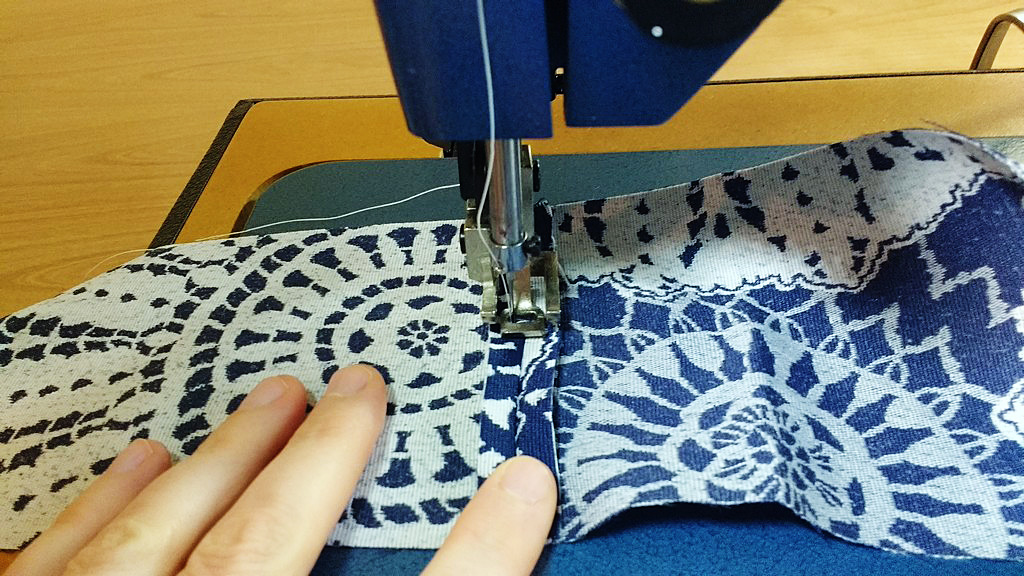
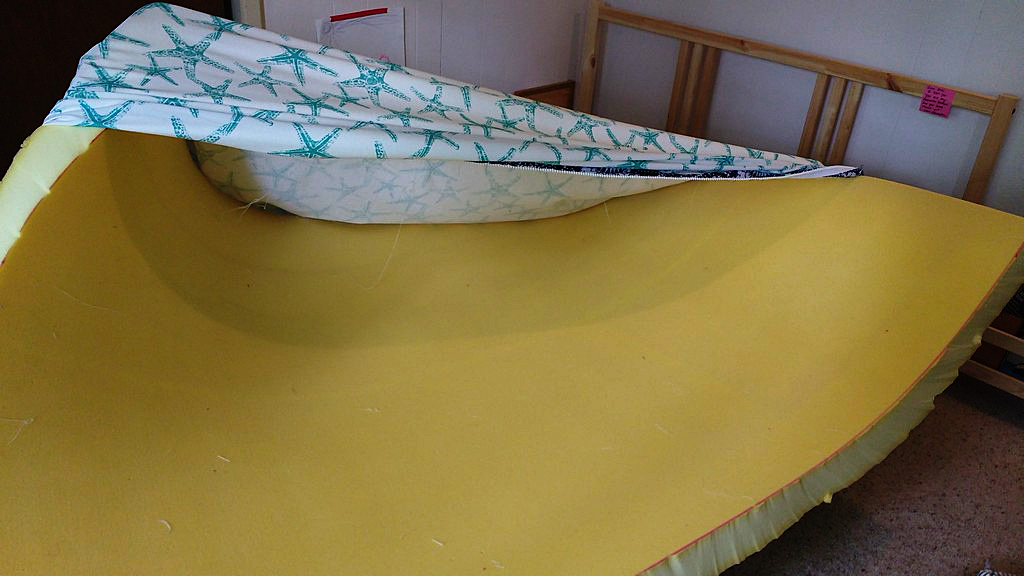
We discovered this foam when we were replacing the cushions in the v-berth of our sailboat. We lived aboard for almost eight years and slept amazingly. When we moved on land we decided to cut costs and stick with the foam. I made a custom cover for it but this frame we recently got from Ikea is smaller than the foam. See how it curves down into the bed and up and over the edges? My husband and I were getting rolled into each other at night so I knew I was going to have to take matters into my own hands.
See how it curves down into the bed and up and over the edges?
Let’s get started
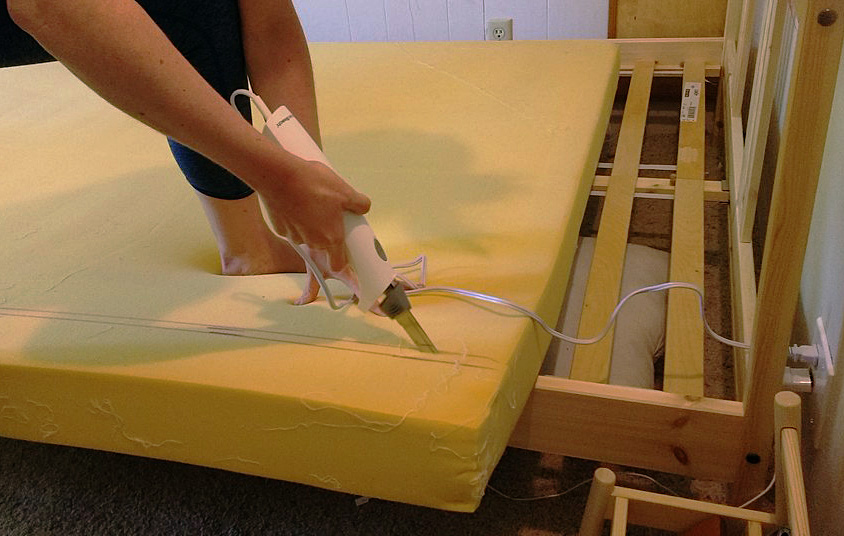
I took off the cover I had made and measured the foam to a size that would fit in the frame. Then I got out my $20 electric cutting knife from Walmart and got to slicing.
Take a deep breath. We’re about to slice into our bed. Ready? Let’s go!
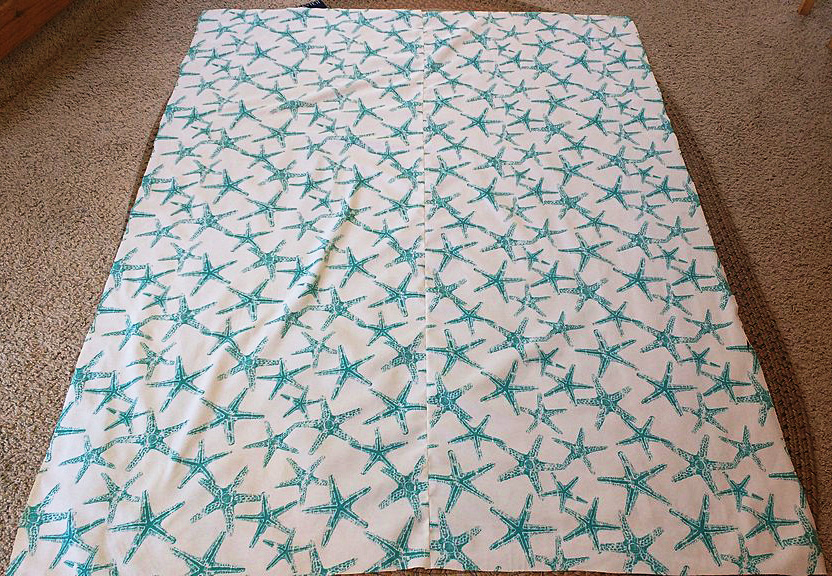
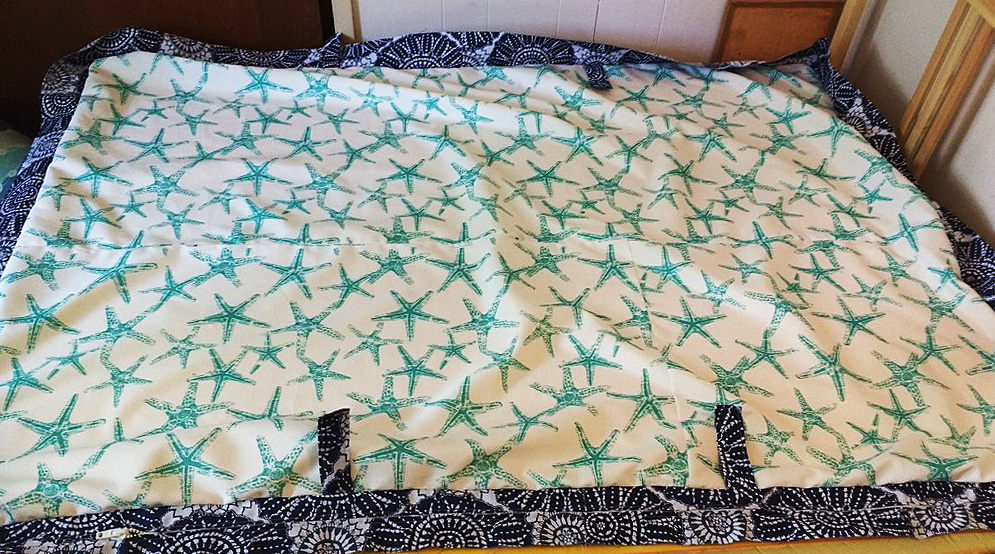
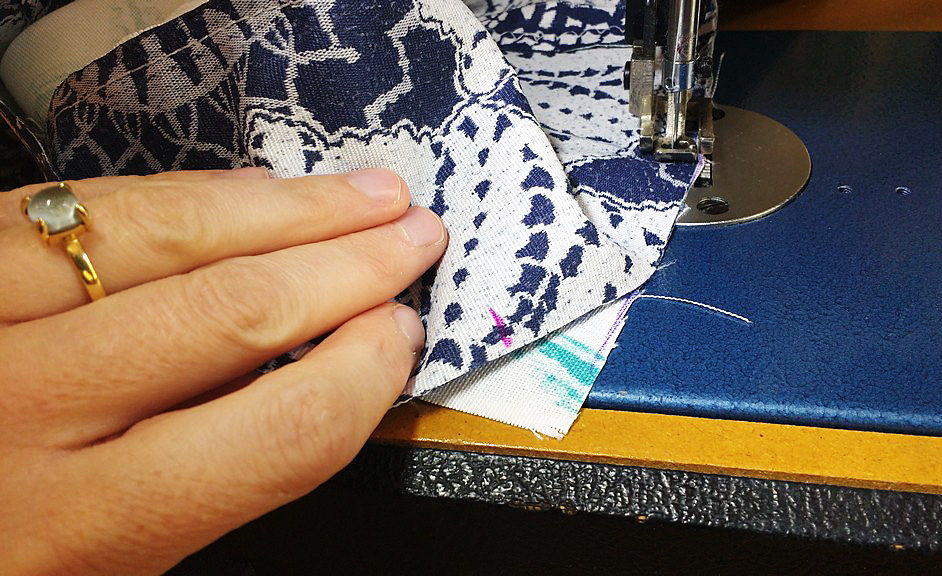
Upstairs, I cut the side piece (zipper piece) off of the top and bottom of the cover. Here are the two main panels laid out.
Here are the two main panels laid out.
Zipper time!
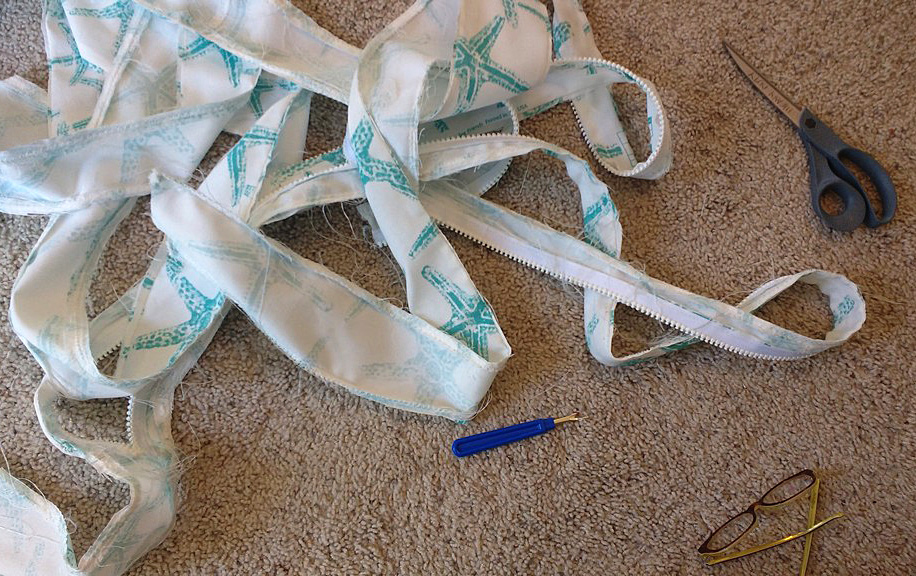
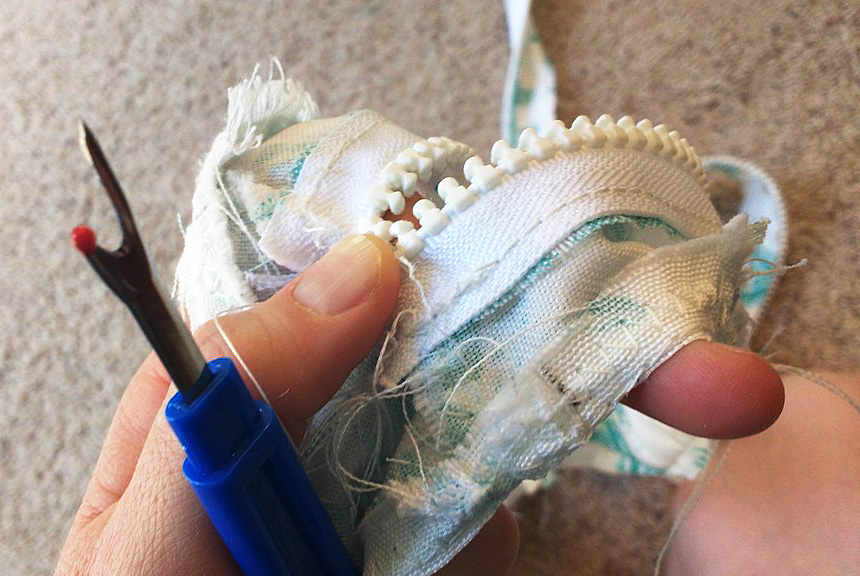
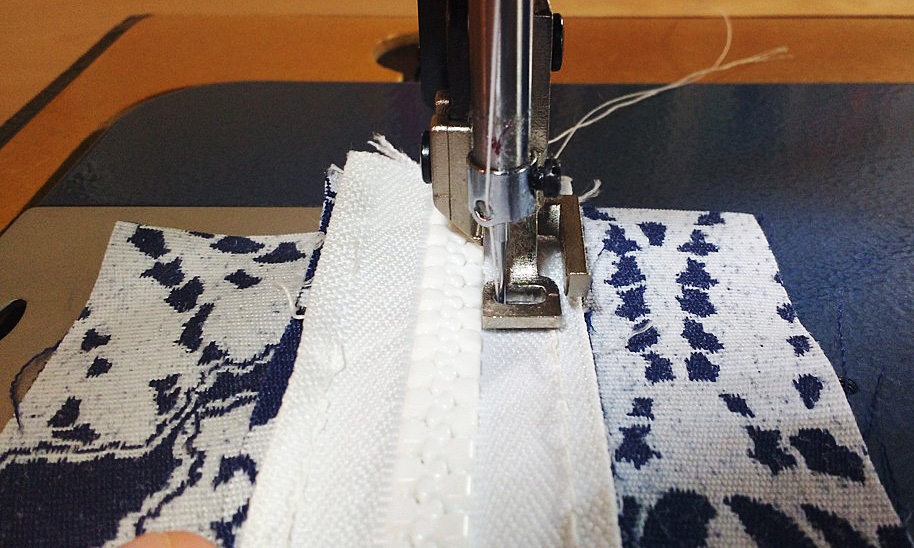
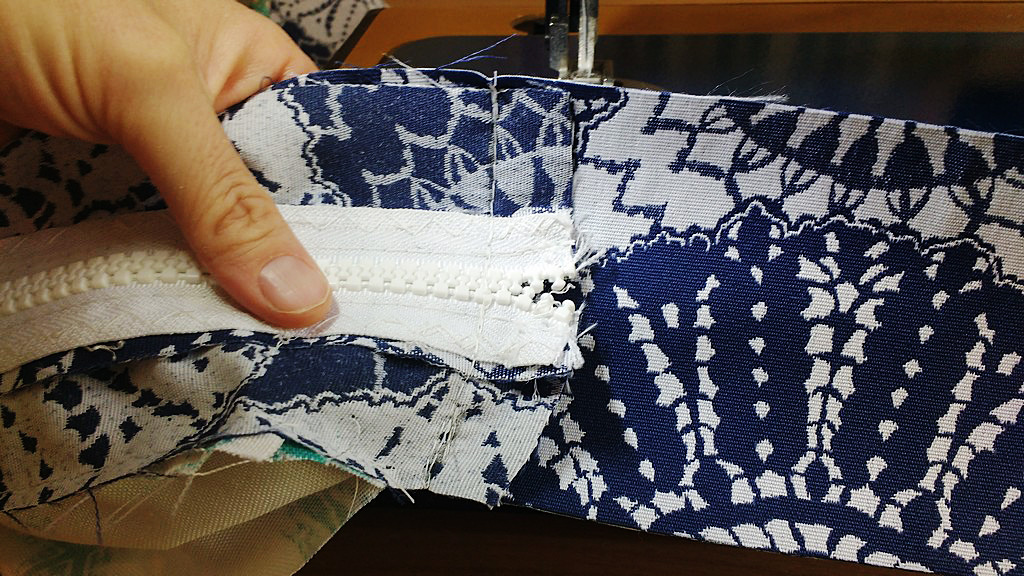
I had finished all my seams with zigzag stitches and there was no way I wanted to take out all those stitches. Instead I saved the zipper by just taking out the straight stitches holding it to the cover.
I saved the zipper by just taking out the straight stitches holding it to the cover.
Zipper saved! Now I didn’t have to buy another one for the smaller sized cover.
Zipper saved!
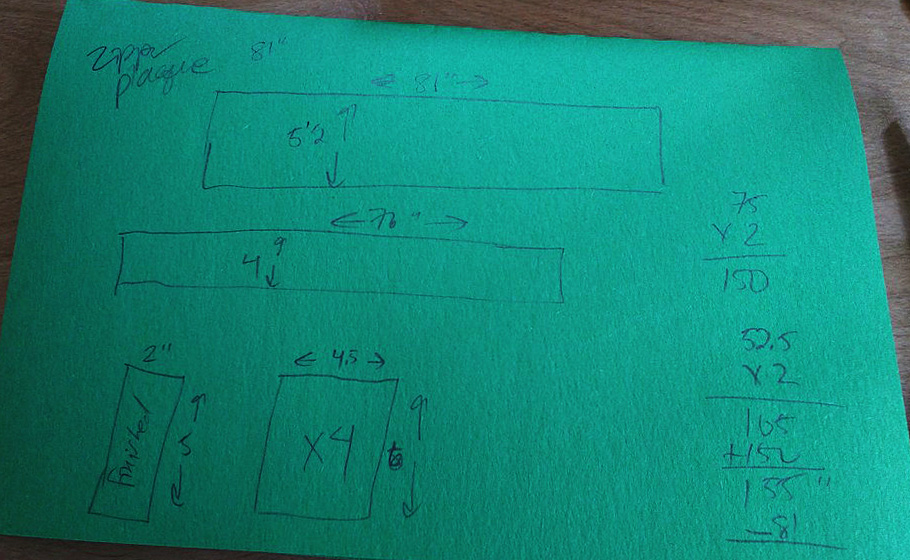
Let’s sketch this out…
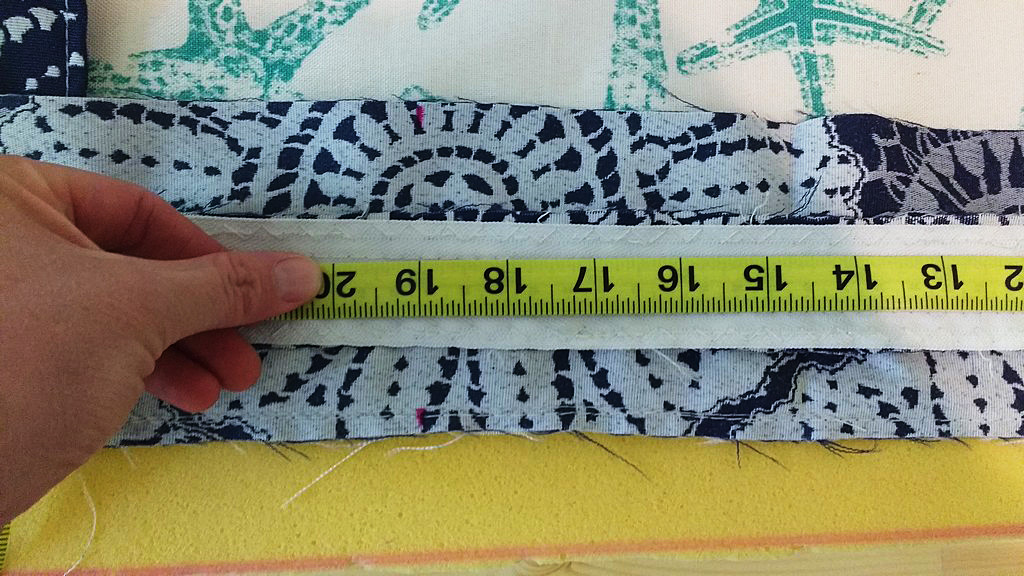
Math time! Here I had to work out the new size of the zipper plaque and the rest of the side facing. Plus I wanted to add handles this time so I measured out those too. I also cut the top and back panels to the same size as the foam that now fit in the bed frame.
Math time!
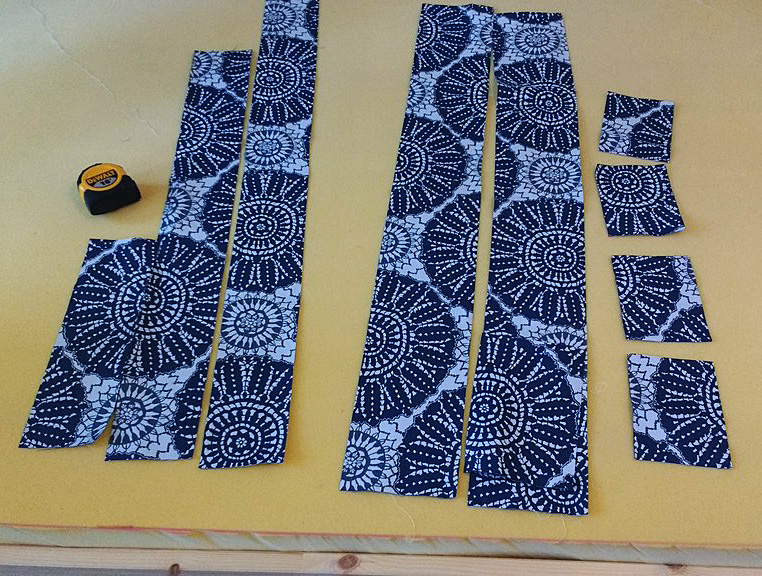
I was all out of the original fabric I had used to make the mattress cover so I used some leftover Sunbrella scraps I had from another project. Here are the parts I’ll need to piece together for the zipper plaque, the rest of the sides and the handles.
Here are the parts I’ll need to piece together for the zipper plaque, the rest of the sides, & the handles.
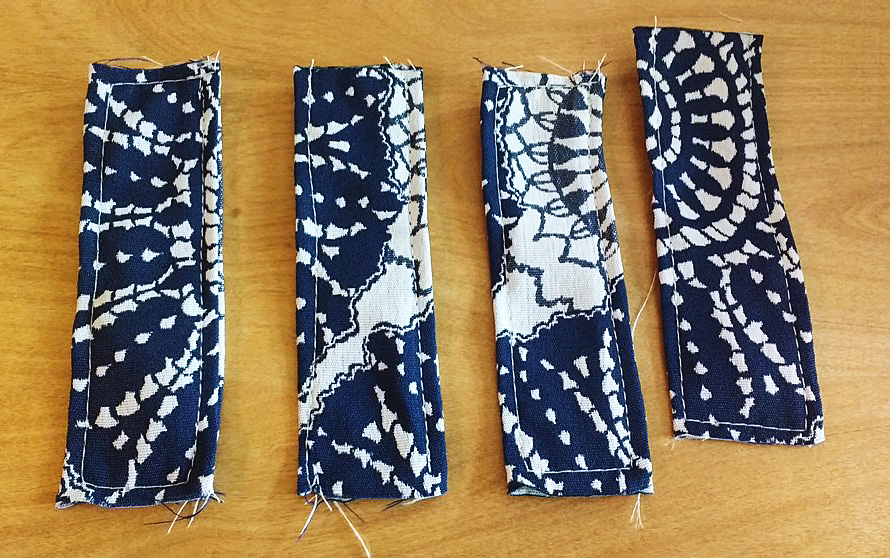
I made quick work of the four handles and top stitched them for strength. The ends are unfinished as they’ll be sewn inside the cover.
I made quick work of the four handles & top stitched them for strength.
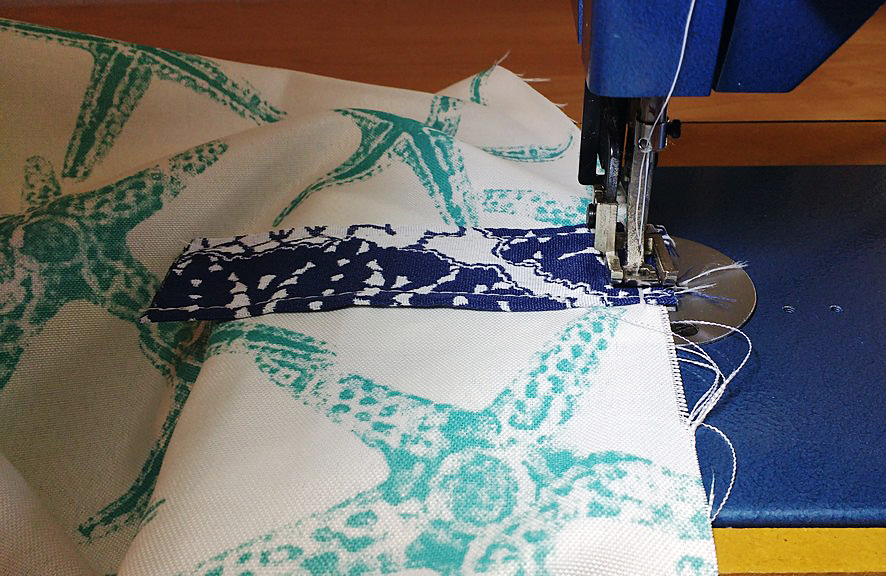
Next I sewed the zipper plaque and side pieces together. I also made sure to zig zag stitch each join to prevent the fabric unraveling.
Next I sewed the zipper plaque & side pieces together.
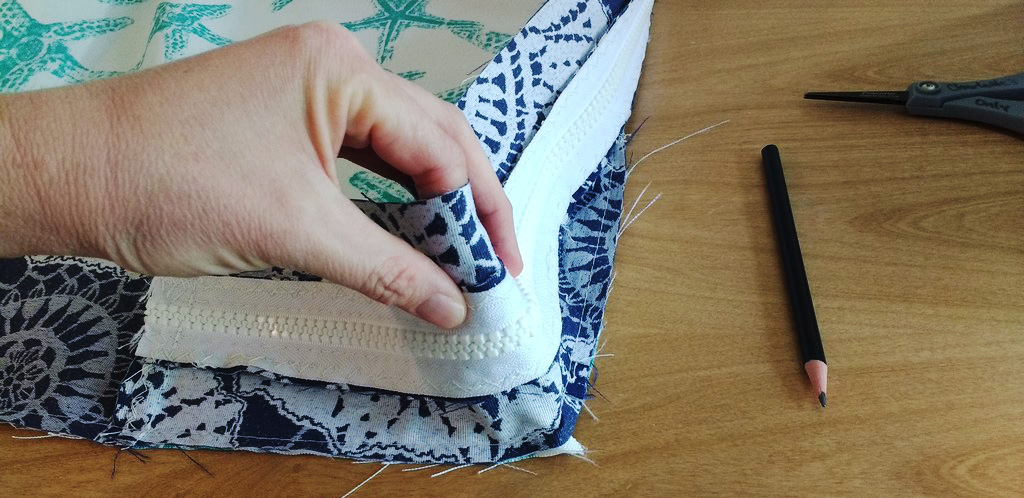
Making the zipper plaque is my favorite part. It means I’m getting close to being done. Here I’ve switched to a zipper foot so I can get super close to the zipper.
Making the zipper plaque is my favorite part.
Next I sewed on the handles to one of the large panels.
Next I sewed on the handles to one of the large panels.
Side facing
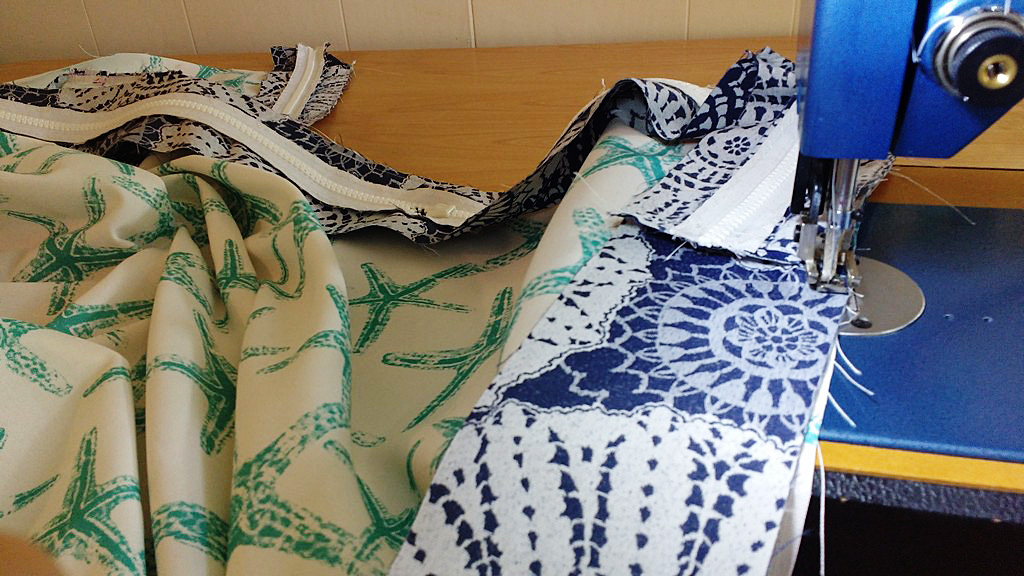
Now it was time to add on the side facing. Yes! I joined one end of the side panel to the zipper plaque and started sewing on the zipper plaque portion first. Then I just transitioned to the side piece and kept going all the way around.
Now it was time to add on the side facing.
I stopped several inches before I got back around to the beginning and joined the two ends. Then I trimmed off the excess, zig zag stitched the join, and then sewed that piece onto the bottom panel completely.
I stopped several inches before I got back around to the beginning & joined the two ends.
Pro tip: make sure you open up your zipper enough right now that you can get your hand through it to open it completely when turn this right sides out in a few more steps.
You are so close now!!!
You are so close now!!!
Before you begin sewing on the top panel there are still two important things you need to do.
Create match up marks.
Create match up marks. When you are working with large pieces of fabric, things have a tendency to shift. These marks will let you know you are joining the two pieces together where you should. If you look carefully you will see pink marks on either side of the fabric at the 19” mark. I marked the side pieces and then the top piece so everything should match up when I sew.
Do your corners!!! This is crucial. Go to each corner and fold it down and back until you are sure the piece is square with each side. Then mark that spot so you know you’re at the actual corner when you get there.
Do your corners!!!
Begin sewing your final panel to the cover. I like to put the panel that is being sewn on the bottom. Here you can see I’ve matched my corners perfectly.
Here you can see I’ve matched my corners perfectly.
When you’ve sewn all the way around you are ALMOST done but not quite. There are two things to be done first.
Take the time to carefully inspect ALL seams, fronts and backs. Sew anything you might need to.
Then you need to zigzag stitch both seams in order prevent the fabric from unraveling.
You may think you have finished the hardest part, but the worst is yet to come.
Pat yourself on the back
You may think you have finished the hardest part, but the worst is yet to come. It’s time for cushion Olympics. Yes, wrangling foam into cushions should be an Olympic sport.
Here’s what you need to know:
Go slowly. Do not pull the fabric or you will rip your seams and pop your zippers.
Rather, walk the foam into the cover. I like to fold it on the ends and walk it a little sideways.
Patience, patience, patience. Fit your foam into the pattern just the way you designed it. It you did your math right, it WILL fit.
Go slowly.
After burning some calories (always a good thing), you will have your new mattress with custom fitting mattress cover that actually fits into your bed frame. Now you may rejoice.
Now you may rejoice.
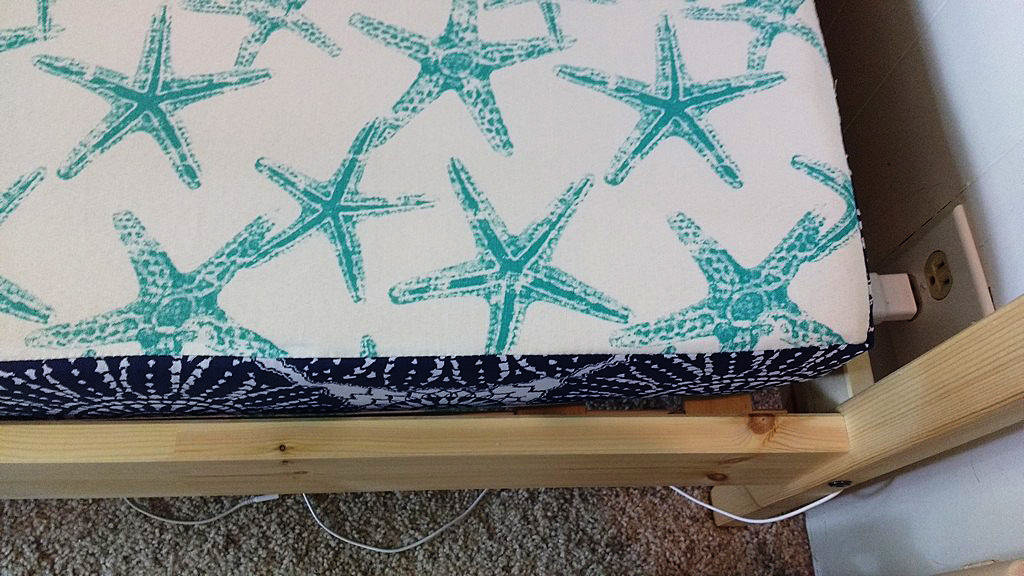
Look at those clean lines!
Look at those clean lines!
Do you make your own bedding, including mattresses? We’d love to hear about your work.
———————————————————————————– Charlotte Kaufman is a writer and sewist in Mammoth Lakes, California. She specializes in marine and home interiors and continues to fall more and more in love with quilting. You can follow her at charlottekaufman.com.
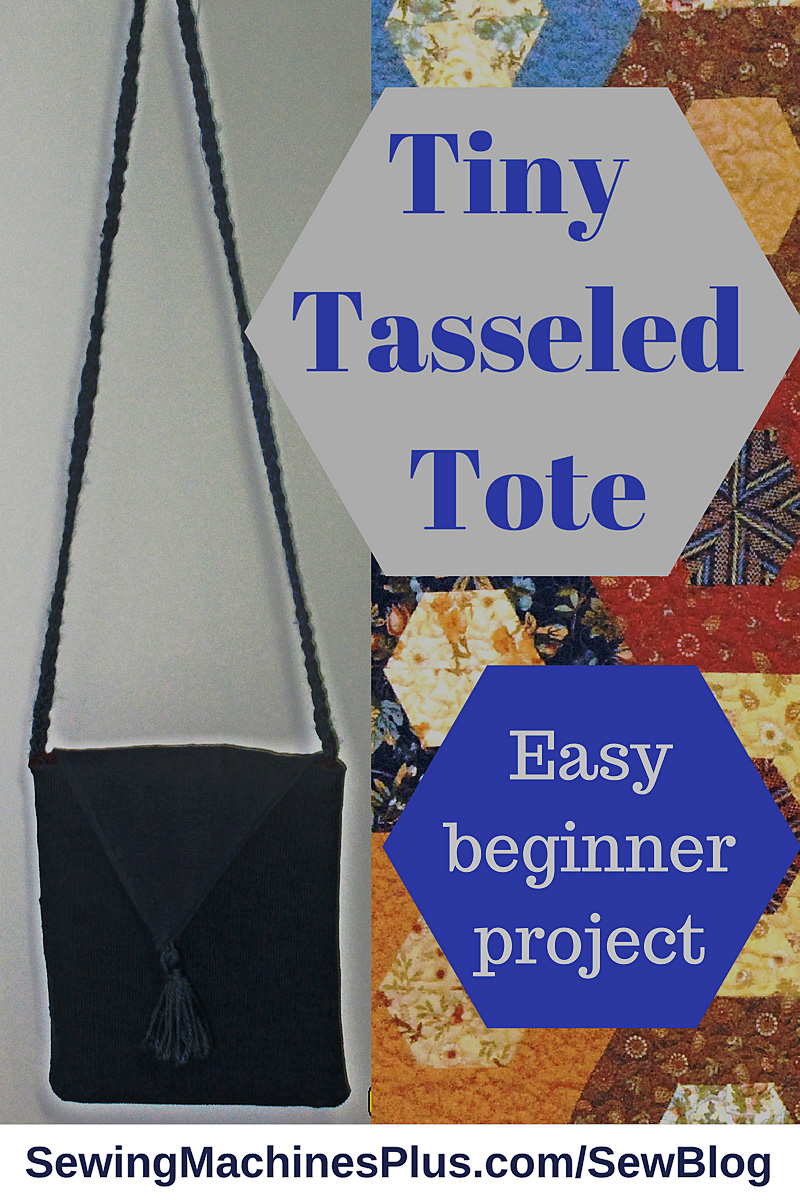
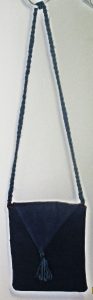
This elegantly simple bag is incredibly easy to sew and offers endless opportunities for embellishment. It is tiny as totes go, but as a small purse it is offers plenty of space for all your essentials, with room to spare. It features an outside pocket big enough for your phone or sunglasses, and two inner pockets, one sized for your ID and debit card.
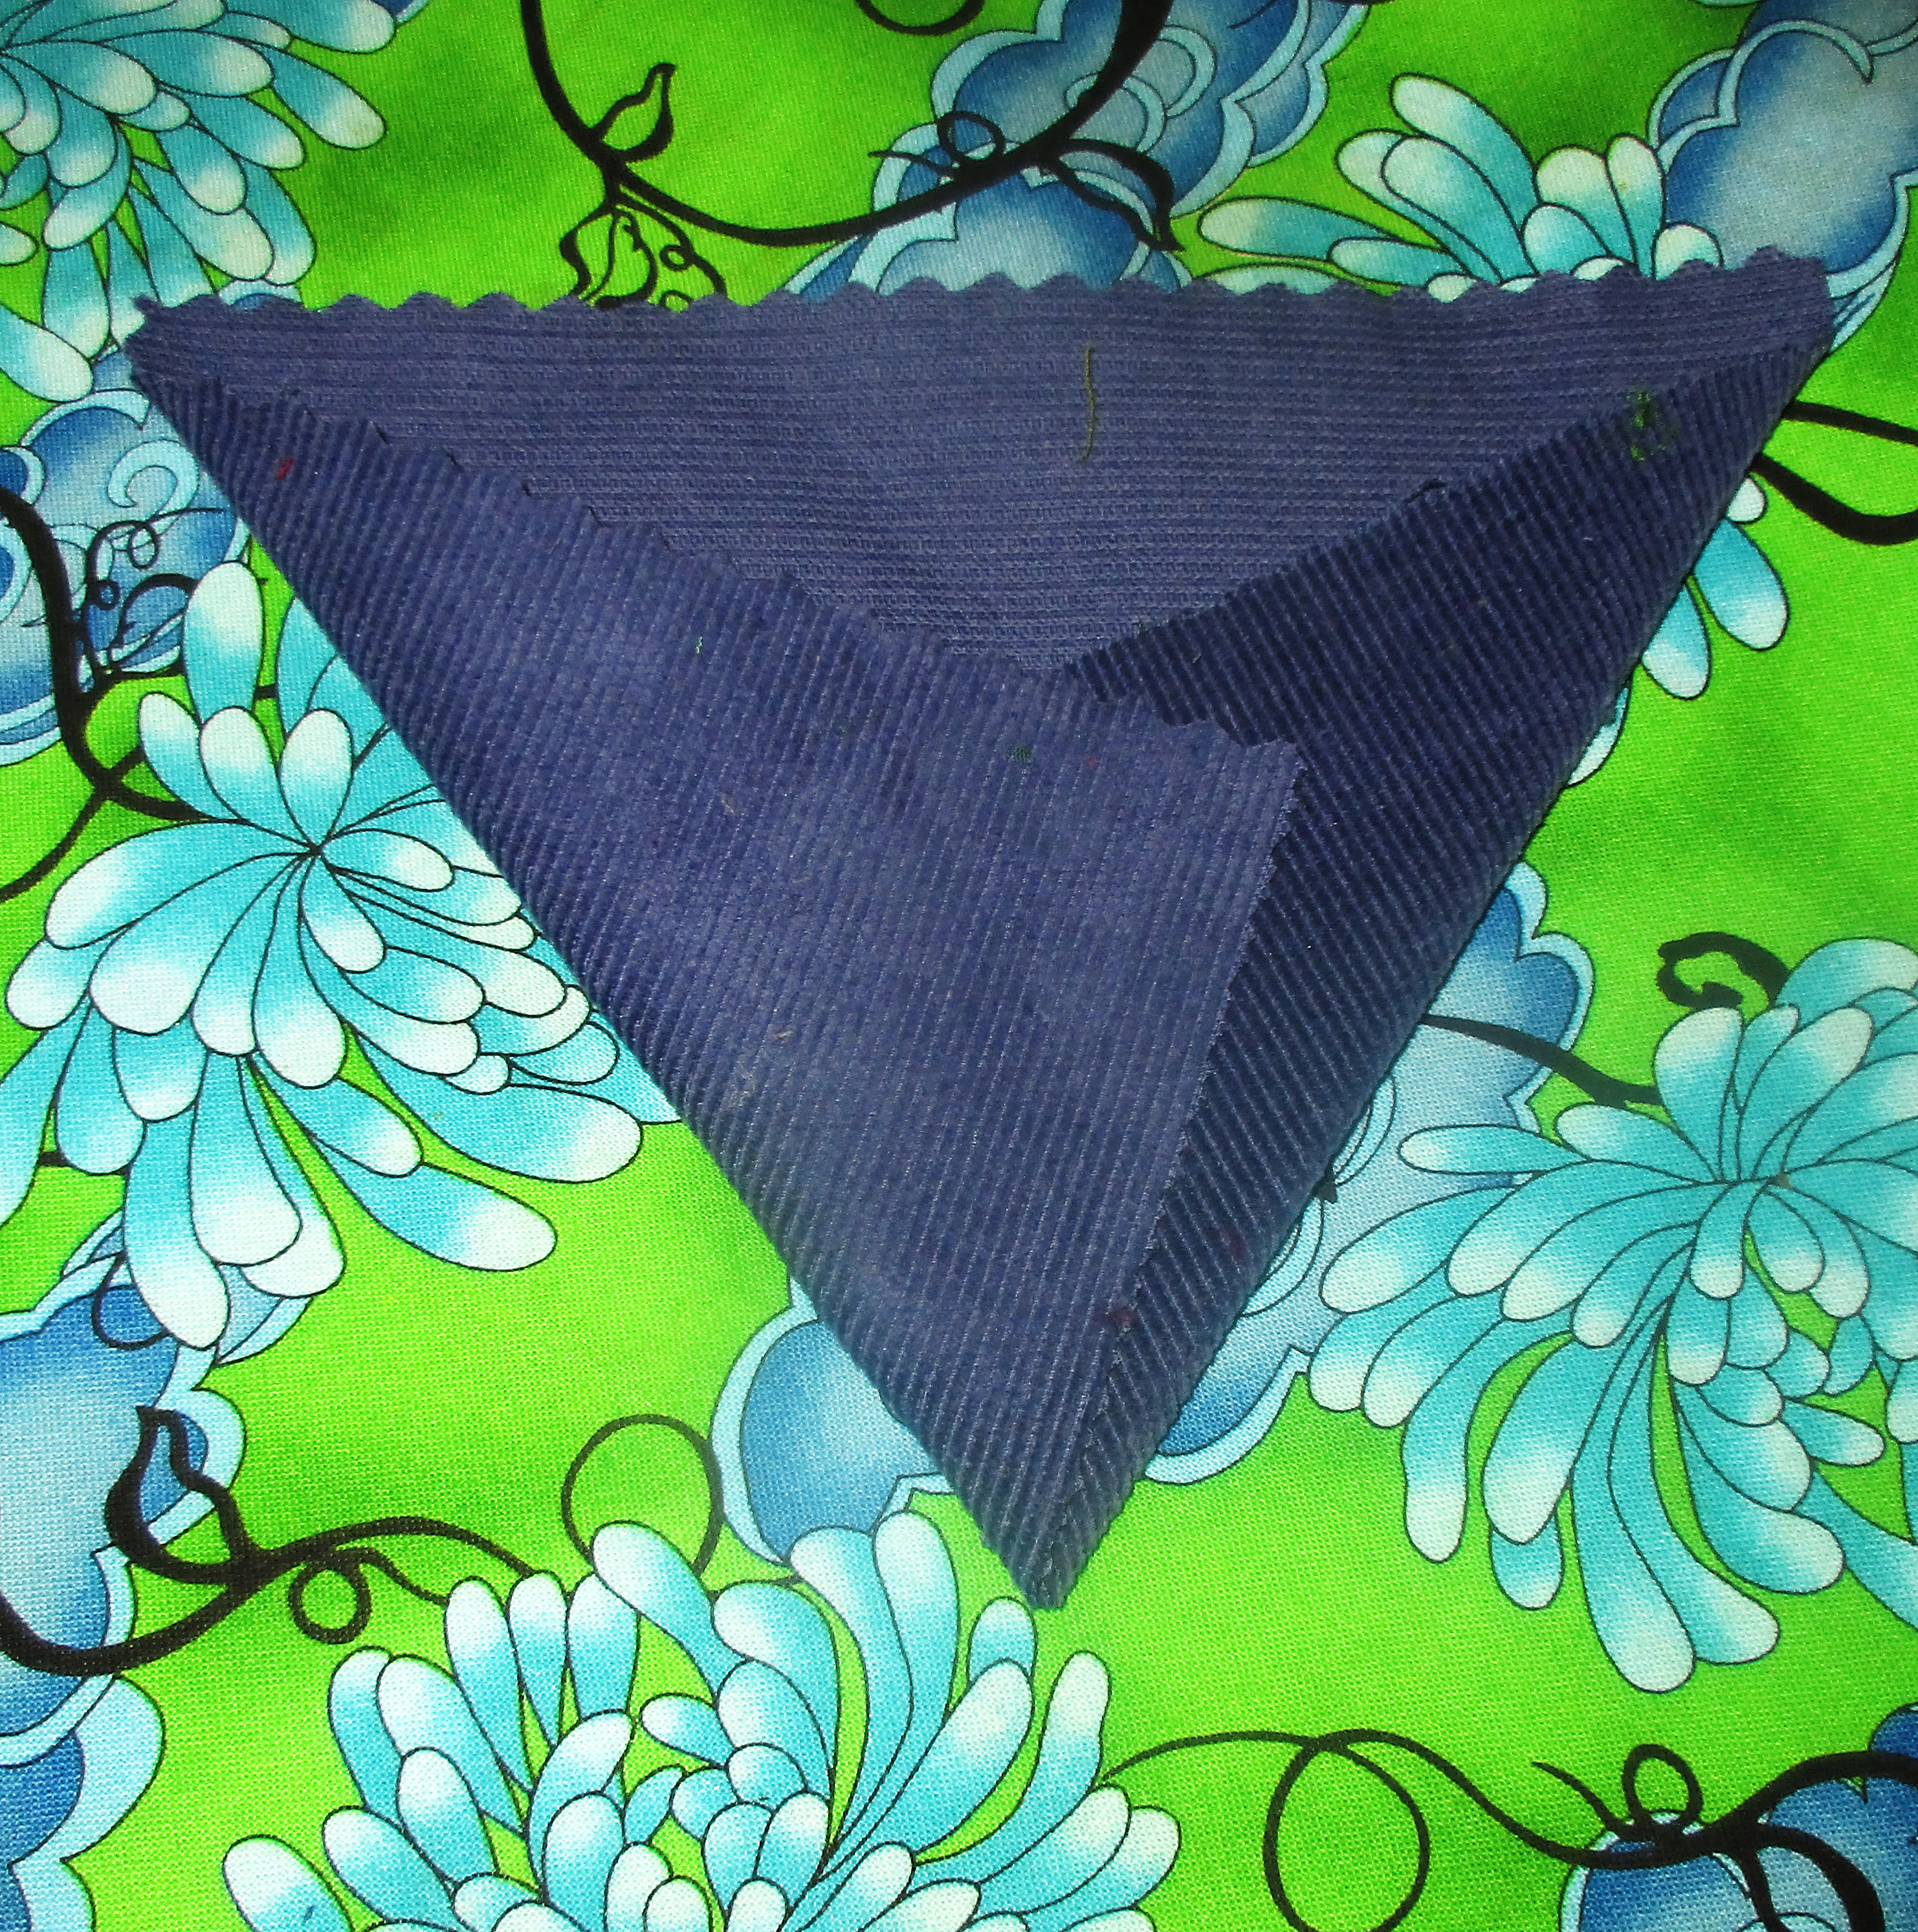
I really wish I had an embroidery machine; if I did I would completely cover this small bag with colorful embroidery. Since I don’t, I decided to make mine understated and casual in all one color and with minimum embellishment. I think this denim blue corduroy is nearly a neutral color and I know it will go with much of my wardrobe.
Tassel bag (front).
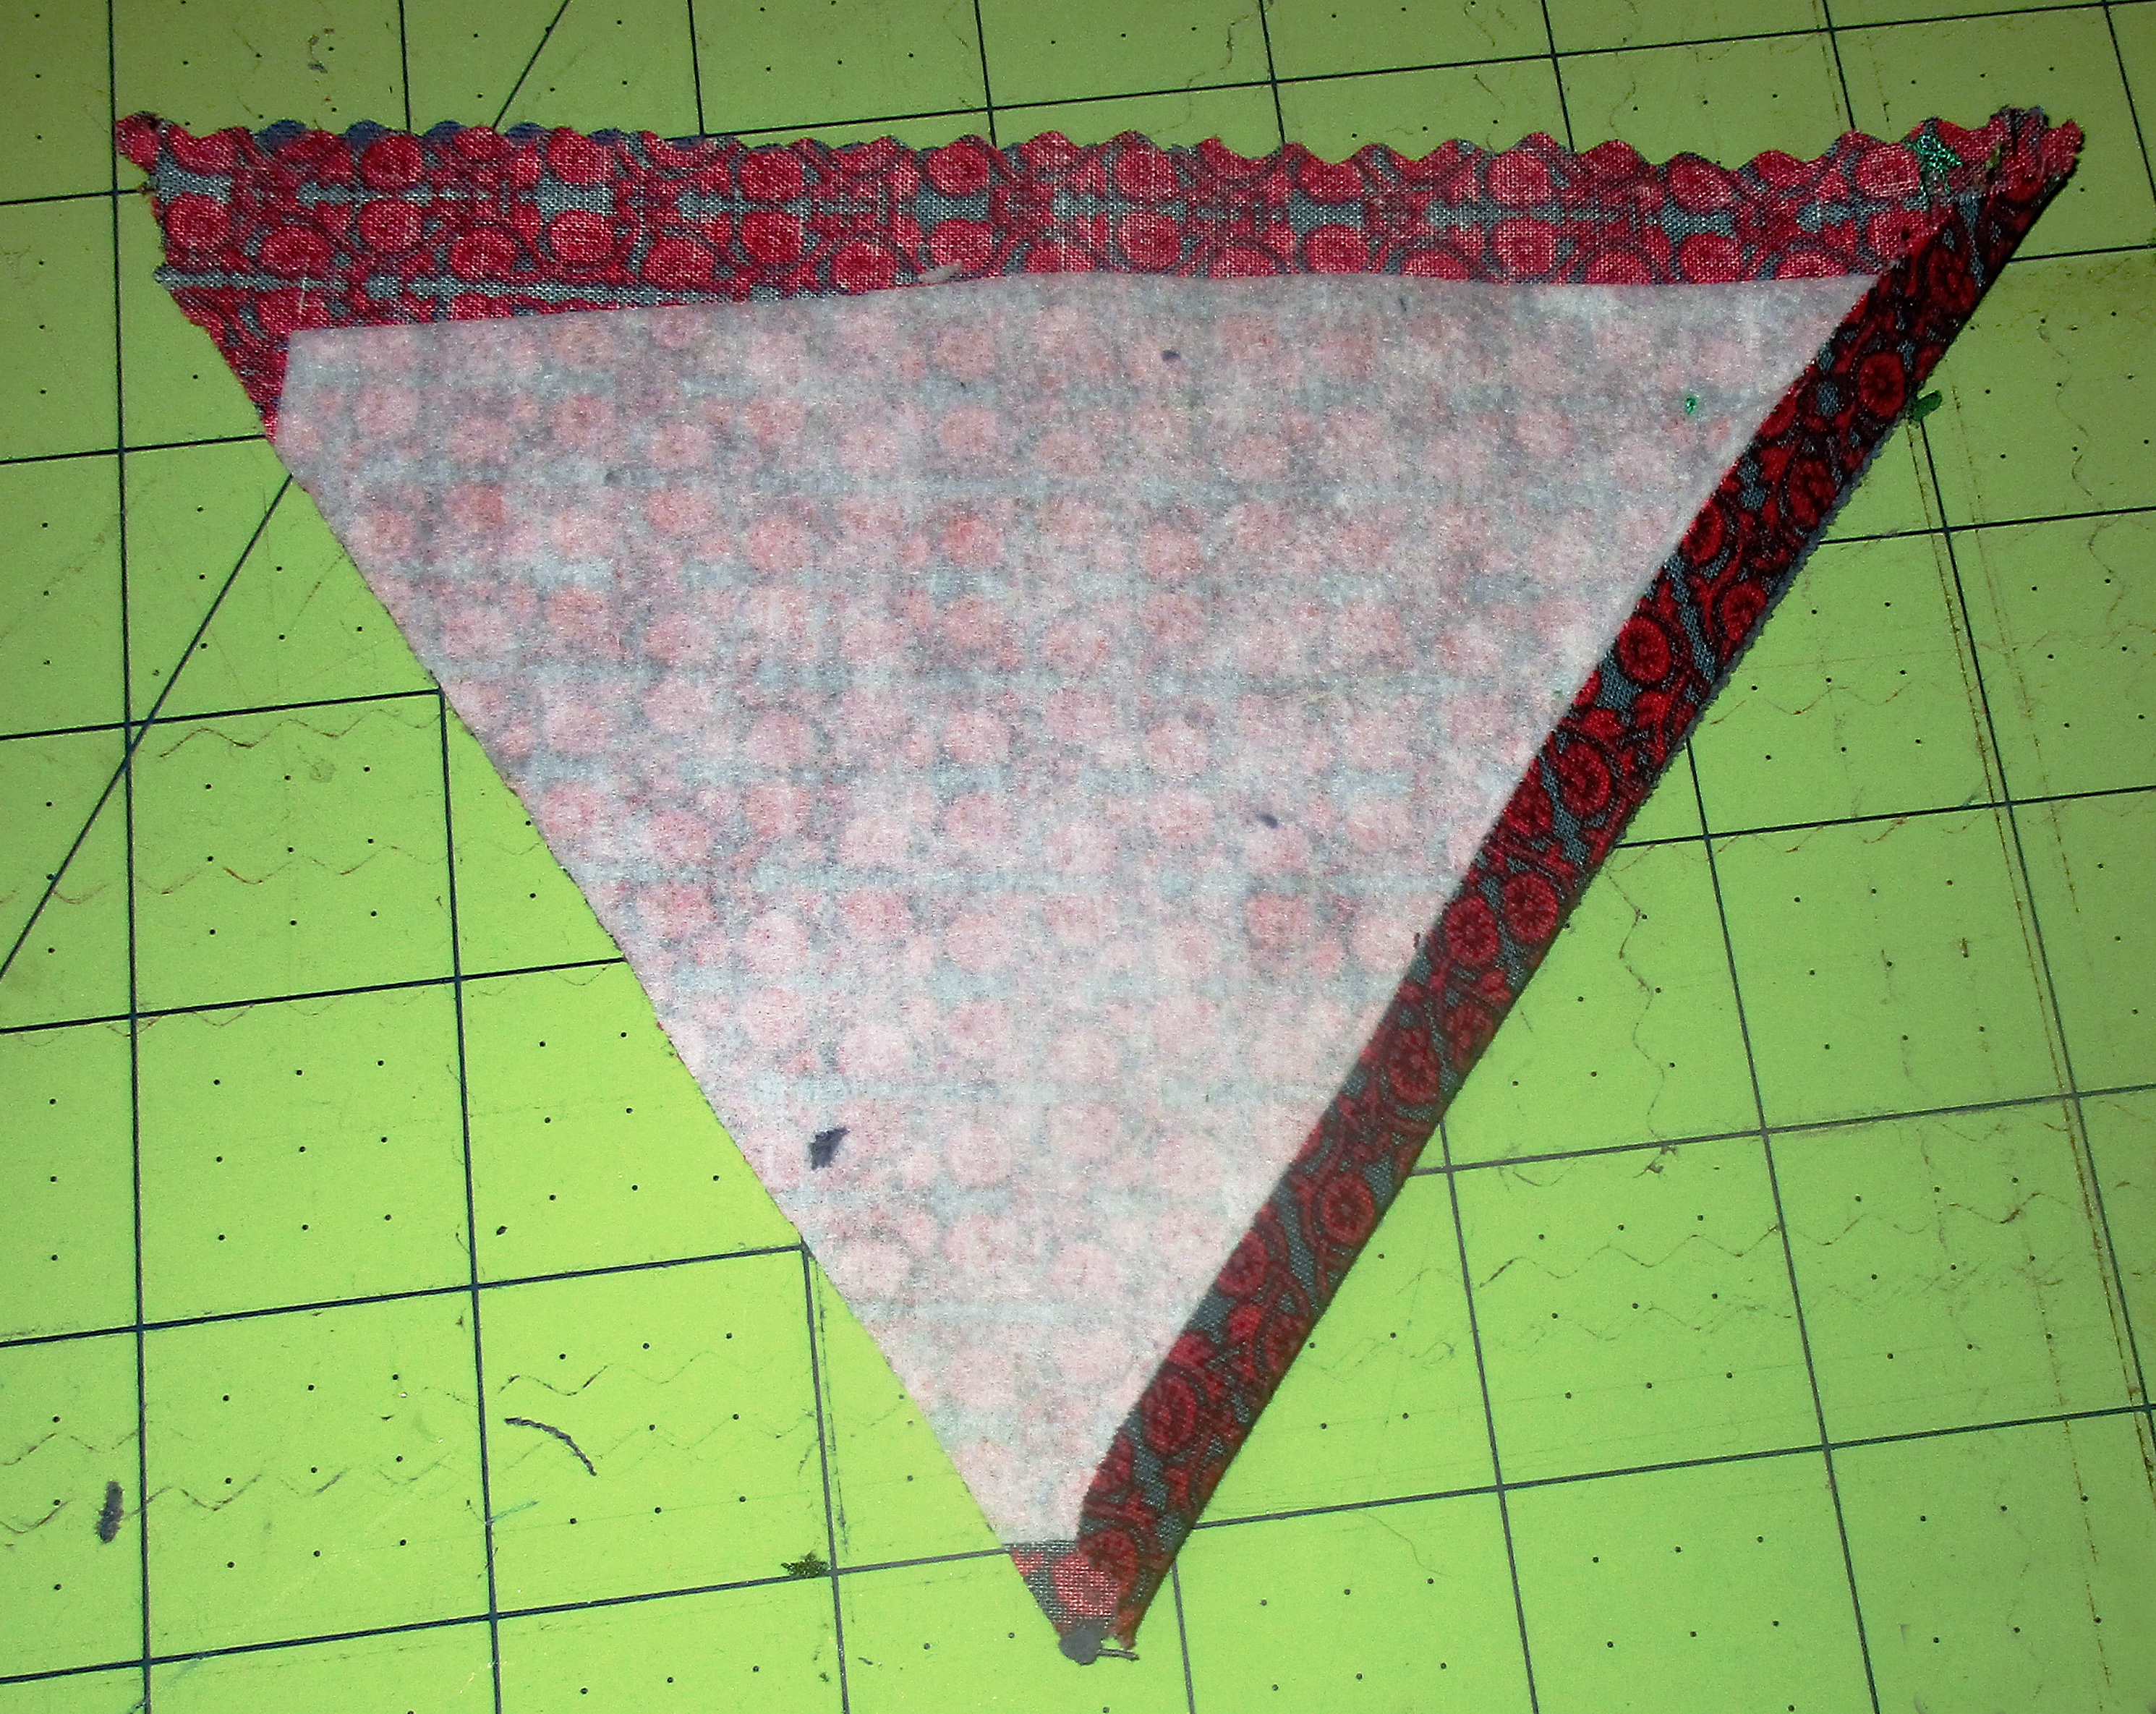
Tassel bag (back).
I want to buy some silk cord to make the tassel and make a bag like this in a dressier fabric, too. Keep tuned to this blog, as I will soon share another small purse tutorial for a variation on this bag that is a lot of fun to make, too.
Without further ado, here’s this small purse tutorial, suitable for beginner sewists:
Tiny tasseled tote small purse tutorial
You need fabric for the bag body and lining, a little bit of interfacing, and yarn for the strap and tassel.
Cutting instructions
Cut:
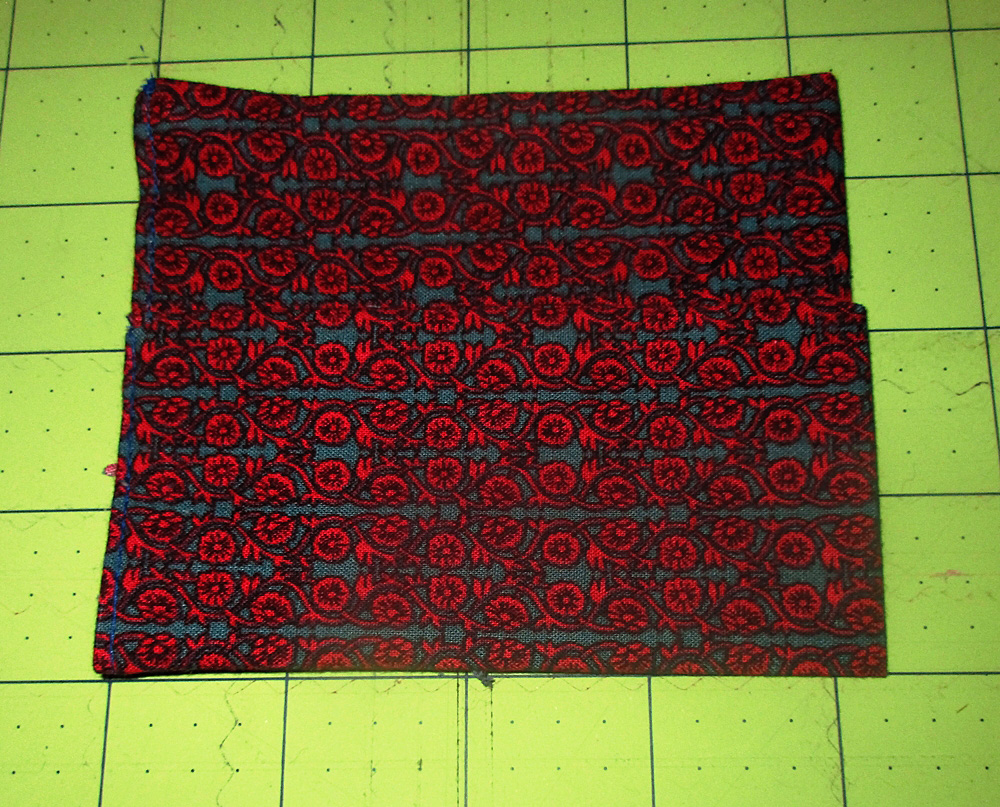
2 bag body pieces (main fabric) 7.5″ by 9″
2 bag lining pieces (second fabric) 7.5″ by 9″
(optional) 2 interfacing pieces 7″ by 8.5″
(optional) 1 interfacing piece 4.5″ by 8″
2 main fabric pieces 5″ by 7″
2 pieces second fabric 5″ by 7″
1 piece second fabric 6″ by 9″
Step one is optional – interface or quilt
If you choose to add interfacing to your bag, do it now. Because my outer fabric was corduroy and the quilter cotton lining fabric less sturdy, I chose to interface the back of my lining fabric (7.5″ by 9″ inch rectangles). If you use quilter cotton or other lightweight fabric for the outside of your purse, then interface that instead. Also apply interfacing to one of the 5″ by 8.5″ rectangles.
Another option is to forego interfacing and quilt one layer of your bag, either the outside or the lining. Just quilt these now, before we move on to construction.
Make the outside pocket
Take one 5″ by 7″ piece of your main fabric, and a matching piece of the lining fabric and align these right sides together. Sew around all four sides, leaving an opening of at least 2″ to turn right sides out. Clip the corners, turn, and press.
Now fold over the top about half an inch, press, and topstitch. I chose to press mine with the lining fabric forward, to show a bit of contrast on the outside of this otherwise plain blue bag. You can fold towards the inside though, if you’d rather not show off your lining fabric on the outside of your purse.
Center the pocket on one of the bag body 7.5″ by 9″ rectangles, with the hem you just sewed at the top of the bag. Sew the sides and bottom of the pocket to the bag body piece about 1/8″ from the pockets edges.
Make the inside pockets
Take the 6″ by 9″ lining fabric, and fold it right sides together to make a rectangle 4.5″ by 6″. Sew with a ¼ inch seam allowance along all three open sides, leaving an opening of at least 2″ for turning. Turn right sides out, press, and top stitch the opening closed.
Now fold one short edge of this finished rectangle upwards about 2 inches and press this fold line well. Then, center this pocket on one of the 7.5″ by 9″ bag lining rectangles, and sew the bottom and sides down on the lining fabric.
Inside pocket image.
Sew the bag body and lining
Now take the two main fabric rectangles and put them right sides together. Make sure the outside pocket is facing with the opening pointing up, then sew the side and bottom seams.
Then repeat for the bag lining pieces, again making sure the pocket opening is facing up before sewing the sides and bottom together. Set both bag and lining aside.
Make the tassel
Wrap yarn around the four outstretched fingers of hand about ten times. Tie the yarn together at the top of these loops with a short piece of yarn, then cut through all the loops at the bottom. Take another piece of yarn and wrap it around and around the strands, about half an inch from where you tied the yarn together at the top, then tie. Voila, a tassel!
How to tie a tassel.
Make the flap
Take one of the 5″ by 7″ pieces to your ironing board and place it right side down, aligned with the long edges horizontal and the short edges vertical. Then fold the bottom corners upward to make a point in the middle and press these fold lines well.
Tassel bag point image.
Then, cut along these pressed lines to make a triangle shaped piece for the flap. Cut a lining rectangle piece to match, too. Now, go back to your ironing board with these pieces. Fold one of the edges you just cut to form the triangle back ¼ inch and crease this well with your iron. Repeat on the second triangle.
Tassel bag point crease image.
Now place the two triangles right sides together and sew together along the opposite side of the triangle from the side that you just creased. Clip the seam allowance from the triangle point, turn right sides out, align the creased seams you previously pressed, and press again.
Now insert the two short yarn tails from where you tied the yarn together at the very top of your tassel into the triangle point. Topstitch along the seam you just sewed, then topstitch to sew the side with the pressed seams closed, too, being sure to catch the yarn at the top of the tassel inside the seam.
The third side of the triangle flap remains open. Align this open edge with the top edge of the back side of your bag body, right sides together, and sew right along the edge to baste these pieces together.
Make your strap
To make the yarn strap, use 9 pieces of yarn about 4 feet long. Use 3 strands each to make three long braids, then braid these three all together. Secure ends by tying with another piece of yarn. Or opt to use ribbon or make a long fabric strap instead, if you prefer.
Final assembly
Take your main bag body and your bag lining body and insert one inside the other, with right sides together. The flap should be between the two bag bodies. Now place your strap inside, also between the two bag bodies, aligning each end with the side seams.
Use the free arm on your machine, and sew these together, leaving an opening to turn. You will sew the backside with the flap and the straps, and leave the opening in the front. Turn right sides out and push the lining side into the bag body. Now fold the edges of the opening inward, topstitch this opening closed, and you are done.
It’s reversible
Technically, this bag is reversible. Although, if I were going to reverse this bag, I would change the construction of the inner pocket. I wouldn’t want a debit card pocket on the outside of my bag. To do this, just omit the step of folding the inside pocket up to create the card pocket. Sew it on as a larger patch pocket instead, the same as you did for the outside pocket.
I hope you use this small purse tutorial to make one, too. What fabric will you use? How will you embellish yours?
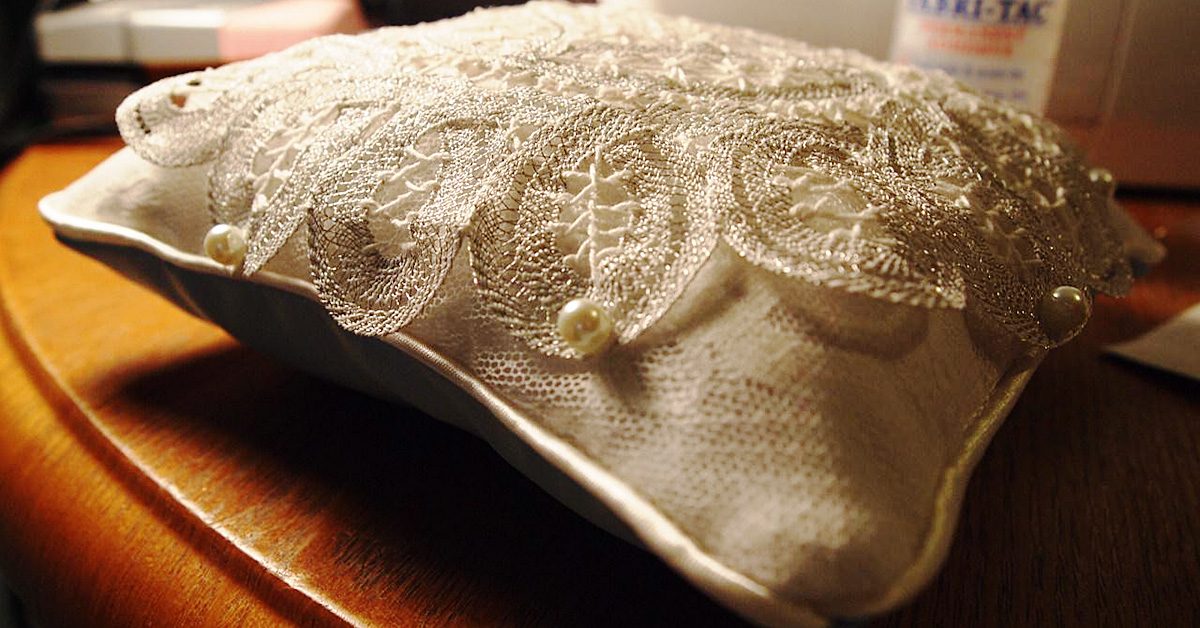
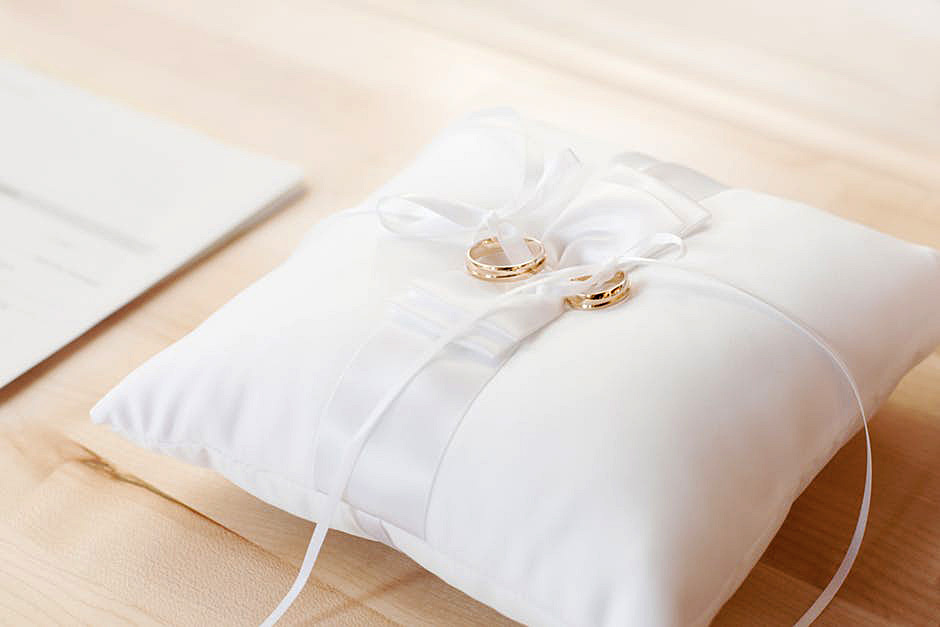
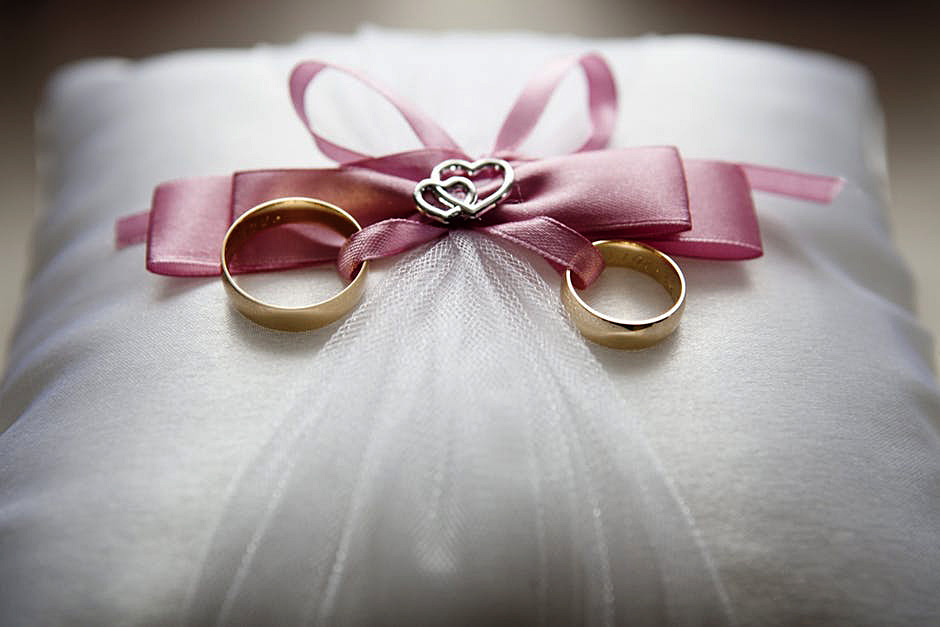
I can’t recall the first time I heard the phrase, “June bride,” but it’s something that’s stuck in my mind as the years have passed. While, to me, other months might present better options for a wedding (Sue me! I don’t like 90-degree weather!), June has somehow become what could arguably be the staple month for wedding ceremonies. Since we’ve entered that month, it seems fitting to target those ceremonies for a post or two. For this particular one, we’ll focus on a tiny wedding detail that can be handmade for that extra bit of sentimental value, and that’s the ring bearer pillow.
The ring bearer’s pillow.
For instructions on how to make a throw pillow in general, you can check out this link. But because pillows can be treated as such simple projects, I won’t discuss how to construct the actual pillow. Instead, I’ll concentrate on more decorative details in regard to the pillow’s appearance. These are aspects of the pillow that could come into play while you’re selecting fabrics and such—little concepts that you can do to construct something that stands out for your big day!
Choose your fabric wisely
The most important thing to consider for your ring bearer pillow is your fabric choice, and the most obvious option would fabric that has a bright white look to it. This matches the bride’s ensemble and showcases the brightness of the day, but if you want to go with something less traditional for your wedding, you might think a little outside of the box in regard to color.
You might think a little outside of the box in regard to color.
For instance, I adore fairies in fiction and movies. If I were to have some kind of fairy garden theme to a wedding, it might make sense to use fabric options that are more creatively colored than basic white. Maybe a pale blue or a light green would work, or perhaps even a combination. It’s worth considering, overall, how your theme and wedding colors could be represented in the pillow for a unique look.
Fabric additions can be applied to the basic pillow structure to give it a more distinctive, lively look—things like lace, ribbon or tulle.
Time to accessorize!
You might also want to consider accessories for the ring bearer pillow, and I don’t just mean the rings that will be carried on it! Fabric additions can be applied to the basic pillow structure to give it a more distinctive, lively look—things like lace, ribbon or tulle. Again, you can go with the basic white, or you can better pair the accessories’ hues with your theme or wedding colors if doing so feels like the right option.
Not only can these accessory decisions make your ring bearer pillow stand out that much more, but they can also be used as ways to fix technical errors. If you sew lace around the ends of the pillow, as an example, you might find that a spot where your stitches weren’t that fantastic on the actual pillow can be covered by the lace. If you accidentally punch a smaller hole on the top of the fabric, you can make sure that ribbon you have meeting in the middle to create a bow covers the error. Essentially, while prettying up your ring bearer pillow with visual elements, you could improve its appearance as well by making your mistakes less visually obvious!
And in regard to those accessories, don’t limit your options to fabrics either! Sometimes the smallest trinkets and gems can push a normal-level work into more amazing territory, and things like gems speckled around your ring bearer pillow or a pin that looks like a heart can create a simple elegance that adds a level of sophistication to the project. Another similar idea would be to use sequins that could catch the light of the event and shimmer to again mimic the brightness of the ceremony. Each of these embellishments are options that, if used in the right amounts and ways, could lead to a ring bearer pillow worth talking about at the reception!
Structure is key
Structural details that you could vary would be the shape of the pillow – maybe use a heart, oval, or star shape.
Keep in mind that even the construction of the pillow could highlight a particular quality that you want to embrace in your wedding if you’re going for something more modern and less traditional. Structural details that you could vary would be the shape of the pillow—maybe use a heart, oval, or star shape—as well as the face of the pillow itself. Instead of thinking, “How can I decorate this simple pillow,” you could make the top of the pillow its own design that doesn’t need any décor at all because the design is the décor—like a large flower, made of fabric, that covers the top. These decisions are structural elements that could create the unique, one-of-a-kind ring bearer pillow that you’re searching for to spice up your wedding!
So to give a sentimental touch to your wedding, turn this traditional addition to the ceremony into something homemade, unique, and fitting! It could add a splash of perfection to an already perfect day!
Have you been avoiding learning how to sew buttonholes?
Have you been avoiding learning how to sew buttonholes? If you have, I don’t blame you, they used to freak me out too. I had a friend once who lightly scoffed at how averse I was to learning how to sew them. “They’re easy!” she admonished me and I tucked that away and kept reminding myself that they were easy.
What type do you need?
Finally, I couldn’t avoid it any longer. I had a project that I really needed to sew a buttonhole on. It was time to learn.
I had a project that I really needed to sew a buttonhole on.
My machine has seven different buttonhole options. I read the manual and I watched a lot of how-to videos before I determined the hole I wanted to use for this project. This is a car seat poncho I made for my daughter to keep her warm in the car during the winter. You can read about it here.
This is a car seat poncho I made for my daughter to keep her warm in the car during the winter.
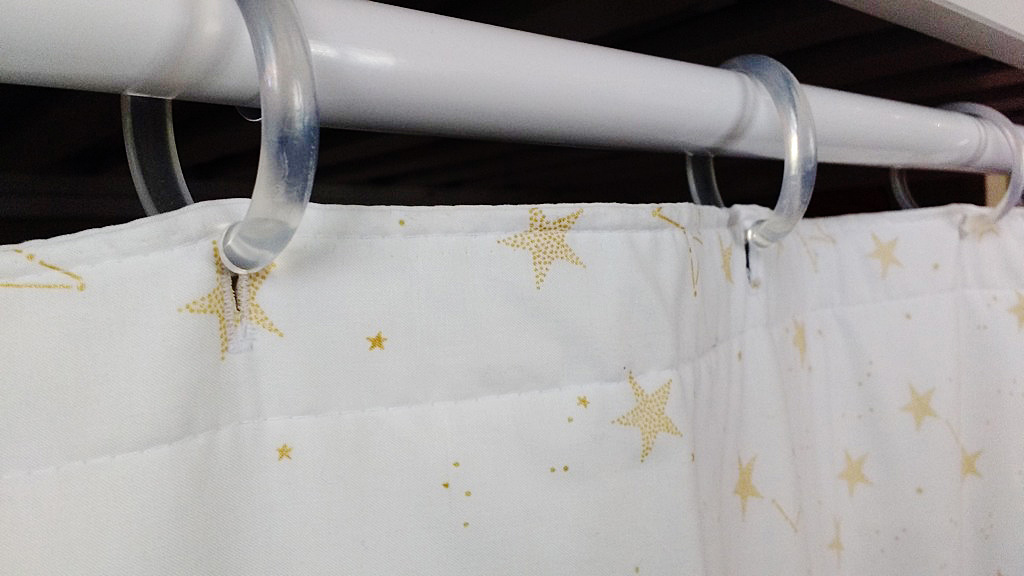
I also used the buttonhole option on my machine to make these openings for curtains in one of my girl’s bunk beds. Once I figured out how to use my buttonhole foot, truly I was unstoppable, and now I am the friend who can gently laugh and say, ‘buttonholes? They’re easy!’
I also used the buttonhole option on my machine to make these openings for curtains in one of my girl’s bunk beds.
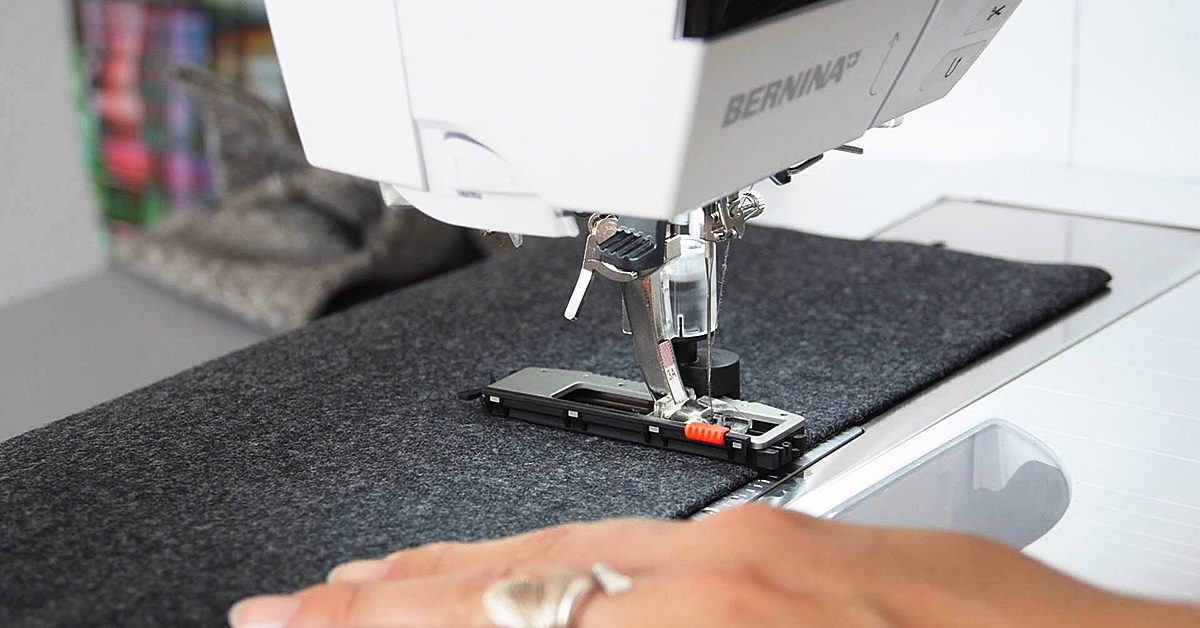
Use a buttonhole foot
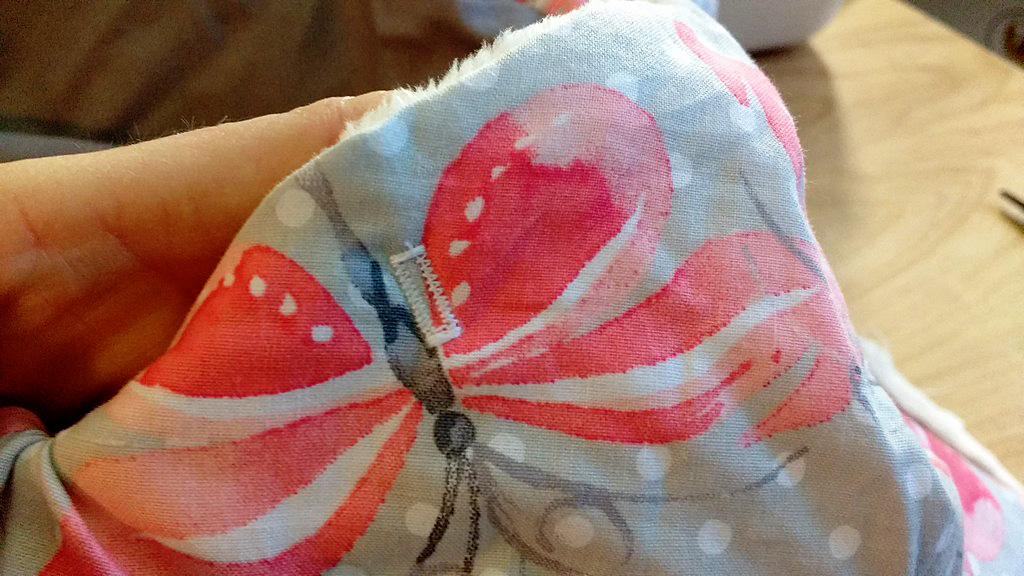
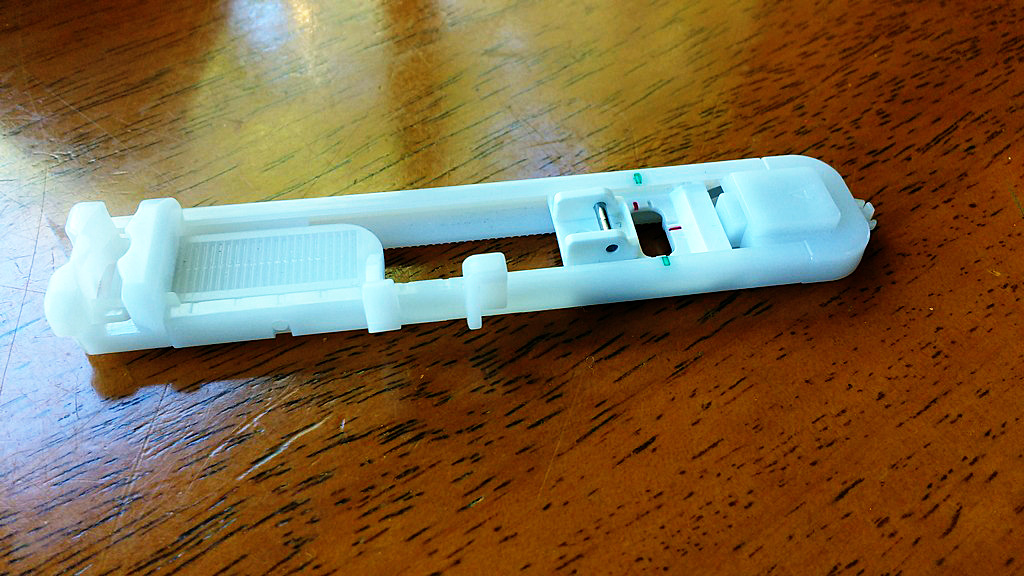
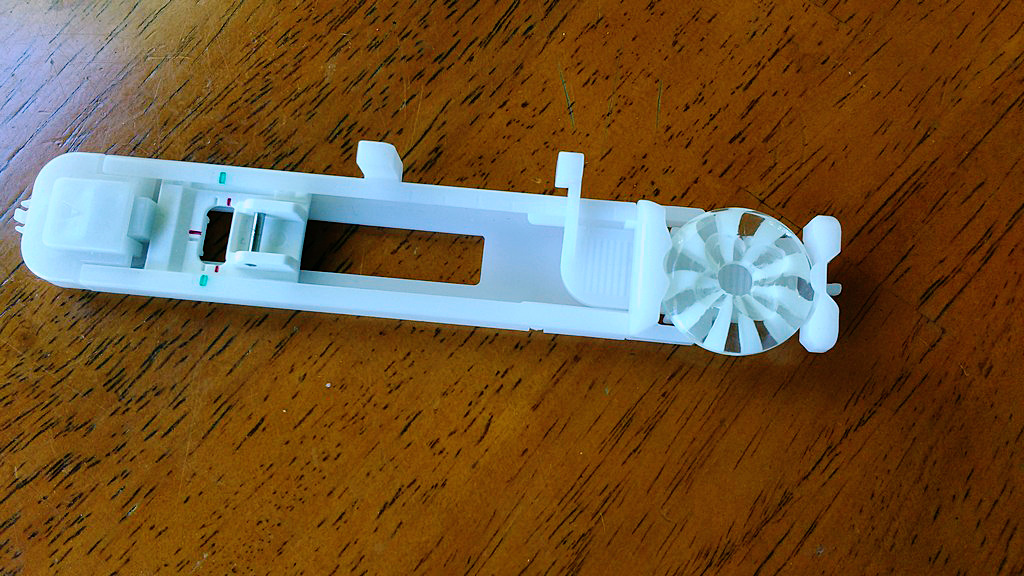
Most machines come with a buttonhole foot attachment. It is the long, weirdly shaped one.
Most machines come with a buttonhole foot attachment.
The adjustable part in the back is where you’ll place the button you’ll be using on your project. It is there to sew the buttonhole to the correct size that the button can fit through. Genius, eh?
The adjustable part in the back is where you’ll place the button you’ll be using on your project.
Your sewing machine manual is your friend
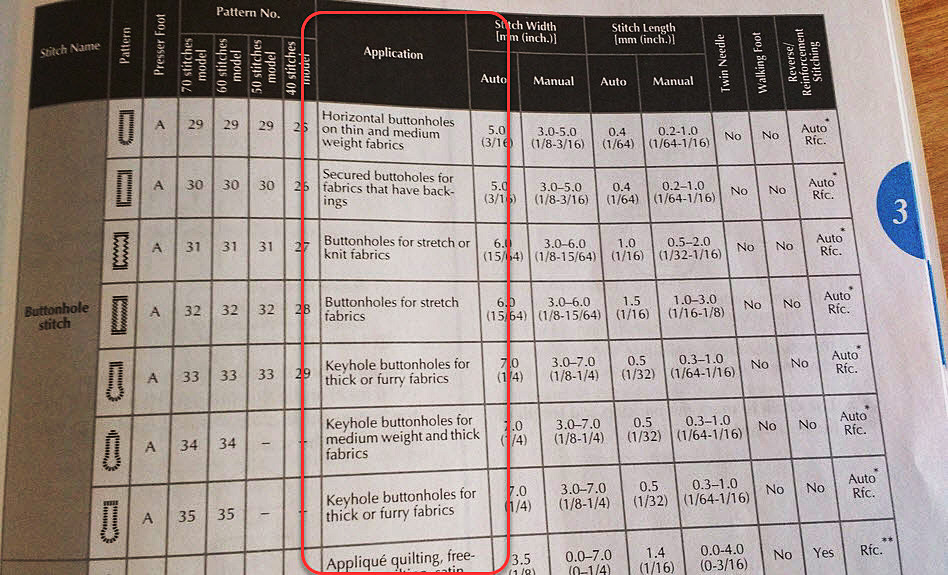
At first, you’re going to need your manual, or a really great how-to video. Your manual will tell you how to determine which buttonhole stitch to use. Pay careful attention to the Application portion. Is your fabric knit? Stretchy? Heavyweight?
Your manual will tell you how to determine which buttonhole stitch to use.
Practice, practice, practice
Before you try a buttonhole for the first time, make sure you practice first! Don’t let your precious project be your battleground. Practice making the buttonhole on scrap fabric several times before you try on the real thing.
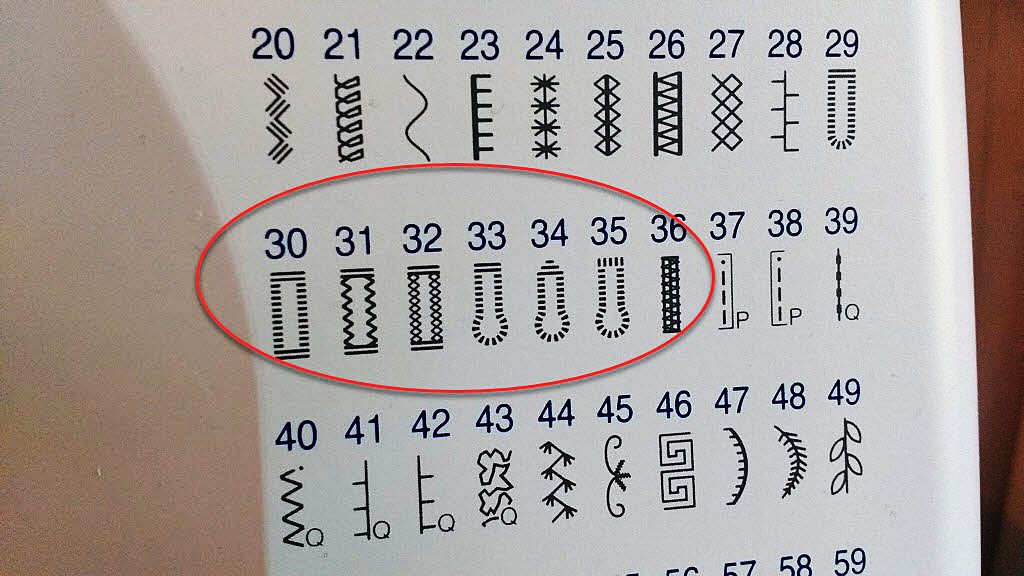
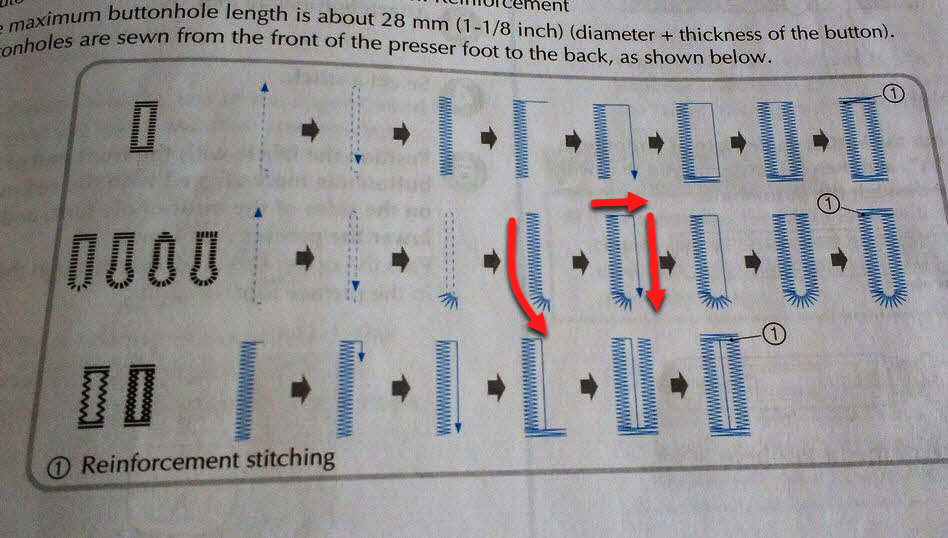
My manual even includes a visual of the way the buttonhole stitch will form with each stitch option. The most important thing I learned was to know exactly where I wanted the stitch to go and then to hold my foot down and not let it back up until the machine stopped itself. With modern machines, they do all the work for you. You just need to nail the placement and be patient.
My manual even includes a visual of the way the buttonhole stitch will form with each stitch option.
Keyhole buttonholes
See the stitches that have little circles at the bottom instead of being perfect rectangles? Those are stitches for keyhole buttonholes. They are perfect for when you are using large, or heavy buttons; the circular shape at the bottom gives the button a place to rest in. Likewise, they are used for thick or furry fabrics, again to give the button more room to get through the hole.
Happy sewing. If you sew some buttonholes today, let us know!
———————————————————————————– Charlotte Kaufman is a writer and sewist in Mammoth Lakes, California. She specializes in marine and home interiors and continues to fall more and more in love with quilting. You can follow her at charlottekaufman.com.
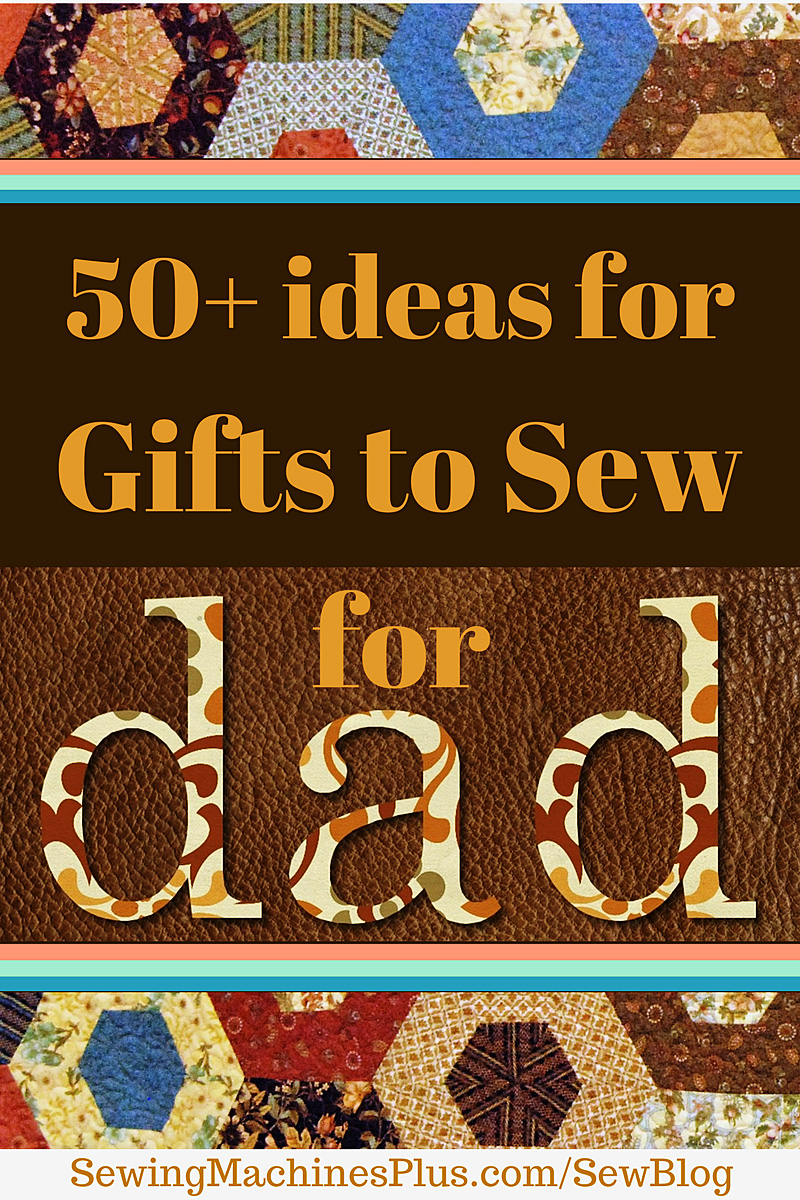
Sometimes it is hard to think of a great gift to sew for dad. It might seem like endless project options come to mind for most any other recipient, but gift ideas to sew for men don’t come quite as easy. Between the holidays, his birthday, and Father’s Day, you need a few good gift ideas each year—and that’s if you only have one dad to sew for!
Gifts to Sew for Dad
To help solve this perennial problem, here’s a long resource list of ideas to sew for men, including your dad, your children’s dad, or any other dad you might love.
Pillowcase
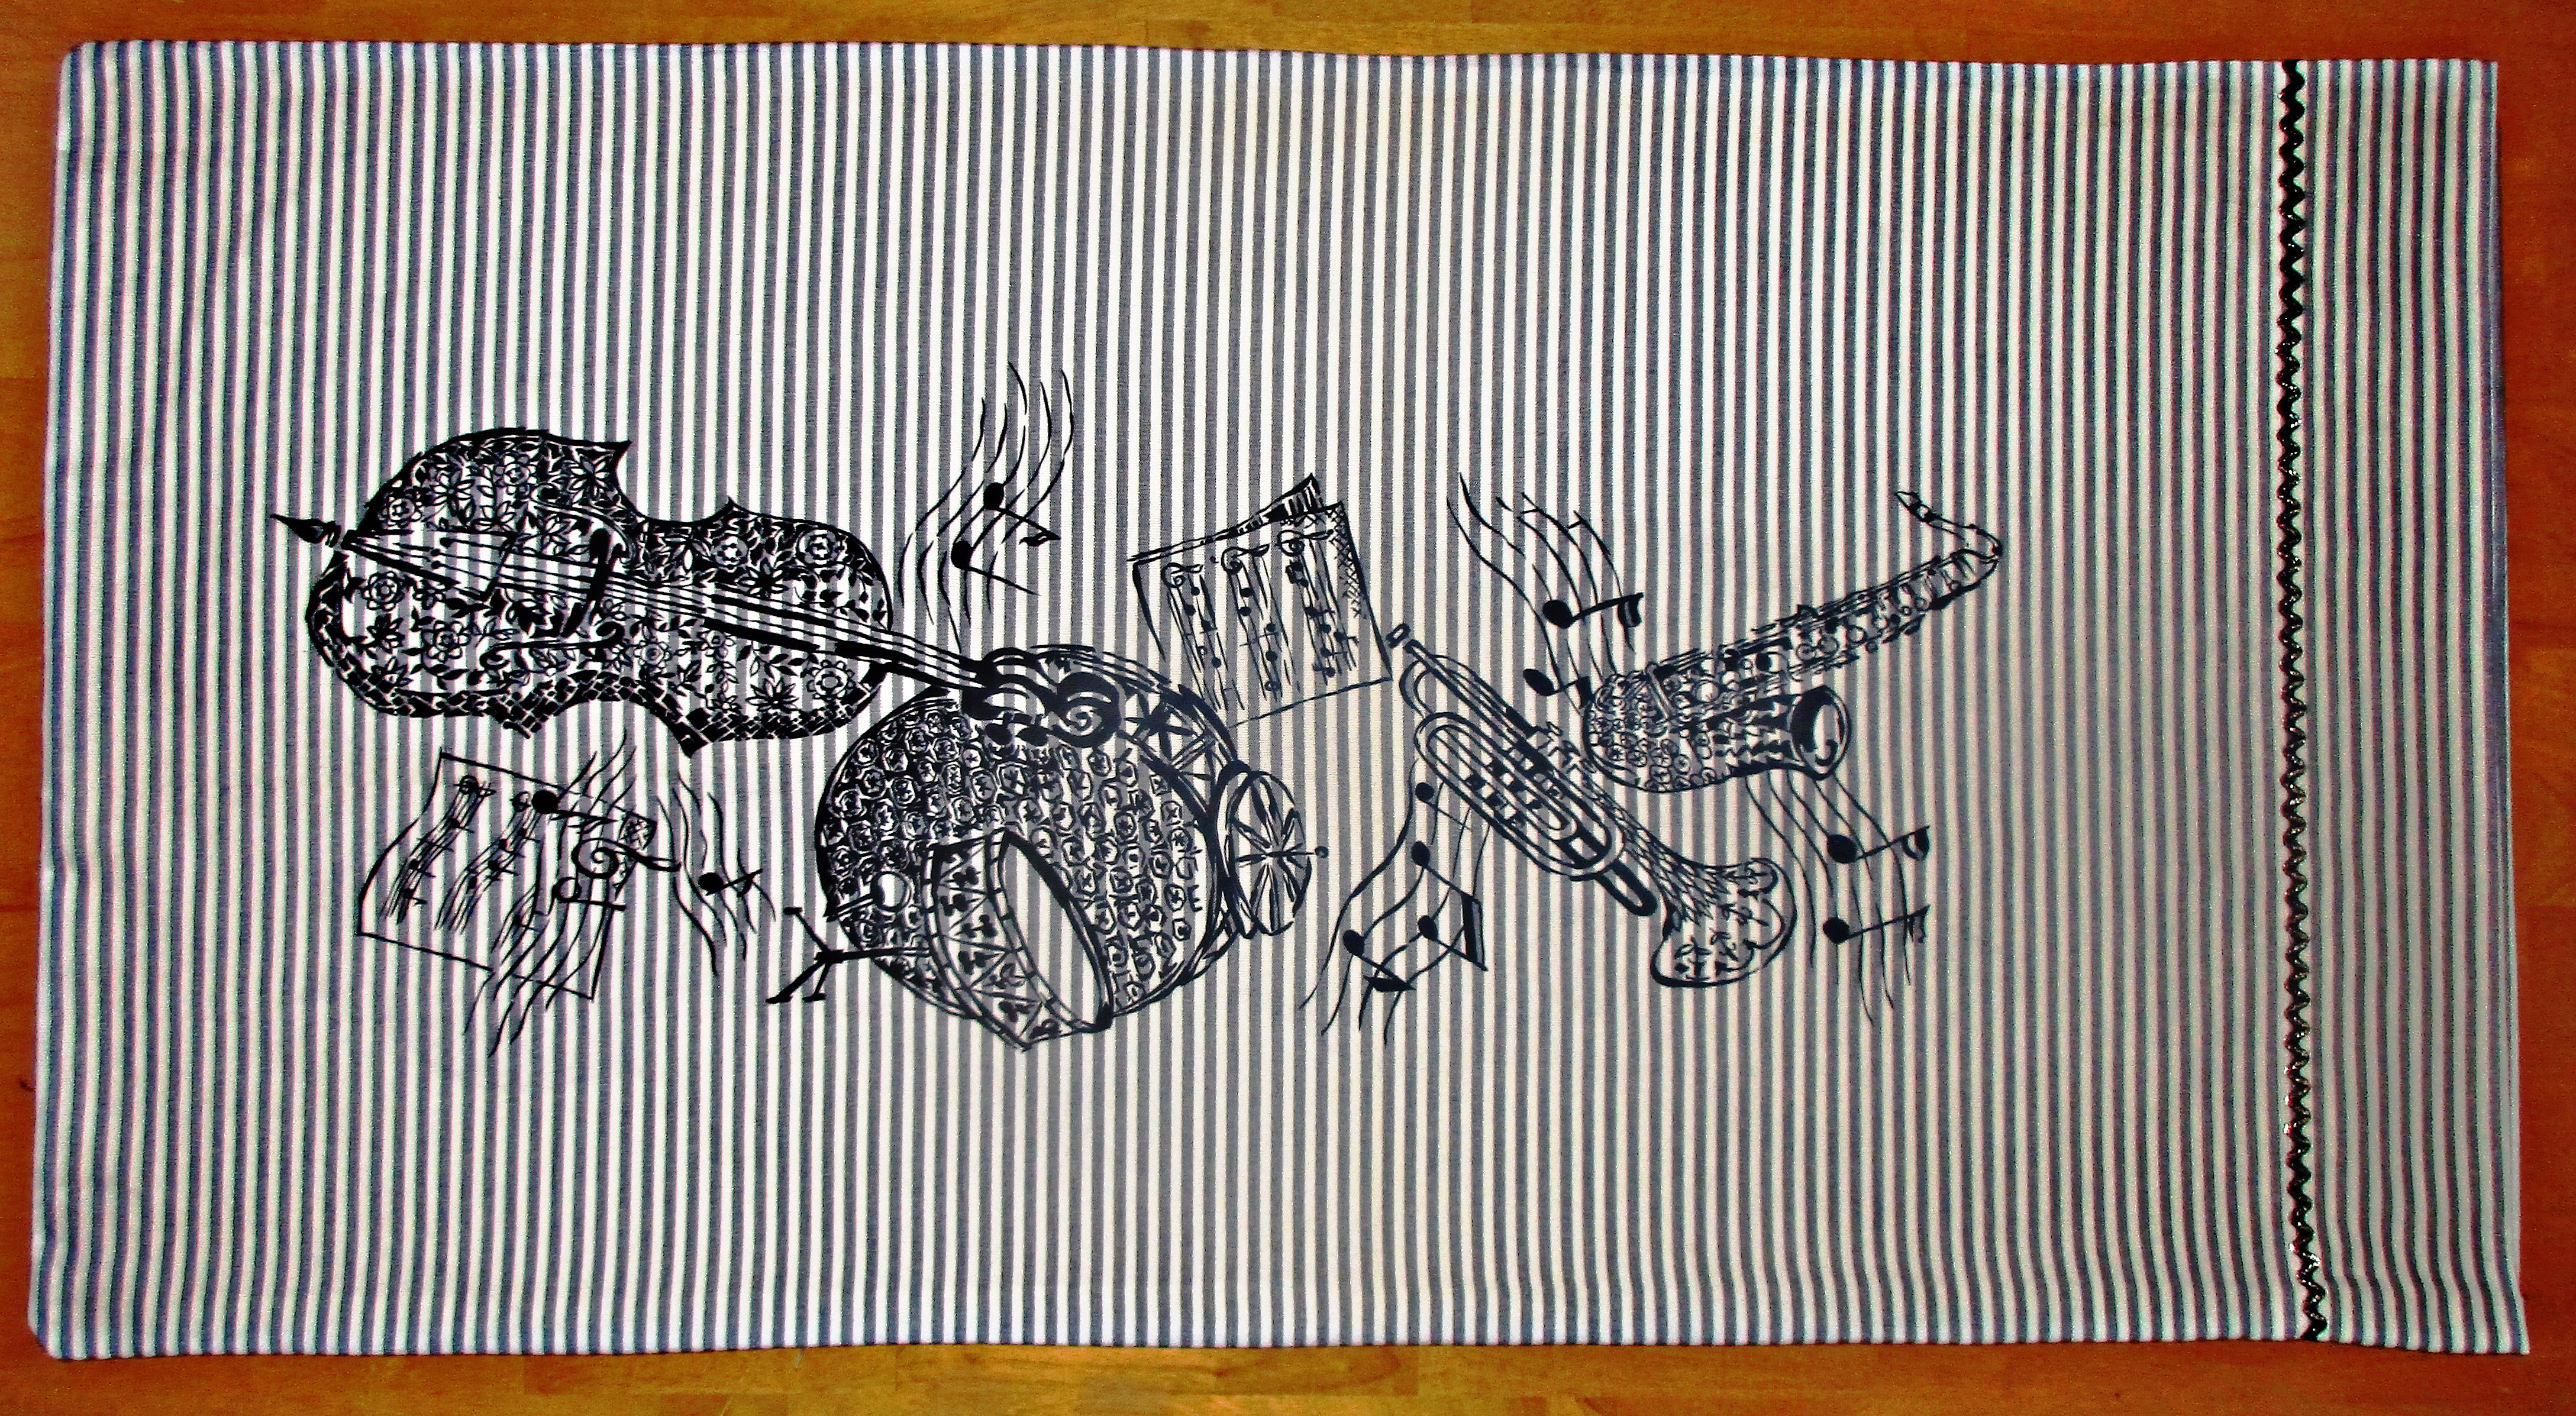
I seem to list pillowcases in every gift idea post I write! That’s because they are easy to make in a hurry, everyone uses them, and none are as nice as those that you make. So they make a nice gift to sew for dad, too. My dear always loves a gift of a new pillowcase, especially for his jumbo XL long pillow. Last year, I made him one with Star Trek fabric, it is covered with line drawings of the Enterprise. I used a vintage yard I’ve been saving and some vintage trim, too, and made him a new one today.
I think he’ll love this for his jumbo pillow. I love the extra bit the sparkly trim adds to this.
Pajamas
Simplicity and other pattern makers make super easy to follow patterns for pajama pants. Or you can trace a favorite pair to make a pattern, or you can follow an online tutorial. Make them extra nice by adding pockets and drawstring waist. My dear prefers these cut quite loose and made from plaid flannel shirting; these look great on him, too.
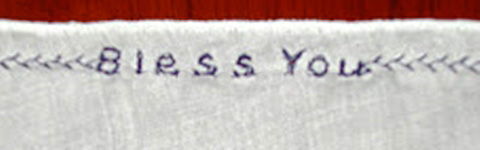
Handkerchiefs
Make these from soft cotton; they are nice in flannel, or even knit. Use a serger to finish all sides. For knit fabrics, you don’t even have to hem them at all. To save a step, buy these pre-made and make them more fun with tie-dye or personalize them with embroidery.
Handkerchief detail.
Quilt
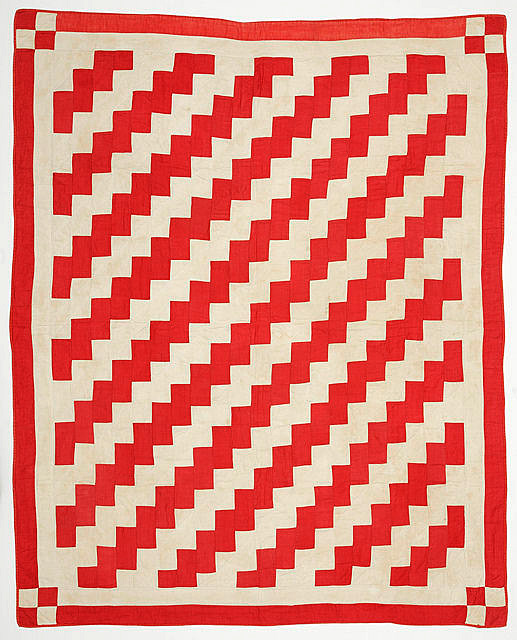
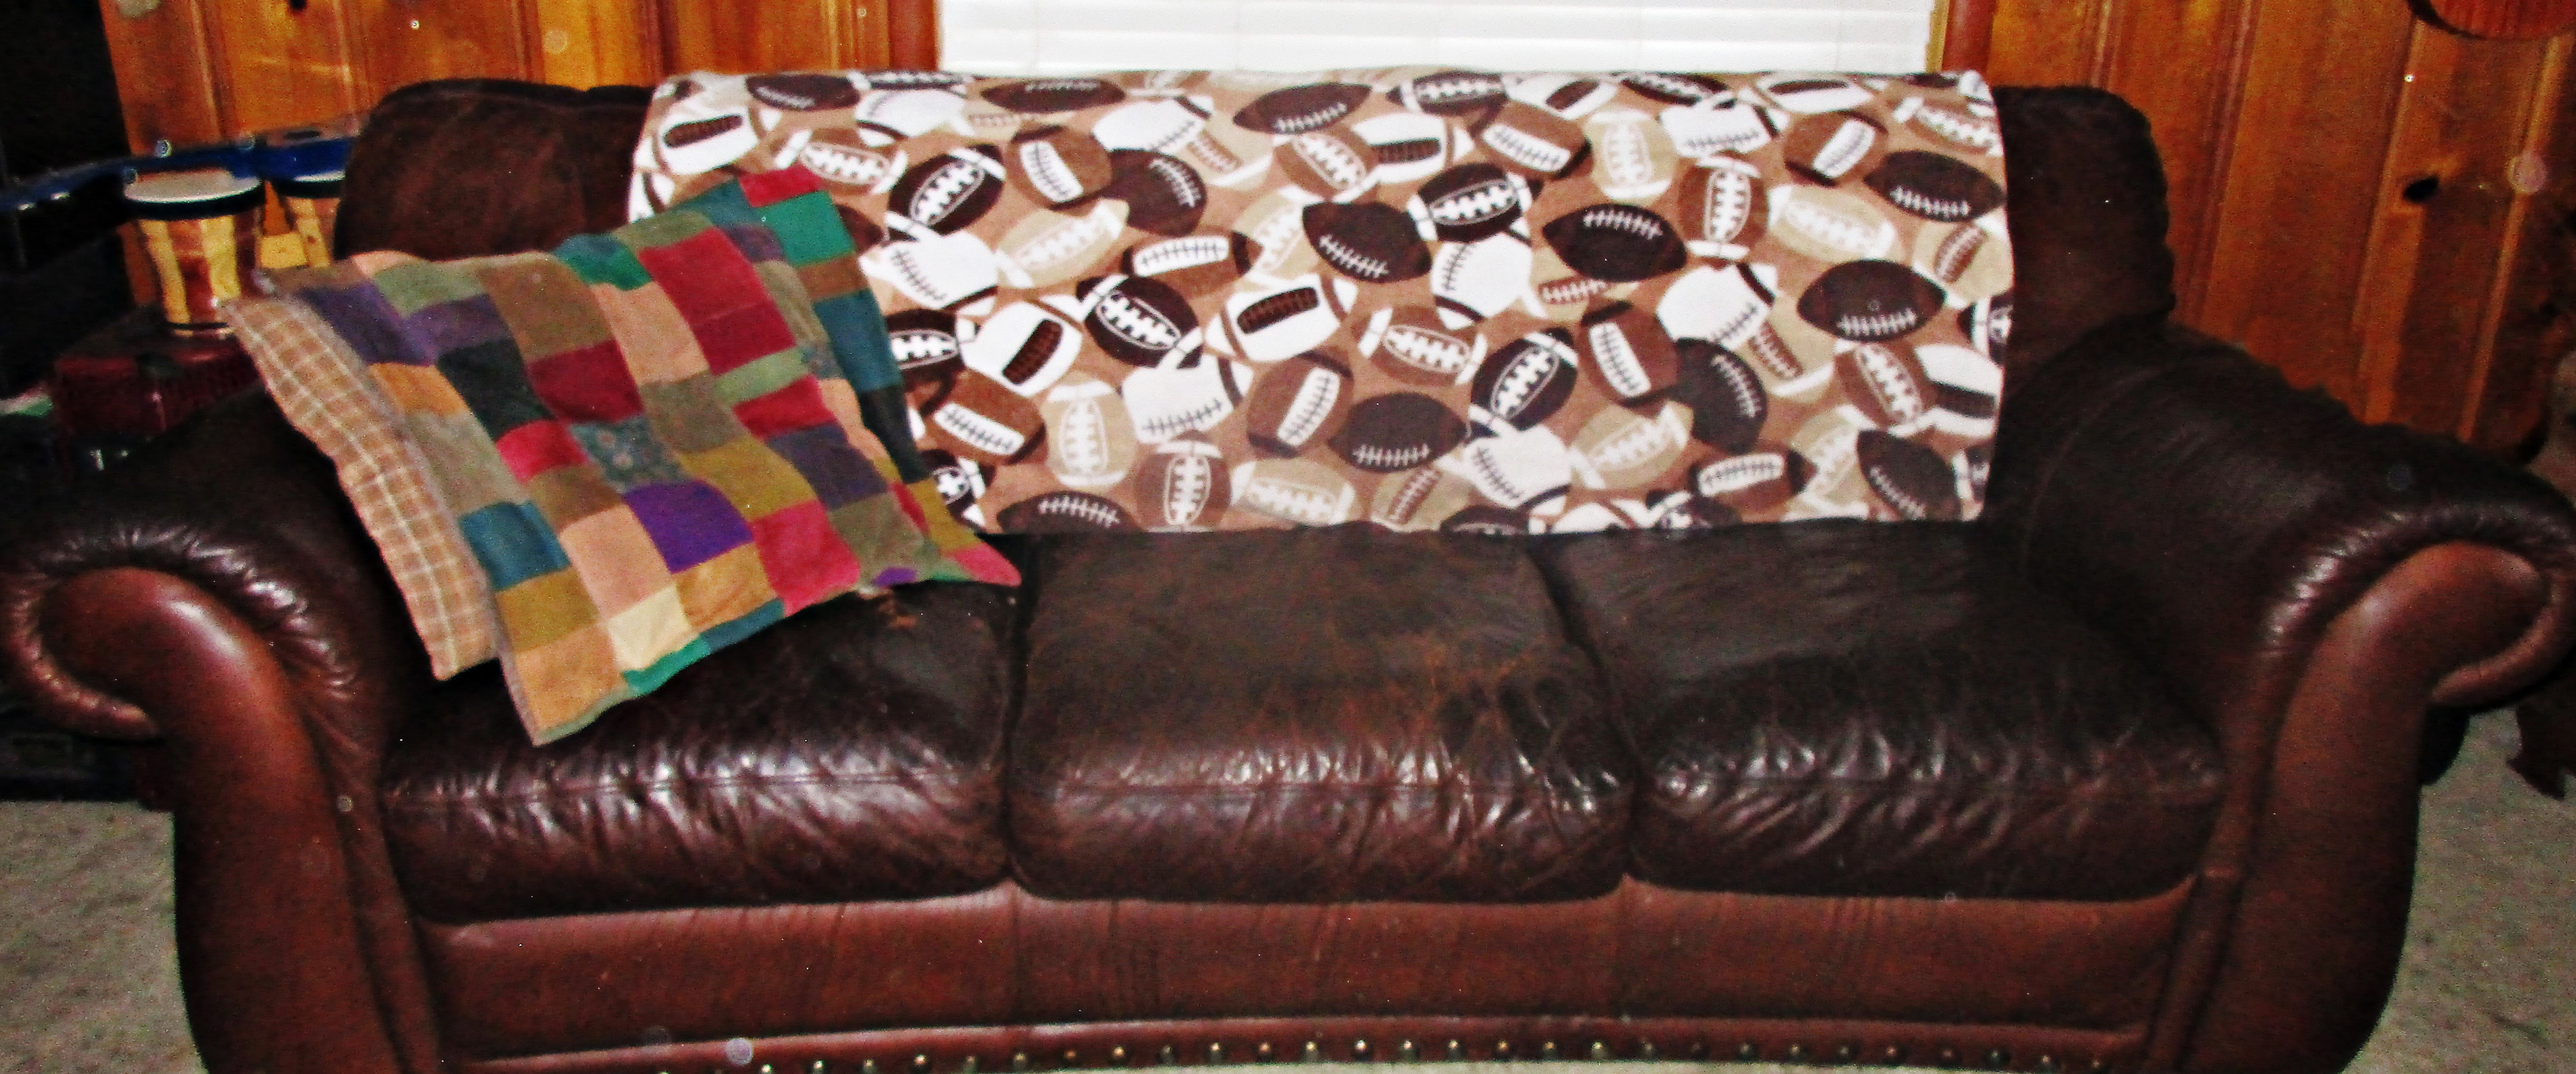
A quilt is a perfect gift to sew for dad. Make him a lap sized or larger quilt in his favorite colors if you know them. If not, you know he loves his college or pro team’s colors, or go with a muted and manly collection of scrap fabrics. My favorite quilt I made for a man was a corduroy scrap quilt, with brightly colored squares alternating with khaki squares in a Streak of Lightning pattern. Choose a high quality, super soft cotton flannel for the quilt backing, and use cotton batting for maximum comfort quilts.
Streak of Lightning quilt, Ashley Van Haeften, from Flickr.
Besides making a quilt, you can make his couch even cozier with custom cushions, perhaps one which includes pockets for his remote. Or make him a cuddly plush sofa blanket.
Two layers of Cuddle Plush fabric make an ultra cozy sofa blanket.
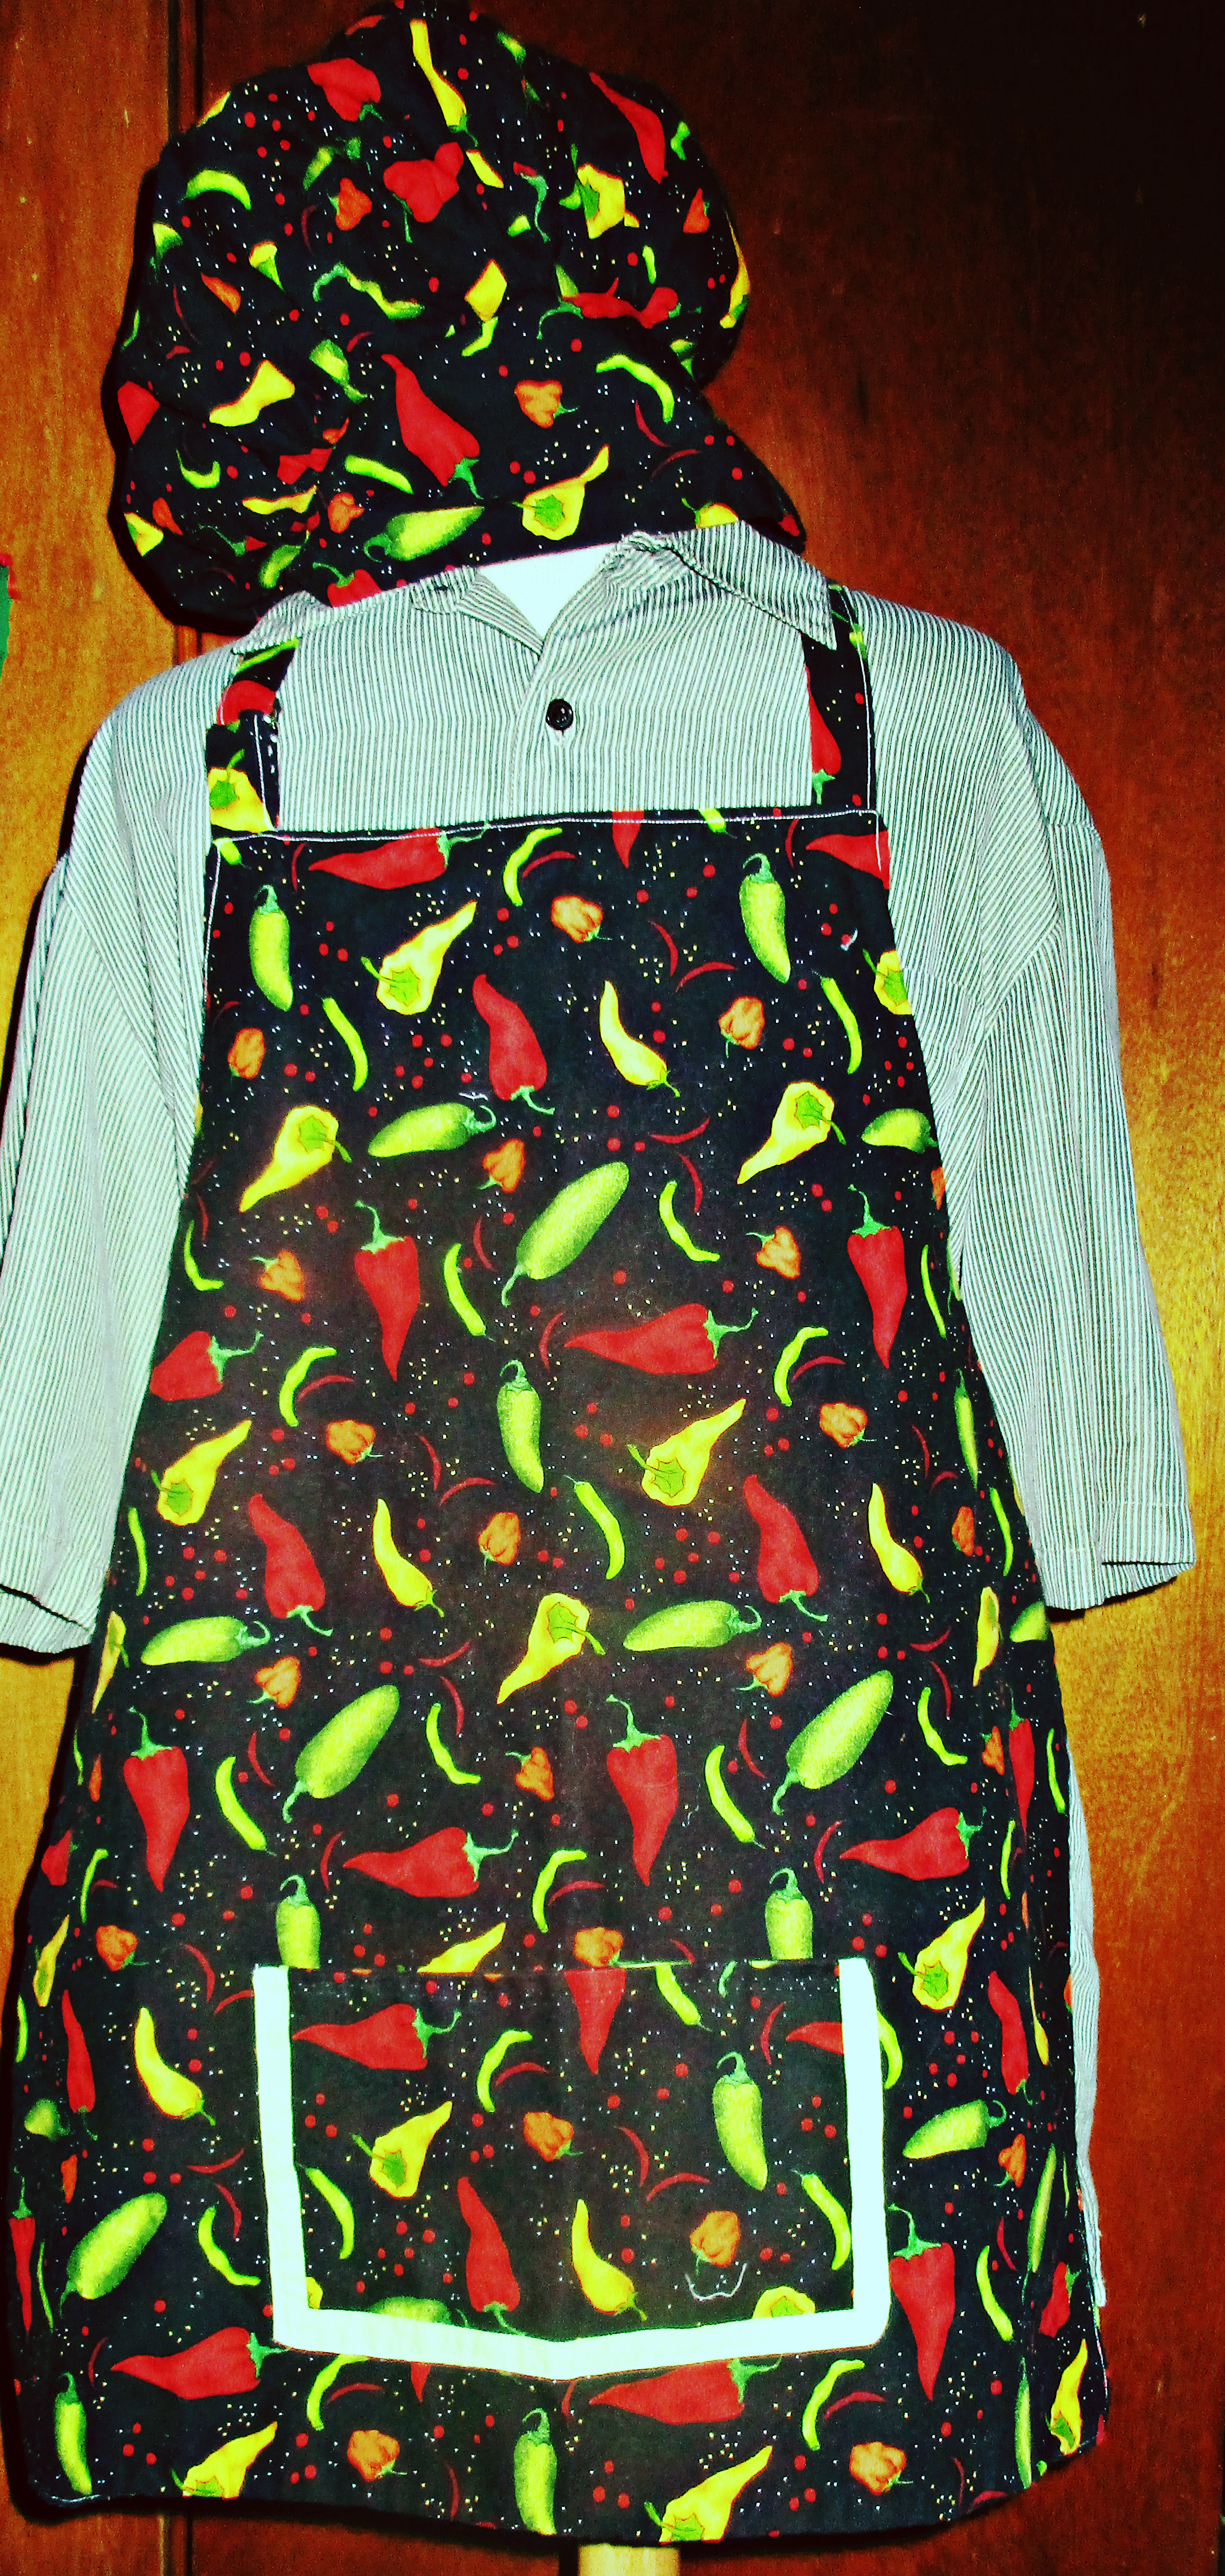
BBQ Apron / tocque / oven mitts
Use appliqué or a fun novelty fabric to make and personalize an apron just for him. I like this reversible pattern from Michael Miller fabrics best. Make the gift even nicer by pairing it with an easy-to-make, matching chef’s hat (tocque is the proper name for these) or an oven mitt.
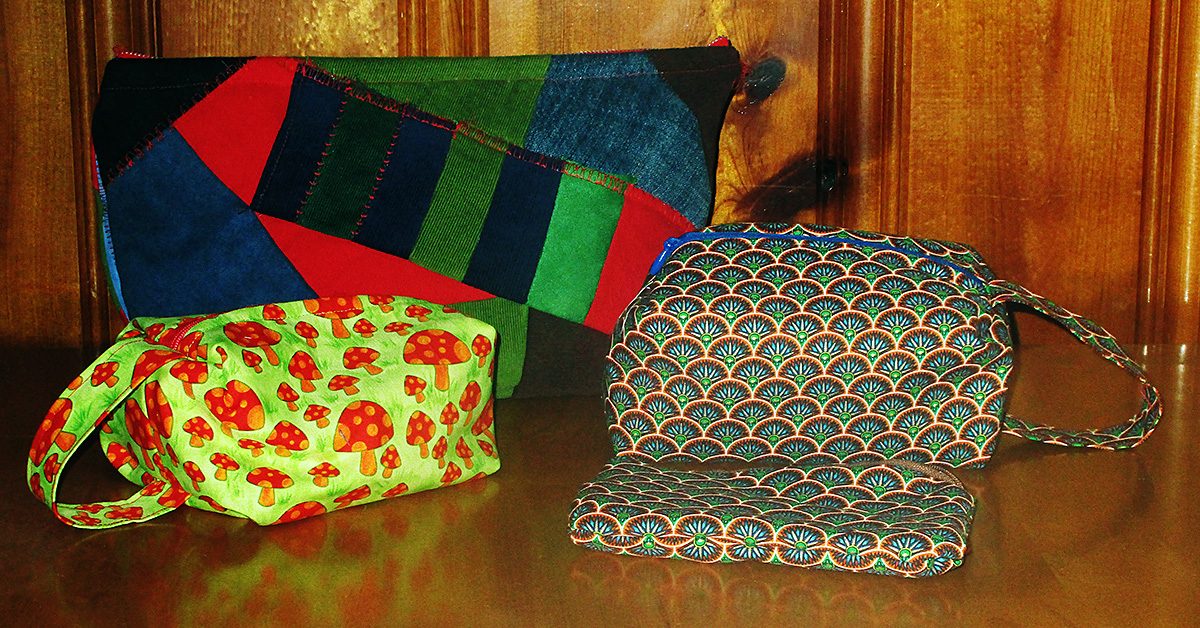
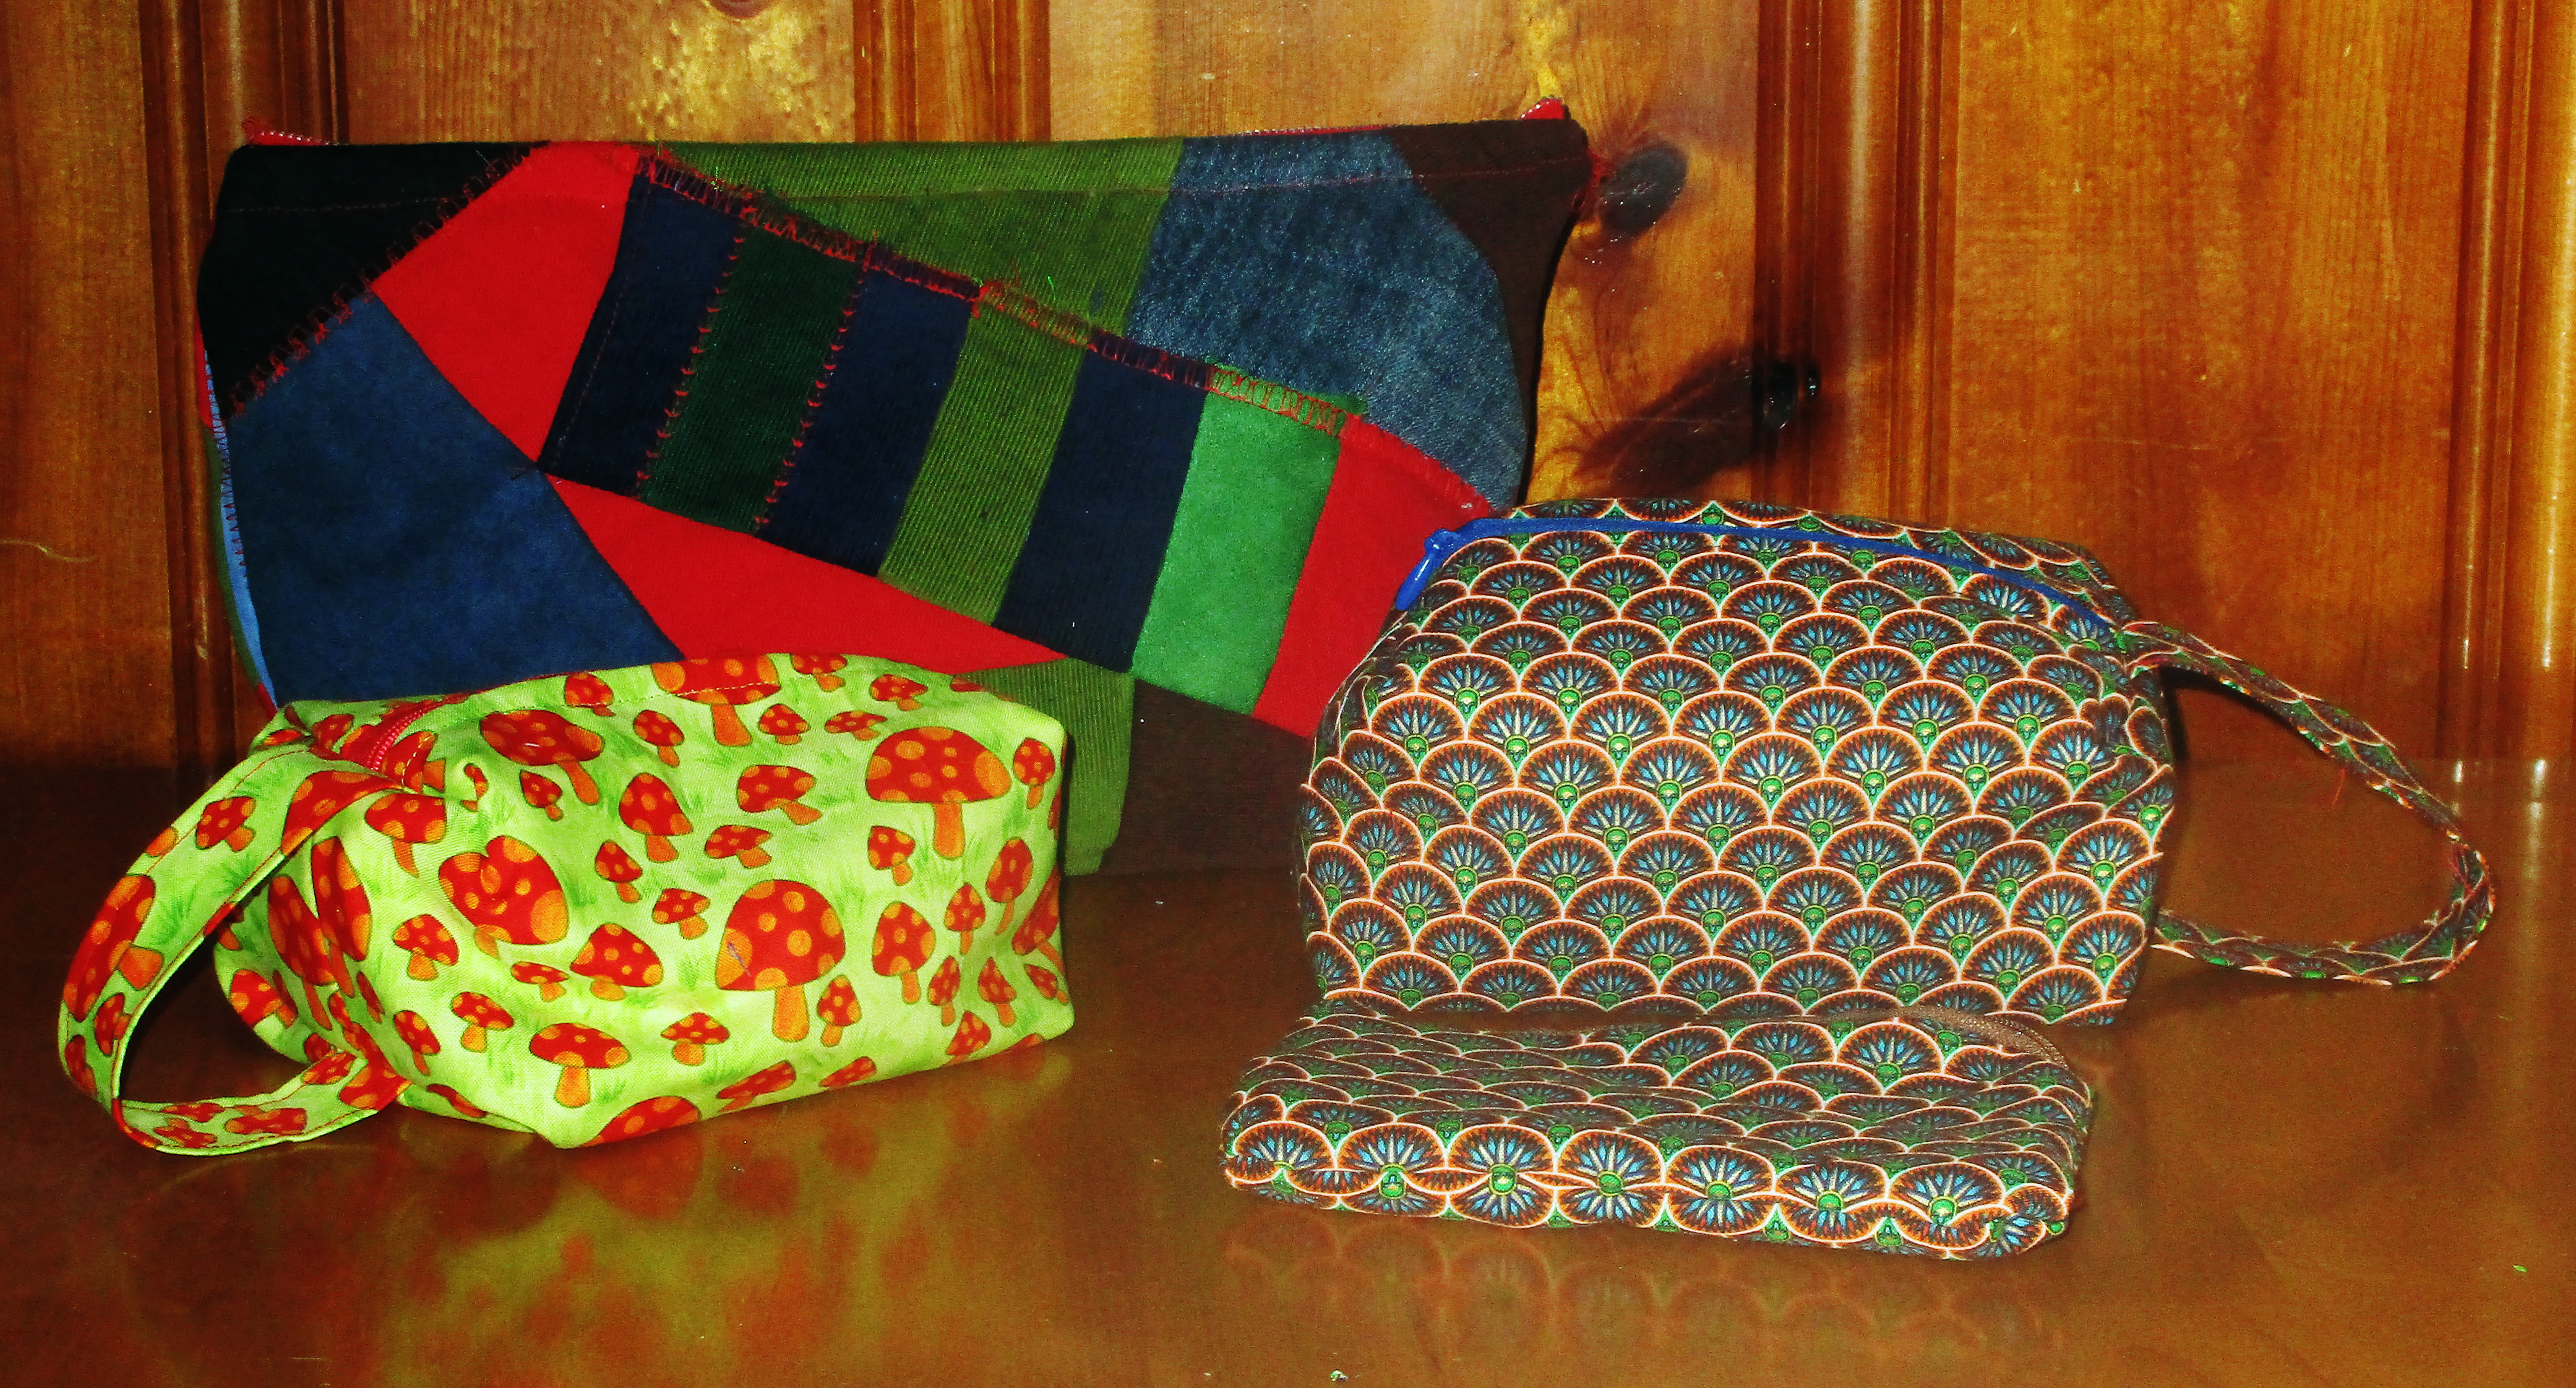
Make him a small and simple zippered pouch for holding his cufflinks and jewelry, sketching pencils, or other small items. For something a bit roomier, here is a tutorial for a boxy toiletries bag that will work well to sew for dad.
You can sew an easy zip bag in 15 minutes, or less.
This one is really easy to make; scroll down to see a manly looking option. The iPlaid is a good choice for a guy, or you could make one from scrap jeans.
Laptop sleeve or bag
If you can get your hands on his laptop to take measurements, then you can make this easy laptop sleeve in an hour or less. For something with a strap, make him a messenger style bag to fit his laptop.
Lunch bag
He’d probably rather not carry a cutesy lunch sack, so here’s how to sew a reusable brown bag with waxed canvas.
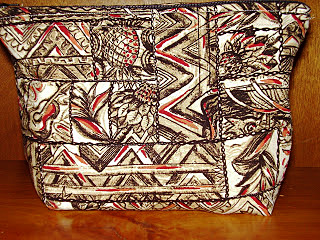
Make a tool roll or tool bag, a cord roll, a battery bandolier organizer, a monogrammed suede bag for his liquor bottle if he carries one to go, a shoe bag for travel. I’m making a patchwork quilted ukulele bag and a drumstick bag for my hubby this year. A soft padded guitar bag is a great idea, too.
This fabric is perfect for lining his ukulele case.
Plenty of dads still keep their music on CD. If yours does, you can sew him a place to hold them on his car visor. I made one with a patchwork dive flag and ocean blue fabrics for my diver dad. You can also use felt to make pocket pages and sew a folder or book for holding CDs.
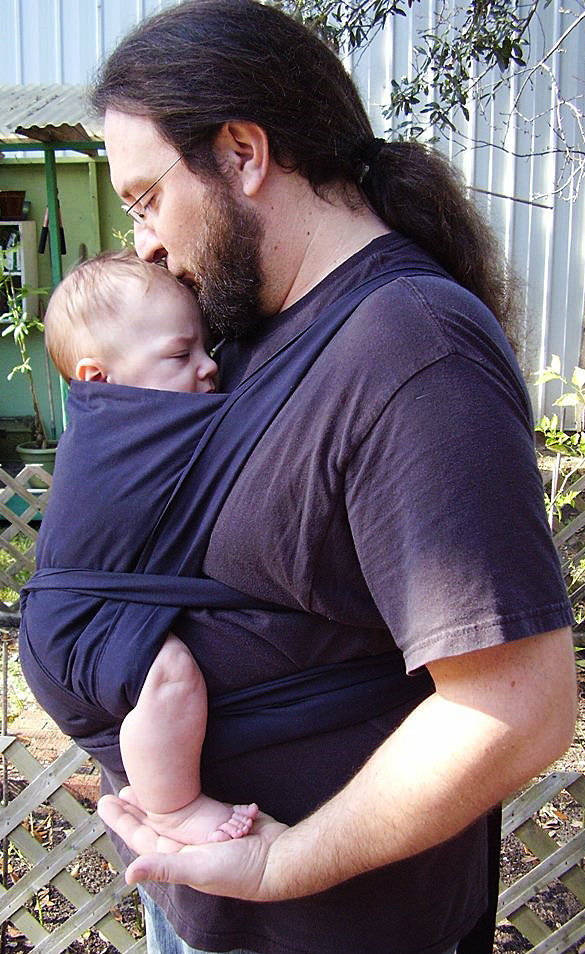
Baby carrier
Dads love to wear babies, and babies love it when they do. For a new dad, make a sling type, mei-tai, or a toddler sized soft structured carrier in a manly color or fabric.
A mei-tai style baby carrier is super easy to sew and comfy for both dad & baby.
Buy a simple pattern, or use my 10-minute way to make shorts. You can make the bandana style shorts in that link for men using four bandanas instead of two. Just use two bandanas instead of one for each leg, and add side seams to sew these together. Add length at the rise with a matching or coordinating fabric, or cut a couple more bandanas in half and sew these at the top. Or choose a funky fabric and whip up some board shorts for him.
Unless you live in the Southern Hemisphere, you probably won’t want to give dad a scarf for Father’s Day. But for winter holidays or birthdays, a scarf or cowl makes a great gift.
Do you have other ideas?
I am sewing all my Father’s Day gifts this year. What about you? Which of these ideas will you sew for dad? If you know any good gifts to sew for dad or men that aren’t on this list, please add them by commenting below.
Have you looked into the world of printed fabric panels yet? If you are someone who wants to sew, but doesn’t want to take the time to do detailed, intricate work, a printed fabric project might be more your speed. With pre-printed fabric you can easily sew up gifts for babies and new mothers, teacher and holiday gifts, and so much more.
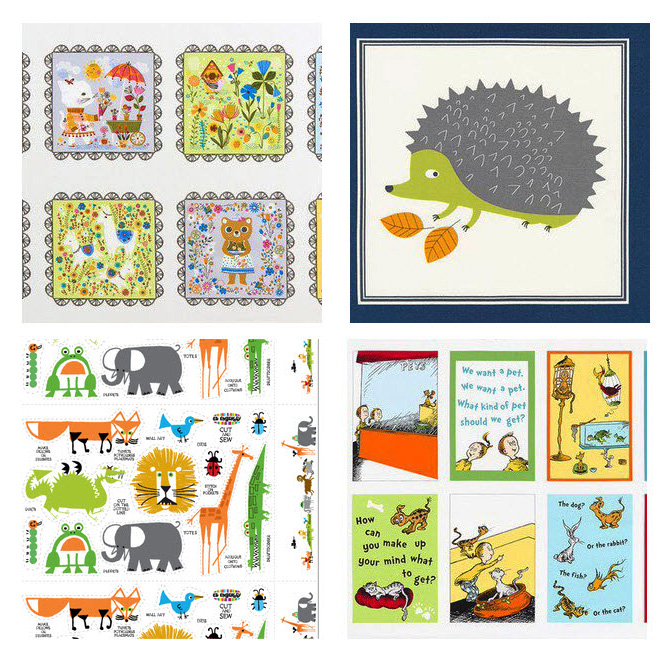
Kids and New Moms
Making a gift for an expectant mother or little kid in your life? Now you can piece together quiet books, soft books, plushies, play cubes, and toys by buying fabric panels, cutting out the patterns, stuffing, and sewing. Here are a few darling examples.
Tara Lilly’s Whimsical Storybook, Sea Urchin Studio’s Forest Fellows 2, Ed Emberley’s Happy Drawing, and Dr. Seuss Enterprises’ What Pet Should I Get?
Housewarming and Hostess Gifts
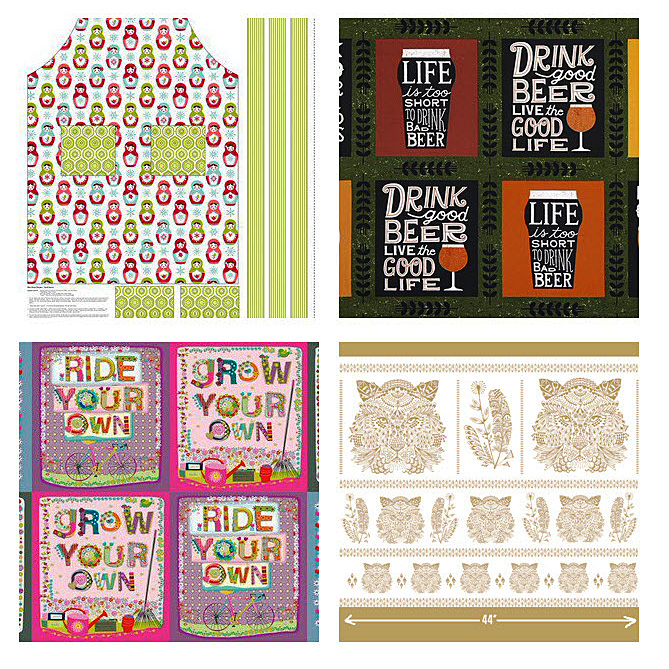
The next time I sew an apron, I’m going to buy a pre-printed fabric panel and just cut and sew. Likewise, there are fabric panels available out there for every type of friend and host or hostess gift you may need. I especially like the two highlighted below for beer lovers and DIYers.
Carly Griffith’s Merry Matryoshka, Robert Kaufman’s Cheers, Maia Ferrell’s Home Grown, Hawthorn Thread’s Bengal Panel.
Make Your Own Pillows
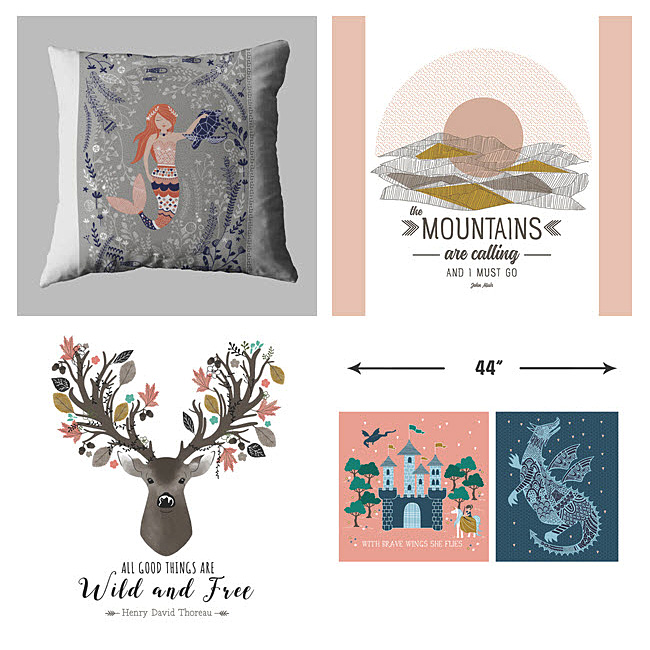
Never buy store bought decorative pillows again. Now you can cut out and sew any size panel with an endless array of patterns, designs, and quotes by inspirational people. I’ve got the John Muir quote one in my shopping cart.
Hawthorne Thread’s Calypso in Aegean, Redwood Panel with John Muir quote, Autumn Fawn with Henry David Thoreau quote, and their Brave Panel in Valor.
Full-sized Quilt Panels
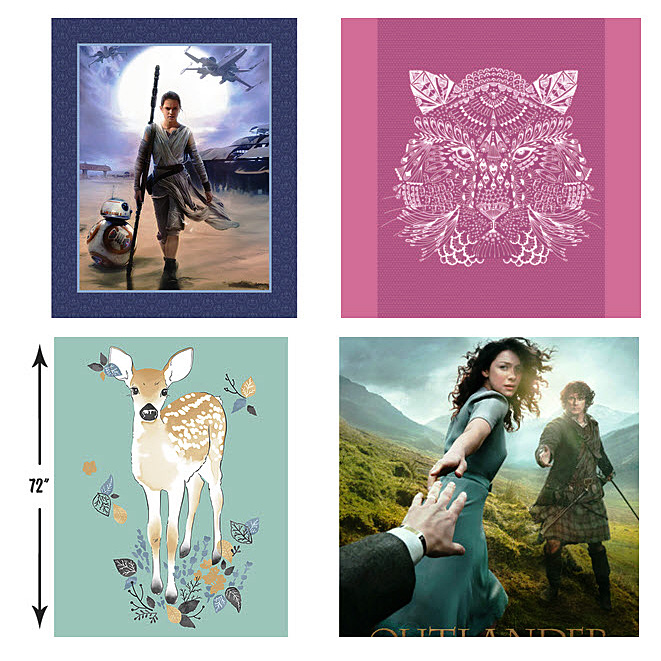
That’s right. Now you can buy an entire fabric panel ready to quilt. You don’t have to piece these beauties together. Just add batting and a backing and start quilting. For my Star Wars and Outlander fan friends, yes, you can now get your favorite heroines in full-sized quilts!
Camelot Cotton’s Rey and BB8, Hawthorne Thread’s Bengal Quilt Panel, and their Fawn Quilt Panel in Aspen, and Kathy Hall’s Outlander Panel.
Season’s Greetings
Holiday decorating and seasonal teacher and co-worker gifts are much easier now that fabric comes in these printed panel projects. Make a stocking for everyone in your kids’ class or just make them all for you and deck the walls at home.
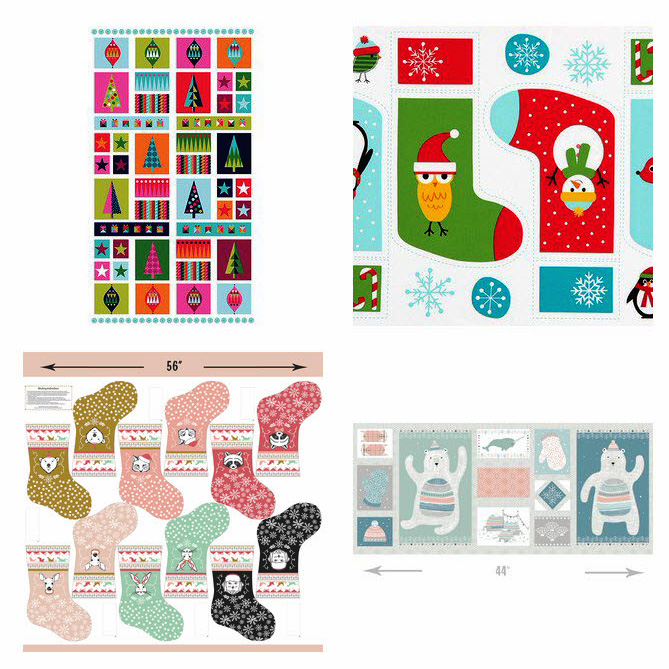
Makower UK’s Wrap it Up Hanging Panel, Ann Kelle’s Jingle 4 Stockings, and Hawthorne Thread’s Oh What Fun Stockings cut outs, and Hawthorne Thread’s Fairisle Panel in Multi.
This is Halloween
I had to spotlight Halloween printed fabric panels because I know a lot of my friends struggle to find Halloween crafts. No more! Make your own trick or treat or gift bags and spooky buntings and pillows.
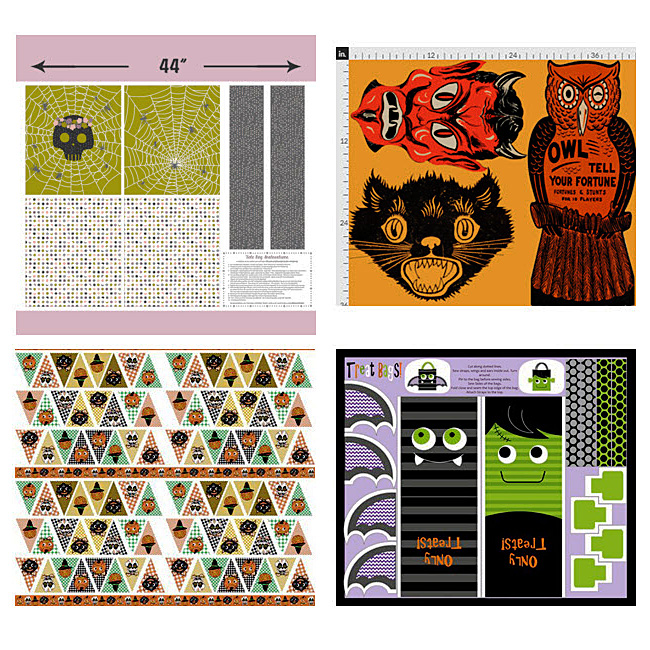
Hawthorne Thread’s Nocturne Trick or Treat Bag panel, Halloween Pillows, Halloween Bunting, and Halloween Treat Bags by Heidi Kennedy on Spoonflower.
What a Doll
Full fabric quilt panels and doll patterns are where I think preprinted fabric panels really shine. Both categories are a lot of work when you make everything from scratch. These cut-out-and-sew doll patterns will have you finished in no time, and the gift recipients are guaranteed to love what you make.
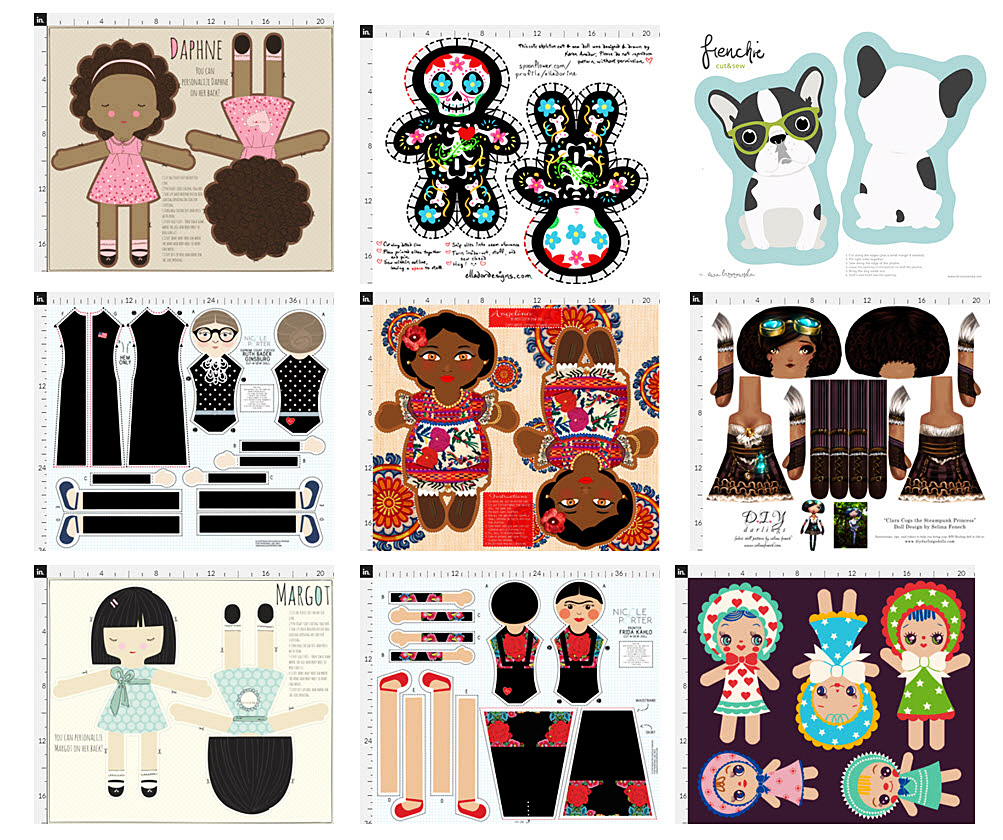
Daphne by stacyiesthsu, Cute Dia de Los Muertos Doll by elladorine, Frenche by ewa_brzozowska, Ruth Bader Ginsburg by nicoleporter, Angelina Cut N Sew Doll by tiffanyhoward, Cut and Sew Doll Pattern Steampunk Princess by selinafenech, Margo by stacyiesthsu, Frida Kahlo by nicoleporter, and Cut N Sew Bunka Dolls by heidikennedy.
Do you use preprinted fabric panels? What are your favorite projects to make from them?
———————————————————————————–
Charlotte Kaufman is a writer and sewist in Mammoth Lakes, California. She specializes in marine and home interiors and continues to fall more and more in love with quilting. You can follow her at charlottekaufman.com.
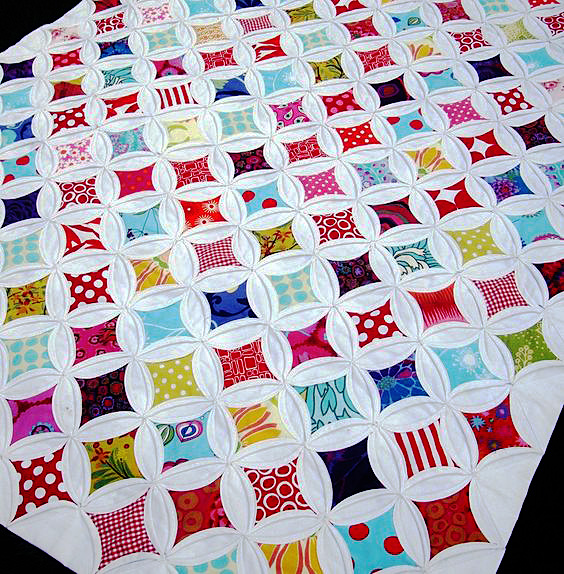
The time has come to explore yet another quilt type, and this one seems a bit less known than your standard patchworks and rag quilts. In fact, until I was doing brainstorm-browsing for this post, I don’t recall having ever heard of this kind of quilt, but the style is noteworthy enough to merit looking into. Through repetition, pattern, and color, quilts of this variety can have an interesting look to them that makes them stand out in similar fashion to the architectural designs of their namesakes.
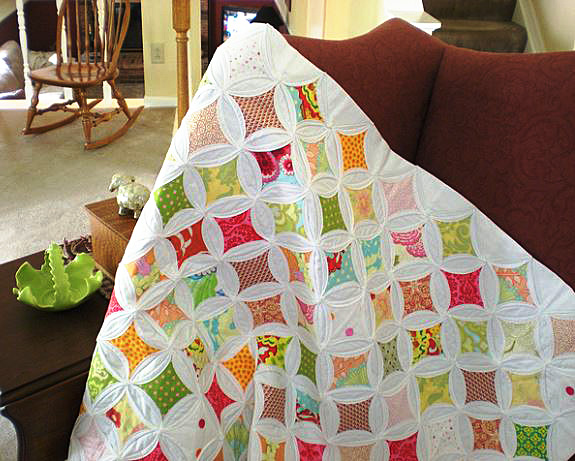
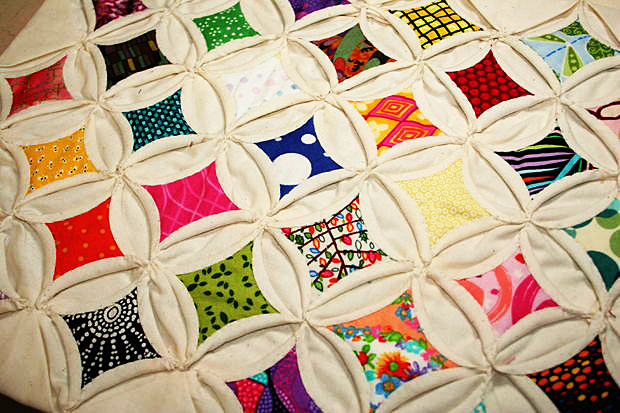
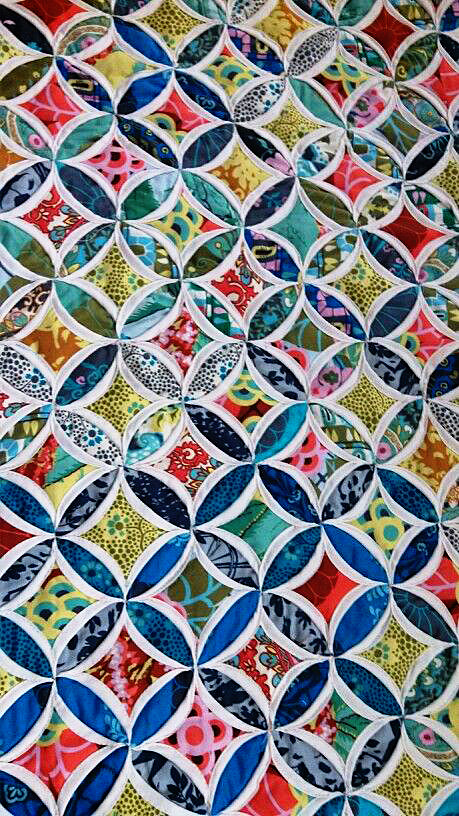
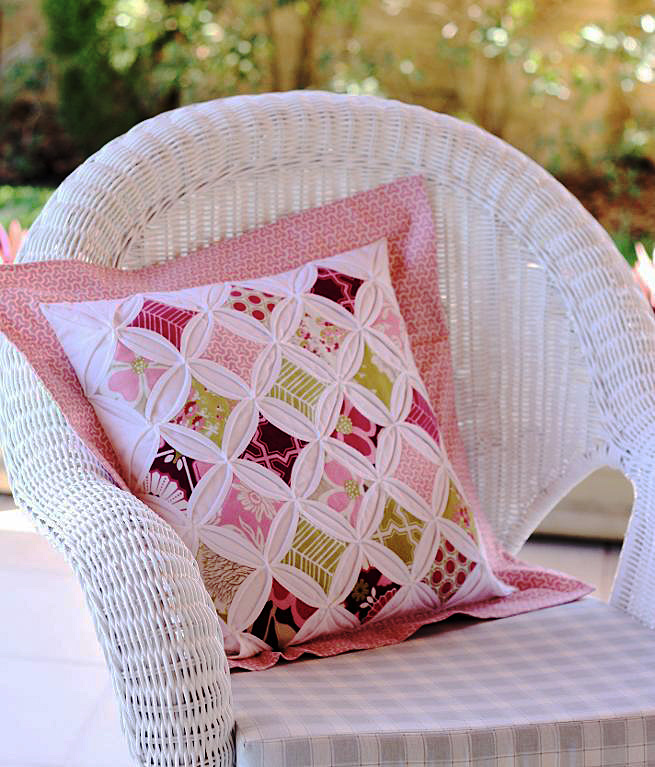
The type of quilt I’m referring to is a cathedral window quilt.
The type of quilt I’m referring to is a cathedral window quilt, and as distinctive as cathedrals themselves could prove, these sewing products can be straightforwardly identifiable once you know the traits to search for. Those traits, as with the artistic and structural wonder of cathedrals themselves, can catch the eye with their composition and beauty like few other quilt styles — in my opinion — are capable of doing. In this post, we’ll go through a list of typical characteristics that you can spot in a cathedral window quilt that provide evidence of its type so you can more easily identify one in a crowd of variously styled quilts. In particular, we’ll focus on four distinctive features of cathedral window quilts, starting with their…
These quilts are not necessarily known for bright coloring.
Bold colors
These quilts are not necessarily known for bright coloring, but a good percentage of the fabric used in creating a work of this category could be very bold, like dark blues, greens, and reds that give their sections a real pop. Even with the cathedral window quilts that use more pastel-based colors, those color options are still varied and strong, and they could build centralized sparks of color in certain patterns. If you’re going to make a cathedral window quilt, be sure to include some very dynamic colors to give these defined and robust splashes of color throughout the product. These bits of color, to construct the right design, “are folded precisely and sewn with curves to create small windows,” and “folded blocks are added together until the quilt is the desired size.” This sounds very direct and uncomplicated, but what are those bold-colored fabric pieces added to? That would be…
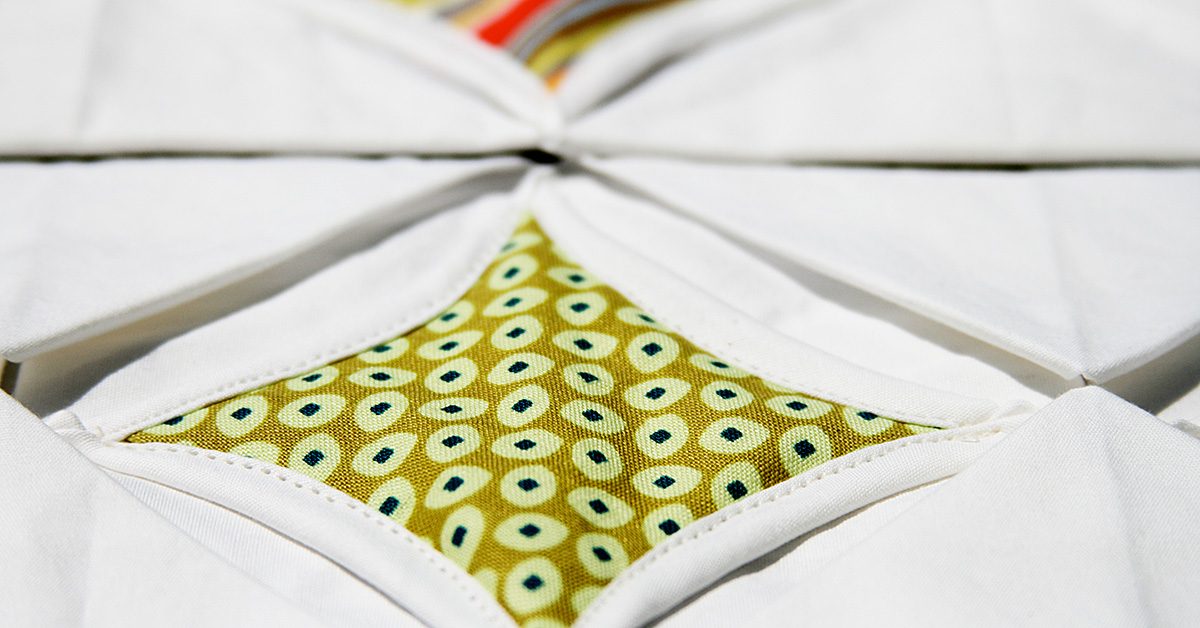
The overall point though is that the juxtaposition of light & dark make each section stand out.
White fabric
Along with varied colors, it’s also a good idea to snatch up some white fabric if you intend to make a cathedral window quilt. That white fabric added in contrast to the bold colors already mentioned helps to cement the notion of having stand-out sections of color on your quilt. Typically, the white fabric can completely surround portions of bold-colored fabric, but the reverse can be true as well if bold colors appear to surround the white fabric. The overall point though is that the juxtaposition of light and dark make each section stand out — the bold colors and the white sections — to result in a quilt that doesn’t necessarily have a single piece of it that isn’t remarkable and noteworthy. The consequence is a repetitious design that follows a…
These quilts can employ very specific shapes in their overall design—ones that can be mimicked in pillows.
Definite pattern
Often, these quilts can employ very specific shapes in their overall design — ones that can be mimicked in pillows. Specifically, the bold colors are often in the shape of near-diamonds, but those diamonds’ sides invert inward to create a swooping motion along all four sides. That diamond-esque shape is surrounded by a circle — one that can be ringed — and those circles can overlap throughout the entirety of the project. Is this the only way that a cathedral window quilt can take shape? Well, it’s not set in concrete! But if you see this general pattern, you have very real evidence that you’re looking at a cathedral window quilt since the pattern is so common for the style. Another trademark is that it has…
If you neglect a layer of quilt, that’s a layer of quilt that isn’t available to strategically cover mistakes & such, so the work could feel more vulnerable.
No backing
That’s right! With this quilt variety, you can forego the backing detail since the “quilt blocks… stand alone as is” without that extra detail. Does that factor make for an easier project? Maybe not! If you neglect a layer of quilt, that’s a layer of quilt that isn’t available to strategically cover mistakes and such, so the work could feel more vulnerable. Once you get the hang of the process though and make the adjustment, it might actually lead to an easier quilting experience because “you simply iron down your edges and sew.” Considering the level of beauty that these quilts can achieve, it seems like a sensible prospect to push through the confusion of learning to construct a quilt without a backing in order to eventually fashion such a lovely and reportedly easy project.
With these guidelines in mind, you could be able to spot a standard cathedral window quilt among other quilt options with scarce effort. In fact, coming to that conclusion of quilt style could become almost instinct where you look at a product and say, “Yeah! That’s a cathedral window quilt!” since the appearance is so very individual — and lovely!
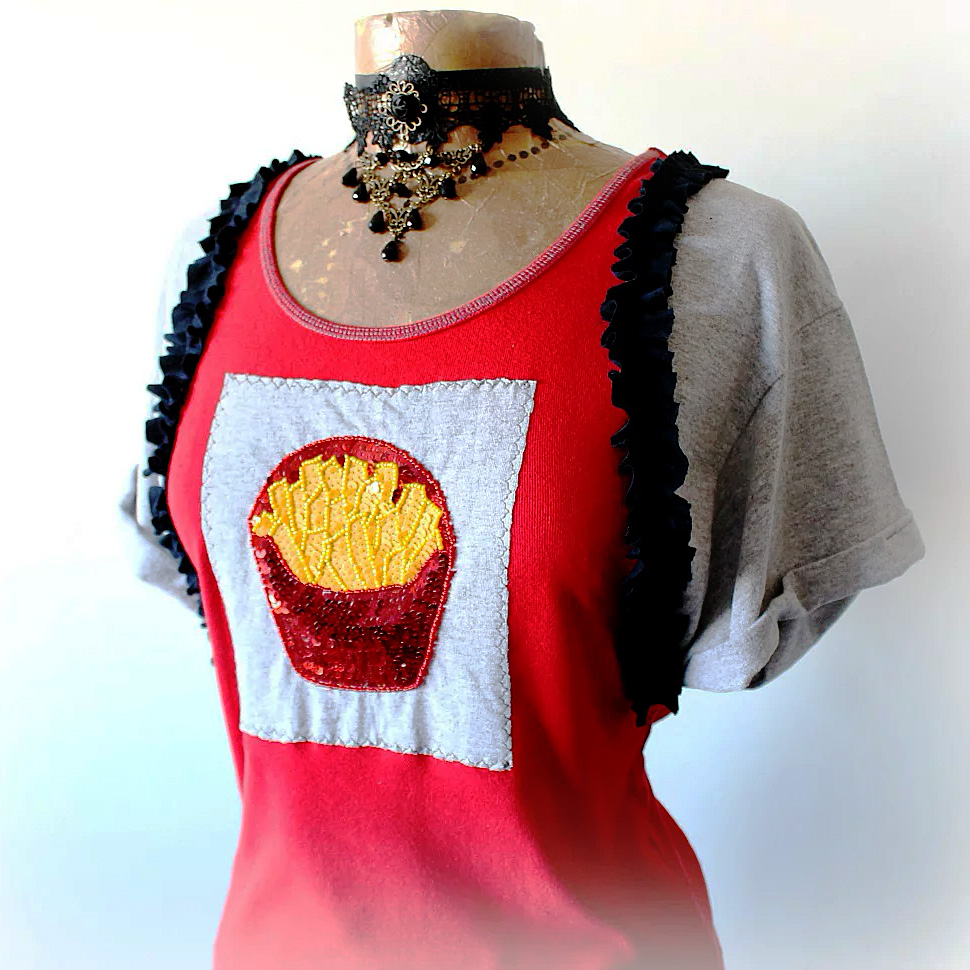
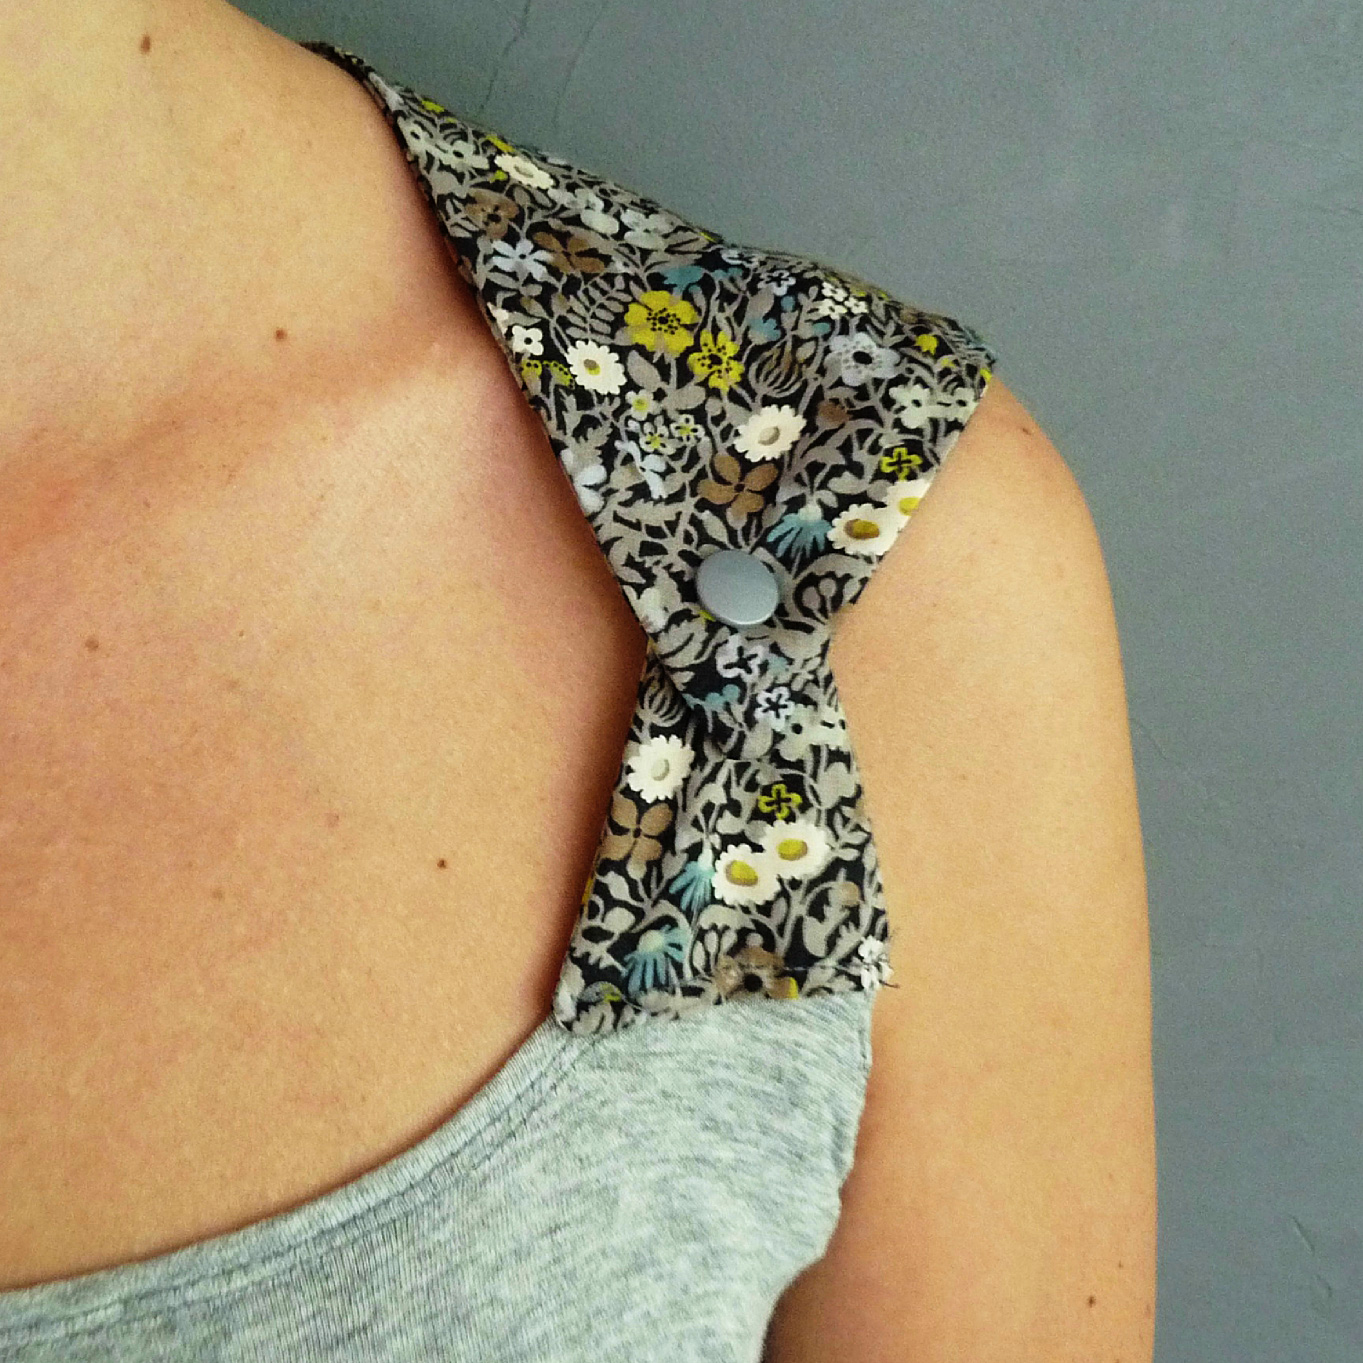
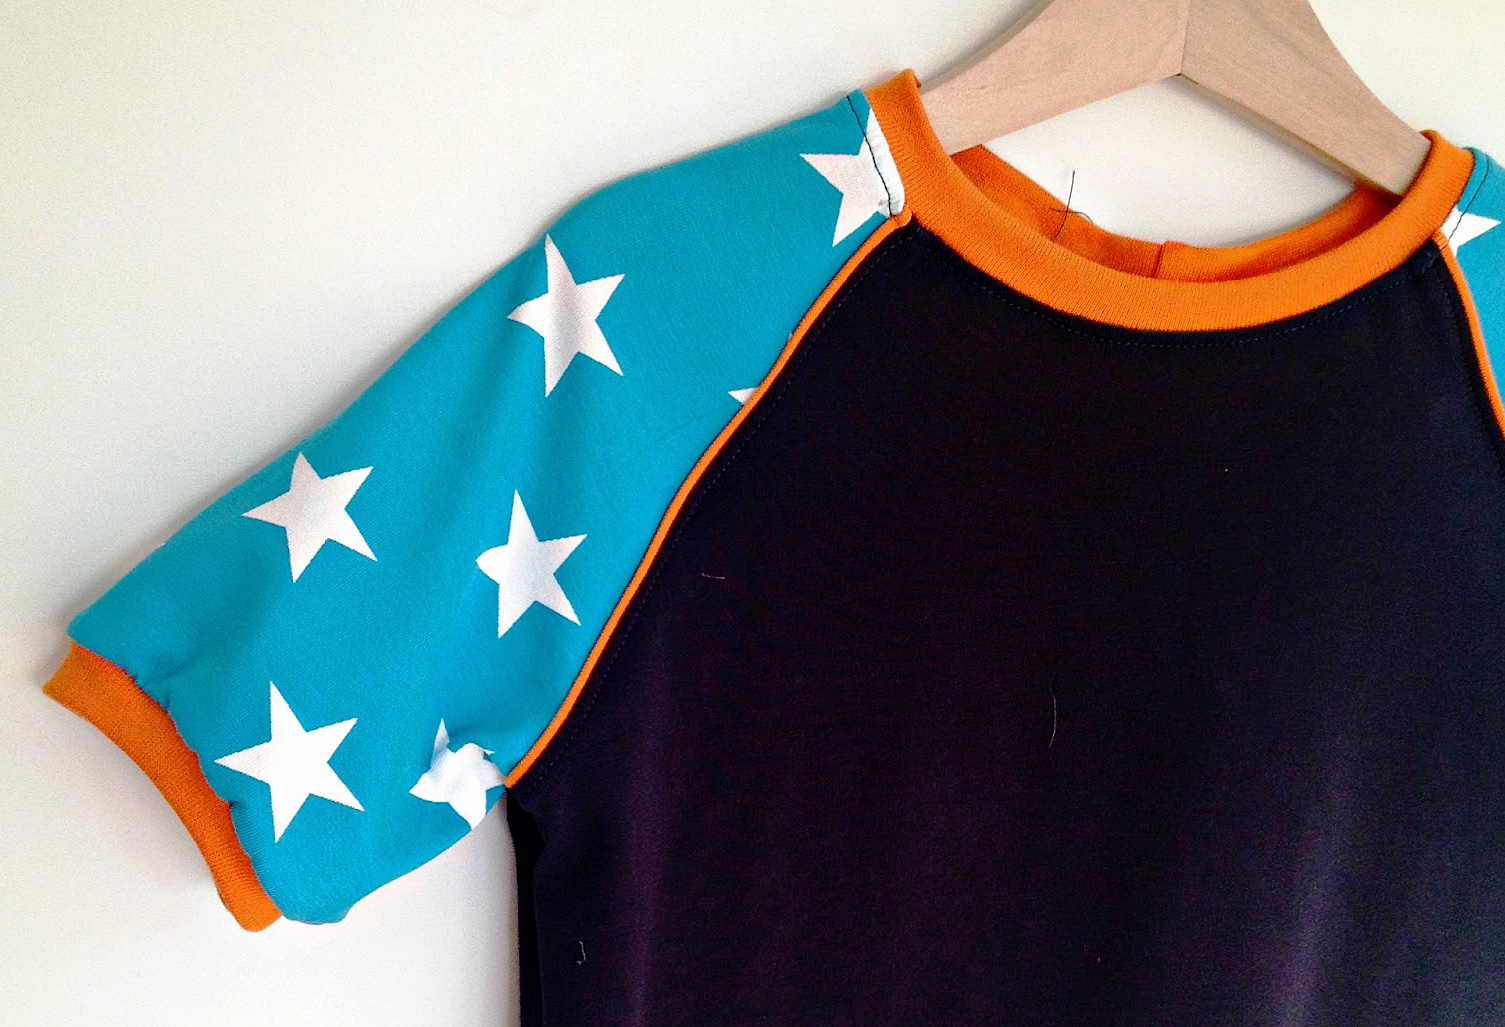
If you’re anything like me, when you find a t-shirt that fits well and is comfortable, you buy a bunch of them in a bunch of colors. Next time you do this, buy at least one more in a duplicate color. That t-shirt becomes the base for creating a fancy t-shirt that shows of your personal style. Build off it using items like lace, patches, fabric scraps, piping and beads. Or try your hand at embroidery.
Lace
There are a couple of ways to use lace on a t-shirt. You can use full pieces of it to create a collar or edging on the sleeves or bottom. If that’s a little too vintage for you, try cutting apart lace and sewing parts of the design on the shoulder, sleeves, hem or around the neckline.
There are a couple of ways to use lace on a t-shirt.
Patches
I’m a big fan of patches. Browse through your local craft store and find some that you really like. Place them on the sleeves, shoulders or bodice of your t-shirt to create the look you want. Even if they’re iron patches, I advise you to sew them on using either your machine or hand stitching.
I’m a big fan of patches.
Fabric scraps
Use these in a similar fashion as store bought patches. It’s a great way to use up some of your fabric stash while creating a funky, country t-shirt look. I recommend sewing the edges under to prevent fraying, unless you’re going for that look. Using a fabric marker in combination with fabric scraps can add to the country-chic look.
Use these in a similar fashion as store bought patches.
Piping
I love using piping around the bottom of the shirt and sleeves, but there are other options too. You can create a military look using piping on the shoulders or add some funk to the bodice. Get creative and use colors that contrast from the t-shirt color.
Get creative & use colors that contrast from the t-shirt color.
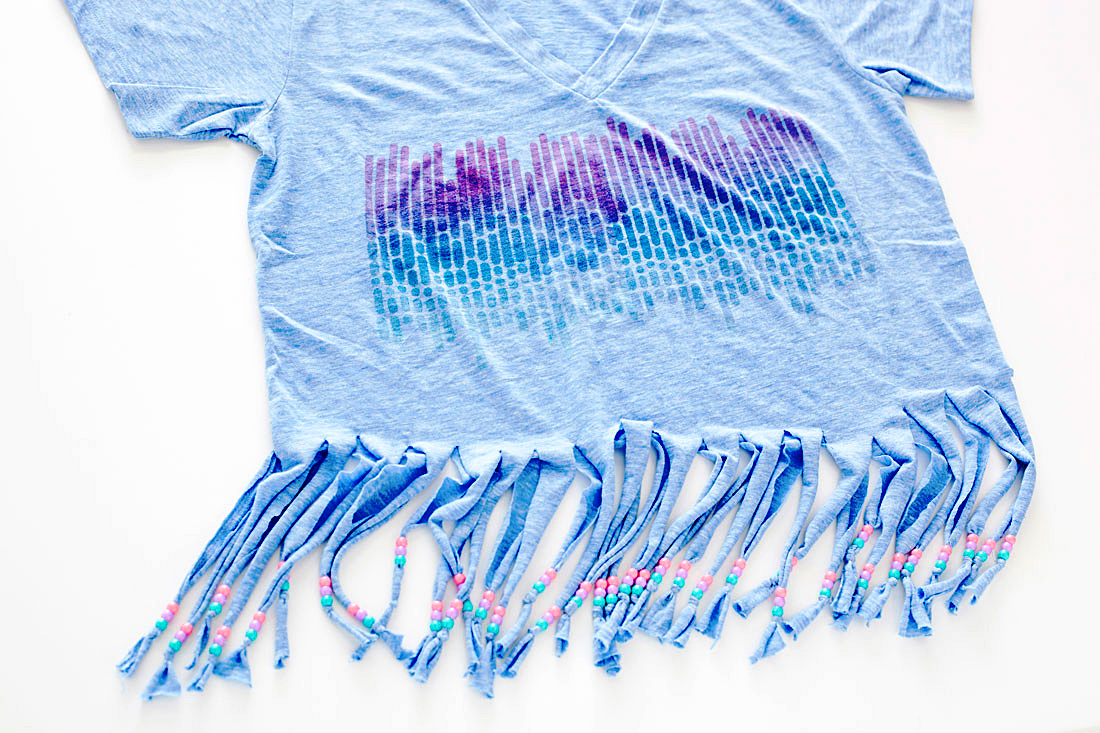
Beads
You can do a lot with beads on your t-shirt.
You can do a lot with beads on your t-shirt. They look great as a faux necklace around the neckline or along the edges of the sleeves or bottom of the shirt. Another option is to create a design on the front of back of your shirt using beads. I suggest using a washable marker or pencil to draw out the design before placing the beads.
Whether you use one or many of these techniques, you’ll wind up with a t-shirt that expresses your sense of style. They’re great in combination or alone. A t-shirt with even one of these creative additions would cost quite a bit in a store. Doing it yourself is both fun and cost effective. Give it a try and see what you come up with.
I currently have at least a dozen WIPs in one stage or another.
If you are like me and many other creative people, you have a long list of projects you are working on, planning, and just getting started. In the quilting community the term for these are WIPs, or ‘works in progress.’ I currently have at least a dozen WIPs in one stage or another (and not just quilts, but other sewing projects as well). Here’s how I manage the materials for each one.
Decorate
Remember that fabric is beautiful. Don’t hesitate to post photos of your ideas on a design board, or, like I’ve done here, with fabric samples that not only keep me motivated to work on my project, but look beautiful on my wall too.
Remember that fabric is beautiful.
Front and Center
Sometimes it’s best to keep your current WIP exactly front and center. I make a point of only keeping one project at a time on my work table. My mental message with this is that the only thing I’m working on is the project in front of me. This keeps me focused on the task at hand. If I truly want to work on something else, I put away the other project first.
Sometimes it’s best to keep your current WIP exactly front & center.
Next Up
The small shelf to the left of my work table is where I keep my iron and my ‘next up’ project. This way I know what I have in my pipeline and can easily get to it once I’ve cleaned up the main table WIP.
I know what I have in my pipeline & can easily get to it.
Special Sections
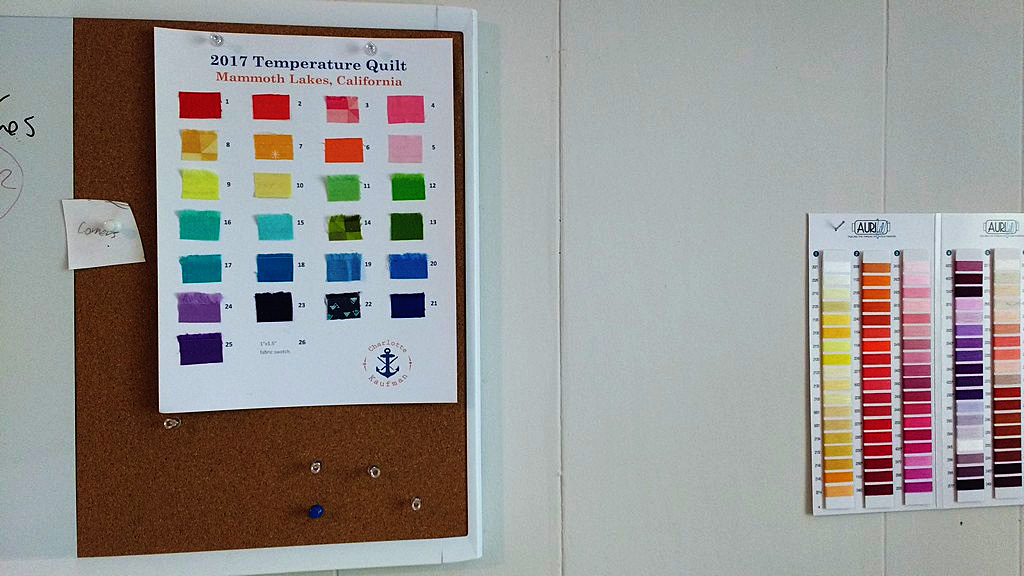
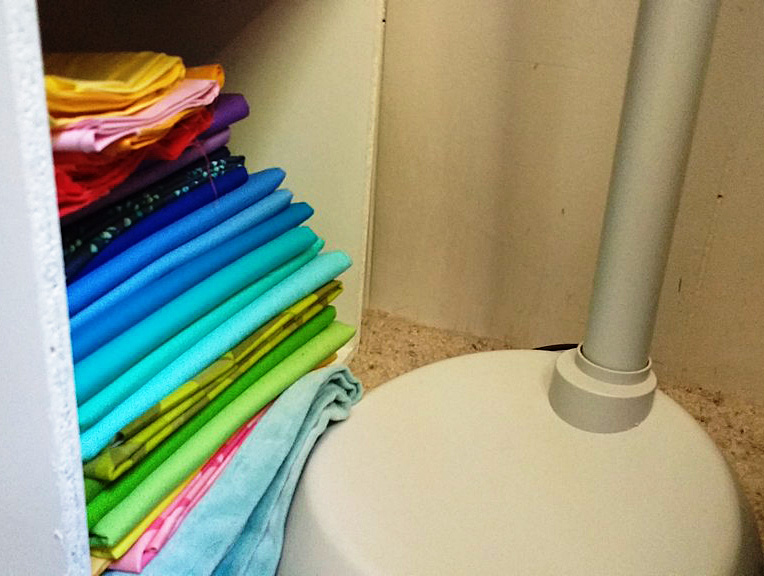
Some projects are so large that I keep them in their own shelves, away from my main fabric stash. The assortment you see here is allotted for my 2017 Temperature Quilt, which will feature 26 different fabrics to map out the daily high temperatures of my city.
The assortment you see here is allotted for my 2017 Temperature Quilt.
Keep it Hidden
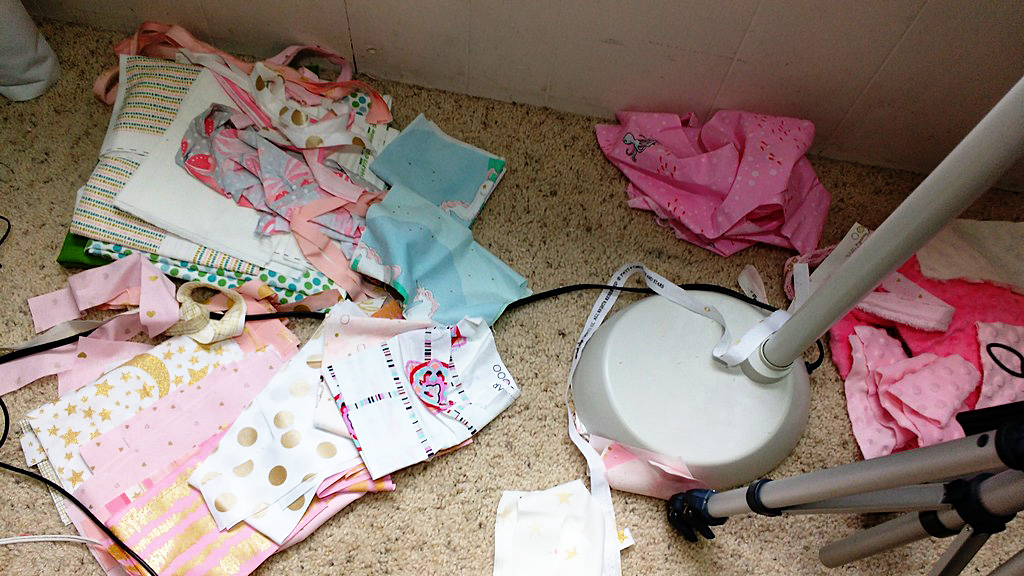
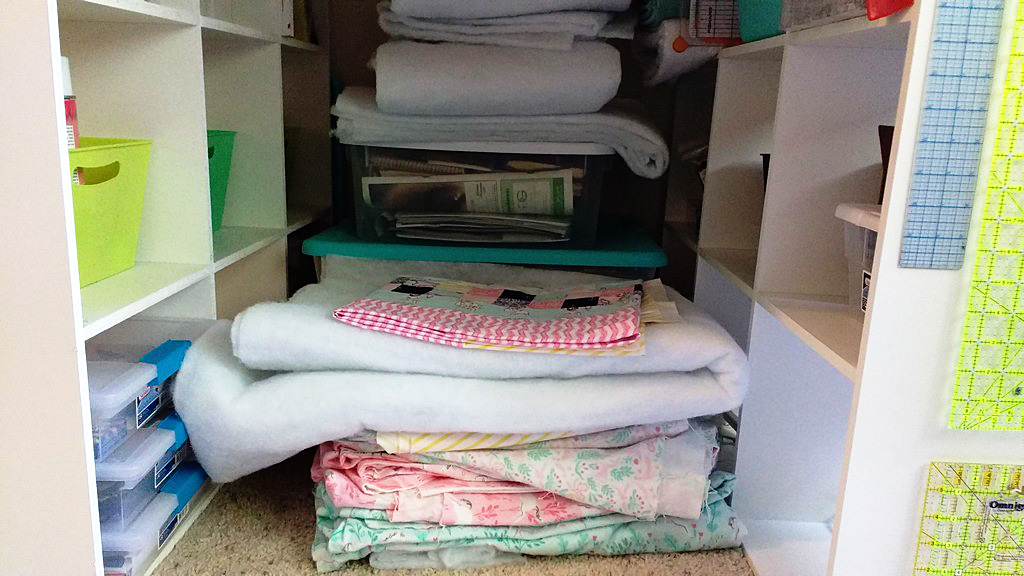
This is the view under my work table. Unless you pull out my chair, you can’t see these large pieces of batting, quilt tops, and backing fabrics I have sitting in wait. Sometimes your WIPs are big. Finding a place to tuck them away until you get to them will help keep your workspace clean and ready to use.
This is the view under my work table.
Fabric Stash
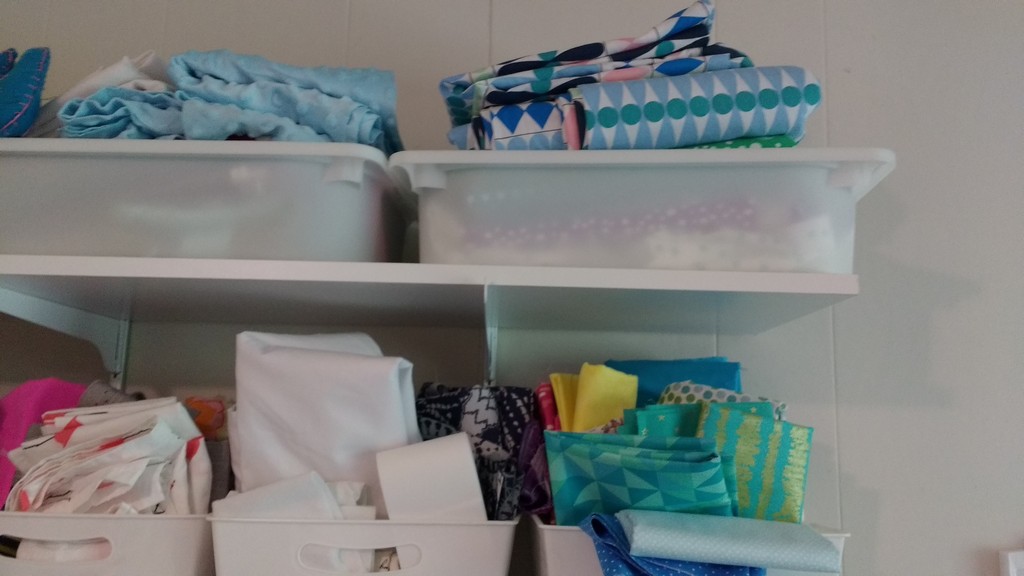
Sometimes my WIPs are tucked directly into my fabric stash. The top bin on the right is fabric I have pegged to become new bedding for the full-sized mattress in my room. It folded neatly and fit right in with the rest of the stash and no one is any more the wiser that I have it in my list of WIPs.
Sometimes my WIPs are tucked directly into my fabric stash.
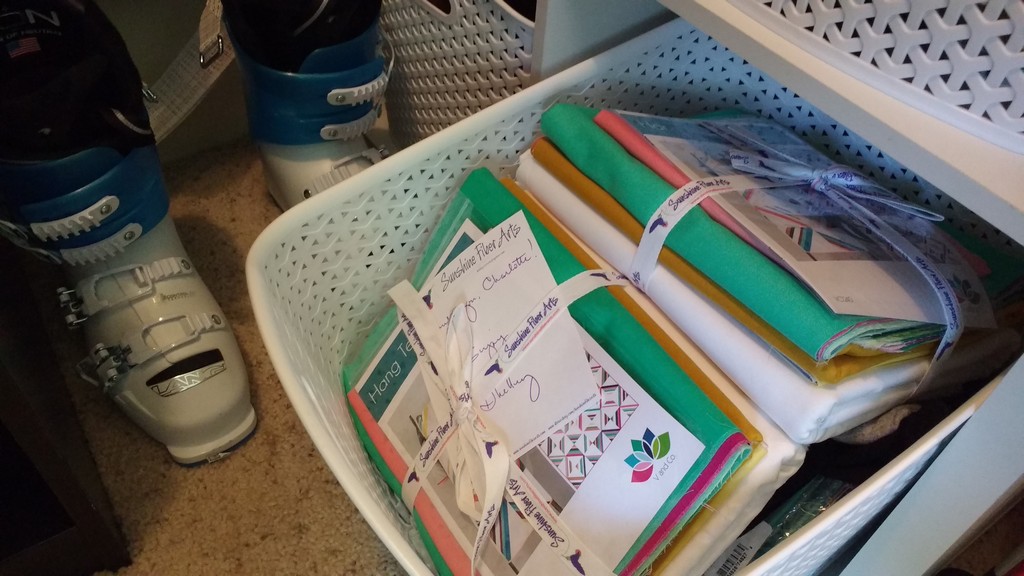
Deep Storage
Sometimes you see a screaming deal on a quilt kit (or two) or you have WIPs that you know you won’t be able to get to for months or even years. I tuck these away in deep storage in my closet. I have a friend who stores them in bins under her guest bed.
I tuck these away in deep storage in my closet.
Computer Files and Pinterest
Don’t forget that some WIPs are still just dreams and plans. Keep these twinkles in your eye safely organized in a documents folders on your computer that has patterns you plan to make or designs you want to pursue. Likewise, Pinterest is a great visual repository for storing images that link to websites with projects you are currently working on or plan to.
How do you manage your works in progress? Let us know what works for you.
———————————————————————————– Charlotte Kaufman is a writer and sewist in Mammoth Lakes, California. She specializes in marine and home interiors and continues to fall more and more in love with quilting. You can follow her at charlottekaufman.com.