Sewing Room Organization Tips and Projects

Sewing Room Organization Tips and Projects

Organization and layout are important factors for any sewing room. In my own small room, I have tried many things that didn’t work well, and I have found many things that do.

What are the most important factors to consider in any sewing room?

I think it boils down to these major factors:

  • Machines
  • Workspaces
  • Storage- of tools, instructional materials, and the “stash.”

Sewing Room Machines

We must keep our machines at the top of this list because neglecting to consider them can be disastrous.

One cannot sew without a trusty machine- and some sewing machines are anything but! You need reliable machines. Have both a trusty mechanical model for backup and an electronic or computerized model. If you want to sew like a pro, you need a serger as well.

You may also like to have a quality embroidery machine, a cover stitch machine, or a long arm quilter.

I listed machines at the top of the sewing room considerations based on my own experience. No mess is as important to clean up and take care of as the machine itself. Do not ever neglect to clean inside your machine! Your sewing machine will break if you do not clean under the bobbin case. And you must clean inside your serger often, for the same reason.

Avoid unnecessary repair bills by cleaning machines with a brush after every project. You must also oil your mechanical machines and sergers. Electronic machines will need oiling at Sewing Machines Plus or your local repair shop. Do not try to oil these at home. Your mechanical machine will serve you during these times.

Sewing Room Workspaces

You need ample workspaces for various tasks:

  • Machines and Sewing
  • Cutting
  • Pressing
  • Layout/ Design

You can save space by creating a design wall for layout, rather than relying on table space for this. Consider ease of moving between the workspaces to create an efficient room.

What I have found to work best in my space is to have both a large table and a counter-top style desk. These are both best kept clear. My machines are covered on shelves and it is easy to take them down and set up on the sewing desk or the table. Sewing Machines Plus has a huge selection of sewing desks and tables to choose from; click here to see these now.

I like to set up in a few different configurations, depending on what I am sewing. I place the sewing machine and serger both on the long desk when making patchwork or small projects. Or, for larger projects, I place one on the table and one on the desk, with my chair rolling back and forth between the two. If I am sewing a quilt, I set my machine on the edge of the table so that the entire table is able to support the quilt. Otherwise, I prefer the machine to be on the desk and to keep the table clear for cutting.

The iron and board or space for ironing needs to be nearby as well. I keep my large ironing board set up in the laundry room and have a folding board mounted on the wall in my sewing room.

Sewing Room Storage

You can break storage in your sewing studio down into a few categories:

  • Tools
  • Information- patterns, books
  • Stash- Fabric and supplies

    For tools, what is most important is that what you need is at hand when you need it.

    For tools, what is most important is that what you need is at hand when you need it.

Storage is where your options are endless and creativity comes into play.

Tools

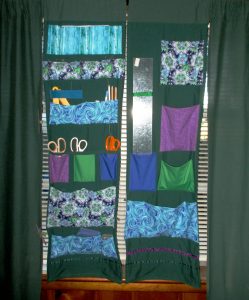
For tools, what is most important is that what you need is at hand when you need it. This issue was problematic for me in the past because of grabby toddlers. So I designed this custom solution to keep my tools neat, in my reach, and away from kids.

You can also use drawers, boxes, or bins for storing tools.

Info – Patterns, Books, Magazines

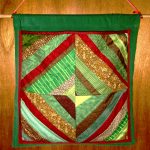
This was made from a spare leftover patchwork block.

I store packets of patterns organized by type in banker boxes, some of these contained in Ziploc bags. I keep favorite and often used patterns in this oversized pocket for ease of reach. This was made from a spare leftover patchwork block.

I store books and magazines on shelves.

The “Stash”

Fabric

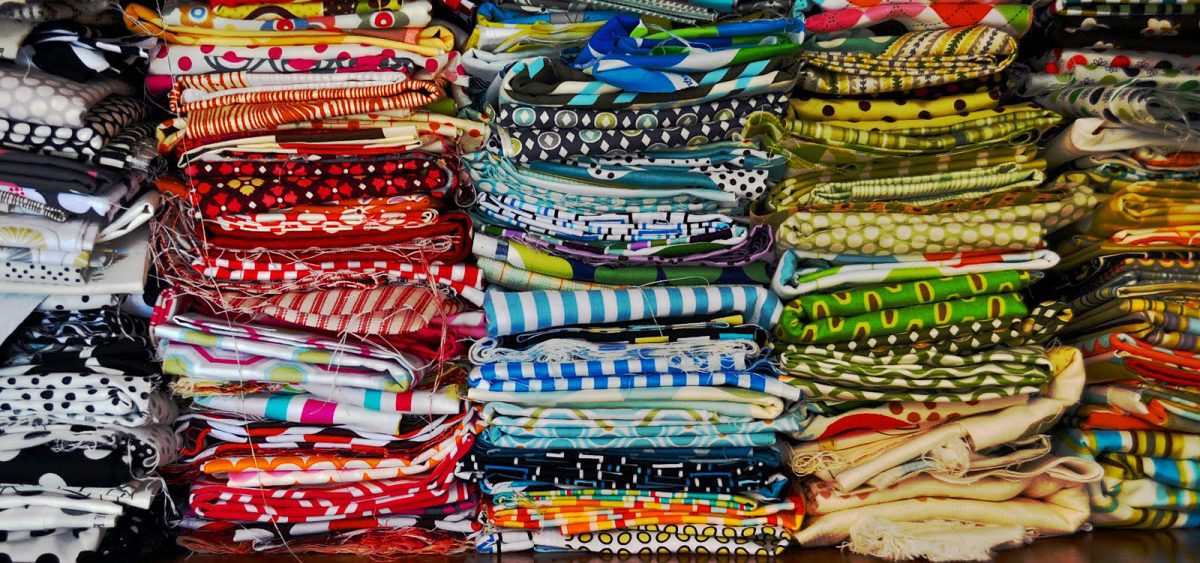
Fabric storage has been covered before on this blog. I won’t repeat the excellent points made in that post. But, as she said, fabric left in the open collects dust. And in the case of my sunny sewing room, colors can fade. Design your space for utility rather than aesthetic considerations only. For example, I once experimented with a rainbow of sorted stacks of fabric on a shelf. This looked lovely, but I don’t recommend this method! Those stacks were not easy to pull from without making a mess.

So I have settled on storing my fabric in covered boxes. I store quilting cottons by color, and other fabrics according to type. Dress weights are together, and knits are in a box of their own, for example. Here is the most helpful tip I have with regard to fabric storage: for the most part, let the fabric live at the store! No longer do I browse sale tables or buy yards of fabric with no particular project in mind. Quilter cottons are the only exception. But I never buy more than a yard of any fabric except as needed for particular projects.

Notions and Other Supplies

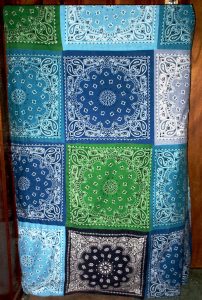
Reduce visual clutter & beautify your creative space with a creative shelving cover!

Reduce visual clutter & beautify your creative space with a creative shelving cover!

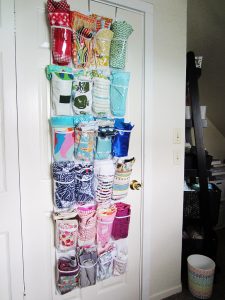
I do find it helpful to keep a good stash other supplies. I use a chest of drawers and small bins. These sort and store elastics, trims, ribbons, bias bindings, lace, velcro, and buttons. I also keep serger threads and tools sorted in a smaller, plastic drawer unit in reach of that machine. Sewing spools hang on a wall mount rack with a clear dust cover for protection.

I hate having dust land on fabrics and supplies, so I made a cover for one of my shelving units. I have enjoyed having my books, magazines, and other items shielded by this. It is easy to pull the cover back and find needed supplies. And it reduces visual clutter and beautifies my creative space.

Trusty machines, ample workspaces, and easy storage contribute to a well-ordered sewing room. The most important factor in your sewing room, though, is you! Create a space that works and that you love and then go there and make stuff as often as you can!

Let's Make Some Goals!

Let’s Make Some Goals!

Once upon a time, I attempted the 101 goals in 1001 days challenge. Ever heard of it? Basically, you come up with 101 goals (at least, that’s the goal—you can decide whether or not that pun was intended!) and you give yourself 1001 days to finish up said goals. It’s a fairly simple idea, and I was intrigued enough to come up with that many things and start on working toward success for the list.

I think I finished writing the list. But I did not finish accomplishing the goals on that list.

I later tried again. Some of the goals might’ve been new. Some might’ve been on the earlier list. Still, I made a list (I think it was full!) and started over.

Again, I didn’t finish with that whole accomplishing-thing.

Even though I might loooove making lists (Nerd? Probably!), I don’t think I’ll ever make a 101-in-1001 list and see the process through. Why? A couple of things are worth mentioning for reasons.

One is that I don’t know what I’ll want to do in over two years. I might know big things, maybe even *some* small things, but to commit myself to 101 things that’ll fit my plans approximately 2.74 years from now? Doubts are reasonable!

Congratulations graduate!

Congratulations graduate!

Also, while going through the process earlier, I found that my goals changed, and my beginning list didn’t really fit at a certain point. Possible example: I think I was working on my MA in Ancient & Classical History for the beginning of one list, maybe both. I never got that degree, but I did end up getting a fancy MA in English and Creative Writing. The school I graduated from even sent me this little guy for social media potential. Lucky me!

The point? I accomplished something, but not what I named if I specified what I wanted an advanced degree in. Things change, and my lists might not have kept up with those things.

And even if the changing goals wasn’t an issue, who actually has 101 things they want to do at any given moment? I might have to make a few things up or stretch my imagination to come up with that many goals—which could heighten the chance that I won’t want to continue with said goals. A scrambled-after goal isn’t necessarily the strongest one. I mean, if I didn’t *seriously* want to do something in the first place and had to think waaaaay outside of the box to come up with it, why make an extended effort to accomplish it? Am I right?

I bring this up because, while I don’t feel like I’m overly good at committing tiny goals to myself for the so-distant future, I do still have goals. Beyond that detail, I also like the idea of giving myself a cut-off for those goals. And, as I said, I like making lists like this!

So… I’m going to do another one! This time though, instead of having such an extended time period of a 101-list of potentially made-up goals, I’m going to focus on something more foreseeable and sizable. The smaller the time span, the less time there is for goals to change. The smaller the number or goals, the higher priority they have to be before they make the list (and the smaller the chance that I made them up as fillers!). Combined, the scenario could make my list more doable and successful. Maybe. Possibly. Hopefully? 🙂

An early step of this process is clearly to come up with that list. And no, I don’t have a finished list to hand to you. Instead, I’m announcing that this will be a concept that will likely pop up on blog posts in the future. This list and these goals won’t be the focus of all future posts, but they might show up as casual “Hey! New Goal!” mentions. If you see one of those at some point, reading this post will have given you a warning about what’s going on!

In early 2017, I plan to have a specific, finished list of quilting/sewing goals to tend to during the year. One year at a time, maybe a dozen goals at a time, seems more like a potential recipe for success than scrambling for something to list and pretending what I want will stay what I want for a long time. I can focus on what I do want to do, and take it in small enough batches that could lessen the likelihood that my interests will do a one-eighty!

But I do have a goal or six to start off with, so my list has already begun! Want to read the goals so far? Here you go!

  • Make a rag quilt – Why do I adore these things soooo much? I’ve never even owned one that I specifically remember, but I’m so interested in making my own. I’m thinking of a conversation-heart design for sentimental reasons, but I guess I can work out the ends and outs of specifics at a later time!

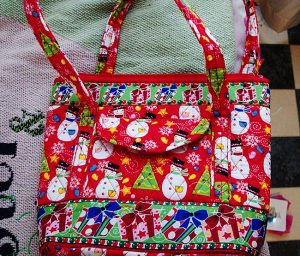
    Behold! The Christmas purse I bought. Isn't it fun?

    Behold! The Christmas purse I bought. Isn’t it fun?

  • Make a Halloween purse – It can be a pretty big holiday person (I already have a Christmas purse I bought!), and I’d love something that I made myself to carry around during the month of October. I don’t know that I’ve ever made any kind of purse, so the whole experience could be new—maybe challenging. Even if I make one this year, I could make a more challenging one next year.
  • Make quilts or blankets for all who know me as an aunt – This goal in itself could be handful, but I think it might be worth the effort. They’re pretty awesome kids, after all!
  • Make a patchwork piece of clothing – Like with the rag quilt, it might be hard to tell why this idea intrigues me like it does. I do like patchwork things though, so why not make a patchwork design I can wear to the store for people to see? Easier to show off that way! 🙂
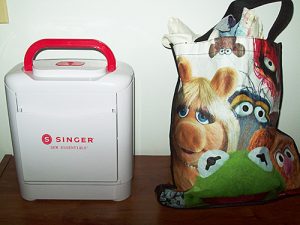
  • Go through all of the free Craftsy classes for quilts and sewing – I’ve already improved my technique because of the video I watched, so browsing the rest of them might be a good idea. Who knows how much I could learn from them, or how much better my sewing/quilting could become because of them? Let’s find out!A pre-assembled sewing kit and a Muppet tote with fabric in it.
  • Improve my sewing tools collection and organization – Not saying this is all I have in the way of tools and organization, but this is a pretty decent percentage: A pre-assembled sewing kit and a Muppet tote with fabric in it. Even when added to the other things I have, I could use an upgrade! Why not tend to that next year, too!

Six goals to start off, and months left to build! Hopefully, the months leading up to 2017 can help me gain ideas through projects and posts.

Any ideas from you guys? If so, post a comment!

How to Store Your Fabric Stash

How to Store Your Fabric Stash

This is post one of a three part series on storing your fabric. Post two (how to store your works in progress) and post three (how to store your fabric scraps) are coming soon.

This is post one of a three part series on storing your fabric. Post two (how to store your works in progress) and post three (how to store your fabric scraps) are coming soon.

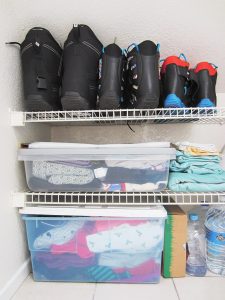
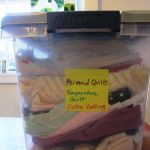
I keep my deep-storage and heirloom fabrics stored in a bin. Fabrics I'll use soon are simply folded neatly awaiting their use.

I keep my deep-storage and heirloom fabrics stored in a bin. Fabrics I’ll use soon are simply folded neatly awaiting their use.

How do you store your fabric stash? I have seen some of the most creative ways while perusing through Pinterest, everything from tucked in the drawers of a dresser, folded neatly on the top of a bunk bed, or deftly displayed in KITCHEN, yes kitchen, cabinets. Who needs to eat when you have beautiful fabric to sustain your soul anyway?

No matter which way you decide to organize your fabric, you will need to keep several things in mind.

My works in progress are kept in a tall bin and labeled so I know where to easily find them.

My works in progress are kept in a tall bin and labeled so I know where to easily find them.

Store Covered

  1. If you decide to store your fabric in bins, consider using plastic instead of paper, or file boxes, or baskets. Keeping your fabric covered will better protect it but consider using a plastic container with tiny holes (or creating tiny holes) to allow the fabric to breathe and to prevent synthetics from yellowing.
  2. Tape a cedar block inside the container to help prevent moths and other insects from taking up residence.
  3. Store away from sunlight to prevent fabric from fading.

    My lovely stash. I do take the time to dust off the fabric about twice a month.

    My lovely stash. I do take the time to dust off the fabric about twice a month.

Display It

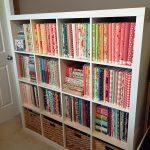
  1. I love the quick access that openly displayed fabric offers. However make sure to keep fabric away from direct sunlight.
  2. Dust! Your fabric will accumulate dust if displayed or left in the open. Keep it tidy with a frequent dusting or airing out.
  3. Keep it clean – little children love to touch and play with fabric and even some adults can’t help but reach up and touch gorgeous fabric. Be aware of where you display your fabric and how frequently it may be handled by people whose fingers could leave it soiled.
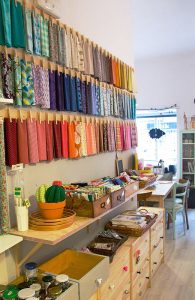
Fabric on display via MuyMolon.com.

Fabric on display via MuyMolon.com.

Additional Methods

  1. Color coded – perhaps the most method of organizing is a stash is by color. This is how I do it!
  2. By Designer or Project – some people also keep their stashes stored by Designer or even projects in progress.
  3. By Size – big, medium, little, tiny. Sometimes storing or displaying by size is also helpful.

    Fabric organized and wrapped around Polar Notion's organizers.

    Fabric organized and wrapped around Polar Notion’s organizers.

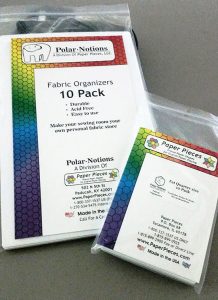
Standout Idea: Acid-Free Fabric Organizers

I just discovered these puppies and as soon as we move to our new home and I start working on my sewing room, I plan on ordering some to start wrapping and displaying my stash. Unlike fabric-store pieces of cardboard, these organizers are sturdy and acid-free. Storing fabric wrapped around cardboard will eventually discolor your fabric since cardboard is not acid-free.

The sad result of what happens when you use regular cardboard to organize your fabric.

The sad result of what happens when you use regular cardboard to organize your fabric.

I’ve found two brands that offer this acid-free option. Polar Notion’s boards are made from plastic and The Fabric Organizer’s boards are made from an acid-free corrugated cardboard. Both look fantastic.

Think about which product would suit your needs and your stash better.

Think about which product would suit your needs and your stash better.

The larger Polar Notion holds up to 15 yards of wrapped fabric and the smaller one is perfect for fat quarters and smaller pieces of fabric.  The Fabric Organizer’s large size holds up to 10 yards. It is also cheaper than Polar Notions. Think about which product would suit your needs and your stash better.

Do you have a favorite method of storing your fabric? Let us know how you do it in the comments below.

Charlotte Kaufman is a writer and sewist in San Diego, California. She specializes in marine and home interiors and continues to fall more and more in love with quilting. You can follow her at charlottekaufman.com.

Pressing Forward – A New Idea

Pressing Forward – A New Idea

As I was organizing my new sewing room, I thought about what components I could use to make sewing organized and efficient. Sewing is my favorite part but keeping things in order can become a challenge.

Sewing is my favorite part but keeping things in order can become a challenge.

Sewing is my favorite part but keeping things in order can become a challenge.

Of course, quilting takes a few more supplies that some hobbies, but I was thinking specifically about how I can make the pressing of quilt squares and fabric as part of my desk area rather than an ironing board and standing each time I had to press.

I made an ironing table on my counter top which has an insulated pad so I could sew and turn my chair to iron. It works fairly well but needs to be adjusted at times, as the pad wriggles around, and I thought there has to be something better.

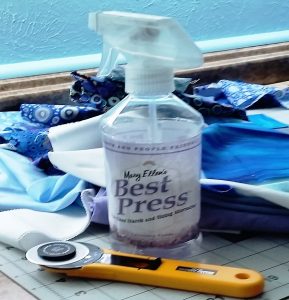
I have to say that ironing is NOT my favorite past time with all the laundry we have, but somehow when I am making quilt squares, it is not too cumbersome. I use a fabric stabilizer when I iron that smells nice when it is heated so it, it gives me ambition to sew my squares and press them neatly to look professional as I go along. I have been thinking that an investment in a Home Pressing system will be beneficial.

Thinking back, actually, when I was a little girl, my Mom had what she called a “Mangle” Iron. I have not seen those again until recently in this website. I always wanted to help her press the sheets and pillow cases and my Dad’s handkerchiefs when she set up the what seemed to be an “ancient” machine. In fact, this type of machine was first used to wring out clothes by washer women beginning in 1843. Mom had hers in the late 1950’s, and used it often.

Sheets, tea towels, table cloths and fabric scraps would be so easy to run through the iron and save time to enable more sewing.

So, with that in mind, I have been researching Pressing Systems. I have come across some great reviews on the Magic Steam Press ESP2 Electronic Iron, and the Miele B990E Rotary Ironing Board. Check out the other brands here as well. The first is a small table model and the second is a rotary iron on a stand capable of ironing most everything. This is easy to use by sitting and makes ironing a breeze! Just be careful about the buttons and zippers, please!

I think these models would be particular good for bonding interfacings and stabilizers to fabric and to make quilt squares, totes, curtain panels and much more. Sheets, tea towels, table cloths and fabric scraps would be so easy to run through the iron and save time to enable more sewing.

Check out the irons on this website, and consider using a Pressing System for your sewing and ironing needs.

The reviews are helpful to see how valuable and what a time saver these systems are.

My next purchase will be to order for one of these products. With time saved and beautifully pressed quilts and clothes, it is an investment well worth the money with energy to spare! Press forward, and enjoy ironing! See you next time!

Luxury Textiles in Italy


Buongiorno from Italy! I am writing the second of my posts about my Fabric Frenzy this time in Italy!

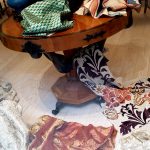
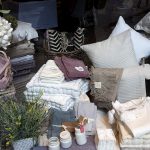
Walking along the shops of Roma and Florence, each window brought new and unusual surprises.

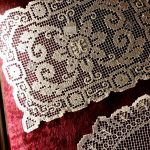
My focus was to look for Italian cloth and textiles to compare to those at home. The lace articles were lovely, but I found a few exquisite and expensive treasures as well.  As I admired them, I thought about how they belonged here in the midst of people of high culture and class.  So many curtains in the windows were lace in even smaller villages I saw, a common elegance for many.

I wanted so much to buy yards and yards of the Hermes fabric and turn our home into one of Italian distinction.  I knew, however, it was only something I could dream about for that moment like the wonderful taste of the gelato I was eating as I strolled by the shops.

Only once did I come upon a shop that made curtains. It was a small establishment with racks of special order designs and a small loft above where the owner did the sewing. I was curious to ask what he charged to make drapes for the home, but my Italian was slight compared to his. So I just admired and appreciated his capability to create many yards of fabric into personal tastes for his clients.  Sewing is certainly not just a hobby here. It can be a “life line” for many.

Fabric Fever and Color Crazy

Fabric Fever and Color Crazy

Have you been exposed to the illness that is taking over so many people these days? If not you, maybe someone you know?

Let me tell you about the symptoms. I know because I have it, and it won’t go away. It actually gets worse!

I have Fabric Fever and I am Color Crazy! Yes, it’s true!

It seems every time I pick up my note or my phone, or sit at my computer, my hands type a search for FABRIC! And the more colorful the better. It has become truly a passion, an addiction. I wish I could show you my fabric “stash”. And each piece I bought, I was thinking about a project for it. My project schedule is outrageous!

I have to share with you how it started. After not sewing for many years, I purchased a beautiful sewing machine. It was a Husqvarna Viking. It was so easy to make a nice straight seam and my machine just purred along. I loved it.

The gentlemen that sold it to me asked, “Why don’t you consider this upgrade.” It is the same good machine, a little more features and computerized, and the work is easier.” (And quite a bit more expensive, I was thinking.) “It’s a great machine for quilting” he said.

I replied with a belly laugh, “No this will do just fine.”
The moral here is think about how it would be to show your family and friends things that are as unique as you are. It takes thought, planning, sewing, ripping, sewing and desire to feed a hobby which I know you will enjoy!
He said, “I bet you will want it in maybe three months or so.” I thought to myself, this is all the machine I will ever need, and I don’t have an interest in quilting.

Well, not EVEN three months later, I purchased the upgrade, started learning about the different methods and supplies needed for quilting and as I said…….. Now, I’m am addicted.

The moral here is think about how it would be to show your family and friends things that are as unique as you are. It takes thought, planning, sewing, ripping, sewing and desire to feed a hobby which I know you will enjoy!

Did you know sewing is an art form? With so many different ways to express your inner soul with creativity, and a productive way to show it, sewing has many different faces.

So now, I want to share my excitement about what I have designed with my Husqvarna Viking 670.

My husband, with the help of his brother, remodeled a bedroom into my sewing room. That alone was enough to do some serious sewing. I painted the room, made Boho curtains and set everything up nice and organized. Such a retreat! I tend to make things that come to me rather than follow patterns most of the time. Although, I do follow quilt block suggestions just for uniformity.

Mixed media customized Christmas gifts.

Mixed media customized Christmas gifts.

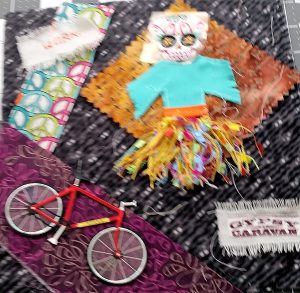
I made this for a gift last Christmas. Mixed media perhaps, each item has a meaning for whom it was made. She loved it, because she related to all the items!

Actually, one of my first baby blankets, and quilt as you go is so easy to do! I used similar blocks on the back of the quilt as well. Here is a quilt I made to display some extra stitching types on my machine. It was fun to personalize the quilt in this way. Simple, but very appreciated by the recipient. I particularly love making soft little things for sweet little boys and girls! Pink and blue are my favorite colors!

Just a couple things for now, but in the meantime, I am anxious to hear your comments on what motivates you to sew. I know you can do it. It just takes practice!

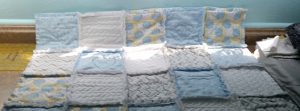
Soft baby blue rag quilt.

Soft baby blue rag quilt.

Especially, I am inviting experienced quilters to tell about their methods for fabric collecting. When my mother was living, she used to tell me, don’t start a project before you finish the first. Oh my, I am so guilty of not doing that! But from what I hear, that is pretty common for quilters. Quilting is a process, and many options to choose from is half the fun! At least, I will believe that!

Find a fabric store or look online this week. What can you make from all the options you saw! Look around and make a list of all things FABRIC! It is the thread of our lives!!

A new way of thinking, a new creative side of you! Welcome or welcome back to Sewing… The art form that never gets old!