Sewing for All Seasons

One of the things I love best about sewing as opposed to some of my other creative ventures is that I can do it any time of year. In the fall and winter, I can make blankets, jackets and other warm items. During the spring and summer months, I can make cute skirts and dresses and flowy decorative items. The different material weights and textures means it’s never too hot or too cold to sew! Here are some of my favorite projects for each season.

Sewing for All Seasons

Sewing for All Seasons

Winter

When it’s cold outside, there’s nothing better than lighting a fire and sewing something with warm, cuddly fabric.

Flannel Blanket

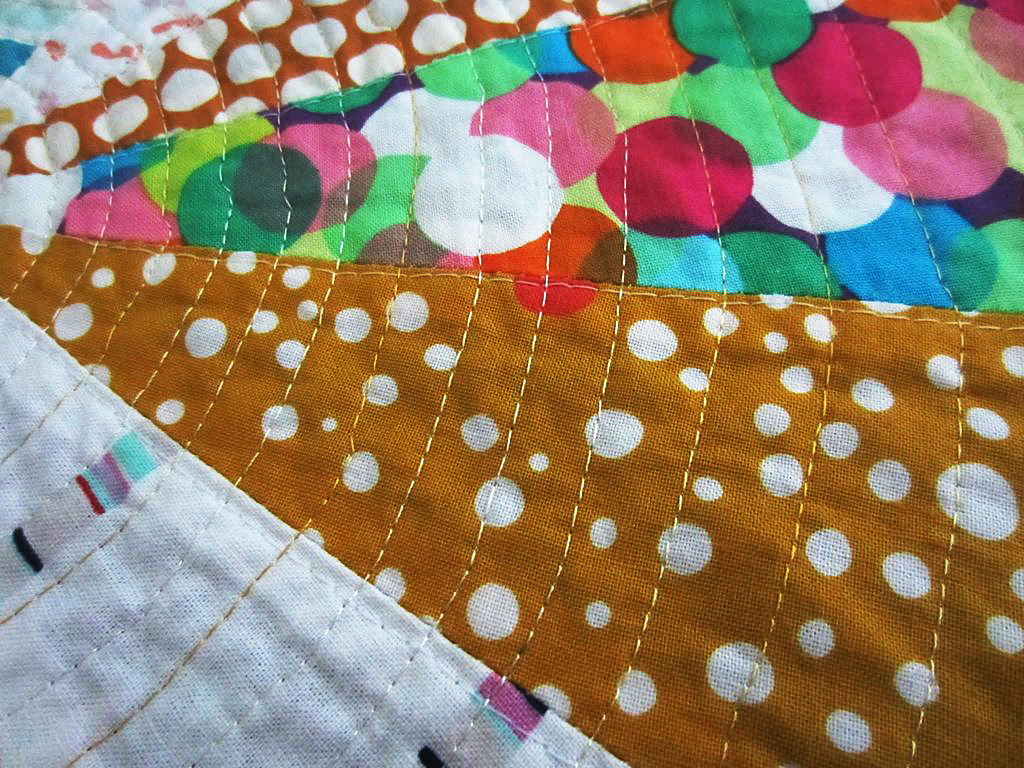
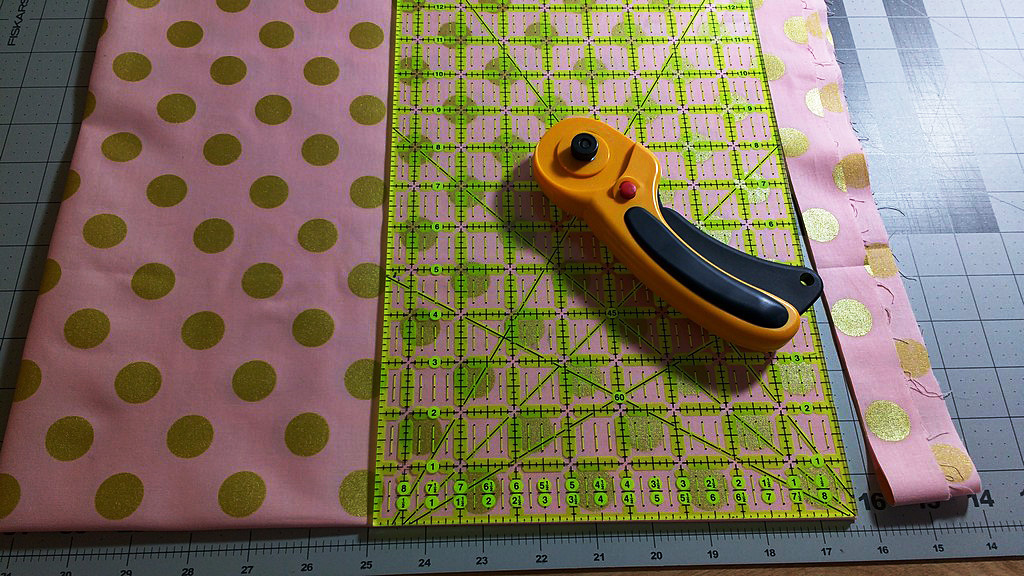
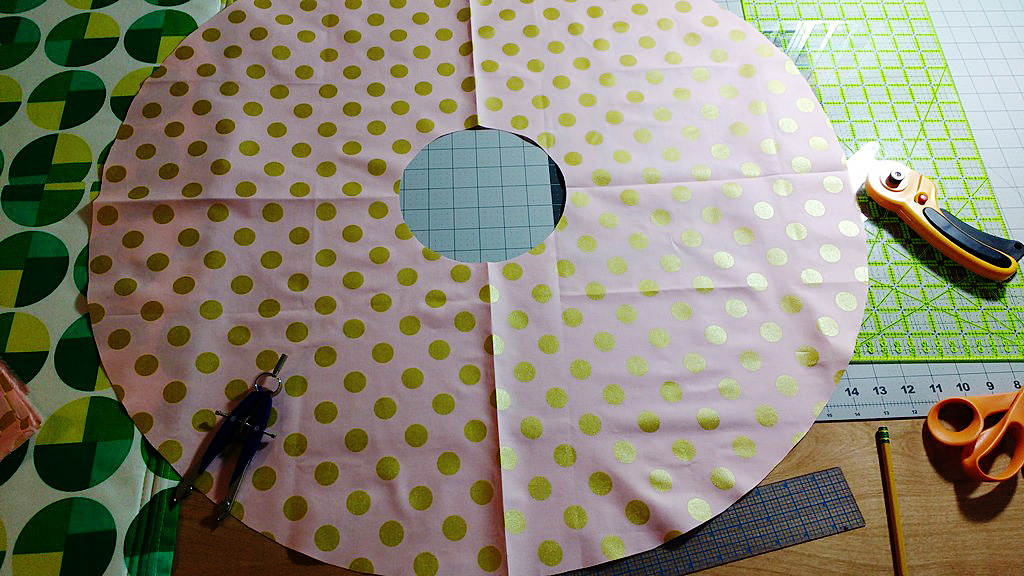
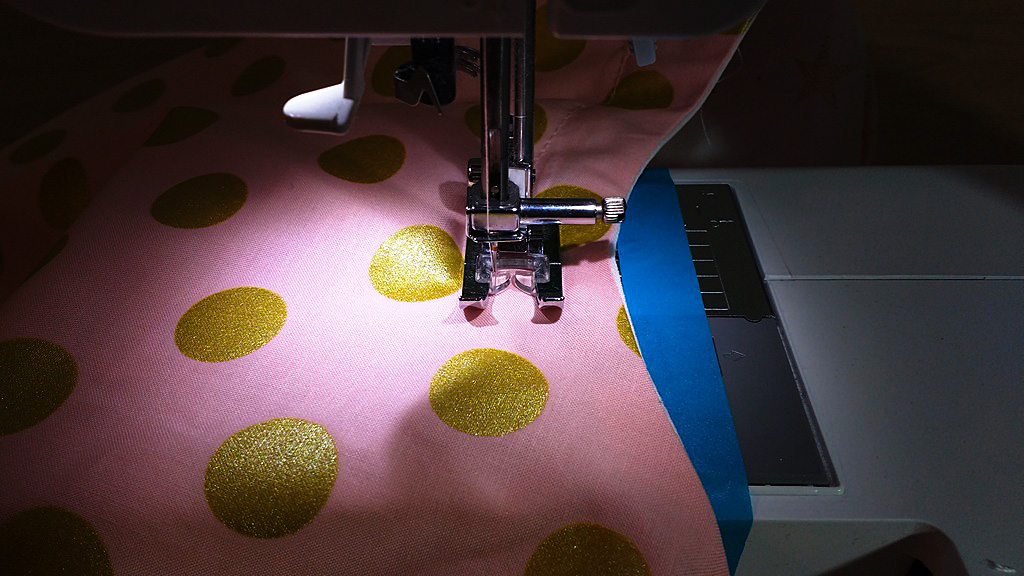
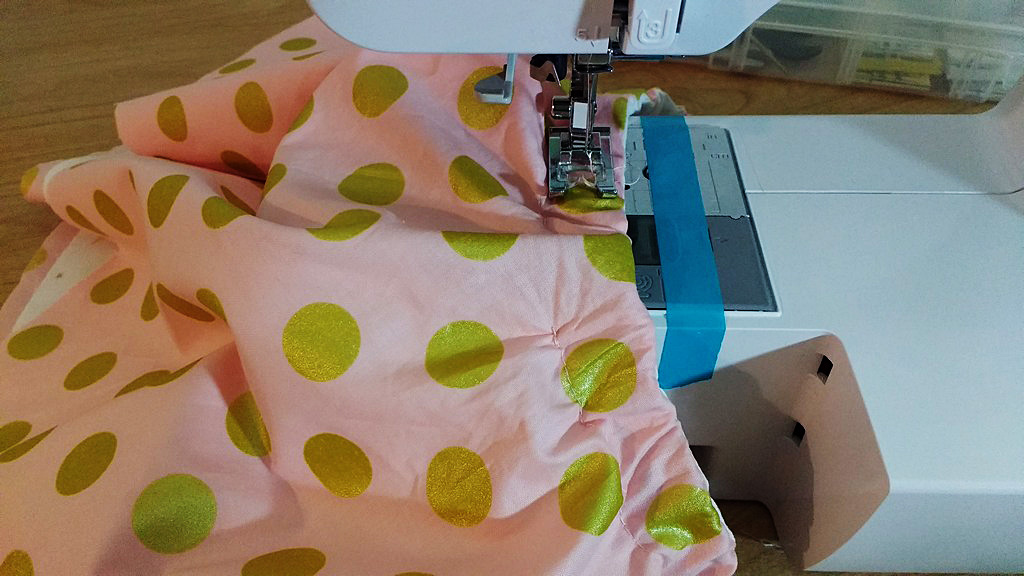
I absolutely adore flannel. It’s always warm and gets softer with each washing. This cozy blanket is easy to do and can be made in any size you like. We’re big on throw blankets in this house, so that’s what I did. Because flannel is available in so many colors and patterns, it’s easy to find something that will match your home and your personal style.

Dinosaur Hoodie

The challenge with winter is that kids are stuck inside. This sewing project will keep you warm and provide them with hours of imaginative play. Can you say “roooarrrr!”? Your kids will love playing dinosaur with this hoodie. Make a couple of the neighbor kids too and have a dino party!

Spring

Spring is a time of renewal. The weather warms up and life starts to return to the great outdoors. It’s still a bit cool to go out and enjoy it without a light cover up and there can be days on end of rain keeping you indoors. That’s where these sewing projects come in!
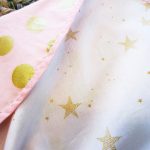
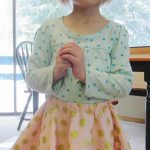
Napkins

Spring is often a time when we entertain more. We can open the windows and doors and guests can flow in and out without tracking snow, ice and dirt. Depending on the occasion, setting a pretty table can be part of the deal as hostess. Check out these colorful napkins. They’re perfect for spring and summer and a conversation starter too!

Picnic Blanket

It might be a bit cool yet to have a picnic, but it’s never too early to plan for one. This adorable picnic blanket is a great spring sewing project. While you’re inside working on it watching birds and other life return to your yard, you can daydream about that first picnic of the year. Won’t it be great with this new blanket?

Summer

Summer is all about hot days, trips to the beach and keeping cool. You may not be spending too much time with your sewing machine, but that’s okay. These quick projects won’t get you overheated – instead they’ll help you keep cool once they’re done.

Towel Wrap

I don’t know about you, but I’m not a fan of getting out of the pool or ocean having to struggle with my towel. This fabulous towel wrap means I can keep my hands free for a drink and a book while still staying dry. Even better – it upcycles towels that might otherwise get tossed.
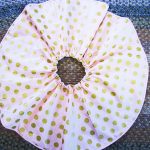
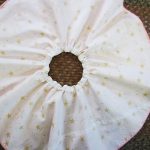
Wine Bag

To go with that lovely picnic blanket you made during the spring, you need a wine bag to tote your bottle for that elegant picnic. You could also use it as a wine gift bag if you need to bring a gift to a house party. It works up quickly and can be made for any style you can imagine.

Fall

I love fall! The changing leaves, the crisp air and the smell. It’s somehow romantic in a way. While I’m going to spend as much time outdoors as I can, there are some great fall sewing projects for those dreary fall days when I can’t get out.

Pillow

I love this! Making this pillow means I can bring some of the fall colors inside while using up some of my scrap stash. Don’t have all the colors? No problem! Remnants are cheap and easy to find in every color and pattern you’ll need.

Coasters

As much as I love fall, I dislike rings on the coffee and end tables as strongly. These adorable leaf coasters solve the problem while bringing all my favorite fall colors into the décor. I personally went for more realistic fabric colors, but you can do whatever you like.

What are some of your favorite seasonal sewing projects?

Different Types of Thread and When to Use Them

Different Types of Thread and When to Use Them

Have you ever gone to the fabric store and been overwhelmed looking at the vast assortment of thread for sale? If so, then fear not, for I will help to break down the mystery of thread and how to use it in all its various types.

To start, consider where you are going to store your thread. I’m a highly visual person and I like to see what I have on hand. I also find looking at thread to sometimes motivate me or inspires me to begin on new projects. I created this thread display in my sewing room using Ikea picture frame shelves (Ikea Ribba) and I added small nails to hang my bobbins by the corresponding color of thread.

I added small nails to hang my bobbins by the corresponding color of thread.

I added small nails to hang my bobbins by the corresponding color of thread.

I live in a rural area, three hours from the nearest Joann Fabrics. Because of that I keep an Aurifil Thread Color Card so I can easily order the exact shade of thread I need. It also looks beautiful too, no?

Thread Weight

When choosing thread, consider the thread weight. A quick breakdown of Aurifil’s brand thread weights (and their many great brands of thread, including Guterman and Coats & Clark) looks like this:

12wt: Use it for sashiko & red work stitchery. This is the thickest thread in the Mako’ range.

28wt: It is strong enough to withstand the stress of hand quilting without needing to be glazed or waxed.

40wt: Favorite thread for machine quilting and all-purpose sewing. A little heavier to show off the quilting stitches.

50wt: Quilters love it for its piecing and quilting. A staple for every sewing studio.

80wt: This is the finest Egyptian cotton, for use by hand or machine. Your new ‘go to’ thread for applique and much more.

~ Thread descriptions from Hawthorne Threads

Buying at a fabric store is actually a little easier than sussing things out online because they divide thread into sections so you can quickly scan for ‘quilting’ or ‘embroidery’ or ‘heavy duty/jeans.’

I keep my standard, quilting cotton weight threads organized by ROYGBIV (red, orange, yellow, green, blue, indigo, violet).

I keep my standard, quilting cotton weight threads organized by ROYGBIV (red, orange, yellow, green, blue, indigo, violet).

ROYGBIV: red, orange, yellow, green, blue, indigo, violet.

I also keep my neutrals and browns organized by gradient.

I keep my neutrals & browns organized by gradient.

I keep my neutrals & browns organized by gradient.

Buying a lot of shades of one color can greatly help when working on projects with a ton of variation in the same tone, like in this quilt I recently finished. I used five different shades of brown and black to finish the horse.


Utility/Novelty Threads

These are threads you reach for when you need to pull out the big guns or you are just doing something different. I use some of these heavy weight threads for upholstery, corduroy, vinyl, or very thick or unique fabrics.

I use some of these heavy weight threads for upholstery, corduroy, vinyl, or very thick or unique fabrics.

I use some of these heavy weight threads for upholstery, corduroy, vinyl, or very thick or unique fabrics.

This is my tub of very heavy duty threads. I use them on marine projects and with my industrial sewing machine.

This is my tub of very heavy duty threads.

This is my tub of very heavy duty threads.

Variegated Thread

I saved these threads for last because they are my favorite. If you haven’t tried sewing with them yet, I encourage you to start today. The richness of their color variation is an absolute delight to the eye and often can take your projects to a whole other level.

I used two spools of variegated thread on this quilt. The blue/rainbow you can see here.

The blue/rainbow you can see here.

The blue/rainbow you can see here.

And the gorgeous bright yellow here.

You can see the gorgeous bright yellow here.

You can see the gorgeous bright yellow here.

Of course, with different threads you will need different needles, but I’ll save the topic of needles sizes and shapes for another post. What are your favorite types of threads? Let us know in comments!

—————————–
Charlotte Kaufman is a writer and sewist in Mammoth Lakes, California. She specializes in marine and home interiors and continues to fall more and more in love with quilting. You can follow her at charlottekaufman.com.

Storing Your Fabric

As I wind down in the steps for making my quilt, I’m finding that I have fabric scraps left over from the endeavor that I really don’t want to toss. One of the problems though is that I have a very lacking fabric storage setup. In fact, it consists of stuffing fabric into a remarkably unprofessional Hello Kitty pail (Note: I don’t even like Hello Kitty). Once that happens, I put the pail into my closet. Since said closet kind of overflows at times, the method is even more lacking than it would otherwise be.

I want to keep this fabric, but I’d like to have a better strategy of doing so. That idea had me browsing some possibilities online, and some of the options I saw were pretty basic.

Simple Solutions

For instance, clear storage bins or canvas bins.

For instance, clear storage bins or canvas bins.

For instance, clear storage bins or canvas bins. While these are simple and efficient ideas for keeping my fabric in order, the truth of the matter is that they’re also, at the moment, things that would probably end up getting stashed away in my closet. As one of the qualms is that my fabric is stored in my closet, neither option fixes that detail.

At least, not alone. If I had a method of storing those bins out in the open, they’d work fine. In any event, the insufficiency could certainly lead to more searching in regard to the best (complete) fabric storage option.

The most fitting right now is the notion of keeping excess fabric pieces in a jar.

The most fitting right now is the notion of keeping excess fabric pieces in a jar.

So during my search, did I have find the perfect one? That might be a complex question since I’m not sure there is a perfect one, but I did find some that are worth mentioning. The most fitting right now is the notion of keeping excess fabric pieces in a jar. I’m not sure I’d ever considered using my extra fabric in a way that actually makes it decorative even before I use it for a sewing project, but I like this concept. Most of the fabric that I have remaining is block-ish, and that smallness of leftovers seems spot-on for the store-in-a-jar method. All I’d have to do is get a jar, fold up my scraps nicely, and let the storage add accent to a room before the pieces potentially add accent to a future project. A similar idea is to store those scraps in kitchen bowls or strainers, like you can find here, or maybe a flower vase.

A similar idea is to store those scraps in kitchen bowls or strainers, like you can find here, or maybe a flower vase.

A similar idea is to store those scraps in kitchen bowls or strainers, like you can find here, or maybe a flower vase.

One is to take the drawers out of a dresser, and once the furniture has been treated so that it looks finished and ready, fabric can be stashed where the drawers used to be.

One is to take the drawers out of a dresser, & once the furniture has been treated so that it looks finished and ready, fabric can be stashed where the drawers used to be.

Two of the more intriguing fabric storage options I found might be more suitable for a time when/if I have more room and/or extra cash. One is to take the drawers out of a dresser, and once the furniture has been treated so that it looks finished and ready, fabric can be stashed where the drawers used to be. I adore this idea, but it’s a project itself! Be aware though that if you don’t want to go through all the sanding and painting to prepare the furniture, you could still use a dresser, drawers intact.

Be aware though that if you don’t want to go through all the sanding and painting to prepare the furniture, you could still use a dresser, drawers intact.

Be aware though that if you don’t want to go through all the sanding and painting to prepare the furniture, you could still use a dresser, drawers intact.

Another option is this square shelf idea that hangs on the wall. This one is particularly of interest if, like me, your bedroom, sewing room, etc. is already pretty full of furniture. When that’s the case, going upward seems like a reasonable option, and that’s exactly what this shelf would do! Being the nerd I am, this square setup appeals to me more than a different shelf idea might because it’s comic-book-ish, but that’s not to say that squares are the only possibility for this method. In fact, you might find that you have some kind of old furniture around your house that can be repurposed for this prospect — like a headboard. There might be plenty of possibilities if you spread your imagination to find them!

Another option is this square shelf idea that hangs on the wall.

Another option is this square shelf idea that hangs on the wall.

Another option is a lot simpler, but might cost more — and that’s to buy a piece of furniture that’s specifically for this purpose. This hutch, for instance, makes a wonderful and aesthetically pleasing storage area for fabric, and other than price and space, I wouldn’t hesitate to have one of these in my home.

This hutch makes a wonderful storage area for fabric, and other than price & space, I wouldn’t hesitate to have one of these in my home.

This hutch makes a wonderful storage area for fabric, and other than price & space, I wouldn’t hesitate to have one of these in my home.

But as breathtaking as these furniture options are, the truth of the matter is that I’ll probably have to start with something easier and more money-friendly. Given that the majority of my current fabric collection is scraps and/or block-ish pieces, my best bet for advancement might be the jar or strainer method, which I’m okay with!

Still, someday, that hutch, that shelf, or that dresser would be a wonderful addition to my sewing life!

Keep Warm with These Fleece Projects

Keep Warm with These Fleece Projects

These Fleece projects will keep you cozy and warm

I don’t know about you, but if you ask me, this Winter can’t end soon enough. I’m dreaming of warm weather and beach trips, but the reality is that it is cold outside. On cold winter days, there is nothing cozier than fleece. So I’ve scoured the net to round up some fun fleece projects for you to sew.

Tips for Sewing with Fleece

Fleece projects are generally easy to sew, but only if you know some tricks for working with this unique fabric:

Needles – Some folks prefer to use a universal point needle when working with fleece. If you choose this type of needle, be aware that fleece will dull these quickly and you will need to change needles often. I find a stretch or ball point needle works better and use these instead for sewing fleece projects. Regardless of needle type, I use use size 14 for fleece.

Foot selection – A roller foot or an even-feed foot (also known as a walking foot) will be most helpful. Reduce presser foot pressure to allow for the extra bulk.

Stitching – I prefer to sew with a stretch stitch for fleece. If your machine does not have a stretch stitch, you can use a narrow zig-zag stitch instead. For straight stitching, use a slightly longer stitch length, about 3.5mm, to prevent skipping.

Thread – Fleece is not only tough on needles; it can also be tough on thread. Don’t try sewing fleece projects with cotton or cotton/poly thread, as this may ravel or break. To prevent breakage, use 100% polyester thread.

Other tips 

  • Don’t use an iron on fleece, as it has a very low melting point.
  • To know which side is which, pull the selvedge taut; fleece will roll slightly on the wrong side.
  • It is difficult to undo stitches from fleece, so work slowly and carefully to avoid mistakes.
  • Clean your machine frequently when working with fleece, as it has a tendency to shed fibers.

And now, for my favorite fleece projects:

Fleece Projects: Hats and Headbands

A U.S. Army survival manual from 1957 claimed we lose 40-45 percent of heat from our heads. There is some controversy about this figure, and this may be overestimated. Regardless, you lose less heat from your head when it is covered!  There are many cute ways to cover heads with fleece, here are just a few.

Delia shows how to embellish a simple ear warmer headband with a huge fleece flower.

Delia shows how to embellish a simple ear warmer headband with a huge fleece flower.

Fleece Projects: Scarves

A fleece scarf can help keep you warm and fashionable, too. You can make one in mere minutes.

Scarflette, courtesy of Leafy Treetop.

Scarflette, courtesy of Leafy Treetop.

Fleece Projects: Mittens and Gloves

  • Make It and Love It shows how to make a pattern for adjustable mittens to fit anyone.
  • These fleece mittens are even easier to make and feature two layers for extra warmth.
  • Here’s how to make fleece gloves with gussets.
  • Ruffled fingerless gloves couldn’t be cuter. These only look complicated; they are actually easy to sew.

Fleece Projects: Footwear

  • This instructable shows how to make fleece socks from a blanket. If you’d rather not cut up a blanket, you could use fleece yardage instead.
  • Here’s a video tutorial for making dainty, ladylike slippers from fleece.
  • These fleece slippers will keep your ankles warm, too.

Fleece Projects: Pants

Nothing is more comfy and cozy than fleece pajama pants. Simply Modern Mom shows to make them using your favorite pants as a pattern. The tutorial is for child’s pants, but you can use this method to make them in any size. If you don’t have a favorite pair to use for making your pattern, of course you can make fleece pajama pants using most any pajama pattern in your stash.

Fleece Projects: Sweater

Here is a tutorial for making a lovely cowl-necked sweater from fleece that is as impressive as it is comfortable. The cowl neck is quite versatile. This can be worn in different ways, depending on the temperature outside.

Fleece Project: Caftan

When it’s really cold and all you want to do is stay cozy indoors, you’ll appreciate this easy fleece caftan. This is even better than the popular snuggies, as it covers both your front and your back sides.

Fleece Projects: Coats and Capes

Fleece outerwear is great because it’s warm, comfortable, and even repels water on wet and drizzly days. You can choose something easy and unstructured, such as a poncho or cape, or go with something more detailed, like a jacket or coat.

  • This instructable shows how to make an easy poncho that’s also pretty.
  • Here are several ways to make a beautiful long cape, with hood or without.
  • This little girl’s cape includes a collar and dressier design details.
  • Craftsy has collected 6 different jacket patterns. This link has something for everyone.
My personal favorite fleece coat is McCall’s pattern 5987. This coat includes a built-in scarf that can be styled several different ways.

My personal favorite fleece coat is McCall’s pattern 5987. This coat includes a built-in scarf that can be styled several different ways.

My personal favorite fleece coat is McCall’s pattern 5987. This coat includes a built-in scarf that can be styled several different ways.  It has an attractive rounded hem that looks great with both skirts and pants. I have made this coat in camel, in charcoal, in navy, and one in red as a gift for my mother. I get lots of compliments on these coats every time I wear them. While they are fashionable outerwear, they are also so cozy that I wear them as an extra layer in the house all the time. Maybe I should make a fleece robe, because I don’t have any robe that feels near as nice over my nightgown as these coats do.

Fleece Projects are Fun

Don’t be afraid of fleece. It is different than other fabrics, but nothing compares to the comfort fleece offers. I also think of this fabric as being more environmentally friendly than many others, since it is often made from recycled plastic bottles. Sewing on fleece is easy if you know the tips and tricks shared here. I hope you will try some of these fleece projects this season and enjoy them for many winters to come.

Should you buy an Industrial Machine?

Should you buy an Industrial Machine?

One of the questions I often get when I tell people that I sew for a living is: What sewing machine do you like the best?

I usually respond that it all depends on what I’m doing and I use different machines for different things. Which is mostly true. But if I’m being completely honest, I do have a favorite. Well, actually two favorites.

The first is my Juki straight stitch industrial. Mine is an older model, the DDL-555-4, which is no longer made.

The first is my Juki straight stitch industrial. Mine is an older model, the DDL-555-4, which is no longer made.

The first is my Juki straight stitch industrial. Mine is an older model, the DDL-555-4, which is no longer made. Juki does though, of course, still make straight stitch industrial machines (the updated models for mine are the DDL-8700 and DDL 5550-N).

Many people are a bit hesitant about buying an industrial machine. Lots of people have told me that industrials frighten them because they’re so fast. Well, these days, a lot of industrials come with a speed setting so you can control how fast it goes (even if you accidentally push all the way down on pedal the machine will not ‘take off’ if you have the speed set to ‘slow’). Nothing to fear. You can start out slow and, as you gain confidence, crank up the speed.

It is important to note, though, that the older models, like mine, do not have this feature. And each machine is a bit different in how it responds to the pressure of your foot.

One of the most crucial things to know about using an industrial machine is that, unlike the majority of domestic machines these days, it does indeed need oil to run properly. Once your machine is all assembled, with the machine head sitting securing in the table, simply tip the machine backwards. Underneath, you’ll see a metal bed. Fill it with machine oil.

Underneath, you’ll see a metal bed. Fill it with machine oil.

Underneath, you’ll see a metal bed. Fill it with machine oil.

I think the new models have a line indicating how much oil you should put in. Mine does not but I fill it so that the deeper part of oil pan (the right side) is about half full.

The next thing to remember is that, if you ever have to transport the machine, you need to drain the oil first. Or you’ll end up with quite the mess. On the right side there will a black screw in plug you can loosen and take out (make sure you have a bowl or plan positioned underneath to catch the oil) to drain the oil from the bed.

One of my favorite things about industrial machines is that you can wind a bobbin while sewing. Most industrial come with a two spool thread stand and the bobbin winding mechanism is separate from the machine on the right side. Place a spool in the thread stand, then thread from back to front through the bobbin stand tension. Pull the thread to the front and around the bobbin. You’ll need to engage the bobbin by pushing it backwards so that the wheel connects with the belt of the machine.

You’ll need to engage the bobbin by pushing it backwards so that the wheel connects with the belt of the machine.

You’ll need to engage the bobbin by pushing it backwards so that the wheel connects with the belt of the machine.

Unlike, domestic machines, there is no disengaging of the machine needle when bobbin winding so if you are winding a bobbin while not sewing make sure you take the bobbin case out and unthread at least to the pick up thread pick up lever.

The beauty of the industrial machine is that, once you are comfortable with it, they are so much faster than domestic machines. You’ll get a lot more done in a shorter amount of time. They also sew through many layers of fabric without complaining. I find that I never have to mess with the tension on my Juki, it’ll sew through light weight chiffon and six layers of denim without needing any adjustment. Brilliant.

Sometimes people are concerned about the lack of a free arm but I can confidently say that you don’t need one. If you need to sew a small circumference like a sleeve hem, turn it the opposite way out you would if you were using a free arm: meaning if you want to stitch on the wrong side or inside of the hem, leave the sleeve right side out, then position it under the presser foot like so:

If you need to sew a small circumference like a sleeve hem, turn it the opposite way out you would if you were using a free arm.

If you need to sew a small circumference like a sleeve hem, turn it the opposite way out you would if you were using a free arm.

See, easy!

If you’ve been debating about getting an industrial, debate no more! Take the plunge. You won’t regret it.

PS: I’ll tell you all about my other favorite machine next week: a vintage Sing

Sewing with Friends

Sewing with Friends

Sewing is frequently thought of as a solo venture. For many, it’s desired to be. Sometimes, though it’s nice to sew with your friends. You can visit while completing a project. For large projects, your sewing buddies may even be willing to pitch in and help you get it done. Sewing with friends can be an impromptu event or a weekly or monthly ongoing get together.

Finishing Large Projects

Are you redoing a room and making all the curtains and throw pillows? Perhaps you’re sewing outfits for several people for Halloween or a special occasion? When you sew with friends, you can enlist their help to complete these projects. Assign everyone a piece or set it up as an assembly line with everyone taking a task or two. Instead of taking weeks or months to complete, with your friends lending a hand, you may have these projects completed in a matter of hours or days!

Ongoing Get Together

Invite your friends over for a sewing party. Ask a few to bring their machines so there’s not a line for yours. Add in some refreshments and beverages and put on some music – you’ve got the makings of a great friend hang out. So that hosting isn’t a burden, you make it potluck and/or rotate whose house the get together is at.

During the first one, talk about frequency and if you want to rotate who hosts as well as any other logistics. If your sewing friends also have friends who sew, invite them too! If people want to bring their kids, consider it. If they’re age appropriate, sewing with friends can be a great way to pass sewing along to the next generation in a fun and easy going way.

Learn New Things

An added benefit to sewing with friends is that you get to see what everyone else is working on. If you’ve made something similar, they may use different techniques or have tips to make something you struggled with easier. Sharing and learning with your sewing friends creates bonds while everyone becomes more skillful.

Have you sewed with your friends recently? Try it and let us know how you liked it!

New Year, New Challenges: The Psychology of Sewing

New Year, New Challenges: The Psychology of Sewing

How many times do we seriously plan things, and within days or hours, our plans change. I used to think I prefer knowing what will happen ahead of time so I can grasp the idea, plan it to my specifications, and control the outcome. Not very many things happen that way.

So last time I wrote, I had a nice New Year’s Resolution list made up for myself. I was ready to learn new things, implement new creative expressions, and sew a rug made of scraps. That was a few days before New Year’s Day.

Now, the middle of January, about 2 days ago, I was able to sit and sew a project I have been thinking about. Sewing is so therapeutic, you forget where you are and the daily chores of life. But now, my Resolutions have been pretty much scrapped. Time changes things so quickly.

Turn that frown upside down

Now, I’m finding myself in a position to decide how to decorate a new home we are building. “Wonderful, you say! Congratulations!” Blushing but thankful, I tell you, “Thank you, but the downside is I’m losing my room for sewing.” For now, I have a countertop that wraps around half the room where I can cut, sew, press, lay out patterns, and holds my computer. Plus tons of shelves for fabric, ribbon, thread, and many other non-sewing related supplies. What will I do?

We determined that I will use the large guest room upstairs for my sewing projects, but it will be deemed a guest bedroom as well. So, gone are the days, of leaving my projects in different stages, and not worrying about things left out. I have to be neat and organized ie. (no thread on the floor) so if we should get company, (my daughter visits frequently) that room will be presentable. OMG, such pressure! I’m already stressed. I can’t even get away and be creative because my room has to be in picture perfect order and stay that way (much like the rest of the house by the way, as my in-laws will be living with us).

So, I need your help! I will explain later. I’m making a checklist of some things, I need to purchase if I am going to continue my psychological sewing retreat. At least I have until late July to decide.

Making a list – checking it twice

First is a desk. I like this one. Nice and neat!

See it here:

Fashion Sewing Cabinets of America 8300 Cloud 9

Or:

Sylvia Design Model 1520 Quilters Work Station

Then a rolling bag to store the sewing machine out of sight while my guest suite is being occupied.

Bluefig TB 23Travel Bag 23″ Julie

Also a box of Aerofil Incredible Threadable Quilt Box Maderia Thread so I can keep the thread bobbins and thread and neatly put away.

Then there’s the fabric and trims, buttons and numerous other collections. That worries me most. I would love to hear your suggestions on how to scale back and organize and still have the ability to retreat to my passion in my changing lifestyle. I hope all will not be lost even with a more spacious house and elder care ahead. One never knows! As for you, my advice is:

Keep sewing, it’s good for the soul! Until next time.

9 Cutting Tools for your Sewing Room

9 Cutting Tools for your Sewing Room

Do you know the difference between scissors and shears? I didn’t so I looked it up and now I can edify us all. Scissors usually have equal-sized finger holes and are under 6″ in length. Shears have one hole that is bigger than the other and their blade lengths are normally longer than 6″. The terms scissors and shears are often used interchangeably and for the purposes of this article, I flip back and forth between them.

Fabric scissors

These are the scissors you hide. Or keep locked away. Or you write in Sharpie on them. DO NOT USE. CLOTH ONLY. MOVE AWAY FROM MY SCISSORS. If you haven’t convinced your family to stay away from your fabric scissors, then move to the second pair below.

These are the scissors you hide.

These are the scissors you hide.

All purpose scissors

THESE are the pair you hand people who want to use your fabric scissors. Keep them sharp so no one is ever tempted to grab the pair you keep for working on your stash.

THESE are the pair you hand people who want to use your fabric scissors.

THESE are the pair you hand people who want to use your fabric scissors.

Heavy duty shears

When your regular fabric scissors won’t cut it. I’ve used these to cut canvas, Sunbrella, and leather. Don’t let your friends or family use these for everyday use. They’re heavy duty. Emphasize that by saying it in a low voice, “Sorry, these are heavy duty.”

Don't let your friends or family use these for everyday use.

Don’t let your friends or family use these for everyday use.

Snipping scissors

Snipping scissors, or scissors with very short, sharp blades are genius for cutting threads as you sew.

Snipping scissors, or scissors with very short, sharp blades are genius for cutting threads as you sew.

Snipping scissors, or scissors with very short, sharp blades are genius for cutting threads as you sew.

Pinking shears

Pinking shears are what you need if you are working with fabric that ravels or if you plan to leave a cut edge exposed. Pinking shears do what zig zag stitching or serging does, they stop fabric from unraveling. They are genius. You should get a pair.

You should get a pair.

You should get a pair.

Herb cutters, fringe scissors

Yes, bring the kitchen into the sewing workshop. These scissors are frequently used to quickly chop up herbs, but in the sewing room they create fringe.

Bring the kitchen into the sewing workshop.

Bring the kitchen into the sewing workshop.

Perhaps you want to make some fringe-cut garland? These would be your tool. They work best when you put the fabric back towards the center of the scissors and stop cutting before you reach the tips. If you have a LOT of tiny snips like this to make, however, you’ll want to see the next pair of scissors.

If you have a LOT of tiny snips like this to make you'll want to see the next pair of scissors.

If you have a LOT of tiny snips like this to make you’ll want to see the next pair of scissors.

Rag quilt scissors

For when you aren’t messing around. Rag quilt scissors have short, sharp blades that let you snip through chunks of fabric to create the famous look of rag quilts.

For when you aren't messing around.

For when you aren’t messing around.

Pro Tip: If you get a pair, make sure to get them spring loaded. Your hands will thank you!

My oldest made this rag quilt with and I snipped it right up with rag quilt scissors. Just put on a TV show you can zone out to and start clipping.

My oldest made this rag quilt with and I snipped it right up with rag quilt scissors.

My oldest made this rag quilt with and I snipped it right up with rag quilt scissors.

Rotary cutter

Rotary cutters are becoming more and more popular. Once you learn how to cut fabric with them, your fabric scissors may start to see a lot less use.

Goodbye fabric scissors!

Goodbye fabric scissors!

Ye olde kitchen drawer scissors

Also known as ‘household scissors’ or ‘the scissors you can do just about anything with and mom won’t get mad.’ They are the unsung hero of your scissors quiver because they keep the rest of your tools safe.

The scissors you can do just about anything with and mom won't get mad.

The scissors you can do just about anything with and mom won’t get mad.

What types of cutting tools do you use in your sewing room? Let us know in comments!

—————————–
Charlotte Kaufman is a writer and sewist in Mammoth Lakes, California. She specializes in marine and home interiors and continues to fall more and more in love with quilting. You can follow her at charlottekaufman.com.
Five Easy-to-Do Mistakes While Sewing

Five Easy-to-Do Mistakes While Sewing

If there’s one thing I’ve figured out over my sewing ventures, it’s that I can’t ever be sure what kind of sewing experience I’m getting into when I sit down to work on a project. It could be an hour or so that goes as smoothly as sewing can go. On the other hand, it could be a terror of a sewing session where my thread keeps bunching up, and I have to wrestle it back into submission more times than I want to.

Five Easy-to-Do Mistakes While Sewing

But whether or not today’s a day that I’ll sit down to sew and have those problems, I expect that those problems will happen in the future if I continue to sew. And, as much as I wish someone would’ve personally told me more about a budget and a probable no-positive-income when publishing my first book (talk about un-fun surprises!), I think it’s beneficial to step into the sewing world with open eyes as well. Odds are, you’re going to make mistakes, and those mistakes aren’t the best of reasons to throw in the fabric! Just like a new driver, a new sewer can expect to have to learn the skill.

It happens to the best of us…

Want to know something else? Even people with miles behind them in the sewing department can still make mistakes! The point is to be aware that they’re going to happen so that maybe, should you make one, you don’t feel like tossing your fabric to the side and trashing your sewing kit!

And that, readers, is the logic behind this post — to point out simple mistakes you might make, but shouldn’t beat yourself up over! They happen, and instead of letting them get you too far down, remember you’re hardly the only person to make one. Since others potentially make these same errors and keep going, use that for encouragement to continue on as well!

Five Easy-to-Do Mistakes While Sewing

Let me count the ways

With that positive thought in place, here are some of the smaller, more embarrassing sewing mistakes you might make, but should push through:

1) Accidentally sewing your fabric to something you didn’t mean to. There are few things I’ve personally encountered in sewing that can make you feel as amateurish as figuring out you’ve sewn your project to itself in a spot you didn’t intend to (as in, your fabric was folded under itself where it shouldn’t be), or if you’re hand-sewing, that you’ve sewn your project to, say, your own clothes. But as daft as you might feel if you notice that has happened, just — as Taylor Swift might say — shake it off! Sure, you might have to redo your stitching, but it isn’t the end of the world!

2) Sewing without knowing your bobbin is out of thread. This one is particularly troublesome since you could feasibly sew for a lot of minutes on your machine without realizing the mistake. However long you invest in that flawed sewing endeavor is kind of wasted time since there’s no thread coming from the bottom to finish your stitch. So, moral of the story: Check your bobbin before you sew by machine!

Five Easy-to-Do Mistakes While Sewing

3) Threading your needle without really threading your needle. For a sewing machine project, there are a number of steps to threading your needle, and you might miss one. As humiliating as that error might be though, it’s nowhere near as ridiculous as doing this while hand sewing. I, for one, recall thinking I’d threaded my needle, and at some point, I realized that although I’d tied it off and such, the thread actually was not through the needle. Now, that is embarrassing!

4) Cutting material you didn’t intend to cut. This could be in line with the earlier idea of sewing something you didn’t mean to sew in that while you’re cutting fabric, something else could be under it. If you do have this issue, depending on how important the now-damaged material is to you, it could be a big deal! Beyond the possibility of forever ruining Great-Grandma Trudy’s sewn-by-hand quilt that has been in your family for over a century (try replacing that one!), you could also harm your current project by cutting your fabric where you don’t need to or cutting a stitch that’s necessary to your work. This is something, in particular, to keep in mind when making a rag quilt since part of the process is to shred your edges. It would be crazy-easy to shred too far and snap a stitch or two, but imagine the pain of having to re-stitch an up-turned quilt block that’s already sewn to other quilt blocks!

Five Easy-to-Do Mistakes While Sewing

5) Thinking up strategies or tackling projects that you’re not ready for. For this one, I’ll give you an example. I didn’t know anything about using a border on a quilt/blanket project, and once I’d learned about it, I labeled it a waste of time and/or not for me. To my way of thinking — and for my past strategy — simply bending the fabric used for a backing to fold over against the front would work. And, yeah, it might… If I were a better sewer! At this point, I’m not advanced enough to comfortably pull this strategy off so that the sides are one-size at all points. So, don’t be like me! Start simple and with the recommended strategies, and work your way up from there!

Even if you manage to do all of these mistakes in one sitting, don’t give up! If you can keep that determination in mind, you might have a bright sewing future ahead of you!

DIY Reversible Circle Skirt

My littlest loves in skirts.

My littlest loves in skirts.

My littlest loves in skirts. In cold weather she puts them over pants and sometimes she even wears them over her pajamas. While I normally am not drawn to making clothes, I knew when her passion for skirts didn’t fade I’d want to start making some for her.

This skirt is reversible, so two skirts in one, though I think she is so in love with the top fabric that she’ll never switch it to the one underneath.

I think she is so in love with the top fabric that she’ll never switch it to the one underneath.

I think she is so in love with the top fabric that she’ll never switch it to the one underneath.

To begin making a DIY reversible circle skirt (or a non-reversible one for that matter), you’ll need to do some math. I take the width of the waist + 2. For her it was 19″ + 2 = 21″. Then I divide by 6.28 (or twice pi.) That gives me the radius of the circle for the waist, 3.34″.

Then I divide by 6.28 (or twice pi.) That gives me the radius of the circle for the waist, 3.34".

Then I divide by 6.28 (or twice pi.) That gives me the radius of the circle for the waist, 3.34″.

Next measure from the waist to the length you want. I went just above the knee, which was 10″. Cut your fabric into a square and then fold into quarters. From the bottom left corner, start drawing first your waist circle, and then the outer, skirt circle (this is the same process I showed you for the DIY tree skirt in one of my December posts).

Cut your fabric into a square and then fold into quarters.

Cut your fabric into a square and then fold into quarters.

From the bottom left corner, start drawing first your waist circle, and then the outer, skirt circle.

From the bottom left corner, start drawing first your waist circle, and then the outer, skirt circle.

If you are making this reversible (and you don’t have to, one sided is great too), do the same for the other side of fabric. In my case, I had to join two pieces together to make a square big enough for the circles.

Pin the circles right sides together and sew around the waist circle. Once sewn, make tiny cuts all around the fabric, taking care not to cut into your sewing. This will help the fabric turn smoother. Flip the skirts so they are wrong sides together and go iron the seam. Ironing is everything in sewing. Don’t skip this step.

Once you’ve ironed, sew a casing big enough to fit the width of elastic you’ll be using for the waist. My elastic was .75″ so I sewed a 1″ casing. Leave about 1.5″ for inserting the elastic.

Once you've ironed, sew a casing big enough to fit the width of elastic you'll be using for the waist.

Once you’ve ironed, sew a casing big enough to fit the width of elastic you’ll be using for the waist.

Put a safety pin through one end of the elastic and feed it through the casing (you’ll find the entrance for the casing hole between the two layers of skirts). Sew the two ends of elastic together and then sew each tail end flat so there is no bulk from the elastic’s sewn seam. Then sew the casing shut, completing the waistband of the skirt.

Sew the casing shut, completing the waistband of the skirt.

Sew the casing shut, completing the waistband of the skirt.

To finish the skirt, you could use a serger and serge the two layers together, and then press them to one side and sew a hem. I chose to add bias tape.

I chose to add bias tape.

I chose to add bias tape.

I used a decorative stitch to complete the look.

Boom! A darling, reversible circle skirt.


And a very happy three year old.


Do you sew clothing for your children or grandchildren? What are your favorite things to make them?

—————————–
Charlotte Kaufman is a writer and sewist in Mammoth Lakes, California. She specializes in marine and home interiors and continues to fall more and more in love with quilting. You can follow her at charlottekaufman.com.