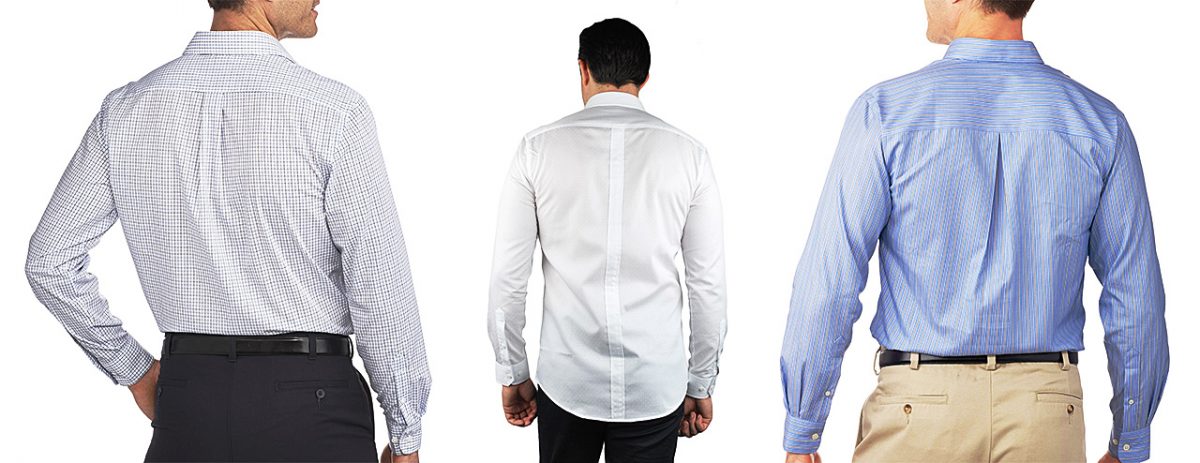
You know the back pleats that are almost always present on the back of button front dress shirts? The ones that are sewn into the shirt body where it attaches to the yoke? Sometimes there are two, one on each side and sometimes, often on women’s shirts, there is a single big one at the center back. They exist for the purpose of ease, or freedom of movement but, what they really do, is just create a whole lot of extra unruly fabric and make a shirt look as if it is too big.
The camera adds ten pounds…
It’s basically true that the camera adds ten pounds so most things in film and television are fit without extra (usually un-needed) fabric mucking up the svelte look.
I spend a lot of time taking these pleats out of shirts, partially because they seem to be in almost all shirts except for ones specifically called ‘slim fit’ and, truth be told, it’s a rather complicated alteration if done correctly.
Step One:
Take things apart. Separate the shirt back from the yoke. If you have two side back pleats, you don’t have to take the whole thing apart. You can stop after the pleats are free on either side and leave the center part still attached. If you have a center pleat, you’ll have to take the whole seam apart. Note how much fabric is in the pleat or pleats. This will tell you how much to take out of the side seam.
Step Two:
Take more things apart.
Take apart the back arms eye. I usually go an inch down from the shoulder seam to the underarm side seam. Then take apart the side seams. Basically, the entire shirt back needs to be free so you can recut it.

Paper diagram illustrating marking new arms eye and side seam lines on the shirt back piece.
Step Three:
Redraw the arms eye and side seam lines.
Lets say your shirt had a center pleat that 1” on either side, or two ½” folds on each side. From this, you know that you want to take an inch out of each side the entire way down the back piece.
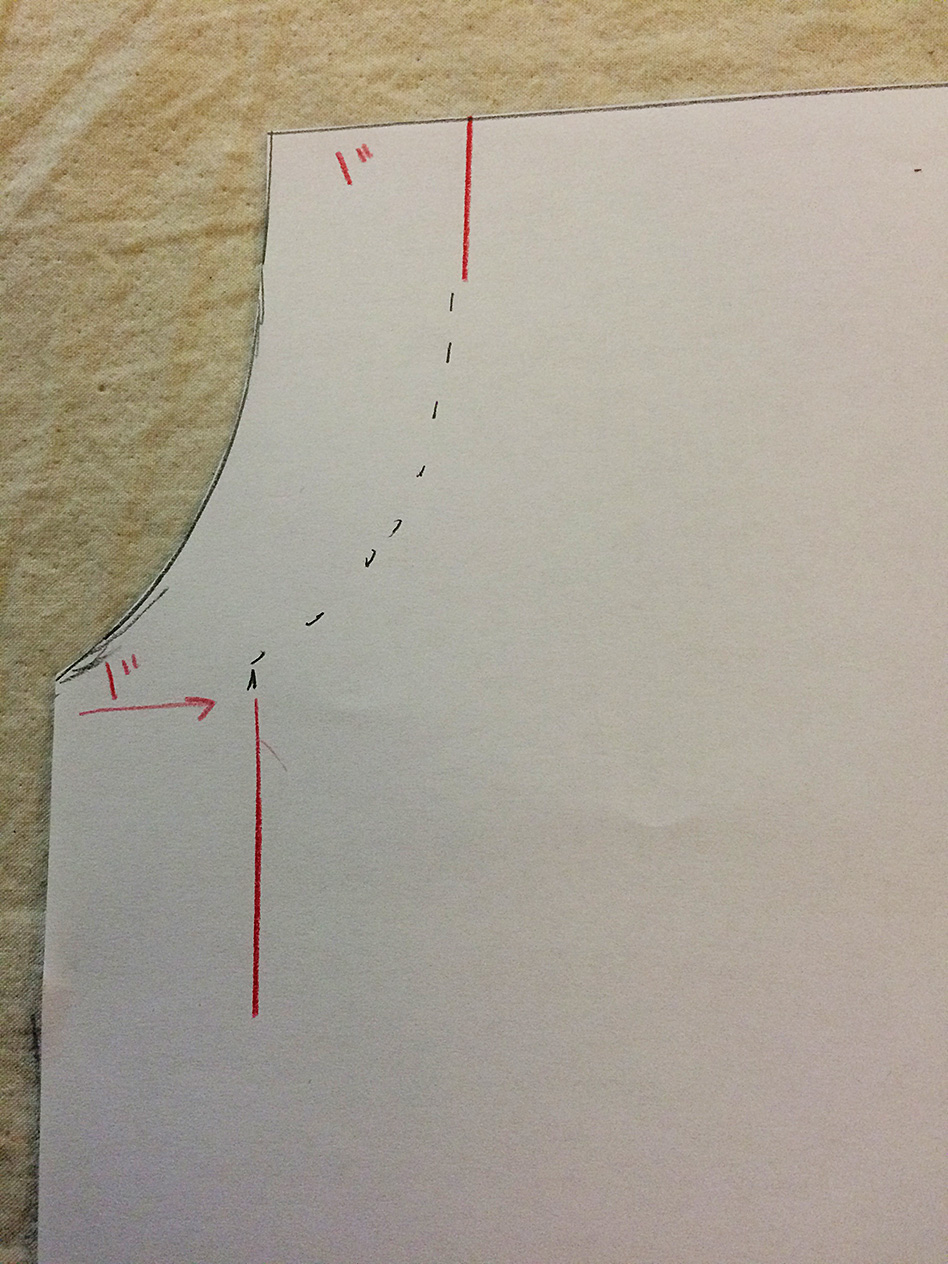
Slice up of new arms eye line.
To redraw the armhole, mark 1” in at the top of the armhole curve and 1” in at the top of the side seam. Then fold your back piece, using the opposite side as a guide as to where to draw the curve.
Mark the side seam line 1” in all the way down through the hem.
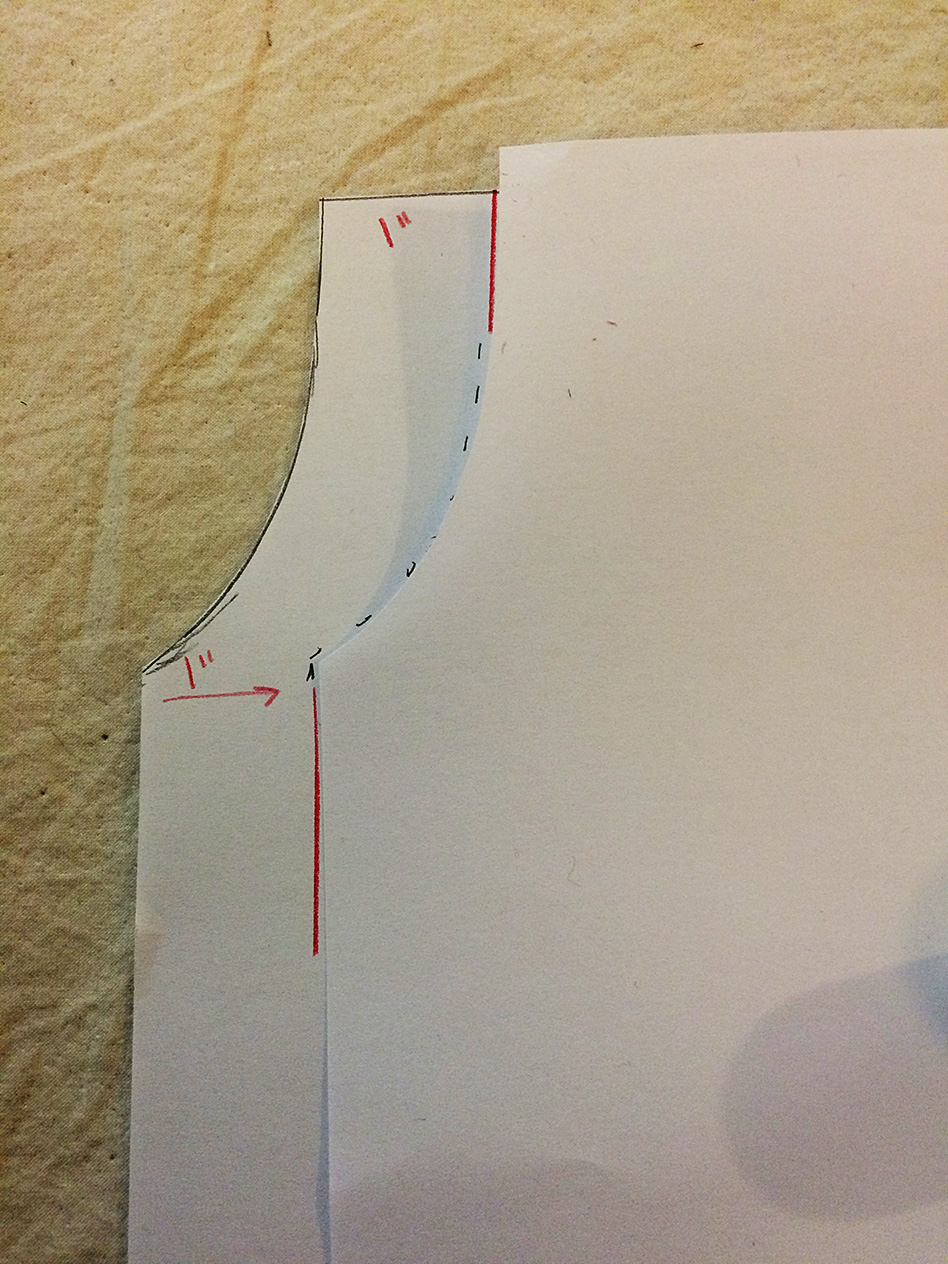
Folding one side over to use as guide for redrawing the arms eye seam.
Step Four:
Sew the back piece to the yoke, lining up the centers first and pinning out from there.
Step Five:
Sew the back armseye along your newly marked seam line.
Step Six:
Sew the side seam. You should use the original line on the front piece and your new line on the back piece.
Step Seven:
Give everything a nice press and you’re done.
Sometimes, designers like to make a shirt even more fitted by having their tailors add side back darts. This is extremely common in the film business. If you ever watch Hawaii Five-0, check out the button front shirts that Scott Caan wears. They are altered to within an inch of their life. They fit him like a glove. And they all have side back darts. Whenever I see them, I think, “Oh, a tailor got a hold of that shirt.” If they’re not custom made for him, then they have definitely been through the back pleat extraction/side back dart procedure.
Next time you’re watching your favorite show, pay close attention to the button front dress shirts. You’ll start to notice side back darts everywhere!