Country Cute Skirts with Patches

Country Cute Skirts with PatchesI’m a bit of a country girl. Plaid shirts, denim. I like them on me and love them on my boyfriend. Sometimes, though I want a denim skirt with a little more personality. Thankfully, they’re really easy to modify and cute-ify. If you’re a country girl like me and want to broaden a selection of your denim skirts, give some of these fun ideas a try.

Calico Swatches

What would a country girl be without a little calico in her life? The texture of the unbleached, low processed cotton pairs well with a denim skirt. And it comes in so many fabulous patterns and colors! If you’ve got some scraps from a previous project, this is a great way to use them up. If not, it’s a great time to go fabric shopping.

Find a denim skirt with a seam in the back. Cut the seam open part way. If it has a slit in the back, you can cut up from there and leave the slit after you insert the calico in the opened seam. The same technique works with side seams if you’d rather do that.

Patches

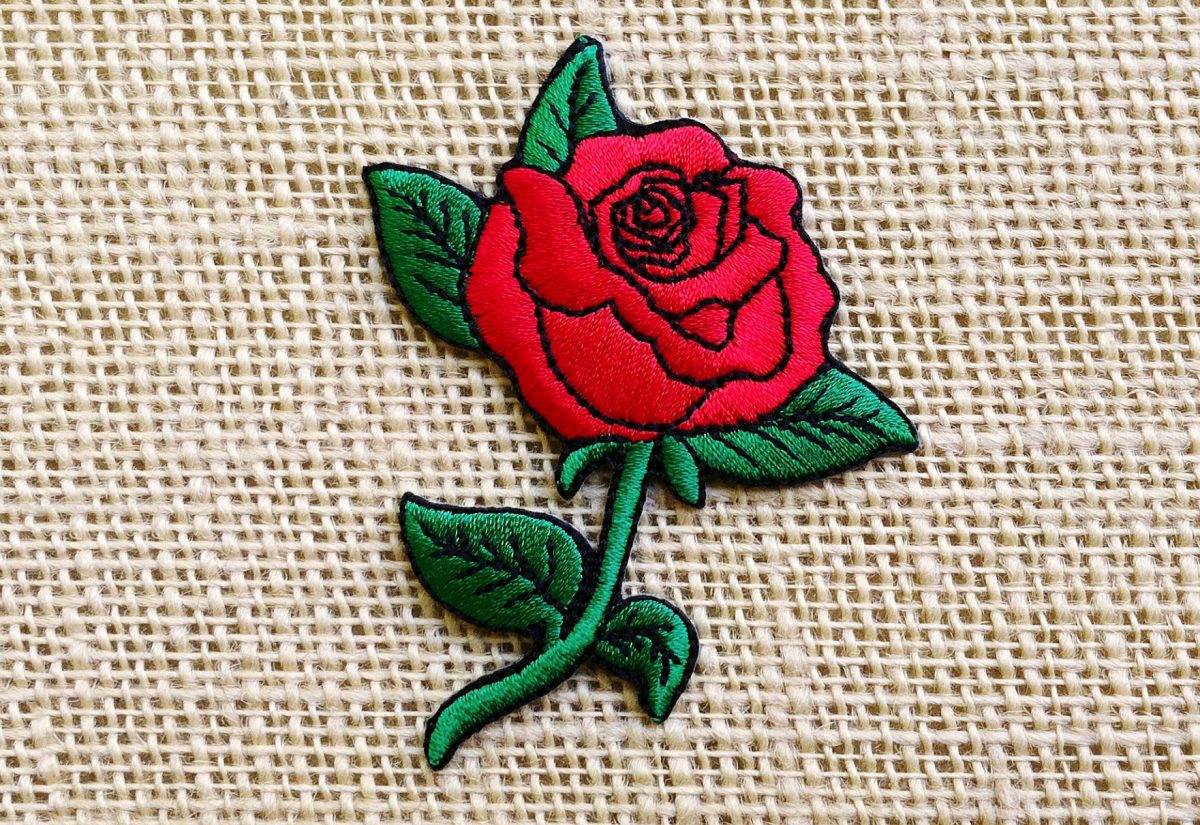
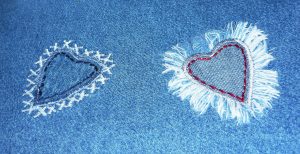
Patches are awesome! Not the plan square ones. The patches in the shape of animals and other cute designs. They’re super easy to use and create an ultra-unique denim skirt. For a long denim skirt, choose four to six of your favorite patches. For a short one, choose three or four. Larger ones look great along the bottom hem and smaller ones look great along the waistband.

Without ironing or sewing, place the patches where you think you’d like them to check the appearance. Once you’ve got the placement figured out, you can either iron them on or sew them on depending on the manufacturer’s instructions. For iron on patches, I suggest tacking them down with a few stitches in case the glue loosens.

Fabric Scrap Squares

Here’s a great opportunity to dive into your scrap bucket and create a cool country skirt in the process. You can either use these to create a skirt by themselves or lay them over an existing skirt you no longer want to wear in its current form.

Cut squares of your fabric scraps in various sizes. Lay them out and move them around until you have a look you like. When you’ve got that figured out, sew the squares together and/or sew them onto the existing skirt you’re modifying. If you’re not adding them to an existing garment, you’ll also need to add a length of elastic along the top to create a waistband. When you’re done, it’ll look like you’re wearing a patchwork quilt.

What other ideas do you have to create a country skirt using patches?

Inspiring Christmas Tree Patchwork Projects

Inspiring Christmas Tree Patchwork Projects

Christmas Tree Patchwork is interesting because there are so many different ways to make trees. They can be made using simple or more elaborate designs and can be laid out in many different ways. I’ve scoured the internet to collect all the best blocks and designs for many different ways to make a holiday or Yuletide tree or trees using patchwork. Let these designs inspire you to create something new this year for your home or a gift.  This collection includes:

  • Easy Christmas Tree Patchwork Blocks
  • Single Tree Quilt Designs
  • Abstract Christmas Tree Patchwork
  • Modern Tree Quilt Designs
  • Other Christmas Tree Patchwork Projects

 Easy Christmas Tree Patchwork Blocks

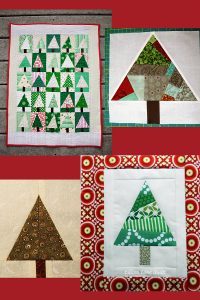
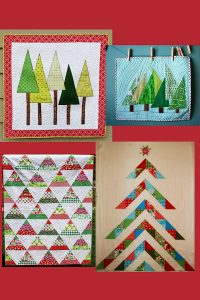
Photo credits: Diary of a Quilter (top left); Happy Quilting Melissa (top right); ChezStitches (bottom left); Ellison Lane (bottom right).

Photo credits: Diary of a Quilter (top left); Happy Quilting Melissa (top right); ChezStitches (bottom left); Ellison Lane (bottom right).

These patterns and design ideas use different ideas to construct the tree blocks, but they all produce quilts with a whole lot or forest of trees. Every one of these designs is easy to piece and quilt.

Patchwork Forest by Amy Smart at Diary of a Quilter is my choice for the holiday quilt to make this year. I just love this easy design and the quirky trees that are not all the same.

These crazy patch trees are arranged into the shape of a larger tree for a different arrangement of the many trees theme.

This Easy Christmas Tree Patchwork Block Tutorial at ChezStitches shows a totally different but equally easy way to piece trees, using mirrored triangles joined back to back.

This way to make strip pieced trees adds more fabric variety within each tree. You can play with this to achieve bedecking and bedazzlement and simulate trimmed trees.

Single Patchwork Christmas Tree Quilts

These quilt designs feature a single tree.

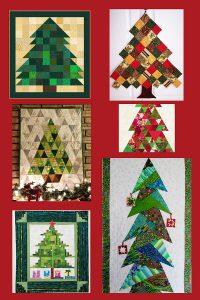
Photo Credits: Quilting at About.com (top left); Treasures-n-Textures (top right); Material Girl Quilts (middle left); Hoffman Fabrics (middle right); McCall's Quilting (bottom left); Waterwheel House Quilt Shop (bottom right).

Photo Credits: Quilting at About.com (top left); Treasures-n-Textures (top right); Material Girl Quilts (middle left); Hoffman Fabrics (middle right); McCall’s Quilting (bottom left); Waterwheel House Quilt Shop (bottom right).

This tutorial for a single Christmas Tree Patchwork design is as easy as it gets.

I’m inspired by this Emma’s Tree design to use reds and gold squares for twinkle and tree trim when following the About.com pattern above.

Here is a different single Christmas Tree Patchwork design constructed from triangles. I love the metallics for the background fabrics on this, and the easy quilting of the individual triangles.

Here’s another triangle Christmas Tree Patchwork, this one built from equilateral triangles, at Hoffman Fabrics.

O Tannenbaum is Christmas Tree Patchwork made from Log Cabin style blocks. This free miniature quilt pattern from McCall’s includes a star on top and presents underneath the tree.

This design, suggested by Moose Creek  Quilting, can serve in lieu of a real or artificial tree. The pattern includes sewing 25 red buttons to hang tiny patchwork or other ornaments you sew yourself. I love this version of this pattern that was made by Waterwheel House Quilting Studio using Kaffe Fassett fabrics.

Abstract and Modern Christmas Tree Patchwork Quilts

These designs are a little different, reflecting a more modern or abstract feel.

Photo credits: May Chappell (top left); Jacey Craft (top right); Ann Kelle (bottom left); Moda Bakeshop (bottom right).

Photo credits: May Chappell (top left); Jacey Craft (top right); Ann Kelle (bottom left); Moda Bakeshop (bottom right).

This Mod Tree Wall Hanging by May Chappell makes me think of a Christmas Tree farm.

Another design with a tree farm vibe is Happy Trees Mini Quilt. Jacey named this one Happy Trees because it reminds her of dear Bob Ross and his “happy little trees.”

This modern Christmas Tree Patchwork quilt by Ann Kelle shows another kind of happy trees, this time with colorful, trimmed trees in an abstract triangle design.

The Oh, Christmas Tree Quilt by Amy Rivera for Moda Bakeshop is a completely different take on Christmas tree patchwork. It looks sophisticated but is easy to pull off. This quilt is extra fun because it calls for a charm pack to use for the colorful patchwork strips.

Other Christmas Tree Patchwork Projects

Patchwork Tree Skirt

Every quilter needs a patchwork tree skirt. If you haven’t made yours yet, check out this full step-by-step video tutorial from the fat quarter shop. This beautiful tree skirt is made from a jelly roll of fabrics.

[youtube https://www.youtube.com/watch?v=YLGr2YsKoGE]

Here are the rulers needed for this tree skirt project.

Photo credits: A Quilting Life, top; She Can Quilt, bottom.

Photo credits: A Quilting Life, top; She Can Quilt, bottom.

Christmas Tree Patchwork Pillow

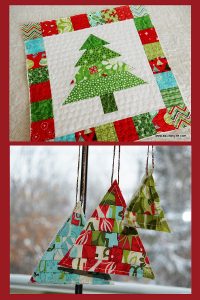
I love the border and construction of this pillow that uses still another Christmas Tree Patchwork design. You could make a forest of trees using this design and turn it into another quilt, if you wanted to. But I think a pretty patchwork pillow is a lovely bit of holiday cheer for any sofa or chair.

Christmas Tree Patchwork Ornaments

These Christmas Tree Patchwork ornaments are a super small project. Makea bunch of these for your tree, or they will make precious present toppers. You could tie one on to dress up gifts you give this year. I love this project because it uses such tiny scraps.

I hope these Christmas Tree Patchwork projects have inspired you and that you’ll make one patchwork tree or many this holiday season. Which one of these fun designs do you like the best?

Tips on Sewing with Kids

Tips on Sewing with Kids

Do you have a child in your life that wants to learn how to sew? If so, encourage that curiosity and allow them to learn this amazing skill. While the process of learning to sew is technically the same for children and adults, there are a few things more to consider when teaching young children how to sew.

Do you have a child in your life that wants to learn how to sew?

Do you have a child in your life that wants to learn how to sew?

What is the right age?

Can your child read? Can they follow simple instructions? Many of my friends begin teaching their children around age 7-8, however children as young as 5 or 6 can sew if they have the right maturity level and fine and gross motor skills to use a sewing machine. If they have the ability to hand sew, they can probably learn how to use a machine.

Adjust things to child size

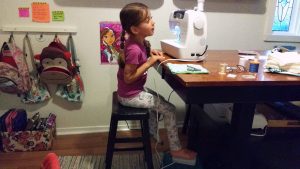
When my 6 year old daughter sews with me, I place the foot pedal on a bathroom stool so that she can reach it while she sews.

When my 6 year old daughter sews with me, I place the foot pedal on a bathroom stool so that she can reach it while she sews.

When my 6 year old daughter sews with me, I place the foot pedal on a bathroom stool so that she can reach it while she sews. Consider what chair you have them sit in and make sure they can reach all the pertinent parts of the machine, like the presser foot lever and the wheel.

Go over the dangers

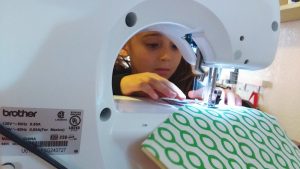
Spend some time demonstrating how fabric goes through the machine and how the needle is in constant motion when the foot pedal engaged.

Spend some time demonstrating how fabric goes through the machine and how the needle is in constant motion when the foot pedal engaged.

The biggest danger is the needle of the sewing machine. Spend some time demonstrating how fabric goes through the machine and how the needle is in constant motion when the foot pedal engaged. Describe the few inches in front of the needle as a ‘no-go zone’ and consider putting washi tape in a small rectangle forward of the needle to remind them not to get their fingers near the needle. Also explain how the foot pedal and needle work together. If they play with the foot pedal without paying attention, they could catch their fingers (or yours) if you are in the middle of demonstrating something to them.

Practice on paper!

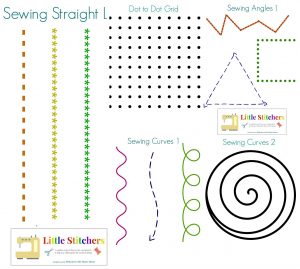
There are many printables available online that allow children to practice “sewing” by having the children sew patterns on paper.

There are many printables available online that allow children to practice “sewing” by having the children sew patterns on paper.

An example of a paper sewing guide for children from www.welcometothemousehouse.com.

That’s right. There are many printables available online that allow children to practice “sewing” by having the children sew patterns on paper. This technique is convenient because the needle’s puncture holes are visible and the children can easily see where they are not staying in the lines. It’s also wonderful for helping them master sewing curves.

Engage your learner

If your child has expressed interest in sewing, try to let them start on a project they actually want to make. This ensures they’ll be invested in the learning process and will make them that much prouder of their final product.

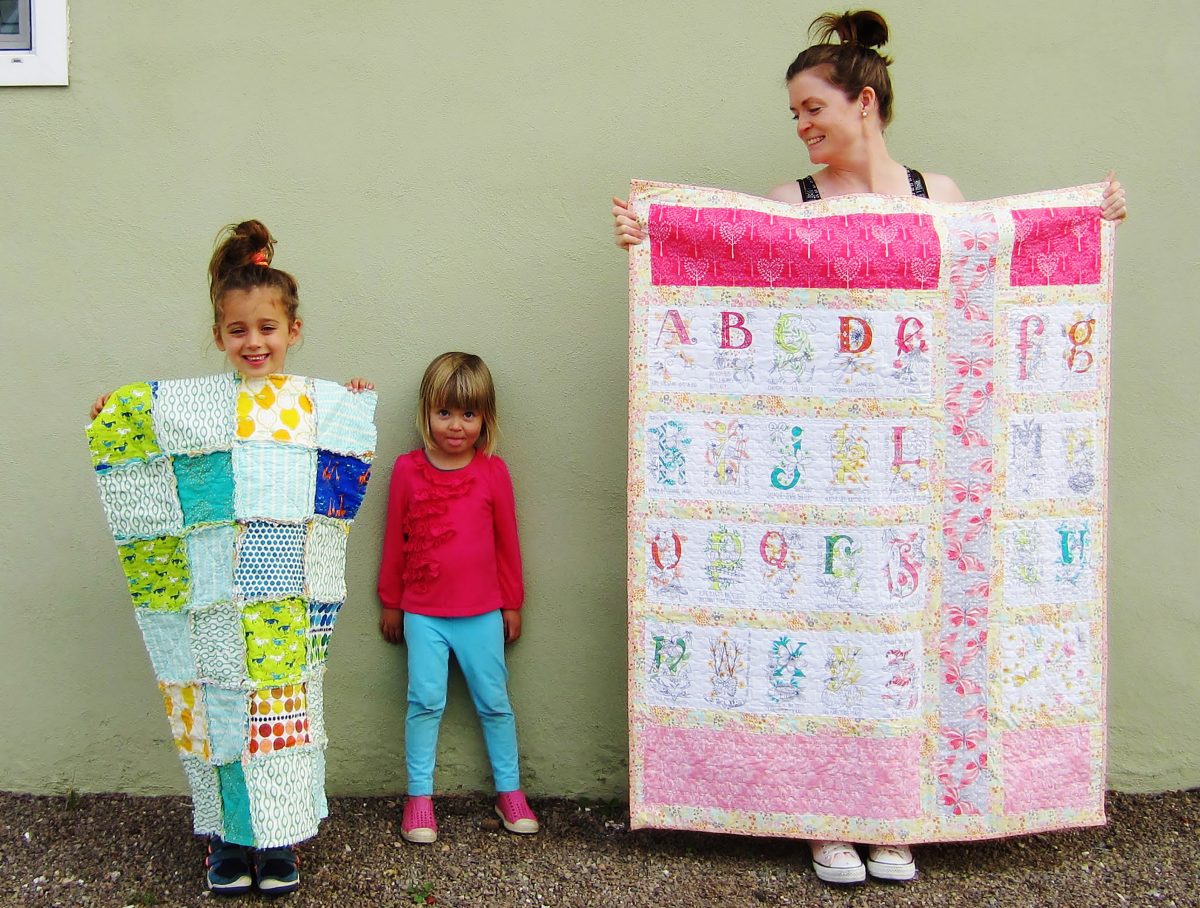
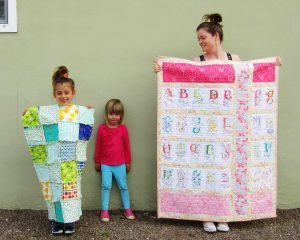
Here is my then five year old daughter showing off the rag quilt she helped to sew.

Here is my then five year old daughter showing off the rag quilt she helped to sew.

Here is my then five year old daughter showing off the rag quilt she helped to sew. She made this as a gift for a teacher at her school who was expecting a baby.

Have fun!

Don’t make this something that is stressful. If you, or the child, are starting to get frustrated, take a breather. Sewing is a wonderful skill. Don’t let their first memories of it be of anger or frustration.

What tips do you have for sewing with kids? Please feel free to share in the comments.

—————————–
Charlotte Kaufman is a writer and sewist in Mammoth Lakes, California. She specializes in marine and home interiors and continues to fall more and more in love with quilting. You can follow her at charlottekaufman.com.
Quilt Museums and Goals

Quilt Museums and Goals

Once upon a time, I was a student tunneling through a graduate program in English and Creative Writing. Before you get too carried away thinking that I know all kinds of things about Chaucer and such, let me admit that there are plenty of literary classics that I haven’t read, and I only used one Shakespeare play (that I recall) during my time in the program. I did, however, write a detailed paper on Dr. Seuss. Because I’m awesome like that.

Quilt nation

Kentucky has a quilt museum.

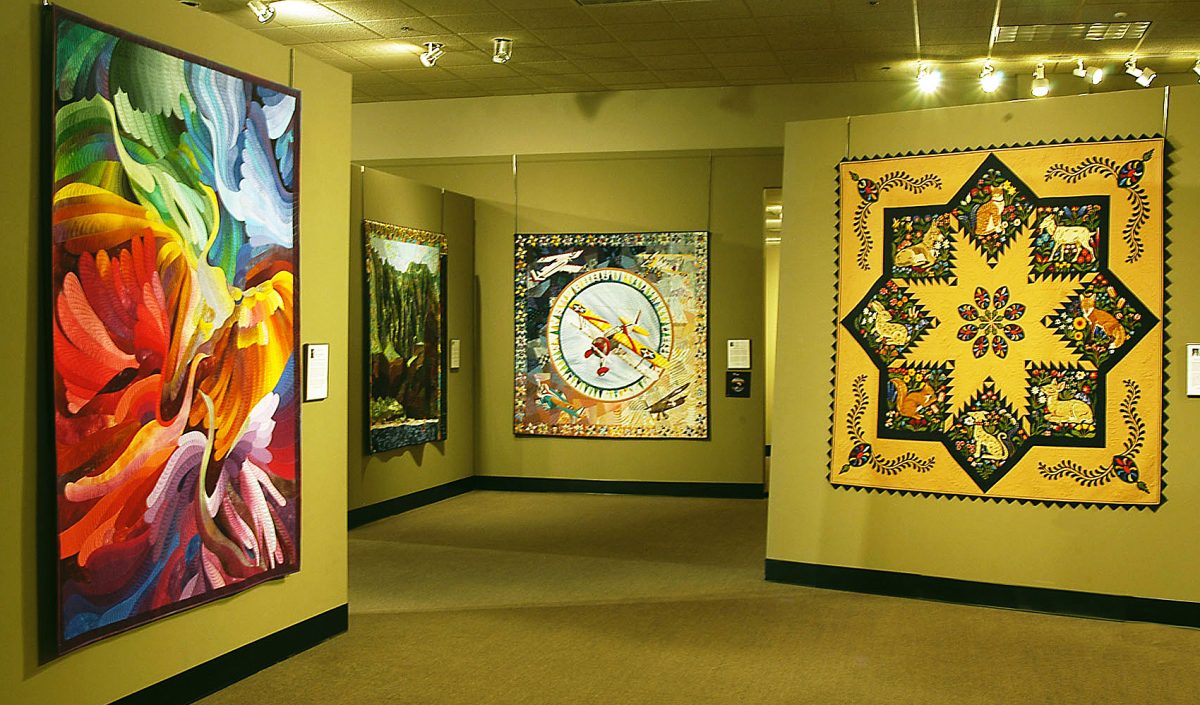
Anyway, while I was working on that MA in English, I learned that Kentucky (my state) has a quilt museum. Weird place to discover this detail? Maybe! But I believe it was my professor who provided me that fact through a discussion board post. I guess I mentioned where I live, as well as quilting, and she was kind enough to inform me that a quilt museum is in my home state. I had no clue, but I did a bit of Google searching about it. What I discovered was that not only is there a quilt museum in Kentucky, but that quilt museums are things in more areas than just the bluegrass state. In fact, a person could find one in Virginia, Texas, Wisconsin…

So, I guess shame on me for assuming that quilting was such an unappreciated pastime? Who knew that there were places like this available where you can go and appreciate someone else’s craft? Okay, maybe you knew, but I didn’t! It was an interesting thing to discover, and it was a nice side-benefit to earning my MA! I got an education, and a piece of quilt-culture tossed my way!

This is intriguing not only because it provides me a possible place to visit to see a collection of quilts, but also because the existence of these places offers solid evidence for the argument that quilting is an art form. If someone claims it isn’t, you can come back with, “Really? They have museums for it.” That alone, I think, makes these museums worth knowing about!

No time like the present

Despite my appreciation of the possibility of going to a quilt museum though, I haven’t actually made it to one. Shame on me again? Maybe! But if you recall, I had this plan of having a list of goals for 2017, and it’s occurred to me that this failure to see a quilt museum can be something to correct during that year-long goal-reaching endeavor.

So, here you go — a new goal for the list, and that’s to see an exhibit at the quilt museum. In fact, I’ve taken the time narrow it down further to choose which exhibit I want to see. The final version of said goal, then, would read something like this:

Go to see the “Quilts of the Lakota” exhibit at the National Quilt Museum in Paducah, Kentucky.

Go to see the “Quilts of the Lakota” exhibit at the National Quilt Museum in Paducah, Kentucky.

This taps into my interest in quilts, and my interest in history (Did I mention I have my BA in History? If not, yeah, that appeals to me, too!), so it’s a wonderful combination for me. In addition, the exhibit is scheduled to happen between October 2017 and January 2018, so there’s plenty of time to pick a date for my own viewing! Should that happen, you might want to keep an eye out for pictures and a post from the event. You might find it interesting, and I might want to prove that I did, in truth, accomplish this goal!

Become a part of history

Other additional and awesome things about this museum, by the way, are that you can apply to have your own exhibit displayed there (a long-term goal?), and they offer workshops for quilting (another year-goal?). This little gem of a museum has been around for twenty-five years, and I was clueless!

And since I happen to live near Virginia, maybe I’ll make a trip over there as well to see that museum.

And since I happen to live near Virginia, maybe I’ll make a trip over there as well to see that museum.

And since I happen to live near Virginia, maybe I’ll make a trip over there as well to see that museum. They have a “Treasures from the Vault: Crazy Quilts” going on right now that could’ve been fun to see and a “Treasures From the Vault: Wool for Winter” option that’s coming up next year. Maybe I can make this a decade-long goal of seeing every quilt museum in the country. It’s a bit more long-term than I was looking for, but how interesting could it be to see all of these museums? It could be fun, inspiring, encouraging…

They have a “Treasures from the Vault: Crazy Quilts” going on right now that could’ve been fun to see and a "Treasures From the Vault: Wool for Winter" option that’s coming up next year.

They have a “Treasures from the Vault: Crazy Quilts” going on right now that could’ve been fun to see and a “Treasures From the Vault: Wool for Winter” option that’s coming up next year.

It’s a possibility, but at least my one quilt-museum goal for 2017 is cemented 🙂

Have any of you ever checked out one of these museums? If so, details in the comments!

My Feet Were Made for Walking

My Feet Were Made for Walking

Hi Everyone and Happy Thanksgiving Weekend!

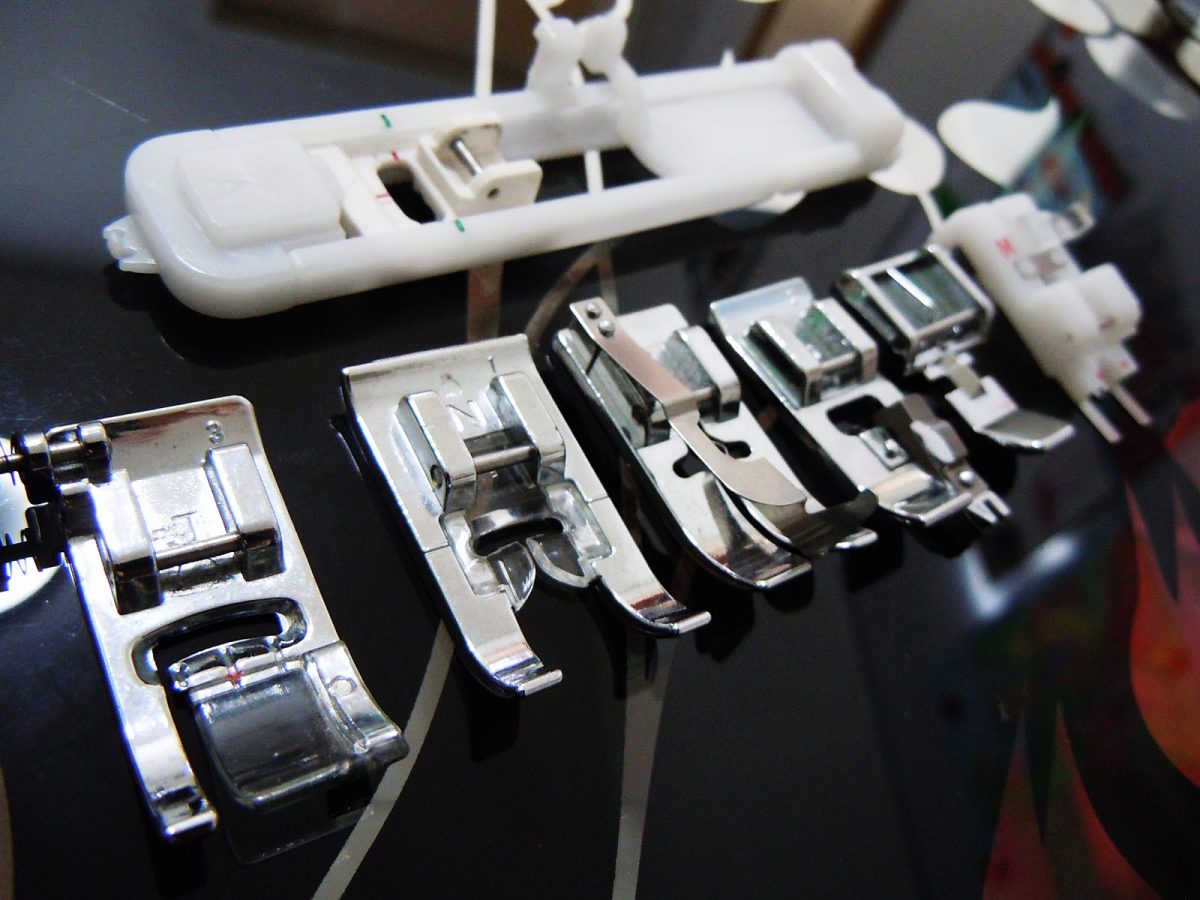
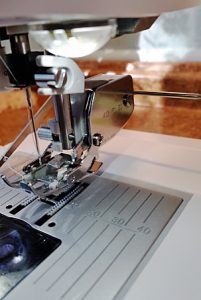
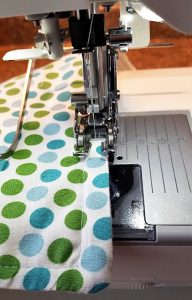
Using the walking foot, means taking off the shank that supports the regular feet and inserting the walking foot unit and the backwards “C” clamp to the screw that holds the needle. Also, the bar inserted behind this walking foot holds down the fabric while the walking foot moves over the fabric as it sews.

Using the walking foot, means taking off the shank that supports the regular feet and inserting the walking foot unit and the backwards “C” clamp to the screw that holds the needle. Also, the bar inserted behind this walking foot holds down the fabric while the walking foot moves over the fabric as it sews.

Perhaps you have had the challenge of trying to sew stretch and non-stretch fabric together? I used to agonize over the idea when I can get two pieces of fabric, one a stretch bamboo and the other quilting cotton, and cut them perfectly the same measurements with my acrylic ruler, and rotary blade cutter, and pin them together matching all sides. When I put them in my machine, it always turns out, the stretch fabric is larger than the non-stretch when I have completed the seam. So, to resolve that, I have to measure the seam line with my ruler, and trim the stretch fabric to 1/4 inch seam line that matches the quilting cotton.

Just keep trimming

I have found that trimming that seam on the inside as perfectly even as possible results in great guide to top-stitch the outside after it has been turned. I also round off the corners rather than cut them straight before turning to the right side of the fabric.

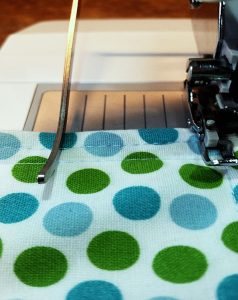
I have sewn the first top-stitch row just using a Type A foot. The row (in progress) close to the edge is done with my walking foot. Using this, if I watch the edge of the sides, as they line up when stitched, my top-stitching turns nice and straight. SLOW AND EASY STITCHING! The bar on the left that stabilizes the fabric is adjustable as well.

I have sewn the first top-stitch row just using a Type A foot. The row (in progress) close to the edge is done with my walking foot. Using this, if I watch the edge of the sides, as they line up when stitched, my top-stitching turns nice and straight. SLOW AND EASY STITCHING! The bar on the left that stabilizes the fabric is adjustable as well.

Many of my projects are top-stitched either with a decorative stitch which is overcast or something that blends with the fabric design. Now with embroidery machines so popular, I seldom see people utilizing the great automatic stitches like those on my Husqvarna Viking 670. With 200 stitches available, one’s creativity can soar! Why not take advantage of it?

Top-notch-stitching

Top-stitching is tricky! To be perfect, it takes a consistent eye to guide the machine in the same place all the way around the project usually very close to the edge. Possibly, an edging foot for quilting may work well for ¼ inch spacing, (although I have not tried that). I most often use that foot to piece guilts. What I have found that does a great job is a walking foot. I use it to sew seams with the different stretch and non-stretch fabric. Again, I trim the seam before turning to the right side.

I also like to make wider stitches for top-stitching using a beautiful premium thread. My favorite is Cotton Mako Auriful, an Egyptian cotton made in Italy. It makes top-stitching look very professional.

I also like to make wider stitches for top-stitching using a beautiful premium thread. My favorite is Cotton Mako Auriful, an Egyptian cotton made in Italy. It makes top-stitching look very professional.

So, I hope you enjoyed learning about the “Walking Foot” today. I enjoy knowing that my products have the professional finishes that make handmade sewing equal to expensive alternatives. I would be happy to hear your comments or things you have discovered on your walk of sewing and fabrics!

Miter Me This

Miter Me This

One of the alterations I did last week for the television show Blindspot was lengthening the sleeves on a woman’s suit jacket for one of our actresses – a straight-forward and fairly simple task.

Or so it should be

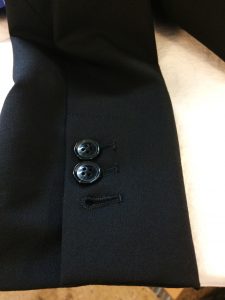
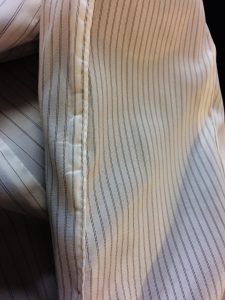
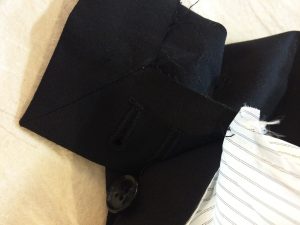
Functional, cut buttonhole, unless you need to lengthen the sleeve.

Functional, cut buttonhole, unless you need to lengthen the sleeve.

This time, though, the alteration gods (and the clever designers at Banana Republic) were against me. The suit jacket had cut, functional buttonholes (three of them) on the sleeves. Not that big of a problem. I just needed to lengthen the sleeves 3/4″ and could get away with leaving the buttonholes as they were as the first hole was only an inch and ¼ from the hem.

No biggie

So, no big deal, I could still re-miter the corner 3/4″ below the original hem and not have to mess with the buttonholes. I might have to cut some of the seam allowance free from the bottom hole but it shouldn’t matter. I would still have enough fabric to do the miter properly.

I pulled both sleeves inside out to find the one with the top stitched opening. Women’s jackets normally just have one sleeve with the lining opening and the entire thing can be pulled through that hole and inside out. This is because, in most cases, the armhole lining isn’t attached all around the seam allowance as it is in men’s suit jackets.

I pulled my two sleeves inside out through the opening and started taking the hem apart. Much to my annoyance, I discovered that the miter corner had been trimmed so it was impossible to redo the miter at a longer length. I also needed to add more seam allowance to be able to lengthen the sleeve the amount I needed.

Take a step back

A simple alteration just got a bit more tedious. First, I dug into my fabric stash to find a wool similar to that of the jacket. In this particular case, the jacket I was working on was a dark brown and black tweed. The jacket was paired with black wool pants so I decided I could get away with using a black wool for my corner and added seam allowance.

I cut two pieces of black wool 2″ wide ( ¾+ ¾+ ¼ for each seam allowance. you need ¾ twice because you need the length for both the lining and the face fabrics) and 10″ long (this length doesn’t matter except it needs to be longer than the sleeve hem) on the bias (or diagonal). I also cut an addition 2″ wide by 6″ long bias piece for the corners.

Sleeve lining with topstitched seam (open up from here and pull everything through).

Sleeve lining with topstitched seam (open up from here and pull everything through).

The next thing to do after opening the entire sleeve hem up (don’t press, you’ll want to see the original seam creases) is to sew the black wool to the miter edge. Follow the stitching line from the original miter and make sure to leave additional fabric on both ends. Then, open the sleeve hem up so you can see the straight angles of the bottom and side edges. Draw straight lines to connect those edges, then trim.

The mitered corner.

The mitered corner.

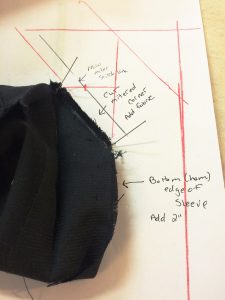
Next, attach the 2″ piece to hem edge and trim any excess off the ends. At this point, I redraw my miter line. Measure down ¾ from the original hemline exactly on the fold line – that’s your cross line for miter. Use your old miter line as a guide for the proper angle. Sew the miter, press, and turn. Don’t cut. I use a wooden tailor point pressing block, a simple point turner, and generous steam.


Diagram on where to add fabric and redraw miter seam line.

Diagram on where to add fabric and redraw miter seam line.

Wash, rinse, repeat

Mark the ¾ down on the un-mitered corner and any sleeve underarm seams into your fabric extension so that you can match up the lining properly. Then, pin together your hem edges and sides. Sew. Repeat for the other sleeve, turn everything back right side out, and sew the opening closed in the sleeve lining.

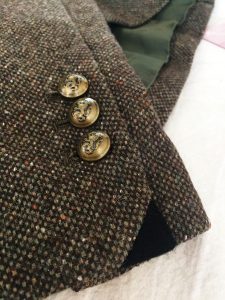
The finished contrasting corner miter: (note: the suit jacket will be worn with black pants so the corner coordinates nicely).

The finished contrasting corner miter: (note: the suit jacket will be worn with black pants so the corner coordinates nicely).

Done. I now have a jacket with a cool little detail. Most people probably won’t notice it but if you happen to watch Blindspot and see it, let me know! I like it and my designer and actress like it, if only for the reason that the sleeves are the proper length.

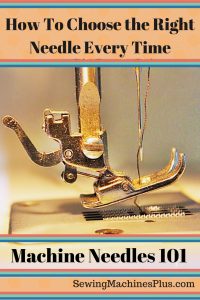
Sewing Machine Needles 101

Machine Needles

When I first started sewing, broken needles were part of my learning curve. This wasn’t necessary, but I had no one guiding me, and I learned as I sewed. I could have learned to sew without all that trial and error if I only had a basic education on the types and thicknesses of machine needles and their uses.

You’ll save yourself more trouble than just the inconvenience of changing a broken needle by using the right needle for each project that you sew. Your thread could break or shred, and seams could pucker or be otherwise unseemly. No pun intended. You can also mess up the machine’s timing or damage the bobbin hook. All of which would require repair.

Of course this is all true and I promise you don’t want to have to stop sewing and wait for machine repair. To save you the troubles of any broken machines, stitches, or needles, allow me to share this short lesson:

Sewing Machine Needles 101

Now you will know which machine needles to buy and what kind to put on your machine for every project you sew.

The short answer is to buy and keep stocked a variety, because you’ll need to use different sizes and types for different projects and fabrics.

Another rule to live by is to change out your needle with every project. At least be in the habit of considering this between every project. Sometimes when working on a string of small or similar projects, you might take a look at the needle to make certain it is still straight and true, and then decide to keep it for the next project too. Definitely change any needle after sewing with it for six or eight hours max.

Sewing Machine Needles: Types

Machine needles are classified according to their point type and by their gauge, or thickness. The fabric or project determines the needle gauge. While classification and types of fabric is another post, they can be broadly classified into two main types: woven and knit fabrics. Because these two types of fabrics are produced by different means, they require different types of needles.

Universal, or Regular Point Sewing Machine Needles

Use these pointy, sharp, regular machine needles to sew woven fabrics. They come in a wide array of sizes, and different fabrics and projects will need different sizes. We’ll look at needle sizes further on in this post.

Ball Point Needles

Also known as jersey needles, these have a rounded tip. Use them for sewing fabrics that are knit. These also come in various sizes. Knits include stretchy knits in varying thicknesses, and also non stretchy knits such as terry toweling. For the stretchier knits, try a stretch needle instead.

Stretch Needles

For some super stretchy fabrics like Lycra, even a ball point needle will still be prone to skipping stitches. I also find a stretch needle to be the key to working with fleece. For these difficult fabrics, a stretch needle will make the difference in being able to pull your project off well.

Wedge Needles

Used for sewing leather and vinyl, wedge needles are designed for piercing holes into these fabrics which will close in on themselves, minimizing the risk of tearing of these special fabrics.

Specialty Sewing Machine Needles

While one of the major needle types listed above will work for most every sewing project, there are many special uses for which your project might benefit by you using one of these specialty needle types, instead:

  • Jeans needles have sharp tips and strong shafts for sewing heavier fabrics
  • Embroidery needles have larger eyes to avoid breakage or damage of specialty threads
  • Topstitching needles work with heavier threads, or even with multiple threads
  • Quilting needles have tapered points and extra strong shafts for sewing through multiple layers
  • Sharps, or Microtex needles, which are even sharper and thinner than universal points and ideal for sewing on fine fabrics or cottons with a high thread count; these work great for appliqué and piecing
  • Metallics needles have teflon coated eyes, for sewing with metallic threads; other needles ravel and damage metallic threads.
  • Twin Needles, which can be universal, ballpoint, or other needle types

Sewing Machine Needles: Sizes

The thinner the material you are sewing, the thinner gauge needle you need. Heavy fabrics, or thicker projects will need thicker gauge needles. Both regular-point and ball-point needles come in sizes ranging from the thin size 8, to heavy 16 gauge and even heavy-duty sizes up to 19.

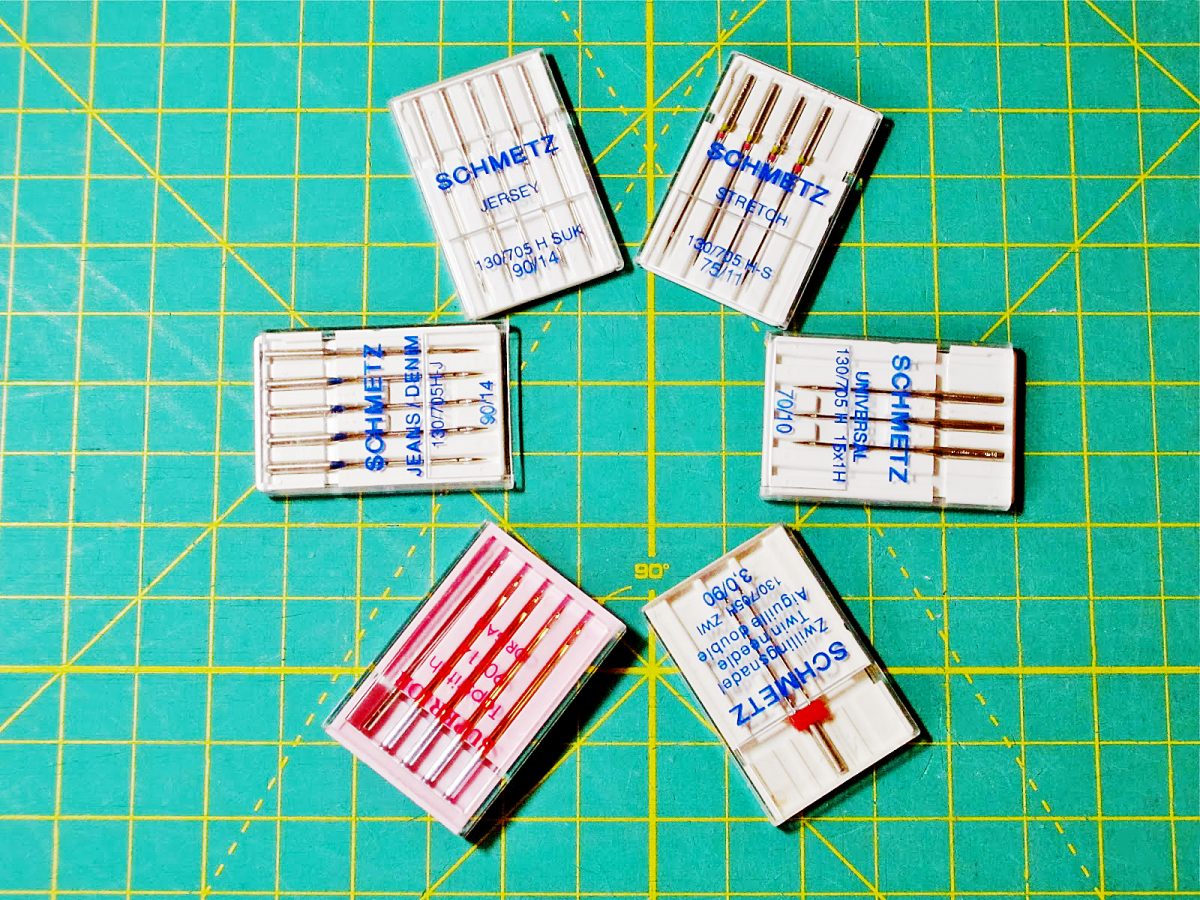
You will sometimes see these needle sizes labeled by gauge and also by needle diameter. So a size 9 gauge needle will sometimes be labeled as size 70/9; size 11 might say 80/11; then there are sizes 90/14, 100/16 and 110/18. The larger numbers refer to the needle’s thickness, in millimeters. US measurements are by gauge, European measurements use diameter.

So which size needle should you choose for which fabric? Here are my choices for the sizes you will use most often and on what fabrics and projects:

Size 9 (European 70) – Use these for sewing sheers and the finest fabrics, such as lace and chiffon.

Size 11 (European 80) – Use these with light-weight fabrics such as silk, muslin, and calicoes.

Size 14 (European 90) – Choose when sewing medium-weight fabrics such as rayon, gabardine, satin, chino, linen, denim; thick quilts. Use ballpoint size 14 for light to medium-weight knits such as tricot or jersey.

Size 16 (European 100) – Sew with a size 16 needle when using medium to heavy-weight fabrics such as: wool or wool blends, canvas, cotton duck, sailcloth, or upholstery fabric, and on thicker projects such as purses.

Size 18 (European 110) – Use these for construction of quilted bags, sewing on nylon web, and other heavy-duty projects.

Here is a helpful chart from Schmetz for further reference.

Be sure to stock needles in all these sizes and in several types so that you are always ready to sew.
Christmas Sewing Projects

Christmas is fast approaching.

Christmas is fast approaching.

Christmas is fast approaching. Thankfully, there’s still time to sew special Christmas decorations or gifts. With so many Christmas themed fabrics to choose from, it may be hard to decide which one(s) you want for your project, but with so many projects, you won’t have to narrow it down too much.

Christmas Tree Skirt Sewing Project

This 50.5” x 50.5” square Christmas tree skirt is easy to make and uses multiple fabrics to create a look that suits any home. Basic quilting skills are necessary as is a template to use for the center circle. An inverted bowl works well. You can make it from fabric scraps and by using washable materials, it’s easy to clean. The red ties in the back are cute and ensure the skirt isn’t pulled off by pets or kids.

Christmas Tree Ornament Project

If love hand sewing, this cute hot cocoa mug ornament is a perfect way to add some whimsy to your tree. The pattern ensures accurate placement of the faces on the mug and marshmallows. You will need to know how to make a French knot for the eyes. If you’ve got felt scraps, you may be able to use those for the bulk of this adorable Christmas sewing project.

Christmas Stocking Sewing Project

Christmas isn’t complete without “stocking hung by the chimney with care.” With this easy Christmas stocking pattern, you can make individualized stockings for everyone in your family. The large size makes it the ideal stocking for creative stocking stuffer gifts and depending on your choice of fabrics, it’s entirely washable. Choose different colors or patterns for each person in your family to personalize the stockings.
Christmas Tree Angel

There’s something about angels…they belong adorning a Christmas tree. This sweet ribbon angel adds a touch of class to any tree. Use different colored ribbons to make each angel a little different. Sewing is optional with this project, but it’s a great opportunity to use some of the wide ribbon you’ve got sitting around from previous projects.

Christmas Garland Sewing Project

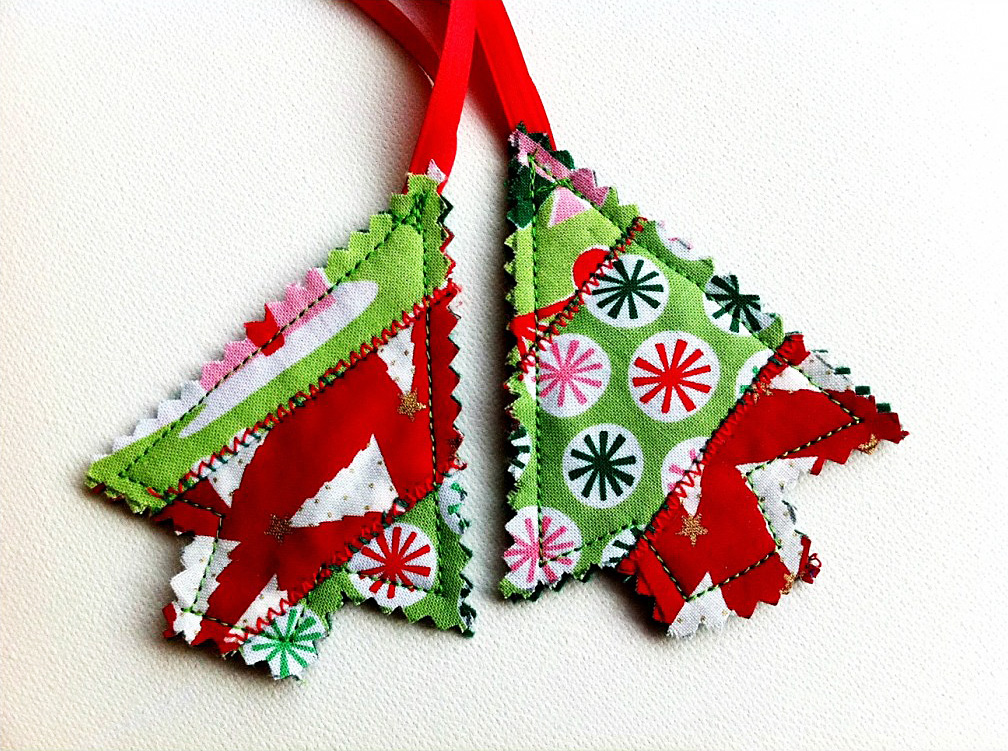
Garland doesn’t have to be tinsel and shine. This adorable garland adds Christmas cheer with rows of fabric Christmas trees. You can either use bits of fabric from your stash or buy remnants from your local fabric shop. This is a great project to do with kids! Their small fingers are great for everting and stuffing the little trees. The number of trees you make will depend on the length you want for the finished garland. A coordinating ribbon completes the project. Use it to decorate your tree or string across a doorway.

What other Christmas sewing projects do you enjoy? If you try any of these, please share the results! I’d love to see them.

Bunk Bed Privacy Curtains

Bunk Bed Privacy Curtains

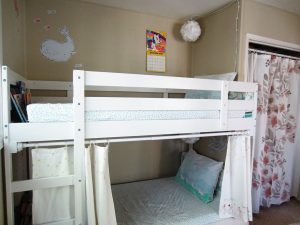
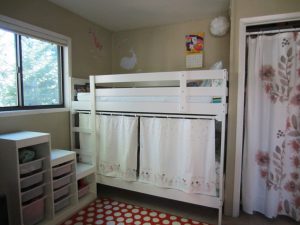
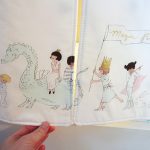
Privacy curtain open.

Privacy curtain open.

If you’ve ever been on a sailboat you might have seen little panels that draw closed across the sides of berths to give sailors a modicum of privacy. It was this tack I took when figuring out how to make each bunk in my daughters’ bed a small, personal space of their own.

Privacy curtain open.

Privacy curtain open.

Supplies

Here are the items you need to make your own bunk bed privacy curtains:

  1. Tension rod and curtain rod holders. We had to affix two square pieces of wood on either end of the bunk bed in order for the rod to fit.
  2. Shower curtain rings (I used clear).
    3. Fabric for the panels (mine are double-sided).
    4. Batting for structure (if using white or light-colored material).
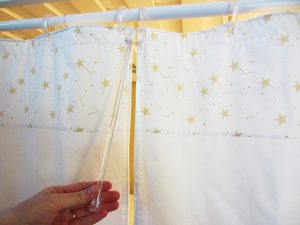
    5. Drapery wands. These are especially useful for keeping little hands off of white fabric, plus they are a ton of fun. I got mine on Amazon in a mini-size by searching for RV Drapery Wands.
Drapery wands.

Drapery wands.

Put it all together

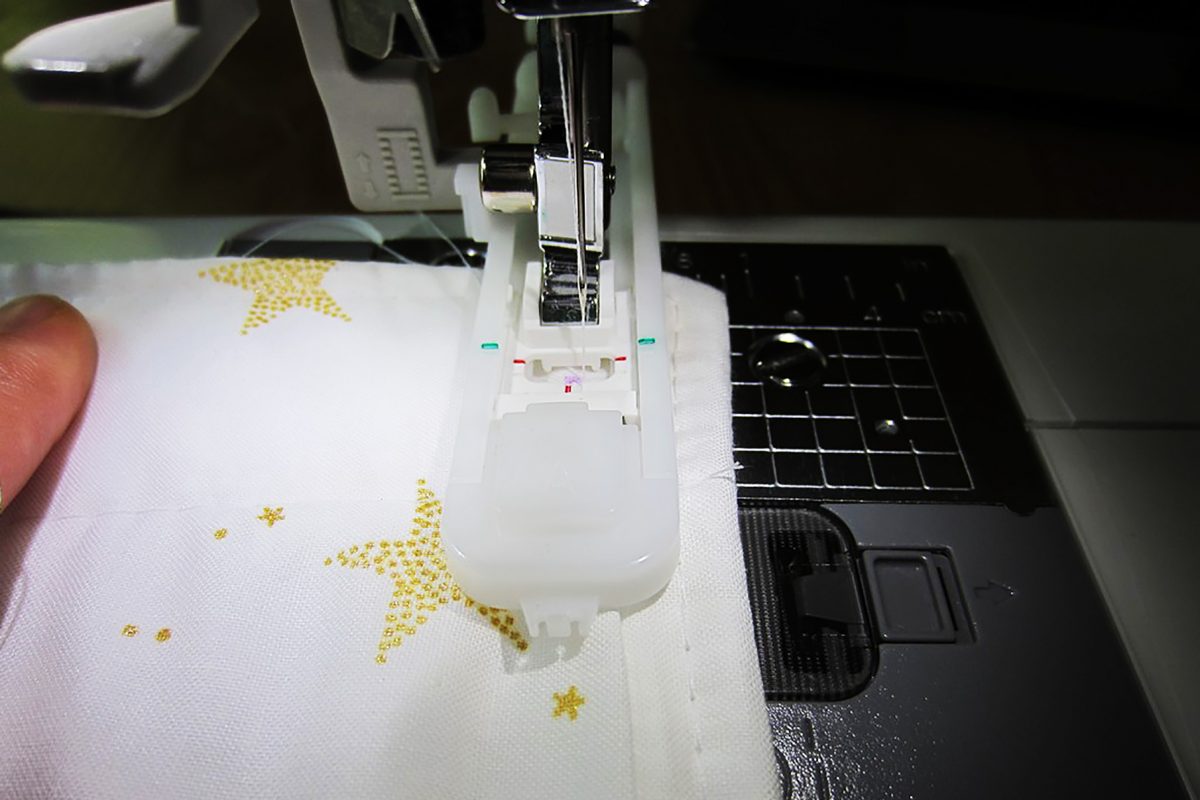
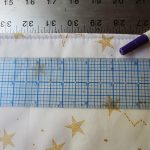
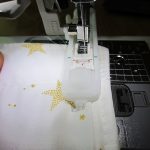
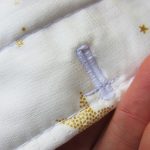
Each panel is 36”x29”. I sewed button holes along the top width and then used shower curtain rings to hang the panels. On my first attempt, I made the buttonhole too close to the top hem.


One of the things I love about sewing is how easy it is to remedy your mistakes. Here I simply sewed across the upper portion of the hole to align it with the others at the correct height. And unless you take a magnifying glass to the finished project, no one is so much the wiser.


The fabric is from Sarah Jane’s Magic line. I used a mix of Magic Parade Double Border in White Metallic and Lucky Stars in White Metallic.

Ta-da!

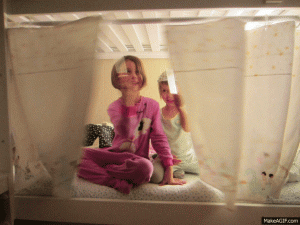
My girls adore these too, as you can see.

My girls adore these too, as you can see.

Projects that come together quickly and look awesome are my favorites. My girls adore these too, as you can see.

What types of quick projects have you done lately that really knocked it out of the park?

—————————–
Charlotte Kaufman is a writer and sewist in Mammoth Lakes, California. She specializes in marine and home interiors and continues to fall more and more in love with quilting. You can follow her at charlottekaufman.com.
Recreation, Meet Sewing!

Recreation, Meet Sewing!

Ever get the feeling that you have 2,394,093,294,032 things to do, but you only have time for, like, 3?

Ever get the feeling that you have 2,394,093,294,032 things to do, but you only have time for, like, 3?

Ever get the feeling that you have 2,394,093,294,032 things to do, but you only have time for, like, 3? Yeah, that. Between work, family, and such, I feel like I just don’t have enough time in the day to tend to everything that requires attention. But I guess that’s being an adult, right?

It’s a real issue to find time for everything that’s a major priority on my plate, but that leaves less time for recreational things that aren’t so big of a priority. You know how long it’s been since I read a book? A while, let me tell you!

But at the end of the day, I’m a southern girl. I like front porches, fresh-picked blackberries and time that’s just for enjoying life. So even with a busy itinerary, I’m all for finding time to relax and do things I appreciate.

In order to have that time, it pays to find ways to mingle productive endeavors with enjoyable concepts to get the best of both worlds, and sewing happens to be a task that allows the kind of openness to let that happen. For one thing, even if I’m working on a business project, the overall process of sewing can already be soooo relaxing. No matter what’s going on around me, it’s a basic process that gives me a structured place to send my focus—straight pin here, needle there, and I’m doing something productive!

And the relaxation element can go beyond the general details of sewing itself, since I don’t have to just sew while I’m sewing. The task is so flexible that working in other recreational hobbies with it is fairly easy!

For me, I sew when I watch TV, which would let me catch up on my favorite TV shows (I’m caught up on none of my favorites!!!) while doing something productive. I say “would let” that happen, because until I get a HDMI cable, anything that I need to watch via computer just isn’t showing up on the flat screen in the living room! Still, TV and sewing can go hand-in-hand for me!

Food Network

Of course, there might be a drawback or two for this TV-sewing notion. For instance, those with louder-running machines might find that there’s too much noise to bother trying to hear the TV. But for those with a quieter machine, those who are hand-sewers, and those who are in various stages of sewing that are before or after the sewing machine comes into play, it’s an option! I might not even know what sewing machine I’ll have in the future, but I do know that I hand sew, and that any project I can think of involves those before and/or after stages in regard to a sewing machine. Basically, no matter the project or the noise level of a machine, sewing is one hobby that I can do while watching episodes of my preferred TV shows — like ones from my darling Food Network.

Cutting fabric, shredding material along the edges, plotting the pattern for a project… These are all things I can do away from a machine, and if I can do them without a machine, I can do them in front of a TV.

I do like sitting on the front porch with some lemonade & mountains like this around me for the visual.

I do like sitting on the front porch with some lemonade & mountains like this around me for the visual.

There are other options as well for the pause-and-enjoy life aspect that can still fit with working on projects away from a machine, and one that I haven’t tried — but might try in the future — is to sit on my front porch sewing, preparing, or plotting. As I said, I’m a Southern girl, and I do like a good-sized front porch! Sitting there with some lemonade and mountains like this around me for the visual? That’s a big yes, and a muse for that matter! Can you imagine plotting a new quilt with this kind of Autumn color scheme in mind? Talk about inspiration right before my eyes! I’m inspired just thinking about it!

I could also listen to audio books while sewing, or plot out a new project when sitting in a waiting room. Sewing truly is a hobby that can be tended to alongside other tasks, letting me do what needs to be done and what I want to do while moving those projects along. I like sewing, and this flexibility might be one of the main reasons!

I’m a TV sewer with an interest in sewing on my front porch, but as I mentioned, those aren’t the only possibilities for multitasking with sewing.

Do you have other activities you like to do while sewing or working on projects? Comment and let me know!