Quick Quilts: Time-Saving Tips

Quick Quilts: Time-Saving Tips

Time-saving Tips for Quick Quilts

Many sewists want to delve into quilting but are daunted by the amount of work required.  It is true that any quilt is a labor of love, however, quick quilts are easier to make than more intricate quilts.
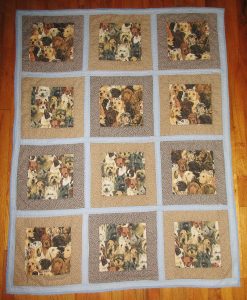
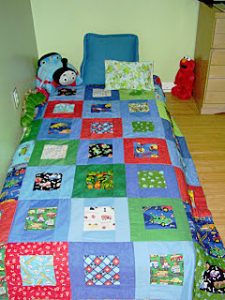
This simple quilt has a super soft flannel backing and may be the most loved and cuddled quilt I have made yet.

This simple quilt has a super soft flannel backing and may be the most loved and cuddled quilt I have made yet.

Quick quilts start with a simple design, using large square and rectangular blocks, rather than many small or fussy pieces.  These easy designs ensure beginners more enjoyment, completion, and success.

Do not choose an intricate star pattern and a bed sized quilt for your first foray into quilting, for example!  This would only result in frustration.

Baby, crib, and lap quilts make great first projects, or you can make a small wall or table quilt.  Starting small ensures an enjoyable, do-able project that will make you proud.

Quick quilts are not just for beginners, though. Everyone loves quilts and, with these, you can give quilts as gifts more often. Let’s look at some tricks to quick quilts.

Many steps go into “building” any quilt.  These are:

  • Design
  • Cutting
  • Patchwork, the “quilt top”
  • Making the “quilt sandwich” and basting
  • Quilting
  • Binding

Quick Quilt Designs

I spy with my little eye...A quilt begins with the patchwork design.  Quick quilts use large square and rectangular pieces for faster completion.

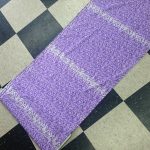
Another option is to just skip the patchwork step. You could use “cheater” patchwork print fabric instead, and quilt along the lines. Or choose a plain fabric and sew your quilt in the “whole cloth quilting” style.  These are easy ways to save time and trouble.

But you won’t want to make many quilts using this method, because the patchwork is the foremost fun of making quilts!Here is a simplified, quicker version of the baby quilt I showed how to make in a previous post.
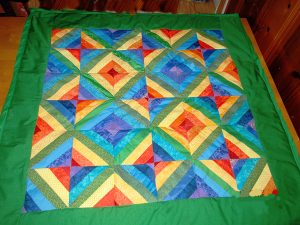
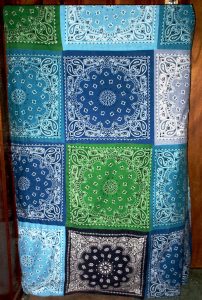
Specialty and novelty fabrics work well showcased in large squares.  Add interest and coherence by adding frames or borders between the individual squares.

Here is a simplified, quicker version of the baby quilt I showed how to make here.  It uses larger and fewer blocks than I used for that quilt.

Saving Time with Patchwork

There is one important time-saver that all quilters must embrace: the rotary cutting tool.  Every quilter needs a rotary cutter, a self healing mat, and a clear ruler to use in cutting patchwork.  These tools make cutting many pieces at a time a breeze, and ensure precision.  Perfect pieces are essential for patchwork; this is not easy to achieve using scissors.

The “Quilt Sandwich:” Saving Time in the Basting Step

The quilt sandwich consists of a backing, a batting, and the quilt top. These are usually basted together using long running stitches.  I like to skip this step and baste my quilts using quilter’s safety pins. This is quicker than sewing stitches and having to remove them later.  Unpinning as needed is faster and saves steps.

An even quicker way to get your quilt layered, basted, and ready for quilting is to use basting spray.  Spray this between the layers to hold them together and there will be no need for pins or basting stitches. This can be a huge time saver, but be careful when using this method.  Take care to ensure all layers are smooth, and be careful as well not to overspray, because this can be messy.  You may like to prepare a place for taking this step outdoors. Otherwise, use a well ventilated room. You might even like to wear a mask or bandana around your face to avoid breathing in fumes.

Saving Time Quilting

The quilting is the actual stitches sewing the three quilt layers together.  Quilting can be elaborate or simple, and dense or sparse.   Many quilts combine more than one quilting pattern and density.

The easiest and simplest way to begin quilting is the “stitch-in-the ditch” method.  Do this by sewing quilting lines along the seams of the patchwork squares.  I recommend that you begin your quilting journey using this method, because it is easiest and fastest by far.

Saving Time in Binding

Most quilters make their own binding strips.  This is easy to do with a rotary cutter, but as a time-saving measure, you can skip this step and use packaged bias or quilt binding instead.  These come in an array of basic colors and you can find them to match most any quilt.

Most books say to sew the binding along the front of the quilt by machine, but to sew the back down with hand stitches.  If you are a purist, you will want to attach your binding along the quilt back by hand.  There are no quilt police, though, so you can save time by sewing the binding down with your machine. Use the same color thread as the binding, take care with this, and chances are no one will notice or mind.

Skipping the Binding

You could save more time by skipping the binding entirely.  One way to do this is to build your quilt sandwich in a different way. Instead of layering the quilt with the right sides out, layer these right sides together. Place the batting layer on top, then sew around the edges, leaving an opening for turning.  Clip the corners and turn right sides out, slip stitch the opening closed, then pin and quilt.  This takes care to do well, but can save you the entire binding step.  The edges of this quilt will not be near as durable and long wearing as a bound quilt.

In addition, I have also cheated on this step by using my serger.  I serged decorative thread around the edges of my quilt instead of using binding.  This looks great, but again, is not as durable a finish as traditional binding would be. Therefore, this might work better for a wall quilt than a baby quilt, which would be more frequently washed.

Just Do It!

Making quilts is fun and worthwhile.  Saving time and frustration by making quick quilts is the best way to get started.  If you ever wanted to make a quilt, don’t waste any more time wishing you could and just do it!  You surely can and you will be so glad that you did.

Teaching Kids to Sew

Teaching Kids to Sew

How Young is Too Young

Does your daughter (or son) hang around while you’re sewing? Do they seem really interested? Maybe they even beg you to show them or let them help? If you’re like most parents, this makes you happy that they’re interested, but unsure when is the right time to get them involved in your hobby.

Like many things in the course of childhood, the decision of when to teach your child to sew isn’t as much about chronological age as it as about maturity level. Before you teach your child to sew, they need to exhibit patience and ability to sit still and pay attention for an hour or so at a stretch. Manual dexterity helps, but isn’t absolutely necessary since you’ll be there to help with items like pinning and cutting.

Step 1: KISS

Even if your child doesn’t love momma kisses and hugs, keeping their first sewing project simple and fun will help keep their interest. Bean bags, doll pillows, and similar items are a great way to engage your child’s interest and help them learn basic sewing skills. They’re small enough to be completed quickly and not overwhelm your child with several steps.

Bean bags can be cut freehand without the benefit of a pattern. Depending your comfort level and your child’s interest and abilities, you can guide them through the setup and use of the sewing machine. At the end, you can both have a great time stuffing the bean bags and playing a game of bean bag tag.

Step 2: A Tougher ProjectHelp your child learn to read the pattern and understand how to lay out the pattern pieces.


Assuming the first project went well and they’re still interested, you can help your child pick a simple pattern to work on. Projects like simple doll clothes for American Girl sized dolls or a basic stuff animal can be great options. Give them some guidelines and set them free to pick out fabric.


Help your child learn to read the pattern and understand how to lay out the pattern pieces. If they’re up to it, explain about the different ways to fold the fabric based on how the pattern needs to be laid out. If you think they’ve got the dexterity, it might be appropriate to let them help you pin and/or cut the pieces. As with the simple first project, let them help you with the sewing machine if it seems appropriate to do so.

Things to Remember When Teaching Your Child to Sew

  • Every sewing project is unique – so is your child
    • Go at their pace
    • Keep their physical needs/abilities in mind
  • Start small
    • Keep it simple with an easy, fun project
    • Judge their interest and only move on to a tougher project if they want
  • Be patient
    • Just as many parents can’t teach their kids to drive, teaching your kid to sew may not work out
    • If teaching your child to sew is too stressful for both of you, check around for classes. Often places like the local YMCA will offer sewing classes for kids.
Sewing Room Organization Tips and Projects

Sewing Room Organization Tips and Projects

Organization and layout are important factors for any sewing room. In my own small room, I have tried many things that didn’t work well, and I have found many things that do.

What are the most important factors to consider in any sewing room?

I think it boils down to these major factors:

  • Machines
  • Workspaces
  • Storage- of tools, instructional materials, and the “stash.”

Sewing Room Machines

We must keep our machines at the top of this list because neglecting to consider them can be disastrous.

One cannot sew without a trusty machine- and some sewing machines are anything but! You need reliable machines. Have both a trusty mechanical model for backup and an electronic or computerized model. If you want to sew like a pro, you need a serger as well.

You may also like to have a quality embroidery machine, a cover stitch machine, or a long arm quilter.

I listed machines at the top of the sewing room considerations based on my own experience. No mess is as important to clean up and take care of as the machine itself. Do not ever neglect to clean inside your machine! Your sewing machine will break if you do not clean under the bobbin case. And you must clean inside your serger often, for the same reason.

Avoid unnecessary repair bills by cleaning machines with a brush after every project. You must also oil your mechanical machines and sergers. Electronic machines will need oiling at Sewing Machines Plus or your local repair shop. Do not try to oil these at home. Your mechanical machine will serve you during these times.

Sewing Room Workspaces

You need ample workspaces for various tasks:

  • Machines and Sewing
  • Cutting
  • Pressing
  • Layout/ Design

You can save space by creating a design wall for layout, rather than relying on table space for this. Consider ease of moving between the workspaces to create an efficient room.

What I have found to work best in my space is to have both a large table and a counter-top style desk. These are both best kept clear. My machines are covered on shelves and it is easy to take them down and set up on the sewing desk or the table. Sewing Machines Plus has a huge selection of sewing desks and tables to choose from; click here to see these now.

I like to set up in a few different configurations, depending on what I am sewing. I place the sewing machine and serger both on the long desk when making patchwork or small projects. Or, for larger projects, I place one on the table and one on the desk, with my chair rolling back and forth between the two. If I am sewing a quilt, I set my machine on the edge of the table so that the entire table is able to support the quilt. Otherwise, I prefer the machine to be on the desk and to keep the table clear for cutting.

The iron and board or space for ironing needs to be nearby as well. I keep my large ironing board set up in the laundry room and have a folding board mounted on the wall in my sewing room.

Sewing Room Storage

You can break storage in your sewing studio down into a few categories:

  • Tools
  • Information- patterns, books
  • Stash- Fabric and supplies

    For tools, what is most important is that what you need is at hand when you need it.

    For tools, what is most important is that what you need is at hand when you need it.

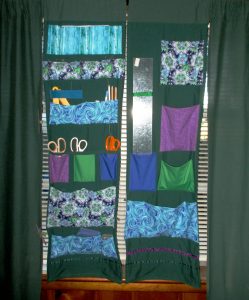
Storage is where your options are endless and creativity comes into play.

Tools

For tools, what is most important is that what you need is at hand when you need it. This issue was problematic for me in the past because of grabby toddlers. So I designed this custom solution to keep my tools neat, in my reach, and away from kids.

You can also use drawers, boxes, or bins for storing tools.

Info – Patterns, Books, Magazines

This was made from a spare leftover patchwork block.

I store packets of patterns organized by type in banker boxes, some of these contained in Ziploc bags. I keep favorite and often used patterns in this oversized pocket for ease of reach. This was made from a spare leftover patchwork block.

I store books and magazines on shelves.

The “Stash”

Fabric

Fabric storage has been covered before on this blog. I won’t repeat the excellent points made in that post. But, as she said, fabric left in the open collects dust. And in the case of my sunny sewing room, colors can fade. Design your space for utility rather than aesthetic considerations only. For example, I once experimented with a rainbow of sorted stacks of fabric on a shelf. This looked lovely, but I don’t recommend this method! Those stacks were not easy to pull from without making a mess.

So I have settled on storing my fabric in covered boxes. I store quilting cottons by color, and other fabrics according to type. Dress weights are together, and knits are in a box of their own, for example. Here is the most helpful tip I have with regard to fabric storage: for the most part, let the fabric live at the store! No longer do I browse sale tables or buy yards of fabric with no particular project in mind. Quilter cottons are the only exception. But I never buy more than a yard of any fabric except as needed for particular projects.
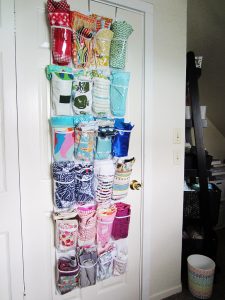
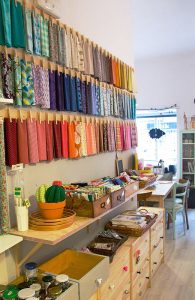
Notions and Other Supplies

Reduce visual clutter & beautify your creative space with a creative shelving cover!

Reduce visual clutter & beautify your creative space with a creative shelving cover!

I do find it helpful to keep a good stash other supplies. I use a chest of drawers and small bins. These sort and store elastics, trims, ribbons, bias bindings, lace, velcro, and buttons. I also keep serger threads and tools sorted in a smaller, plastic drawer unit in reach of that machine. Sewing spools hang on a wall mount rack with a clear dust cover for protection.

I hate having dust land on fabrics and supplies, so I made a cover for one of my shelving units. I have enjoyed having my books, magazines, and other items shielded by this. It is easy to pull the cover back and find needed supplies. And it reduces visual clutter and beautifies my creative space.

Trusty machines, ample workspaces, and easy storage contribute to a well-ordered sewing room. The most important factor in your sewing room, though, is you! Create a space that works and that you love and then go there and make stuff as often as you can!

Beginner's Guide to Bed Runners

Beginner’s Guide to Bed Runners

Mystic Connecticut on a Saturday Afternoon

Good morning from Connecticut.

Good morning from Connecticut.

Good morning from Connecticut;

I am so enjoying cool and sometimes rainy weather in this beautiful forest laden state! The history and rolling scenery and fine Colonial homes makes me think of the coziness of fall as the leaves will change color soon.

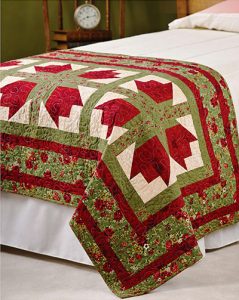
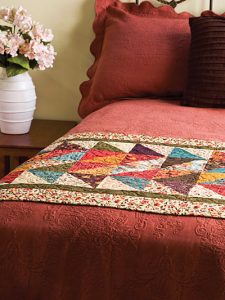
As I think of the weather change, I wanted to share with you a great way to add style and elegance to your bedroom by making a quilt to cover the bottom of your bed. When it’s not cold enough for a blanket, and a smaller cover may take off the chill, a bed runner is a great idea.

When it’s not cold enough for a blanket, and a smaller cover may take off the chill, a bed runner is a great idea.

When it’s not cold enough for a blanket, and a smaller cover may take off the chill, a bed runner is a great idea.

I have noticed a new wave of interest for bed runners has appeared in high end boutique hotels, and staging properties for sale. The look can be casual or classic depending on your style.

They are also good to change the look of the time of year using neutral spreads and decors.

They are also good to change the look of the time of year using neutral spreads and decors.

They are also good to change the look of the time of year using neutral spreads and decors.

HOWEVER, I have always enjoyed picking out fabric to coordinate with my décor, so I prefer to be inspired by personally designed articles. So to start, measure the top of the bed width-wise.

Then add 24 to 26 inches for the drop on the sides. Then measure 18 to 24 inches for the width plus seam allowances. View many options from patterns to discern your favorites so your bed runner is uniquely YOU. Proceed using the piecing method, batting and backing and of course binding to complete the project.

Pre-cuts are great for patchwork projects or take yardage where you make a one piece cover and perhaps make coordinating pillows for a classic look.

Bed runners also add protection against soil or hair from our 4 legged family members that occupy that space at the end of our beds.

Bed runners also add protection against soil or hair from our 4 legged family members that occupy that space at the end of our beds.

Another idea is make a headboard from your bed runner to add comfort and warmth to your tranquil area for rest and relaxation.

The size of a bed runner quilt can be a versatile addition to your décor. It could be used as a wall hanging, a sofa throw or a sophisticated mantle drape. Also for quick and the more casual type, a method of protection from soil or hair from our 4 legged family members that occupy space at the end of the bed.

One final thought is that I can use my Husquvarna Opal 670 machine, as well as the new Japanese Juki machines. A great addition to any quilters workroom is a machine designed for quilting as well as sewing. Quilting machines that have extended tables make quilting so enjoyable.

SEWINGMACHINESPLUS.com features these as well as other machines that will fit your sewing and quilting needs as well as your budget.

Think of it! You can have a beautiful bed runner ready for those chilly days before the leaves fall!

I would love to hear your comments as soon as I get back from the Fabric store. COMMENTS AND QUESTIONS ARE ALWAYS WELCOME on my blog, HAPPY SEWING UNTIL next time!

The quilts pictured above come as kits from Annie’s E-patternsCentral.com where patterns can be purchased and sewn. So many beautiful options to choose.
Let's Make Some Goals!

Let’s Make Some Goals!

Once upon a time, I attempted the 101 goals in 1001 days challenge. Ever heard of it? Basically, you come up with 101 goals (at least, that’s the goal—you can decide whether or not that pun was intended!) and you give yourself 1001 days to finish up said goals. It’s a fairly simple idea, and I was intrigued enough to come up with that many things and start on working toward success for the list.

I think I finished writing the list. But I did not finish accomplishing the goals on that list.

I later tried again. Some of the goals might’ve been new. Some might’ve been on the earlier list. Still, I made a list (I think it was full!) and started over.

Again, I didn’t finish with that whole accomplishing-thing.

Even though I might loooove making lists (Nerd? Probably!), I don’t think I’ll ever make a 101-in-1001 list and see the process through. Why? A couple of things are worth mentioning for reasons.

One is that I don’t know what I’ll want to do in over two years. I might know big things, maybe even *some* small things, but to commit myself to 101 things that’ll fit my plans approximately 2.74 years from now? Doubts are reasonable!

Congratulations graduate!

Congratulations graduate!

Also, while going through the process earlier, I found that my goals changed, and my beginning list didn’t really fit at a certain point. Possible example: I think I was working on my MA in Ancient & Classical History for the beginning of one list, maybe both. I never got that degree, but I did end up getting a fancy MA in English and Creative Writing. The school I graduated from even sent me this little guy for social media potential. Lucky me!

The point? I accomplished something, but not what I named if I specified what I wanted an advanced degree in. Things change, and my lists might not have kept up with those things.

And even if the changing goals wasn’t an issue, who actually has 101 things they want to do at any given moment? I might have to make a few things up or stretch my imagination to come up with that many goals—which could heighten the chance that I won’t want to continue with said goals. A scrambled-after goal isn’t necessarily the strongest one. I mean, if I didn’t *seriously* want to do something in the first place and had to think waaaaay outside of the box to come up with it, why make an extended effort to accomplish it? Am I right?

I bring this up because, while I don’t feel like I’m overly good at committing tiny goals to myself for the so-distant future, I do still have goals. Beyond that detail, I also like the idea of giving myself a cut-off for those goals. And, as I said, I like making lists like this!

So… I’m going to do another one! This time though, instead of having such an extended time period of a 101-list of potentially made-up goals, I’m going to focus on something more foreseeable and sizable. The smaller the time span, the less time there is for goals to change. The smaller the number or goals, the higher priority they have to be before they make the list (and the smaller the chance that I made them up as fillers!). Combined, the scenario could make my list more doable and successful. Maybe. Possibly. Hopefully? 🙂

An early step of this process is clearly to come up with that list. And no, I don’t have a finished list to hand to you. Instead, I’m announcing that this will be a concept that will likely pop up on blog posts in the future. This list and these goals won’t be the focus of all future posts, but they might show up as casual “Hey! New Goal!” mentions. If you see one of those at some point, reading this post will have given you a warning about what’s going on!

In early 2017, I plan to have a specific, finished list of quilting/sewing goals to tend to during the year. One year at a time, maybe a dozen goals at a time, seems more like a potential recipe for success than scrambling for something to list and pretending what I want will stay what I want for a long time. I can focus on what I do want to do, and take it in small enough batches that could lessen the likelihood that my interests will do a one-eighty!

But I do have a goal or six to start off with, so my list has already begun! Want to read the goals so far? Here you go!

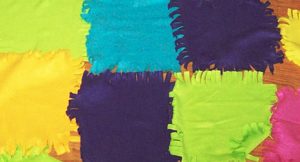
  • Make a rag quilt – Why do I adore these things soooo much? I’ve never even owned one that I specifically remember, but I’m so interested in making my own. I’m thinking of a conversation-heart design for sentimental reasons, but I guess I can work out the ends and outs of specifics at a later time!

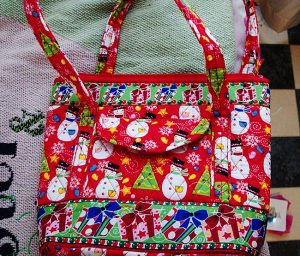
    Behold! The Christmas purse I bought. Isn't it fun?

    Behold! The Christmas purse I bought. Isn’t it fun?

  • Make a Halloween purse – It can be a pretty big holiday person (I already have a Christmas purse I bought!), and I’d love something that I made myself to carry around during the month of October. I don’t know that I’ve ever made any kind of purse, so the whole experience could be new—maybe challenging. Even if I make one this year, I could make a more challenging one next year.
  • Make quilts or blankets for all who know me as an aunt – This goal in itself could be handful, but I think it might be worth the effort. They’re pretty awesome kids, after all!
  • Make a patchwork piece of clothing – Like with the rag quilt, it might be hard to tell why this idea intrigues me like it does. I do like patchwork things though, so why not make a patchwork design I can wear to the store for people to see? Easier to show off that way! 🙂
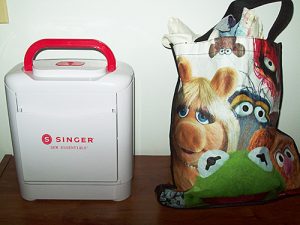
  • Go through all of the free Craftsy classes for quilts and sewing – I’ve already improved my technique because of the video I watched, so browsing the rest of them might be a good idea. Who knows how much I could learn from them, or how much better my sewing/quilting could become because of them? Let’s find out!A pre-assembled sewing kit and a Muppet tote with fabric in it.
  • Improve my sewing tools collection and organization – Not saying this is all I have in the way of tools and organization, but this is a pretty decent percentage: A pre-assembled sewing kit and a Muppet tote with fabric in it. Even when added to the other things I have, I could use an upgrade! Why not tend to that next year, too!

Six goals to start off, and months left to build! Hopefully, the months leading up to 2017 can help me gain ideas through projects and posts.

Any ideas from you guys? If so, post a comment!

Sew Calm

Like many hobbies, sewing can help you relax and put aside the stress of daily life. Depending on the hobby, there can be many reasons for this. For me, sewing is relaxing because it requires intense concentration, which means there’s no room left in my brain for worrying about life stressors. And then there’s the rhythms – they call to something deeper much the way drum beats do in Native American rituals.

Snip Snip Snip

Next time you’re sitting down to cut some fabric really listen.

Next time you’re sitting down to cut some fabric really listen.

Have you ever noticed the sound scissors make when cutting fabric? There’s something almost melodic about it. Try it out next time you’re sitting down to cut some fabric really listen. If you can safely close your eyes for a moment to tune into the sound, do so. The crunch, snip, clip is mesmerizing. I allow it to become like a mantra – if there’s something I’m working through, the rhythm of the scissors can help me hone my focus and energy. Try it – you’ll see.

Whirr Whirr Whirr

I don’t have a lot of experience with modern machines; I’m still using the old Singer my mom taught me on, so I’m not sure if newer machines have the same wonderful whirring sound. When doing a long straight row of stitches and keeping steady pressure on the pedal, that whirr is as rhythmic as train speeding down the tracks. The whirring helps organize my thoughts and creates a space where my only focus is the machine, the fabric, and the whirr. As my problems and stressors take a back seat, they also subconsciously begin to resolve.

As with the snip and whirr sounds, my anxious thoughts fall away and my focus hones in on the task at hand.

Motions

Sewing also has a lot of repetitive, and thus soothing, motions. The body and brain disconnect during these moments and the subconscious takes over. Just as our brains are able to work out problems as we sleep, so too can they work out problems while our conscious brain is disconnected during waking hours.

Pin and Unpin

The motion and concentration needed to properly pin a sewing project are often all consuming. I find this quite soothing. As with the snip and whirr sounds, my anxious thoughts fall away and my focus hones in on the task at hand. When I’m done, the thoughts and anxieties plaguing me don’t seem so all-encompassing.

Joy of Completion

I’m sure you know the feeling. That moment of elation when the hours of snipping, pinning, and sewing come to fruition with the final product. For me, the only thing that tops it is when I’m wearing something I made and someone compliments it, giving me the opportunity to say that I made it. Oh man! Is there anything else like that? I don’t think so.

How about you? What part of sewing speaks to your inner being and helps you relax and release the stressors of daily life?

DIY – Elegant Upscale Apron

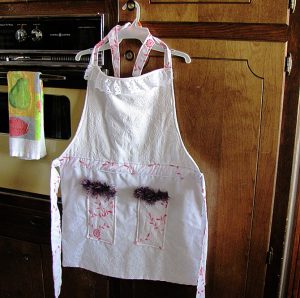
Elegant upscale apron

Elegant upscale apron

A cherished friend gifted me some very beautiful, elegant materials. She purchased them long ago with the intention of making an apron but never got around to it. I thought, “How wonderful, I’ll surprise her by making it for her!” I designed this apron to be elegant and classy while also being functional. This Elegant Upscale Apron really hit the spot. She adores it and I hope you will too!

***ProTip: When making clothes of any type, washing and ironing before sewing are extremely important!! Measurements are based on material already washed. If they aren’t washed before sewing, they may shrink by an inch or more when washed later on, resulting in the clothing being too small to wear.

Level: Beginner
Time to Complete: In A Weekend
Sewn By Machine: 3/8″ straight stitch unless otherwise specified
Sewn By Hand: Purple thread to sew pocket accents

**Tip: Iron cut pieces before sewing and in between each step. This helps in the sewing process as well as setting the stitches to lessen unraveling with age. And the extra bonus-the end results tend to look more professional as a result. 


Materials:

These fabrics are relatively thin. Aprons generally require a thicker material to help resist staining of clothing underneath. I used a piece of thicker off-white fabric as the backing to keep the elegant style while serving as an effective apron as well. The thicker backing also eliminates the need for a middle layer of batting. 

Top:

Measurements for Top – 14″ W<
Measurements for Bottom End – 23″ W
Length at middle – 18″ L

Skirt:

1 – 23″ W x 18″ L – Lace Fabric
1 – 23″ W x 18″ L – Backing

Neck Ties:

2 – 3″ W x  20″ L – Same material as used for Pockets

Waist Ties:

2 – 4″ W x 23″ L -Same material as used for Pockets

Neck Accent:

– 13″ W

Waist Accent:

1 – 23″ W x 3″ L Accent-Same material as used for Pockets

Pockets:

25″ W x 14″ L – Same material as used for Waist Accent
2 – 5″ W x 14″ L – Backing

Pocket Accents:

2 – 5″ W – Snazzy Boa

Purple Thread:

To sew pocket accents (boa) on by hand
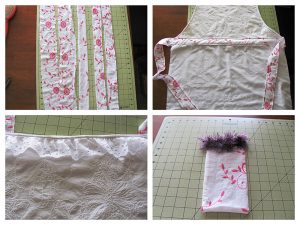
Cut fabric pieces.

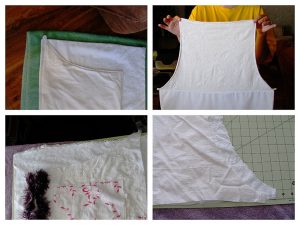
Cut fabric pieces.

**Tip: When I’m  ready to cut my fabric, I place the line to be cut at the end of my cutting board. I use the end of the board to guide the scissors. This results in a straighter, cleaner cut.

Instructions:

I recommend using fabric scissors instead of a roller when cutting these materials. I found the embroidery and embellishments in these materials are a little too much for the roller to cut through with one or even two strokes.

These are my favorite fabric scissors. Great slicing with minimal fraying.

  1. Wash and iron all material except pocket accents unless you use a washable material for pocket accents.
  2. Cut out all material using the above measurements.
    • I cut the boa accent pieces a couple of inches longer than needed, about 7 in. in case the hand sewing with the clear thread makes it a little shorter. When done, I cut off the extra.
    • After I measured the top section of the apron, I used a pencil to trace the curve from top to bottom. Then I folded the top in half and cut the curve on both sides so they would be symmetrical.
  3. Skirt
    • Pin and sew with the lacy fabric and backing right sides together, leaving a couple inches on one end to pull the fabric right side out after sewing. Cut diagonally outside the corners to help create more well-shaped corners after turning right side out. Turn right side out and iron.
  4. Top
    • Pin and sew fabric and backing for top, right sides together. Leave an opening to pull the top right side out. Trim corners. Turn right side out.
    • Top stitch around the top part of the apron, making sure to stitch closed the opening used to pull the fabric through.

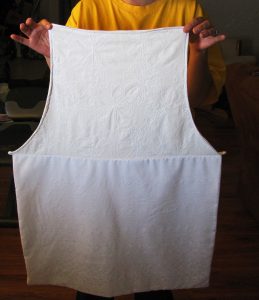
      Top and skirt sewn into one piece.

      Top and skirt sewn into one piece.

  5. Sew the top and skirt together, right sides together. Iron with the seam pointed down.
  6. Pockets
    • Pin and sew with 1/8″ seam the fabric and backing for the two pockets right sides in. Leave an opening in the top of the pockets. Trim corners, turn right side out and iron.
    • Top stitch with 1/8″ seam the top of the pockets only, making sure to sew the opening closed.
  7. Waist Accent Piece
    • Fold accent piece in half, right sides together. Iron to make crease for accurate sewing. Sew with 1/8″ seam the length or the strip, leaving one end open. Trim corners and turn right side out. Iron to create flat strip. Top stitch with 1/8 in. seam the open end closed.
      **DO NOT top stitch around strip yet. That will be done when sewing the accent piece to the apron.
  8. Waist and Neck Ties
    • Fold all 4 waist and neck straps in half, right sides together. Iron to make crease to help with accurate sewing.
    • Sew 1/8″ the length of the strip, leaving one end open. Trim corners and turn right side out. Iron to create flat straps.
    • Top stitch 3/8″ around each strap.
  9. Time to put all the pieces together. Yay!!
    • Place the accent strip on top of the apron over the seam where top and bottom pieces were joined.
    • Place one of the waist ties at the same spot but on the underside of the apron.
    • Sew the accent strip and waist tie with the X box often found to be used for ties since it creates a stronger hold.
    • Pin accent strip over the seam of the apron, making sure it is straight and level. Iron.
    • Top stitch the accent piece to the apron.
    • Sew the other waist tie on back of apron. Top stitch accent strip with waist tie behind, the same as with the other, using the X box to secure the waist tie.

      Putting it all together.

      Putting it all together.

    • Sew neck ties onto the top corners of the apron using the same X box.
  10. Hand sew boa pieces onto pockets. If you have a material more suited for machine, sew them on.
    • I couldn’t find clear thread anywhere, which is what I prefer to use with embellishments like these. So instead I used a purple thread closely matching the color of the boa.
  11. Sew both pockets on the apron using 1/8″ seam.

Pre-heat the oven. Put on your new Elegant Upscale Apron. Time to bake!

Stacey's Stitches

Stacey’s Stitches 

Hi all! I’m Stacey Martinez 🙂

I love to design imaginative custom items for my active, crazy family. Bright

colors and beautiful fabrics sing “Stacey, Stitch Me!”

Let your imagination inspire you to breathe personality into every stitch!

Please feel free to post comments, questions, and pictures of your own Elegant Upscale Aprons. I can’t wait to see your creations!

The Sewing Needle Controversy

I have a freebie calendar hanging on my wall. Well, actually, I got the calendar in the mail from a business that I’ve done quiiiiiiiiiiiiiiiiiiiiite a bit of shopping through, so I guess “freebie” might be a stretch. Maybe “reward” would work better? Though if they wanted to reward me, cheesecake might’ve been the better option…

In any event, the calendar has random holidays listed, like July’s “Thread the Needle Day.” Personally, I’m not sure I ever knew that there was such a thing as a day set aside for something as small as threading a needle, but hey! If the calendar says it, let’s go with it!

Threading the needle is an action related to a topic that’s somewhat un-nice for me. That un-niceness isn’t because I can’t thread a needle, but the very idea of needles can be a bit daunting to me—and not just because I may or may not have a tendency to accidentally stab myself with needles and straight pins. Blood, sweat, and tears might be a bit more literal for me in that regard than for other people!

The issue I’m bringing into the conversation today is the fact that there are SO MANY needles, and I end up sticking to a preferred one. I couldn’t even tell you what size my current sewing needle is. It was just selected by my preferred method of sewing needle selection, which is basically something like this:

“Which one is gonna be the easiest to get the thread through? Maybe this one? Okay, that’s my needle!”

Effective, no? Well, the process hasn’t left me in too dire straights as of yet, but I’m inclined to believe that there’s supposed to be more to choosing your needle than that one tiny factor. I suppose though that I’m a person of habit, and I use needles and thread without really considering the other factors that should potentially go into selecting those kinds of elements.

I’m a rebel sewer like that, I guess? Or maybe the reason is something a lot less shades-and-leather-jacket sounding. Maybe I just don’t know those other factors, and I’m too lazy to figure them out.

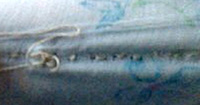
Large holes in used fabric.

Large holes in used fabric.

Which is bad, because while the flaw hasn’t left me in too dire straights, as I said earlier, it is the possible culprit as to why some of the thin fabric on my current project has visible holes that seem larger than they should be where the needle and thread went through. That thin fabric, by the way, also happens to be used since I’m making this quilt out of old clothes. Especially for a project as tedious as this one, maybe I should’ve been more careful about how I chose my sewing needle. The material is fragile from use, and having fabric damaged in the process of making a quilt or blanket before it ever becomes that quilt or blanket is disappointing.

Look how well some of my corners are turning out this time!

Look how well some of my corners are turning out this time!

On a side note though, look how well some of my corners are turning out this time! The change is directly connected to that online class I shared on my last post, so you might want to check it out (Kesser, n.d.)! You live and learn, I suppose, and what I’ve learned since my last blanket/quilt project has helped me better put together this one. Maybe that I-need-to-be-more-careful-about-needles thing can help on me the next project in like manner. Then, perhaps someday down the road, I can have a quilt or a blanket that doesn’t have such easily avoided mistakes! Maybe it’s one lesson at a time, one realized mistake at a time 🙂

SEW-lutions Guidelines: Your Guide to Successful Sewing

SEW-lutions Guidelines: Your Guide to Successful Sewing

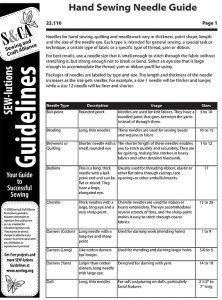
Luckily though, like with learning about my sewing machine without the printed instructions, there is assistance online to help me with this needle selection problem. One source is this PDF file that takes a hand-sewer through certain kinds of needles that could be used for projects.

Another idea would be to visit a sewing shop, the really nice kind with people who are willing to help and are capable of helping customers with these sorts of issues—instead of the one that I currently use (that will remain nameless because I’m thoughtful like that) where I might do well to find someone to cut some fabric for me. I’ve actually heard about a local shop that I could try, and if I do, I’ll try to remember to take mental notes—with exquisite mental penmanship—for a later post about my first-ever, non-department-store, non-online, sewing-material-and-tools-buying experience!

All in all though… Thread the Needle Day? Maybe I should celebrate Learn Your Needle Day first even if I have to pick a random date and assign it that name myself! If anyone has any tips for this process, be sure to leave them in the comments! I—and maybe other readers—would appreciate the input!

I guess a moral of this post’s story could be that not everyone knows everything about a subject, and sometimes a bit of research could go a long way in helping to make our projects the best that they can be. Like I might have said about my sewing machine on an earlier post, if I don’t know my tools for the craft well enough to accurately use them, I’m putting myself at a disadvantage. I can’t apply the most effective techniques, so I can’t expect the most professional results. And it takes *me* to do my homework to learn those techniques. So, dear self, do your homework on sewing needles! Then next Thread the Needle day, you could have a party hat and streamers. And that piece of cheesecake the store didn’t reward you with.

What about you guys? Do you have a particular area in sewing or quilting that just seems daunting to you?

Reference:

Kesser, G. (n.d.) “Piece, Patch, Quilt: Basic Quiltmaking Skills.” Craftsy.com. Retrieved from www.craftsy.com/project/course/piece-patch-quilt-quiltmaking-skills/369

Finding the Fabrics

Finding the Fabrics

Sometimes, little decisions can make big impacts. Details that are minute and all but brushed aside as secondary could really have an effect on a life. Or in this case, a project! I’ve said before on this very blog that quilting is not baking, and it’s true! While I can guesstimate with my baking ingredients, specifics can be a serious deal when partaking in a sewing-related hobby. I’ve already covered that general topic, but for this blog post, I’d like to funnel that idea to one particular concept. That detail is picking out your fabrics for a project that requires more than one design of material.

In the world of sewing, matching isn’t the goal. Complementing is.

Now, I’m not saying that people don’t take this consideration seriously. I’m saying that in a world where you can find all kinds of free patterns online for sewing projects, this step is worth considering just as much as finding that right pattern, and that maybe there’s less help in regards to learning how to select a fabric set than—for instance— learning how to operate your sewing machine. After all, your fabric might not come with instructions or a series of recommendations for other fabrics to blend together into one project!

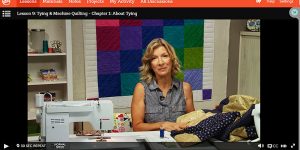
Gail Kesser helps you pick our your fabrics in her Craftsy series.

Gail Kesser helps you pick our your fabrics in her Craftsy series.

Luckily though, you don’t have to be completely alone in the matter! There are certain options for help—like asking friends, particularly ones who are involved with sewing. Likewise, you can find assistance online. Some of the best advice I’ve gotten in regards to picking out quilting fabrics came from a free class on Craftsy.com. The class was called “Piece, Patch, Quilt: Basic Quiltmaking Skills,” and in it, Gail Kesser—the instructor—has an entire section based on fabric selections called “Choosing Your Fabrics.”

In that lesson, Kesser advises the virtual student to choose a “mommy fabric” (Kesser, n.d., Lesson #3), then “walk it around the store” (Kesser, n.d., Lesson #3) to find fabrics that work well with the initial choice. Honestly, I don’t know that there’s better advice when it comes to putting together an entire quilt—or any other project with multiple types of fabric—but I’d like to expand on the overall idea just a bit. Maybe someone reading this post can look at the mentioned video for help, and possibly get a pointer or two from me as well 🙂

So, here are some thoughts to chew on!

Picking out a series of fabrics to use in one cohesive work isn’t about making sure they match in the traditional sense. The situation isn’t like you’re planning an outfit to wear. When deciding on your clothes for the day, you might consider a list of details to make sure everything works together because the result is supposed to match. In the world of sewing, matching isn’t the goal. Complementing is. That idea of complementing can come in the form of sticking with similar colors, or even embracing an overall theme your pieces all agree with, so to speak. As long as it’s a unified idea or connected imagery throughout, you’re good to go!

The quilting-for-kids project my niece got for her birthday.

The quilting-for-kids project my niece got for her birthday.

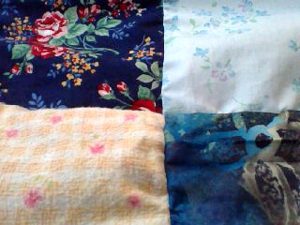
Don’t believe me? Even the people who created this quilting-for-kids project my niece got for her birthday knew that sometimes it isn’t about matching. This design is about complementing, or holding on to one specific theme—like the collection of different colors that my niece can put together!

This concept might seem unimportant, but it isn’t since the distinction is so clear. Think of it this way. If you were picking out an outfit for a typical day, you might not go with a floral pattern top and a polka dot bottom, even if both of them are pink. Why? Because while pink might match pink, the designs don’t match. That disconnect isn’t necessarily okay when putting together an outfit, but when sewing? All you need to do is check out a set of pre-cut shapes to find evidence that the same guidelines don’t apply to the hobby of sewing. All in all, it doesn’t matter if your fabrics match like your outfit would. They can vary in design, and even color, so long as they complement one another in some way.

And that aspect of the situation, my friends, leaves a whole lot of room for exploration and gives you plenty of room to make a design that’s all your own. To be truthful, that detail might be one of my favorite things about quilting and sewing. Whatever I come up with, it’s my design, I made it myself, and no one else likely has one like it. That feeling… That’s an okay thing!

This image is based off of Dr. Seuss’s Fox in Socks, but I didn’t stop with socks! This fox is my “(Dressed Up) Fox in Socks” that was made by taking a general idea, and putting a hat and red attire on him.

This image is based off of Dr. Seuss’s Fox in Socks, but I didn’t stop with socks! This fox is my “(Dressed Up) Fox in Socks” that was made by taking a general idea, and putting a hat and red attire on him.

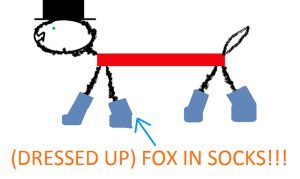
Anyway, a sewer or a quilter should really take charge in this detail, and maybe push it to unique, individual places. As an example, consider the work of art I created on the Paint program that came with my computer. This image is based off of Dr. Seuss’s Fox in Socks, but I didn’t stop with socks! This fox is my “(Dressed Up) Fox in Socks” that was made by taking a general idea, and putting a hat and red attire on him. It started off simple—just socks from the story—and imagination took it further. Disclaimer: I’m not saying this Paint project is actually impressive—just that it shows how a theme can grow with some thought and creativity!

That’s the kind of pushing I’m referring to when picking out fabrics. Consider what you’re going for, find that beginning fabric, and think outside of the box enough to choose those complementary fabrics to create a breathtaking piece of art. Don’t stay with the easy options all the time! Push yourself, because sometimes the unexpected and the outside-of-the-box things can be a whole lot of fun!

This post might be more centered around quilting, but it could be applied to different areas of sewing (or crocheting, or knitting…) that involve material. A purse that’s going to have more than one fabric, for example, could be planned out with the same guidelines. Any time you’re blending fabrics together, think it through to come up with a cohesive, beautiful work. Complement those designs and colors, or stick to a theme from start to finish. Either way, your work would come out cohesive with your final product being a one-of-a-kind gem that’s beautiful and looks just as put together as a well-planned outfit—just with different rules!

Reference:
Kesser, G. (n.d.) “Piece, Patch, Quilt: Basic Quiltmaking Skills.” Craftsy.com. Retrieved from www.craftsy.com/project/course/piece-patch-quilt-quiltmaking-skills/369
How to Store Your Fabric Stash

How to Store Your Fabric Stash

This is post one of a three part series on storing your fabric. Post two (how to store your works in progress) and post three (how to store your fabric scraps) are coming soon.

This is post one of a three part series on storing your fabric. Post two (how to store your works in progress) and post three (how to store your fabric scraps) are coming soon.

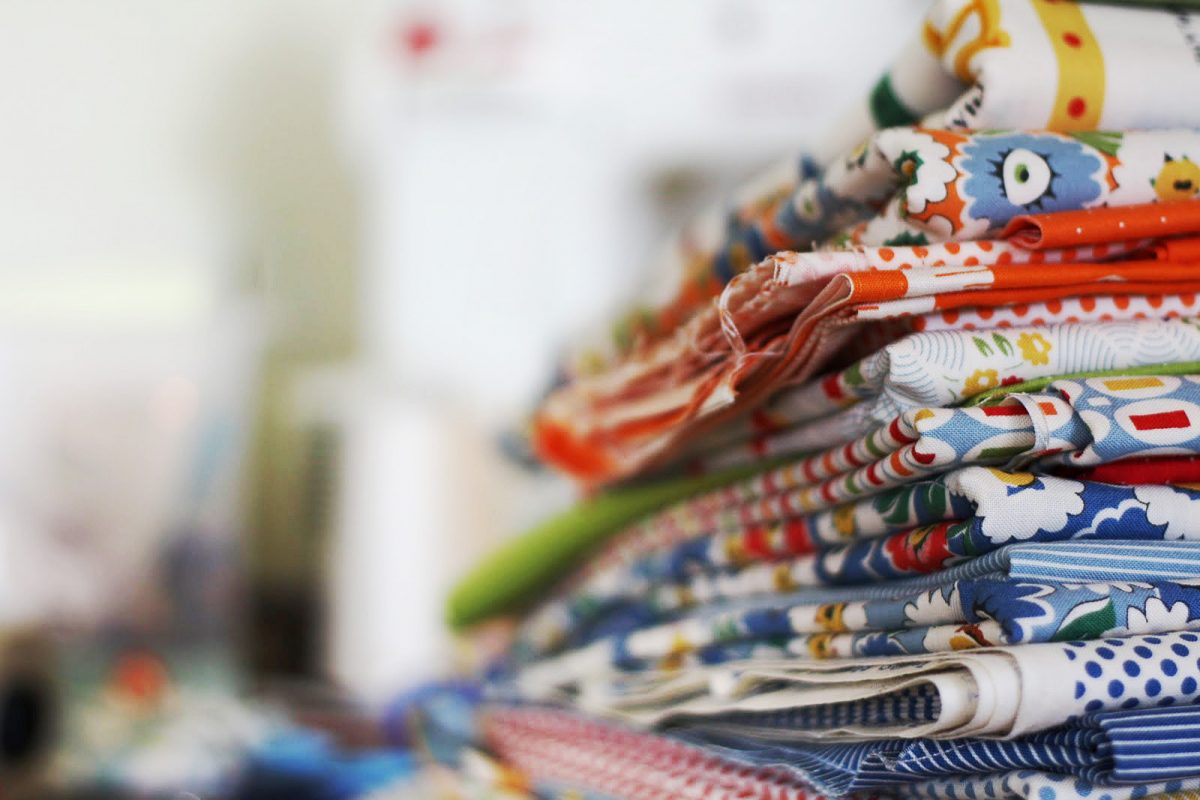
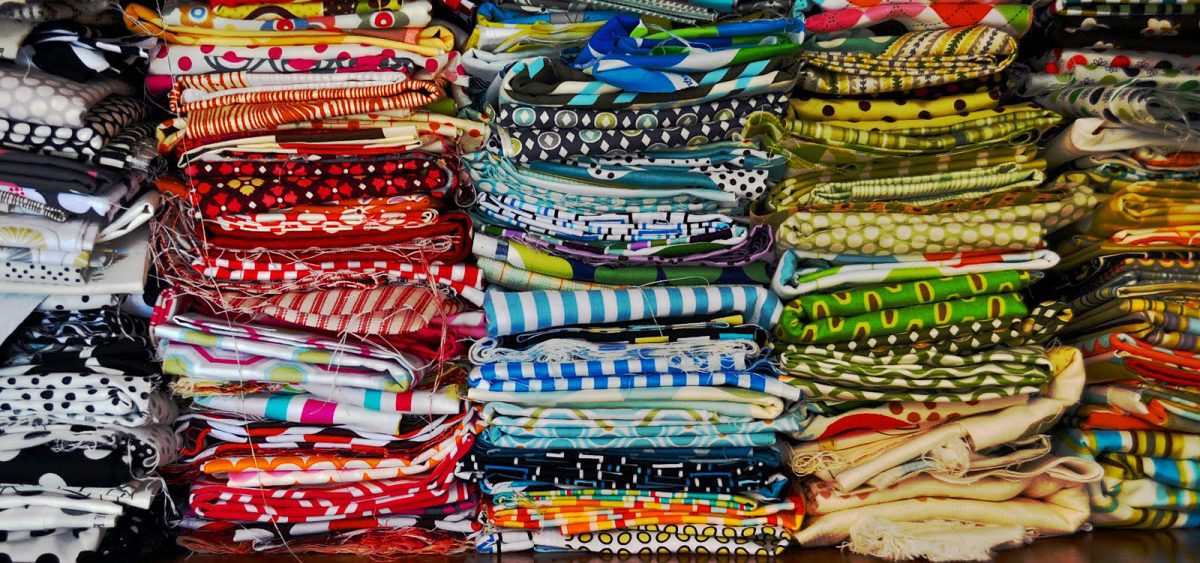
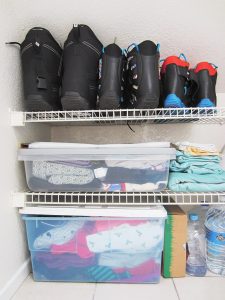
I keep my deep-storage and heirloom fabrics stored in a bin. Fabrics I'll use soon are simply folded neatly awaiting their use.

I keep my deep-storage and heirloom fabrics stored in a bin. Fabrics I’ll use soon are simply folded neatly awaiting their use.

How do you store your fabric stash? I have seen some of the most creative ways while perusing through Pinterest, everything from tucked in the drawers of a dresser, folded neatly on the top of a bunk bed, or deftly displayed in KITCHEN, yes kitchen, cabinets. Who needs to eat when you have beautiful fabric to sustain your soul anyway?

No matter which way you decide to organize your fabric, you will need to keep several things in mind.

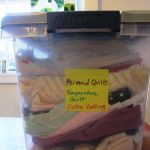
My works in progress are kept in a tall bin and labeled so I know where to easily find them.

My works in progress are kept in a tall bin and labeled so I know where to easily find them.

Store Covered

  1. If you decide to store your fabric in bins, consider using plastic instead of paper, or file boxes, or baskets. Keeping your fabric covered will better protect it but consider using a plastic container with tiny holes (or creating tiny holes) to allow the fabric to breathe and to prevent synthetics from yellowing.
  2. Tape a cedar block inside the container to help prevent moths and other insects from taking up residence.
  3. Store away from sunlight to prevent fabric from fading.

    My lovely stash. I do take the time to dust off the fabric about twice a month.

    My lovely stash. I do take the time to dust off the fabric about twice a month.

Display It

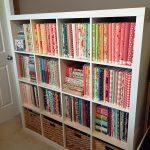
  1. I love the quick access that openly displayed fabric offers. However make sure to keep fabric away from direct sunlight.
  2. Dust! Your fabric will accumulate dust if displayed or left in the open. Keep it tidy with a frequent dusting or airing out.
  3. Keep it clean – little children love to touch and play with fabric and even some adults can’t help but reach up and touch gorgeous fabric. Be aware of where you display your fabric and how frequently it may be handled by people whose fingers could leave it soiled.
Fabric on display via MuyMolon.com.

Fabric on display via MuyMolon.com.

Additional Methods

  1. Color coded – perhaps the most method of organizing is a stash is by color. This is how I do it!
  2. By Designer or Project – some people also keep their stashes stored by Designer or even projects in progress.
  3. By Size – big, medium, little, tiny. Sometimes storing or displaying by size is also helpful.

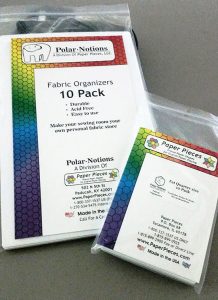
    Fabric organized and wrapped around Polar Notion's organizers.

    Fabric organized and wrapped around Polar Notion’s organizers.

Standout Idea: Acid-Free Fabric Organizers

I just discovered these puppies and as soon as we move to our new home and I start working on my sewing room, I plan on ordering some to start wrapping and displaying my stash. Unlike fabric-store pieces of cardboard, these organizers are sturdy and acid-free. Storing fabric wrapped around cardboard will eventually discolor your fabric since cardboard is not acid-free.

The sad result of what happens when you use regular cardboard to organize your fabric.

The sad result of what happens when you use regular cardboard to organize your fabric.

I’ve found two brands that offer this acid-free option. Polar Notion’s boards are made from plastic and The Fabric Organizer’s boards are made from an acid-free corrugated cardboard. Both look fantastic.

Think about which product would suit your needs and your stash better.

Think about which product would suit your needs and your stash better.

The larger Polar Notion holds up to 15 yards of wrapped fabric and the smaller one is perfect for fat quarters and smaller pieces of fabric.  The Fabric Organizer’s large size holds up to 10 yards. It is also cheaper than Polar Notions. Think about which product would suit your needs and your stash better.

Do you have a favorite method of storing your fabric? Let us know how you do it in the comments below.

Charlotte Kaufman is a writer and sewist in San Diego, California. She specializes in marine and home interiors and continues to fall more and more in love with quilting. You can follow her at charlottekaufman.com.