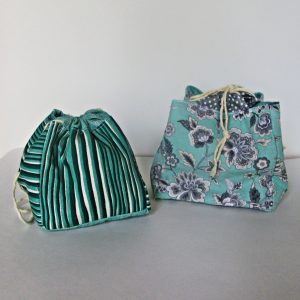
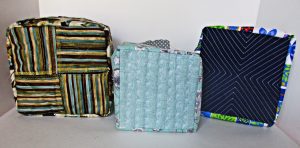
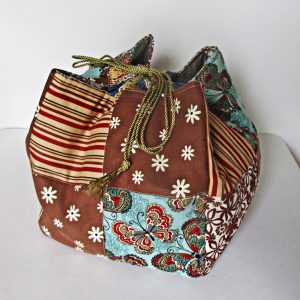
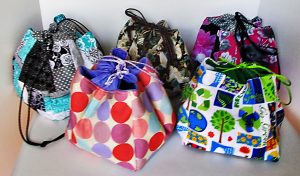
Sew Blog Inspiration

Final Sew Blog Inspiration

The Sew Blog project at Sewing Machines Plus ends today!  I have really enjoyed sharing projects, ideas, and inspiration with you here, but now it is time for us to move on to new things. And so we will no longer post updates on this sew blog.
If you have been a loyal or an occasional reader here, thank you. If you are just now finding us, please read on! We’ve worked hard to pack this sew blog full of both easy and challenging projects, information, inspiration, and more. If you have a sewing question, we hope you will find the answer here.

Keep in touch

Follow Sewing Machines Plus on Facebook and on YouTube for info on what’s new at SMP.
For more from me, please join my email list at Sewing and Growing. There will be new posts there and I will also be releasing several bag and patchwork skirt patterns soon. These patterns will be available on Craftsy and some will be free.  Sign up for the newsletter at my sew blog to be notified as soon as these patterns are released, and for more sewing info and inspiration from me. I’ll look forward to seeing you there!
You can also follow me on Twitter and Pinterest.

margaret1

Printable patterns for my new projects will be at Craftsy soon

Final sew blog inspiration

I’d like to share a couple more fun and helpful ideas with you here before we go. These ideas are not my own, but I’ve been having a lot of fun playing with them lately, and one has been an absolute revolution in scrap management for me; I hope you’ll love these ideas as much as I do.

A scrap-busting revolution

Scrap management is always an issue for sewists and quilters. How do you manage yours?
I have to admit that I have tried many different ways, but mostly I end up stuffing scraps in boxes, bins,  baskets, or bags, and then dumping these out to pick through when I want to use them. This is messy for sure!
Recently I came across this post on Victoria Findlay Wolfe’s sew blog and tried her idea for “made fabric.” I fell in love with the idea, and now, instead of gathering my scraps from the floor and stuffing them somewhere, I sew them together at the end of the day and make patchwork fabric.

Sew Blog Inspiration

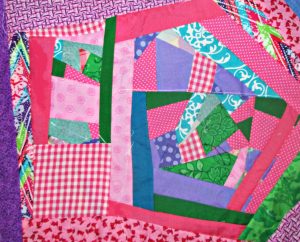
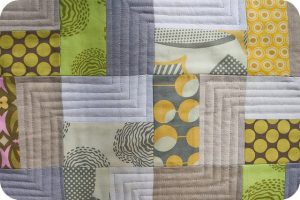
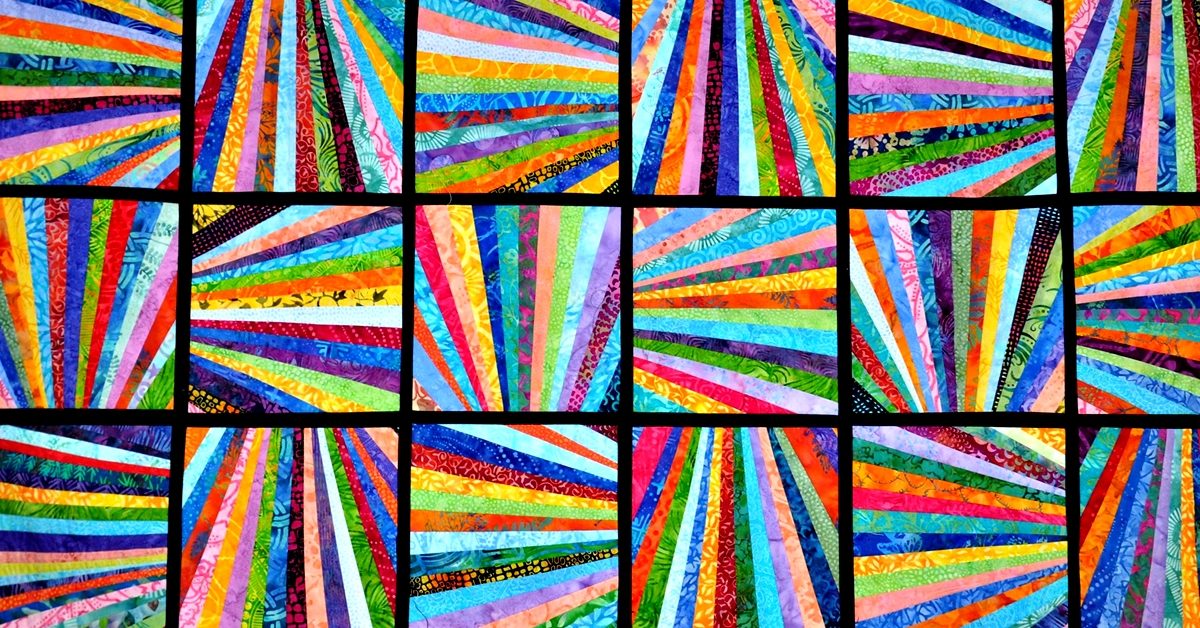
Start with your tiniest scraps and join them every which way.

I’ve been asked how this is different from crazy patchwork. Crazy patchwork uses a foundation fabric, and scraps are sewn down on top of this foundation. So, while crazy patch is a good way to use scraps, it is not “made fabric.” In this method of scrap busting, you sew the scraps to each other to make fabric. You don’t use any foundation behind them.

15 Minutes of Play

Victoria wrote a book, 15 Minutes of Play, which gives lots more inspiration for using her made fabric idea. This book has been on my wish list for a while now, but her sew blog also provides plenty of ways to work with made fabric. I find that it’s so much fun to make that I usually extend this playtime for more than just 15 minutes and make a few blocks, but you can complete one in just a quarter of an hour.

Sew Blog Inspiration

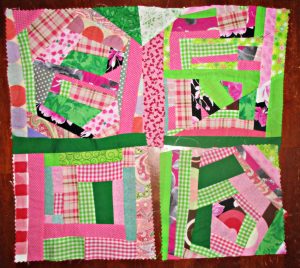
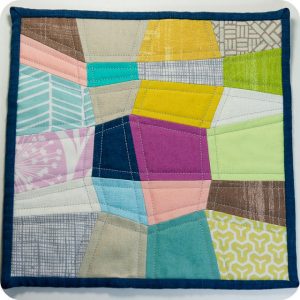
Finish one block in 15 minutes or work on 4 for an hour. I’ll use my square ruler to trim these.

I have a few ideas of my own for what to do with made fabric, too, and I’ll share some of them with you now:
Besides cutting it into blocks and making quilts, I plan to make different sizes of lined bags (with drawstrings) from them, to use as quilt and gift bags. I already made a lotus bag from a twelve-inch square—I’m sorry to say that I gave it away without snapping a picture. I might use several squares and make this kind of kinchaku bag.
I’ll also make a journal cover from some of my made fabric. I might even use the tiniest scraps to make small made fabric circles to cover Mason jar lids when I make bath salts or other gifts to give in a jar. And I think that a made fabric patchwork bear or bunny would be a ton of fun to create.
I bet you will come up with lots of ideas, too; this is such a fun thing to do that, like me, you might like to spend even more than 15 minutes each day playing with patchwork and scraps.

Scatterbrain quilts

You can incorporate both made fabric and leftover or UFO blocks in the fun quilts that Felice Regina calls scatterbrains. She says that she dislikes making the same block over and over, so she combines different blocks to make these gorgeous but informal sampler quilts. Check out Felice’s inspirational Scatterbrain quilts on her blog.
Whether you have a few random or leftover blocks taking up space in your sewing drawer, or a few blocks that you’d love to try without committing to making a whole quilt of them, you might like to make one of these fun quilts, too. I think all quilters will love to make at least one of these. I’ve just gotten started on my first one; if you’ll like to see photos of this when it’s complete, visit me at Sewing and Growing.

That’s all folks!

Thanks for reading this blog. Please follow us elsewhere for more info and inspiration, and shop SewingMachinesPlus.com for all your sewing machine and supply needs. Happy sewing!

Authentic Japanese Boro, Boro Mending and Boro-Inspired Patchwork

Authentic Japanese Boro, Boro Mending and Boro-Inspired Patchwork

I have recently been fascinated with the historic Japanese textiles known as boro.

Authentic Japanese Boro, Boro Mending, and Boro-Inspired Patchwork

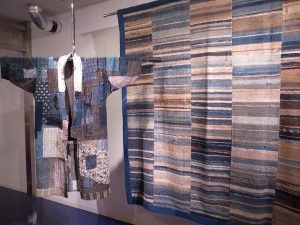
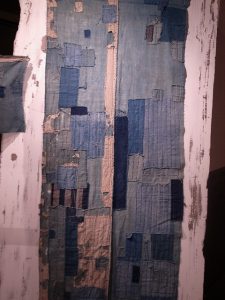
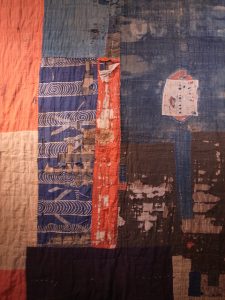
Boro exhibit at the Amuse Museum in Tokyo

Authentic Japanese boro

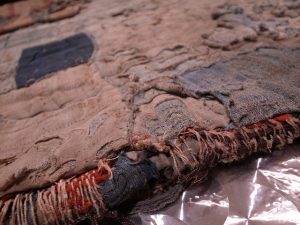
Boro means, literally, “tatters.” These were made by repurposing carefully saved garment pieces and other handspun and indigo-dyed fabrics. They were sewn together as a patchwork built up from many layers providing extra warmth.

Authentic Japanese Boro, Boro Mending,and Boro-Inspired Patchwork

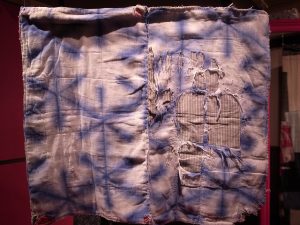
The example below was dyed using a simple shibori technique. I showed several ways to do shibori dying here recently.

Authentic Japanese Boro, Boro Mending,and Boro-Inspired Patchwork

If this example were still in use, it would have been patched with another fabric over the tattered right middle section.

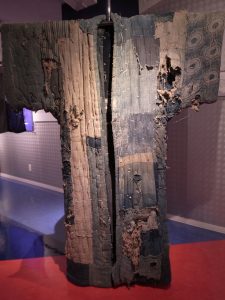
The Japanese used these unique textiles for utilitarian items such as futon covers, field clothing, sheets, and more. Including the interesting relics known as donja or yogi. These curious boromono were quilts constructed in a kimono shape and worn by parents and children together while sleeping.

Authentic Japanese Boro, Boro Mending,and Boro-Inspired Patchwork


Makers used careful patching and sometimes intricate stitching to craft these textiles, mending the same item many times over many generations.

Boro origins

This accidental art form was born of necessity in Northern Japan. Peasants started making them during the Edo (1603-1868) period. Japan was closed to trade and under sumptuary laws at this time. These laws restricted clothing choices for the lower classes and forbade silk, bright colors, and large patterns.

Authentic Japanese Boro, Boro Mending,and Boro-Inspired Patchwork

In addition, as explained by Kat Siddle in the August 2016 issue of Seamwork Magazine:

“Industrialized fabric production didn’t reach Japan until the 1870s. Cotton, linen and hemp were spun, woven, and dyed by hand. Cloth was a precious resource that represented huge amounts of labor, and even scraps had value. Even after mechanized mills were built near Osaka, the fabric produced there was too expensive for many people to afford, and they continued to weave their own yardage for clothing and household items. Cotton was particularly scarce in northern Japan, where it was too cold for it to grow.”

So peasants pieced and patched their indigo-dyed fabrics and saved every usable scrap of cotton for reuse in these boro items and garments.

Generations of history

Since these pieces include fabrics saved and repaired over many generations, each piece is rich with family history and memories. The homespun and indigo-dyed patchwork acquired a specific patina with age and antique boro cloths can be awe-inspiring when seen up close and in person today.

Authentic Japanese Boro, Boro Mending, and Boro-Inspired Patchwork

This special and breathtaking beauty and historical significance takes several generations and a great many years to develop. So you could say that it is not possible to create new, authentic boro today- at least, not without also waiting about a hundred years!

Sashiko stitching

Authentic Japanese Boro, Boro Mending,and Boro-Inspired Patchwork

photo courtesy Sake Puppets

Japanese ladies began carefully piecing homespun and indigo-dyed natural fabrics together into boro during the Edo period using the distinctive and decorative stitches that later became known as sashiko. This art is still practiced today.

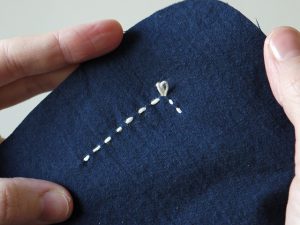
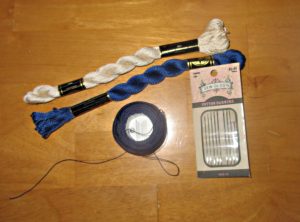
To work sashiko, you need a long needle and thick thread. You can order sashiko needles and sashiko thread from Japan, but if you don’t want to wait for long-distance shipping, you can make do with a long cotton darning needle.

Authentic Japanese Boro, Boro Mending, and Boro-Inspired Patchwork

To substitute for sashiko thread, try perle cotton, which DMC makes in several thicknesses, both on spools and in skeins. Or you can just use regular embroidery floss.

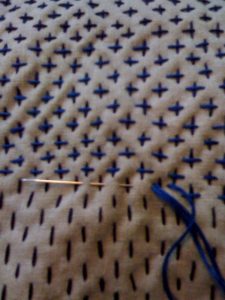
Sashiko stitching can be as simple as straight and long running stitches, or it can be challenging and complex. It can be sparse or dense. There are many traditional patterns to choose from. But sashiko allows individual creativity, and you can invent your own sashiko patterns, too. Here’s a tutorial from Sake Puppets to help you.

Authentic Japanese Boro, Boro Mending,and Boro-Inspired Patchwork

Simple crossed sashiko stitches, photo courtesy GinaPina

Authentic Japanese Boro, Boro Mending, and Boro-Inspired Patchwork

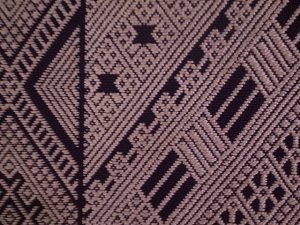
This antique piece at the Amuse Museum in Tokyo is a wonderfully dense and detailed example of sashiko stitching.

Boro mending

You can borrow from boro and use this style of mending today. Boro-inspired mending uses the same techniques and shares the same sentiment of mottainai, or “too good to waste.”

Authentic Japanese Boro, Boro Mending,and Boro-Inspired Patchwork

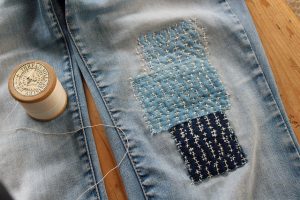
Boro mended jeans and photo by Heather, via Flickr

Boro jeans mending is currently popular right now, thanks in part to Ralph Lauren and other fashion designers who have featured several boro-inspired denim collections within the last decade. So if you have any torn jeans, you can use boro techniques to mend them into something more stylish. Here’s a nice tutorial that will help you to do this.

Feel free to feature your boro patches on either the inside or outside of your jeans; they look interesting and stylish done either way. Also, don’t limit yourself to jeans; you can use boro mending to repair canvas shoes, a bag, jacket, hat, or any other item of clothing you choose.

Authentic Japanese Boro, Boro Mending, and Boro-Inspired Patchwork

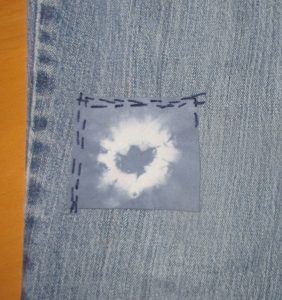
It’s not quite as easy as you’d think it would be. I’m not happy with these stitches at all and will rip them out and try again!

Boro-inspired patchwork

Yoshiko Wada, who popularized shibori in America, wrote an entire book about boro. I think that she would disagree with the notion that you can’t make new boro today.

She says that she uses the term “to define a new aesthetic and to bring new meaning to an alternative creative process, e.g., darning = healing, meditative action = marking time, reuse/repair = recording history. “Boro” represents the transformation of inconsequential material to something precious and valuable… This type of imperfect beauty possesses a power that resonates with people almost like an emotional barometer. It points to an alternative value of “beauty” slowly coming to surface in our social consciousness.”

In any case, you can certainly make boro-inspired patchwork now.

Authentic Japanese Boro, Boro Mending,and Boro-Inspired Patchwork

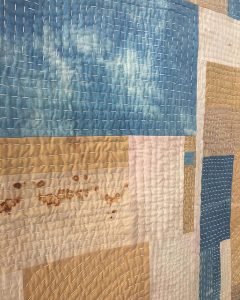
This modern day version of a boro quilt, photographed by GinaPina and made by Vessel Quilts, achieves an antiqued and authentic look through the use of rust and indigo dyes.

Choosing your palette

In making your own, you can choose to limit yourself to the authentic original palette of indigo-dyed natural fabrics.

Authentic Japanese Boro, Boro Mending, and Boro-Inspired Patchwork

Or you can add in more neutrals, browns, blacks, or even a few reds for an extra pop of color.

Authentic Japanese Boro, Boro Mending, and Boro-Inspired Patchwork

Machine sashiko

If hand stitching isn’t your thing, you can construct boro-inspired patchwork the same way you would make strip patchwork. Then you can embellish with machine stitching over these seams, using a simple zigzag or a more decorative stitch. You could even get amazing and more authentic looking results if you invest in a Baby Lock Sashiko sewing machine.

What will you make?

You could make a boro-inspired quilt, a pillow or cushion, or a small or large boro bag.

Authentic Japanese Boro, Boro Mending,and Boro-Inspired Patchwork

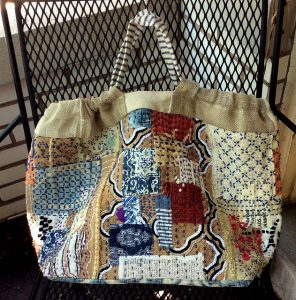
Boro bag with sashiko stitching by Jacque Davis

Authentic Japanese Boro, Boro Mending, and Boro-Inspired Patchwork

You could echo boro’s traditional uses by making a futon cover or coat. Or construct part of or an entire garment from your modern boro patchwork. Here’s my boro board on Pinterest, too, in case you’d like more info, inspiration, and ideas than I could fit into this post.

Authentic Japanese Boro, Boro Mending, and Boro-Inspired Patchwork

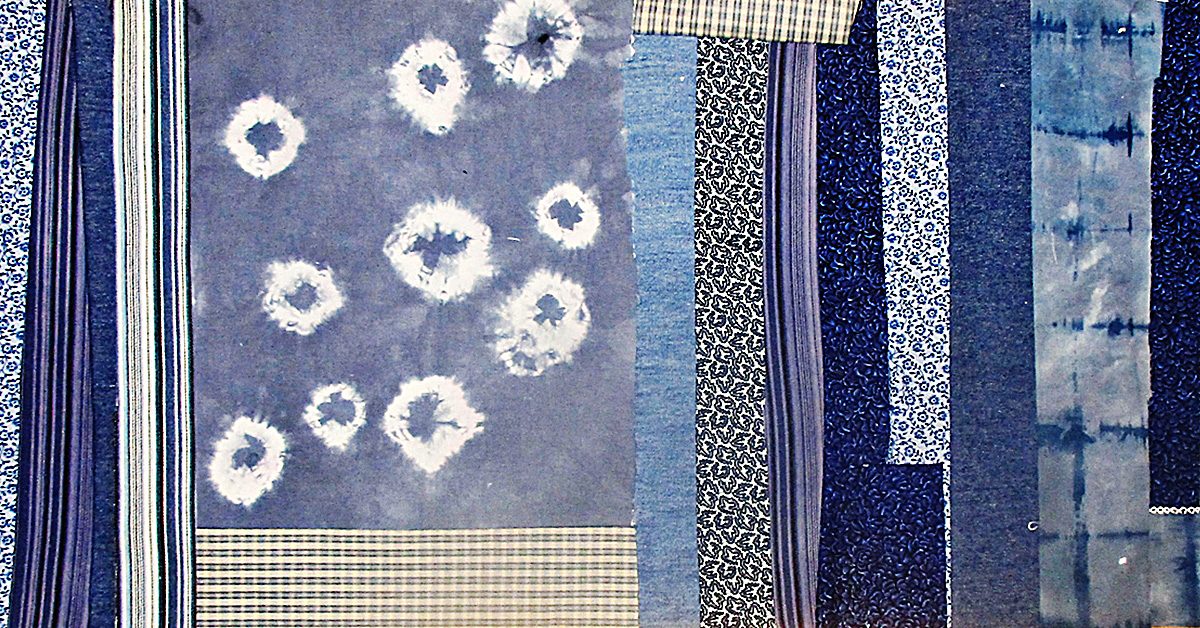
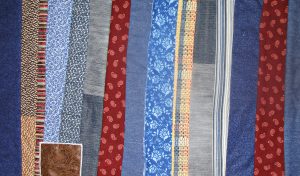
I made the pieces pictured above to sew a small kinchaku drawstring bag. I also think this kind of patchwork would look great as a bento, or azuma bukuro, bag. Both of these linked projects would be quick, useful, and satisfying ways to play with and use boro-inspired patchwork.

I’ll show you what I’ll make from my other panels soon. In the meantime, if you are even half as intrigued by this textile art as I am, then I recommend that you experiment and play with it because it’s fun! Happy sewing!

Thanks to na0905 for taking photos of the Boro exhibit at the amazing Amuse Museum in Tokyo, and for sharing these at Flickr with the lovely Creative Commons license. Thanks to GinaPina, Heather, and Jacque Davis for making their photos available this way, too.

Traditional vs. Modern Quilts - What’s the Difference?

Traditional vs. Modern Quilts – What’s the Difference?

Do you understand the differences between traditional and modern quilts?

Let’s look and see just what sets these different styles apart.

Traditional quilts

Traditional quilts are tried and true. Folks have been piecing and quilting these familiar designs for hundreds of years. Traditional patchwork designs have names: Log Cabin, Courthouse Steps, Nine-Patch, Dresden Plate.  There are thousands of these traditional patterns, and these are based on blocks and a grid.

Traditional vs Modern Quilts-What's the Difference?

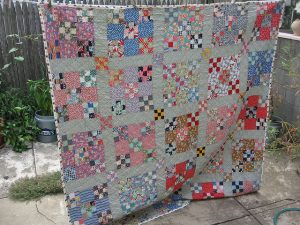
Traditional quilts use regularly repeating shapes and blocks, based on a grid.

Traditional patchwork can be simple or complex, but it is usually made up of many repetitions of the same block and orderly rows. These are frequently combined with uniform sashing between individual blocks and/or borders all around. They rely heavily on symmetry in both the patchwork and the quilting.

Traditional quilt patterns are still made and loved today, but we can say that these are our grandmothers’ quilts—and their grandmothers before them.

Traditional vs Modern Quilts- What's the Difference?

Modern quilts

As the name implies, modern quilts are something new. They are more experimental and rely less on rules and order.  Modern quilt designs began popping up in the last half of the twentieth century. But they really hit their stride just before the new millennium.

Modern quilts differ from traditional quilts in many ways. Traditional quilts rely on a grid of regularly repeating designs, symmetry, sashing, borders, often complicated patchwork, and simple quilting. In contrast, modern quilts go off the grid and use asymmetry, less fuss, minimalist designs, and a more improvisational style with unusual arrangements of blocks and settings.

Traditional vs Modern Qults- What's the Difference?

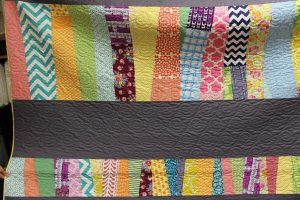
While there is a definite list of characteristics that categorize the modern quilt style, these are not rules. Most modern quilts will fulfill at least one but not usually all of them.  In general, modern quilt characteristics include a minimalist style; they emphasize negative space rather than intricate patchwork. They may feature bold colors and graphic designs that give high-contrast pop. And modern quilts often feature asymmetry and use unusual block placement and off-center motifs.

Traditional vs Modern Quilts- What's the Difference?

photo courtesy redheadwiththread

Modern colors and fabrics

Colors in modern quilts tend to be bold. High contrast graphic designs are created with brightly colored solid fabrics and striking modern prints. These are used more sparingly than in the more familiar repeating patterns which march across so many traditional quilts.  The focus is on the bold modern fabrics, rather than fussy technique.

Traditional vs Modern Quilts- What's the Difference?

Bold colors make modern quilts pop

Negative space and dense, innovative quilting

Negative space features heavily in modern quilts.  In traditional quilting, the repeating patchwork is meant to stand out. So traditional quilters most often construct backgrounds from neutral, receding colors. But backgrounds in modern quilts are brighter and more expansive. Whites and grays are popular choices to bring these negative spaces forward.

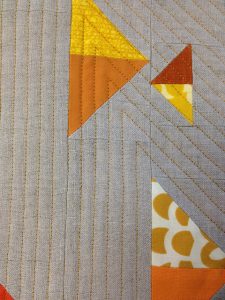
All this negative space highlights asymmetrical, alternate grid, or graphic modern quilting.  Simple piecing contrasts with dense quilting in innovative designs. Whereas patchwork commands attention in traditional quilts; on modern quilts, the quilting more often stands out.

Traditional vs Modern Quilts- What's the Difference?

Zig-zag modern quilting

No rules quilting

Traditional quilting stitches may be straight and simple lines, such as with “stitch in the ditch” lines that follow piecing seams. Or they can be elaborate curliques and designs which are deliberately and symmetrically placed to line up with wide borders. They may even meander as free-motion stipples, but these must follow rules, and not cross each other.

Modern quilters are free to abandon all these rules. Modern quilting lines may cross to form geometric patterns, irregular curlicues, or any other design an imaginative quilter can dream up. Quilters can even combine many varied stitches and feature each separately to break up a large expanse of negative space into different sections, for example.

Traditional vs Modern Quilts- What's the Difference?

Another quilt by Columbus Modern Quilt Guild member DanaK

Free-motion quilting is one way to let loose and experiment with fun and free modern quilting. To quilt in the free motion style, use your darning foot. You can either lower your feed dogs to guide your fabric by hand, or you can leave your feed dogs up and just set your stitch length to zero. Either way works!

Leah Day, who teaches free-motion quilting online, challenged herself to create a new filler design every day for a year. And her Free-Motion Quilting Project blog is an excellent resource and inspiration.

Off the grid layout

Patchwork in modern quilts can include off center or tessellated designs.  Modern quilts differ with much less reliance on uniform blocks and borders than is traditional and may feature irregular rows. Lack of borders and offset blocks create designs that continue beyond the quilt’s edge.  In general, both the patchwork and the quilting on modern quilts tends not to rely on a grid.

Traditional vs Modern Quilts- What's the Difference?

Example from Flickr user Gabrielle shows a modern, off-the-grid design

Modern quilts may make use of technology, such as computers for visualizing designs, and tools such as cutting machines or tessellating or other specialty rulers, to assist with cutting and design.

Traditional vs Modern Quils- What's the Difference?

This quilt by Columbus Modern Quilt Guild member shows a fun take on pixelation.

Hybrid design: modern traditionalism

You don’t have to choose between these two styles, however! Modern traditionalism is a hybrid of both. These quilts marry the improvisational freedom in design, piecing, and quilting of modern quilts with the traditional patchwork designs that connect us to the many generations of quilters before us.

A modern traditional quilt may shrink a traditional pattern and sprinkle these sparsely as isolated individuals amongst a wide expanse of negative space. Other modern treatments of traditional patchwork include combining patterns or enlarging blocks to a single design. A quilter may then feature such blocks this off center, for example.

Traditional vs Modern Quilts- What's the Difference?

Modern traditionalism features new settings for traditional blocks. Photo courtesy of Trillium Designs

Which style do you prefer? I love them all!

For more modern and modern traditional inspiration, check out the gallery at the Modern Quilt Guild.
Flickr images licensed under Collective Commons.

Sewing for Harvey and Irma

September has REALLY been a month for Texas and Florida so far! Mother Nature has once again chosen to fill the lakes and streams, and even the streets and houses with her life sustaining water, wind and rain. Unfortunately, it has left many, many thousands of people stranded without power, water, food and many families with lost animals and family and worse than that, the roof over their heads is gone.

Such devastation is certainly overwhelming even to those with a strong purpose to ride out the storm. My prayers go out to all affected.

image1

Andrew

I was living in Florida through Hurricane Andrew, and it had to be was one of the most stressful events in my life. I was about 90 miles from Homestead, but the weather forecaster reports were very certain it would make landfall on my community. It did not, however, but the fear was still strong.

Also, in many areas of California, from time to time, dry land and fires ravish the wonderful trees and expensive homes. It simply occurs out of our control. We have to survive and rebuild.

As the reality of these catastrophes hit our homes, and friends and families, my heart hurts to see people’s possessions on the curbs of streets, ruined and wet and unsalvageable. But, there has been an awesome power of giving and helping and a true blessing to my fellow Texans and those in Florida.

How to help

So, to make this article a positive one, rather than a stark reality check, I have been brainstorming ways that one can make a difference to help these people in distress.

Of course, there are agencies that help people with the general necessities, such as water, and food, and shelter in these areas.

But.. most want donors to send cash. But with short notice to evacuate, many people with small children have little chance to gather baby things and comfort items for themselves and even their pets. They won’t have transportation to go shopping either in many cases until the water lowers enough to leave shelters.

I was happy to hear that pets were included in the evacuations; however, some were transported to separate shelters with other displaced pets. I hope their families will be able to retrieve them once they are able to return home or find a new home. But they need comfort too! After all, they are our families.

Anyway, I am researching companies that will take handmade clothes, blankets, hats, burp cloths and other things that I have made for my online shop. I have discovered several charitable agencies and particularly church groups, classes at schools, some women’s shelters, hospitals, even families of our neighbors who may be located in the Houston or Florida area. Check online for these groups. If there is not one, form one from your sewing circles and sewing class students!  Form a group and make small packages together. Include paper diapers, and other essentials, and a handmade toy perhaps.  Sew small things, make sweet surprises and you will make a huge difference for a family and their children.

“It takes a whole village to raise a child” – H.R. Clinton

Here are some suggestions that came to mind:

  • Small blankets
  • Bib cloths
  • Bibs
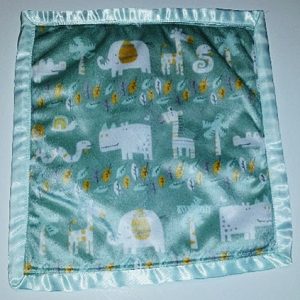
  • Snuggle blankets (small blankets with satin edging) or Minky fabric
  • Swaddles
  • Diapers
  • Dog mats and blankets – don’t leave them out! (Dallas Animal Shelter is temporarily boarding Houston animals)
  • Soft towels, perhaps small ones, sewn together
  • Soft flannel sheets for the crib
  • Sewn hats or capes
  • Small toys for babies (or dogs) made of soft, safe materials

Use fabric you find on sale, and then you can use other leftover scraps from previous projects (SewingMachinePlus.com now sells fabric in their brick and mortar store. One day, I hope to shop there).

The Basics Photo Quilts

Once again, we come to the point on this blog where it’s reasonable to look into a new quilt type. The reason for this specific interest for this post is because I happened to figure out that making a certain type of quilt is a lot less difficult than I expected. In fact, I’m toying with the option of making one of these for a Christmas present this year.

But I’m getting ahead of myself. First, let’s look at the quilt type I’m referring to, and then we’ll go into the ease and benefits of making one.

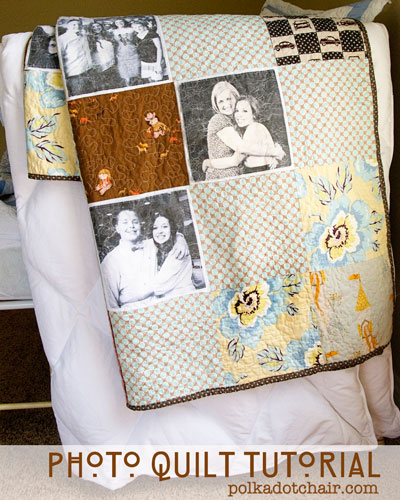
The type of quilt in question is a photo quilt, and it gets its name in the way you might expect—it includes photographs in its design. Now, you can order a printed throw like this through a store, but if you’re going to own or gift something that’s as sentimental as a series of personal photographs, it makes sense to add in that additional personal touch of sewing it yourself.Picture 1

Up until recently, I never realized how simple this prospect could be because I couldn’t grasp how printed photographs made their way to a quilt—unless, of course, you bought the quilt that way. As it turns out, the process is actually simple. You can treat it like a general patchwork quilt—so long as you have printable fabric at your fingertips.

With that one addition to your sewing supplies, you can browse through your pictures to find the perfect ones for your project.Picture 3

If you’re going to create a photo quilt for a wedding gift, for instance, concentrate on images of the right couple together. Once you find enough fitting photographs for the prospect, scan them if you only have print copies and get to printing on that fabric! From there, you’ll need to rinse it and iron it to keep the ink from ruining in the wash or bleeding where you don’t want it to go. You can find those details here.

You can pick and choose other fabrics that complement the theme and look of the images to build the rest of the quilt, and you can tend to the trimming and sizing of the photo blocks in the same manner that you would any other fabric style. Essentially, you’re doing nothing differently expect printing and preparing some of your fabric rather than purchasing all of the fabrics already printed.Picture 1

This is a simple prospect, but it’s a wonderful idea to add personalization to quilts for your own home, for a nursery, for a gift… The process shows care because you searched for the right pictures and because you took the time to piece everything together yourself rather than run to a store to have it printed for you. In a world so technologically advanced, this is one of the ways to use technology to bring a personal quality to something homemade.

Remember that the fabric you pair your photographs with can add value to your work in that they can carry out a particular theme that you’re going for. If you’re creating a graduation quilt (like in the link provided) and you want to showcase all of the graduate’s high school friends for a keepsake to take to collage, choosing fabrics that represent their school’s colors or mascot would be useful, as would ones that reflect typical graduation items—like caps or diplomas.Picture 1

For a Mother’s Day present, you could consider what your mom’s favorite colors and items are and use them for inspiration in regard to other fabric choices. If she adores light blue and lilac, pairing the photographs with those hues can add a level of care to the overall product since it’s another bit of evidence that you know the recipient well enough to pattern the design for them.

You could also use these for your own purposes as well, such as printing off photographs from your trip to Rome or Venice for a European-themed work that showcases the pictures you took during your stay. Even a moment that might seem trivial could be represented through one of these quilts, like the first time you baked with your children. Just take enough photographs to commemorate the experience, then pair your printed photographs with colors that reflect the baked goods you created together. It’s a big way to remember in detail such a small moment.Picture 1

Overall, I’m very much interested in trying my hand at this quilt type, and you can expect updates as I go through the process of trying to construct one. It’s so personal, and I look forward to testing the waters on the matter—especially to see how well the ink stays in place through my own personal experience.

Have any of you ever tried a photo quilt? Suggestions? Let me know!

Tutorial: More Kinchaku Japanese Drawstring Bags

Tutorial: More Kinchaku Japanese Drawstring Bags

We made lotus shaped kinchaku drawstring bags here on the blog a couple of weeks ago. I told you then that there are other ways to make kinchaku, too. So let’s look at these now.

Kinchaku are purse or lunch sized drawstring pouches. They were traditionally made with chirimen, which are kimono fabrics. They are most often made with a round or square bottom.And they are and were extremely popular with ladies in Japan, both now and in history.

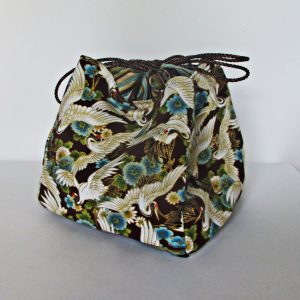
I didn’t have any chirimen fabric, but I did have a piece of Robert Kaufman Tranquility fabric with a crane motif and hints of gold shimmer.

kinchaku tutorial

Square kinchaku, fabric by Robert Kaufman

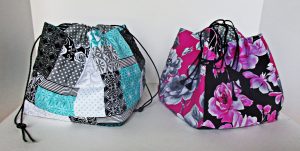
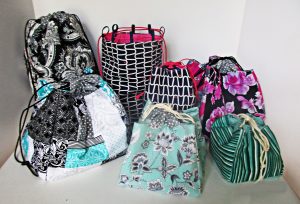
I started with this Japanese inspired print, and then I made these in all sorts of other prints, too.

kinchaku Japanese bag tutorial by Millie Green

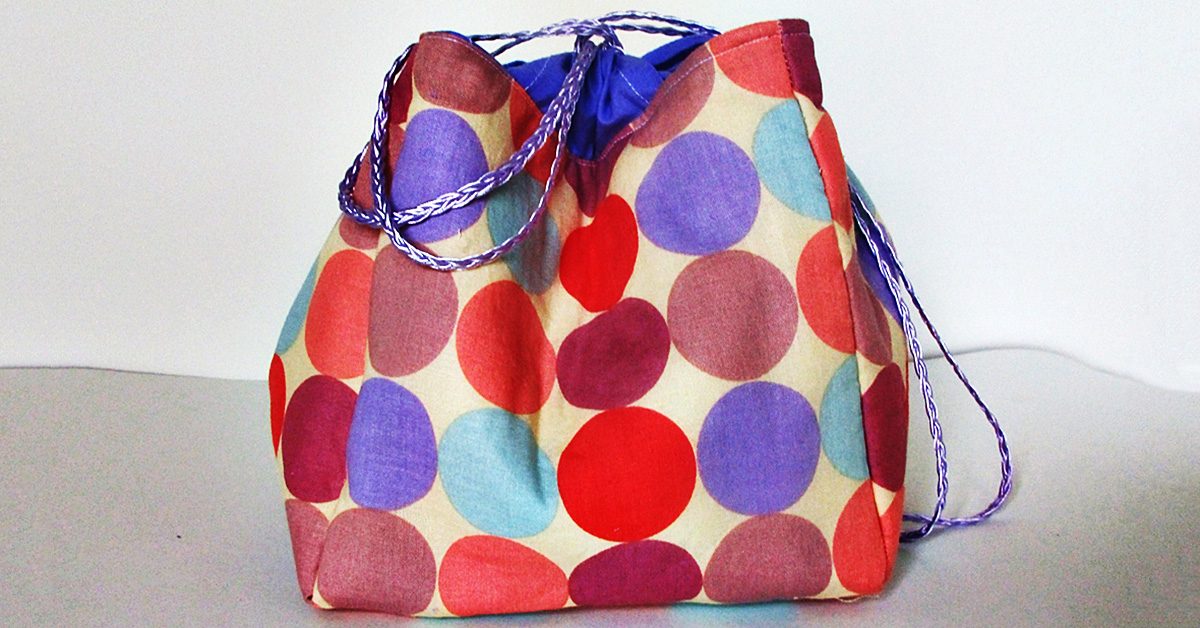
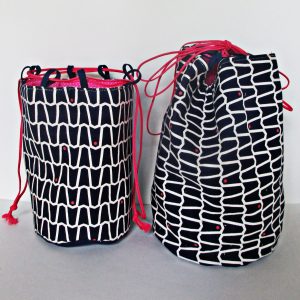
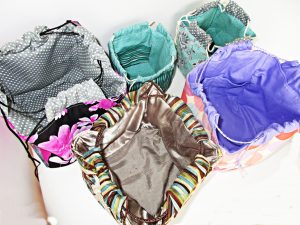
These are reversible, by the way, when you make them the way I’m showing you.

How to sew kinchaku

You can make your kinchaku with a square  or a round bottom.

Kinchaku tutorial by Millie Green

Small kinchaku made from five and six-inch squares

You can make them any size that you like.  Use three or four inch squares and add pockets inside to make a small pouch for carrying jewelry. Or use eight or nine inch squares to make a large purse. I think seven and a half inch squares are the perfect size for lunch bags.

I made one that’s ten inches all around, but once you make these that large or bigger, then they become komebukuro. We’ll save those for another post.

Make them sturdy

You will want to prepare your fabric squares before sewing these together in order to create a nice sturdy bag. You have choices here, and I recommend you make your choice based on the wise old principle of using what you have.

Prepare your squares using any combination of:

  • Batting and backing
  • Fusible fleece
  • Midweight interfacing
  • Heavyweight interfacing
  • Felt
  • Canvas
  • Duck
  • Denim

I like to use fusible fleece on five of the squares and midweight interfacing or sturdy duck or denim for the other five. Felt works nicely in place of fusible fleece.

For canvas, felt, or anything other than fusible type interfacing, you can baste the sturdier fabric to the back of a lighter weight cotton if you are using this for your outer fabric. To baste, just sew these together with a scant 1/8” inch allowance all around.

Or make a miniature “quilt sandwich” by layering your outer fabric over a layer of wadding (batting) and a backing square. Then quilt these together. You can have fun with this and do some fancy or decorative quilting. Or you can keep it simple.

Kinchaku tutorial by Millie Green

I had some fun quilting on the outer base square for these kinchaku.

You can add pockets to some or all of the lining squares, too. Do this now, after you interface the pieces and before you sew them together.

Of course you should feel free to construct your fabric pieces by patchwork. Simple four-patch works nicely here, or use your imagination and go wild.

large kinchaku

Ten inch square bags (made here from four- patched five-and-a-half inch squares) are a great size for a project bag for knitting or other take-along crafts.

To make square kinchaku

Kinchaku sewing tutorial

You will need five squares of outer fabric and five lining fabric squares, prepared (as discussed above).

For the exterior, I like to use a contrasting square, possibly of the lining fabric, for the bottom piece. In this case, I cut four of the outer fabric and six of the lining.

Take the bottom piece, and sew the other four pieces to the four sides of this bottom square,right sides together,  starting and stopping a seam allowance width from the edges.

Then, sew these four squares to each other, creating the side seams. Now use your fingers and eyes to check and make sure there are no openings in these seams. Fix this now if you missed any spaces.  You can turn it right sides out and look at it now if you want. Then repeat with the remaining five squares.

Skip to the next section to finish your square kinchaku.

To make round kinchaku

Round kinchaku tutorial

You need two circles for the outer and lining bottoms, and a piece of each fabric that is as tall as you’d like your round kinchaku to be by the circumference of your circle, plus seam allowance. You can use a compass or trace a dish or other round object to make your circles.

Prepare your fabrics as discussed above. Then, simply sew the other piece right sides together around the circle and then sew the side seam. It’s easy to sew the circle, just go slowly and carefully guide your fabric to keep your seam allowance uniform.

You can clip little slits in the seam allowance all around if you like, but if your seam allowance is narrow you won’t need to clip much if at all. Check the bottom and side seam with your eyes and fingers to make sure everything is connected and you didn’t accidentally miss a spot. It is easy to fix these mistakes now. Turn right sides out, if you like. Then repeat for the lining piece and base.

To make the drawstring casing

For either square or round kinchaku, you have options in constructing your drawstring casing.

You can make tabs from matching or contrasting fabric, grosgrain or other ribbon, or bias binding. You can make several evenly spaced  tabs or just choose one wide tab centered on each of the four sides.

I like to use contrasting fabric. To make the tabs like I have done for most of the kinchaku pictured here, cut four same sized rectangles. Cut them between three and four inches wide by a length that is anywhere between one-third and five-sixths of the width of your squares. Turn and press a narrow hem on all the short sides, then sew these down. Now fold along the long edge, and center it along the top edge of one of the squares with the raw edges of the folded rectangle aligned with the raw edges of the square. Baste down with a one-eighth inch seam allowance. Repeat for the other three tabs.

You could do the same thing with shorter squares rather than rectangles and space two or three tabs along each square. If you use narrow bias binding, cord, or ribbon, you will want to use more tabs.

You can use contrasting fabric, even satin for the lining, and add pockets if you choose.

You can use contrasting fabric, even satin for the lining, and add pockets if you choose.

To finish your kinchaku

Place the inside and outside bag pieces right sides together, with the casing or tabs sandwiched between the two layers. Sew together, leaving an opening big enough to turn. Turn right sides out. Pull the tabs and push the lining down into the bag.

Sew the opening closed and continue top-stitching all the way around the top of the bag. Pull down on the lining and straighten the top seam as you sew.

Now thread a cord or ribbon through all tabs and tie the ends together. Then thread another cord of the same length starting and ending on the opposite side of where you started and ended the first cord. Tie the second drawstring and your bag is complete. You can tie the cords in a bow or use them as handles to carry your bag.

These are addictive

kinchaku tutorial

I can’t stop making these bags! They go together so quickly and are so cute and sturdy; sewing them is addictive. That’s good because these will make great gifts. Try this quick easy project and I bet you can’t make just one either.

Happy sewing!
One Day Sewing Projects

One Day Sewing Projects

one-day-sewing

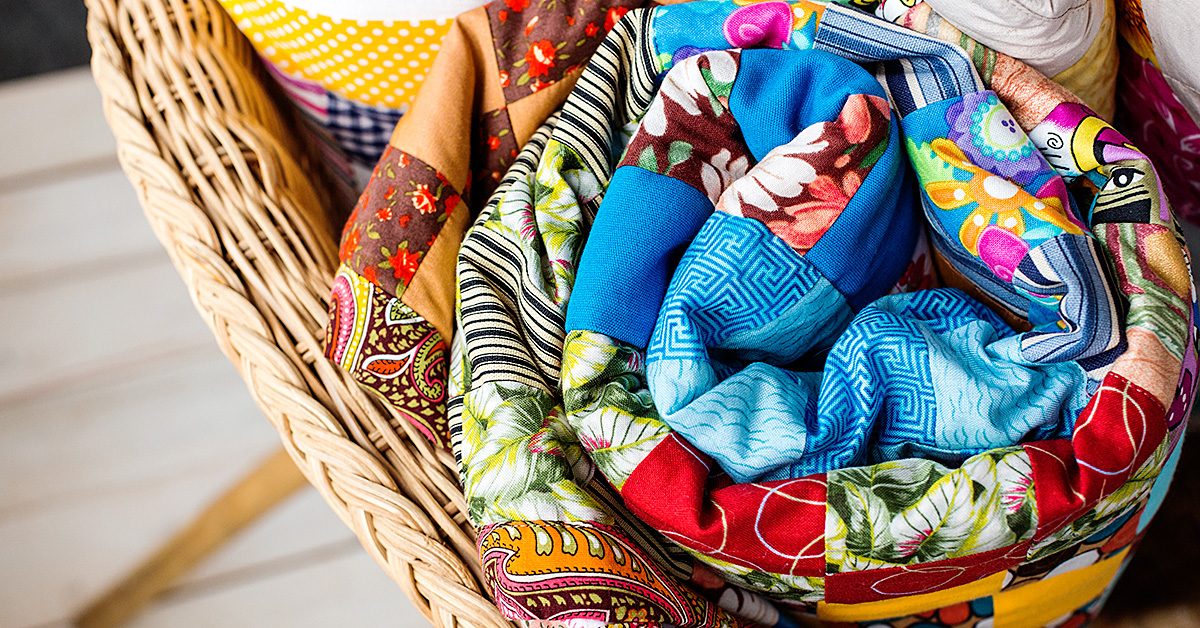
Sometimes I don’t want a big sewing project. If I’m pressed for time or simply need to fill an afternoon or one day out of the weekend, I don’t necessarily want to start a project that will take days, weeks, or months to complete. Nor do I want the hassle and expense of shopping for supplies for a larger project. I just want to sew for a couple of hours and have something to show for it. If that’s ever happened to you, these sewing projects you can do in a day are the perfect solution.

Circle Skirt

Make this for yourself or your daughter…or making a matching mother/daughter pair. This circle skirt can be done in just a couple of hours and it’s perfect for whirling and twirling when it’s done. Unless you have large amounts of the same fabric on hand (cause you just buy fabrics you like when you see them, maybe?) you’ll need to hit the store for material. If you’ve got enough fabric on hand, you’re good to go.

Vendor Apron

Are you the one they ask to help out with bake sales, garage sales, and other school fund raisers? You need this vendor apron to keep your notepads, pens, and other supplies close at hand. It’s super simple to make with an old pillowcase or one you fell in love with at the thrift store and now need a use for. Make a bunch so the whole PTA will have one.

Trendy Fashion Tank

With this awesome pattern there’s no need to spend your hard earned money on brand name t-shirts and tanks. The trendy fashion tank is patterned after a popular JCrew top, but made by you. You’ll need jersey sheets or another source of that same material to make this pattern. Flat jersey sheets can be bought at discount stores for around $7, so it’s well worth the investment to make this shirt yourself.

Hair Bows

Not only do these work up fast, they’re a great way to use up your scraps. Hair bows never really go out of style, so make a bunch. Give them as gifts or sell them at craft fairs. Depending on the material you choose they can be vintage, modern, or anything in between. No matter what, they’re sure to be a hit!

The next time you’re looking for a quick project, try one of these projects. They take a day (or less in most cases) and leave you with a great finished piece, a feeling of accomplishment, and instant gratification. Many of these projects are also great for sew sewers since they can quickly see the results of their efforts.

Easy, Easier, Easiest Ways to Sew Baby Blankets

Easy, Easier, and Easiest Ways to Sew Baby Blankets

My favorite ways to sew baby blankets

Every baby needs blankets and these make wonderful gifts. There are lots of ways to sew baby blankets, but after making dozens over the years, both for my own babies and for gifts, I have settled on three basic ways that I prefer to make them. These three types of blankets are each useful in their own way, and any new parent will appreciate any one or all of these styles.

Baby quilts are easy to make!

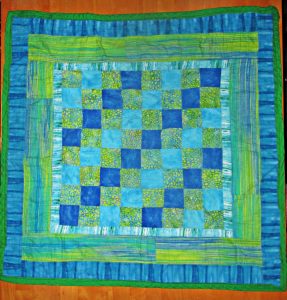
If you ever wanted to get into quilting, a baby quilt is a great place to start. Because baby quilts are small, you won’t have to wrestle with these on a regular sewing machine, as you might for a larger quilt. Start with a simple pattern which uses just squares or rectangles if this will be your first quilt.

Easy,Easier,and Easiest Ways to Sew Baby Blankets

This tiny baby quilt is wrinkled to high heaven because baby outgrew it years ago and I pulled it from a box to show you!

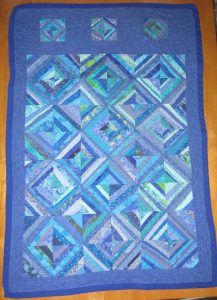
You can choose a quilt with many small pieces if you have plenty of time to finish the quilt before baby’s arrival. I made this blue strip pieced crib quilt while I was waiting for my youngest baby’s birth. This quilt is 100% easy, but it is not the speediest of quilt projects.

Easy, Easier, and Easiest Ways to Sew Baby Blankets

See link for tutorial for this quilt.

Bigger blocks make quicker quilts

If you’d like to make a baby quilt in a hurry, choose a design with fewer and larger blocks.  For a great example of a quick and easy baby quilt, check out Jera Brandvig’s Log Cabin baby quilt at Quilting in the Rain. Her project includes instructions for quilting as-you-go, and this is a particularly speedy method of quilt construction.

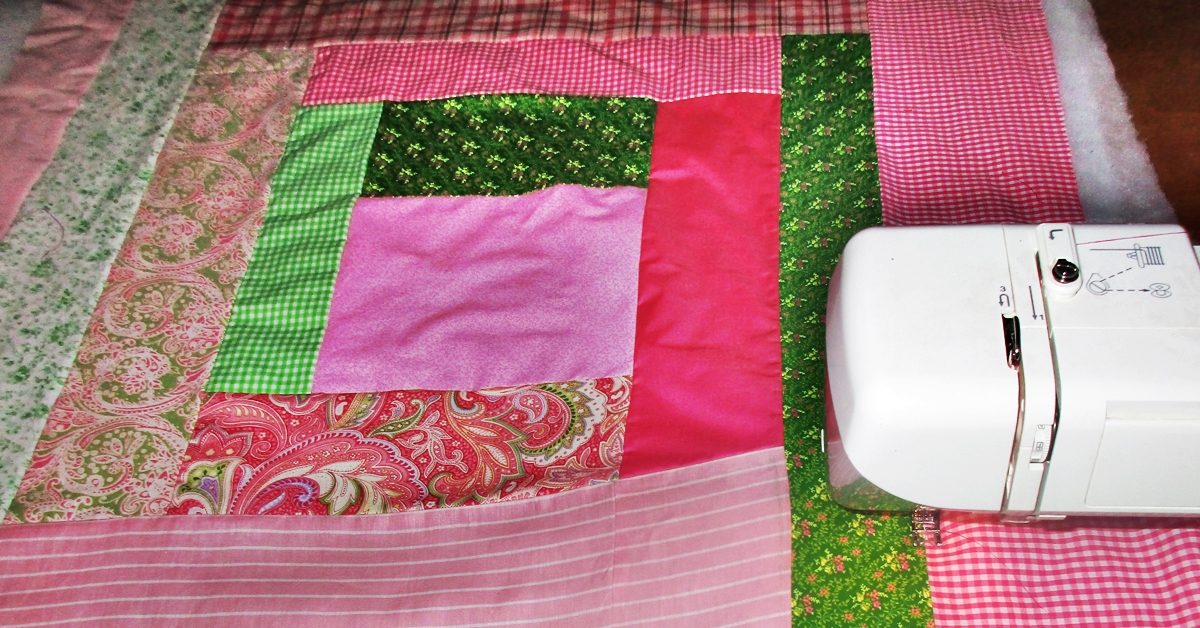
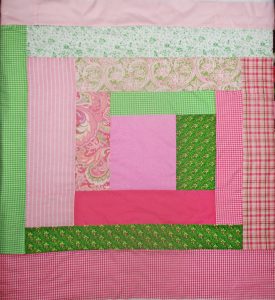
I used Jera’s idea for making one large log cabin rectangle to piece a baby quilt top this morning in about an hour. I didn’t use the quilt as-you-go method on this, however; I’m quilting it all at once using free motion quilting.

This one will be an oversized baby quilt with a super soft flannel backing. The larger size means she won’t outgrow it as fast and can enjoy it into childhood, too.

baby log cabin 1

With large pieces and no precise cutting or corners, this large baby quilt top came together really quickly.

Here’s more from me on making quick quilts. Baby quilts are easy, and if you want to make one, you should. Please don’t be afraid of making quilts, it’s fun!

Easy, Easier, and Easiest Ways to Sew Baby Blankets

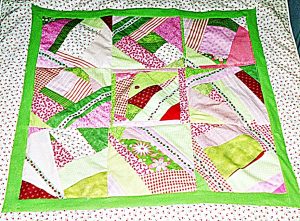
Crazy patchwork in large blocks makes an easy baby quilt, too.

An even easier way to sew baby blankets

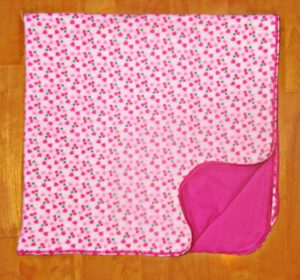
If you don’t have the time or trouble to spare for making a baby quilt, you can sew a soft and sweet reversible baby blanket in a fraction of the time it would take to make even a simple quilt.

Easy, Easier, Easiest Ways to Sew Baby Blankets

To do this, you need two same sized pieces of fabric. One yard square is a nice size, or you can make it larger, perhaps to fit a crib mattress (27″ x 52″, plus a few inches on all sides to hang over the sides). You will want at least one of these to be a soft flannel. I prefer to use flannel for both sides, but they are nice when made with quilter’s cotton on one side and flannel on the other, too.

Feel free to applique or embroider the front of one of the fabrics before assembly. This looks really sweet in the bottom corner.

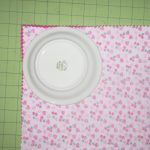
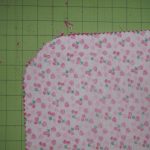
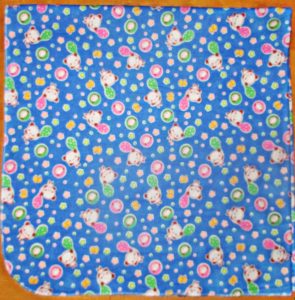
Cut the two fabrics to match and place them right sides together.  Then, using a dessert plate or saucer as a guide, curve the corners.

Easy, Easier, Easiest Ways to Sew Baby Blankets Easy, Easier, Easiest Ways to Sew Baby Blankets

Sew the two pieces together all the way around, except for an opening to turn. Turn right sides out and press. Then set your machine to make a wide, short zigzag stitch. I set mine with to a width of 5.0 and a length of 0.5. Zigzag around the edges of the blanket, about 1/8” from the edge. Be patient; stitching like this takes a lot longer than straight stitching does, so it will take quite a few minutes to go all the way around.

Or use binding instead

Another easy way to make this kind of double sided blanket is to layer the two fabrics wrong sides together and use bias binding all around to join them together.

I give these reversible blankets to every baby I know. Their mothers have often told me that these wind up being baby’s favorite blanket. My own boys liked these double sided flannel blankets so much that I made them to fit their beds.

Using a serger is the quickest and easiest way to sew baby blankets

Parents of babies who like to be swaddled will need lots of single layer receiving blankets. These are also nice to have in warmer weather and for on-the-go. I always kept at least one in the diaper bag and one in the car. They couldn’t be easier to make and take less than ten minutes, including cutting and pressing time.

Easiest Baby Blanket

Folded in fourths here to show the corner curve. These will fold down really small to fit in your diaper bag or even the glove box.

Simply cut one piece of flannel to your desired size (one yard square is my favorite size), curve the corners, and serge all around. I set my serger to its narrowest width overlock stitch.

If you are not comfortable serging around curves, then skip the curving of the corners. To do this, just serge four straight sides, burying the end of each chain under the beginning of the stitches on the next side. Then use a tapestry needle to bury the last thread chain under your previous serging.

If you don’t have a serger yet, this is one of many reasons you will want one. Here’s my recommendation for which one to buy.

It’s easy to sew baby blankets

You can sew a quick baby quilt, a soft double-sided blanket, and a single-layer receiving blanket (or several) all in the same day. These little projects are so satisfying that I bet, like me, you’ll want to sew some for every baby you know.

Happy sewing!
Sewing for a Living

Sewing for a Living

For the lucky people who discover early on what they want to do for a living, picking a career can be as easy as following interests. But sometimes, knowing your primary interest isn’t enough to form a decision on a career since you don’t know what in the world you could do in the field that would actually make you money. I mean, come on. I could love collecting quarter-machine stickers, but unless at least one of them become a collector’s item, what exactly am I going to do career-wise with that interest?Sewing1

You might have a similar struggle with sewing since it’s often treated as a hobby or a practical exercise, but as hesitant as you might be to try your hand at it for a living, you can absolutely earn money working in the sewing world. In fact, Sewing Machines Plus is currently hiring salespeople. Just sayin’.

If you’re looking for something a little different than a salesperson though, here are six career options that you can explore to make cash with your interest in sewing.

1. Be a seamstress. This might be the most obvious choice, so let’s go ahead and cover it! As a seamstress, you’ll have the opportunity to be the community go-to for sewing repairs, which works out well since certain people aren’t interested in making those repairs themselves! You can use your interest to earn money while helping out people with their clothing needs. Sound good?

2. Make clothes. On the same train of thought, you can make clothes to sell for people who don’t have the interest or skill to make these projects themselves. If you can construct something fancy, like a prom dress, you might find that you can make real money for weddings and dances by allowing people to have more input in their clothes designs than they can get by shopping retail. It might take time to prepare yourself for these kinds of tasks, but talk about the creativity involved with this one!Sewing5

3. Write. If you have interests in sewing and writing, this is a good fit! You might not find that perfect writing opportunity as soon as you start looking for it, but trust me when I say that a consistent effort in looking for freelance writing jobs can lead to some possibilities that are in line with non-writing interests. Fitness, education, and traveling are varied topics that you could find freelance offers for, and they’ll hopefully give you an idea of how assorted freelance subjects can be. It’s reasonable then to believe that someday a sewing-related possibility could come your way if you keep searching for it! You might even end up with a career writing regularly for a famous magazine that deals with sewing.

4. Own a shop. There’s variety in this option because your shop could be for a number of things. Maybe it’s exclusively to sell the clothes you make, or it might be a collection of community sewing projects all sold under one roof. Maybe you’re only interested in selling quilts, or baby supplies, or handmade home décor… Whatever your niche and however far your reach for merchandise, if you have the knack for running a business, this might be the career for you!Sewing2

5. Teach. If you search online *right now,* you could find job listings for tutors or teachers in the field of sewing. This makes sense since sewing beginners might breathe a little easier with someone there to guide them in their early projects and learning experiences. You might not even have to look online to get a chance at this type of job if you happen to know someone who wants to learn to sew. Then maybe one student leads to another, and perhaps one day you can have a full class of people waiting to learn about sewing. As a side note, if you’re technologically inclined, you might think of filming classes, making them look professional, and selling them as DVD’s through vendors. It might take a while for this to really take off, but that doesn’t mean it can’t happen!

6. Make Patterns. It’s entirely possible that you adore sewing, but you’re not overly interested in teaching the practice. Maybe your appreciation of the sewing process is primarily in the most technical aspects—like building patterns. If so, be aware that a pattern maker is a job possibility! You could land a job as a pattern maker for a designer or company to put ideas to paper, but honestly, what’s to stop you from creating your own designs, mapping out the patterns, presenting them in a professional manner, and selling them? In fact, this would be an interesting detail to add to that shop that was mentioned earlier! Either way, it’s possible to make money by making patterns!

And there you have it—six ways you could earn money by putting your love of sewing into a career choice. Some of these might be easier to attain, like a seamstress, but even the more obscure options can be done part-time to boost your income. Basically, you can make a living on your sewing!
Sewing Buddies

Sewing Buddies

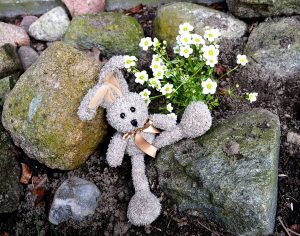
Among my group of friends, I’m the only one that sews. We all figure it’s a skill that they’ll all turn to me for after the Zombie Apocalypse. Kidding! I am the only one who sews and it is a valuable skill, but since I don’t have a group of friends to sew with, I’ve made my own sewing buddies. Really, they’re just stuffed animals I’ve made, but they sit in my swing area and keep me company when the cats take off at the sound of the sewing machine. If you need some sewing buddies too, check out these cute stuffed animal patterns and make some for yourself.
soft-toy-2186249_1280

Stuffed Fox Sewing Pattern

Made from fleece, these little guys work up quickly and are loved by kids and adults. When finished, they’re about 15” tall and have the sweetest faces. I used buttons for the eyes and nose, since there aren’t young children playing with them in my house, but the applique idea is great for homes with kids. Make a girl one and a boy one so they can keep each other company.

Sock Monkey Pattern

I’m not sure why, but people seem to give me wild sox for birthday or Christmas gifts. I don’t wear crazy socks, never have. I re-gift them when I can, but that’s not always possible. So, this sock monkey sewing pattern is the perfect way to use those crazy socks and get myself a sewing buddy. Make two and they can cuddle with intertwined arms. Add some Velcro to their hands to keep the cuddle pose in place.

Fat Quarter Bunnies

I love these! So often when I’m at the fabric store, I see fat quarters and want to buy them, but typically, they’ll wind up sitting in my fabric stash, never used. These sweet bunnies are the perfect use for those fat quarters and they’re so cute in my sewing area.
Sock Dragon Sewing Pattern

Yet another awesome use for all those crazy socks I seem to get. The sock dragon is a bit more challenging than his cousin sock monkey, but it also uses an additional pair of socks! I love dragons, so having one, or several, in my sewing space is great company.

If you’re looking for some sewing buddies, these stuffed animal patterns are a great way to make some company for yourself. Try them and let me know what you think!