Color Theory for Quilters

Color Theory for Quilters

Color Theory for QuiltersColor theory and scheme play an essential part in any design, and color choices are most important in planning any quilt. Choosing a color scheme that works for your quilt prevents muddy color or boring results from your hours of work.  You want quilts that both stand out and fit in, and the key to this is using color theory to your advantage. Using colors that work together as a quilting team in your design can enable you to do any or all of the following:

  • Achieve harmonious results using a wide array of many fabrics
  • Make some colors pop and others recede, to emphasize or unify block patterns
  • Design quilts to complement interiors without any clash, and without being boring
  • Have backgrounds that work well, rather than as competition to spoil design effects
  • Balance any design and make all your quilts sing
  • Add extra Oomph and Wow Factor, for perfect success

You can do all this with ease when you understand color theory and recognize the logical choices available.  We don’t have to reinvent the wheel, and so we can choose from a preselected menu of color scheme styles, or teams, that we know will always work wonderfully together.

The Color Wheel

Color theory and schemes

What are some of these tried-and-true color teams? Let’s look at them all:
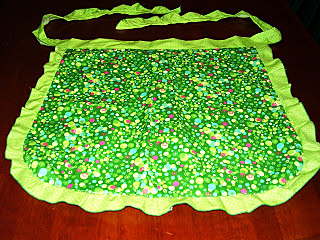
Monochromatic

A monochromatic color scheme uses only one color, choosing from all shades and tones of that color. How many greens are in the garden, and all of nature? It feels like shades of blue are unlimited when you think of the many colors for sky and sea.  The brown palette includes all colors of dirt and soil layers, skin tones, fur shades, tree barks, and more. You could use hundreds of different fabrics in one quilt and stick to one color. Or limit yourself to less, if you like, but know that a monochromatic quilt is a viable option in any color. You can also use a monochromatic palette as an element of your quilt, rather than the whole thing. This trick will enable you to paint with your fabric and achieve dramatic landscapes or picturesque quilts.
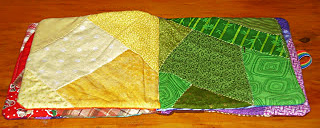
Analogous

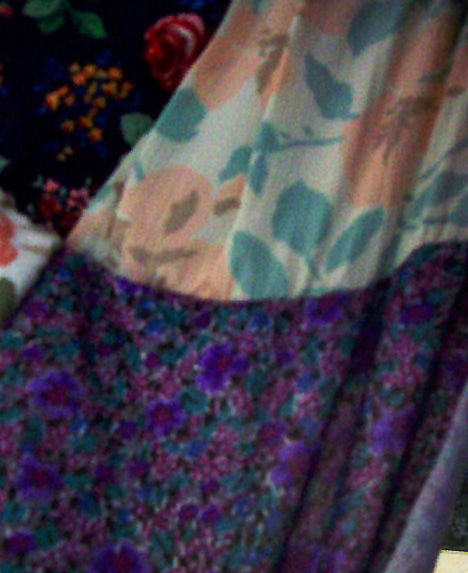
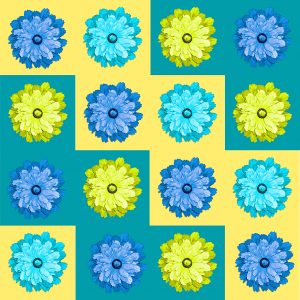
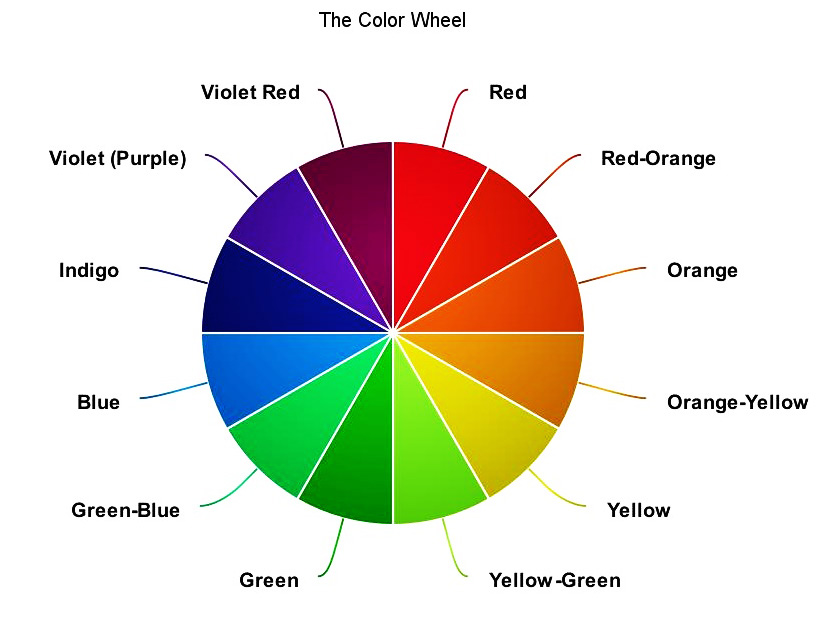
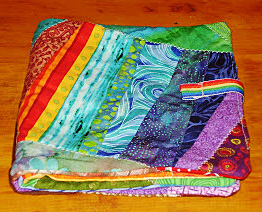
Analogous colors are next to each other in the color wheel.  You can choose a narrow or a wide analogous scheme. You could choose to use all shades of just red, orange, and what is between them, or include all the way to yellow for more contrast. Choose from the other side of the wheel using blues and indigos, or including violets. Or go with yellow, green, and blue, including everything in between them, or blue, purple, and red with shades in between these. There are a lot of options for analogous quilts. I made one using blues and indigo, I showed how to make it on this blog a while ago.
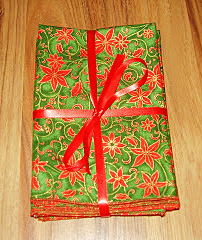
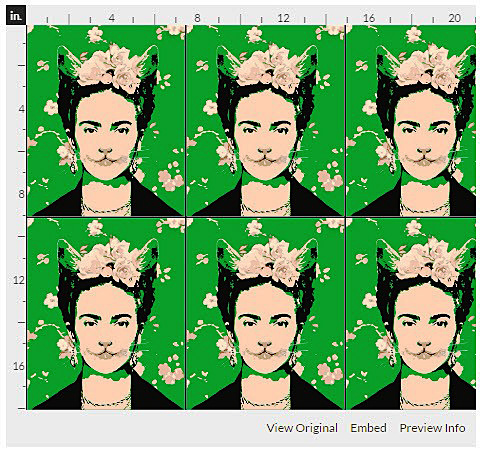
Complementary

Complementary colors really set each other off.

Complementary colors really set each other off.

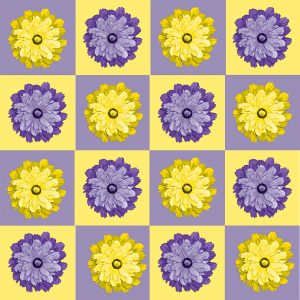
Complementary colors are opposites on the color wheel. They go well together as natural pairs and seem to reflect their differences pleasingly. Complementary pairs are: red and green, blue and orange, yellow and purple, and more.  Indigo is between blue and purple, so its opposite shade is between yellow and orange. You could also choose two analogous colors and also use both color’s complementary colors. For example, I have never used indigo and violet with yellow and orange yellow as a color scheme, but I know that it would work well.

Triadic – primary, secondary and tertiary

The familiar primary color scheme of red, yellow, and blue is triadic. Triadic colors are evenly balanced and play well together without competition. The secondary triadic trio includes green, purple, and orange. Tertiary triads include indigo, red-orange, and yellow-green together, or yellow-orange, blue-green, and violet red. Remember that you can choose from different shades of each color. For example, the familiar pastel trio of pink, pale yellow, and light blue used so often for babies, is a just a lightened up version of the primary color triad.

This rainbow book of colors is one of my favorite gifts ever.

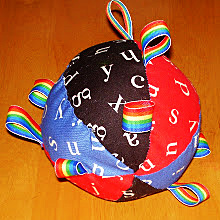
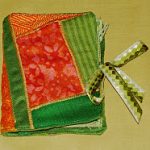
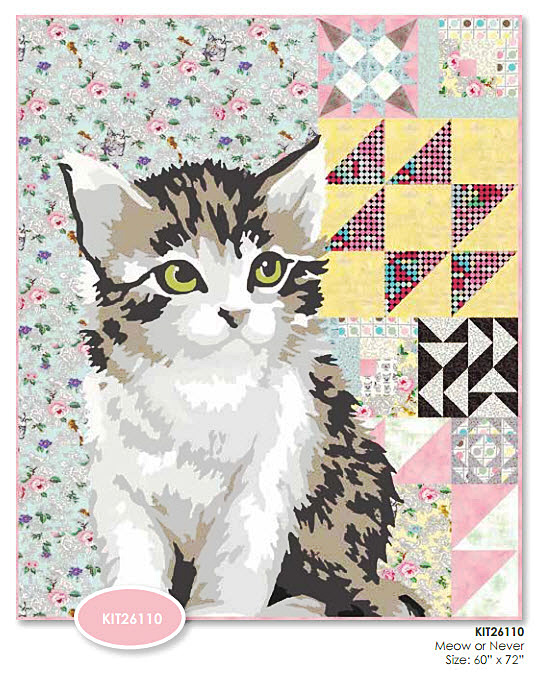
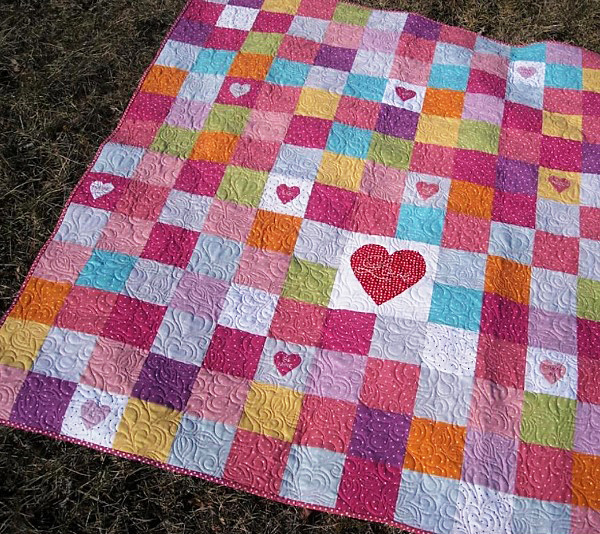
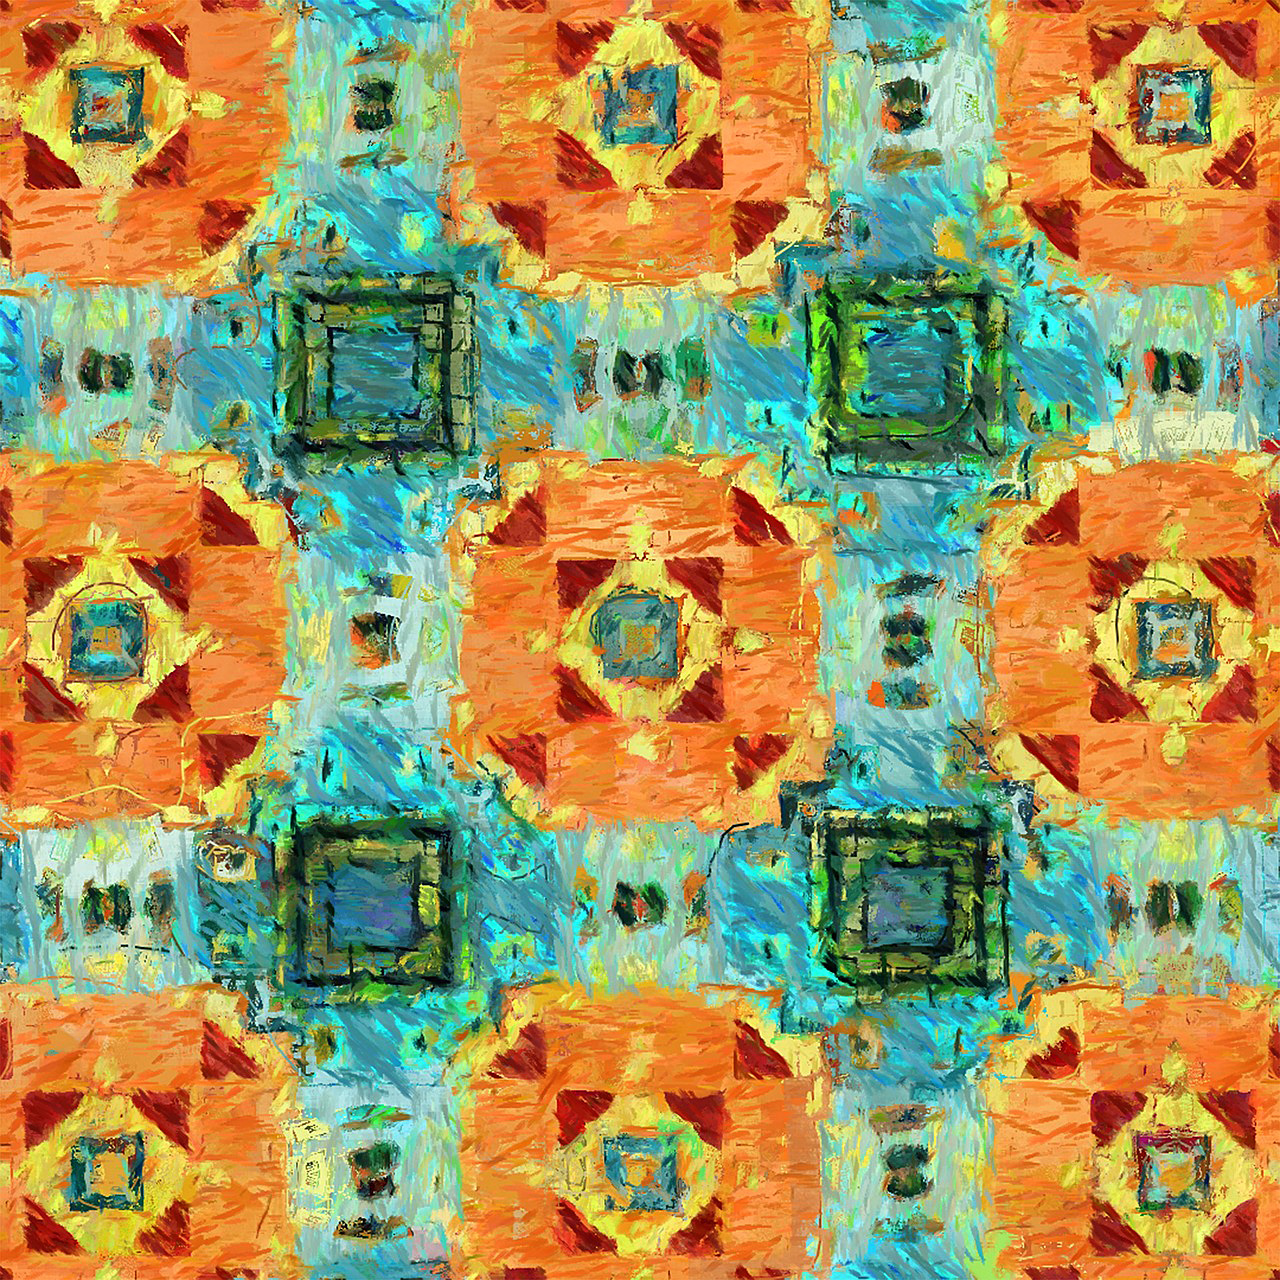
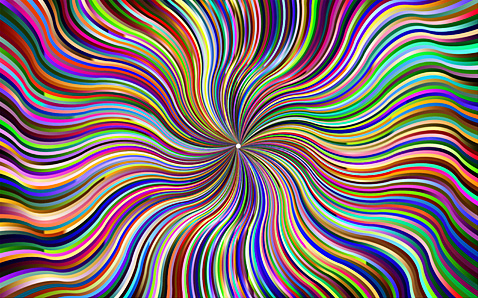
I used a Rainbow color scheme for the cover of this baby color book.

Rainbow

The rainbow color scheme includes, you guessed it, every color of the rainbow. Don’t leave any out; a rainbow palette must include red, orange, yellow, green, blue, indigo, and purple. You can decide for yourself whether to include the tertiary colors that fall between these or not. A rainbow scheme will work with or without these colors. A rainbow scheme always results in a vibrant quilt.
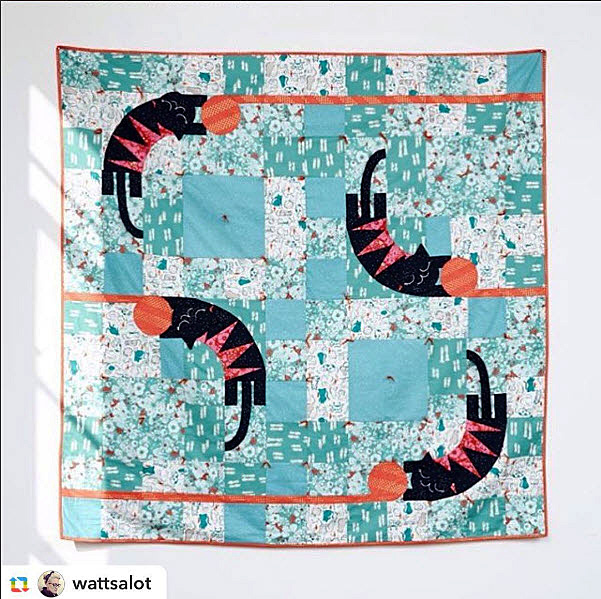
Warm and cool

Warm and Cool

Warm and Cool.

Warm colors range from red to yellow, like the colors of the sun. Browns and sands are included in this group, too. Cool colors go from blue-green to purple, like the seas and the skies, including at night. Warm colors advance; cool colors retreat. Cool colors separate and warm colors unify. Stars pieced from warm colors really pop against a cool background.  Pairing warm and cool colors differently can make dramatic differences in blocks, and changing this up may provide a lot of interest in repeating motifs.

Light and dark

This is the ultimate contrast, like black and white. Shapes are emphasized and the look is simple and uncluttered. Use your choice of colors for the light and dark pairing. You could choose light and dark shades of the same color or a complementary pair to contrast between light and dark, for example. While black and white can be starkly dramatic, this can also be downplayed in a light/dark combo by choosing a mix of lights and darks and gradating the tone.
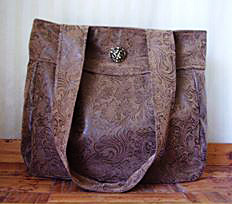
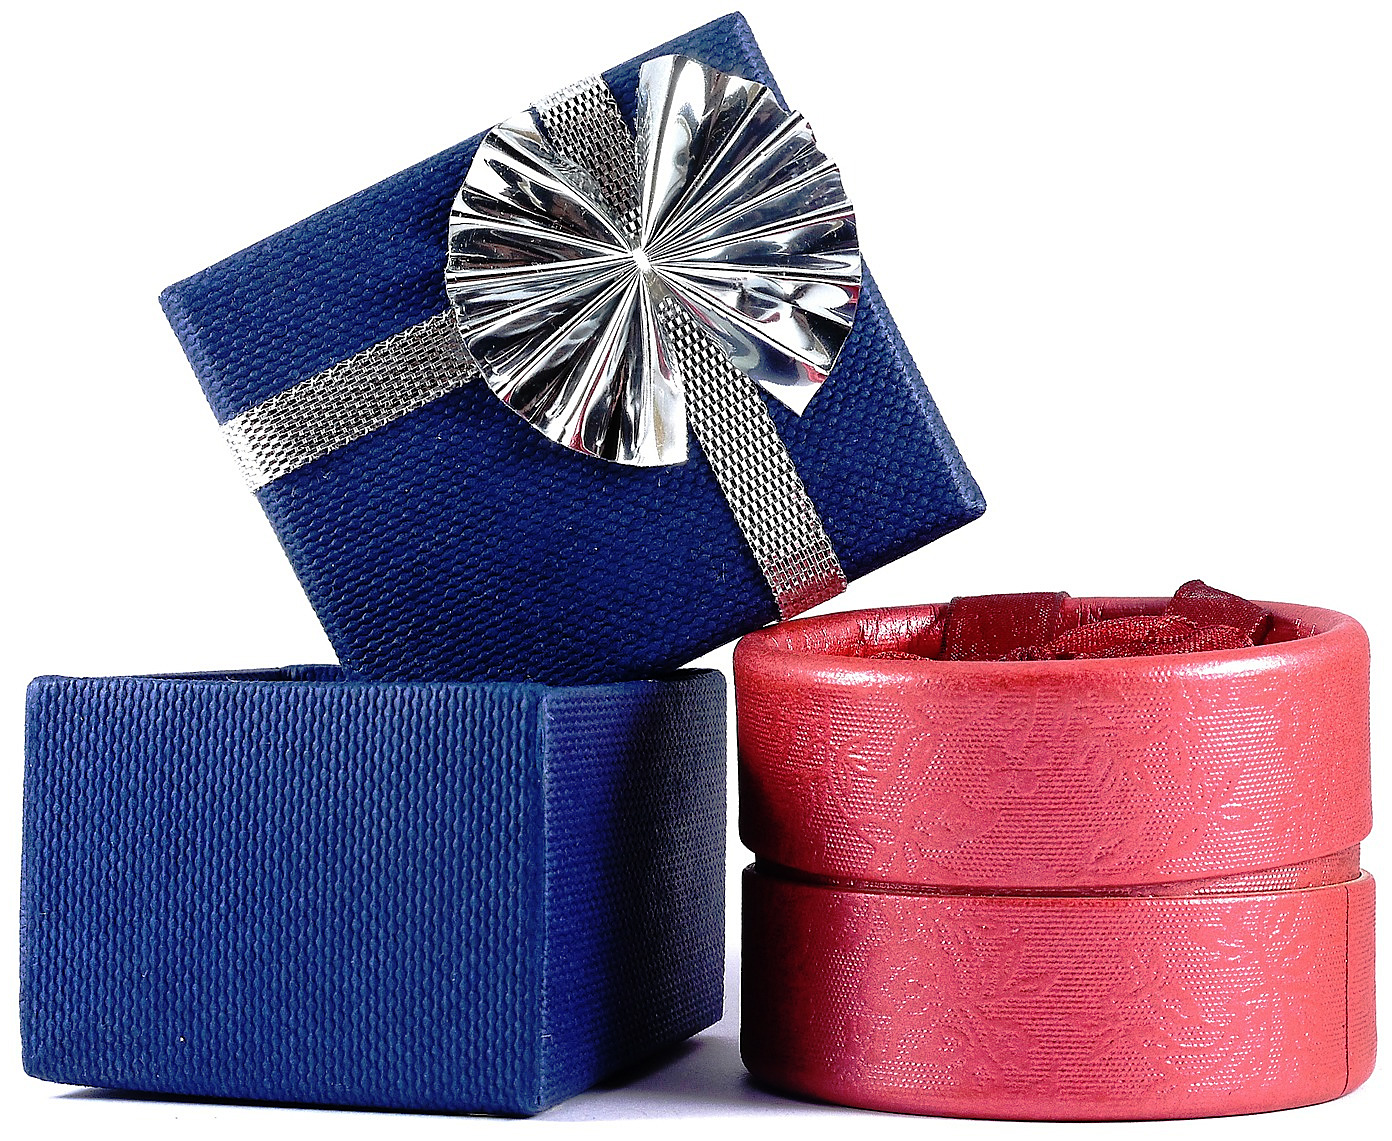
Neutral

Natural colors: the seashore and shells; barks and stems; wood; dried grasses; crinkly leaves; skin-tones; rocks and soil. Grays like the sky sometimes and clouds, or concrete, and silvery steel. Creams, ivories, bone, and every shade of brown are all neutral colors. Neutrals can be light or dark. They are non-competitive, and help other colors. This is why they work so well as backgrounds. Neutrals are peaceful and offer support, so in general they are always welcome.

Traditional

A traditional quilt color scheme depends less on color than value. It is traditional to choose three colors for quilting: one that is dominant, one that is subordinate, and one as an accent. The dominant and subordinate colors play off each other, and the accent provides a pop. The red squares traditionally used as the centers of Log Cabin blocks both provide pop and serve to unify and define this classic design. You can use your dominant color to emphasize a repeating motif and the subordinate color as the background, sprinkling the accent color about to add sparkle and interest.

Scrap bag

It is a valid choice to use no color scheme at all and choose indiscriminately from among a plethora of colorful scraps. Scrap quilts, with their confetti of riotous colors, are endlessly pleasing, both to make and to look at. You can piece together a pleasing string or strip patchwork quilt by choosing blindly from an abundant scrap pile.

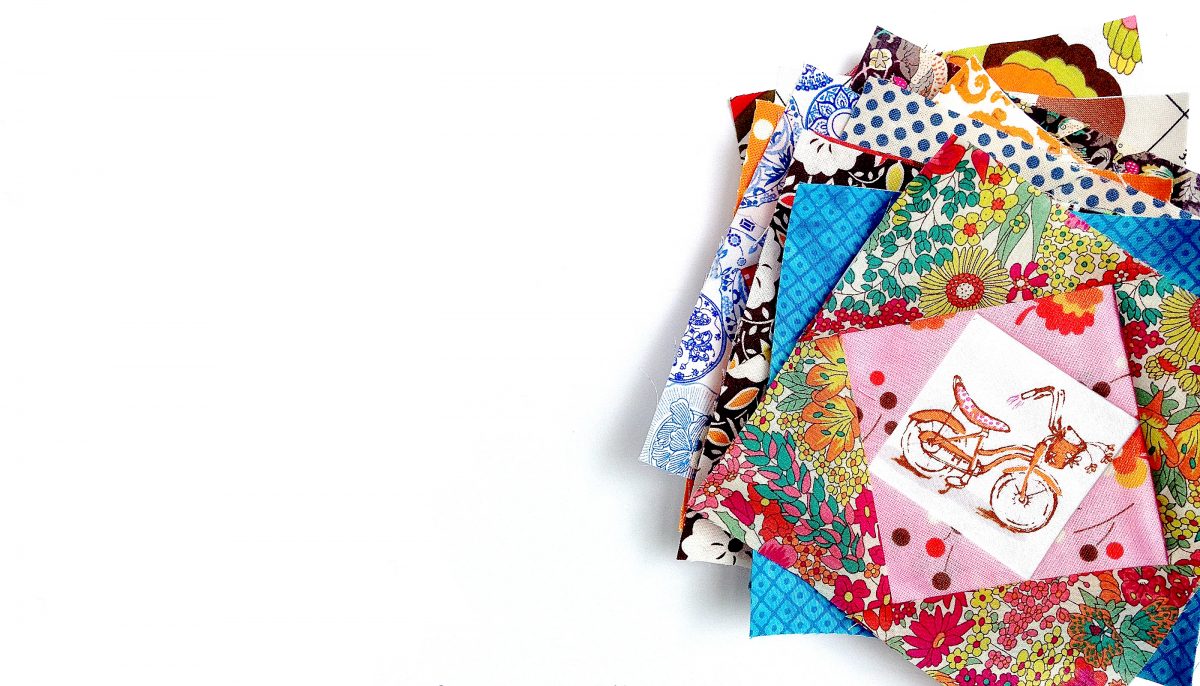
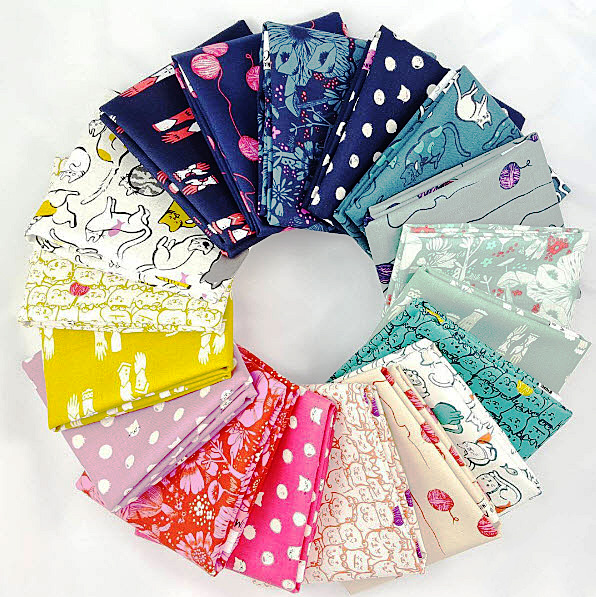
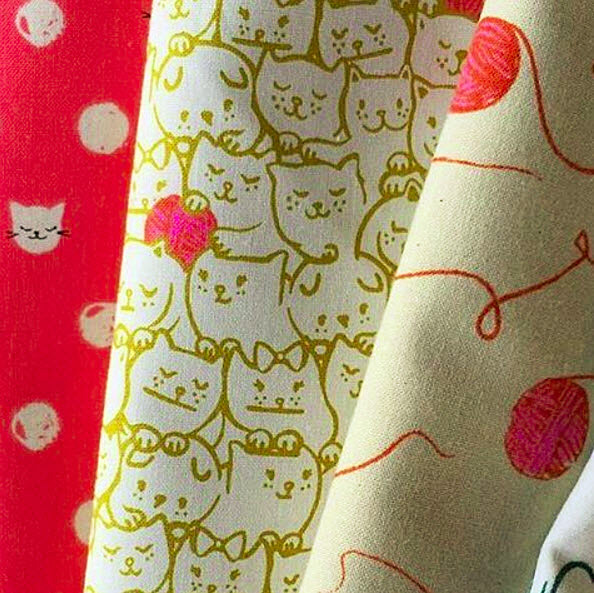
Choose a variety of fabrics

Color Theory for QuiltersYou can use a favorite fabric as a starting point to choose your scheme around, or you can begin choosing fabrics according to a predetermined scheme. The unlimited choices available to quilters are a big part of what makes quilt-making fun. You can increase your enjoyment in making any quilt by widening your variety of fabric choices. If you choose a triadic color scheme, for example, but then choose only one fabric of each color to complete your quilt, you may be bored by the lack of variety.  Choose several fabrics in each color to increase interest instead.

Don’t be daunted by color choices. Choose any one of these color schemes and your quilt is sure to be a success. I hope that you understand color theory now and that this has helped you.

Shopping in the New York City Garment District

Fabric Shopping in the New York City Garment District

Shopping in the New York City Garment DistrictWhen I first moved to NYC a lifetime ago, I worked for very little money as an assistant to a crazy hat designer in the heart of the garment district. The only upside to the job was that I spent a good part of every day out on the streets gathering fabric swatches and button and trim samples. There was another assistant who had been there for almost a year already and she took me around with her and introduced me to all the people and stores. The two of us had a great time digging through bins of buttons, wandering deep into the back corner of NY Elegant Fabrics, and convincing the nice people at Mood to let us into their “secret” warehouse (it really does exist).

I only stayed at that job for about a month, though it felt like a year, and the other assistant (who has since moved back to Korea to head up a fashion company there) and I still keep in touch. I don’t go to the garment district as often as I once did but I do have a list of must visit favorite places.

Mood – 225 West 37th Street

I’ll get this one out of the way first since most people at this point have heard of Mood which lucked into some amazing advertising when it became the fabric store featured on Project Runway. One of the coolest things about Mood is the building its in and the old elevator, still manned by an actual man, that you have to take up to the 3rd floor. Once up there, the rows and rows of fabric reach from floor to ceiling. Things are pretty well organized, the selection is large, and most bolts have swatches already cut and attached to the ends that you can take.

One little note about swatching in most all the stores in New York City: If someone asks if you are a student, say no. They’re asking because most stores have specific hours for student swatching and won’t allow you to do so if its not during those hours.

Also of note: Mood has a public restroom in the back right corner. 😉

NY Elegant – 222 West 40th Street

I love NY Elegant for its selection of light weight cottons, organdies, and batistes. NY Elegant is a family run store and is the last standing fabric store on 40th St. They also get a lot novelty fabrics – fake furs and things with glitter and sparkly threads.

Paron Fabrics – 257 West 39th Street

This is one of my absolute favorite family run fabric stores in the city. Sadly, they closed their doors for good just last month. I’m only including it to remind everyone to try and support their local fabric stores and if, you have the chance, come to NYC and shop in the garment district. You really can find almost any kind of fabric there by visiting the larger stores and just wandering down 39th street and stopping in to the small stores that still remain.

B & J Fabrics – 525 7th Ave #2

B & J is your best bet for high end linens, lace, and silks. The store is extremely well organized and always seems extraordinarily well lit in comparison to other garment stores. They are a little pricier than some of the other stores but the quality of the fabrics they stock is superb.

Lou Lou Buttons – 69 West 38th St

Lou Lou Buttons sells only buttons. They have bins and drawers and barrels full of buttons. They have wood buttons, shell buttons, mother of pearl buttons, and every funky, unique kind of button you could imagine. The people who work there are helpful and friendly and don’t seem to mind if you spend hours looking.

M & J Trimming – 1008 6th Ave

There are a lot of small trim stores in the garment district with beautiful things but M & J has by far the largest selection of trims in the city. And, unlike a lot of the garment district stores, they’re open on Sunday (you know, for those weekend trim emergencies.)

Tinsel Trading – 828 Lexington Ave

Shopping in the New York City Garment DistrictTinsel Trading recently moved out of the garment district to this new location on Lexington. They stock the most amazing unique vintage and new trims you’ll find (unless you’re shopping in India or Southeast Asia). Their stuff is expensive but much of it really is one of a kind. If you like metallic thread, fabrics, and fringes, this is the place to go.

If you’ve never had the chance to shop for fabric in New York City, I encourage you to plan a trip if possible – you won’t regret it. And, if you come during the month of December, you can also go visit the holiday windows at the retail stores along 5th Avenue – Bergdorf’s (always my favorite), Saks, etc.

Sew It Straight and Square

Sew It Straight and Square

I wanted to take an opportunity to tell you about something I learned very early in my sewing experience. Hopefully, it will help when you have to square off fabric for blocks or other things.

When I resumed by sewing hobby after being away for several years, I found many things have changed. Well, me for one, because I started out thinking I would make a few things, have a sewing machine available for mending, and leave it at that. I wanted to make a shirt or two.

But, never, in my wildest dreams, I thought I would have an interest in quilting. Being able to buy many different fabrics, mix them up, find harmony between them, and create an awesome piece of art was exciting!

So my first fabric obsession started with “fat quarters”. You know, they are bundles of one designer’s collection, or curated by someone else mostly sold in online fabric stores offering 10, 15, 20 or more pieces that have the same colors or coordinating fabrics! Oh… shopping online!! A whole other obsession!! Sorry. I got distracted!

But, I knew right off, I couldn’t cut them with fabric shears or pinking shears. It would take years off my life.

So, today I want to share how I learned to share how to cut “ fat quarters” for multiple precise pieces all at once.

Three tools necessary for straight and square pieces:

  1. Rotary cutter
  2. Acrylic ruler – my favorite 24 x 6 inches, but I also love 14 x 8 inches. Another handy one is 12 x 6 inches. I use them all.
  3. A self-healing cutting mat, measured in centimeters and inches. One with measurements is the KEY here.

Most Important!

RULE #1 – Never Cut Toward Yourself or Sideways with a Rotary Cutter – Always Away from Your Body

RULE #2 – Measure Twice and Cut Once

  1. Open 21 x 18 inch piece. Press with iron flattening fold creases. It makes a difference, you will see!
  2. Cut away selvage edge. You will have the longest part on the mat. Do not double the fabric and trim as close to the edge of the selvage as possible.
  3. Refold the length piece in half by taking the left side and match the edges on the right side where the selvage was.
  4. Square right hand edge with ruler and mat. Take off just a little sliver. Then trim the opposite side for threads. Not much to do there if it is square.
    • Now, the left has a fold, the top is folded two times giving you 4 layers of fabric. The top folded pieces have to be shaved too and the left side so you will still have exactly 9 inches on those two sides if you are careful.
    • Are you still here? Almost done!
  5. Line up the longer piece with the ruler, and trim off the small 2 inch piece to have 4 perfectly squared 9 x 9 pieces. The best part is you only lose about 1 ½” of the fabric by cutting it this way.

However, if you are feeling bold… and you put:

Beautiful 8 x 8 inch napkins ready for your next meal or party.

Beautiful 8 x 8 inch napkins ready for your next meal or party.

Right sides together, sew up the sides at ¼ inch leaving an inch or two (somewhere close to the end but not the corner) to turn them to their right sides, press seams, pin opening closed and top-stitch around all sides.

Then you have:

Beautiful 8 x 8 inch napkins ready for your next meal or party.

I would love to hear your comments or questions. Stop by and see me again soon!

Scissors, scissors, scissors

Scissors, scissors, scissors

Partial scissor collection.I have a bit of a scissor problem, as in, I have a lot of them. I’m not always good about getting them sharpened, or sharpening them myself and often will just order a new pair – which isn’t necessarily very economical but, often, much more fun. This photo is of the scissors that are currently in my shop at Blindspot. It doesn’t include the scissors I have at home or the scissors that are in my sewing kit on the wardrobe truck or the scissors I probably forgot about that are at the bottom of a bag somewhere in a closet.

In New York City, you can have someone come to your shop and sharpen all your scissors with an electric grinder. There’s also a scissor and knife sharpening truck that still trolls the streets of Brooklyn (like the Mr. Softee ice cream truck). I never have any scissors on me when I see the truck though I always want to flag it down. You can, of course, sharpen your own scissors using a sharpening stone but I never seem to get around to doing that.

Most tailors have a favorite pair or a preferred model that they own more than one of.

My absolute best loved are Gingher’s original 5” tailor points, the ones that are actually pointy on the end. For some reason, when Fiskar acquired the Gingher brand, they altered the 5” tailor points. Now they have more rounded blades and a blunter end and are often called ‘craft’ scissors. The pair on the left in the following photo is the oldest pair. See how much narrower and pointier the blades are?

Evolution of Gingher’s 5” tailor points.

Evolution of Gingher’s 5” tailor points.

I do quite a bit of cutting. I never really took to the mat and rotary blade camp though I can understand how it can be an efficient and accurate way to cut. Probably because I started my whole tailoring/pattern making career before cutting mats and rotary blades were prevalent. Or maybe I’m just old. At any rate, my favorite scissors to cut with are Gingher 11” knife edge shears.

Cutting shears.

Cutting shears.

Other scissors that I use on a daily basis are:

Gingher 8” straight blade shears

– For trimming seam allowances, though you can cut with them. I just like a longer blade.

Gingher 7 ½” pinking shears

– I usually pink the hems in men’s suit pants as opposed to serging, mainly because a serged hem will leave a ridge if someone (drycleaner or otherwise) gets over zealous with the hem pressing.

Gingher 6” applique scissors

– I use these when I need to trim something very close the edge, or when I’m cutting around an applique (obvi.)

Gingher 7” straight blade scissors

– I use a pair of these as my paper scissors when patterning.

One of the sacred sewing laws is to never use someone’s fabric scissors to cut anything but fabric. Ever.

One of the sacred sewing laws is to never use someone’s fabric scissors to cut anything but fabric. Ever.

Excuse me… What are you cutting?!

Speaking of paper scissors. One of the sacred sewing laws is to never use someone’s fabric scissors to cut anything but fabric. Ever. The standard response from someone who sews to the question, “Can I borrow your scissors?” is “What are you cutting?”

The reason why is fairly simple: try cutting fabric with a pair of craft or paper scissors and you’ll find your edge looks as if it were chewed off by some sort of extremely hungry wild animal.

Wiss pinking shears.

Wiss pinking shears.

A few years ago, I acquired some old scissors for a mens’ tailor in the city who was retiring. I love this pair of old Wiss pinking shears. Despite the knicks and scratches on the exterior, they still cut very well.

What’s your favorite pair?

Sew Gifts for Everyone on Your List

Sew Gifts for Everyone on Your List

Do you make most of your holiday gifts?  Have you wanted to start this tradition?  If you haven’t, this is a great year to sew gifts for everyone on your list.Sew Gifts for Everyone on Your List

I have been sewing and/or making most every gift I give for many years now.  So I know from experience that it is easy to get stuck for ideas, especially for certain recipients.  But I have learned that with time and thought, it is possible to sew gifts for everyone on your list.

The most important tip I have learned in making holiday gifts over the years is to get started early.   With an early start you can complete your gifts in plenty of time to enjoy your holidays.   Starting in December can make for a stressful season!  Learn from my mistakes and get started now, or you could wind up as I have- sewing late into the night on Christmas Eve.

For babies, try a stuffed ball with ribbon tags for grabbing.

For babies, try a stuffed ball with ribbon tags for grabbing.

You can sew gifts that everyone will love.  Here are some ideas to consider for everyone on your list:

For Kids

Quiltshere are some tips for sewing fun, quick quilts.

Soft Toys –  dolls, stuffed animals, robots, monsters. For babies, try a stuffed ball with ribbon tags for grabbing.

This rainbow book of colors is one of my favorite gifts ever.

This rainbow book of colors is one of my favorite gifts ever.

These are a lot of fun, both to make and to play with.

These are a lot of fun, both to make and to play with.

Soft Books – These are a lot of fun, both to make and to play with.  This rainbow book of colors is one of my favorite gifts ever.

Bags – make a tote bag with divided pockets for crayons and include a coloring book.  Or whip up a precious little purse to match a sweet girl’s personality.  I’ve even made a Star Wars backpack from an outgrown favorite T-shirt.

ou could sew a sack lunch, complete with felt brown paper bag; pretty cupcakes and donuts; even a whole roast turkey!

Felt Food – these are both easy and lots of fun to make.  You could sew a sack lunch, complete with felt brown paper bag; pretty cupcakes and donuts; even a whole roast turkey!  There are a ton of free patterns and tutorials for felt foods available online, but these are easy to make up off the top of your head, too.Crayon, Marker, or Colored Pencil Rolls- make a great gift for kids on-the-go.

Crayon, Marker or Colored Pencil Rolls – make a great gift for kids on-the-go.

Doll Clothes and Accessories – Sew something new for her favorite dolly.  Make a dress or two, a carrying bag with a front pocket designed as the doll’s bed, or a doll quilt.

For Anyone

Lap Quilts.Zip Bags – These are useful for everyone.  Ladies can use them for cosmetics, men will appreciate them for holding shaving and toiletry supplies for travel. Children can use them as crayon or pencil bags, or for containing sets such as legos to-go.  They also make great first aid kits for the car or travel.

Lap Quilts – Be inspired by your recipient’s favorite colors or personality and sew them something special for snuggling.

Pillowcases – You can sew a pillowcase from any yard of cotton fabric.  Choose a beautiful print or fun novelty fabrics.These are always appreciated and a great way to use fat quarters from your stash. Embellish with ruffles, pockets and/or appliqué.

For Ladies

Half Aprons – These are always appreciated and a great way to use fat quarters from your stash.  Embellish with ruffles, pockets and/or appliqué.

Needlebooks –  These are a fun little project for playing with patchwork and make useful and treasured gifts.

Folklore Bag

Folklore Bag

Purses – What lady wouldn’t like a pretty new handbag?  My favorite purse pattern is the Folklore Bag from the book One-Yard Wonders.  I like to add special details like an attached clip for easily finding keys.

Cloth Napkins – Holiday themed sets from novelty fabrics make a lovely gift. This is my go-to for teacher gifts.

Cloth napkins.

Cloth napkins.

For Men

Barbeque Apron – Here’s another fun place to use novelty fabric.  He’s sure to appreciate one emblazoned with his favorite ball team’s logo, or choose a funky fabric with vintage cars, guitars, or hot dogs.

Handkerchiefs – I use the embroidery feature on my machine along the edges.  My machine has an alphabet, so I like to sew “Bless You” on these too.

Throw Pillows – with football fabrics or something else he’ll appreciate.  Be sure they match the couch or décor in his man-cave!

Over-the-Visor CD Pockets for the Car – include a mix cd for extra fun.

For Furry Friends

Gift wrap.Dog or Cat Bed – You can make these as a simple stuffed rectangle or square, or go fancier with patchwork or other design details.

Stuffed Toys – catnip stuffed mouse or felt or fleece “bones.”

Matching Collar and Leash – I buy ugly collars from the dollar store for the hardware, then I make nicer, new collars with nylon webbing covered with embroidered ribbon.  These make a super nice gift for pet parents.

Make this the year that you sew gifts for everyone on your list and they will thank you for it!  And don’t forget the gift wrap; use holiday fabric and whip up gift bags to fit any size gift. These re-usable wrappers are zero-waste and your recipients will be happy to use them again next year.

Should you Include Barter in your Sewing Business?

Should you Include Barter in your Sewing Business?

If you run a small (or sometimes large) sewing business, you may occasionally have the desire, or encounter an offer, to barter services. Bartering is an age old method of exchanging labor and/or goods and it’s one I would encourage you to not dismiss until you’ve fully considered what it could offer.

Bartering is an age old method of exchanging labor and/or goods and it’s one I would encourage you to not dismiss until you’ve fully considered what it could offer.

When considering barter, keep the following things in mind before you agree:

Make Sure you Get an Equal Exchange of Goods

Ensure your barter is for an equal exchange of goods or labor. If you are providing someone with $500 worth of labor on repairing upholstery, make sure you get the equivalent in return. If, for example, you would only receive $300 in custom built-in shelving, be very explicit that the remaining $200 will be paid in dollars. Be sure to delineate labor versus supplies/shipping/etc., and that both parties are in agreement on which exactly of those things is being bartered equally for.

Is it Worth it to You?

A lot of people have a hard time saying no. Remember, in addition to practicing your craft, you are running a business. If you prefer cash or the person offering the bartered goods or services doesn’t have something you need or desire, politely decline and ask for actual payment instead.

Exchanging my labor for spa services worked for me. Here I’m on a Mexican vacation, rocking a pedicure obtained via barter for my sewing services.

Exchanging my labor for spa services worked for me. Here I’m on a Mexican vacation, rocking a pedicure obtained via barter for my sewing services.

Recently I was approached about doing barter for a local spa. They needed large amounts of their high-end spa robes repaired and offered to barter in exchange for spa services. I’m a sucker for a good pedicure and I usually pay for this indulgence. A barter of my labor in exchange for spa service in this case was definitely worth it. I submitted invoices of the time my labor took for each batch of robes, and the monetary amount was then put 1 to 1 into my vendor account as credit at the spa.

Write it Down

Get your agreement in writing. Even if that writing is an email thread where you go back and forth until all the details are fully worked out, it’s crucial you have the agreement in writing should either party need to go back and clarify.

Also consider only doing barter for a specific time or a specific project. Just because you’ve used barter in the past does not mean you are forever stuck doing that. Be clear about for how long you’d want that specific agreement to last and don’t hesitate to ask for monetary payment in the future.

Understand whether or not to include tax on a barter invoice. In California, you do not need to charge tax for labor on repairing items that have already been made.

Understand whether or not to include tax on a barter invoice. In California, you do not need to charge tax for labor on repairing items that have already been made.

Don’t Forget Taxes

You may need to include tax on your barter invoice. Every state has its own laws in this regard, so look up where you are living to make sure you bill accordingly. I live in California. In the example above where I bartered my labor in exchange for spa services I did NOT need to charge tax but that is only because my labor was on repairs. If I had sewn new robes for them, I would have needed to charge tax on that labor. Take the time to find out how to report each transaction.

Do you barter? If so, what types of bartering situations motivate you? If you haven’t tried bartering, you may want to give it a try. Let me know how it goes.

—————————–

Charlotte Kaufman is a writer and sewist in Mammoth Lakes, California. She specializes in marine and home interiors and continues to fall more and more in love with quilting. You can follow her at charlottekaufman.com.

Fabric Guidelines and Tips!

I’ve written tips on this blog, and I’ve written about fabrics. Truthfully though, some of the most sensible pieces of advice I think you can give a person just diving into the world of sewing are about fabric. While it might be easy to fall into the mindset of simply looking for patterns and colors, there’s more to consider in regards to your fabric choices—particularly for those of us with potential baby-steps skills with sewing. Those details, as it were, can have severe impacts on the ease or difficulty of putting together your first quilt, pillow, shirt, etc. For this particular post, I’ll focus on one specific kind of project: Patchwork Quilts.

Running the risk of making this read like a high-school, three-point essay, I’ll still stick to my idea here in saying that there are at least three fabric details worth considering before beginning your first patchwork quilt: Type, stretchiness and size.

1) Type:

Can words honestly express how big of a deal the type of fabric you pick can be? Well, let’s look at it logically. Through Amazon, you can buy these pieces of material:

Which one, just by looks, seems to be the most agreeable to work with? If you chose the owl-including Door #2, you would be correct!

Of course, that was an easy example since lace just looks like it would be a pain, but even choosing silk or satin as your first fabrics could prove a regretted decision. They’re slick, and that easy-to-slide quality could lead to stitching that is too wavy to be precise.

A good first-fabric, in my opinion, is cotton. It’s simple, but it stays where you put it more than silk or satin, which could lead to more accurate stitching with less hassle. A better product that’s simpler to come by could be in your hands and on your sewing-resume just by picking the right fabric!

Another detail worth considering in type is *you* personally. Example: I have potential issues with polyester—like sneezing—so that’s probably not the way I should go!

Some fabrics have more give than others seem to have.

Some fabrics have more give than others seem to have.

2) Stretchiness:

Some fabrics have more give than others seem to have. That doesn’t mean you should necessarily rule out every piece of material for the rest of your life that has a stretchy quality, but it’s something worth noting as you pick out fabrics. If you’re making a quilt, a stretchy piece of material that’s beneath a non-stretchy one could be an issue.

Example: If Block A is non-stretchy and is above stretchy Block B, the end result could be that Block B *has* to be stretched out to match Block A’s size. Say you measured Block B’s fabric by *having* it stretched out. That decision, if your blocks are the same size, would lead to the need to keep Block B’s fabric stretched for it to reach the same end-line as Block A. That, in turn, could lead to a scrunchy detail for your quilt that you don’t care for because the material condensed back into its original form.

Trust me! Few things are as disappointing on a quilt you made as seeing lines that are obviously not straight and blocks that are clearly mismatched in size! Speaking of size…

3) Size:

Last but not least, the size of your material matters, and I’m not talking about how much you get from your fabric store. I’m talking about block sizes. It really pays to think about where you want your overall product to go, and in two particular ways for this idea: How complex you want your product to appear, and how difficult you want your journey toward a final product to be. Once you find the answers to those questions, you might be closer to deciding on a block size for your patchwork quilt.

For instance, if you want something that looks really complex, smaller pieces of material might be your friend. Think of it like a puzzle. If your puzzle has one hundred pieces, you might have an easier, quicker time finishing it than a puzzle with fifteen hundred pieces, but the fifteen-hundred-piece product might look more impressive to someone who notices it. It’s the same principle with patchwork quilts. Even though tiny squares can look impressive, there’s more time that goes into making smaller squares into that large final product. It might look better if you get it right, but be ready for some effort!

If you want something that’s easier, you might think of having larger squares—like ten inches. The final product could look particularly amateurish though *because* the quilt squares are so large. Without some kind of embellishment for the patches, the simplicity might make your product seem less impressive.

For those reasons, you might want to decide on a combination of impressiveness and ease for your first quilt—maybe 8 inches. They’re large enough blocks to be easy to work with, but with the material that would be taken up while sewing the patches together, the final product might look more professional. Sounds like a potential win/win!

One final tip about size: Once you select one, you might think of buying pre-cut fabric squares in that size for your quilt. It’ll ease up your first-quilt process, and maybe you can get enough confidence with their help to give you fuel to keep going in your quilting journey!

Birthday Present Ideas for Sewers

Birthday Present Ideas for Sewers

Birthday Present Ideas for SewersI’m lucky enough to have an October birthday, which is the inspiration for this post. But whether you or the sewer in your life has an October birthday or any of the other 11 months of the year, they’ll love these birthday gifts and use them all year long.

Sewing Machine Needles

If you happen to know the particular brand of machine, or can lay your hands on universal needles, these make a great gift. Get a variety of sizes suitable for many fabric types. Sewers know that machine needles break and get dull, so a package or two of machine needles to replace the ones they’ve gone through will be greatly appreciated.

Dress Form

If the sewer you’re buying a gift for makes a lot of clothes a dress form will be a gift straight from heaven. These aren’t inexpensive so most casual sewers don’t invest in them, but they make the process of sewing a dress much easier and help make sure they’re sized correctly and will fit as expected. Look for one close to the sewer’s size. They’re adjustable, but only to a point.

Self-Healing Cutting Mat

The larger the better. These mats are amazing! If the sewer in your life uses a rotary cutter, a self-healing mat protects the table, floor or other surfaces. Quilters use these a lot and may need to put several together to make a mat the size of the finished quilt. Get a few so they can make whatever size they need.

Straight Pins

Straight pins are essential for every sewer. They hold the sides or pieces of fabric together while they sew over them with the machine. Sometimes, the pins get bent in the process. They also get dull over time. A package of these is inexpensive and will be greatly appreciated by the sewer in your life.

Supply Boxes

Your sewer likely has numerous spools of thread, bobbins, buttons and innumerable other supplies. A set of clear plastic boxes in various sizes will help her organize them while keeping her supplies visible and easily accessible.

Sewing Books

There’s a huge variety of sewing books available. You can get a collection of patterns, tips on fitting, advanced fabric guides or a variety of other sewing related books. Depending on what interests your sewer has, you can find a book, or books, to suit.

Gift Certificate

What sewer doesn’t love a craft or fabric store shopping spree? If you’re not sure what to get the sewer in your life, gift certificates to the local craft or fabric store will be greatly appreciated. They can revel in fabrics, poke through threads and notions, and flip through patterns to their heart’s content.

Sewing Class

If the sewer in your life is dreaming about learning a particular technique, sign them up for a class. They’ll love the chance to learn something new and appreciate the thought you put into the gift. And who knows, maybe they’ll make you something to boot!

What other gift ideas do you have?

Fabric Trend: Crazy Cat Lady

Fabric Trend: Crazy Cat Lady

You are bound to get a cross over between fabric lovers and cat lovers.

In the United States alone, we have over 85 million house cats. Additionally a 2014 survey by Quilting in America showed that there are over 16 million active quilters in our country as well. With numbers that high, you are bound to get a cross over between fabric lovers and cat lovers, and when you do, new fabric lines like these are born:

From Porto with Love, by Sarah Watts, for Cotton + Steel

Inspired by designer Sarah Watts’ travels to Portugal, From Porto with Love features cats designed with old world charm.

Inspired by designer Sarah Watts’ travels to Portugal, From Porto with Love features cats designed with old world charm.

The line includes a pattern for cut-out cat plushies in two colorways.

The line includes a pattern for cut-out cat plushies in two colorways.

There are two cat plushies per panel and when complete they mirror each other. Just cut, stuff and sew.

There are two cat plushies per panel and when complete they mirror each other. Just cut, stuff and sew.

Cat plushies from Cotton + Steel’s Pennie print

MEOW or Never, by Erin Michael, for Moda Fabrics

Designer Erin Michael continues her paint-by-number palette with this new line, MEOW or Never, featuring a colorful assortment of feline friends.

Michael’s purrific designs stood out Quilt Market Spring 2016 and quickly inspired many projects including this cat clutch designed by Anna Graham of Noodlehead.

Michael’s purrific designs stood out Quilt Market Spring 2016 and quickly inspired many projects including this cat clutch designed by Anna Graham of Noodlehead.

The true piece de resistance of the MEOW or Never line is this giant kitty cat quilt. Truly, cat lovers everywhere are lining up to order this quilt kit, which is sure to please both humans and felines alike.

The true piece de resistance of the MEOW or Never line is this giant kitty cat quilt.

Cat Lady, by Sarah Watts, for Cotton + Steel

Sarah Watts is a co-founder and designer for Cotton + Steel. After the purrfection of her cats in From Porto with Love, she is back with the Cat Lady line of fabrics.

After the purrfection of her cats in From Porto with Love, she is back with the Cat Lady line of fabrics.

And yay, cat lovers everywhere rejoiced!

And yay, cat lovers everywhere rejoiced!

Cat Lady fabric, image via Lady Belle Fabric

Cat Lady is full of whimsy, color, and movement.

Cat Lady is full of whimsy, color, and movement.

Cotton + Steel offers this free pattern for this Cat Lady quilt on their site. I love the cats playfully flow around the quilt.

Cotton + Steel offers this free pattern for this Cat Lady quilt on their site.

This Frida Cat is one of my current faves by designer Cynetik.It’s not just fabric houses that are getting onboard the cat craze. Spoonflower has pages of fabric designed with cats galore. This Frida Cat is one of my current faves by designer Cynetik.

There are even fabric websites dedicated solely to offering cat-themed fabric. www.felinedezine.com and www.felinedrive.com are just two examples. Have you made anything that made you or a favorite pet meow? I think the Meow or Never kitty quilt by Erin Michael’s is next on my ‘to make’ list.

Charlotte Kaufman is a writer and sewist in Mammoth Lakes, California. She specializes in marine and home interiors and continues to fall more and more in love with quilting. You can follow her at charlottekaufman.com.
I Sew! You Sew! We Sew!

I Sew! You Sew! We Sew!

When I was a little girl, music was a group experience in my family. Clearly, that would be the case if we were members of a band or something, and we certainly had some musically inclined folks in our circle. I, more’s the pity, only ever learned to play a number of simple tunes on a recorder and very—very—minimal details of a guitar. With that lack of musical ability, I wasn’t exactly going to grab some drumsticks and make awesome music with anyone!

Old school—fifties and sixties, and maybe even some from the decades before those.

Old school—fifties and sixties, and maybe even some from the decades before those.

So the band element isn’t what I mean about music being a group experience. What I *do* mean is that my parents had this floor model record player, and it wasn’t all that odd for us to sit around said player while old school country and rock played from it. And by old school, I mean old school—fifties and sixties, and maybe even some from the decades before those. That idea of group music-listening continued as I grew older, taking shape in sitting around with my brother while he played 80s rock and such. In case anyone wants a reason as to why my music collection might seem outdated, I think I’ve given you a direction to consider to find the reason!

The point is that we’re the type of people who can sit and talk about music or play music together, and it’s not too weird of an occurrence. In fact, it’s kind of normal.

Back in the Day…

Even in my high school art class, working on projects was a group experience because the classroom was arranged in such a relaxed way. We were allowed to talk with one another while we worked, so we basically ended up chatting and working in small groups—and I might have broken out a Disney tune or so along the way.

Those are two artistic categories that I’ve treated with group experiences, and I recently had reason to consider making sewing a group experience as well. As of right now, if I’m around people when I sew, it’s potentially because we’re all watching TV or something, and I’m sewing while we watch. I might be in a group, but it’s definitely not group sewing!

Branching Out

This month though, I had a Facebook comment conversation with someone that got me thinking. If music is a group experience in my history, and art was a group experience in my high school class, why not sewing? I did some browsing online, and the idea doesn’t seem like a new one! Apparently, sewing clubs exist! Who knew?

Still, I happen to live in a lesser known area of my state, so the odds that there’s going to be a local sewing club are pretty low. If I want a group sewing experience, I should think about leaning toward the idea of virtually sewing in groups, which is okay because virtual sewing possibilities are evidently out there, even if we have to make them happen ourselves.

That friend I had the comment conversation with.For instance, that friend I had the post conversation with? She claimed that she, like me, wanted to make a rag quilt. Well, if we both want to make rag quilts, why not make them at the same time and compare notes online along the way? It sounds like a good idea to me, and as of right now, we’ve talked about the possibility of doing exactly that next year.

What I want to do for a pattern.

What I want to do for a pattern.

The idea is so intriguing to me!!! I even have a possible idea of what I want to do for a pattern, and it looks something like this Craftsy project, but with a more equal-block style:


Beyond my personal idea for my own quilt, I also have an idea of expanding this situation beyond just two people, or at least trying to. You see, I’ve decided that what would be even more awesome is if this could somehow become a bigger thing—like if more people decided to make a rag quilt around that time, and it became something that included dozens of people. This notion, in fact, is so intriguing that I’m putting it on my goals list for 2017. The official goal would read something like this:

Create an organized sewing project, promote it online, and hopefully engage a number of people in the endeavor.

Let’s Collaborate

Even if I only gained five people who would be willing to partake through Twitter promotion and such, that’s five people to discuss my rag quilt with beyond what I already have! That idea of comradery is hard to pass up, and it isn’t something I necessarily considered before that series of Facebook comments. Something that simple got my thought process going, and I want to run with it!

So, dear reader(s) that I hope are out there, keep an eye out for future posts regarding specifics about this event. I want to plan things out right in order to ideally get good results, so I’m not going to throw out a specific date without that proper planning. But unless things change and the plan shifts, the rag quilt virtual extravaganza is happening! And I’m looking forward to the possibilities!

What do you guys think? Interested in the event? Even if you aren’t, have you ever sewn in groups? Details, guys! Details!