Brother SE1800 Sewing & Embroidery Machine Review

Brother SE1800 Sewing & Embroidery Machine Review

Brother SE1800 Sewing & Embroidery Machine Review

If you looked at my sewing room right now, you would think I was my own little sewing shop. Seriously. There are seven machines strewn out right now. Some of them have their own little stack of projects just waiting for attention, and some are lined up against a wall waiting for projects.

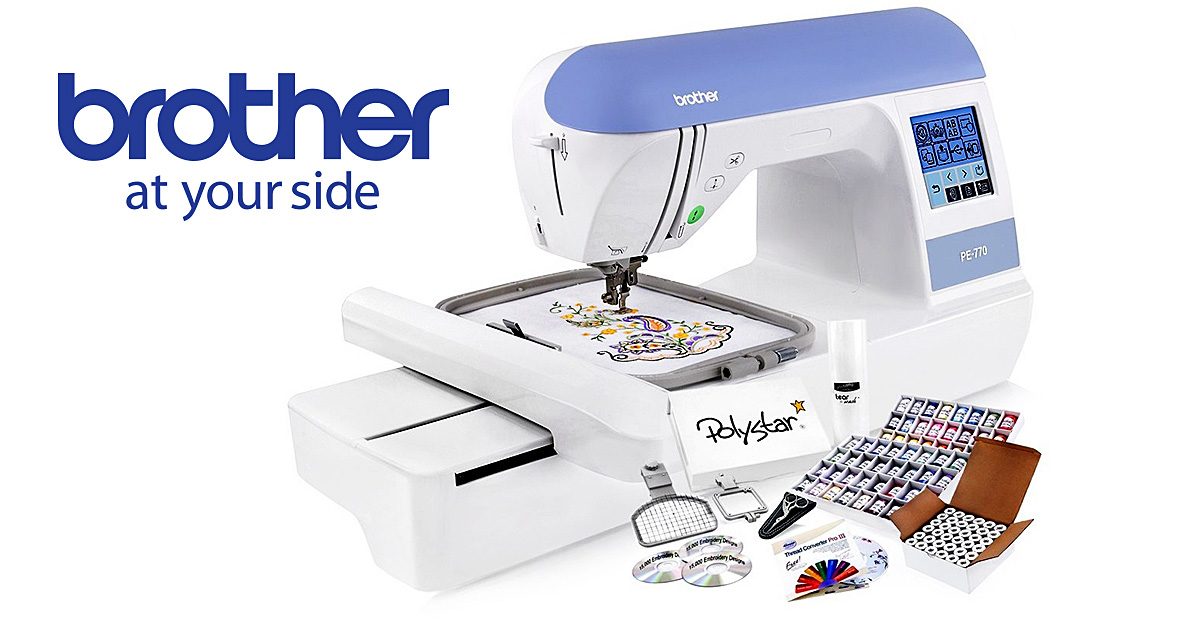
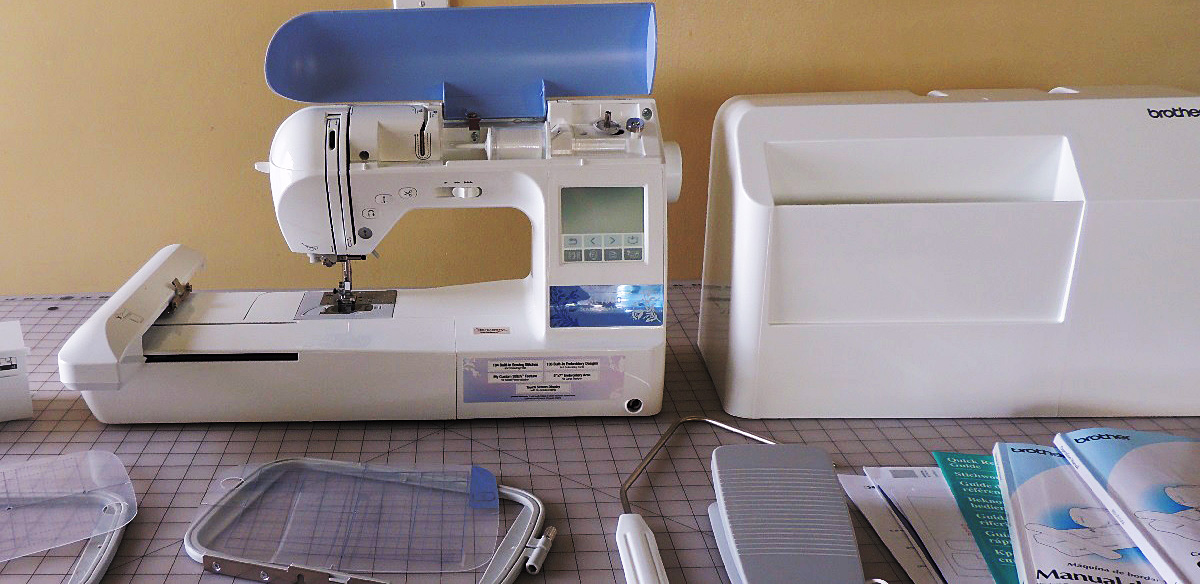
This year, I added the Brother SE1800 Embroidery And Sewing Machine to my collection. I received this machine from Sewing Machines Plus in exchange for my honest review. All opinions are my own.

First impressions

I was very pregnant when this box arrived at my doorstep — about three days after completing my “order.” So, needless to say, I thought this 39 pound box was quite heavy. Lest you think the machine itself is super heavy, you should know that there are a lot of extras included with this 22 pound machine.

I was very impressed with how quickly this machine was delivered to my front porch, and how carefully packaged it was.

After I got my machine out of the box and set up, my first impression of the Brother SE1800 was how quiet it was. In both the embroidery and the sewing modes, this is a very quiet machine.

Putting the Brother SE1800 through the tests

I wanted to put this machine through as many tests as I could, so I began by reading the owner’s manual from front to back (which I highly suggest any new owner do). I then made a list of projects I could make. My goal was to try out as many of my new machines features as I could — which was a lot.
Embroidery patterns are easily downloaded to a USB, which then plugs directly into the left-hand side of the machine.

Embroidery patterns are easily downloaded to a USB, which then plugs directly into the left-hand side of the machine.

I initially set up my favorite sewing machine next to this one and planned to use the two machines together to make projects faster and smoother. However, I found myself using this combination machine for both the sewing and the embroidery parts of my sewing stack.

Switching back and forth between tasks was as easy as turning the machine off and switching the flat bed with the embroidery unit. After turning the machine back on, the display automatically switches to the proper mode.

I used this machine for basic sewing, heirloom sewing, basic smocking, embroidery and appliqué. It also has darning features I have yet to use.

The pro’s

I could go on and on telling you all the features this machine offers, but that would be boring and you can see all those details here for yourself. I will get straight to the exciting part — my favorite features.

My favorite type of machine sewing is heirloom sewing. This machine made pulling strings and sewing lace together smooth and quiet — it has been a very peaceful experience.

Secondly, I also enjoy smocking. Until receiving this machine I had previously only done this with a smocking machine and hand stitching. Although there is definitely a learning curve with this machine, I have thoroughly enjoyed learning a new trick to a timeless technique.

The appliqué process/instructions are different from how I normally do appliqué, but once again I enjoy learning a different technique.

I have, since receiving this machine, had a new baby. The Brother SE1800 has become one of the main machines I use now because of how quiet it is. Although this machine doesn’t replace a heavy duty machine or serger, because it’s a combination machine, it’s done every other project I’ve needed to do.

If you have never had an embroidery machine before, then I highly suggest getting one with a USB port, as this one has, so that data transfer cords are not needed when embroidering — unless you like to be attached to a computer for that part.

The con’s

If there is one thing I would change about this machine, it would be that the owner’s manual would have pictures of the included embroidery programs. The screen showed a picture of the embroidery and appliqué designs, but I wasn’t sure what the exact picture would look like until I did a test run for each one. Although it’s not that big of a deal, I did have to use extra thread and material to do a test run of each one to see it before I placed it on my desired garment.
While I'm unable to add beads & change colors smocking on the machine, I was able to save at least a day working on these side panels.

While I’m unable to add beads & change colors smocking on the machine, I was able to save at least a day working on these side panels.

Is is worth the price?

Would I have purchased this particular machine myself? Yes, I would have. Although I probably would not have paid the full amount of this machine, Sewing Machines Plus very often has sales going on, and that’s when I would have made a purchase.

Another thing that sweetens the deal is all the extras that they put in with this machine. I was able to get started trying out different features right away with all the tools and extras that came as part of this package (which you can check out here).

Overall impression

This machine is one of the three machines I have out on my sewing table right now, along with a heavy duty machine and a serger.  I’m sure that is where it will stay for quite awhile.  Though I will use the other four here and there, this combination machine really replaced them all in so many ways.

To read more details and see what I was able to do with my machine while I was running through its features, read this. If you have more questions after you have read this, please feel free to ask.

Deborah Olsen writes for gracegardenandhomestead.com from her farm & homestead deep in the heart of the Rocky Mountains.
Save on Sewing Machines This Spring

Save on Sewing Machines This Spring

March Madness – It’s Not Just for Basketball Fans

I still sew on my mom’s old Singer. It’s got its quirks and issues, but I feel close to her when I use it. Each stitch reminds me of childhood memories sewing with my mother. Like the time she came into my nursery school class and made bean bags with all of us. Or the first time she showed me how to use a pattern to make my own clothes. As much as I wouldn’t trade these memories, having a new sewing machine is appealing.

A new sewing machine has features mine doesn’t. And a new sewing machine would, in some ways, be easier to use. There have been improvements in mechanisms and needle motion since my mom’s Singer was manufactured. I’m not ready to trade up from that old Singer, but you might be. If that’s the case, Spring is the perfect time to buy from Sewing Machines Plus!

Spring Sale on Sewing Machines

As nature comes back to life and renews itself, you can renew your passion for sewing with up to $400 off sewing machines and furniture. Even with that great discount, sewing machines can take a big bite out of your budget. To help out with that, you can combine the $400 off with 0% APR financing! Check out all the items included in the Spring Sales Event from Sewing Machines Plus, including furniture, right here.

SewingMachinesPlus.com Spring Sale - shop now!

SewingMachinesPlus.com Spring Sale – shop now!

Other Spring Sales Benefits

Every purchase you make on Sewing Machines Plus that’s over $49 comes with free shipping! In most cases, purchases ship the same day and are delivered in two to five business days. Don’t miss out on your chance to save big on that new sewing machine! Whether you’re looking for a long-arm quilter, an embroidery machine, a serger/overlock machine, or a simpler sewing machine, you’ll find something amazing at the Spring Sales Event.

What sewing machine or furniture will you save on this spring?

Make More Time to Sew, Part Two

Make More Time to Sew, Part Two

Here are more tips to make more time to sew

Here are more tips to make more time to sew.
Hi! I hope you found part one of this series helpful for making more time to sew. I saved my favorite productivity hacks for this week. Here are new ideas for how to make more time to sew; hopefully these will help you, too.

Automate systems

If you can’t get someone else to go for your groceries, could you streamline and automate your system by meal planning and ordering the groceries online, for example, rather than wandering grocery store aisles with your cart?

An easy system for meal planning definitely helps me to make more time.

Another example: some people do laundry on a certain day of the week, but I can’t imagine that. I do laundry every day, automatically. Or I did, anyway; I battled laundry and gave up significant amounts of time to taking care of laundry with love for my family.

Finally, I managed to eliminate laundry backups and piles by doing a load or two — through to completion of putting them away, without exception — every day.

And my work on getting this system into an automated rhythm paid off for me even further. My husband surprised me by offering to take over this daily management! I happily loaded laundry onto my don’t do list and that gives me more time every day.

Keep reading to see more ideas for easy automation of regularly recurring tasks.

Keep reading to see more ideas for easy automation of regularly recurring tasks.

Just having an automated system of where you always put your keys, phone, and other items, for example, could potentially save many minutes of time spent searching for your things.

The same goes for your sewing tools and space, of course. Keep your machines next to their thread, for example. Arrange a hot iron and pressing board within your reach from your sewing machine when you make patchwork. Always know exactly where everything you need is by having a dedicated place for everything and keep everything always in its place when not in use. These little tweaks can save a lot of time for more sewing.

Speaking of systems:

Take a tip from the king of Twitter. I am talking about Jack Dorsey. Dorsey is one of Twitter’s founders and its first CEO. And when Twitter performance was lagging in 2011, he came back as CEO to turn the company around. Dorsey also founded Square, the app that turns a cell phone into a card scanner and enabled everyday folks to easily accept credit card payments.  For a time, he was CEO of both giant operations.

This productivity whiz shared his secret by talking about how he themes his days. When I read his descriptions about how he handles marketing, communications, and growth on Wednesdays, and culture and recruiting on Fridays, for example, I sensed a way to make more time and I started thinking about this.

Keep it simple, silly: easy to remember themes

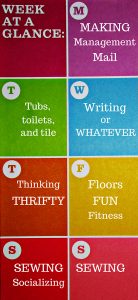
For this to work for me, it had to be simple and easy to remember. After working with different iterations of this idea, my current themes for my days include things like:

Monday

Mail and management on Mondays. Some folks might prefer to use the OHIO rule (only handle it once) for mail. For me, though, I prefer to deal with the last week’s incoming mail quickly and all at once on Mondays.

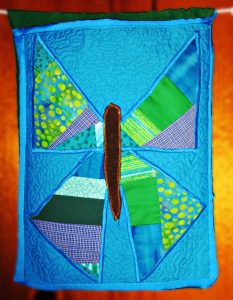
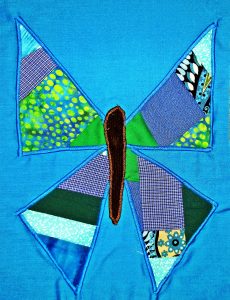
I made this butterfly organizer pocket to hold my mail for dealing with on Mondays.

I made this butterfly organizer pocket to hold my mail for dealing with on Mondays.

Management for me means I am paying bills, scheduling tasks, planning my next week and reviewing the previous week, following up on things, etc.

You could have Making on Mondays, and fit sewing and other projects in on this day every week.

Tuesday

I clean tubs, toilets, and tile on Tuesdays.

Or how about teaching on Tuesdays? You could teach yourself or someone else how to do something new.

Wednesday

For me, Wednesdays are devoted exclusively to writing, and I try to do not much else, because I am currently writing more than one book.

If you don’t have much writing to do, you might like to have whatever Wednesdays instead, for maximum scheduling freedom on hump days.

Sewing could definitely fit into Whatever Wednesday!

If you are in the once a week laundry camp, you could do your washing on Wednesdays.

Thursday

Thrifty Thursdays. I used to choose to do my shopping on this day, since following the thrifty theme helped me not to make impulse purchases or otherwise spend unwisely.

Now that shopping is on my don’t do list, I am helping to free time from excess management on Mondays by theming Thursdays for thinking, too. I allow myself to invest a larger percentage of this day for reading and learning new things.

Friday

Floors, FUN, fitness, and friends on Fridays- I use Fridays for fitting in all these things.

I try to schedule most of our outings, field trips, hikes and other outdoor activities, and also playdates or informal dinner parties with friends, on Fridays.

I also do a good bit of sewing under the umbrella of fun on Fridays. This would be for fun new project ideas, just playing with patchwork or starting a new quilt, stuff that is fun. I wouldn’t do mending on a Friday, since that isn’t as much fun.

We have family time every day here, but if yours doesn’t live with you, maybe you could use Fridays for family time, if this will help you.

I’ll also tell you about a tool that can save a ton of time from Friday’s floor cleaning task. I have a lot of hardwood and other hard floors, and also a pack of boys and a dog. So cleaning floors used to take up what felt like half my day on Fridays.
Luckily, a steam mop is a huge helper that cuts this task from tedious chore to so fast and effective it is almost fun to clean floors.

These are not all made equal, however. I love the well-designed Luna Plus steam mop system, especially because of its handy extra uses in the bathroom. This baby can save time on the floors on Fridays, and the tub and tile on Tuesdays, too.

It cleans twice as well as you can, and in half the time!

Saturday

Sew on Saturdays.

Here are some ideas to get you started thinking about your own themes for every day of the week.
Here are some ideas to get you started thinking about your own themes for every day of the week.
I would advise against any temptation to have Saturday shopping as a theme! That is based on my own opinions, however; you should do what makes you happy.

If you normally shop on Saturdays, could you move to using thrifty Thursdays for this? Then you could save money for more sewing equipment and supplies and a whole day of the week for sewing. I’d love to help you save time AND money, so do consider this option.

Some folks might like to theme their Saturdays for socializing. I do this some weeks myself.

Sunday

Sew on Sundays, too!

It is fortunate that there are two days of the week beginning with S! And it makes perfect sense when theming your days to plan two days of sewing, if you want to make more time to sew.

Of course you could also devote all or part of either Saturday or Sunday to Service or as your Sabbath day of rest and reflection.

And wait, there’s more!

This series will be continued to part three, next week, because I’ll like to show you a few more ways to make more time. And I’ll share a video I am working on for you, where I’ll give you more details and inspiration about all the ideas from this series.

Until then, happy sewing. I hope these tricks can help you to make more time for sewing this week, and I hope you get to enjoy making something you’ll love.

T-Shirt Quilts: Superhero Style!

T-Shirt Quilts: Superhero Style!

Superhero movies are a pretty big thing these days, and I find little shame in saying that I’m a fan of some of them myself. Even in my childhood days, I remember watching the X-Men, Ninja Turtles, Power Rangers… I even liked the old-school Adam West Batman TV series.

As the years rolled on and high school surrounded me, X-Men was made into a movie and began the string of Marvel films that have been hitting theaters for years. And, sure, the X-Men movies mutilated my favorite character’s personality, but they still brought me joy in themselves, and in sparking a series of movies about characters I admittedly wasn’t overly familiar with — like Iron Man and Captain America. That might sound ridiculous coming from a superhero fan, but I wasn’t really into the comic books — just what TV and movies brought me in my favorite shows (which might be a bit embarrassing!).

Avengers assemble!

I’ve taken such a shine to some of these newer-to-me superhero characters — Avengers!!!

I’ve taken such a shine to some of these newer-to-me superhero characters — Avengers!!!

Since that first X-Men movie though, I’ve taken such a shine to some of these newer-to-me superhero characters — Avengers!!! — that I’ve fake-married a number of them in the Game of Life. Now, that is appreciation!

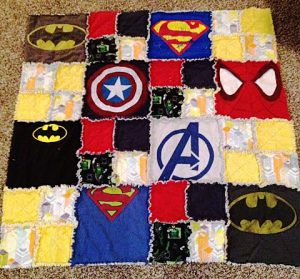
These characters and stories are so remarkable to me that I would love to have some kind of sewing project that’s superhero-related, and I’ve been thinking about my options. As a quilter, I could make a superhero quilt, but I’d want to do something a bit more interesting than just buy collage-types of fabrics and make squares out of them. This week, I was doing sewing research, and I came across a wonderful option: a t-shirt quilt that’s superhero-based.

Hip, cozy, fun!

This week, I was doing sewing research, & I came across a wonderful option: a t-shirt quilt that’s superhero-based.

This week, I was doing sewing research, & I came across a wonderful option: a t-shirt quilt that’s superhero-based.

There are plenty of solid reasons for making a t-shirt quilt, not the least of which is that it’s a good use of fabric you might have in your house since it’s created from t-shirts. In fact, having the shirts already is the best strategy because if you don’t have them, buying them brand new could cost you some serious money! Think about how much you’d spend by paying $20 per shirt with maybe one block coming from each. That’s an expensive project!

But, there’s an alternative if you don’t have those shirts! You could keep an eye out for used ones at local stores or online shops, like I’m thinking of doing. If you can buy them cheap, maybe one shirt here and one there, you could end up with enough tops for a whole quilt without ever breaking your bank!

If you can buy them cheap, maybe one shirt here & one there, you could end up with enough tops for a whole quilt without ever breaking your bank!

If you can buy them cheap, maybe one shirt here & one there, you could end up with enough tops for a whole quilt without ever breaking your bank!

Use what you’ve got

As I said though, having the t-shirts already at your disposal is the best tactic, but not only because there’s no additional fabric purchase for that top layer of the quilt. Another good detail is that you can use this process to declutter your home. How many times do you go through your closet and end up with clothes you never wear? How often do you find yourself needing more room to store your things? If you make use of your graphic t-shirts in a quilt, you’re clearing out space in a productive, creative way that you can use for years to come for practical purposes — and that’s not a bad takeaway from going through your clothes for things to toss!

If you use your own shirts, it also comes with the additional bonus of being able to add sentimental value to the quilt beyond knowing that it’s something you made yourself. Once it’s finished, you could look over your blocks and recall memories that are tied to each piece. Maybe you bought the Iron Man top while on a fun shopping spree with your best friend. Maybe you wore that Black Widow t-shirt to a concert you had a blast at. Maybe you were wearing a Hulk shirt when you got the news that your niece was born. A number of memories could be tucked away in a fun, energetic quilt that primarily came from clothes you had in your closet — low budget, close-to-the-heart, and organization-friendly!

Quilt block paneling

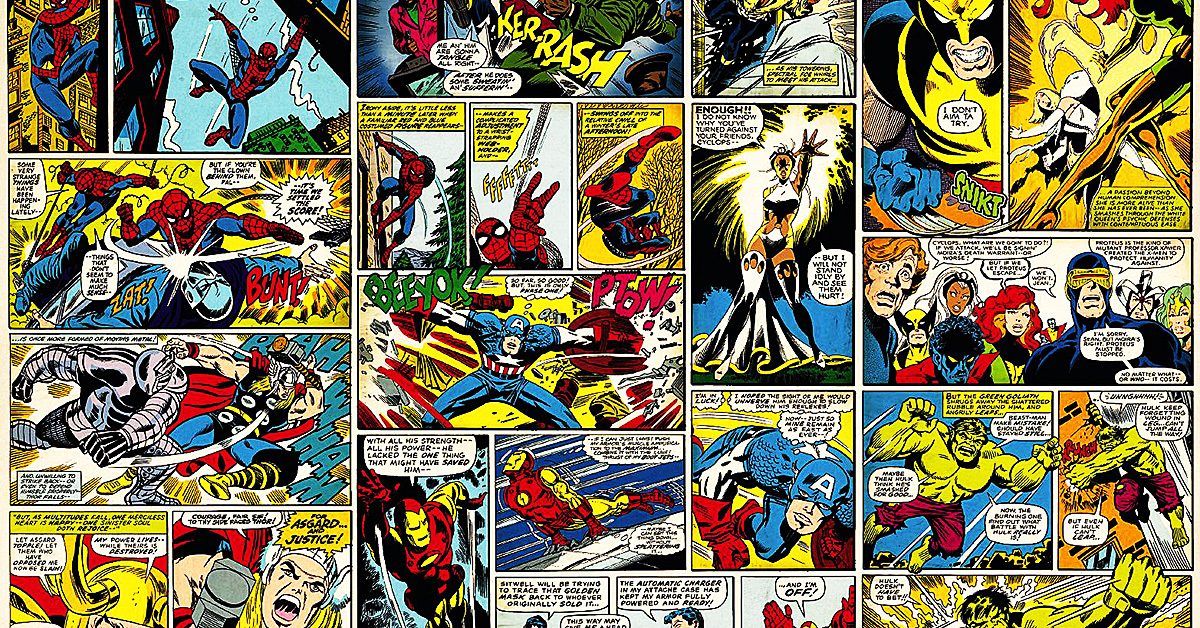
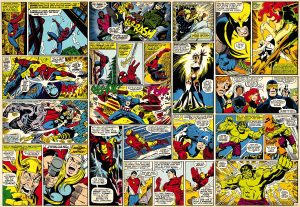
For a superhero t-shirt quilt, you have yet another bonus of the quilt actually mimicking the set-up of a comic book because comic books, too, are given in blocks.

For a superhero t-shirt quilt, you have yet another bonus of the quilt actually mimicking the set-up of a comic book because comic books, too, are given in blocks.

For a superhero t-shirt quilt, you have yet another bonus of the quilt actually mimicking the set-up of a comic book because comic books, too, are given in blocks. Honestly, the connection is so reasonable that making a quilt for comic book superheroes seems like a fairly flawless link. I’m pretty excited to put this idea into action, even if I have to build up my superhero shirts to do it!

For those of you who do have a ton of graphic t-shirts, you could get started on this kind of project in the same way you would for any other quilt. For those of you who don’t, be like me and start keeping an eye out for cheap, used options to buy and store until you get enough to make your crazy-awesome quilt!  If you do these things, a superhero quilt could be in your future, and if you’re a nerd like me, that’s a good prospect!

DIY Home Sewing Projects

DIY Home Sewing Projects

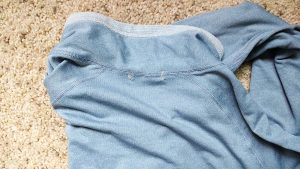
Is it just me, or do an awful lot of jackets and sweaters come without a loop or tag to hang them with? I get it that many have hoods, and you could hang them from the hood, or even the back neck of the jacket, but there is nothing like a solid loop to quickly hang your jacket up.

Another problem is that many hooks are sharp or pointy and if you hang a jacket from the neckline or hood you end up with a bump in the fabric from the imprint of the hook. This is no bueno when you’ve spent good money on the jacket in the first place.

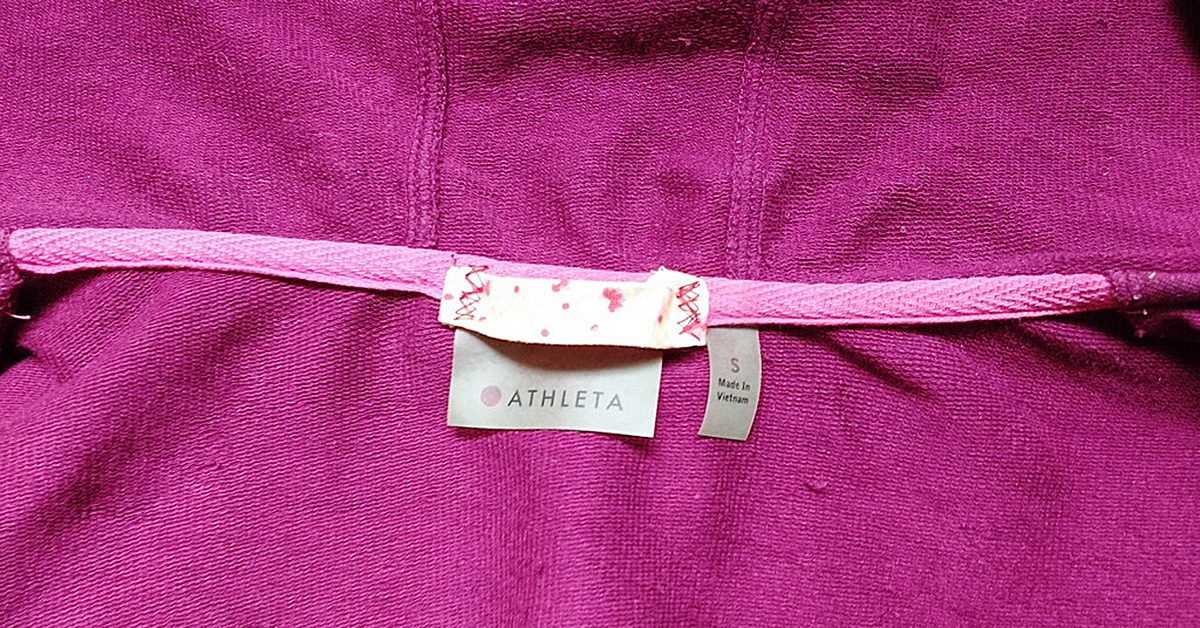
I like to add jacket loops using double fold binding I have on hand.

I like to add jacket loops using double fold binding I have on hand.

Let’s Sew!

It’s times like these when you need to put your sewing skills to use. I like to add jacket loops using double fold binding I have on hand. I sew it on with a zig zag stitch and I find the stitching to be very inconspicuous on the exterior neckline (and it’s often hidden by the hood anyway.)

I find the stitching to be very inconspicuous on the exterior neckline (often hidden by the hood).

I find the stitching to be very inconspicuous on the exterior neckline (often hidden by the hood).

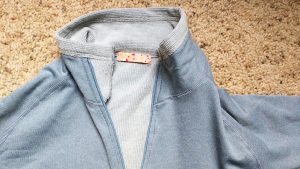
I used the same binding on this gray pullover. I love the pop of color it gives the jacket.

I used the same binding on this gray pullover.

I used the same binding on this gray pullover.

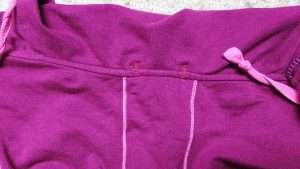
The zig zag stitching is barely noticeable from the back view. Perfect.

The zig zag stitching is barely noticeable from the back view.

The zig zag stitching is barely noticeable from the back view.

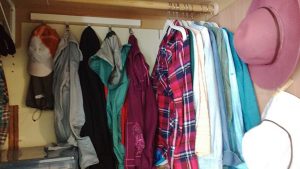
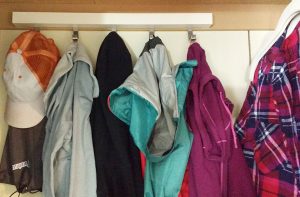
Now I can hang both jackets without the metal hooks on that hanger digging into the fabric of either jacket.

Now I can hang both jackets without the metal hooks on that hanger digging into the fabric of either jacket.

Now I can hang both jackets without the metal hooks on that hanger digging into the fabric of either jacket.

The gray hoodie is on the left and the maroon jacket is on the right. I love organization and I love that I made it happen with my sewing skills!

The gray hoodie is on the left & the maroon jacket is on the right.

The gray hoodie is on the left & the maroon jacket is on the right.

Handy dandy skills

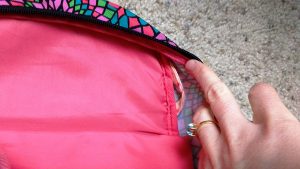
Here’s something else I fixed by knowing how to sew. My daughter’s backpack had no loop on the interior of the backpack for carrying a house key. There was a loop on the exterior, but that’s not very safety conscious, is it?

I took matters into my own hands and modded out the backpack by sewing in my own loop (again with that pretty flowered binding in the photos above). Now she can securely carry a house key tucked safely inside her backpack.

I took matters into my own hands & modded out the backpack by sewing in my own loop (again with that pretty flowered binding in the photos above).

I took matters into my own hands & modded out the backpack by sewing in my own loop (again with that pretty flowered binding in the photos above).

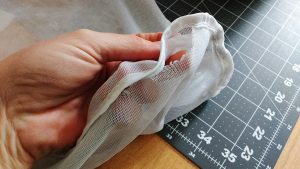
I bought two lingerie bags at Target a while ago and one has started to fray at the seam. While lingerie bags are fairly inexpensive, I knew I could save this one by flipping over the seam and sewing a zig zag stitch.

I bought two lingerie bags at Target a while ago & one has started to fray at the seam.

I bought two lingerie bags at Target a while ago & one has started to fray at the seam.

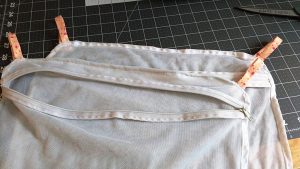
I also added hanging hooks on each side of the bags. I again used that pretty pink binding and now I have no more. At least it will live on in infamy in all of these great home DIY projects I’m showing you.

I also added hanging hooks on each side of the bags.

I also added hanging hooks on each side of the bags.

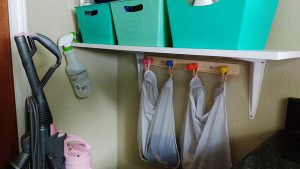
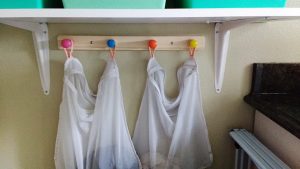
I installed these hooks by our laundry and cleaning station and hung the lingerie bags there.

I installed these hooks by our laundry & cleaning station and hung the lingerie bags there.

I installed these hooks by our laundry & cleaning station and hung the lingerie bags there.

This easy access makes it a breeze for my small kids to put things like their tights and other delicates right into the bags so I have everything ready for laundry day.

This easy access makes it a breeze for my small kids to put things like their tights and other delicates right into the bags so I have everything ready for laundry day.

This easy access makes it a breeze for my small kids to put things like their tights and other delicates right into the bags so I have everything ready for laundry day.

What kind of modifications have you made to home items with your sewing skills? Let us know in comments!

———————————————————————————–
Charlotte Kaufman is a writer and sewist in Mammoth Lakes, California. She specializes in marine and home interiors and continues to fall more and more in love with quilting. You can follow her at charlottekaufman.com.
How to Sew Pocket Organizers

How to Sew Pocket Organizers

Sew pocket organizers to hold all your stuff!

Pockets are not only for clothes and bags.  You can sew pocket organizers for:

  • Shoes
  • Jewelry
  • Sewing supplies
  • Knitting or crochet supplies
  • Art supplies
  • Any other kind of supplies
  • Baby gear
  • Guitar gear
  • Other kinds of gear
  • Remotes
  • Cords or cables
  • Tools
  • Toiletries
  • First aid kit
  • Other kits
  • Frequently used pattern pieces
  • Bills or mail
  • Money
  • Magazines
  • Papers
  • Games
  • Toys

Those are just quick ideas off the top of my head; the possibilities are endless.

How to sew a single hanging pocket

Anyone can sew a pocket organizer, even absolute beginner sewists.  A basic hanging pocket is just two finished  squares or rectangles, one sewn down on three sides on top of the other.

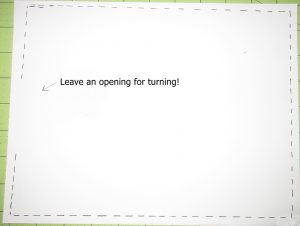
To finish the squares, you cut two identical layers and sew them around all four corners and sides with right sides together, leaving an opening for turning.

I drew this because the ink shows up better than my stitching in the photo.

I drew this because the ink shows up better than my stitching in the photo.

Clip the corners and turn right sides out. You can stick something inside to push the corners out.

Then stitch the opening closed. I usually just topstitch along that entire side. Sometimes I topstitch around all four sides.

Fold the top down an inch and a half or more towards the back and sew the edge down to form a casing for hanging. Then make a smaller finished square or rectangle pocket piece using the same directions as above.

Topstitch the pocket onto the larger panel along the sides and bottom. Don’t sew the top of the pocket closed!

I made this pocket from my leftover butterfly block to hold mail, which used to pile up in my entryway.

I made this pocket from my leftover butterfly block to hold mail, which used to pile up in my entryway.

Or cheat and use jean pockets

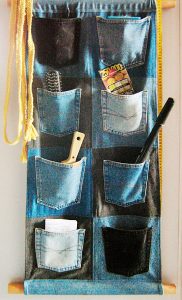
I did some searching to find some cute projects to recommend for you.  And I found some examples of organizers that were made by reusing jeans pockets. These save a step and so you can make these with super speed. Just be sure to use a jeans needle.

I think this one is a great idea for a closet organizer.

I think this one is a great idea for a closet organizer.

I will like to make a long double sided one of these to hang in the middle of a closet that’s shared by two boys at my house. This will solve a couple of different organizational challenges in that small closet nicely.

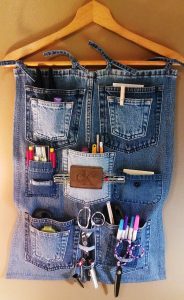
Here is one on a hanger that is being used for sewing supplies storage.

Here is one on a hanger that is being used for sewing supplies storage.

How to sew pocket organizers with multiple pockets

To start, make a backing panel. Cut two square or rectangular pieces to the desired size of your organizer pocket panel. Press interfacing to the wrong side of one of the two square or rectangular pieces. Then layer the two pieces right sides together and sew around, leaving an opening for turning.  Turn right side out, push the corners out well from the inside, press, and then sew closed.

To allow for hanging, you can simply fold over at the top and sew a casing, or you can make hanging loops and attach these by tucking between the two pieces when you sew them together in the steps above.

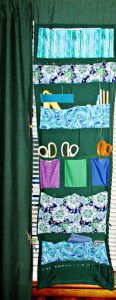
My sewing room curtain organizer panels use all of the above kinds of pockets.

My sewing room curtain organizer panels use all of the above kinds of pockets.

For the pockets, you could make several or many individual pockets in the same way as the larger backing piece and topstitch each pocket onto the backing panel separately. Or you could make long pockets the width of the backing panel. You can then topstitch to divide these long pockets into shorter sections.  You can also make your pockets slightly wider than your backing panel.  Then pleat them at the bottom and add elastic casings along the top edges, to build roomier pockets with more holding power.

My sewing room curtain organizer panels use all of the above kinds of pockets. I also stuffed a long one and sewed it closed around all sides to make a pin cushion way up high and out of the reach of grabby kids.

You can customize your pocket panels to suit your organizational challenges, no matter what they are.

Sew a money bag pocket

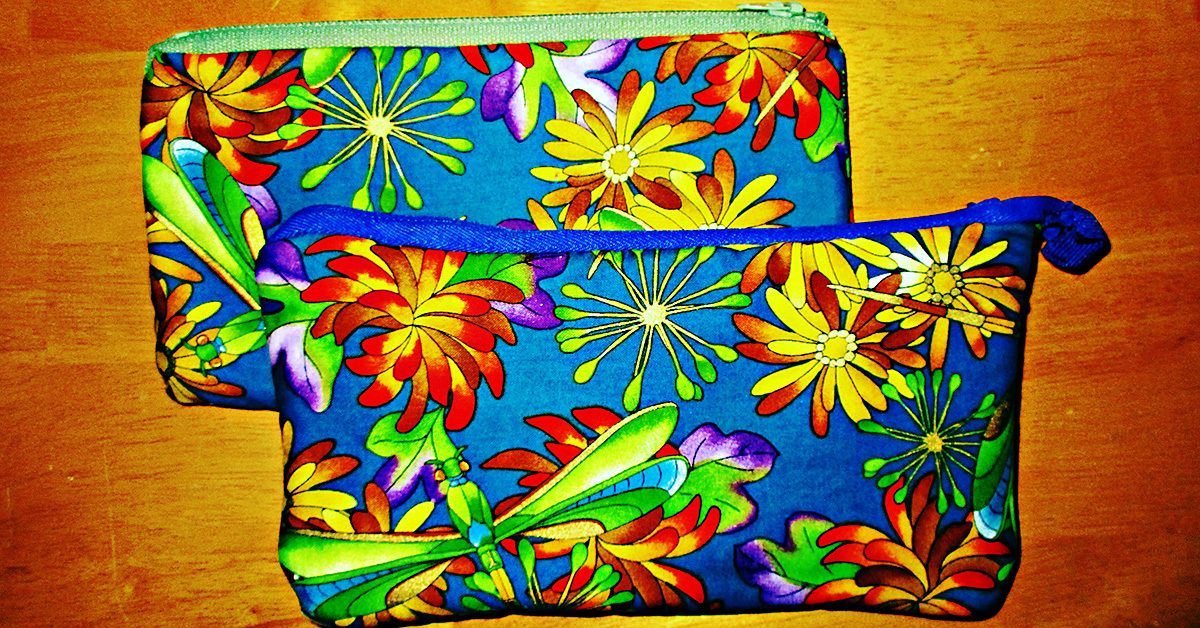
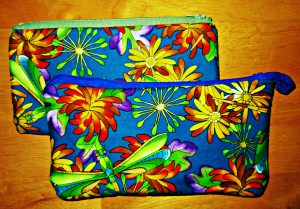
Maybe you’d call it a bag, but this project is simply a big pocket with a zipper at the top. You could use these as bank bags for deposits or otherwise holding cash. I made them big enough to hold multiple envelopes for monthly budgeting.

For stashing cash or other goodies.

For stashing cash or other goodies.

Or you could make these zippered pockets to hold your pencils or some other small collection.  I’m using one of mine for stashing my jewelry pliers set where no kids can reach them. Keeping my things out of the reach of children seems to be the major part of my own organizational challenges!

Favorite pocket organizers from around the web

If I haven’t given you enough inspiration to sew pocket organizers yet, check out these other ideas and tutorials that I found and collected from around the web. I will make the handy ironing board pockets right away, I can’t believe I have never thought of this simple solution before. And I think the pocketed towel will make a great gift for a sunbather I know and love.

Are the gears in your brain turning now? What problems could you solve if you sew pocket organizers to keep things in place?

Crazy Patch Butterfly Applique Blocks

Crazy Patch Butterfly Applique Blocks

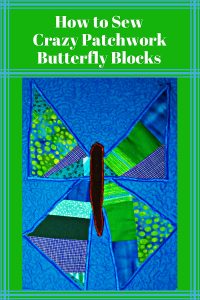
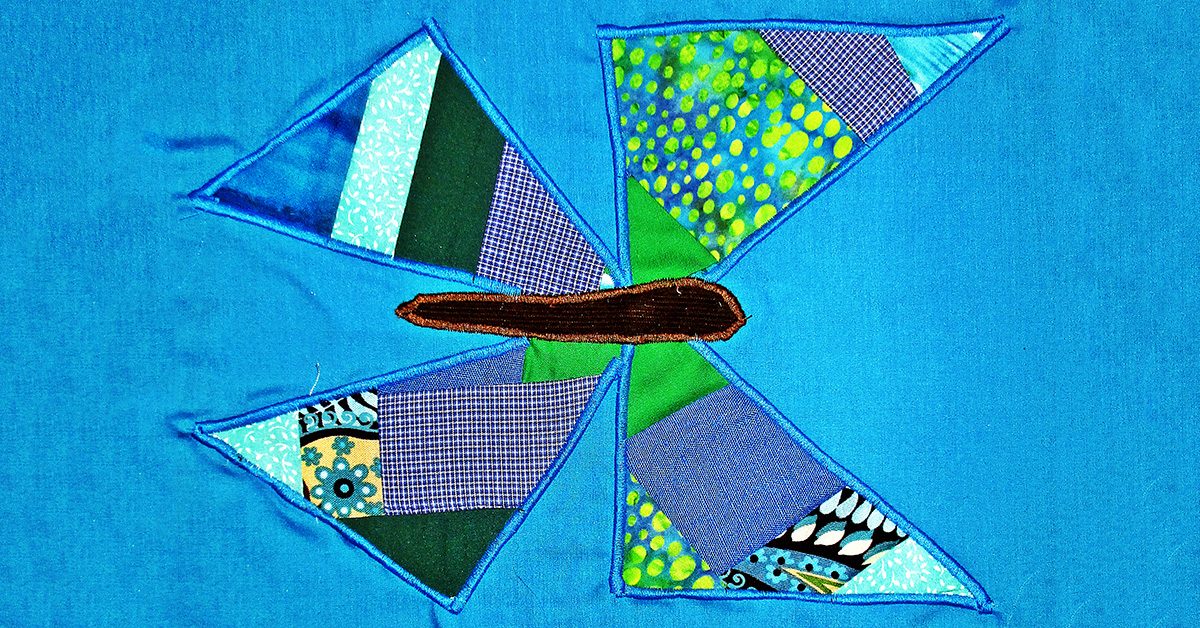
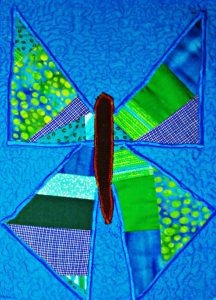
These crazy patch butterfly blocks happened by accident.

These crazy patch butterfly blocks happened by accident.

These crazy patch butterfly blocks happened by accident.

The last time I made a crazy patch quilt, I wound up with two extra blocks. I have no intention of collecting UFO blocks, but I’m not inclined to throw my handiwork away. So I stared at them a while, trying to think of something to make from these extra blocks.

Something told me to cut them into triangles, so I did, still not knowing what I’d do with them. I played with the triangle pieces for a few minutes, and this design idea came to me. I think it’s a good one.

You could make a bunch of these for a quilt, a few for a table or bed runner, feature one in a sampler quilt, or just make one for a small project.

I plan to use one of these to make an oversized pocket on a skirt. And I’ll show you what I’m going to do with the other one next week, so stay tuned.

Here are the steps to make these:

Crazy Patch Butterfly Blocks

For each block, you will need:

  • Background rectangle or square
  • Muslin square
  • Assorted small scraps

Step one: make the crazy patchwork

You could make these crazy patch butterfly blocks any size, but my examples started with a six inch square. Take your muslin square and arrange a several sided scrap somewhere near the middle of the square.  Choose another scrap with one side at least as long as one side of the first fabric, and place it right side down atop the first.  Sew along this seam, flip the second fabric down where the right side faces up, then press.  Repeat this process, gradually adding scraps, until the square is fully covered by your assorted scraps.

Then, place the block right side down on your cutting mat and use your rotary cutter and ruler to trim the fabric scrap from the edges of the muslin square.

I made one on video so you can see exactly how to do this step:

I should mention that traditional crazy patchwork also incorporates embroidery stitches over the seam lines. If you have a machine that does decorative stitching, then you can sew a line of decorative stitches along the seam after you add each new scrap to your crazy square. You don’t want to wait until the end, since these scraps go every which way.

Step two: cut triangles

Now lay the crazy patchwork square right side up on your cutting board. Use your ruler and rotary cutter to cut it in half diagonally, then move your ruler and cut diagonally the other way, to end up with four quarter square triangles. You could use scissors if you don’t have a rotary cutter, but if you want to make patchwork, you really want to get a rotary cutter and cutting mat.

Step three: appliqué

Here’s how to arrange the triangles to construct these crazy patch butterfly blocks. Place the top pair of wings with points together and the ninety degree angles at the outside bottom corners. Then angle the bottom wing pieces with the longest edges on the inside and the ninety degree angles pointing out.

Crazy patch butterfly block.

Crazy patch butterfly block.

Pin these to your backing square and appliqué using a satin stitch. I made these using a rectangular backing cut at nine and a quarter by eleven and a half inches.

If you will be using these for a small project rather than a quilt, there is an alternative way to hold your pieces in place rather than using pins. You could use double-sided fusible web. You would affix this to the back of your appliqué pieces and then remove the paper backing and affix the other side to the backing rectangle.

This makes appliqué really easy, but I don’t recommend using it for quilts, because it will be crinkly inside the appliqué. If you are making a wall quilt or other small decorative project, it is an easy choice.

Bust out the scraps

After you appliqué the crazy patch butterfly wings, then use corduroy or another scrap fabric to cut a long, tapered oval for the caterpillar body. Applique this in the middle, to cover the intersecting wings.

My son just pointed out that I forgot to add antennae to mine. If you’d like to add antennae, you can do this using hand or machine embroidery. Or you can use Debbie Mumm’s easy idea that she calls pen-stitch embroidery. That is, you can draw them with a fine tipped Sharpie or other permanent pen.

Here is one that I quilted the background using using tight free-motion quilting.

Crazy patch butterfly block quilted.

Crazy patch butterfly block quilted.

As you can see, these crazy patch butterfly blocks are super easy to make. They’d be cute on a baby, wall, or bed quilt. Or you could feature just one on an apron or skirt.

What will you make with these crazy patch butterfly blocks?

Cactus & Succulent Fabrics for You to Love

Cactus and Succulent Fabrics for You to Love

California’s deserts are super blooming right now thanks to a long and wet winter. While we still have over 15 feet of snow in the ground here in Mammoth Lakes, California, I am not immune to dreaming of spring and the beauty of a flowering desert.

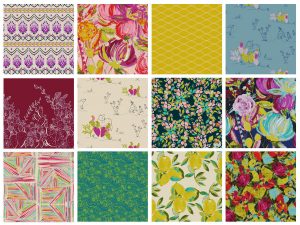
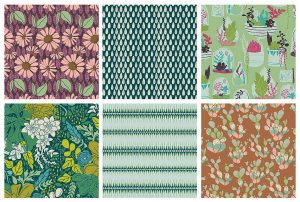
With that in mind, I give you NINE fabric lines featuring cacti, succulents, and the beauty of the high and low deserts.

Desert blooms

First we start with Rae Ritchie’s debut collection, Desert Bloom.

First we start with Rae Ritchie’s debut collection, Desert Bloom.

First we start with Rae Ritchie’s debut collection, Desert Bloom.

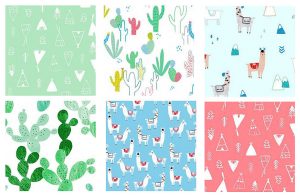
Lovely llamas

If you are looking for something with a little more ‘prickly’ whimsy, check out No Drama Llama by Dear Stella House Designer.

If you are looking for something with a little more ‘prickly’ whimsy, check out No Drama Llama by Dear Stella House Designer.

If you are looking for something with a little more ‘prickly’ whimsy, check out No Drama Llama by Dear Stella House Designer.

Not satisfied with the selection of llamas above? Don’t fret, here are more Lovely Llamas by Michael Miller.

Not satisfied with the selection of llamas above? Don’t fret, here are more Lovely Llamas by Michael Miller.

Not satisfied with the selection of llamas above? Don’t fret, here are more Lovely Llamas by Michael Miller.

California dreaming

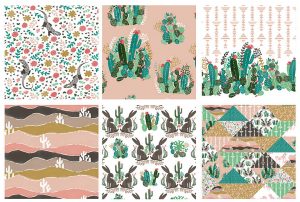
Hawthorne Thread’s Palm Springs line brings us deep into California with cacti, lizards, geometry, and the sweeping vistas of a desert skyline.

Hawthorne Thread’s Palm Springs line brings us deep into California with cacti, lizards, geometry & the sweeping vistas of a desert skyline.

Hawthorne Thread’s Palm Springs line brings us deep into California with cacti, lizards, geometry & the sweeping vistas of a desert skyline.

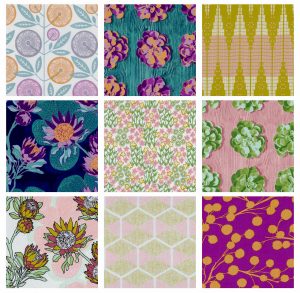
Joel Dewberry’s Cali Mod fabric continues with the California theme. He absolutely knocks it out of the park with images of succulents that look like a Warhol painting, and vibrant and metallic colors combined.

He absolutely knocks it out of the park with images of succulents that look like a Warhol painting, and vibrant & metallic colors combined.

He absolutely knocks it out of the park with images of succulents that look like a Warhol painting, and vibrant & metallic colors combined.

Back into the desert

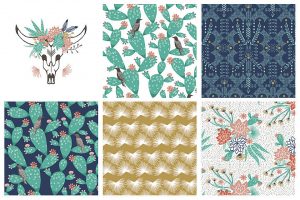
The next two lines are both by Hawthorne Threads and they each coordinate with the other, as well as with Palm Springs above. Here you have Mojave by Hawthorne Threads.

Here you have Mojave by Hawthorne Threads.

Here you have Mojave by Hawthorne Threads.

And this is Coyote, also by Hawthorne Threads. They basically have the market cornered on any type of desert, cacti, or succulent-themed fabric you could want. The motifs make me want to sew a super lightweight quilt and wrap myself in it on a porch somewhere in Joshua Tree as I watch the sunset.

The motifs make me want to sew a super lightweight quilt & wrap myself in it on a porch somewhere in Joshua Tree as I watch the sunset.

The motifs make me want to sew a super lightweight quilt & wrap myself in it on a porch somewhere in Joshua Tree as I watch the sunset.

Heading to Arizona

Bari J. Ackerman’s fabric line, Sage, moves us from the California deserts to her home state of Arizona. These fabrics are individually works of arts, together, they are really visually stunning. The maximalist floral and fruit prints combined with repetitive patterns, bright colors, cacti, and desert animals render me incapable of picking a favorite fabric. I love and want them all!

I love & want them all!

I love & want them all!

Succulence

Lastly you have Bonnie Christine and Art Gallery Fabric’s Succulence line. The only plants I can keep alive are succulents; it’s nearly impossible to kill them. They thrive in amazing conditions. Bonnie has paid homage to this amazing ability to survive with even tiny amounts of water in this retro-inspired line of succulent fabrics.

Lastly you have Bonnie Christine & Art Gallery Fabric’s Succulence line.

Lastly you have Bonnie Christine & Art Gallery Fabric’s Succulence line.

Did I miss any? Do you have any other favorite cacti, succulent, or desert-inspired fabrics you love? Let us know about them in comments!

———————————————————————————–
Charlotte Kaufman is a writer and sewist in Mammoth Lakes, California. She specializes in marine and home interiors and continues to fall more and more in love with quilting. You can follow her at charlottekaufman.com.
Sewing on the Go: What and How to Pack for Class or Traveling

Sewing on the Go: What and How to Pack for Class or Traveling

Sewing on the Go: What and How to Pack for Class or Traveling

Whether you are attending a sewing class or planning a leisurely vacation, sewing on the go is something you will want to do sooner or later.

We’ve talked a lot about sewing rooms here on the blog, but we haven’t addressed the issue of sewing on the go here before now.

Sewing on the go won’t work if you aren’t properly prepared, so I’ve made this short video to cover all the areas you need to address to ensure you have what you need when you take your sewing on the road.

Here’s everything you’ll need:

Sewing on the go: portable machine

Janome Jem Gold

I already discussed this machine in my beginner sewing machine buying guide. It is definitely my choice for best lightweight portable machine.

Sewing on the go: machine carriers, luggage and totes

You definitely want to think about this before you get ready to take your sewing to go. I hadn’t ever considered this myself until the day before I taught my first sewing class at the community center. I suddenly realized I was going to have a lot of equipment and gear to lug and I had no idea how I was going to carry it all!

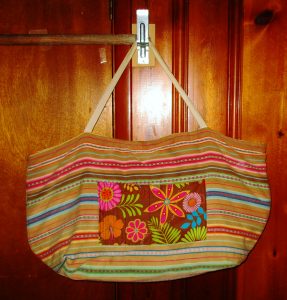
So I grabbed a thick piece of table linen and whipped up a humongous bag to carry everything.

So I grabbed a thick piece of table linen & whipped up a humongous bag to carry everything.

So I grabbed a thick piece of table linen & whipped up a humongous bag to carry everything.

While this bag has proven itself to be quite useful in other ways, I don’t recommend this solution for sewing supplies and gear. I only used it that one time for this purpose and then I found a more suitable option. I have appreciated the ample sack for carrying beach supplies for myself and my kids, and it carries three of our ukuleles in boxes safely in the trunk when we travel with them these days.

For toting your sewing machine and supplies, save time and trouble by ordering one of these great choices from Sewing Machines Plus:

Here is a link to SMP’s full selection of trolleys, totes, and cases.

Sewing on the go: sewing supplies

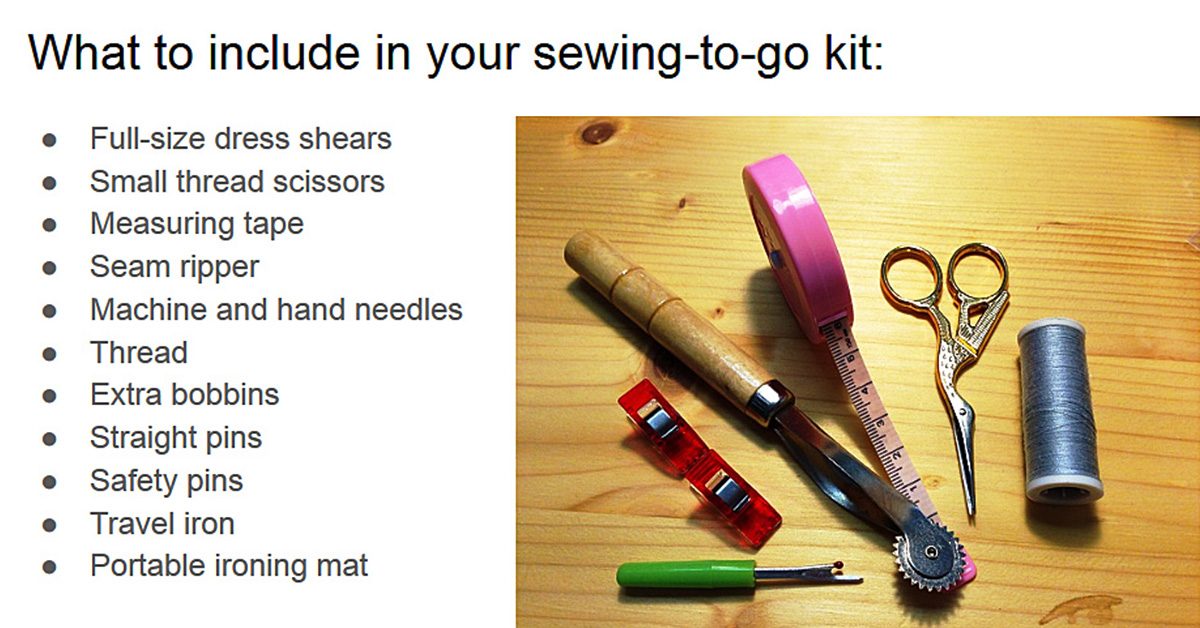
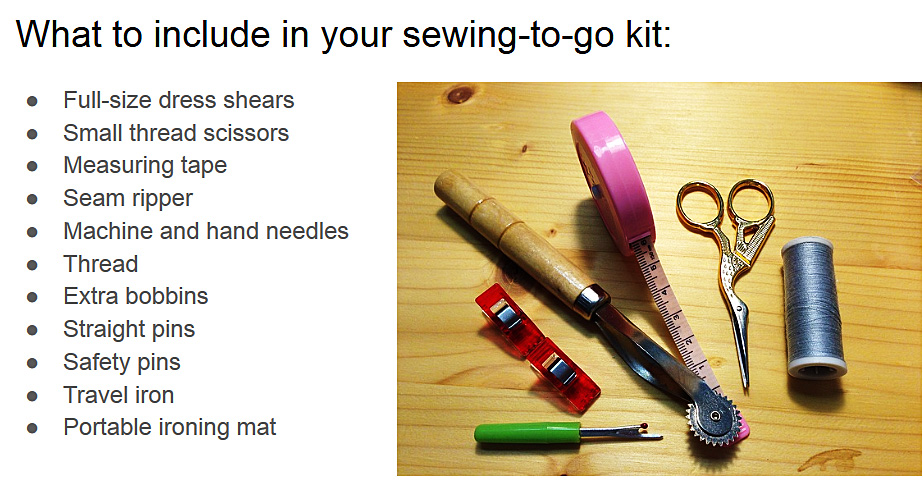
Here is the list of supplies to be sure to include in your travel sewing kit:

Here is the list of supplies to be sure to include in your travel sewing kit:

Be sure to get an extra pair of dress shears to keep in your go bag at all times.

You’ll also like to have a portable rotary cutter.

Here is the combo cutting mat/ pressing board mentioned in the video.

And here is that Rowenta travel iron.

The clover mini-iron is available in a couple of different options:

Here are the cooling sleeves for the mini-iron.

And that’s what you need to be well equipped for sewing on the go. Happy travels to you!

March Madness – It’s Not Just for Basketball Fans

March Madness – It’s Not Just for Basketball Fans

Sewing lovers get their own version of March Madness! If you’ve been wanting to buy a new sewing machine, upgrade your current machine or purchase a different type of sewing machine March is the time to do it.

March Madness – It’s Not Just for Basketball Fans

March Madness – It’s Not Just for Basketball Fans

With the amazing sale at SewingMachinesPlus.com you can save up to $400 on the sewing machine you’ve been lusting after since last year.

As an added bonus, you’ll get FREE shipping on all orders over $49 – every day! And an additional 10% off qualifying items. Take a look at a sampling of the sewing machines included in this fabulous March Machine Madness Sale.

HQ Sweet Sixteen Long Arm Quilter with True Stitch Regulator

This quilting machine is ideal for quilting projects of any size while seated. The throat space is large enough to handle a king size quilt! The easy to use touch screen makes it easy to choose your stitches and easily access them the next time while the unique light ring brightens the area being quilted with 28 LEDs. One of several patent-pending features on the Sweet Sixteen is a low bobbin alert. You’ll never run out of bobbin thread and not know it again.

Singer 4432 Heavy Duty Extra-High Speed Sewing Machine

This machine is a workhorse! The heavy-duty metal frame stands up to daily use and provides skip-free sewing. The stronger motor enables you to sew through heavy weight fabrics without a problem. Its complimented by the adjustable pressure foot lifter meaning you can sew lightweight and heavy fabric easily. And buttonholes are no longer a struggle with the automatic 1-step buttonhole feature.

Every March Machine Madness purchase comes with optional no interest financing at the sale price. And just like all purchases from SewingMachinesPlus, you’ll get a lifetime of support from the talented customer service crew.

Check out the full line of products on sale at sewingmachinesplus.com!