Skip Hop Children’s Backpack Hack

Have you seen these adorable little children’s backpacks that look like animals? They’re made by Skip Hop and retail for around $20. The only problem with them is that, like many children’s backpacks, they don’t come with a chest clip. Kids’ shoulders are tiny and their frames are narrow. This means they usually can’t keep backpack straps on when there is any weight added to their bags. For the most part I see Skip Hop backpacks slung over a parent’s shoulder, carrying the bag for their children.

Have you seen these adorable little children’s backpacks that look like animals?

Have you seen these adorable little children’s backpacks that look like animals?

I decided to make my own chest clips for these puppies and for my friends who have the bags too. The result is a backpack that children can truly wear on their own.

A backpack that children can truly wear on their own.

A backpack that children can truly wear on their own.

To make your own, you’ll need to unthread the backpack straps from the base of the bag.

To make your own, you’ll need to unthread the backpack straps from the base of the bag.

To make your own, you’ll need to unthread the backpack straps from the base of the bag.

Once you’ve unthreaded the straps, you can sew a webbing piece for the right and the left strap that holds each end of your clasp. I used 1″ webbing and 1″ clasps. I got all of my supplies from StrapWorks.com.

I used 1" webbing & 1" clasps.

I used 1″ webbing & 1″ clasps.

I sewed a small loop of 3/8″ black elastic on the end of the webbing so I could roll up the extra webbing and tuck it neatly into the loop. These are examples of clips I made for friends.

These are examples of clips I made for friends.

These are examples of clips I made for friends.

If your child is really little, they may not be able to manage the clasp on their own.

If your child is really little, they may not be able to manage the clasp on their own.

If your child is really little, they may not be able to manage the clasp on their own.

If you give them enough time to work at it though, they’ll eventually get it. It gives them a great sense of independence and freedom.


And really, how adorable is this bag with the added chest clip?

And really, how adorable is this bag with the added chest clip?

And really, how adorable is this bag with the added chest clip?

What type of sewing hacks have you done to children’s products in your life?

What type of sewing hacks have you done to children’s products in your life?

What type of sewing hacks have you done to children’s products in your life?

———————————————————————————–
Charlotte Kaufman is a writer and sewist in Mammoth Lakes, California. She specializes in marine and home interiors and continues to fall more and more in love with quilting. You can follow her at charlottekaufman.com.
May the 4th Be with Your Sewing Projects

May the 4th Be with Your Sewing Projects

Not every holiday has to be one that leaves the shelves of stores stocked with accessories and baking supplies that are that-holiday-themed. Some of them can pass by with a lot less glitz and glamour, with only those people who are interested and aware of said holiday embracing it on their own terms. National Talk Like a Pirate Day, anyone?

Pirate talk included, one of my absolute favorite holidays of that category is one that embraces a very real part of my nerdy heart: Star Wars Day.

That’s right. May the 4th is a good day for me! In fact, for this Star Wars Day, I’m planning on trying to introduce my youngest niece to the first movie of the original trilogy. Here’s hoping she loves Chewbacca as much as her Aunt Connie does!

There are a number of options for this kind of product, but one that really stuck out to me was this Death Star quilt.

There are a number of options for this kind of product, but one that really stuck out to me was this Death Star quilt.

And there are plenty of sewing projects that are fitting for the day. Of course, it’s a little late in the game to make these for this Star Wars Day, but they’re ideas to keep in your head for 2018!

For instance, you could make a Star Wars blanket or quilt. There are a number of options for this kind of product, but one that really stuck out to me was this Death Star quilt. I absolutely love the collage element that makes up the Death Star in this project, and the galaxy-esque material it’s on is a perfect fit for the theme. It’s dark and looming, just like the Death Star should be! I, personally, would be proud to be the maker of such an interesting take on the empire’s weapon!

For a person — like me — who adores baking, making a character-inspired apron like this one feels like a wonderful option!

For a person — like me — who adores baking, making a character-inspired apron like this one feels like a wonderful option!

But if you’re feeling a little more Jedi/Rebel Alliance-inclined, maybe you’d rather embrace a concept from their side of things — like R2-D2. For a person — like me — who adores baking, making a character-inspired apron like this one feels like a wonderful option! Since I may or may not have a series of Star Wars kitchen supplies on an Amazon wish list, this would be a wonderful addition to the mix. I could totally see myself wearing an R2-D2 apron and oven mitts while my R2-D2 oven timer buzzes…

Oh, & remember how I said I loved Chewbacca? Imagine your little one decked out in this Chewbacca costume!

Oh, & remember how I said I loved Chewbacca? Imagine your little one decked out in this Chewbacca costume!

Oh, and remember how I said I loved Chewbacca? Imagine your little one decked out in this Chewbacca costume! This one could double as a Star Wars Day project and a Halloween one since this would make an adorable costume for trick-or-treating time! It would include a number of pieces — like ammo belt details — so you might want to make sure you start early enough to tend to all of these aspects!

Another Star Wars project that you could make for your little one is this BB-8 skirt.

Another Star Wars project that you could make for your little one is this BB-8 skirt.

Another Star Wars project that you could make for your little one is this BB-8 skirt. It’s a nod to the more recent Star Wars movies with one of the two awesome droids that have come to the surface through them. Seriously! I adore BB-8, and K-2 is so awesome! This skirt would be something that could be worn any other day of the year as well since while it’s a nod to BB-8, it’s basic enough that it doesn’t necessarily have to be a skirt that’s Star Wars themed. It could easily just be a skirt with stripes, which isn’t day-specific! Essentially, with this product, you could have a perfect piece of clothing to wear through the day that’s general enough to wear again and again, regardless of the day.

One last project applies to anyone in need of carrying around documents & such — whether that something to carry is the sketch pad shown or a stack of papers that you, as a teacher, graded!

One last project applies to anyone in need of carrying around documents & such — whether that something to carry is the sketch pad shown or a stack of papers that you, as a teacher, graded!

One last project applies to anyone in need of carrying around documents and such — whether that something to carry is the sketch pad shown or a stack of papers that you, as a teacher, graded! Now, obviously, you might want to make sure that this project is okay with your employer before you carry it into a formal meeting, but if you get a thumbs-up, there’s something awesome to me about the idea of carrying a Star Wars case into said meeting with your company-important documents. This could also be used for things around the house, like keeping your receipts or pictures in, and it’s a small enough project to easily manage between today and May 4, 2018!

This is the perfect day, in my opinion, to embrace your inner nerd and run with your sewing projects! It’s for what could be labeled the epitome of Sci Fi/Fantasy movies, and there’s plenty of room to work these mentioned projects into your May the 4th schedule. Need proof? Here you go: You could grab that Star Wars quilt and the baked goods you made while wearing your apron, toss that quilt over you and your kids in the Chewy costume and BB-8 skirt, put your distractions in your carrying case, and watch some Han Solo!

Happy Spring! The Joy of Warmer Weather and Beautiful Flowers

Happy Spring! The Joy of Warmer Weather and Beautiful Flowers

Hi! Good to see you again!

Hi! Good to see you again!

Today, I wanted to share what I have been doing these days. It know it has been awhile since I wrote, however, I have been away from my favorite past time for other “pressing matters” (i.e. ironing hubby’s shirts, not quilt squares) and other important tasks!

Scrappy leftovers

I have an enormous collection of scraps in my sewing studio. Since I have been reorganizing in preparation to move our home, I have to make a strong effort to release some things I have collected to make packing a little easier. Well, packing is never easy, but psychologically, it forces you to consider the value of all the things you think you absolutely needed to have, right? And also, without saying, it alerts you to some of the things you want to make this hobby more efficient. No wonder it takes forever to pack and with sewing, I always think if I throw it away, I will want it later. Tough decisions, aren’t they?

So, I started with a pile of disorganized scraps, which I have previously cut for something else, some time ago. I don’t even remember what I had in mind at the time, but I need to throw them away or use them. This is just part of the large amount of fabric and bright colors I have to work with.

This is just part of the large amount of fabric & bright colors I have to work with.

This is just part of the large amount of fabric & bright colors I have to work with.

Improv isn’t only for comedians

Recently, I have been learning about “improvisational” sewing. It is interesting to me because I like doing things that are unique to my creativity. However, it takes you out of your comfort zone. The experts say, it reveals your creative side by working with no specific pattern, no color guidelines, no measurements, just picking up random pieces of fabric, basically scraps, and sewing them together without a pattern. It reminds me of the dreaded “improvisational” speeches required in college speech classes.

I know there are many patterns and helpful information about quilting that give exact instructions and even kits that you can complete. So, this is an adventure to test your creativity for sure.

So, now I have my scraps and the easiest way to explain how this came together is: I took a medium sized scrap, and added to others to make an approximate square about 7 x 6 inches. I didn’t measure at all, just found several squares which had in this case, a little girl with a magic wand. I used the “fairy girl” as my focal fabric.

It was not too difficult because the pattern of the fabric was already woven like patchwork.

It was not too difficult because the pattern of the fabric was already woven like patchwork.

It was not too difficult because the pattern of the fabric was already woven like patchwork.

So, I just added like-colored fabric to make an extension of the pattern. No true measurements, pieces were just trimmed to fit inside the square, and the princess would appear somewhere on each one. I used the square as a template and compared the rest to the template, and then trimmed them to be the same size as close as possible. NOW… Comes my favorite friend in the WORLD while quilting! My IRON! And I need a NEW ONE at that (please refer to great wishlist choices from SewingMachinesPlus.com).

Finishing touches

So finally, I was feeling pretty good about how my unplanned, off the top of my head, quilt top was coming along. So I sewed the pieces together in 5 rows and 5 squares each. Then added white jelly roll strips between each row of 5. I had to trim it only a little to make it a true measurement all around.

“Improvise” a cheerful quilt or smaller project & smell the beauty of your creation this spring.

“Improvise” a cheerful quilt or smaller project & smell the beauty of your creation this spring.

I still need to finish the border, batting and binding, but here’s what it looks like now. It was really fun to do, because I didn’t know how it would turn out. I should say I learned that I need solid color between busy patterns to give a quilt top a cohesive, unified look so each quilt patch is recognizable from the next. Do you mix plain fabric among many different prints?

I think you would enjoy this truly personal form of expression with fabric.

“Improvise” a cheerful quilt or smaller project and smell the beauty of your creation this spring.

Better yet, know that even without a plan, or a pattern, you can turn scraps into something as personal as you are! Then, please reply to this blog with pictures. I would love to see them. Until next time, when I will tell you about how I am repurposing handmade flannel wash clothes into a sweet little blanket and stitched without a seam. Carpe diem!

A Little Bit of History from the Desert

A Little Bit of History from the Desert

Here's a picture from my balcony in Madaba, Jordan. I hope to find some interesting textiles in the bazaars as I travel through the country.

Here’s a picture from my balcony in Madaba, Jordan. I hope to find some interesting textiles in the bazaars as I travel through the country.

I’m in Jordan today. Yes, the Jordan in the Middle East, northeast of Egypt and Israel. I woke up in Madaba to a beautiful sunrise and rose blooms over the desert. I’m here on holiday, to ride my bike and spend the later afternoons looking for textiles in the bazaars.

The Middle East has always been a nexus of textile production. Trade routes commonly known as the Silk Road terminated on their western end in the eastern Mediterranean ports. As a result, these markets were also the centers of textile production.

Textiles of the Middle East during the Middle Ages were highly prized goods. I’d venture to say they still are. Many of the words we use to describe textiles in the English language are derived from Persian, Arabic, and Turkish – terms like damask, taffeta, cotton, muslin, seersucker, and mohair.

Historical value

Long ago, textiles in this region were also often accepted as payment of taxes or other moneys owed. Visiting officials and ambassadors were given gifts of cloth or garments. In a part of the world where much of the population was once primarily nomadic, interiors were furnished with textiles used to cover floors, walls, cushions, and to create beds and storage of all kinds.

Traditionally, gifts of any kind were also presented in a textile wrapper. The more elaborate the wrapper the greater honor was intended. Textiles were thought to be able to hold powers of protection or harm, depending on the symbols and inscriptions incorporated into them.

After the death of Muhammad, representation of living creatures was banned in most cultures of the region. As a result, Islamic design developed a beautiful metaphorical language all its own, utilizing geometry, calligraphy, vegetal, and architectural forms (though in many Persian & Central Asian silks and carpets, human and animal figures do appear).

Silk

Elaborately patterned silks were produced throughout the Middle East in all sorts of complex weaves – such as twills, lampas, and brocades. Silks of a more simple nature, tafta and satin weaves, were also quite numerous. A cloth made from a silk warp and a cotton weft, known as alaca, produced a more “economical” textile.

Tiraz textiles are a silk fabric, particularly important from the tenth to the fourteenth centuries, embellished with a border containing inscriptions of religious quotations and often woven in gold thread. Baghdad was the best known source of tiraz but it was produced in many other Middle Eastern locations. The borders appear most commonly on upper sleeve bands. They are were also found on burial shrouds and ceremonial textiles.

Cotton and linen

Both cotton and linen, ranging more heavy canvas to lightweight gauze, were widely produced in the Middle East. Textile printing also existed and, by the sixteenth century, a printing industry existed in Syria, later expanding into Anatolia.

Mohair and wool

Mohair, camel hair, and goat hair – referred to as cashmere or pashima, is used to weave soft and beautifully patterned shawls throughout the region. These shawls became very popular in the west during the nineteenth century.

The patterns, woven in twill tapestry or other complex compound weaves, featured colorful and elaborate designs. One such design was a complex vegetal one known as boteh. In the west this design became to be known as the paisley motif, named after Paisley, Scotland where textile mills produced copies of the design in the latter nineteenth century.

The best known wool textiles of the region are the pile and flat cloths made as rugs, bags, wall coverings, and the like. The oldest surviving example of Islamic carpet weaving is the “Fostat” fragment from the ninth century found in Cairo.

Carpet design can be divided into 3 categories

  1. Tribal carpets, produced by nomadic or village households for their own use, tend to be geometric in design and reflect regional affiliations.
  2. Court carpets, created by the finest artists of the day, are usually the most intricate and finely knotted.
  3. Urban manufactured carpets are the third category. These are often technically fine but most often have less intricate designs.

Adventure time!

I’m excited to see what kinds of things I’ll be able to unearth over the next week as I wander about Jordan. Hopefully, I’ll have some interesting finds to share with you!

Textiles, especially those that are handmade, have such a deep history. I love learning about a design or technique that is unique or specific to a certain village or area. I also enjoy meeting local artisans who still produce works of art in the same way their ancestors always have.

This all ties into one of my previous posts about passing on skilled expertise to younger generations. Its a tradition pretty much as old as human civilization and one very much worth sustaining.

I wish you all a week of amazing discoveries (whether they be ancient or not). Next week I’ll be posting from Cairo. Arak qaribanaan.

Prepping Your Sewing Room for Summer

Prepping Your Sewing Room for Summer

I’ve come up with a few tricks over the years to let the fresh air in while keeping my sewing projects organized.

I’ve come up with a few tricks over the years to let the fresh air in while keeping my sewing projects organized.

With the warm weather rolling in, it’s time to open the windows. I love the feel of fresh air blowing through the house and cleaning the stagnant air out. It does present a few sewing challenges though. Fabric and patterns get blown around if I’m not careful. I’ve come up with a few tricks over the years to let the fresh air in while keeping my sewing projects organized.

Positioning

In my house, the air blows in from some directions more than others. I use this to my advantage and position my sewing table and supplies in such a way that they’re not directly inline of the strongest gusts. This usually takes care of most of the issues with supplies blowing around.

Paper Weights

Well, maybe they should be called Fabric Weights. Personally, I use clean rocks I’ve found on hikes, but anything that holds down the fabric and pattern pieces you’re not actively using will do. They look pretty and keep everything neatly in place while you enjoy the summer air.

Opposing Force

It sounds counterintuitive, but it seems to work when I do it right. If it’s a particularly breezy day, I’ll turn a fan on facing into the breeze coming in the window. When the balance is right, my sewing supplies wind up in a pocket of non-blowing air. It takes practice to find the right direction and speed and doesn’t always work. I prefer the first two tricks, but I’ll resort to this one if I’m really struggling with the wind.

I find that sometimes the breeze from an overhead fan or air conditioner can cause my sewing projects to blow around too. I’ve found that fabric weights are usually the best solution there since I want to feel the cooling effects of the air conditioner and/or fan.

What other tricks do you do to keep yourself comfortable and keep your fabric and pattern pieces from blowing around?

My Little Pony Blankets and Pillows

My Little Pony Blankets and Pillows

These are my daughters’ favorite toys.

These are my daughters’ favorite toys.

These are my daughters’ favorite toys. These ladies and gents can be found all around our house, in all manner of adventures. Sometimes, they even go to sleep. The problem with this was that my youngest was using tissues to make blankets and pillows for them. All of them. Every day. That’s a lot of tissues.

Enter my layer cake stash. ‘Layer cake’ means a precut stack of fabric cut in 10” x 10” squares. I asked my daughter to look and find a selection of fabrics she liked and I turned them into blankets and pillows for her My Little Pony and tiny doll friends.

Enter my layer cake stash.

Enter my layer cake stash.

Downton Abbey

She picked several pieces from my Downton Abbey collection (yes, they have Downton Abbey-themed fabric and yes, I bought some!) I made her eight reversible blankets. This was a fun chance to use the variety of decorative stitches on my machine. The decorative stitches available on modern sewing machines is incredible. SewingMachinesPlus.com has a wide assortment you can view here: https://www.sewingmachinesplus.com/computerized-sewing-machines.php

She picked several pieces from my Downton Abbey collection.

She picked several pieces from my Downton Abbey collection.

Next I made small and large-sized pillows. She had asked for ‘big’ pillows so some of her ponies could go to sleep together. So sweet!

Nap time

Next I made small & large-sized pillows.

Next I made small & large-sized pillows.

I left an opening in each piece to stuff them and cut the batting to size.


Here you see how they got put into action. My youngest, especially, was thrilled.

Here you see how they got put into action.

Here you see how they got put into action.

The big pillows and the little pillows are used equally. So are some squares of felt I keep on hand for crafting.

The big pillows & the little pillows are used equally.

The big pillows & the little pillows are used equally.

Even ponies need their beauty rest.

Even ponies need their beauty rest.

Even ponies need their beauty rest.

These handmade blankets and pillows have been used for all kinds of imaginative play, including as rivers and lakes in Lego houses they’ve built.

These handmade blankets & pillows have been used for all kinds of imaginative play.

These handmade blankets & pillows have been used for all kinds of imaginative play.

What kind of handmade items have you sewn to supplement your children’s or grandchildren’s toy supply? Let us know in comments!

What kind of handmade items have you sewn to supplement your children’s or grandchildren’s toy supply?

What kind of handmade items have you sewn to supplement your children’s or grandchildren’s toy supply?

———————————————————————————–
Charlotte Kaufman is a writer and sewist in Mammoth Lakes, California. She specializes in marine and home interiors and continues to fall more and more in love with quilting. You can follow her at charlottekaufman.com.
Tell-Tale Traits of a Primitive Quilt

Tell-Tale Traits of a Primitive Quilt

As I step further into the world of sewing, I find that there’s plenty of information out there that I didn’t even know to look for. My primary focus in sewing has been patchwork designs, and I definitely continue to hold a passion in regard to that style of work. I’d love to have a patchwork purse, patchwork clothing, patchwork pillows…

My primary focus in sewing has been patchwork designs, & I definitely continue to hold a passion in regard to that style of work.

My primary focus in sewing has been patchwork designs, & I definitely continue to hold a passion in regard to that style of work.

But I’m not sure I fully realized how many other avenues there are to plan out a quilt before I started looking, and those are details that can be interesting finds! Some of them, though, require a bit of an explanation to truly understand what a quilt of that nature is, and this post will explore one of those types in particular.

Once upon a time

I was in a social media marketing program where, for two of the classes, I had to keep a blog for a business. For one course, I used my author career as the business. For the other, I created a could-someday-be-real quilt company. It was fine, by the way, for the company to not actually be real in the current world!

The idea was that we were to explore marketing concepts through the blog and end up with a marketing plan — at least generally — by the end of the semester. During that quilt-company semester, I came across the idea of a primitive quilt, which was a fairly new phrase to me. At the time, I focused mostly on the social media presence of one particular company, but I find myself now thinking on what exactly a primitive quilt is.

During that quilt-company semester, I came across the idea of a primitive quilt, which was a fairly new phrase to me.

During that quilt-company semester, I came across the idea of a primitive quilt, which was a fairly new phrase to me.

If I claim to be quilter, after all, it might help to know the basic terminology!

After research and consideration of a number of quilts with the label of “primitive,” I offer you a number of details that help to make a primitive quilt… Well, primitive! Note: These are commonalities — not necessarily requirements through and through!

A primitive quilt will make use of neutral colors, though things like dark red & dark blue can make appearances.

A primitive quilt will make use of neutral colors, though things like dark red & dark blue can make appearances.

Basic Coloring

By this, I don’t mean a color-equivalent to no-artificial-flavoring! I mean that the colors are typically more straightforward than neon oranges and vivid pinks. Instead, a primitive quilt will make use of neutral colors, though things like dark red and dark blue can make appearances. These quilts often employ the colors that you might think of when words like “rustic” come to mind — which rationalizes why red and blue are used in regard to red barns and blue skies. In the end, if you plan on making a primitive quilt, you might want to keep the lime green fabric stored away for another project!

Simple Fabric Patterns

Like the coloring, the fabrics, too, are less elaborate than what might be common for a more vividly styled work. Typically, patterns — rather than fabrics — steal the focus in primitive quilts, so no fabric should be so busy or stand-out that it takes attention above and beyond the level of the quilt pattern as a whole. For this, solid colors or very simple patterns on your fabric are your best bet for forming your primitive quilt.

Basic Shapes

Don’t fancy it up!

Don’t fancy it up!

While the overall quilt might have a remarkably interesting visual in regard to its structure, the pieces of fabric that make up that visual are often based on the simplest of designs, like triangles, squares, and rectangles. This doesn’t mean that only geometric shapes can be used for your quilt though! Other shapes can come into play, but make sure to keep them simple to provide that outdated appearance that’s so synonymous with the rustic, primitive design. Think to yourself what the simplest method of delivering an object or shape is — don’t fancy it up!—and you could have the right look!

Empty space

The patterns for primitive quilts are structured, but those empty spaces between the distinct pattern formations can be just as organized. Now, this isn’t necessarily the case for every quilt! It’s not unheard of though for darker, geometric patterns of multiple fabrics to be separated by pieces of lighter fabric that are larger than any individual dark piece. It creates an overall repetition to the quilt, and the result is an almost soothing effect in that the contrast softens the appearance to something calming and steady. As I said, this tactic might be more pronounced in some primitive quilts than others, but don’t be shocked if you notice it fairly often for quilts of this style.

Geometric patterns of multiple fabrics to be separated by pieces of lighter fabric that are larger than any individual dark piece.

Geometric patterns of multiple fabrics to be separated by pieces of lighter fabric that are larger than any individual dark piece.

If you keep these things in mind, you’re on your way to planning a primitive quilt!


References:
Alcorn, J. (2014, September 10). What Is Primitive Home Decor? Retrieved from: https://www.primitivestarquiltshop.com/blogs/quilt-shop-gathering-place/24406593-what-is-primitive-home-decor
Craftsy. (2017, April 24). Can You Spot a Primitive Quilt? Retrieved from https://www.craftsy.com/blog/2017/04/primitive-fabric/
How to Sew Easy Shorts in Just 10 Minutes

How to Sew Easy Shorts in Just 10 Minutes

You really can sew easy shorts in ten minutes. I made pairs for two of my boys and a pair for myself in half an hour, and this included stops for elastic fitting and rewinding a bobbin.

Sew Easy Shorts

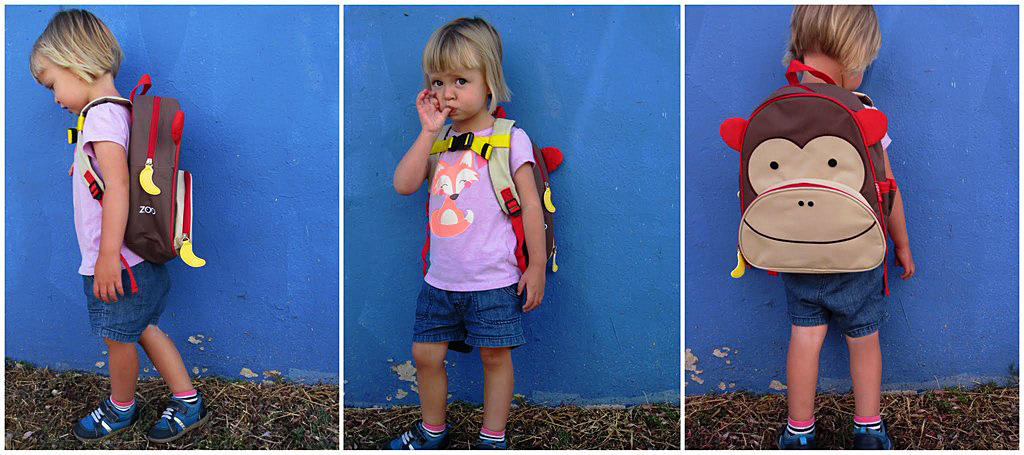
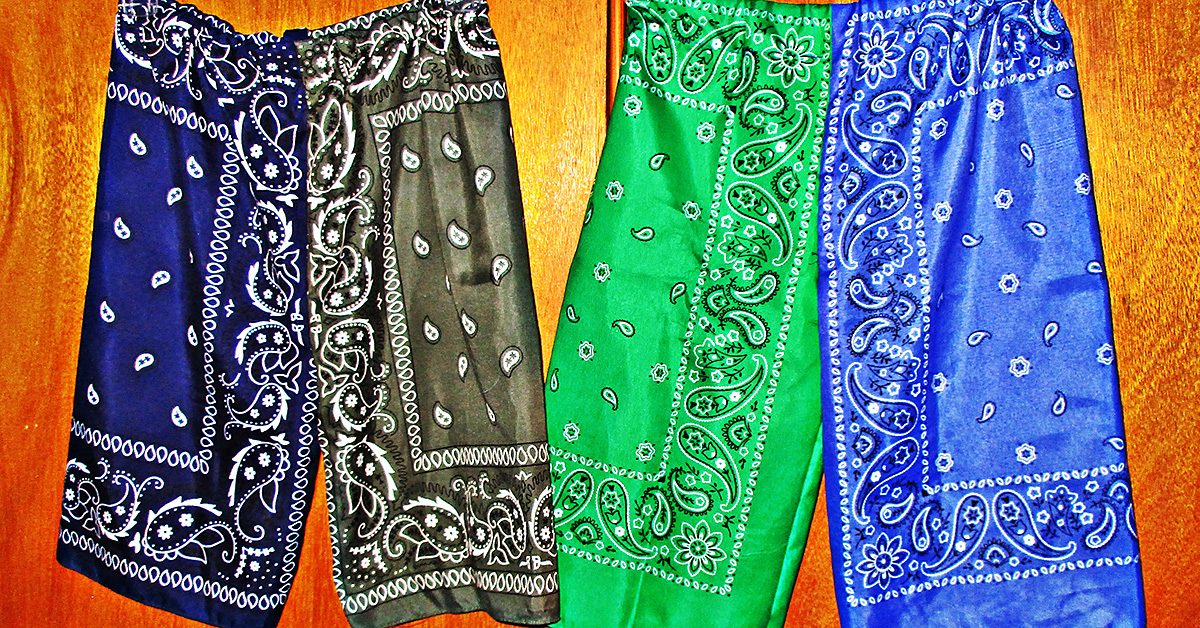
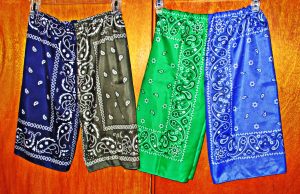
For kids, sew easy shorts in 10 minutes using bandanas

Easy bandana shorts are a super quick and simple way to make cute shorts for kids.

I made these with polyester, rather than cotton, bandanas. I am collecting cotton bandanas for another project and I accidentally bought a couple that turned out to be poly.

It occurred to me that these will dry quickly and so make perfect yard shorts for my boys who are in and out of the garden sprinkler this time of year.

I’ve made these from cotton bandanas before and they have been summer favorites for all my children. They wear them so much that the cotton ones don’t last through too many seasons. So it was time for me to whip up a couple more.

You can use bandanas to make shorts to fit most any size child. Or you can make bandana pants for a baby or toddler. Here’s how to make them:

Supplies:

  • Two bandanas
  • Elastic for waist
  • Sewing machine
  • Thread
  • Scissors

Step one to sew easy shorts: measure

The key measurements you need are the child’s waist and rise. To measure rise, run the measuring tape from the waist, between the legs, to the back waist.

I like to make bandana shorts like jams using the full bandana and not measure inseam or length. If you’d like to hem your child’s pants to a specific length, you are welcome to take the leg measurements. Then you could trim the bandana from the top rather than hemming the legs. That’s what I’d do if I wanted to shorten these.

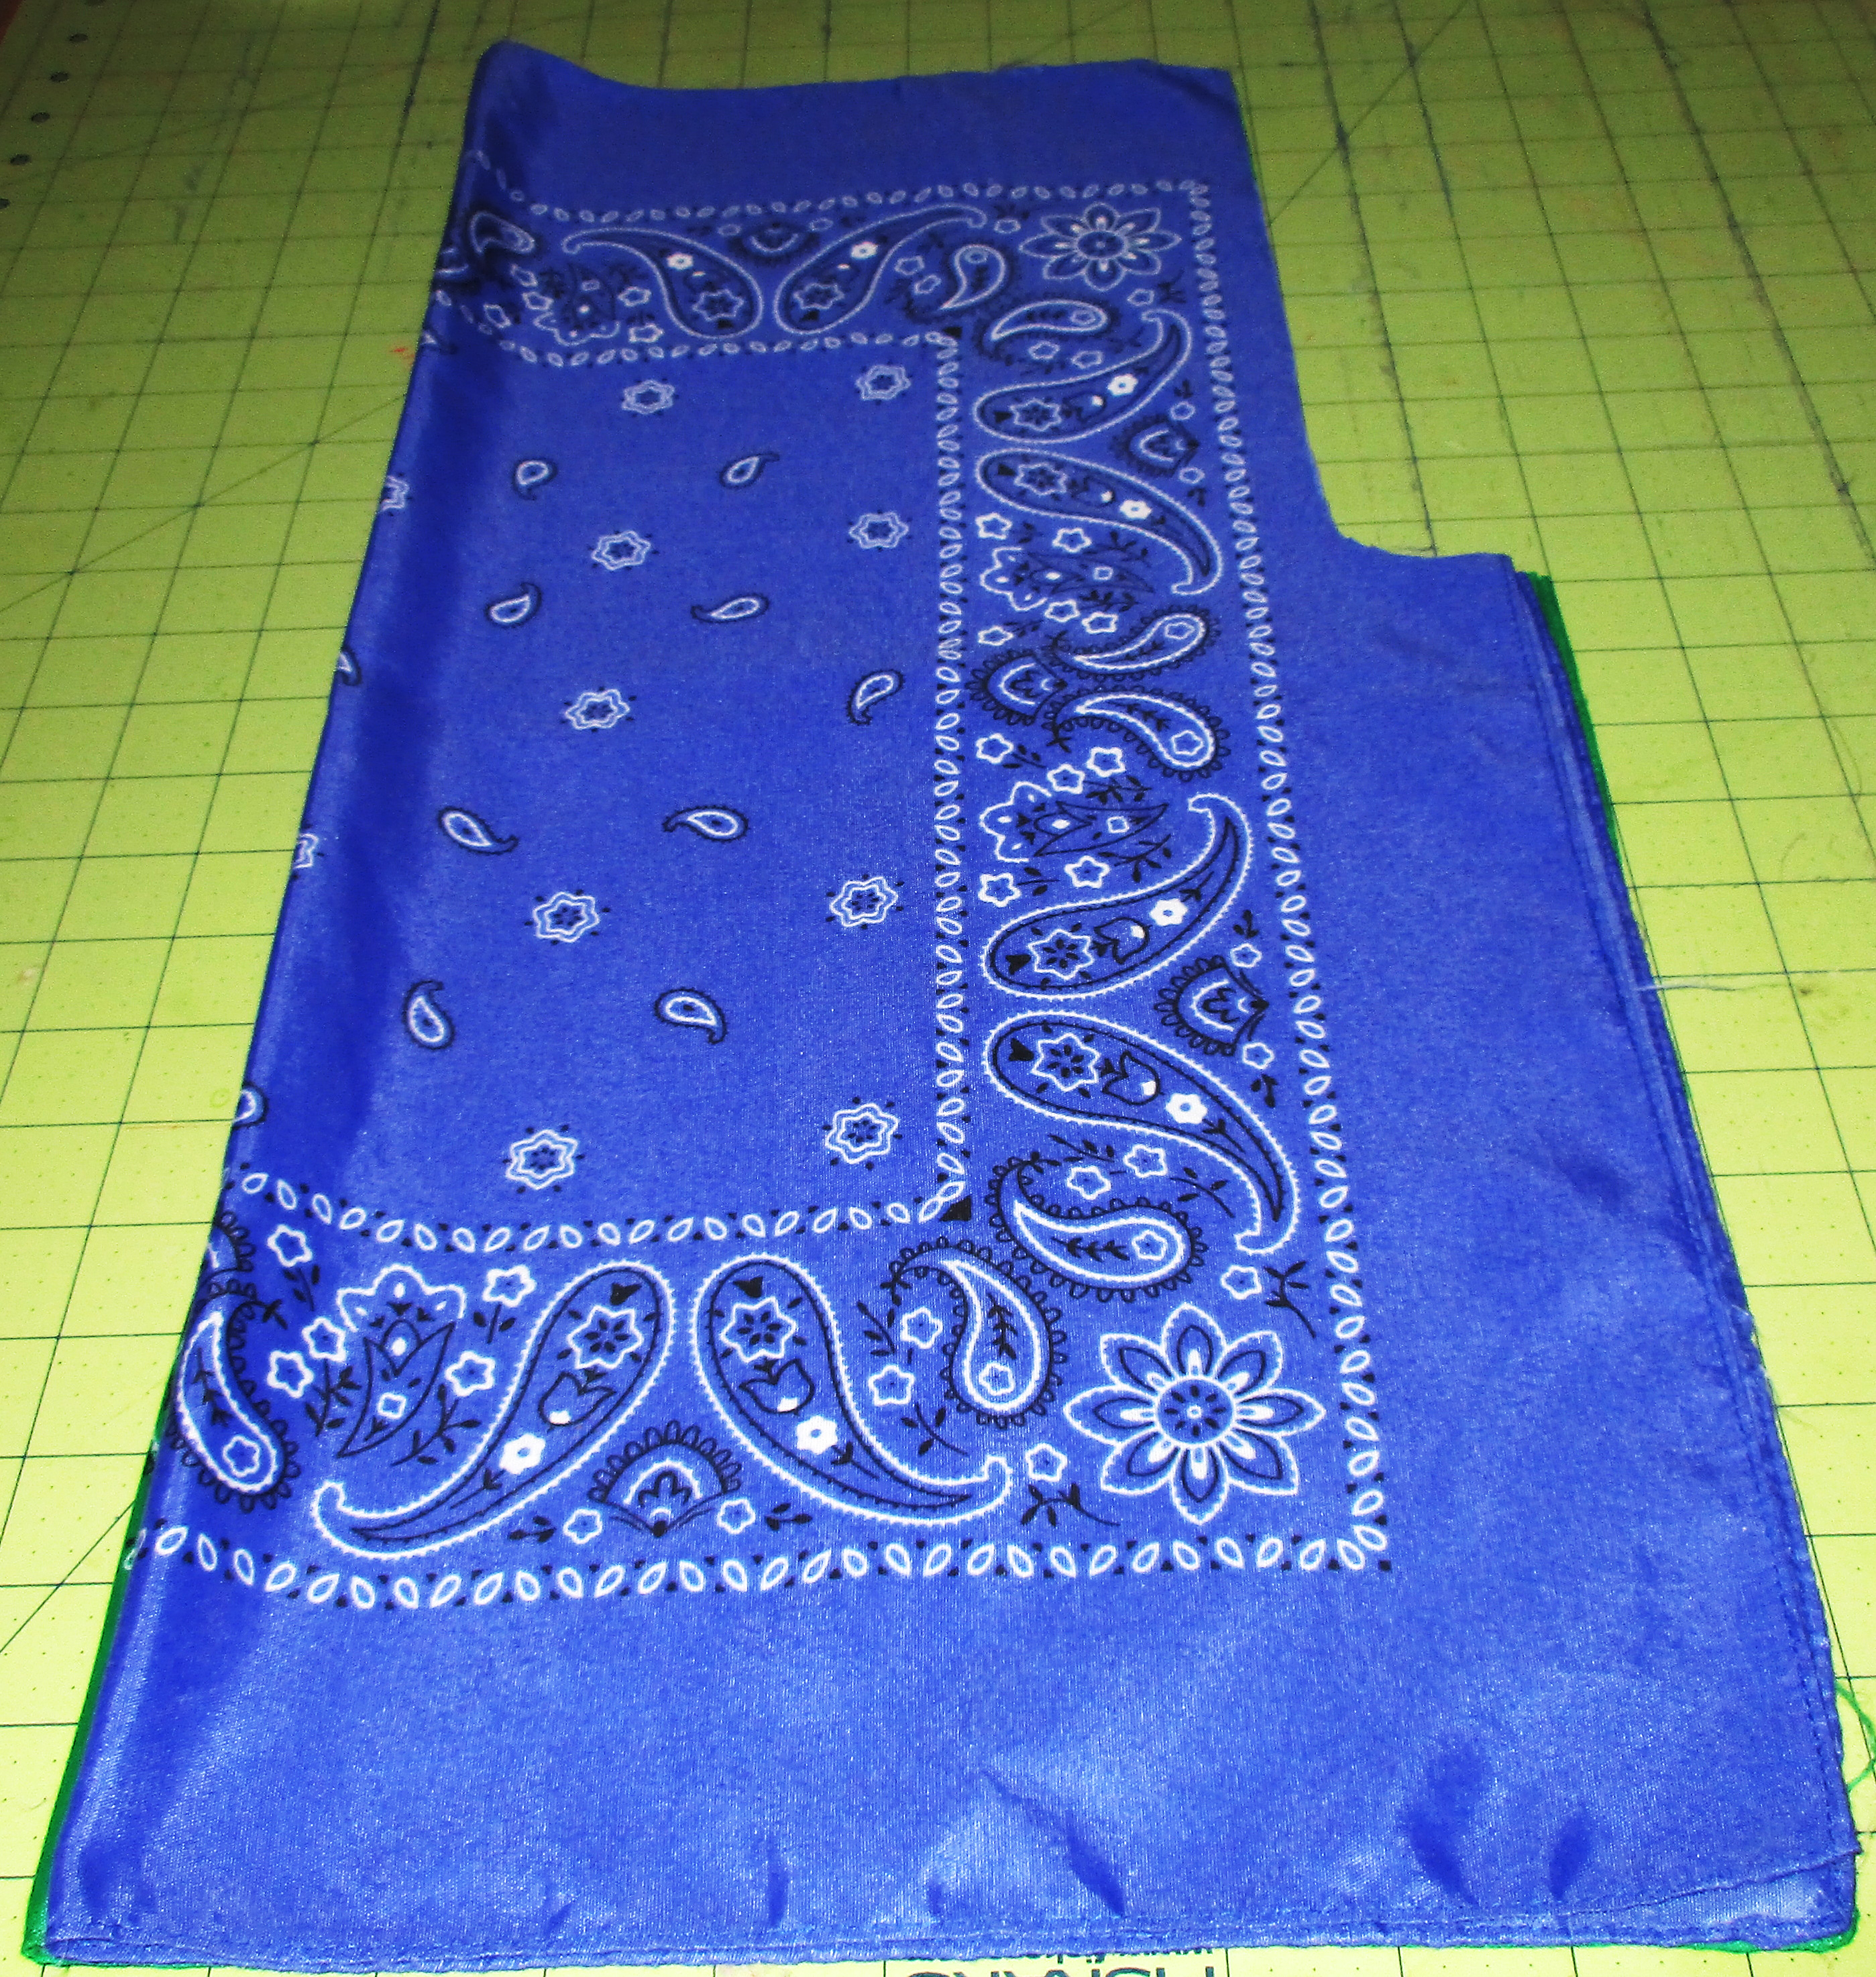
Sew easy shorts step two: cut

Fold the bandanas in half with the fold running vertically. You are going to cut out a J shaped piece from the top edges. Determine how deep and wide to cut this J shape based on your measurements.

You will want to divide the child’s rise measurement by half and add 1 inch — or up to 2 inches, if you’d like to add more room to grow.

Mark that far down from the top corner edge of the folded bandana. Then mark an inch and half to two inches in from the outside edge. Cut in a J shape between these two points, leaving a J shaped cut-out on the edges of your folded bandanas.

Fold the bandanas in half with the fold running vertically.

Fold the bandanas in half with the fold running vertically.

If I wanted to shorten the legs from the bandana lengths, I would cut that many inches off the top, before I measured and cut the J.

Step three: sew legs

Each bandana will make one leg. Fold them right sides together, and sew down the inseams, which are the edges of the bandana beneath the J crotch seam you cut out.

After you sew each leg, turn them right sides out.

Step four: sew crotch seam

With the legs right sides out, align the crotch seams of each leg piece. Make sure the leg seams you already sewed are aligned, as well as the top edges.

Sew this crotch seam with a stretch stitch, for maximum strength.

Now they look like shorts.

Now they look like shorts.

Step five: sew the waist

Now fold over about an inch at the top of the shorts, toward the inside, and press.

Sew around this seam, leaving a couple inches open, to allow for elastic insertion.

Cut elastic to the child’s waist measurement, attach a large pin to the end of the waist elastic, and thread it through the waist channel.

Then, sew the elastic ends together and top-stitch the waist closed.

Of course, you can hem them if you like, and if you did not shorten them from the top at the beginning.

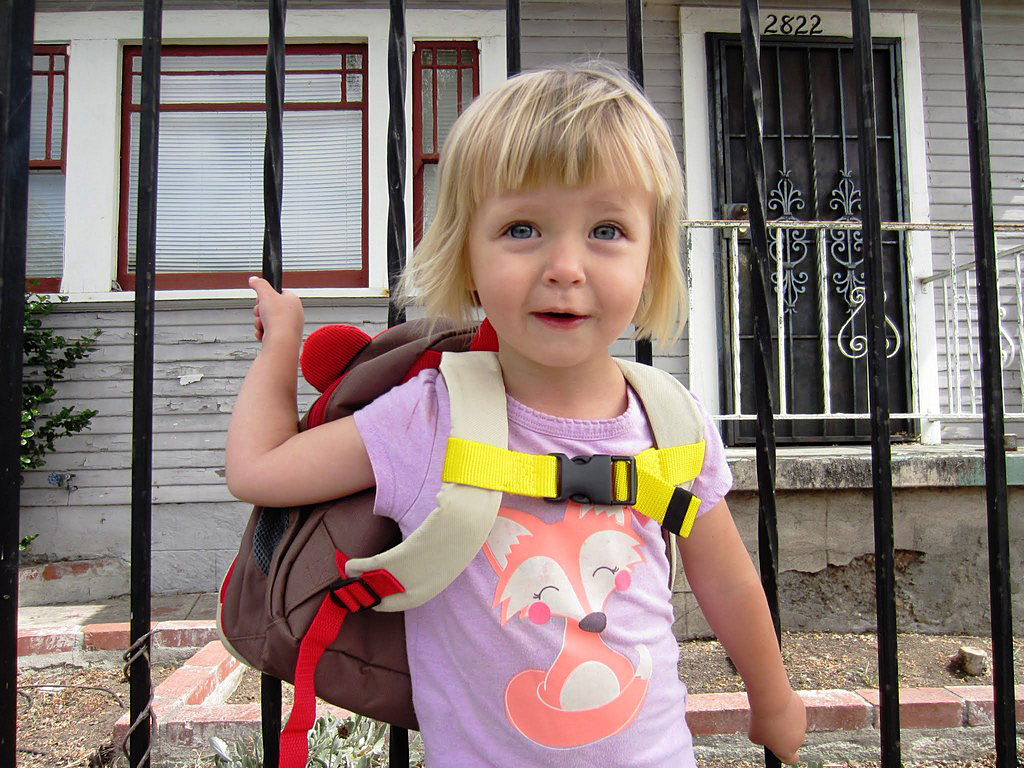
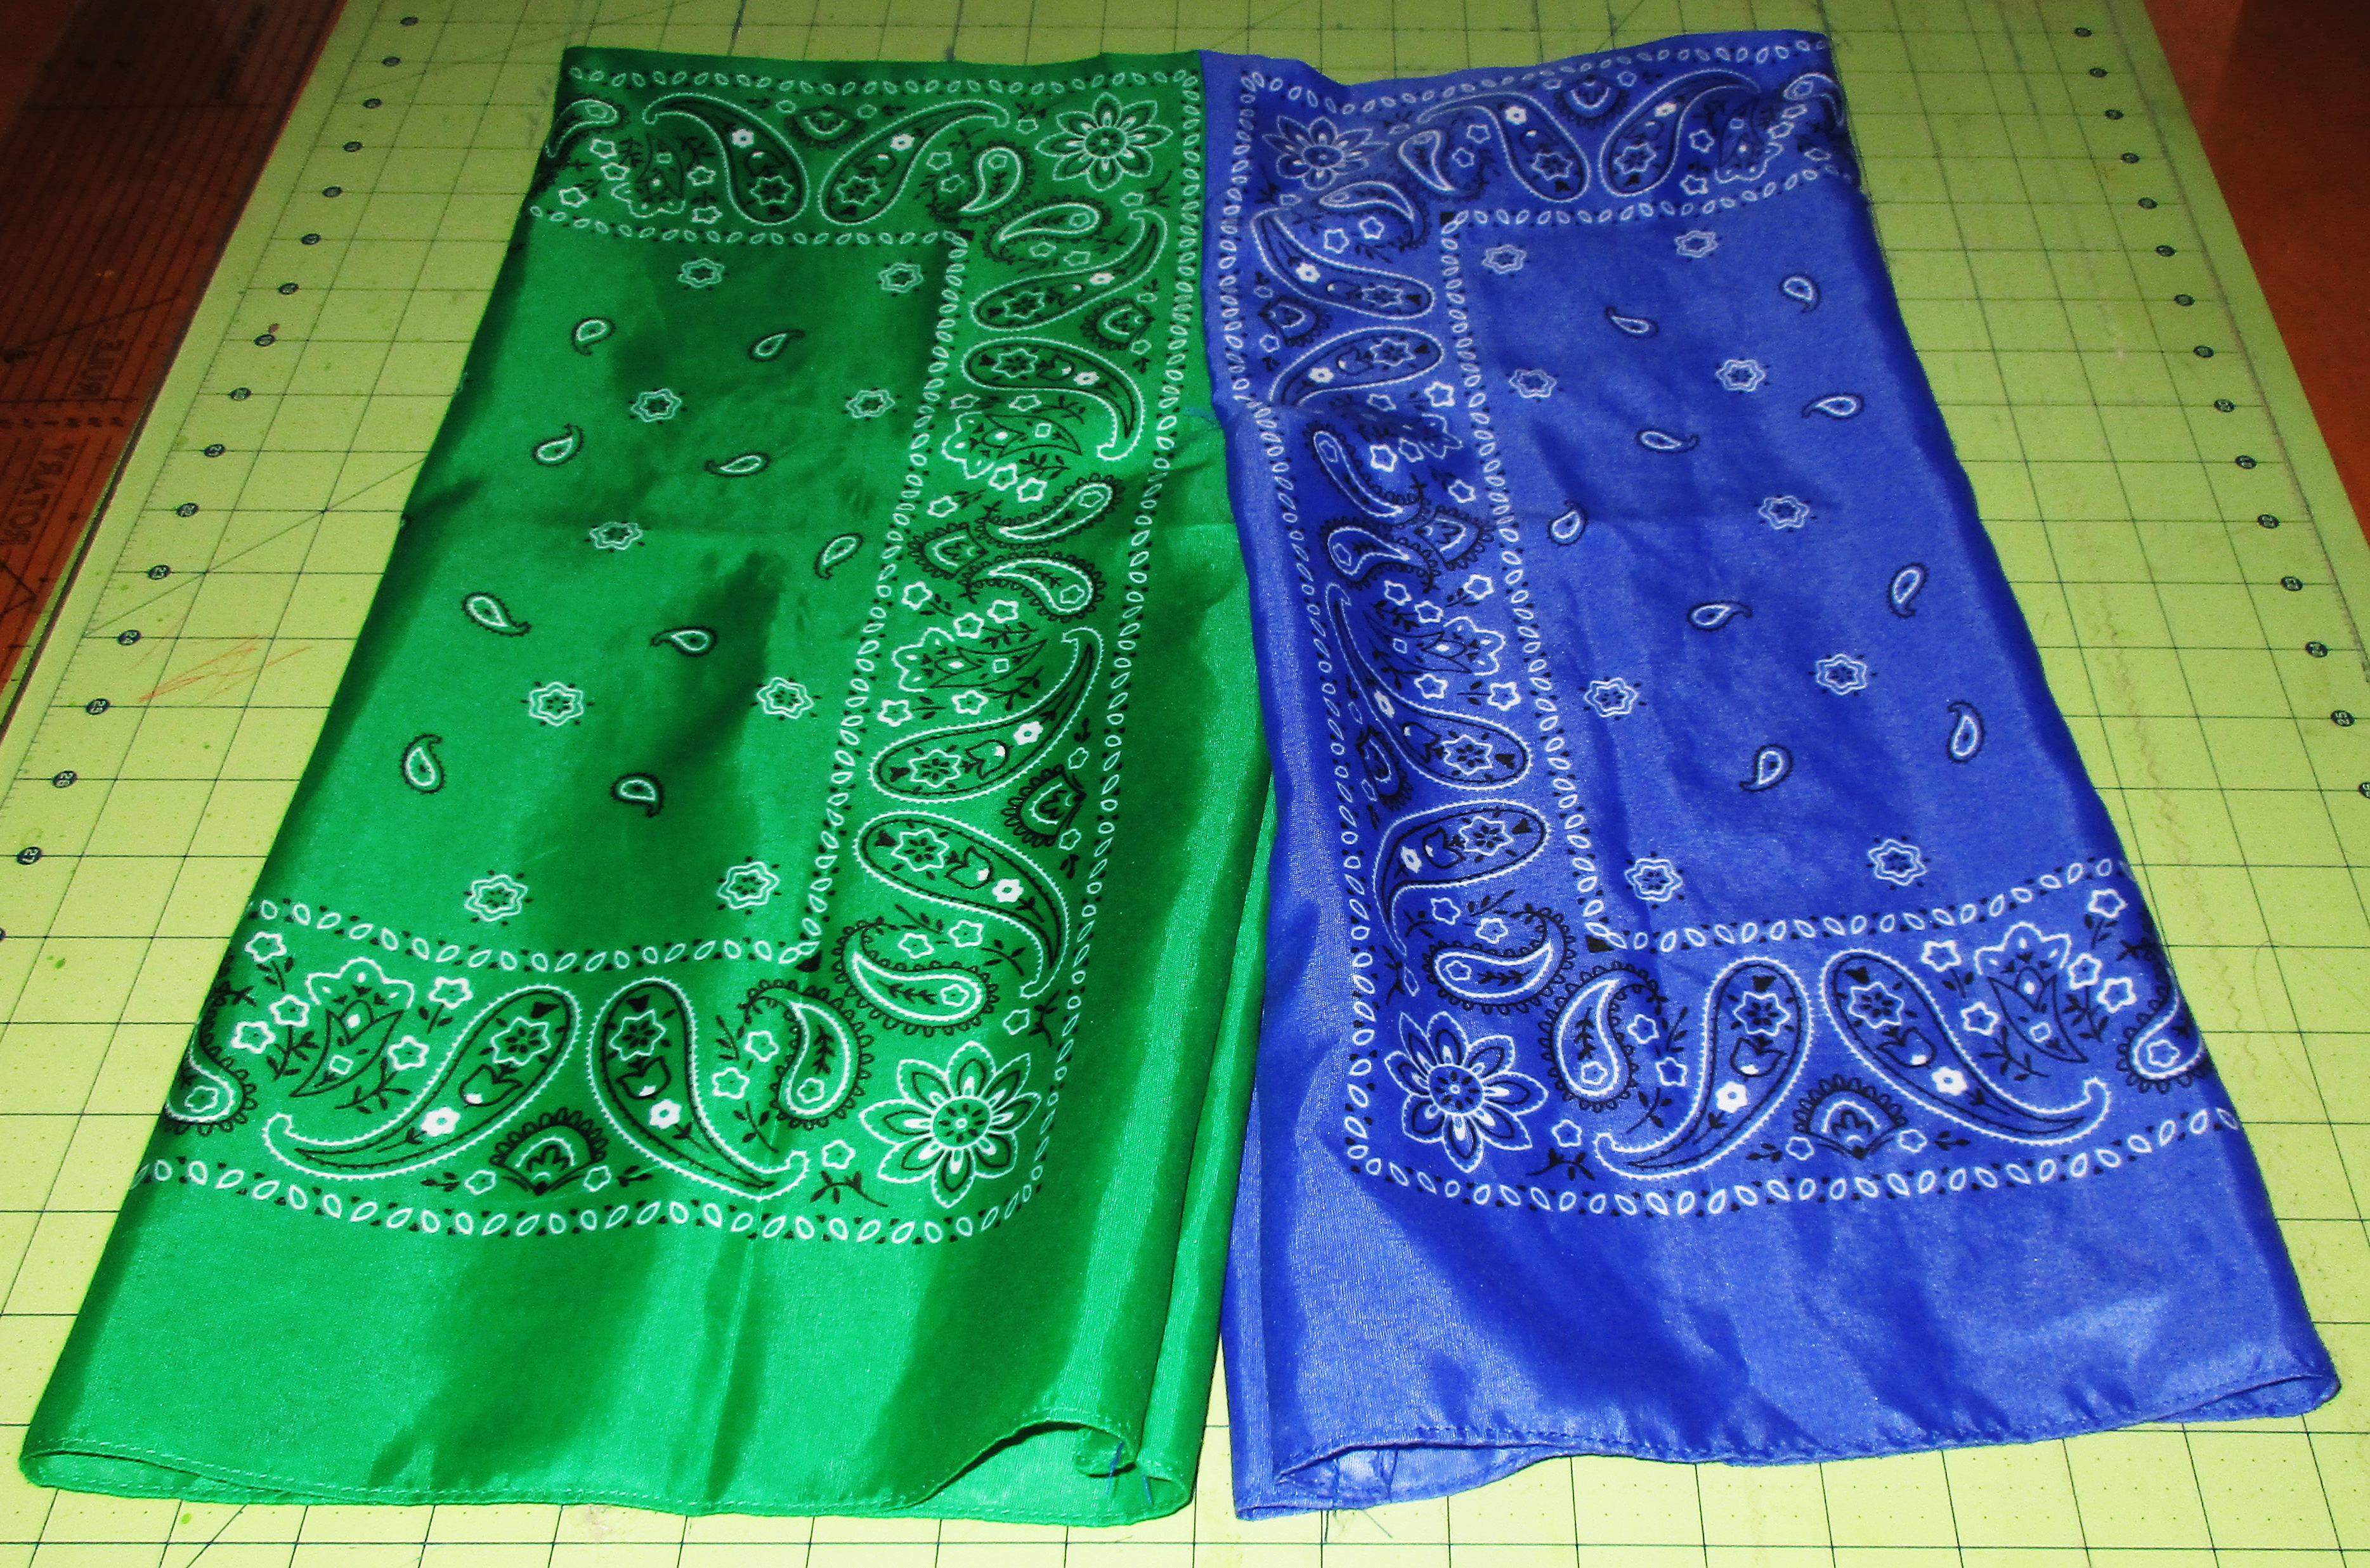
Personally, I like to let little boys wear them long. The green and blue pair are longer than knee length on my youngest and look cute to me.

Voila! Ten-minute kid shorts.

Voila! Ten-minute kid shorts.

Sew easy shorts: ten minute adult yoga shorts

I used the same technique to make myself a ten minute pair of shorts, too, refashioned from a t-shirt. I made legs from the front and back panel of one of my dear’s favorite t-shirts, which he has outgrown.

Sew all the seams on these with a stretch stitch.

For mine, I cut the rise a bit short, and then added a waist section from another shirt.

This did not work out perfectly as a ten minute design, so I won’t go into detail about the waist section. Other than to say that I sewed it right sides together to the top of the shorts, and then folded it over and sewed it down on the inside atop the previous seam.

My mistaken way to do this had to add elastic for the top of this section. I want to make these and yoga pants with a crosswise knit cut short enough that it will not need elastic; the ones I just made have too much bulkiness around my already too bulky middle! I’ll hope to show how to make a yoga pants pattern here soon if I can.

But these worked well enough to wear and to love. My husband particularly loves these shorts; he’s been complimenting me on them all day. He doesn’t mind all the bulkiness around my middle, because he is responsible for it. This is what has come from having “cook dinner” on my don’t do list. He cooks things like rich stews, fried chicken, pizzas, and fat burritos and burgers every week! I’m going to have to take dinner off of my don’t-do list soon, or else I’ll have to make myself a whole new wardrobe!

I think they will be a comfy favorite, & I made them in just ten minutes for $0.

I think they will be a comfy favorite, & I made them in just ten minutes for $0.

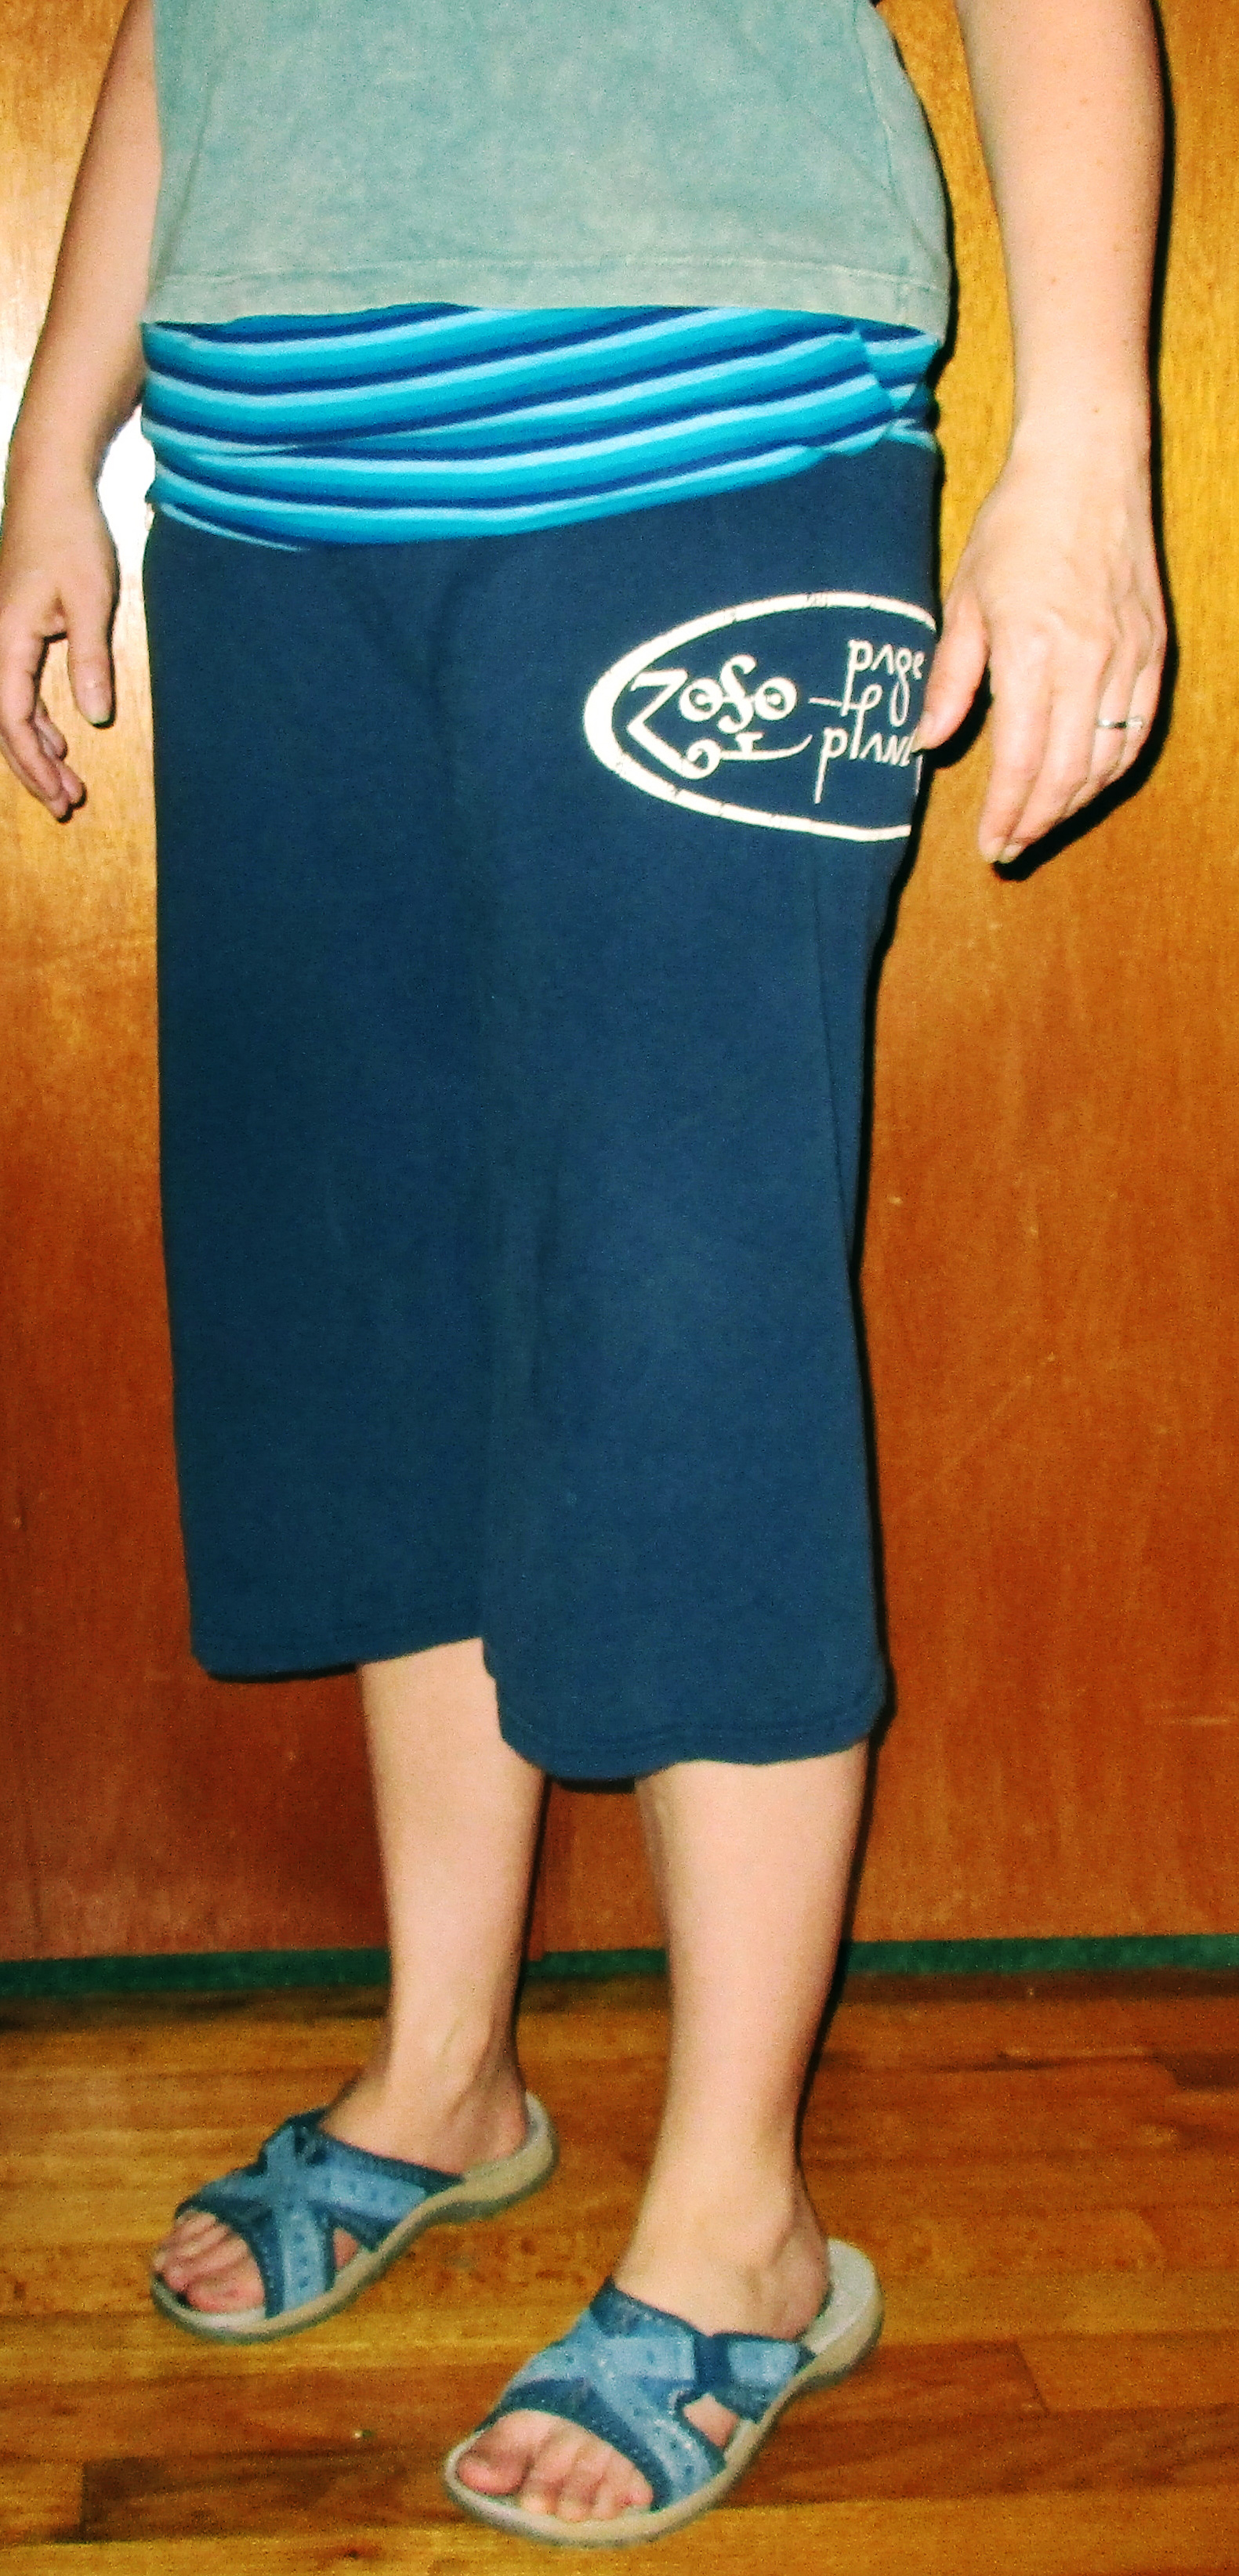
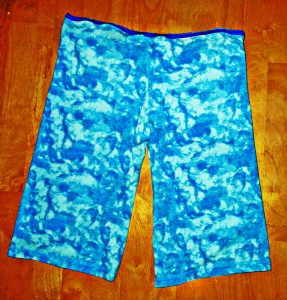
Ten minute adult legging shorts

I made another kind of shorts for me in ten minutes, too.

I made another kind of shorts for me in ten minutes, too.

I made another kind of shorts for me in ten minutes, too.

I think of these knee length leggings as undershorts and wear them under casual short dresses.

Make these the same way as the other shorts, using stretchy knit and cutting them smaller for a closer fit.

Rather than adding bulkiness with a waistband channel, stretch a narrow elastic waistband and top stitch it down using a stretch stitch.

The elastic I had is fairly decorative,so I sewed it on the outside in this case. You can use a thicker elastic for the waistband, and sew it on the inside instead, if you prefer.

Make your own shorts

You don’t have to start with bandanas or T-shirts to make shorts.

Make elastic waist shorts to fit anyone by measuring desired length, inseam length, waist and leg circumferences (plus ease) and rise. It is easy to cut shorts to fit anyone’s measurements in just a few short minutes. No pun intended!

I encourage you to both sew easy shorts and to play with bandanas, refashion T-shirts, and have fun with fast fashion ideas like this. Happy sewing!

Looking for the Light

Looking for the Light

Unless I’m sewing in my lovely big-windowed space at Blindspot, I find that I’m constantly searching for more lamps.

Unless I’m sewing in my lovely big-windowed space at Blindspot, I find that I’m constantly searching for more lamps.

The older I get, the more light I need to sew – or so it seems. Perhaps the many years of sewing in dimly lit church basements and cramped corners surrounded by double racks of clothing and piles of waxed cardboard ‘chicken’ boxes has finally taken its toll.

Unless I’m sewing in my lovely big-windowed space at Blindspot, I find that I’m constantly searching for more lamps. Even with the almost entire wall of windows in my shop I still have a couple white paper Chinese lanterns hanging from the ceiling, two floor lamps, and small gooseneck table lights next to the machines. The little lights in the domestic machines never seem to be quite enough. I’ve even been known to prop up my cell phone with the flashlight on under the top arm of machines, leaning it against the solid part with the controls and wheel.

Industrial machines come with moveable, bendable gooseneck lamps attached. I position mine low to the left of the machine, almost touching. I never have a problem seeing when sewing with the industrial.

There are countless types of table lamps out there but, for sewing purposes – and especially if you want to be able to angle the light beam under a sewing machine – a clamp-on style or one with a small base is the best. If the base is too big it’ll just get in your way when you’re trying to sew (especially with a machine). You also need one with a long, moveable goose neck or adjustable arm so you can point it where you need it.

Daylight Slimline LED table lamp

The Daylight Slimline LED table lamp is a great choice. It’s extremely narrow and clamps to a table edge. I like that it doesn’t take up excess space; it just does its intended job without being obtrusive and overbearing (and yes, I know I’m anthropomorphizing).

Daylight or full spectrum light sources are said to improve color perception and visual clarity, as well as, mood, productivity, and mental awareness. How valid these claims are depends on whom you’re talking to but, it is pretty well accepted that they do improve color perception. Here’s one study conducted by the Lighting Research Center at the Rensselaer Polytechnic Institute if you’re interested in that sort of thing.

Daylight Slimline floor lamp

The Daylight Slimline light also comes in a floor lamp version, which is also very useful as you can bend the arm over a chair or your shoulder to work.

Ottlight Creative HD

A really nice, easily portable light is the Ottlight Creative HD high definition natural light.

The Ottlight is named after the inventor of full spectrum lighting, Dr. John Ott.

Doc Ott

All living organisms needed the full spectrum of light provided by the sun.

All living organisms needed the full spectrum of light provided by the sun.

Dr. Ott was a banker who loved horticulture and time-lapse photography. This led him into a pioneering career in photobiology; the study of light on living cells.

Dr. Ott ended up working as a consultant for the Walt Disney “Secrets of Life” film series where he found that he couldn’t successfully grow plants indoors under normal everyday artificial lighting. His research showed that, in order to thrive, all living organisms needed the full spectrum of light provided by the sun. It was also during the making of this film that Dr. Ott pioneered the use of time lapse for film and television.

Moving through the spectrum

As his career progressed, Dr. Ott began monitoring the beneficial effects of full spectrum lighting on certain human physiological conditions. He discovered that light color temperatures affected mental health, with balanced light reducing hyperactivity in classrooms and negative behavior in prisons.

One of his biggest discoveries was that proper reproduction of individual cells (plant and animal) is affected by lighting variances. He also realized that the light entering our bodies through our eyes controls and regulates our brain chemistry.

Dr. Ott wrote tons of research as well as three books. He published a series of seven articles in the International Journal of Biosocial Research, titled Color and Light: Their Effects on Plants, Animals, and People. These articles summed up Dr. Ott’s decades of independent research, which, at the time, was contrary to the established wisdom of pharmaceutical companies who were intent on toting the negative effects of natural sunlight.

The Silent Epidemic

It’s a sunny morning here in Harlem, so I’m about to grab my bike & go spend some time out in the sun.

It’s a sunny morning here in Harlem, so I’m about to grab my bike & go spend some time out in the sun.

At first, Dr. Ott’s research was most often met with polite indifference from the scientific community. Soon, though, clinicians and medical professionals emerged who recognized and aligned with his theory of Mal-illumination or “the silent epidemic”.

Mal-illumination refers to the human trend of becoming ‘contemporary cave dwellers’ and spending the majority of their time indoors and away from natural light sources. Doesn’t sound good, does it?

So, in closing, don’t forget to go outside (outside and sunlight are still free after all!), open the shades, and consider buying yourself a full spectrum lamp if you don’t have one already.

It’s a sunny morning here in Harlem and I’m about to grab my bike and go spend some time out in the sun.

Master Your Serger with Tote-Making Class

Master Your Serger with Tote-Making Class

Sewing Machines Plus in San Marcos, CA has the perfect class to help you master your serger, use your fabric stash & walk away with a fabulous tote bag!

Sewing Machines Plus in San Marcos, CA has the perfect class to help you master your serger, use your fabric stash & walk away with a fabulous tote bag!

If you’ve been using your serger machine for a while now, you’ve probably mastered many of the basics. And if you’re like me, you’re completely in love with your serger! But you’ve probably also noticed there are a lot of features you’ve never used. Some of them you may not need, but wouldn’t it be cool to at least know a few of them? I think so too.

Sewing Machines Plus in San Marcos, CA has the perfect class to help you master your serger, use your fabric stash and walk away with a fabulous tote bag!

Serger Class Details

This class is 2-hours a day for three consecutive Wednesdays in May. May 17, 24 and 31 from 3:30 – 5:30. You’ll need to bring you serger including the power cord, foot pedal and cord. You’ll also need a variety of serger feet, including standard, cording, lace applicator, cover and chain, ruffler, elastic and clear. If you don’t have all of these serger feet, don’t worry, you can buy them at SMP before class.

Don’t forget the fabric! You’ll need at least 7 coordinating fat quarters or scraps and one yard of Soft and Stable.  To go along with the fabric, you’ll also need to bring thread, zipper, buttons, piping and cording. Full class supply list and registration instructions available here. It’s a fun, affordable way to learn the ins and outs of your serger, connect with other stitch aficionados and make an adorable tote bag project.

When your serger tote bag is done, it’ll be great for you or as a gift for a graduating student. Plus, you’ll have a much greater understanding of your serger machine and all its features and accessories.

Are there other classes you’d like to see offered? Let us know! We’ll do our best to accommodate and provide classes of interest.