Make More Time to Sew, Part Two

Make More Time to Sew, Part Two

Here are more tips to make more time to sew
Here are more tips to make more time to sew.
Hi! I hope you found part one of this series helpful for making more time to sew. I saved my favorite productivity hacks for this week. Here are new ideas for how to make more time to sew; hopefully these will help you, too.

Automate systems

If you can’t get someone else to go for your groceries, could you streamline and automate your system by meal planning and ordering the groceries online, for example, rather than wandering grocery store aisles with your cart?

An easy system for meal planning definitely helps me to make more time.

Another example: some people do laundry on a certain day of the week, but I can’t imagine that. I do laundry every day, automatically. Or I did, anyway; I battled laundry and gave up significant amounts of time to taking care of laundry with love for my family.

Finally, I managed to eliminate laundry backups and piles by doing a load or two — through to completion of putting them away, without exception — every day.

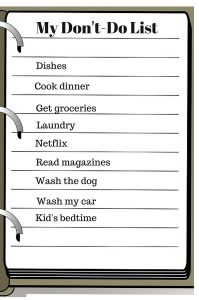
And my work on getting this system into an automated rhythm paid off for me even further. My husband surprised me by offering to take over this daily management! I happily loaded laundry onto my don’t do list and that gives me more time every day.

Keep reading to see more ideas for easy automation of regularly recurring tasks.

Keep reading to see more ideas for easy automation of regularly recurring tasks.

Just having an automated system of where you always put your keys, phone, and other items, for example, could potentially save many minutes of time spent searching for your things.

The same goes for your sewing tools and space, of course. Keep your machines next to their thread, for example. Arrange a hot iron and pressing board within your reach from your sewing machine when you make patchwork. Always know exactly where everything you need is by having a dedicated place for everything and keep everything always in its place when not in use. These little tweaks can save a lot of time for more sewing.

Speaking of systems:

Take a tip from the king of Twitter. I am talking about Jack Dorsey. Dorsey is one of Twitter’s founders and its first CEO. And when Twitter performance was lagging in 2011, he came back as CEO to turn the company around. Dorsey also founded Square, the app that turns a cell phone into a card scanner and enabled everyday folks to easily accept credit card payments.  For a time, he was CEO of both giant operations.

This productivity whiz shared his secret by talking about how he themes his days. When I read his descriptions about how he handles marketing, communications, and growth on Wednesdays, and culture and recruiting on Fridays, for example, I sensed a way to make more time and I started thinking about this.

Keep it simple, silly: easy to remember themes

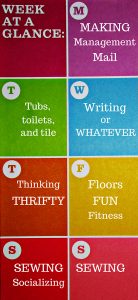
For this to work for me, it had to be simple and easy to remember. After working with different iterations of this idea, my current themes for my days include things like:

Monday

Mail and management on Mondays. Some folks might prefer to use the OHIO rule (only handle it once) for mail. For me, though, I prefer to deal with the last week’s incoming mail quickly and all at once on Mondays.

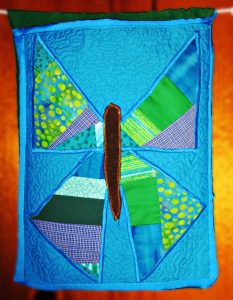
I made this butterfly organizer pocket to hold my mail for dealing with on Mondays.

I made this butterfly organizer pocket to hold my mail for dealing with on Mondays.

Management for me means I am paying bills, scheduling tasks, planning my next week and reviewing the previous week, following up on things, etc.

You could have Making on Mondays, and fit sewing and other projects in on this day every week.

Tuesday

I clean tubs, toilets, and tile on Tuesdays.

Or how about teaching on Tuesdays? You could teach yourself or someone else how to do something new.

Wednesday

For me, Wednesdays are devoted exclusively to writing, and I try to do not much else, because I am currently writing more than one book.

If you don’t have much writing to do, you might like to have whatever Wednesdays instead, for maximum scheduling freedom on hump days.

Sewing could definitely fit into Whatever Wednesday!

If you are in the once a week laundry camp, you could do your washing on Wednesdays.

Thursday

Thrifty Thursdays. I used to choose to do my shopping on this day, since following the thrifty theme helped me not to make impulse purchases or otherwise spend unwisely.

Now that shopping is on my don’t do list, I am helping to free time from excess management on Mondays by theming Thursdays for thinking, too. I allow myself to invest a larger percentage of this day for reading and learning new things.

Friday

Floors, FUN, fitness, and friends on Fridays- I use Fridays for fitting in all these things.

I try to schedule most of our outings, field trips, hikes and other outdoor activities, and also playdates or informal dinner parties with friends, on Fridays.

I also do a good bit of sewing under the umbrella of fun on Fridays. This would be for fun new project ideas, just playing with patchwork or starting a new quilt, stuff that is fun. I wouldn’t do mending on a Friday, since that isn’t as much fun.

We have family time every day here, but if yours doesn’t live with you, maybe you could use Fridays for family time, if this will help you.

I’ll also tell you about a tool that can save a ton of time from Friday’s floor cleaning task. I have a lot of hardwood and other hard floors, and also a pack of boys and a dog. So cleaning floors used to take up what felt like half my day on Fridays.

Luckily, a steam mop is a huge helper that cuts this task from tedious chore to so fast and effective it is almost fun to clean floors.

These are not all made equal, however. I love the well-designed Luna Plus steam mop system, especially because of its handy extra uses in the bathroom. This baby can save time on the floors on Fridays, and the tub and tile on Tuesdays, too.

It cleans twice as well as you can, and in half the time!

Saturday

Sew on Saturdays.

Here are some ideas to get you started thinking about your own themes for every day of the week.

Here are some ideas to get you started thinking about your own themes for every day of the week.

I would advise against any temptation to have Saturday shopping as a theme! That is based on my own opinions, however; you should do what makes you happy.

If you normally shop on Saturdays, could you move to using thrifty Thursdays for this? Then you could save money for more sewing equipment and supplies and a whole day of the week for sewing. I’d love to help you save time AND money, so do consider this option.

Some folks might like to theme their Saturdays for socializing. I do this some weeks myself.

Sunday

Sew on Sundays, too!

It is fortunate that there are two days of the week beginning with S! And it makes perfect sense when theming your days to plan two days of sewing, if you want to make more time to sew.

Of course you could also devote all or part of either Saturday or Sunday to Service or as your Sabbath day of rest and reflection.

And wait, there’s more!

This series will be continued to part three, next week, because I’ll like to show you a few more ways to make more time. And I’ll share a video I am working on for you, where I’ll give you more details and inspiration about all the ideas from this series.

Until then, happy sewing. I hope these tricks can help you to make more time for sewing this week, and I hope you get to enjoy making something you’ll love.

80s Prom Dress Hack

80s Prom Dress Hack

For the most part, I use my sewing skills for myself, and my immediate family. Sometimes, however, I get to help friends out. As was the case this week when my friend, Tania, asked if I could help her with a costume for a party this weekend. The theme was 80s Night and she had found an authentic 80s Prom Dress that ALMOST fit her. She just needed the dress to work for that one night. I was game to help her make it happen.

Verdict

When she brought over the dress I assessed three main issues:

  1. The zipper was broken on the left side of the plaque.
  2. There were two rips to the right of the right-side zipper.
  3. Her rib cage was wider than the fit of the dress. We would need to somehow expand the torso piece of the dress to get it to fit her for an evening.
I decided to extend the circumference of the dress by creating a fabric plaque that would be sewn onto the left side of the zipper opening.

I decided to extend the circumference of the dress by creating a fabric plaque that would be sewn onto the left side of the zipper opening.

The good news is that these were all problems I could tackle. I decided to extend the circumference of the dress by creating a fabric plaque that would be sewn onto the left side of the zipper opening (I cut off the broken zipper) and would attach via Velcro to the right side of the zipper opening.

The good news is that these were all problems I could tackle.

The good news is that these were all problems I could tackle.

Resourceful fabric recycling

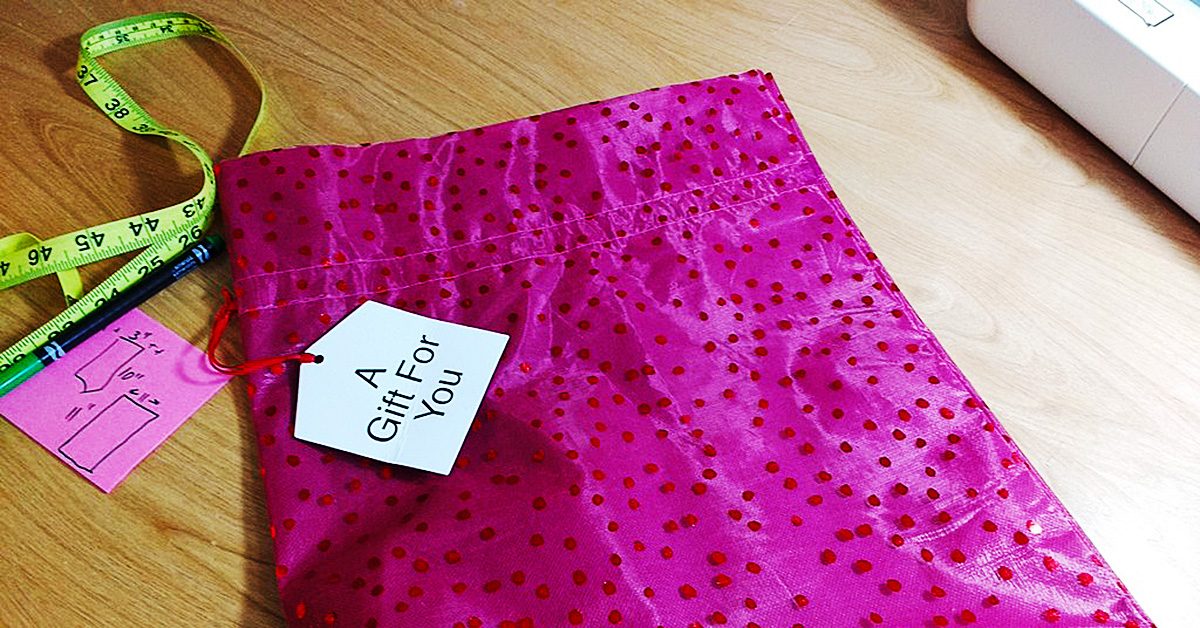
Tania brought two gift bags with her that we planned to use as extra fabric. They were glittery and shiny and would match the dress and the theme of the party. From the red bag I cut out the larger plaque.


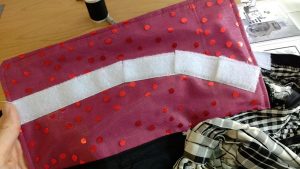
I sewed it directly onto where the zipper would have zipped up on the left side of the dress opening.

I sewed it directly onto where the zipper would have zipped up on the left side of the dress opening.

I sewed it directly onto where the zipper would have zipped up on the left side of the dress opening.

Patches?! We don’t need no stinking patches

Then I tackled the holes. I used the gray gift bag fabric to support the fabric under where the rips were and then zig zag stitched several lines of stitching to patch the rips (Remember this just needed to work for one night).


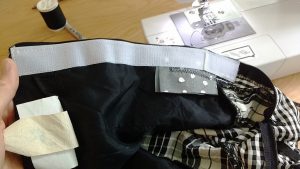
Here you can see the gray gift bag fabric on the underside of the dress. I sewed Velcro to the right side of the dress opening, sewing right over the invisible zipper.

Here you can see the gray gift bag fabric on the underside of the dress.

Here you can see the gray gift bag fabric on the underside of the dress.

Measure twice – cut once

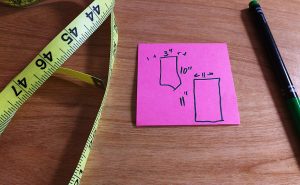
For this part, I had her put the dress on and then we fit the dress to exactly the width she felt comfortable in. I used my Clover Chaco-liner Pen to draw a line where the other side of the Velcro needed to be sewn on. The curve at the end is where the lower portion of the still working zipper zipped up to meet the straight line of the back piece.

The curve at the end is where the lower portion of the still working zipper zipped up to meet the straight line of the back piece.

The curve at the end is where the lower portion of the still working zipper zipped up to meet the straight line of the back piece.

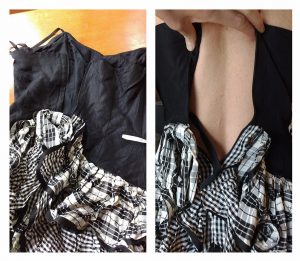
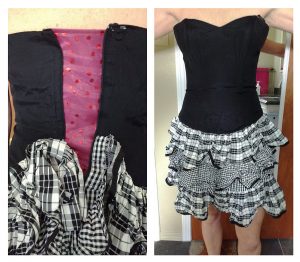
Ta da!!! The red fabric + Velcro expanded the corset piece perfectly. On the right you can see her in the dress after we’d finished. The dress is a little roomy in the bust, but she will be wearing a strapless bra to fill that in.

I’m so glad I could help my friend out with my sewing skills.

I’m so glad I could help my friend out with my sewing skills.

I’m so glad I could help my friend out with my sewing skills.

Have you ever helped someone DIY a costume?

———————————————————————————–
Charlotte Kaufman is a writer and sewist in Mammoth Lakes, California. She specializes in marine and home interiors and continues to fall more and more in love with quilting. You can follow her at charlottekaufman.com.
How to Make More Time to Sew

How to Make More Time to Sew

You can make more time to sew

Do you have more ideas and things you’d like to make than time to do them?

No matter how many ideas that is, the right answer is no.

You can make more time to do anything you want, including sewing.

Here are my tips & tricks for finding more time.

Here are my tips & tricks for finding more time.

Productivity has become one of my passions. In fact, I am outlining a book I’ll write about many productivity hacks I have learned. I’ll share a few of these with you.

Make More Time to Sew

Set up for success

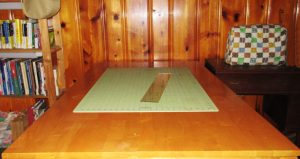
You need an efficient, working sewing system, including machines and workspace. That’s not to say that you can’t use a kitchen table if you don’t have dedicated space. In that case, a big part of your system would be keeping that kitchen table clean and never allowing piles of things to accumulate there. That way, you can whip out your sewing machine and get to work whenever you find a chunk of time to sew.

Keep work spaces clear & ready for working whenever you find time to sew.

Keep work spaces clear & ready for working whenever you find time to sew.

You do not want to waste time having to clear a space to sew. Keep your spaces clean and clear. Have backups of all machines, if you can. And keep them clean and in good working order. I gave tips about this when I laid out rules for keeping your sewing room in order.

The don’t-do list

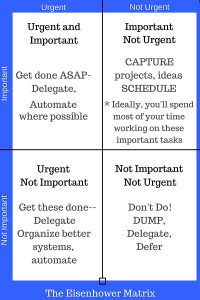
Use the Eisenhower Matrix for prioritizing tasks. Start your don’t do list by dumping all the tasks in the not important, not urgent quadrant.

Use the Eisenhower Matrix for prioritizing tasks. Start your don’t do list by dumping all the tasks in the not important, not urgent quadrant.

Here is a great way to grab all kinds of time.

What are you currently doing that someone else could do?

If you are a parent, for example, that job is about raising competent people. And doing things for kids is often a disservice to both of you. It was awfully helpful for me and my kids when I realized this.

My own don’t do list started with only one item I could think to move there—washing dishes. It stayed like that for a long time. Gradually, I started finding things to add and helpers to give tasks to. My don’t do list is quite long by now.

My don’t do list now includes going shopping for groceries, for example. I order groceries online, and my husband is willing to go to the grocery store and pick them up. So I never go out for groceries at all anymore!

This is liberating and frees up all kinds of time to sew.

You can say no!

Do not feel obliged to accept all invitations or requests for your help. Be helpful and social, but remember the rule: don’t do for others what they can do for themselves.

Here is another helpful rule to keep in mind when thinking about your don’t do list: Only do what only you can do.

Right now, I’m busy doing so much that only I can do that I have delegated a lot of tasks to others & gained time by having a long don’t do list.

Right now, I’m busy doing so much that only I can do that I have delegated a lot of tasks to others & gained time by having a long don’t do list.

When you are looking at items on your plate and deciding which things to dump, it might be helpful to think of the 10-10-10 question. Just ask what difference a particular task will make in ten minutes, in ten months, and ten years. If it doesn’t matter much in any of these timelines, then perhaps that is a task you can let go and include on your don’t do list.

You can use this question to clearly see and reorder your priorities if necessary, so it is a helpful tool in other ways, too

Capture all your ideas

Achieve a mind like water that is free to flow in whatever container it finds itself by emptying it of all those things you do want to do.

Don’t use your brain power for keeping track of ideas and plans. Write these down. You need to regularly drain your brain, or download data to paper or digital file.

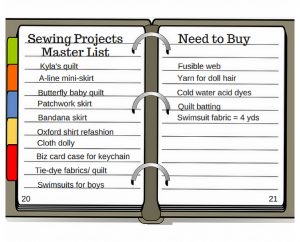
Use a notebook, card file, or organize lists on an app. The important thing is to have a system for tracking all your ideas, projects, and tasks. And use it!

How to Make More Time to Sew

I’ll recommend my two favorite ideas for this: a bullet journal or bujo, as these are affectionately known online, and a kanban, which comes from the system known as kaizen.

Bullet Journal

A bullet journal is a notebook with numbered pages and an index in the front. This helps to organize your lists and information so you can find it. You can have project lists, lists of next actions and Most Important Tasks, books you’d like to read, garments or quilts you want to sew, ideas, sketches. The point is to use it to capture everything you want to keep track of, rather than using your headspace for this.

Use an index in the front & number bullet journal pages to easily find all your lists.

Use an index in the front & number bullet journal pages to easily find all your lists.

Kanban

A kanban board is a central tool in the system known as kaizen (“change for better” or “continuous improvement). I find it to be incredibly helpful.

A kanban board is simply three columns: to-do, doing, and done. I have used a white board and also a tri fold board and post-it notes to organize a kanban for some big projects before. Now I use free Trello boards to do this digitally.

My kanban board for today.

My kanban board for today.

The trick to making kanban work for you is to limit the Doing column, and keep it moving. My advice would be to use no more than three doing cards at a time. I allow an absolute maximum of five on mine, but try to keep it to three or just two.

Move these doing cards quickly to done, in a continual stream. The way to successfully do this is to make highly actionable tasks. “Make a quilt,” for example is a PROJECT, not a task or next action. Break projects into next actions. So the first task for “make a quilt,” might be to settle on a design, or if you’ve done that, plan and buy all the fabrics. Next actions in order would then be, prewash fabrics, iron fabrics, cut patchwork pieces, assemble patchwork, finish quilt top, make a quilt sandwich and pin, quilt, bind.

I hope these time saving tips help you. There’s more; I saved my favorite productivity hacks for finding more time to sew for part two of this series, next week.

Fabric Scrap Projects

Fabric Scrap Projects

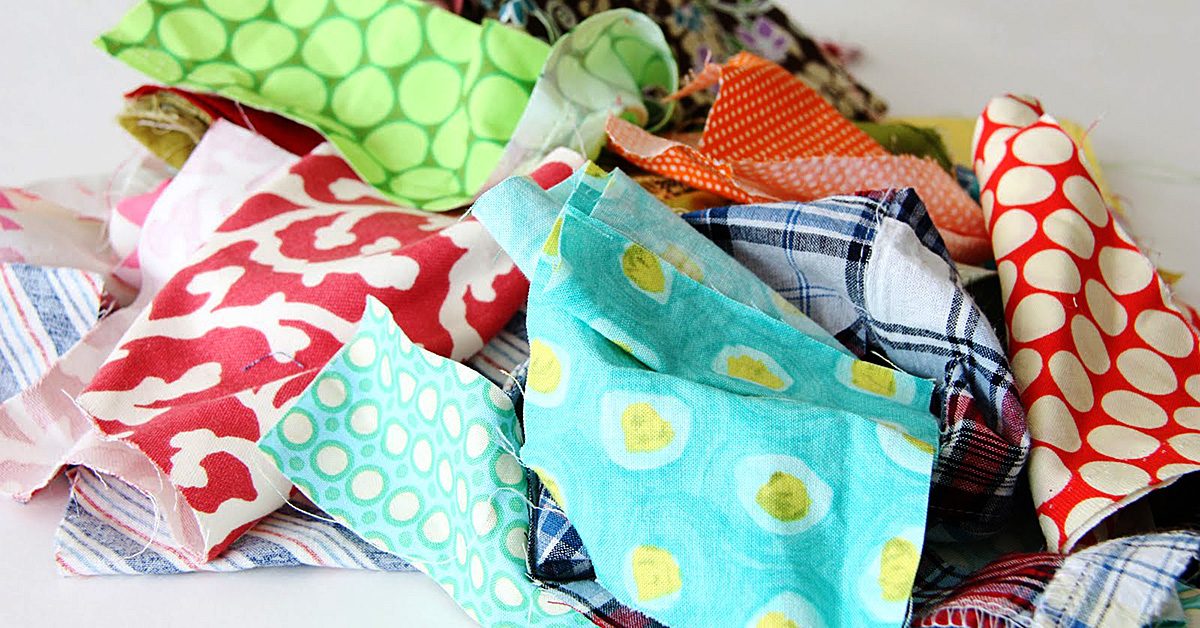
If you’re anything like me, you’ve got a huge stash of fabric scraps. You don’t want to toss them since the pieces are big enough to be used for SOMETHING. But you also don’t really know what you’ll use them for. I’ve recently made it a mission of sorts to use my fabric scraps before I buy any new fabric. That’s led me to come up with projects, many of which allow me to upcycle other items as well.

Cat litter bucket small ottoman

I’ve been looking for a small ottoman to go with my living room love seat for a while. I hadn’t found anything I liked, that was the right size and that matched my décor. Then, I hit upon an idea!

With four cats in the house, I buy large tubs of cat litter on a regular basis. They pile up until I either find a use for them or make room in the recycling bin. I also had in my scrap bucket some brown faux suede upholstery fabric that goes nicely with the décor and nearly matched the love seat color. Perfect! I grabbed the litter bucket and layered the bottom with sand to make it a little heavy so it wouldn’t tip easily. Then, I hot glued a pile of polyester stuffing on the top of the bucket and cut off the handle.

Finally, I cut the upholstery fabric scrap to fit around the bucket and wrapped the bucket the same way you might wrap a Christmas or birthday present. Some beads of hot glue and voila! A comfy ottoman that’s also cat approved.

Hair scrunchy

Those of us with long hair know the importance of having a great hair tie for every outfit. Using my fabric scrap stash I’ve come up with a way to make a scrunchies to match every piece of clothing I’ve made. It’s super easy! All you need is a rubber hair elastic like you buy at any drugstore or grocery store.

Cut a piece from your fabric scrap that’s long enough to go around the hair elastic. With right side out, encircle the hair elastic in your chosen fabric. Use pins to keep it in place and to be sure it wrinkles and folds in enough places to make you happy. Tuck in the raw edges and hand sew the fabric, being sure the fabric remains loose around the hair elastic. Then simply rotate the fabric so the seam you’ve made is on the inside of the scrunchy circle. Place in your hair and be the envy of all.

What other fabric scrap ideas do you have?

All in the Family

All in the Family

One of my work colleagues is currently in the process of setting up a costume shop for a new period television show. Setting up a new shop is a pretty big job. There is so much to do and lots of decisions to make.

Setting up a new shop is a pretty big job.

Setting up a new shop is a pretty big job.

My colleague asked about sourcing options for rolls of muslin and whether buying online or locally in the city made more sense. I actually have some very strong opinions on the subject. I believe very much in supporting local and family owned businesses. Sewing Machines Plus is a family owned company in San Marcos, California and I am happy to contribute to their blog. If you are local to that area, or if you live in a place where sewing supplies are not plentiful, or your only choice is a big name chain store, I encourage you to check out the Sewing Machines Plus website as an alternative.

If I can make it there, I’ll make it anywhere

I happen to be lucky enough to live in New York City where there is still a garment district. In the city, it is still possible to get pretty much anything you need sewing-wise from the garment district or other local businesses, though it does sometimes take a bit more time/legwork and actually talking to a real live human in person to procure what you need.

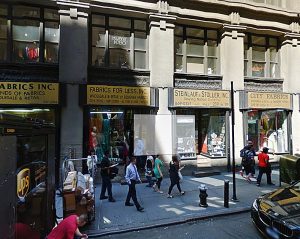
I always get my muslin from Steinlauf and Stoller on 39th Street. It’s a small, narrow store with not much of a traditional showroom. You have to ask one of the crotchety older gentlemen behind the counter for what you need. He’ll probably grumble a bit at you and ask you what you’re making and what you need the thing for but he’ll eventually reach into some drawer or cupboard, or disappear into the depths of the storeroom and pull out the thing you need. All in all, it makes for a very authentic New York experience.

Another one of my favorite supply places in the city is Oshman Brothers in the Lower East Side. They’re a third generation family business and are always super helpful with digging out the specific supplies you’re looking for. They are, though, closed on Saturdays.

Andy’s

In true NYC style, Andy’s is not actually a store but rather a workshop in the back of another store (True Hair Company) at the end of a hallway lined with random dress form parts.

In true NYC style, Andy’s is not actually a store but rather a workshop in the back of another store (True Hair Company) at the end of a hallway lined with random dress form parts.

Andy’s dress forms is the last dress form manufacturer left in New York City. They also repair forms. Their website cautions you to call before coming by the store. In true NYC style, Andy’s is not actually a store but rather a workshop in the back of another store (True Hair Company) at the end of a hallway lined with random dress form parts. Going for a visit is always an adventure. But if you’ve been once, they are likely to recall your name and know what show, or shows you work on, and treat you like one of the family.

Another store with limited hours and a recommendation to call before stopping by. Manny’s was once one of the most magical stores in the city, with shelves stuffed full of amazing millinery trims and notions. The place used to offer a bit of a treasure hunt. Now, they are much more streamlined and organized and don’t stock as many things as they once did. Sadly, this is the result of the decreasing demand for millinery supplies and the consumer trend of shopping at big name “convenient” outlets.

The New York City garment district isn’t dead yet but it has certainly suffered somewhat of a decline, as have many family owned and run businesses in the U.S. If you can, get out and support your local fabric and sewing supply store. And if there isn’t one nearby, check out an online family owned store such as Sewing Machines Plus who still believe in the personal touch. You’ll be glad you did.

DIY Home Sewing Projects

DIY Home Sewing Projects

Is it just me, or do an awful lot of jackets and sweaters come without a loop or tag to hang them with? I get it that many have hoods, and you could hang them from the hood, or even the back neck of the jacket, but there is nothing like a solid loop to quickly hang your jacket up.

Another problem is that many hooks are sharp or pointy and if you hang a jacket from the neckline or hood you end up with a bump in the fabric from the imprint of the hook. This is no bueno when you’ve spent good money on the jacket in the first place.

I like to add jacket loops using double fold binding I have on hand.

I like to add jacket loops using double fold binding I have on hand.

Let’s Sew!

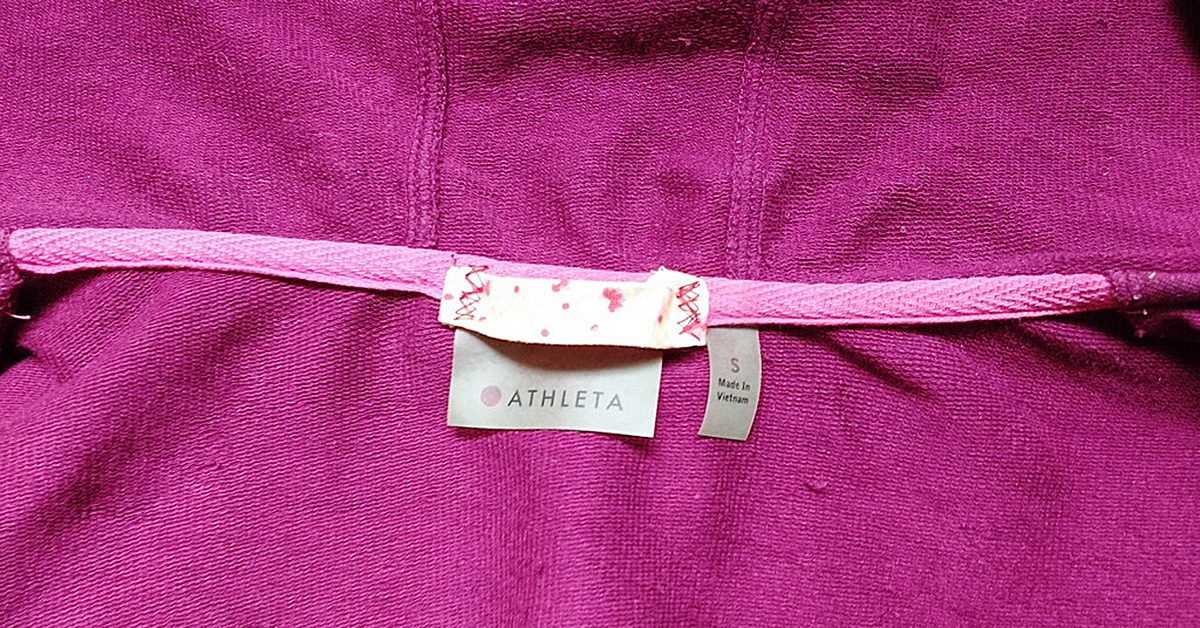
It’s times like these when you need to put your sewing skills to use. I like to add jacket loops using double fold binding I have on hand. I sew it on with a zig zag stitch and I find the stitching to be very inconspicuous on the exterior neckline (and it’s often hidden by the hood anyway.)

I find the stitching to be very inconspicuous on the exterior neckline (often hidden by the hood).

I find the stitching to be very inconspicuous on the exterior neckline (often hidden by the hood).

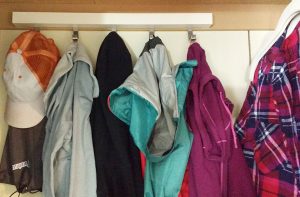
I used the same binding on this gray pullover. I love the pop of color it gives the jacket.

I used the same binding on this gray pullover.

I used the same binding on this gray pullover.

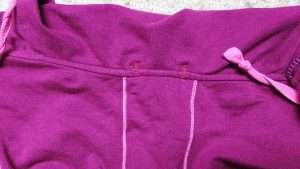
The zig zag stitching is barely noticeable from the back view. Perfect.

The zig zag stitching is barely noticeable from the back view.

The zig zag stitching is barely noticeable from the back view.

Now I can hang both jackets without the metal hooks on that hanger digging into the fabric of either jacket.

Now I can hang both jackets without the metal hooks on that hanger digging into the fabric of either jacket.

Now I can hang both jackets without the metal hooks on that hanger digging into the fabric of either jacket.

The gray hoodie is on the left and the maroon jacket is on the right. I love organization and I love that I made it happen with my sewing skills!

The gray hoodie is on the left & the maroon jacket is on the right.

The gray hoodie is on the left & the maroon jacket is on the right.

Handy dandy skills

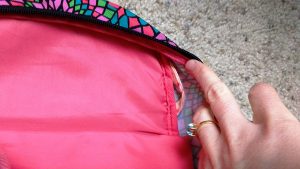
Here’s something else I fixed by knowing how to sew. My daughter’s backpack had no loop on the interior of the backpack for carrying a house key. There was a loop on the exterior, but that’s not very safety conscious, is it?

I took matters into my own hands and modded out the backpack by sewing in my own loop (again with that pretty flowered binding in the photos above). Now she can securely carry a house key tucked safely inside her backpack.

I took matters into my own hands & modded out the backpack by sewing in my own loop (again with that pretty flowered binding in the photos above).

I took matters into my own hands & modded out the backpack by sewing in my own loop (again with that pretty flowered binding in the photos above).

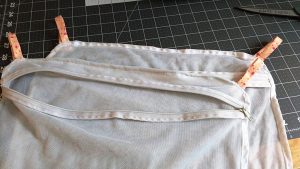
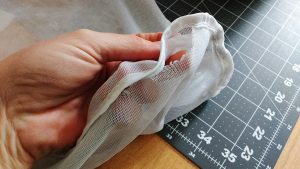
I bought two lingerie bags at Target a while ago and one has started to fray at the seam. While lingerie bags are fairly inexpensive, I knew I could save this one by flipping over the seam and sewing a zig zag stitch.

I bought two lingerie bags at Target a while ago & one has started to fray at the seam.

I bought two lingerie bags at Target a while ago & one has started to fray at the seam.

I also added hanging hooks on each side of the bags. I again used that pretty pink binding and now I have no more. At least it will live on in infamy in all of these great home DIY projects I’m showing you.

I also added hanging hooks on each side of the bags.

I also added hanging hooks on each side of the bags.

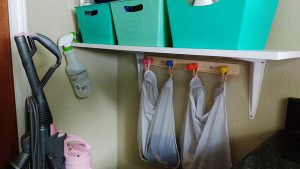
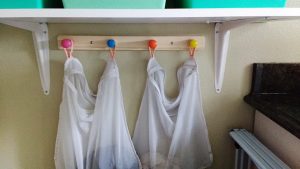
I installed these hooks by our laundry and cleaning station and hung the lingerie bags there.

I installed these hooks by our laundry & cleaning station and hung the lingerie bags there.

I installed these hooks by our laundry & cleaning station and hung the lingerie bags there.

This easy access makes it a breeze for my small kids to put things like their tights and other delicates right into the bags so I have everything ready for laundry day.

This easy access makes it a breeze for my small kids to put things like their tights and other delicates right into the bags so I have everything ready for laundry day.

This easy access makes it a breeze for my small kids to put things like their tights and other delicates right into the bags so I have everything ready for laundry day.

What kind of modifications have you made to home items with your sewing skills? Let us know in comments!

———————————————————————————–
Charlotte Kaufman is a writer and sewist in Mammoth Lakes, California. She specializes in marine and home interiors and continues to fall more and more in love with quilting. You can follow her at charlottekaufman.com.
How to Sew Pocket Organizers

How to Sew Pocket Organizers

Sew pocket organizers to hold all your stuff!

Pockets are not only for clothes and bags.  You can sew pocket organizers for:

  • Shoes
  • Jewelry
  • Sewing supplies
  • Knitting or crochet supplies
  • Art supplies
  • Any other kind of supplies
  • Baby gear
  • Guitar gear
  • Other kinds of gear
  • Remotes
  • Cords or cables
  • Tools
  • Toiletries
  • First aid kit
  • Other kits
  • Frequently used pattern pieces
  • Bills or mail
  • Money
  • Magazines
  • Papers
  • Games
  • Toys

Those are just quick ideas off the top of my head; the possibilities are endless.

How to sew a single hanging pocket

Anyone can sew a pocket organizer, even absolute beginner sewists.  A basic hanging pocket is just two finished  squares or rectangles, one sewn down on three sides on top of the other.

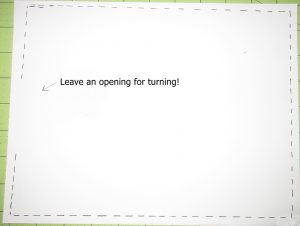
To finish the squares, you cut two identical layers and sew them around all four corners and sides with right sides together, leaving an opening for turning.

I drew this because the ink shows up better than my stitching in the photo.

I drew this because the ink shows up better than my stitching in the photo.

Clip the corners and turn right sides out. You can stick something inside to push the corners out.

Then stitch the opening closed. I usually just topstitch along that entire side. Sometimes I topstitch around all four sides.

Fold the top down an inch and a half or more towards the back and sew the edge down to form a casing for hanging. Then make a smaller finished square or rectangle pocket piece using the same directions as above.

Topstitch the pocket onto the larger panel along the sides and bottom. Don’t sew the top of the pocket closed!

I made this pocket from my leftover butterfly block to hold mail, which used to pile up in my entryway.

I made this pocket from my leftover butterfly block to hold mail, which used to pile up in my entryway.

Or cheat and use jean pockets

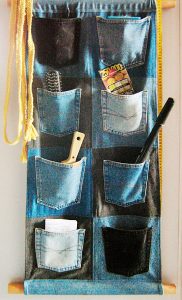
I did some searching to find some cute projects to recommend for you.  And I found some examples of organizers that were made by reusing jeans pockets. These save a step and so you can make these with super speed. Just be sure to use a jeans needle.

I think this one is a great idea for a closet organizer.

I think this one is a great idea for a closet organizer.

I will like to make a long double sided one of these to hang in the middle of a closet that’s shared by two boys at my house. This will solve a couple of different organizational challenges in that small closet nicely.

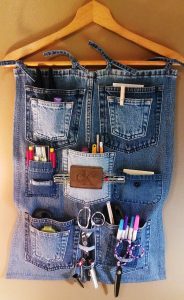
Here is one on a hanger that is being used for sewing supplies storage.

Here is one on a hanger that is being used for sewing supplies storage.

How to sew pocket organizers with multiple pockets

To start, make a backing panel. Cut two square or rectangular pieces to the desired size of your organizer pocket panel. Press interfacing to the wrong side of one of the two square or rectangular pieces. Then layer the two pieces right sides together and sew around, leaving an opening for turning.  Turn right side out, push the corners out well from the inside, press, and then sew closed.

To allow for hanging, you can simply fold over at the top and sew a casing, or you can make hanging loops and attach these by tucking between the two pieces when you sew them together in the steps above.

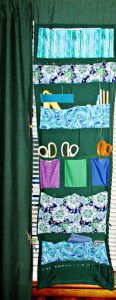
My sewing room curtain organizer panels use all of the above kinds of pockets.

My sewing room curtain organizer panels use all of the above kinds of pockets.

For the pockets, you could make several or many individual pockets in the same way as the larger backing piece and topstitch each pocket onto the backing panel separately. Or you could make long pockets the width of the backing panel. You can then topstitch to divide these long pockets into shorter sections.  You can also make your pockets slightly wider than your backing panel.  Then pleat them at the bottom and add elastic casings along the top edges, to build roomier pockets with more holding power.

My sewing room curtain organizer panels use all of the above kinds of pockets. I also stuffed a long one and sewed it closed around all sides to make a pin cushion way up high and out of the reach of grabby kids.

You can customize your pocket panels to suit your organizational challenges, no matter what they are.

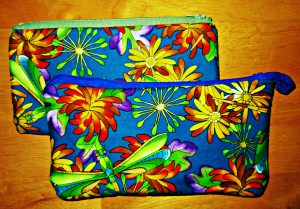
Sew a money bag pocket

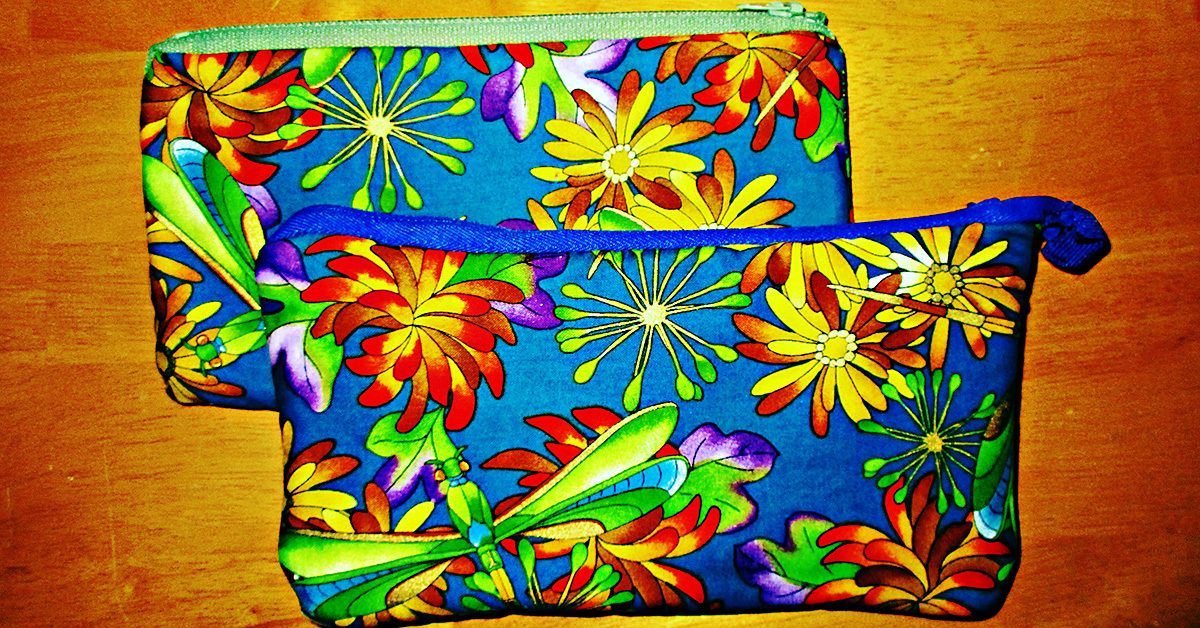
Maybe you’d call it a bag, but this project is simply a big pocket with a zipper at the top. You could use these as bank bags for deposits or otherwise holding cash. I made them big enough to hold multiple envelopes for monthly budgeting.

For stashing cash or other goodies.

For stashing cash or other goodies.

Or you could make these zippered pockets to hold your pencils or some other small collection.  I’m using one of mine for stashing my jewelry pliers set where no kids can reach them. Keeping my things out of the reach of children seems to be the major part of my own organizational challenges!

Favorite pocket organizers from around the web

If I haven’t given you enough inspiration to sew pocket organizers yet, check out these other ideas and tutorials that I found and collected from around the web. I will make the handy ironing board pockets right away, I can’t believe I have never thought of this simple solution before. And I think the pocketed towel will make a great gift for a sunbather I know and love.
Are the gears in your brain turning now? What problems could you solve if you sew pocket organizers to keep things in place?

Sewing in 1900: Mary Cassatt's Take

Sewing in 1900: Mary Cassatt’s Take

One of my regrets in life is that I never majored in art history. Ever since my high school humanities teacher introduced me to the world of architecture, painting, and sculpture, I’ve had a hard time shaking the interest in the subject. Sure, I majored in history, but the focus was more on rulers and wars than painters and art masterpieces. Shame, right?

Art can be a window into society that allows a distinctive look into the world it was created for, and it can be so arbitrary and open to interpretation that two people can garner two completely different meanings from the same piece. Regardless though, it’s still that window, and it’s still a peek into a time past if you look at the most historic works.

This looks familiar!

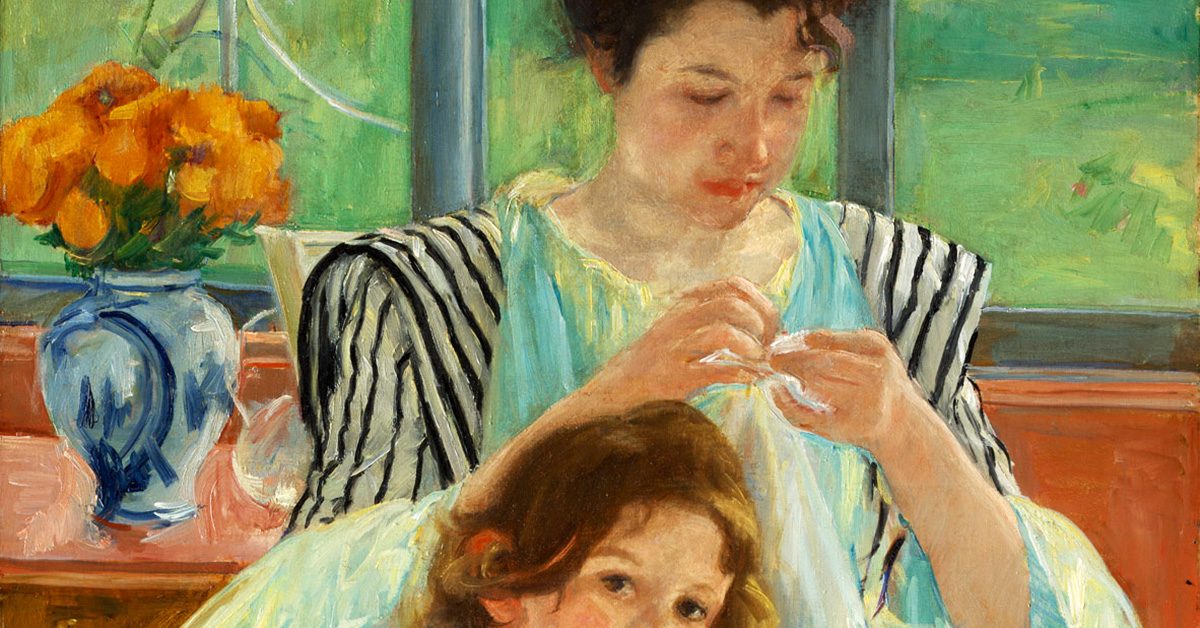
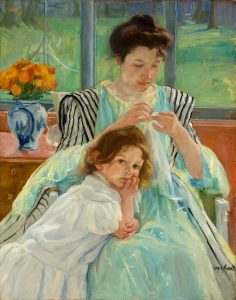
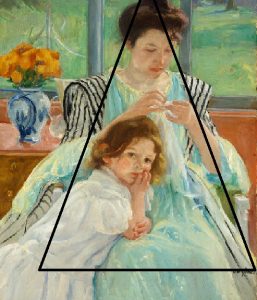
This post's painting of choice: Mary Cassatt’s Young Mother Sewing.

This post’s painting of choice: Mary Cassatt’s Young Mother Sewing.

I hadn’t realized until recently that sewing was such a theme in art from the last centuries. Apparently, painting an image of sewing — which, in itself, can be art — has been a goal in more than one artistic work. This concept intrigues me so much, guys! I’m interested in looking into these works and examining them with an artistic eye and historic mindset. What are the differences in these paintings, and what can be inferred from each concerning sewing in that historic context?

So, you might have guessed, I plan to explore some of these works on this blog! Those explorations won’t be every post since I think more of a mixture of post angles creates for a more engaging set-up, but here and there, look for a sewing-related work of art to surface — complete with analysis and description.

This post’s painting of choice: Mary Cassatt’s Young Mother Sewing

This oil on canvas painting is from 1900, and it’s a part of Cassatt’s exploration of the dynamic between women and children that reportedly began a decade before the completion of this painting. Given that the people in this painting are, in fact, a woman and a child, the connection is clear, but what does the delivery say about the circumstance and, specifically, sewing at the time?

Take a pencil & draw a triangle around the main focal point of the work. That targeted area can draw attention directly to the focal point.

Take a pencil & draw a triangle around the main focal point of the work. That targeted area can draw attention directly to the focal point.

Well, first we can identify what the focal point is for this work, and that’s obviously the woman and child — both, as if they’re actually one object and inseparable. There is literally no part of this child that exists outside of the woman’s space if you include the dress she’s wearing. Attention is drawn directly to the pair because of the composition of the work, which incorporates the pyramid look that has so often surfaced in the art world. With this approach, basically, you could take a pencil and draw a triangle around the main focal point of the work, and that targeted area can draw attention directly to the point the artist wants you to notice.

Because this painting was from a period that explores the woman-and-child relationship, there’s really no surprise in the detail that the woman and child are the focal area. In fact, the overall imagery of the woman and child dominate the painting so strongly that the detail that the woman’s sewing is almost background material within the focal pyramid.

More than meets the eye

Unbalanced section.

Unbalanced section.

So what does this background trait say about the importance of sewing in the work?

I think it shows sewing as something that was simply a part of the taking-care-of-children theme rather than something that was being done out of love for the pastime, and if you consider the balance of the painting, that theory gains merit. Everything outside of the pyramid is more or less balanced, from the trees outside to the windows, except for the fact that there’s a series of items that show up on the same side of the painting as the child. The table, vase, and flowers are variations of that balance, and they tip the importance scale more in favor of the child — which happens to be away from the sewing.

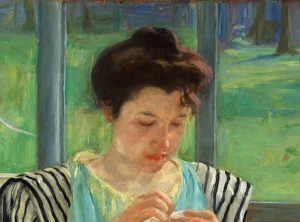
She’s tunnel-focused on that sewing project as the child leans over her & stares outward.

She’s tunnel-focused on that sewing project as the child leans over her & stares outward.

Hidden messages

Still, even if sewing is only being shown as a means to care for the child, it’s worth noting that the woman doesn’t look unhappy while sewing. Her brow isn’t crinkled in any way that shows frustration, and her lips aren’t overly drooping in a frown. Rather, she’s tunnel-focused on that sewing project as the child leans over her and stares outward. Perhaps then the sewing message to be inferred from this work is that sewing was just another piece of the puzzle, and the woman in the painting is capable of seeing to that task perfectly — and without visible frustration — while still keeping the child as the primary priority.

This would fall in line with the notion that Cassatt was exploring that woman-and-child relationship, and it’s a tactical outlook on sewing that doesn’t include any sort of negative expression from the woman. All in all, it was a part of life for the historic time frame, and the woman is committed to seeing to the task — for the sake of her child, but not with any real disgust for the job.

But, as I said, art is open to interpretation! What do you guys think can be inferred about sewing in 1900 from this painting?

Stunt Doubles and Magic Gloves

Stunt Doubles and Magic Gloves

The film and television business has many safety precautions in place. Productions almost always have a Stunt Coordinator to supervise and choreograph any type of fight or daredevil action scene. Actors and actresses often have stunt doubles who will perform most of the really ‘dangerous’ bits. Big name actors usually have a regular stunt double who always works with them no matter what show or film they are on.

What this means costume-wise, is that we need to dress the double in exactly the same clothes as the actor. Many times, both the stunt and actor themselves will require multiple outfits of the same thing.

Love / hate

I have a love-hate relationship with multiples. On the one hand, it can be super boring to do the same alteration on the same pair of pants, or jacket, or whatever six to ten times. On the other hand, it can be a very zen experience: doing the same thing over and over kind of puts you into a rhythm where everything flows naturally and without much thought. I prefer to do all the multiples at one time if possible.

When I lived in Austin, TX, I worked as a set costumer on many of the films directed by Robert Rodriguez: Spy Kids, Sin City, Grindhouse. His movies are very stunt heavy which makes his sets very active and interesting. The stunt coordinator for all the films I worked on for Mr. Rodriguez was a lovely and talented man named Jeff Dashnaw. Many of the actors and stunt actors were harnessed for various scenes. A stunt harness is similar, I suppose, to a climbing harness or rig. It’s made of heavy canvas and twill and sometimes has metal jump rings to facilitate the attachment of cables.

There are different types of harnesses, depending on what sort of action is required. Some are full vests and some are just a belt and leg straps. It’s up to the stunt coordinator to determine what harness should be used and where the cables should be attached in order to create the desired effect. There’s quite a bit of physics knowledge in all of that!

What to do when things go wrong

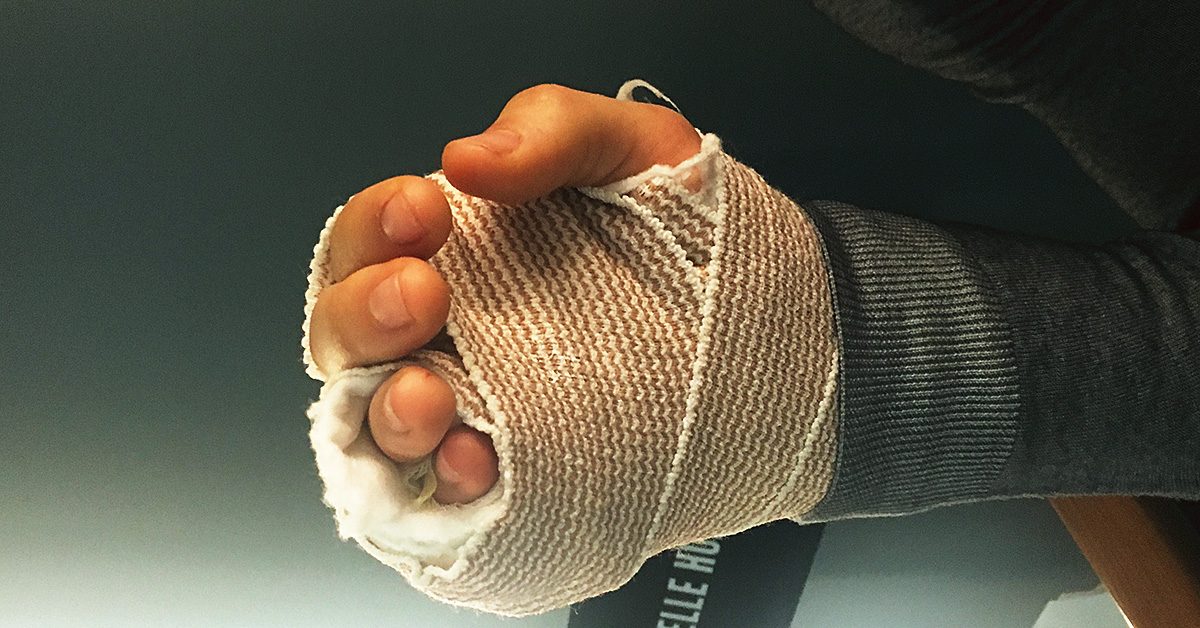
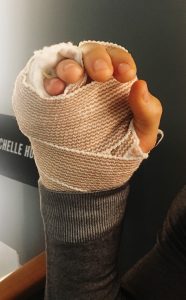
Things can go wrong sometimes and people can be injured. Thankfully, it doesn’t happen all that often. On a show I worked on recently one of the actors tore a ligament in his hand which, in turn, resulted in him having to wear a big, rather awkward cast. The task of trying to disguise this cast fell to the costume department.

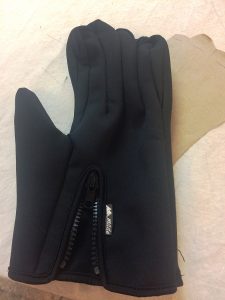
The costume designer and I had to figure out how to make a glove of some sort to cover the cast.

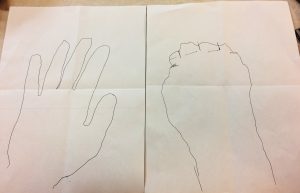
Tracing of hands.

Tracing of hands.

First, we traced the actor’s hand in his cast.

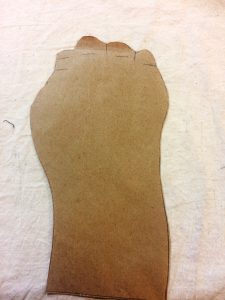
Make a pattern.

Make a pattern.

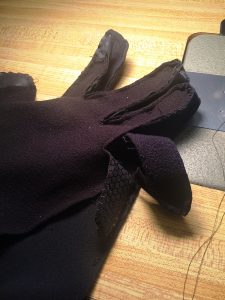
Next, I made a pattern of the tracing. Our idea was to use an existing glove, take it apart, stitch the fingers together (since his fingers are bound together), and add a new neoprene layer on the palm side.

Taking apart an existing glove.
Taking apart an existing glove.
This was the first result: Not too bad.

First attempt at a glove to hide the cast.

First attempt at a glove to hide the cast.

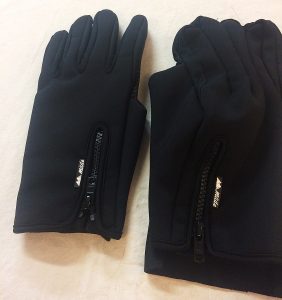
Then we decided that it might look better to have the thumb separate so I did some modifications:

Attempt 2 with separate thumb.

Attempt 2 with separate thumb.

Now, it’s a bit too small across the knuckles so I have to take the neoprene back off and recut a new, wider one, to add some width.

Being flexible is key

Projects like this are fairly normal in my sewing life. And if there’s one thing that seems to be true no matter what show I’m working on it’s that the costume department is almost always the ones tasked with finding solutions to a problem that no one else wants to deal with.
TV magic. It’s a real thing. This actually reminds me of an incident during Boardwalk Empire when I came to work one morning to find a shredded beaded dress on my table with a note that said, “Help! Please work your magic to fix this dress. It works again this evening.”

We did indeed manage to put the dress back together to get through one more night of filming but we sent it back to set with a note that read, “We are all out of magic for the week but did our best to bring this dress back from the dead. Love, The Costume Shop.”

Free Brother Sewing Projects

Free Brother Sewing Projects

Free Brother Sewing Projects

How cool is this? Project Runway uses Brother sewing machines to create their fabulous fashions. To celebrate, we’ve got some amazing Free Brother Sewing Projects right from Project Runway. You’ll love making them and wearing them!

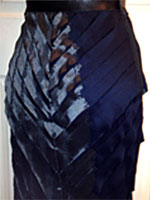
Feathered Skirt

Free pencil skirt pattern by Christopher Palu.

Free pencil skirt pattern by Christopher Palu.

Christopher Palu shares his amazing feathering technique. It’s easier than you might think and makes any fabric look gorgeous. He teaches it to you in this free pencil skirt pattern. You’ll need two different fabrics, one solid and one patterned, that look well together and a zipper. Give it a shot and share a picture of your results!

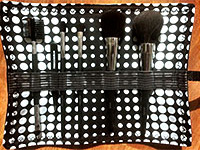
Makeup Bag

Seth Aaron’s free makeup bag pattern.

Seth Aaron’s free makeup bag pattern.

No fashionista’s get up is complete without makeup and way to touch up imperfections on the go. Seth Aaron’s makeup bag pattern is the ultimate in makeup carry-alls. There’s room for all your makeup essentials inside the bag and the exterior strap holds all the brushes you’ll need to keep your face looking its best all day and night long.

Custom Laptop Case

Joshua Cook’s custom laptop case free pattern.

Joshua Cook’s custom laptop case free pattern.

In the on-the-go world we live in, most people carry their laptop with them at some point. This is simply another way to show your style. Forget those laptop cases you can buy at any retailer. Instead, create a custom laptop case with Joshua Cook’s pattern. It works up quickly in less than 20 steps.

Earrings

Anthony Auld’s free Embroidered Earrings pattern.

Anthony Auld’s free Embroidered Earrings pattern.

Yes, that’s right, you can make earrings with your Brother sewing machine. They’re a great way to practice your embroidery skills. Anthony Auld shows you how to get fashion on your ears using your Brother in this free Embroidered Earrings pattern. Make sure to share pictures of your amazing earring creations.

Whether you’re looking to practice your sewing skills or learn some new ones, these fabulous Project Runway Free sewing patterns for Brother are a great place to start. They’ll add some class and style to your wardrobe, too – you’ll feel like you just stepped off the runway!