How to Store Your Fabric Scraps

How to Store Your Fabric Scraps

It only took me six months, but I finally organized my fabric scraps after our move.

It only took me six months, but I finally organized my fabric scraps after our move.

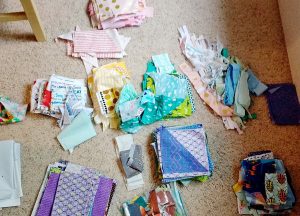
It only took me six months, but I finally organized my fabric scraps after our move to this new town and new house. When we made the move, I dumped my two huge bins of scraps into a few shopping bags and tucked them away until this glorious moment when they would not only be sorted, but have a place to reside.

Bits and pieces

Why should one keep & organize fabric scraps?

Why should one keep & organize fabric scraps?

Why should one keep and organize fabric scraps? Here are some reasons to consider.

  1. Fabric is expensive. Long sized strips, and smaller pieces can be reused for a vast amount of projects. The internet is a trove of fabric scrap project ideas.
  2. Out of sight, out of mind. The reverse of this is true as well. When you have your scraps visible, you are much more likely to use them and be aware of what you have available.
  3. Have a favorite color? It probably shows in the types of fabric you buy. Take a look at your pile of scraps and try to use up more of that color before you buy a few more yards.
  4. Many people cut their scraps to standard sizes. If you have a size of fabric you constantly seem to go to, make your life easier by making your own pre-cuts out of scraps.

Scrap bags

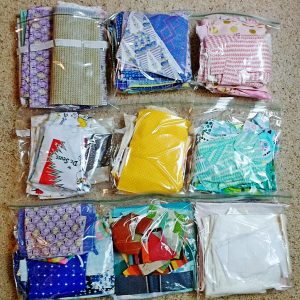
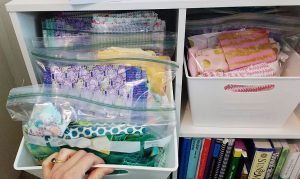
I ultimately made 9 bags of folded scraps.

I ultimately made 9 bags of folded scraps.

I ultimately made 9 bags of folded scraps. They included the following (from left to right):

  1. All of my precut Layer Cakes (10” x 10” squares)
  2. All of my other-sized precuts
  3. Pinks
  4. Whites
  5. Yellows, tans and oranges
  6. Greens, teals and aquas
  7. Blues and purples
  8. Heavy duty fabric scraps (canvas, Sunbrella, etc)
  9. Utility fabric scraps (batting, white out fabric, mesh, etc.)

One of these things is not like the others…

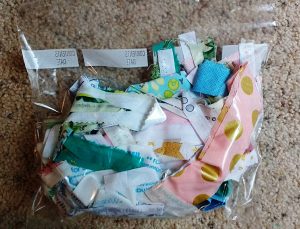
Bag #10 holds all of my selvage edges & very thin strips of fabric.

Bag #10 holds all of my selvage edges & very thin strips of fabric.

There is also a 10th bag (but it didn’t fit well in the group photo above). This holds all of my selvage edges and very thin strips of fabric. I have a huge wish list of projects to make from selvage edges. Perhaps I’ll write a post soon showing you the world of possibility with saving those thin strips!

A place of and for my own making

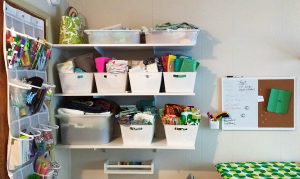
Welcome to my fabric corner.

Welcome to my fabric corner.

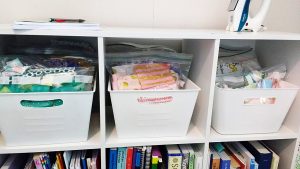
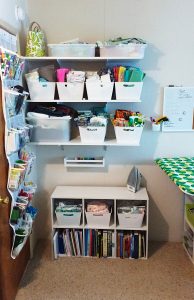
This is my fabric corner. The upper shelves hold my larger stash of fabrics, so pieces that are a fat quarter size or larger. The lower shelves hold my iron on top, and my fabric scraps in the bins below.

Dirty little secret: I just tuck larger pieces in wherever I find room.

Dirty little secret: I just tuck larger pieces in wherever I find room.

I’d love to tell you that I have my larger pieces organized in some kind of fancy way, but I really don’t. I just tuck them in wherever I find room.

Behold! A place for everything & everything in its place.

Behold! A place for everything & everything in its place.

Can you see how lovely the organization of these scraps is? The easy access and keeping them visible by my work space means I’m often including them in my daydreaming when it comes to new sewing projects.

Do you store your fabric scraps? If so, tell us where or how you do!

———————————————————————————–
Charlotte Kaufman is a writer and sewist in Mammoth Lakes, California. She specializes in marine and home interiors and continues to fall more and more in love with quilting. You can follow her at charlottekaufman.com.
What You Might Not Know About Your Favorite Thread

What You Might Not Know About Your Favorite Thread

Click the image to get your thread!

Shop Thread Now!

Shop Thread Now!


Choose the right type of sewing thread for your next project

Any sewing enthusiast knows that a seam is only as good as the thread that holds it together. From polyester to silk, the type of thread you choose for your next project can leave you happy — or horrified. Luckily, we’ve put together a brief rundown of five popular types of thread, so that next time you’re at the fabric store, staring down hundreds of spools, you can confidently pick the right one for the job.

Cotton thread

Cotton thread is washable & wearable but has "give" — which makes it great for quilting, piercing & appliqué projects.

Cotton thread is washable & wearable but has “give” — which makes it great for quilting, piercing & appliqué projects.

A common “go-to” for many sewing enthusiasts, cotton thread is washable and wearable but has “give” — which makes it great for quilting, piercing, and appliqué projects. Keep in mind, though, that the lower the weight, the heavier and thicker the thread. If your next project is a thin blouse or lingerie set for example, consider using 50 weight cotton thread: this thin thread has less bulk, so your seams will lay flatter. For an “all-purpose” quilting thread, a middle-of-the-road 40 weight cotton thread is ideal (for both machine and long-arm quilting); it’s thin enough to glide easily through thick fibers, but strong enough to secure your quilt. Finally, a 30 weight cotton thread has the thickness necessary for dramatic accents in topstitching and quilting stitches.

Rayon thread

Rayon is relatively inexpensive & provides a decorative finish with shine.

Rayon is relatively inexpensive & provides a decorative finish with shine.

The most commonly used thread for embroidery, rayon is relatively inexpensive and provides a decorative finish with shine. Rayon thread also has high tensile strength: it doesn’t break easily and is very stretchable and flexible, even when wet. However, rayon is usually not colorfast and often fades or bleeds from fabric.

Polyester thread

Stronger than rayon thread, polyester thread is a great "all-purpose" choice that can be used for most sewing projects, both hand- & machine-sewn.

Stronger than rayon thread, polyester thread is a great “all-purpose” choice that can be used for most sewing projects, both hand- & machine-sewn.

Stronger than rayon thread, polyester thread is a great “all-purpose” choice that can be used for most sewing projects, both hand- and machine-sewn. Polyester thread has some “give” to it, so unlike cotton, it won’t break when you use it with stretchy fabrics; polyester thread also remains bright after several washes. If you need a thread that will slip through fabric easily, you can also choose a glazed polyester thread, which will have a wax or silicone finish. It’s important, however, to avoid using glazed threads for machine-sewn projects, because the glaze can rub off and jams your machine.

Metallic thread

Designed for embroidery, quilting, & decorative stitching projects, metallic thread can be used to create beautiful topstitching designs.

Designed for embroidery, quilting, & decorative stitching projects, metallic thread can be used to create beautiful topstitching designs.

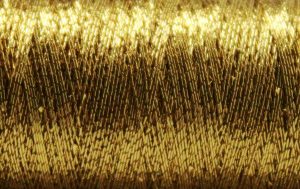
If your handbag needs touching up, metallic thread may be the perfect choice. Designed for embroidery, quilting, and decorative stitching projects, metallic thread can be used to create beautiful topstitching designs. Often available in gold, silver, and copper varieties, metallic threads are smooth, strong and vibrant.

Silk thread

Thin but strong & flexible with a lot of "give," silk thread is also ideal for basting stitches and tailoring curved areas.

Thin but strong & flexible with a lot of “give,” silk thread is also ideal for basting stitches and tailoring curved areas.

When sewing silk or wool fabrics, silk thread is the obvious choice. Thin but strong and flexible with a lot of “give,” silk thread is also ideal for basting stitches and tailoring curved areas.

Now choose wisely

Overall, the key to a durable and professional-looking finish is choosing a high-quality thread that closely matches the weight and fiber content of the fabric you’re working with. Take it from us: using the perfect thread will make sewing your next project that much more enjoyable.


Click the image to get your thread!

Shop Thread Now!

Shop Thread Now!

Ironing out the Ironing Details

Ironing out the Ironing Details

Random fact: My family does not like ironing.

We’re the type of people who, if something is wrinkled, minutes in the dryer are the way to work on the issue.

We’re the type of people who, if something is wrinkled, minutes in the dryer are the way to work on the issue.

Seriously. We’re the type of people who, if something is wrinkled, minutes in the dryer are the way to work on the issue. That being said, my hobby/profession of sewing is a bit contradictory for such an I-don’t-love-irons approach because an iron can be such a significant part of the sewing process.

Pressing seams, for instance, could add to the professional look of your project, and ironing your fabric before you sew can help to create more equal blocks and pieces. All in all, if you don’t iron, your product might look less impressive than you want it to, and with all the work you invest, taking the small steps to create a wonderful product could be worth the effort!

I come from an anti-iron family.

I come from an anti-iron family.

But given that I come from an anti-iron family, the idea of embracing the step can be daunting. Even picking an iron could pose a problem because there’s such a range of options. When you literally have thousands of options to choose from, selecting that right one could be a complex process. Do I get the pretty blue one, or should I pay the extra $50 for that name-brand one? What kind of features do I need, and what ones will I never use? Is this iron going to break in a month, or will it last me for years? These are the kinds of things worth considering should you choose to buy a new — and fitting — iron for your sewing.

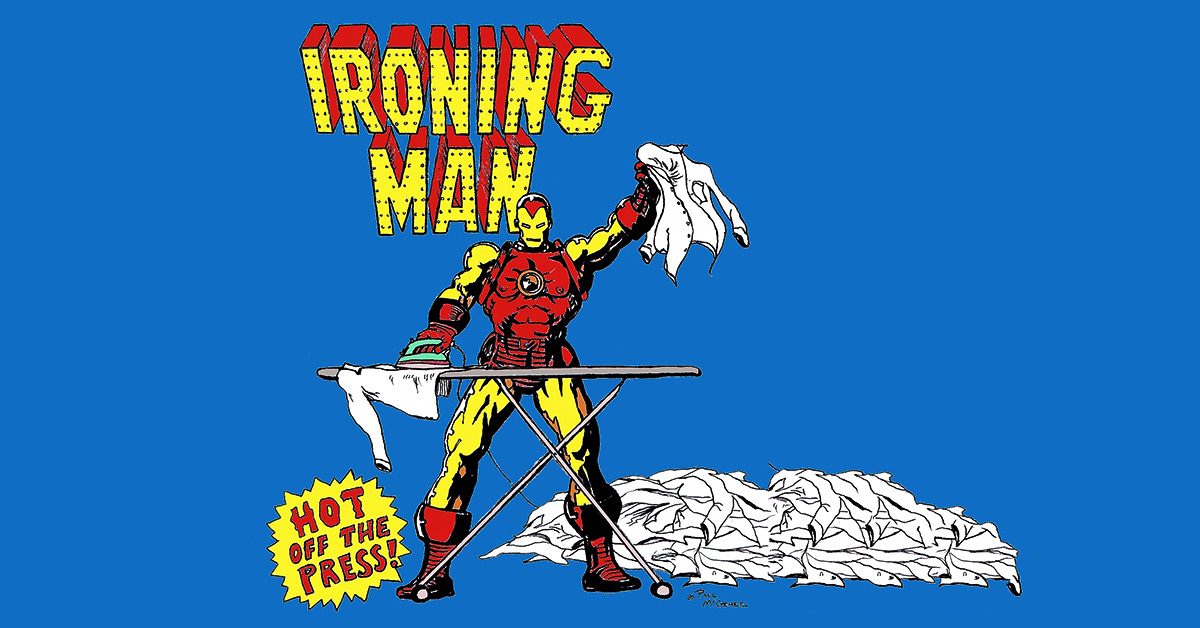
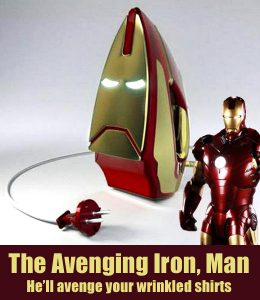
Note: With my nerd interests, all of this anti-iron business could potentially be overlooked if I owned an Iron Man iron like the one seen here.

Note: With my nerd interests, all of this anti-iron business could potentially be overlooked if I owned an Iron Man iron like the one seen here.

Anyway. I did some research this week on iron-related topics, and I came up with a list of what I felt were the most important qualifications for an iron and the preferred method of selecting that sewing tool.

Price

Hey, remember me? I’m the cheapskate who blogs about saving money on sewing projects! Of course — of course — cheaper isn’t always the overriding criterion for an iron because sometimes things are cheaper for a reason. Maybe the $10 iron has no special functions to help you. Maybe it’s made of bad materials and will leave an imprint on your fabric. Maybe it’ll fall apart in five minutes. The point is that this is NOT the only detail worth considering, but if you can find an iron that suits your purposes for $30, why pay hundreds?

Functions

As I said, price can be overshadowed by functions that your iron can bring to the ironing board. For sewing, I don’t know that there’s a more important function than releasing steam to better tackle wrinkles in fabric. Basically, if you see an iron that doesn’t release steam, you might want to keep looking! Another detail you might want to think about is if your iron automatically shuts itself off after a span of time. While this might be an aspect that doesn’t concern you in the least because you’re so careful with your iron, if there’s a chance you’ll forget and leave your iron going, I would recommend trying for an iron that’ll automatically shut off. That choice could prevent a fire, after all!

Build

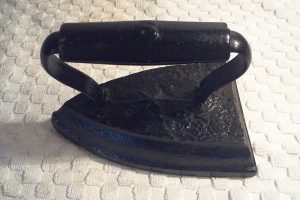
More than one source that I found mentioned older irons — “vintage” or “antique.”

More than one source that I found mentioned older irons — “vintage” or “antique.”

In a world where smaller technological devices can steal the spotlight, believe it or not, heavier can be a good thing for an iron when it comes to pressing seams! More than one source that I found mentioned older irons — “vintage” or “antique.” And it makes sense because that extra weight could make it easier to smooth out your seams with a smaller amount of effort. So should you completely fall back on your grandma’s iron from the 1800s? Not necessarily! Remember what I said about steam? But that doesn’t mean that a secondary iron for this purpose can’t benefit you, especially since you can buy used ones for such small prices (like, less than $10). For a brand new iron though, thinking about that extra weight could lead you to the right iron, as could other details like whether or not it uses a cord. As a person who can forget something is plugged up and trip over a cord fairly easily, I think cordless might be a good option for me!

And, now that we’ve labeled some of the most important traits for an iron, the situation comes down to how you can find that perfect iron even after you narrow down your options by price, function, and build. My main recommendation for this step would be to read customer reviews and try for something that received a high average rating. You might also want to look at how many reviews the product has since a 4.5 rating over 5000 reviews provides more credible feedback than a 3.0 rating out of 2 reviews. Why? As an example, a 5.0 rating could’ve been lowered by a 1.0 rating from someone who was criticizing the seller rather than the product.

Look for irons that have a lot of reviews, read through them for details that fit your needs, and pay very real attention to the average ratings. If you do, you could have the right information to find the perfect iron for your products.

Design Your Dream Sewing Room

Design Your Dream Sewing Room

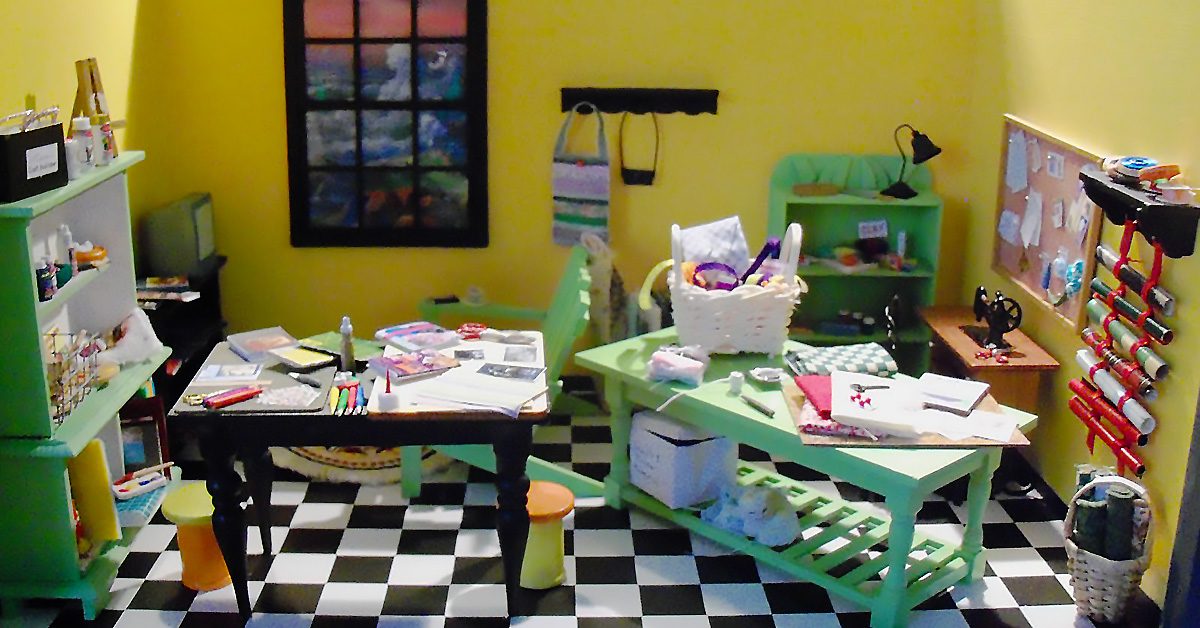
I’ve never been lucky enough to have a whole room dedicated to sewing. I’ve always kept my sewing machine and accompanying needs in a closet and pulled them out when needed. For a few hours, while I sew something, the machine takes up the dining room table. I also use the table for cutting and measuring. If it’s larger pieces, the floor gets called into action as a cutting surface. That hasn’t stopped me from thinking about what my dream sewing room would look like. Here’s what I’ve come up with. How does it align with your dream sewing room idea?

Storage

Organization and storage are critical in a sewing room. I’m not a fan of tangled thread spools or bobbins I can’t find. I hate having to search for my measuring tape and it really irks me when someone “borrows” my fabric scissors and uses them on something else. I bet you know that feeling! So, the first thing my dream sewing room would have is a way to organize all those supplies in a tidy and efficient manner. Something like this cabinet. I also adore this thread tray.

Sewing Table

It needs to be sturdy and stationary. I’m not a fan of things rolling away from me while I try to work.

Next, I’d want the perfect place for my sewing machine to sit permanently rather than pulling it out each use. It needs to be sturdy and stationary. I’m not a fan of things rolling away from me while I try to work. It also needs to be open in the back so I can stretch my legs without banging my knees or feet. Something like this adjustable height table would be ideal for me.

Cutting Surface

The final piece of furniture my dream sewing room needs is a cutting surface. I want it sturdy and stable, but also with the ability to measure and pin to. I’ve created this ideal using two pieces. First, a sturdy table with side extensions. I love that I can drop one or both sides down if I’m working on a smaller project. Second, a cutting mat. By laying this on top of the table and fastening it down with glue or Velcro or double sided tape, I’ll have a sewing surface with the ability to measure built in.

You may notice I didn’t include a chair. That’s because I already have my ideal sewing chair and it happens to live in my dining room.

What does your dream sewing room look like?

DIY Chair Cushions for Kids

DIY Chair Cushions for Kids

DIY Chair Cushions for Kids

DIY chair cushions for kids.

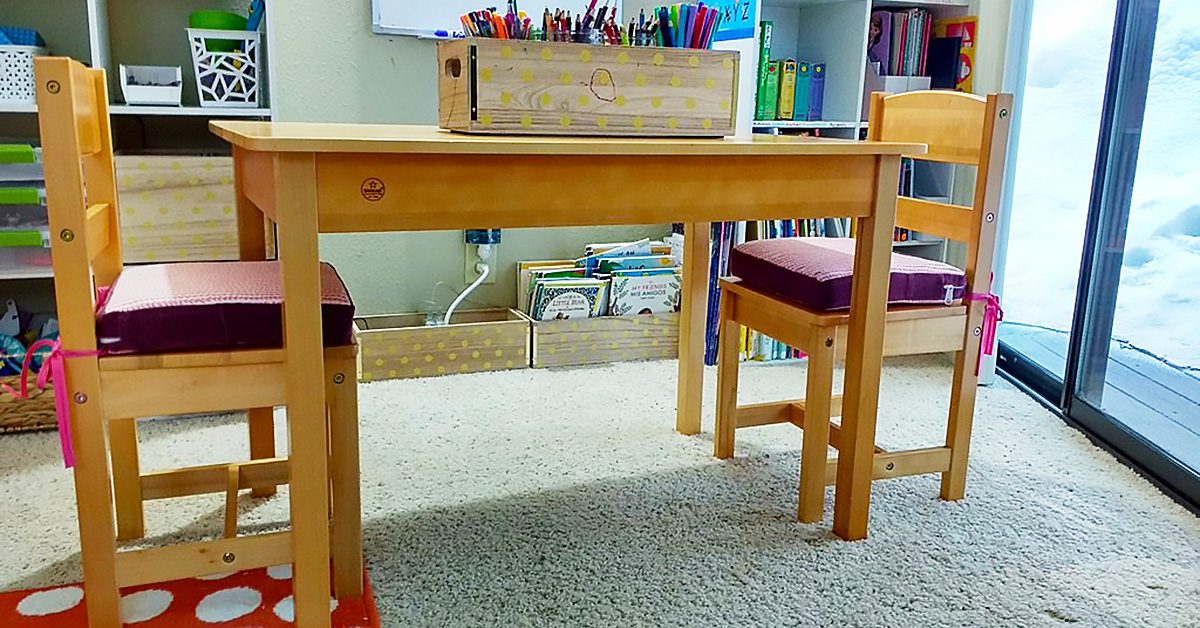
I’ve been wanting to make cushions for the art table chairs in our girls’ room for a while and I finally made it down to a craft store that sold foam this week to get started on the project.

The first step in making custom cushions is accurate measurements. Notice how the chairs are not true squares? The front measurement was 13” and the back 12”. The distance between the front and back was 11 ¼”.
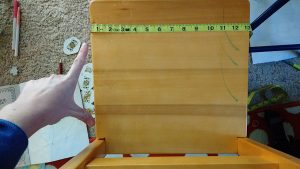
The first step in making custom cushions is accurate measurements.

The first step in making custom cushions is accurate measurements.

Want to know a trick with cushions? Cut your fabric to the exact size of the foam. I know this sounds counter-intuitive. ‘But what about seam allowance?’ you’re thinking. The thing is, foam compresses. If you cut your fabric to the size of the foam, and then sew ¼” seams (or ½” if using heavier duty fabric), the compression of the foam once it is in the cushion cover will more than cover the seam allowance you are used to providing on other sewing projects.
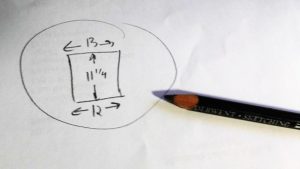
Want to know a trick with cushions? Cut your fabric to the exact size of the foam.

Want to know a trick with cushions? Cut your fabric to the exact size of the foam.

I’m trying to use up my fabric scraps this year, so I pulled out a few larger, odd-shaped scraps I had from this fabric and was able to cut out four top and bottom panels for the two chairs.
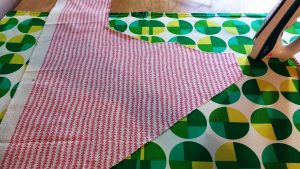
I’m trying to use up my fabric scraps this year, so I pulled out a few larger, odd-shaped scraps.

I’m trying to use up my fabric scraps this year, so I pulled out a few larger, odd-shaped scraps.

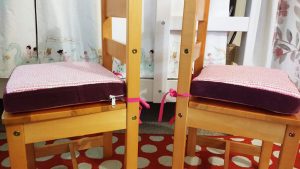
I used this fabric to make custom piping for a bench seat for the girls’ godmother. I like that they’ll have a small piece of the project I made for her in their own room. See the pink trim on the cushion below? That’s the same fabric.
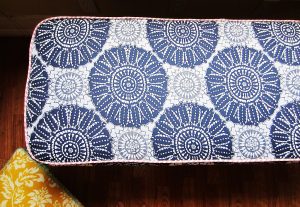
See the pink trim on this cushion? That’s the same fabric.

See the pink trim on this cushion? That’s the same fabric.

For the side panels I decided to use corduroy from an old pair of pants I’d been saving for just this kind of project. They’d developed holes along the belt loops so I had held onto them just for the pretty fabric.
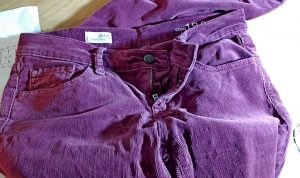
For the side panels I decided to use corduroy from an old pair of pants I’d been saving for just this kind of project.

For the side panels I decided to use corduroy from an old pair of pants I’d been saving for just this kind of project.

After marking the measurements with a Sharpie, I used an electric bread knife to cut the foam. It cuts through that stuff like butter. Here’s a gif as proof.
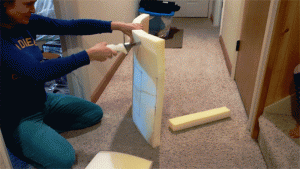
My electric bread knife cuts through the foam like butter.

My electric bread knife cuts through the foam like butter.

Another make-your-cushions-super-great secret is to use batting!! Wrapping them in batting or putting a layer on the top and bottom will improve how the puff up in your cushion covers. I used an adhesive spray to affix the batting to the top and bottom of each one.
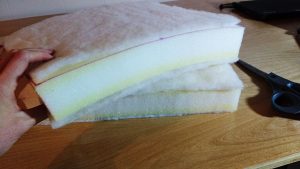
I used an adhesive spray to affix the batting to the top and bottom of each one.

I used an adhesive spray to affix the batting to the top and bottom of each one.

Don’t measure the height of your sides until you’ve added batting. While the foam is 2”, adding the batting made the total measurement just under 2 ¼” (I should know what that measurement is, but I don’t. I just mark to the line under that ¼”).
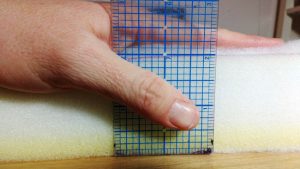
While the foam is 2”, adding the batting made the total measurement just under 2 ¼”.

While the foam is 2”, adding the batting made the total measurement just under 2 ¼”.

Grab your zippers and zipper pulls, or, if you aren’t like me with spares on hand, plan ahead and order them before you begin.
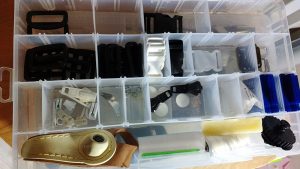
Grab your zippers and zipper pulls!

Grab your zippers and zipper pulls!

I like to sew the zipper plaques first. Use whichever technique you like. I generally use the first method shown in this video by Sailrite.
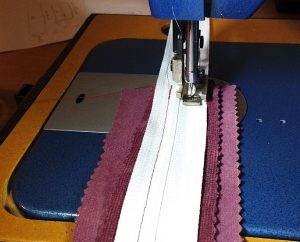
I like to sew the zipper plaques first.

I like to sew the zipper plaques first.

If you need to attach extra fabric to the side panels, consider adding it to the ends in small amounts so the joins don’t show on the front of the cushion.
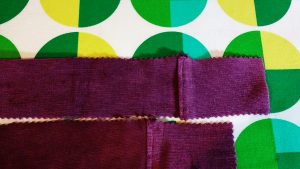
If you need to attach extra fabric to the side panels, consider adding it to the ends in small amounts.

If you need to attach extra fabric to the side panels, consider adding it to the ends in small amounts.

Attach the zipper plaque to the side fabric and then sew onto the bottom fabric piece.

Before you begin sewing the top piece on, make sure to mark your corners accurately. Fold them to each seam to make sure they match (the yellow mark in the photo below is my matching point.)
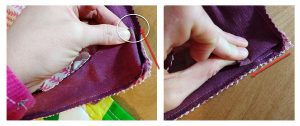
Fold the corners to each seam to make sure they match (the yellow mark in the photo below is my matching point).

Fold the corners to each seam to make sure they match (the yellow mark in the photo below is my matching point).

Next, make sure to slide on the zipper pulls BEFORE you sew the top piece onto the final assembly or you’ll be sad.
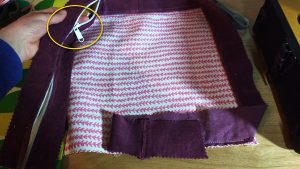
Next, make sure to slide on the zipper pulls BEFORE you sew the top piece onto the final assembly or you’ll be sad.

Next, make sure to slide on the zipper pulls BEFORE you sew the top piece onto the final assembly or you’ll be sad.

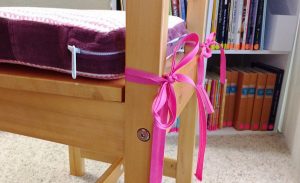
And finally, do not forget to sew your tie backs in between the seams as you go.
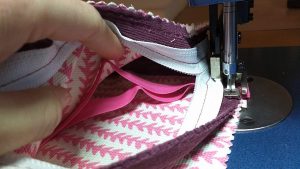
Do not forget to sew your tie backs in between the seams as you go.

Do not forget to sew your tie backs in between the seams as you go.

Whoohoo, you’re done! But, before you start celebrating, go over every seam to make sure they are secure.
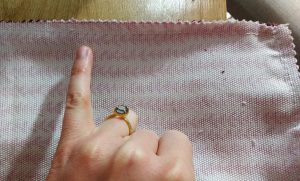
Whoohoo, you’re done! Now, go over every seam to make sure they are secure.

Whoohoo, you’re done! Now, go over every seam to make sure they are secure.

Then take your scissors and round the corners so they turn prettier. I used pinking shears on the fabrics in this project. Check out my post from January to learn about their benefits, along with other important cutting tools for your sewing room.
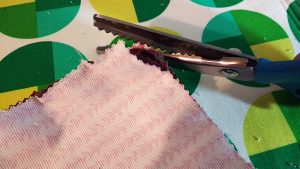
Take your scissors and round the corners so they turn prettier.

Take your scissors and round the corners so they turn prettier.

When you turn the covers right-sides out, use your fingers to pop out each corner.
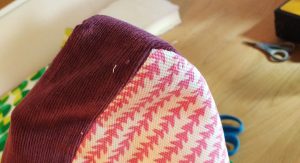
When you turn the covers right-sides out, use your fingers to pop out each corner.

When you turn the covers right-sides out, use your fingers to pop out each corner.

If you’ve done this right, your finished cover is going to look smaller than your foam; that’s because it is! Now is the time to put the cover on the cushion and here is where you’ll see how foam compresses to fit your new cover.
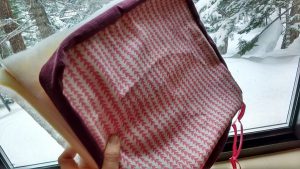
Now is the time to put the cover on the cushion & here is where you’ll see how foam compresses to fit your new cover.

Now is the time to put the cover on the cushion & here is where you’ll see how foam compresses to fit your new cover.

I’m going to use caps lock here to get across how important this next step is: DO NOT TUG OR PULL ON YOUR FABRIC TO GET IT ONTO YOUR CUSHION. I promise you, if you do that, your seams will pop. Instead, fold the cushion to slide it into the cover, and then slowly work the foam into the fabric, NOT the other way around. Just keep thinking ‘move the foam, not the fabric.’ Don’t be afraid to really get your hands deep into the cover and use them to maneuver the foam in place. Adjust, adjust, and adjust, until the cushion sits perfectly in the cover, with the lines of the foam matching the lines of the cover.
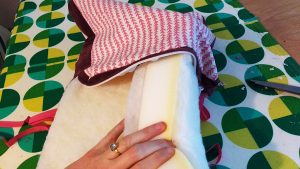
DO NOT TUG OR PULL ON YOUR FABRIC TO GET IT ONTO YOUR CUSHION!!!

DO NOT TUG OR PULL ON YOUR FABRIC TO GET IT ONTO YOUR CUSHION!!!

Ta-da!!!
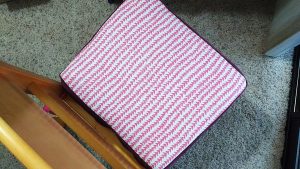
Ta-da!

Ta-da!

This project turned out just darling. The corduroy almost looks like velvet and I love the effeminate touch it brings to the room.
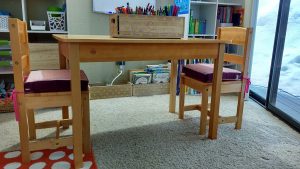
The corduroy almost looks like velvet and I love the effeminate touch it brings to the room.

The corduroy almost looks like velvet and I love the effeminate touch it brings to the room.

These cushions will inevitably get marks on them. That’s okay, they have zippers so they can be washed, AND, they are reversible. I can just flip them over if I need to.
I can just flip them over if I need to.

I can just flip them over if I need to.

My daughters loved these and immediately hopped on and got cozy.
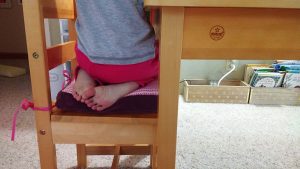
My daughters loved these and immediately hopped on and got cozy.

My daughters loved these and immediately hopped on and got cozy.

What DIY projects have you made for your home lately? Let us know in comments!
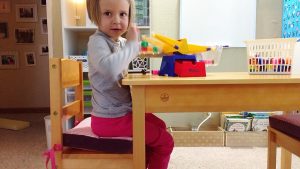
What DIY projects have you made for your home lately? Let us know in comments!

What DIY projects have you made for your home lately? Let us know in comments!

———————————————————————————–
Charlotte Kaufman is a writer and sewist in Mammoth Lakes, California. She specializes in marine and home interiors and continues to fall more and more in love with quilting. You can follow her at charlottekaufman.com.
How to Sew Faster

How to Sew Faster

My job as a tailor on a television show often requires me to complete an alteration in a seemingly impossible amount of time. Not to be overly cocky or self-congratulating but, I can be pretty fast when needed. People frequently ask me how I’m able to do something so quickly.

Don’t hesitate. Just, do.

Honestly, I don’t think so much about it anymore: its pretty much second nature at this point. But, I suppose if I were to break it down, the process would go something like this:

First, don’t panic. Whatever you do, don’t panic. If you do, you could find that suddenly you’re unable to thread a needle, or your needle breaks, or the thread tangles.

Second, don’t hesitate. Just, do.

As you’re working, think about the next step. Plan ahead.

Concentrate fully on what you’re doing. Don’t listen to the conversations going on around you. Pay no mind to whatever random chaos might be happening in another part of the room. Just focus your full attention on the one thing you are doing. That is all that is important.

Whatever you do, don’t thread mark. I know that’s what they teach in sewing school but there is no reason to have to thread mark a pant hem.

A few tips on how to sew faster:

Do as much as you can without stopping to iron.

If I’m really pressed for time, I tend to leave all the ironing until the very end (pun intended).

Learn how to eyeball measurements. Think about it, if you’ve been sewing long enough, you know what a ½” looks like. You honestly do not need to mark every single little line. If you want to measure, go ahead, put use your pins to mark the line. I often work with a metal seam gauge but rarely actually draw a new stitching line. One exception is if I’m re-mitering a suit jacket sleeve corner though I know lots of tailors that do not need to draw that line either.

Whatever you do, don’t thread mark. I know that’s what they teach in sewing school but there is no reason to have to thread mark a pant hem. I once had an additional tailor helping me on a show who insisted on thread marking the fold line on hems for cop pants. Buy some tailor’s chalk and use that to mark your hemline. It’ll disappear when ironed.

Unless you’re topstitching, you really don’t have to have your thread match exactly. Believe me. Whatever thread is in your machine is just fine. I cannot begin to tell you how many black garments I’ve altered quickly with red or yellow or whatever happened to be in the machine colored thread.

Learn how to undo a chain stitch. A lot of manufacturers use chain stitches in clothing construction. This makes it super easy to take them apart when needed. You can only unravel a chain stitch in one direction, the direction it was sewn in. Most of the time, all you need to do is insert a seam ripper and pull in that direction and all the stitching will come undone. The center back seam of men’s pants, often will have two rows of stitching so you’ll need to pull each row separately.

A couple other seam deconstruction tips:

To take apart a serged seam, use a nice sharp seam ripper and run it through the threads that wraps around the edge of a seam. After you do this, the rest of the threads will usually come apart rather quickly. Some serged seams are on a chain as well and you can undo them by pulling the thread on the straight stitch.

One of the fastest ways of taking apart a seam is to, again, use an extremely sharp seam ripper and insert it into the seam from the right side and just pull upwards through the seam. This technique takes a bit of practice (and bravery) though as the potential to accidentally slice through the fabric is ever present. There’s a knack to getting the angle of the seam ripper just right though and once you figure that out, you’re golden.

In the end, the one sure way of becoming a faster tailor is by practice. The more often you repeat the same task, the more efficient at it you become.

As you do an alteration, try to think of ways you could save time: do you really need to flip everything back right side out then inside out then right side out again? Probably not. If you sew this first, will it make it easier to sew this? Or visa versa? Experiment and try things multiple ways until you’ve figured out the quickest sequence of steps for yourself.

I love discovering a new, faster way of doing something I’ve done a million times. Sewing is kind of cool like that: there’s always something more to learn and fresh tactics to uncover.

Beginner Sewing Machine Buying Guide

Beginner Sewing Machine Buying Guide

Buying a beginner sewing machine is an exciting decision that will impact your future in wonderful ways, but only if you choose a good beginner machine.

There is a huge difference between a great sewing machine and a not-so-great machine

Beginner Sewing Machine Buying Guide

The difference a well designed machine makes to a sewing beginner’s journey will save an enormous amount of frustration.  With a good machine, you will enjoy the process and learn to sew without trouble. With a poorly designed nightmare of a machine, your progress will not be near as fast. That is, if you progress at all; many beginners have thrown up their hands and given up on learning to sew thanks to an overly complicated or inferior beginner sewing machine, and this is a shame.

I’m speaking from experience here. If someone had told me these things I could have been spared an awful lot of trouble and tears. I’m not exaggerating to say tears, either; I not only cried but also screamed and wanted to tear out my hair in frustration when I was learning to sew. Learning to sew seemed so hard to do, but this was only because I was trying to teach myself on a terrible machine. I bought it at the same store where I shopped for groceries and it was, to put it mildly, a piece of junk!

If I had only known that I could have bought a much better machine for about the same amount of money, I could have enjoyed my beginner sewing experiences so much more. I’d love to save someone else that same trouble.

Start with a mechanical model sewing machine

My first recommendation is to start with a mechanical-only model. There are awesome computerized and electrical sewing machines available, and soon you will definitely want to add one of these to your collection, too. But I recommend you start with a mechanical model for two reasons.

First of all, you don’t want to confuse yourself with too many options and features when you first start sewing. I think it is best to focus on learning the basics of sewing on a good, basic machine.

And perhaps more importantly, you need to have a mechanical back-up machine in your collection before you buy an electronic or computerized machine. That’s because computerized machines require regular maintenance that you cannot do yourself. Nor can you repair any problem that might arise on a computerized machine at home.

When your machine is away, sometimes for as long as a few weeks, you cannot sew—unless you have a mechanical backup. So I think this needs to be the first sewing machine you buy.

I’d think I was sewing and then realize that I was sewing without thread! Argh, this is what made me scream and want to tear out my hair when using that machine!

Don’t buy a beginner sewing machine without these features:

Built-in needle threader

You’ll be threading your machine every time you sew.  With an easy machine, you are going to love sewing and want to make lots of things, so you will thread your machine thousands or even ten-thousands of times.

Save yourself a lot of time and trouble by getting a machine with a handy dandy built-in needle threader. Even if you are young with great eyesight and steady hands, this will still make needle threading go a lot faster for you. I wouldn’t buy a machine without this feature.

Top loading drop-in bobbin

The poorly designed bobbin system was the thing that caused me the most frustration on my first sewing machine. On that thing, the bobbin was concealed inside the front of the machine. To change it, I had to take the case off the front and then remove the bobbin casing to get to the bobbin which was held vertically inside.

Besides all those extra steps, the problem with this system was that there was no way to see that my bobbin was running low on thread. So what would happen is that my bobbin would run out without me knowing it. I’d think I was sewing and then realize that I was sewing without thread! Argh, this is what made me scream and want to tear out my hair when using that machine! I’d have to remove my project from the machine, rewind and replace the bobbin, and then start all over again. NOT fun!

A top loading bobbin system is so much better. With this system, the bobbin just pops out and drops into place without your having to disassemble a bobbin casing to get to it. Even better, this kind of system is accompanied by a see through cover plate. So you can see at a glance when your bobbin thread is low. Believe me, you want to get a machine with this feature.

Free arm capability

With a free arm, you can sew narrow, round garment pieces such as sleeves and pant hems. If a sewing machine won’t convert to free arm sewing you can’t sew these things easily, if at all.

As a beginner sewist, you will want to make many small projects. That’s because they are easy and satisfying, not to mention useful. Not having the ability for free arm sewing is unnecessarily limiting. There are basic beginner sewing machines that do limit you in this way. Be sure the machine you buy includes this important feature.

My recommendations for your beginner sewing machine:

I always recommend Janome brand machines. That is because I have seen for myself that Janome offers the best quality and the best value, by far. From my experiences with my own nightmare first machine to my experiences helping others with frustrating machines when I teach sewing classes, I have seen clearly that there is a big difference in user friendliness between different makes of machines. I can’t imagine buying any other brand and I recommend them as being the best choice for beginners and experienced sewists alike.

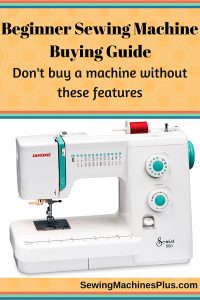
Janome Sewist 500

If I were buying a beginner machine, I would buy the Janome Sewist 500. I like this one because, besides offering my must-have features listed above, it goes beyond being a basic machine and offers a lot of options without being overly complicated. It has 25 different stitches, including some decorative stitches, and a one step buttonholer. I love this option on Janome machines, it makes sewing buttonholes as easy as pie.

Janome Jem Gold 660

I would also recommend this machine as being a great choice for a beginner sewing machine. It too includes all the features I would demand. And besides the fact that the price is nice, this machine is also lightweight. This makes it easy to grab and go to class or wherever else you’d like to take it. While it only has eight stitches to choose from, these include everything you need. Almost all sewing uses either a stretch or a zigzag stitch. This machine performs both, and with adjustable stitch length and width. It also has two different useful stretch stitches and a buttonhole stitch.

With either of these as your beginner sewing machine, you will be sure to enjoy learning to sew and you won’t have to suffer needless frustration. Either of these high-quality Janome machines will continue to serve you well long beyond your brief time as a beginner.

To save yourself another easily avoided frustration, be sure to read my guide to machine needle selection, too. Besides using a poorly designed beginner sewing machine, nothing else can cause you as much trouble as using the wrong size or type of needle. You won’t have to suffer this problem when you clearly understand which needle to use when.

Happy sewing to you!

Leftover Fabric: The Toss Across Edition

I think I’ve mentioned before that I have quite a bit of fabric leftover from the top layer of my quilt, right? Well, I do, and it’s interesting to come up with practical, usable projects that could give that fabric a purpose. This week, I did exactly that, and I’m going to share the idea that was a two-fold win for me: Using a little bit of fabric and creating something that I had a genuine reason for making.

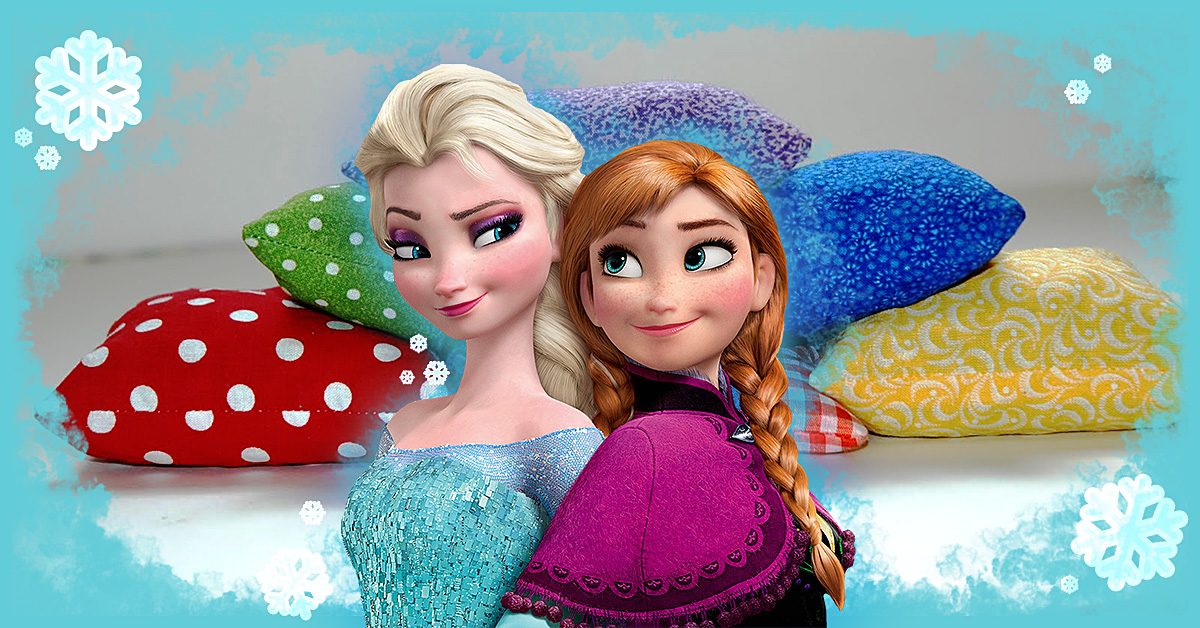
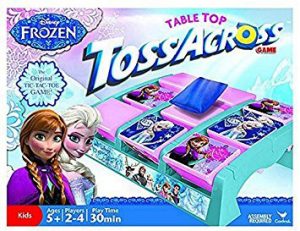
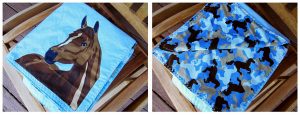
Frozen Toss Across set , and it comes with simple blue throwing bags.

Frozen Toss Across set , and it comes with simple blue throwing bags.

So, my niece has this Frozen Toss Across set , and it comes with simple blue throwing bags. The idea is to tic-tac-toe with Anna or Elsa (whichever character you are) to win, but the thing is that we currently only have three throwing bags out of the original set that we can use. What that boils down to is that the two of us would play the game one toss at a time, and we’d have to keep going over to the board to retrieve the bags for the next round. Sure, it’s doable, but it isn’t as convenient as only having to go bag-retrieving every third toss or so!

Get resourceful

Yesterday, it occurred to me that I have small pieces of material and fewer throwing bags than we used to have. Why not use some of that fabric to make new throwing bags?

It’s a simple idea, and the process was fairly to-the-point. All I needed beyond the sewing essentials of fabric, needles, thread, and pins was something to fill up the bag, which I honestly had to think on for a while — maybe until I was ready to fill the throwing bag. I thought about trying small rocks, but I was sewing at night. Since I didn’t want to wait until morning to finish my trial sewing bag or go rock hunting at night, I needed another option. At some point, it dawned on me that I have blue sand that could work, but you might find something just as fitting for the purpose around your house. Just think a little outside of the box, and the fillings might take shape!

Time to begin

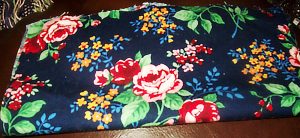
I took one of the pieces of fabric & folded it in half since the fabric size was nearly ideal to make two separate throwing bags.

I took one of the pieces of fabric & folded it in half since the fabric size was nearly ideal to make two separate throwing bags.

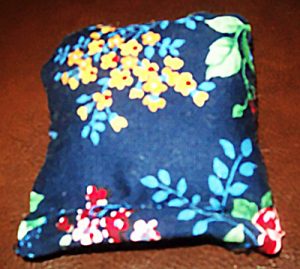
Now that we have the list of supplies, it’s time to get into how all of them came together into a Toss Across throwing bag. First, I took one of the pieces of fabric and folded it in half since the fabric size was nearly ideal to make two separate throwing bags. These bags needed to be small enough to flip spaces on the board, after all! Once I cut the fabric in half, I again cut it in the opposite direction so that what started as one piece of material was now four individual pieces — two for each throwing bag.

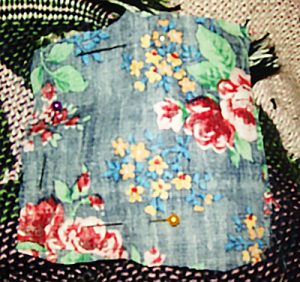
Luckily, these are small products, so I only needed about three pins to hold them!

Luckily, these are small products, so I only needed about three pins to hold them!

Then it was time to pin them. Luckily, these are small products, so I only needed about three pins to hold them! I took two pieces of the fabric and placed them together so that their printed sides were facing one another and pinned them on three sides to hold them steady. Note: This is also a good time to trim off any excess fabric on the ends if they’re terribly uneven with one another, though these seams will be inside the bag anyway. You don’t have to be too careful to make things perfect!

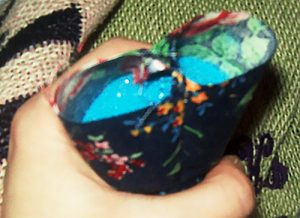
From there, it was time to sew, which was a pretty straightforward process! Three sides needed to be closed up completely, but I needed to keep that fourth side open to fill the sewing bag before I closed it as well. I simply sewed one side, then the next, and then the next. Then, it was time to flip the bag so that the printed fabric was now on the outside and add in what I decided would be blue sand to fill it. Again though, you can try a different tactic to fill the throwing bag — sand, beads, etc.

You can try a different tactics to fill the throwing bag — sand, beads, etc.

You can try a different tactics to fill the throwing bag — sand, beads, etc.

Be sure though while you’re filling the throwing bag that you don’t fill it too full. It’s important that it’s weighty enough to be able to turn one of the Toss Across spaces, but if it’s too full, you might have a hard time sewing that final side together. As it happens, I ended up towing the line, so for future projects, I might use a little less filling!

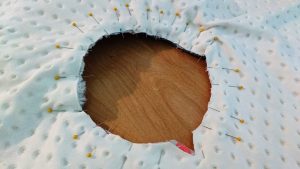
Once I’d finished with the filling, I sewed that final line together. I did this by folding the edges inward, kind of like I was wrapping a present, then folded the line downward to pin it in place. After that, I just had to sew what I’d pinned and cut the thread.

I did this by folding the edges inward, kind of like I was wrapping a present, then folded the line downward to pin it in place.

I did this by folding the edges inward, kind of like I was wrapping a present, then folded the line downward to pin it in place.

I have plenty of fabric to keep making these, but already with this one bag, I’ve evened up the throwing bag numbers so we can play two rounds at a time!

Do NOT iron minky directly!

Tips for Sewing with Minky Fabric (Cuddle or Plush Fabric)

Tips for Sewing with Minky Fabric (Cuddle or Plush Fabric)

I know a lot of people that shy away from sewing or quilting with minky but I’m here to tell you that minky is not the bogey-woman some people make it out to be, as long as you follow some important tips to make your sewing with it a success.

1. Pre-washing is not needed. Well, at least for the minky that is. Plush fabrics are made from polyester so they don’t shrink. If you’ll be pairing with fabrics that do shrink, then pre-wash the other fabrics in advance.

Minky bumps

2. Nap! Minky has a nap. Nap is the raised or fuzzy/bumpy parts you find on certain fabric (think velvet). If you brush your hand one way on minky, it will be soft, if you brush it the other way, it will be rougher. Take the direction of the nap into the consideration when cutting out your project.

Take the direction of the nap into the consideration when cutting out your project.

Take the direction of the nap into the consideration when cutting out your project.

3. Minky can STRETCH! But only from one direction. Take a piece of the fabric you are working with and stretch it one direction and then the other. You’ll find the stretchy side very quickly. I make sure to not ever leave my hole for turning on the super stretchy side.

Minky can STRETCH! But only from one direction.

Minky can STRETCH! But only from one direction.

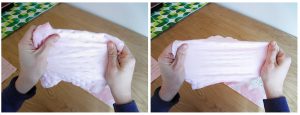
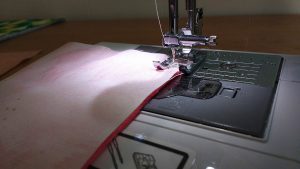
4. Use the right needle and correct sewing foot. A lot of guides will recommend a universal needle size of 12. I prefer size 14, but find what works for you. Additionally, if you have a walking foot, use it! If you are too lazy to use your walking foot (or don’t have one), I find minky sews better when you place it on the bottom and the regular fabric on the top.

Use a walking foot. I find minky sews better when you place it on the bottom and the regular fabric on the top.

Use a walking foot. I find minky sews better when you place it on the bottom and the regular fabric on the top.

5. Seam allowance and stitch length – I tend to give myself more room with minky and usually use a 1/2” seam allowance. I also use a longer stitch length, around 4.

6. DO NOT IRON MINKY DIRECTLY. It will melt. I promise you. You need to even be careful ironing with another fabric placed on top as pressing too hard or with too much heat will ruin the nap or little bumps of the minky underneath.

7. Pins, clips and washable basting spray or this Wash-A-Way Wonder Tape are your friends with minky. Use them excessively and you’ll get much better results.

https://www.sewingmachinesplus.com/tacony-BT14.php

Pins, clips and washable basting spray or this Wash-A-Way Wonder Tape are your friends with minky.

Pins, clips and washable basting spray or this Wash-A-Way Wonder Tape are your friends with minky.

8. Top stitch!! Top stitching minky will really help to remove bulk, keep the seams in line and make your project look more professional.

Top stitching minky will really help to remove bulk, keep the seams in line and make your project look more professional.

Top stitching minky will really help to remove bulk, keep the seams in line and make your project look more professional.

9. Use a rotary cutter and a vacuum. Rotary cutters help make very exact cuts with minky. I also suggest having your vacuum nearby to clean up after cutting and to clean out your machine as you sew. SewingMachinesPlus.com has a variety of vacuum cleaners for your sewing room.

https://www.sewingmachinesplus.com/tacony-fb-gim.php

10. Practice! You’ll get better the more you use it. Soon, you’ll be wondering what all the fuss is about when others say they shy away from sewing with plush fabrics.

Do you have any tips for making sewing with cuddle fabrics a success? Let us know what works for you in comments!

———————————————————————————–
Charlotte Kaufman is a writer and sewist in Mammoth Lakes, California. She specializes in marine and home interiors and continues to fall more and more in love with quilting. You can follow her at charlottekaufman.com.
Costume Department Positions for Movies and Television Shows

Costume Department Positions for Movies and Television Shows

Last week, I wrote about how it takes a whole team of individuals to make a television show or movie, often more than most people realize. Then I got to thinking about all the conversations I’ve had throughout my life trying to explain to family, friends, acquaintances and sometimes strangers, what I do at work and what others in my department do.

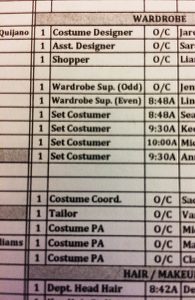
One of the daily call sheets for Blindspot which lists the positions with call time (time to report to work). O/C means on call and is what is used for those who do not need to be on the actual shooting set.

One of the daily call sheets for Blindspot which lists the positions with call time (time to report to work). O/C means on call and is what is used for those who do not need to be on the actual shooting set.

Here’s a list of some common positions found in costume and wardrobe departments of films and television shows.

But first, the difference between the costume and wardrobe departments. Theses terms are basically interchangeable but, if a dividing line were to be drawn it would separate the costume and wardrobe departments by union locals.

The labor union for theatre, film, television and live events, founded in 1893, is IATSE or, the International Alliance of Theatrical Stage Employees, Moving Picture Technicians, Artists and Allied Crafts of the United States, its Territories and Canada.

Designers, assistant designers, shoppers and coordinators are normally members of Locals 829 (United Scenic Artists) or 892 (Costume Designers Guild). There are various locals across the country that are wardrobe specific. In New York City, the wardrobe local is 764.

Common costume and wardrobe positions on movies and television shows

Design/Costume Department:

Costume Designer

This is fairly self-explanatory. The costume designer is responsible for developing the look and feel of a show. They usually spend time talking with producers or the creators of a show, reading scripts and discussing character with the actors and actresses, as well as researching. They conduct fittings and manage the entire department.

Assistant Costume Designer

Again, pretty self-explanatory. Often, the assistant designer is the one who dresses the background actors. They also often deal with the budgets.

Shopper

The shopper spends his or her day out in the world, shopping. Being a shopper in NYC is completely different than being a shopper anywhere else because well, you can’t get around NYC efficiently in a car. NYC shoppers spend a lot of time walking, schlepping and taking the subway. There’s often a costume department driver who will meet them to pick up purchases.

Wardrobe Department (764 positions):

Wardrobe Supervisor

This position is the department head. He or she manages the day-to-day execution of the designers vision. They are responsible for making sure everything runs smoothly on set. They spend a lot of time looking ahead and anticipating problems and catastrophes before they arise. They are also very good at putting out fires.

Set Costumer

A set costumer takes care of the actors on set. He or she is responsible for continuity (making sure the correct outfit is worn at the correct time in the proper manner). Shows are rarely, if ever, filmed in order. A set costumer watches during filming and makes adjustments as needed. He or she pays attention to things like: How many buttons are buttoned, are the sleeves of the shirt supposed to be rolled, should that bag be over the right or left shoulder.

There is usually more than one set costumer on a show. Some actors have personal set costumers who only take care of them but most television shows don’t have the budget for this. Some high paid, “famous” actors have a personal costumer written into their contracts.

In Europe, a set costumer is often called a stand by costumer.

Production Assistant

Every department tends to have a production assistants who are usually people just starting out in the business. They do all sorts of things. In the world of television they spend a lot of time returning unused clothing and organizing receipts.

Costume Coordinator

I always think of the Costume Coordinator as the glue that holds the entire department together. They should really be paid more money than what they are.

They are the accountants of the department, the phone call makers, the calmer of nerves, the birthday party planners, the detectives, the soothsayers, the joke makers, the ice cream and alcohol buyers, the lunatic whisperers and the magicians. A costume department with a shoddy coordinator will most certainly fall apart at some point.

On Blindspot, we are very lucky to have an amazing coordinator named Sade.

Tailor

Most contemporary television shows have one full time tailor who is responsible for alterations and clothing construction. Big, costume heavy shows often have a full in house costume shop.