Sewing with Friends

Sewing with Friends

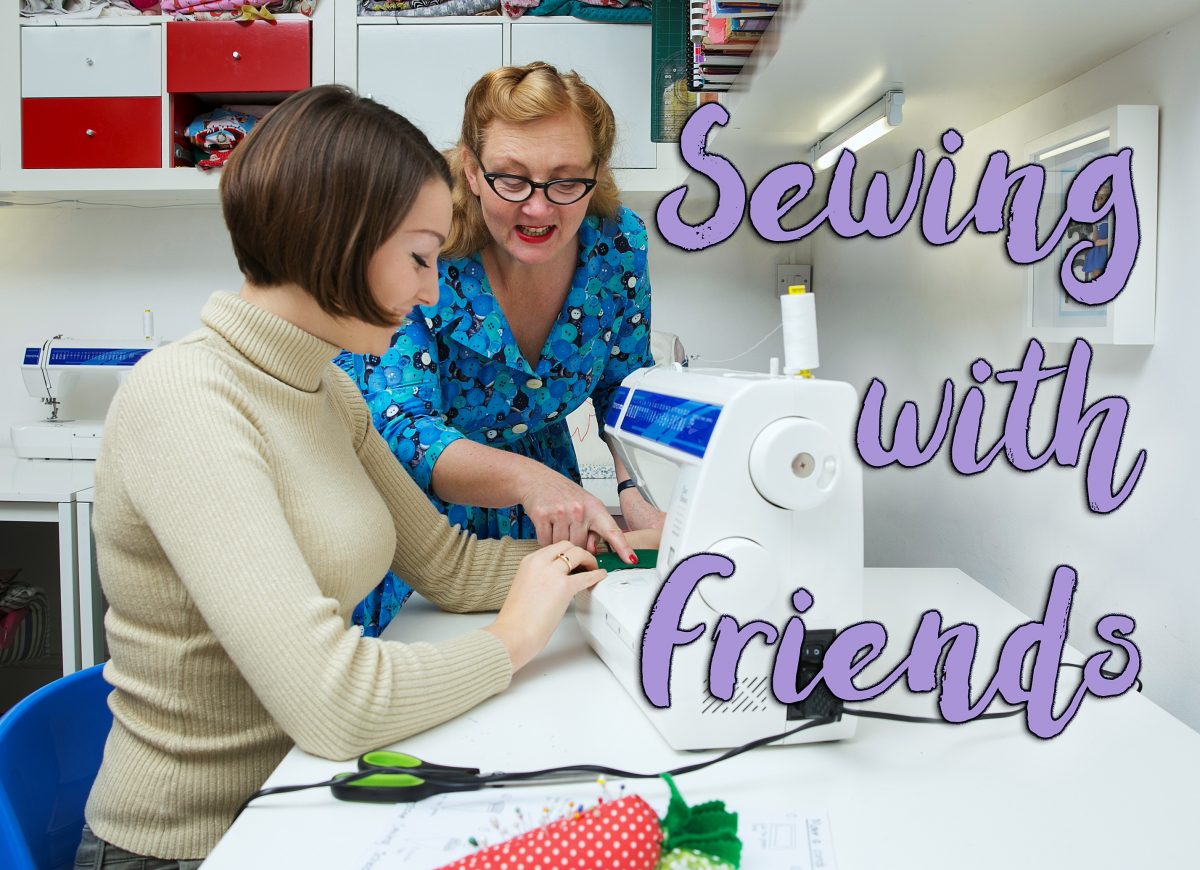
Sewing is frequently thought of as a solo venture. For many, it’s desired to be. Sometimes, though it’s nice to sew with your friends. You can visit while completing a project. For large projects, your sewing buddies may even be willing to pitch in and help you get it done. Sewing with friends can be an impromptu event or a weekly or monthly ongoing get together.

Finishing Large Projects

Are you redoing a room and making all the curtains and throw pillows? Perhaps you’re sewing outfits for several people for Halloween or a special occasion? When you sew with friends, you can enlist their help to complete these projects. Assign everyone a piece or set it up as an assembly line with everyone taking a task or two. Instead of taking weeks or months to complete, with your friends lending a hand, you may have these projects completed in a matter of hours or days!

Ongoing Get Together

Invite your friends over for a sewing party. Ask a few to bring their machines so there’s not a line for yours. Add in some refreshments and beverages and put on some music – you’ve got the makings of a great friend hang out. So that hosting isn’t a burden, you make it potluck and/or rotate whose house the get together is at.

During the first one, talk about frequency and if you want to rotate who hosts as well as any other logistics. If your sewing friends also have friends who sew, invite them too! If people want to bring their kids, consider it. If they’re age appropriate, sewing with friends can be a great way to pass sewing along to the next generation in a fun and easy going way.

Learn New Things

An added benefit to sewing with friends is that you get to see what everyone else is working on. If you’ve made something similar, they may use different techniques or have tips to make something you struggled with easier. Sharing and learning with your sewing friends creates bonds while everyone becomes more skillful.

Have you sewed with your friends recently? Try it and let us know how you liked it!

New Year, New Challenges: The Psychology of Sewing

New Year, New Challenges: The Psychology of Sewing

How many times do we seriously plan things, and within days or hours, our plans change. I used to think I prefer knowing what will happen ahead of time so I can grasp the idea, plan it to my specifications, and control the outcome. Not very many things happen that way.

So last time I wrote, I had a nice New Year’s Resolution list made up for myself. I was ready to learn new things, implement new creative expressions, and sew a rug made of scraps. That was a few days before New Year’s Day.

Now, the middle of January, about 2 days ago, I was able to sit and sew a project I have been thinking about. Sewing is so therapeutic, you forget where you are and the daily chores of life. But now, my Resolutions have been pretty much scrapped. Time changes things so quickly.

Turn that frown upside down

Now, I’m finding myself in a position to decide how to decorate a new home we are building. “Wonderful, you say! Congratulations!” Blushing but thankful, I tell you, “Thank you, but the downside is I’m losing my room for sewing.” For now, I have a countertop that wraps around half the room where I can cut, sew, press, lay out patterns, and holds my computer. Plus tons of shelves for fabric, ribbon, thread, and many other non-sewing related supplies. What will I do?

We determined that I will use the large guest room upstairs for my sewing projects, but it will be deemed a guest bedroom as well. So, gone are the days, of leaving my projects in different stages, and not worrying about things left out. I have to be neat and organized ie. (no thread on the floor) so if we should get company, (my daughter visits frequently) that room will be presentable. OMG, such pressure! I’m already stressed. I can’t even get away and be creative because my room has to be in picture perfect order and stay that way (much like the rest of the house by the way, as my in-laws will be living with us).

So, I need your help! I will explain later. I’m making a checklist of some things, I need to purchase if I am going to continue my psychological sewing retreat. At least I have until late July to decide.

Making a list – checking it twice

First is a desk. I like this one. Nice and neat!

See it here:

Fashion Sewing Cabinets of America 8300 Cloud 9

Or:

Sylvia Design Model 1520 Quilters Work Station

Then a rolling bag to store the sewing machine out of sight while my guest suite is being occupied.

Bluefig TB 23Travel Bag 23″ Julie

Also a box of Aerofil Incredible Threadable Quilt Box Maderia Thread so I can keep the thread bobbins and thread and neatly put away.

Then there’s the fabric and trims, buttons and numerous other collections. That worries me most. I would love to hear your suggestions on how to scale back and organize and still have the ability to retreat to my passion in my changing lifestyle. I hope all will not be lost even with a more spacious house and elder care ahead. One never knows! As for you, my advice is:

Keep sewing, it’s good for the soul! Until next time.

9 Cutting Tools for your Sewing Room

9 Cutting Tools for your Sewing Room

Do you know the difference between scissors and shears? I didn’t so I looked it up and now I can edify us all. Scissors usually have equal-sized finger holes and are under 6″ in length. Shears have one hole that is bigger than the other and their blade lengths are normally longer than 6″. The terms scissors and shears are often used interchangeably and for the purposes of this article, I flip back and forth between them.

Fabric scissors

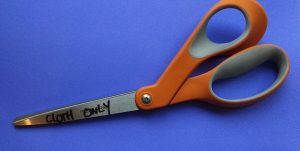
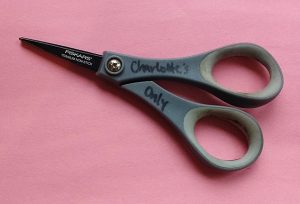
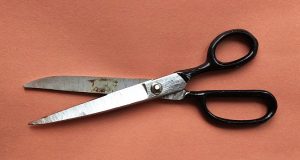
These are the scissors you hide. Or keep locked away. Or you write in Sharpie on them. DO NOT USE. CLOTH ONLY. MOVE AWAY FROM MY SCISSORS. If you haven’t convinced your family to stay away from your fabric scissors, then move to the second pair below.

These are the scissors you hide.

These are the scissors you hide.

All purpose scissors

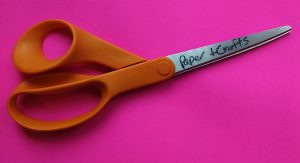
THESE are the pair you hand people who want to use your fabric scissors. Keep them sharp so no one is ever tempted to grab the pair you keep for working on your stash.

THESE are the pair you hand people who want to use your fabric scissors.

THESE are the pair you hand people who want to use your fabric scissors.

Heavy duty shears

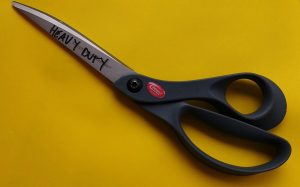
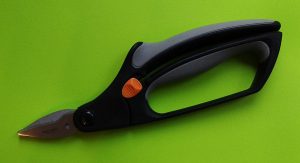
When your regular fabric scissors won’t cut it. I’ve used these to cut canvas, Sunbrella, and leather. Don’t let your friends or family use these for everyday use. They’re heavy duty. Emphasize that by saying it in a low voice, “Sorry, these are heavy duty.”

Don't let your friends or family use these for everyday use.

Don’t let your friends or family use these for everyday use.

Snipping scissors

Snipping scissors, or scissors with very short, sharp blades are genius for cutting threads as you sew.

Snipping scissors, or scissors with very short, sharp blades are genius for cutting threads as you sew.

Snipping scissors, or scissors with very short, sharp blades are genius for cutting threads as you sew.

Pinking shears

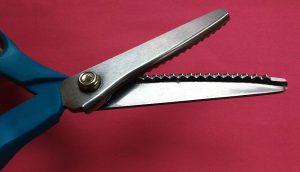
Pinking shears are what you need if you are working with fabric that ravels or if you plan to leave a cut edge exposed. Pinking shears do what zig zag stitching or serging does, they stop fabric from unraveling. They are genius. You should get a pair.

You should get a pair.

You should get a pair.

Herb cutters, fringe scissors

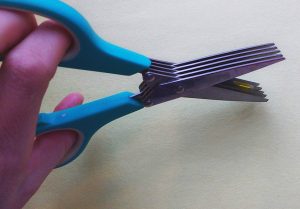
Yes, bring the kitchen into the sewing workshop. These scissors are frequently used to quickly chop up herbs, but in the sewing room they create fringe.

Bring the kitchen into the sewing workshop.

Bring the kitchen into the sewing workshop.

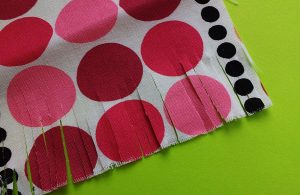
Perhaps you want to make some fringe-cut garland? These would be your tool. They work best when you put the fabric back towards the center of the scissors and stop cutting before you reach the tips. If you have a LOT of tiny snips like this to make, however, you’ll want to see the next pair of scissors.

If you have a LOT of tiny snips like this to make you'll want to see the next pair of scissors.

If you have a LOT of tiny snips like this to make you’ll want to see the next pair of scissors.

Rag quilt scissors

For when you aren’t messing around. Rag quilt scissors have short, sharp blades that let you snip through chunks of fabric to create the famous look of rag quilts.

For when you aren't messing around.

For when you aren’t messing around.

Pro Tip: If you get a pair, make sure to get them spring loaded. Your hands will thank you!

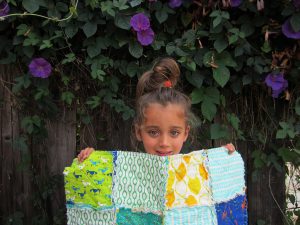
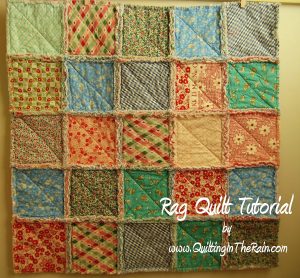
My oldest made this rag quilt with and I snipped it right up with rag quilt scissors. Just put on a TV show you can zone out to and start clipping.

My oldest made this rag quilt with and I snipped it right up with rag quilt scissors.

My oldest made this rag quilt with and I snipped it right up with rag quilt scissors.

Rotary cutter

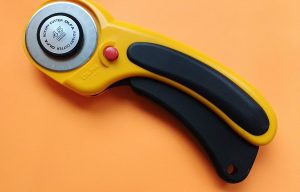
Rotary cutters are becoming more and more popular. Once you learn how to cut fabric with them, your fabric scissors may start to see a lot less use.

Goodbye fabric scissors!

Goodbye fabric scissors!

Ye olde kitchen drawer scissors

Also known as ‘household scissors’ or ‘the scissors you can do just about anything with and mom won’t get mad.’ They are the unsung hero of your scissors quiver because they keep the rest of your tools safe.

The scissors you can do just about anything with and mom won't get mad.

The scissors you can do just about anything with and mom won’t get mad.

What types of cutting tools do you use in your sewing room? Let us know in comments!

—————————–
Charlotte Kaufman is a writer and sewist in Mammoth Lakes, California. She specializes in marine and home interiors and continues to fall more and more in love with quilting. You can follow her at charlottekaufman.com.
Five Easy-to-Do Mistakes While Sewing

Five Easy-to-Do Mistakes While Sewing

If there’s one thing I’ve figured out over my sewing ventures, it’s that I can’t ever be sure what kind of sewing experience I’m getting into when I sit down to work on a project. It could be an hour or so that goes as smoothly as sewing can go. On the other hand, it could be a terror of a sewing session where my thread keeps bunching up, and I have to wrestle it back into submission more times than I want to.

Five Easy-to-Do Mistakes While Sewing

But whether or not today’s a day that I’ll sit down to sew and have those problems, I expect that those problems will happen in the future if I continue to sew. And, as much as I wish someone would’ve personally told me more about a budget and a probable no-positive-income when publishing my first book (talk about un-fun surprises!), I think it’s beneficial to step into the sewing world with open eyes as well. Odds are, you’re going to make mistakes, and those mistakes aren’t the best of reasons to throw in the fabric! Just like a new driver, a new sewer can expect to have to learn the skill.

It happens to the best of us…

Want to know something else? Even people with miles behind them in the sewing department can still make mistakes! The point is to be aware that they’re going to happen so that maybe, should you make one, you don’t feel like tossing your fabric to the side and trashing your sewing kit!

And that, readers, is the logic behind this post — to point out simple mistakes you might make, but shouldn’t beat yourself up over! They happen, and instead of letting them get you too far down, remember you’re hardly the only person to make one. Since others potentially make these same errors and keep going, use that for encouragement to continue on as well!

Five Easy-to-Do Mistakes While Sewing

Let me count the ways

With that positive thought in place, here are some of the smaller, more embarrassing sewing mistakes you might make, but should push through:

1) Accidentally sewing your fabric to something you didn’t mean to. There are few things I’ve personally encountered in sewing that can make you feel as amateurish as figuring out you’ve sewn your project to itself in a spot you didn’t intend to (as in, your fabric was folded under itself where it shouldn’t be), or if you’re hand-sewing, that you’ve sewn your project to, say, your own clothes. But as daft as you might feel if you notice that has happened, just — as Taylor Swift might say — shake it off! Sure, you might have to redo your stitching, but it isn’t the end of the world!

2) Sewing without knowing your bobbin is out of thread. This one is particularly troublesome since you could feasibly sew for a lot of minutes on your machine without realizing the mistake. However long you invest in that flawed sewing endeavor is kind of wasted time since there’s no thread coming from the bottom to finish your stitch. So, moral of the story: Check your bobbin before you sew by machine!

Five Easy-to-Do Mistakes While Sewing

3) Threading your needle without really threading your needle. For a sewing machine project, there are a number of steps to threading your needle, and you might miss one. As humiliating as that error might be though, it’s nowhere near as ridiculous as doing this while hand sewing. I, for one, recall thinking I’d threaded my needle, and at some point, I realized that although I’d tied it off and such, the thread actually was not through the needle. Now, that is embarrassing!

4) Cutting material you didn’t intend to cut. This could be in line with the earlier idea of sewing something you didn’t mean to sew in that while you’re cutting fabric, something else could be under it. If you do have this issue, depending on how important the now-damaged material is to you, it could be a big deal! Beyond the possibility of forever ruining Great-Grandma Trudy’s sewn-by-hand quilt that has been in your family for over a century (try replacing that one!), you could also harm your current project by cutting your fabric where you don’t need to or cutting a stitch that’s necessary to your work. This is something, in particular, to keep in mind when making a rag quilt since part of the process is to shred your edges. It would be crazy-easy to shred too far and snap a stitch or two, but imagine the pain of having to re-stitch an up-turned quilt block that’s already sewn to other quilt blocks!

Five Easy-to-Do Mistakes While Sewing

5) Thinking up strategies or tackling projects that you’re not ready for. For this one, I’ll give you an example. I didn’t know anything about using a border on a quilt/blanket project, and once I’d learned about it, I labeled it a waste of time and/or not for me. To my way of thinking — and for my past strategy — simply bending the fabric used for a backing to fold over against the front would work. And, yeah, it might… If I were a better sewer! At this point, I’m not advanced enough to comfortably pull this strategy off so that the sides are one-size at all points. So, don’t be like me! Start simple and with the recommended strategies, and work your way up from there!

Even if you manage to do all of these mistakes in one sitting, don’t give up! If you can keep that determination in mind, you might have a bright sewing future ahead of you!

DIY Reversible Circle Skirt

My littlest loves in skirts.

My littlest loves in skirts.

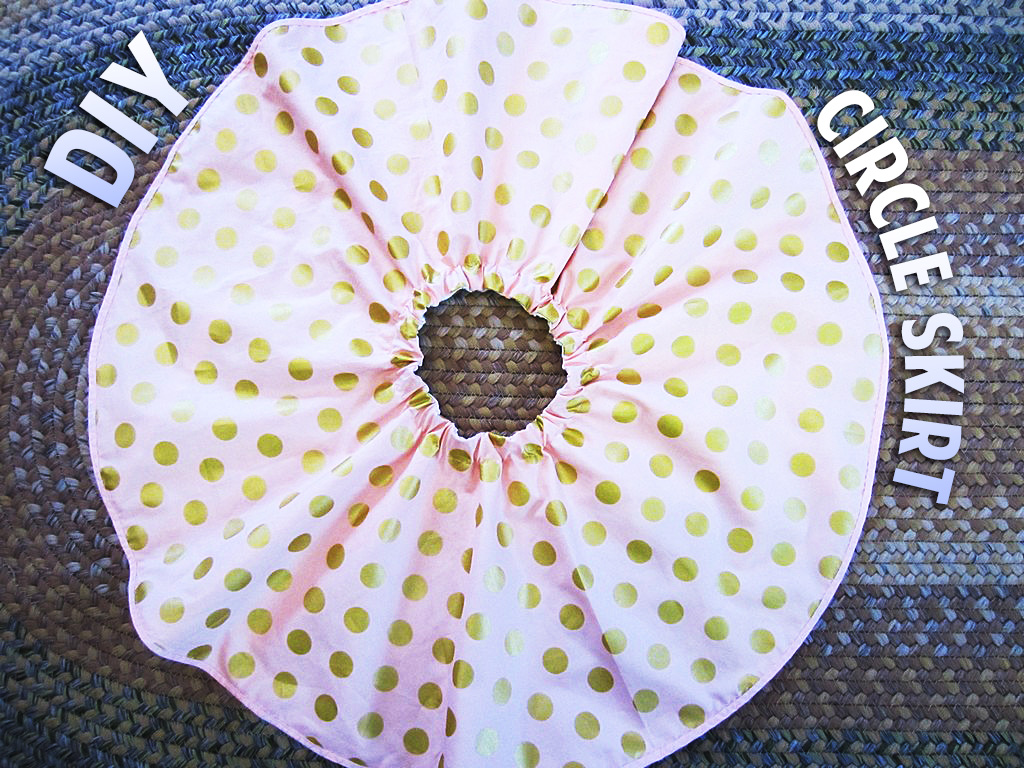
My littlest loves in skirts. In cold weather she puts them over pants and sometimes she even wears them over her pajamas. While I normally am not drawn to making clothes, I knew when her passion for skirts didn’t fade I’d want to start making some for her.

This skirt is reversible, so two skirts in one, though I think she is so in love with the top fabric that she’ll never switch it to the one underneath.

I think she is so in love with the top fabric that she’ll never switch it to the one underneath.

I think she is so in love with the top fabric that she’ll never switch it to the one underneath.

To begin making a DIY reversible circle skirt (or a non-reversible one for that matter), you’ll need to do some math. I take the width of the waist + 2. For her it was 19″ + 2 = 21″. Then I divide by 6.28 (or twice pi.) That gives me the radius of the circle for the waist, 3.34″.

Then I divide by 6.28 (or twice pi.) That gives me the radius of the circle for the waist, 3.34".

Then I divide by 6.28 (or twice pi.) That gives me the radius of the circle for the waist, 3.34″.

Next measure from the waist to the length you want. I went just above the knee, which was 10″. Cut your fabric into a square and then fold into quarters. From the bottom left corner, start drawing first your waist circle, and then the outer, skirt circle (this is the same process I showed you for the DIY tree skirt in one of my December posts).

Cut your fabric into a square and then fold into quarters.

Cut your fabric into a square and then fold into quarters.

From the bottom left corner, start drawing first your waist circle, and then the outer, skirt circle.

From the bottom left corner, start drawing first your waist circle, and then the outer, skirt circle.

If you are making this reversible (and you don’t have to, one sided is great too), do the same for the other side of fabric. In my case, I had to join two pieces together to make a square big enough for the circles.

Pin the circles right sides together and sew around the waist circle. Once sewn, make tiny cuts all around the fabric, taking care not to cut into your sewing. This will help the fabric turn smoother. Flip the skirts so they are wrong sides together and go iron the seam. Ironing is everything in sewing. Don’t skip this step.

Once you’ve ironed, sew a casing big enough to fit the width of elastic you’ll be using for the waist. My elastic was .75″ so I sewed a 1″ casing. Leave about 1.5″ for inserting the elastic.

Once you've ironed, sew a casing big enough to fit the width of elastic you'll be using for the waist.

Once you’ve ironed, sew a casing big enough to fit the width of elastic you’ll be using for the waist.

Put a safety pin through one end of the elastic and feed it through the casing (you’ll find the entrance for the casing hole between the two layers of skirts). Sew the two ends of elastic together and then sew each tail end flat so there is no bulk from the elastic’s sewn seam. Then sew the casing shut, completing the waistband of the skirt.

Sew the casing shut, completing the waistband of the skirt.

Sew the casing shut, completing the waistband of the skirt.

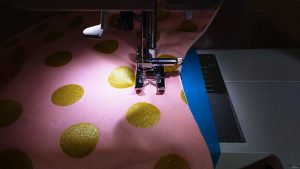
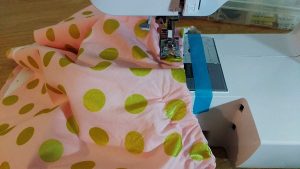
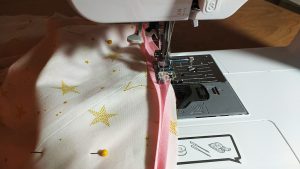
To finish the skirt, you could use a serger and serge the two layers together, and then press them to one side and sew a hem. I chose to add bias tape.

I chose to add bias tape.

I chose to add bias tape.

I used a decorative stitch to complete the look.

Boom! A darling, reversible circle skirt.


And a very happy three year old.


Do you sew clothing for your children or grandchildren? What are your favorite things to make them?

—————————–
Charlotte Kaufman is a writer and sewist in Mammoth Lakes, California. She specializes in marine and home interiors and continues to fall more and more in love with quilting. You can follow her at charlottekaufman.com.

Thanks for the Fabric, Tahari

Throughout my career I’ve worked on a variety of projects. People often ask what my favorite show to work was, or what my favorite period is. Both of those questions are difficult for me to answer. I could probably tell you what my least favorite show to work on was but narrowing them all down to one single absolute best and favorite is not possible.

It all depends. Some projects require more creativity than others. Some are relatively simple straightforward gigs that involve hemming a staggeringly large number of pants. Some shows are more stressful than others with a higher than normal rate of last minute changes. Some involve working with difficult people. Others are filled with co-workers that quickly become family.

Whenever I mention any of the period shows or movies I’ve worked on, people usually say, “Oh that must be so much fun!” When I say I work on a contemporary procedural crime drama, the response is more something like, “Oh. The show with the tattoos?” or “That’s interesting.” Meaning: That doesn’t sound interesting at all. Don’t actors just wear store bought clothes? What do you possibly have to tailor on those shows?

To this all I can do is laugh. No major actor or actress on any contemporary procedural crime drama wears clothing that hasn’t been fit and altered specifically for him or her.

There are, always, a few exceptions to this, notably when a talented costume designer knows the cut and style of high-end clothing well enough to know which designer label will fit a particular actor the best with little or no alteration. Frank Fleming who designs Power for Starz Network is an absolute master at this.

I truly enjoy working on Blindspot (my current gig). Everyone in the costume/wardrobe department is absolutely amazing and all the actors are lovely to work with.

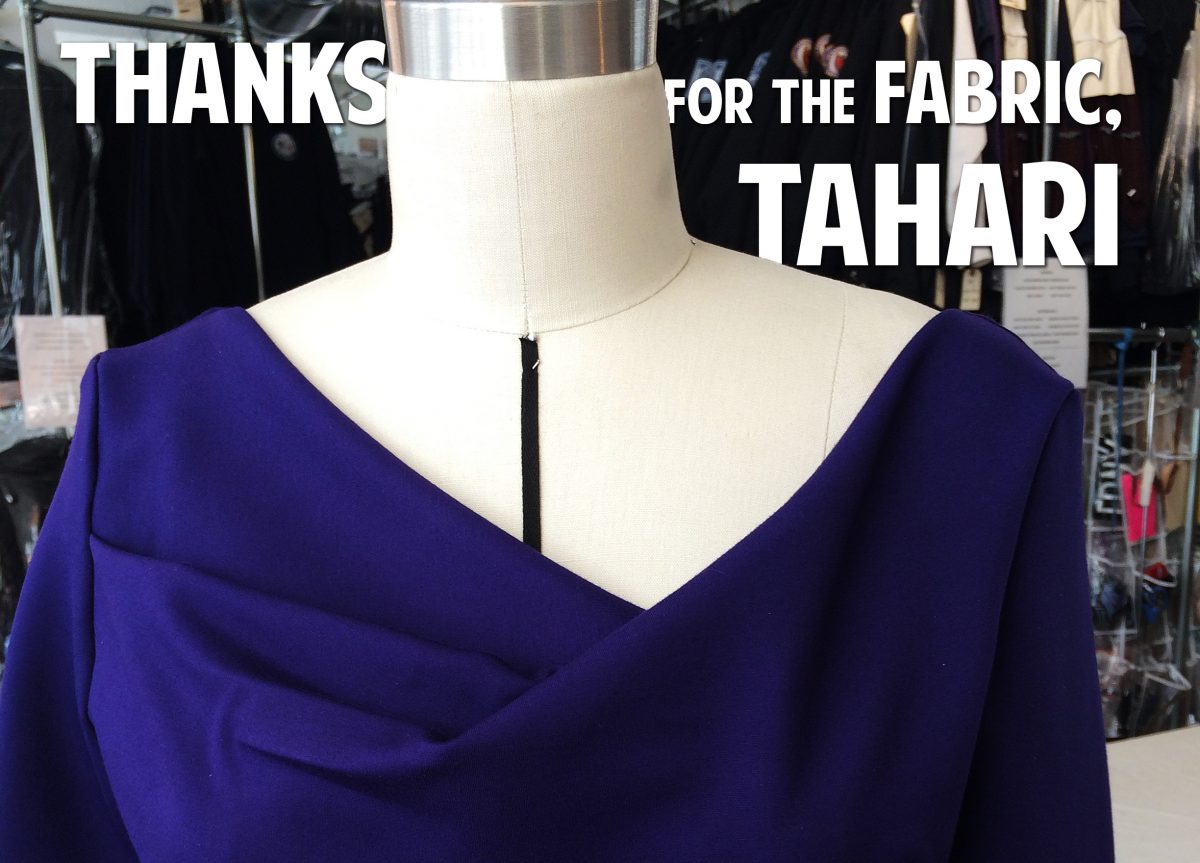
One of the lead actresses wears a lot of expensive high-end dresses and skirts and blouses. Most of the dresses I alter for her require alterations in the shoulder, side, and waist seams. Altering the shoulder seams means the neckline will need to be altered and the sleeve taken out and reset. Altering the side seam means (again) the sleeve will need to be removed and put back on. Basically, I must take apart the entire dress and put it back together (Thanks for the fabric, Tahari! or Black Halo or Escada or Nanette Lepore).

We also do things like changing necklines (from a high scoop to a vee) and changing short sleeves to long sleeves or even adding sleeves altogether. Jared B Leese who designs Blindspot comes up with many creative and brilliant ways to alter something so that it no longer is a dress ‘off the rack’. He’ll ask things like, “Can you open this neckline?” or “Will you make sleeves for this dress?” or “What if we turn this into a v-neck – do you think that would look better.”

The answer is always “yes”.

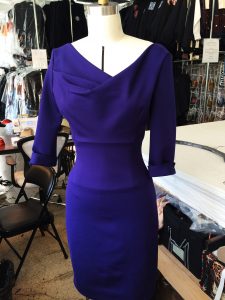
This beautiful suede Tahari dress used to have a high crew neckline and short sleeves:

Tahari dress with new neckline and sleeves.

Tahari dress with new neckline and sleeves.

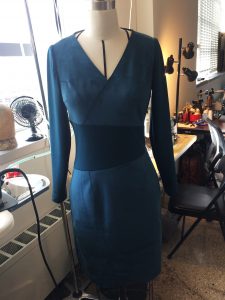
This lovely dress (also by Tahari, I think) used to be sleeves and all suede. We replaced the center panel and added some sleeves.

Tahari dress with new sleeves and center piece.

Tahari dress with new sleeves and center piece.

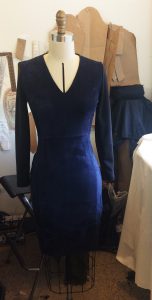
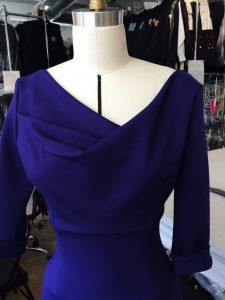
And this Black Halo dress used to be navy.

To be honest, this one was a complete rebuild. I copied the pattern from the existing dress, made a few adjustments and cut out and built a whole new dress.

Make of Black halo dress.

Make of Black halo dress.

See, contemporary procedural crime dramas are anything but boring (and often my favorite type of show to work on).

Just a closer view of the Black Halo dress.

Just a closer view of the Black Halo dress.

Janome DC5100 Sewing Machine Review

Janome DC5100 Sewing Machine Review

The Janome DC5100 is Super Sweet

The Janome DC5100 is super sweet!

The Janome DC5100 is super sweet!

When I decided to upgrade my basic machine several years ago, I took a lot of time investigating all the different options. At first I felt overwhelmed by the huge selection of makes and models available.

But then I discovered the Janome DC5100 with its impressive features. This was the clear choice as the right sewing machine for me.

I love this machine; it’s the sweetest sewing machine I have ever used. I have been sewing on mine for several years now and I have only grown fonder of this dear friend.

What’s so great about it?

Like all Janome machines, the DC5100 is well designed with user friendly features. Like other Janomes, it has a horizontally loaded bobbin with see-through cover, built-in needle threader, snap-on presser feet, one-step buttonholer attachment and more.

But the DC5100 is even more special than all the other lovely Janome sewing machines I have used, for quite a few reasons:

Variable Speed Controls and Quiet DC Motor

I love it because it is fast. It will sew 820 stitches per minute. But it also has a helpful speed adjustment switch which I can use to set the machine to sew more slowly. This helps me in sewing curves or other delicate tasks, since I have a tendency to have a lead foot on the sewing pedal. I can slide this easy control all the way to the left and force myself and the machine to go very slowly, toggle towards the middle for a moderate speed, or I can do what I usually do and slide it all the way to the right and run through projects with super fast speed. The Janome DC5100 sews well at all these different speeds because it has a powerful DC motor.

It sews quietly, too. The Janome DC5100 is the quietest machine I have ever used. Because I have little kids who keep me busy during the day, I often stay up quite late at night to do my sewing, and my husband used to complain about the noise. Now that I have this machine, when I come to bed, he asks “What have you been doing?” That’s because the Janome DC5100 is so quiet that no one outside of my sewing room can even hear it.

A Wide Variety of Stitches and Programmable Memory

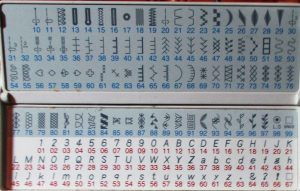
Janome DC5100 has 167 different built-in stitches and 215 stitch functions.

Janome DC5100 has 167 different built-in stitches and 215 stitch functions.

What has made this my all time favorite sewing machine, besides its smoothness and speed, is its wide variety of functional and decorative stitches. This machine has 167 different built-in stitches and 215 stitch functions. It includes many quilting, blanket, heirloom, embroidery, home deco, and garment sewing stitches, as well as both upper and lower case alphabets, numerals, and punctuation. It can even cross-stitch.  And it can make five different types of easy one-step buttonholes.

The Janome DC5100 also has a programmable memory which holds up to fifty different patterns. I use this both for programming stitch patterns combining multiple decorative stitches, and also for remembering my favorite zig-zag stitch length and widths. The programmable needle up/down function allows you set the machine to stop sewing with the needle in either position.

Includes a Huge Selection of Feet

It also came with a great selection of feet. Besides the impressive variety of stitches, this detail was the selling point for me. No other machine I looked at included so many feet. The Janome DC5100 comes factory packaged with ten different feet. These include a ¼ inch seam foot, straight stitch foot, a zigzag foot, a satin stitch foot, a zipper foot, the one-step automatic buttonholer foot, overedge foot, adjustable blind hem foot, darning foot, and even a walking foot.

That darning foot is darn helpful, too. I use it with the feed dogs dropped for both free motion quilting and embroidery. The foot package also includes a handy quilting bar. And if you buy this machine from Sewing Machines Plus, they even include three additional feet in their bonus package: a ditch quilting foot, a concealed zipper foot, and my favorite, a see-through appliqué foot.

And More

Other user-friendly features include a built-in needle threader, thread cutter, jam-proof magnetic drop-in horizontal loading bobbin, super fast automatic declutch bobbin winding, auto-lock button for securing seams, easy reverse button, superior feed system, seven piece feed dogs, easy drop feed switch for free motion sewing, stitch length up to 5mm and width up to 7mm, backlit LCD screen and touchpad, hardcover, automatic presser foot tension which you never need adjust, roomy accessory storage compartment, and more.

The push button controls are easy to use and intuitive; the display even shows what foot to use after you select your stitch. This machine also comes with an excellent manual that covers everything in depth. Another special feature that I especially appreciate is the extra high presser foot lift.

Excellent Value

After sewing on mine for several years, I have zero complaints and nothing but raves.

I heartily recommend the Janome DC5100 as an amazing value. It’s a sweet, reliable, powerful machine that can increase your creativity with its wide variety of stitch functions and accessories. And the price is pretty sweet, too. After sewing on mine for several years, I have zero complaints and nothing but raves; I fell in love with it the first time I used it and I can’t imagine loving any machine more.

You will love it, too. Now is a great time to upgrade from a basic machine to expand your capabilities with a computerized Janome DC5100. You will be amazed by the difference this machine will make for your stitching and your creativity. Act now to take advantage of Sewing Machines Plus’ great price on this Janome and get the free bonus package with three additional feet and two kinds of needles while this hot deal is still available.

Envision Your Sewing Goals

Envision Your Sewing Goals

For the first time this year, I made a vision board. If you’re not familiar with the concept, let me explain. A vision board captures the things you want and desire for the upcoming year. They can be serious, silly, fun or anything at all so long as they’re important to you. Making them is fun too! You cut pictures and words from magazines and paste them on your chosen background. You then place the completed vision board somewhere that you can see it daily.

Doing this helps you stay focused on your needs and wants and helps propel your forward.

They Really Work

Here’s a quick story from a friend who put a silly item on her vision board. She loves country music, particularly Keith Urban. While she’s had many cool Urban experiences, including a chance to meet him, she didn’t have his signature. So, one year she decided to put something with his signature on her vision board in hopes that somehow she’d get it in the coming year. She found a picture of a black guitar with his signature online and printed it out.

Later that year, she went to see Keith Urban in concert. As she was entering the venue, she sang for a stranger to enter a contest and win his signature. As a shy person, she’d normally not sing in public. Of the 30,000 people in attendance, my friend won! And it turns out, she won the very guitar she’d put on her vision board – and it was signed to her!

Making a Sewing Vision Board

Since it seems vision boards do help manifest goals, even silly ones, I thought it might be fun to make a vision board for sewing goals, wants and needs. Whether it’s a fancy new sewing machine, a certain fabric, completing a particular project or moving your love of sewing from a hobby into a career a vision board may help you get there.

To start, think of all the things you desire with your sewing. Grab your latest sewing related magazines or go buy some and a pair of paper scissors. Find words or pictures that connect with your desires. Even if you’re not sure of the connection, but simply like the way the picture makes you feel, cut that out too. It could be connecting to a subconscious desire.

When you’ve got loads of clippings, have fun dry placing them on your vision board. When you like the layout, glue everything down. Feel free to add to it throughout the year if you come across other items as you peruse new issues of your sewing magazines. Place the completed vision board somewhere you can see it daily. You don’t need to study it in depth, just glance at it and let your subconscious do the rest.

At the end of the year, take a look at your vision board. How many of the items of on it have become reality?

Basting Your Quilt: Sprays and Pins

Basting Your Quilt: Sprays and Pins

Last week’s post was on batting, but as I freely admitted within that post, there’s more to finishing up a quilt than deciding on that detail. As the time approaches to dive into those final stages for this quilt, I’d say it’s a logical decision to explore those other topics.
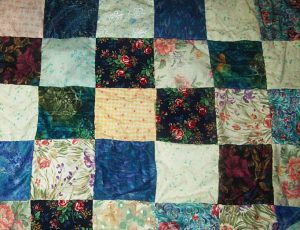
Basting Your Quilt: Sprays and Pins

This week’s subject of interest: basting.

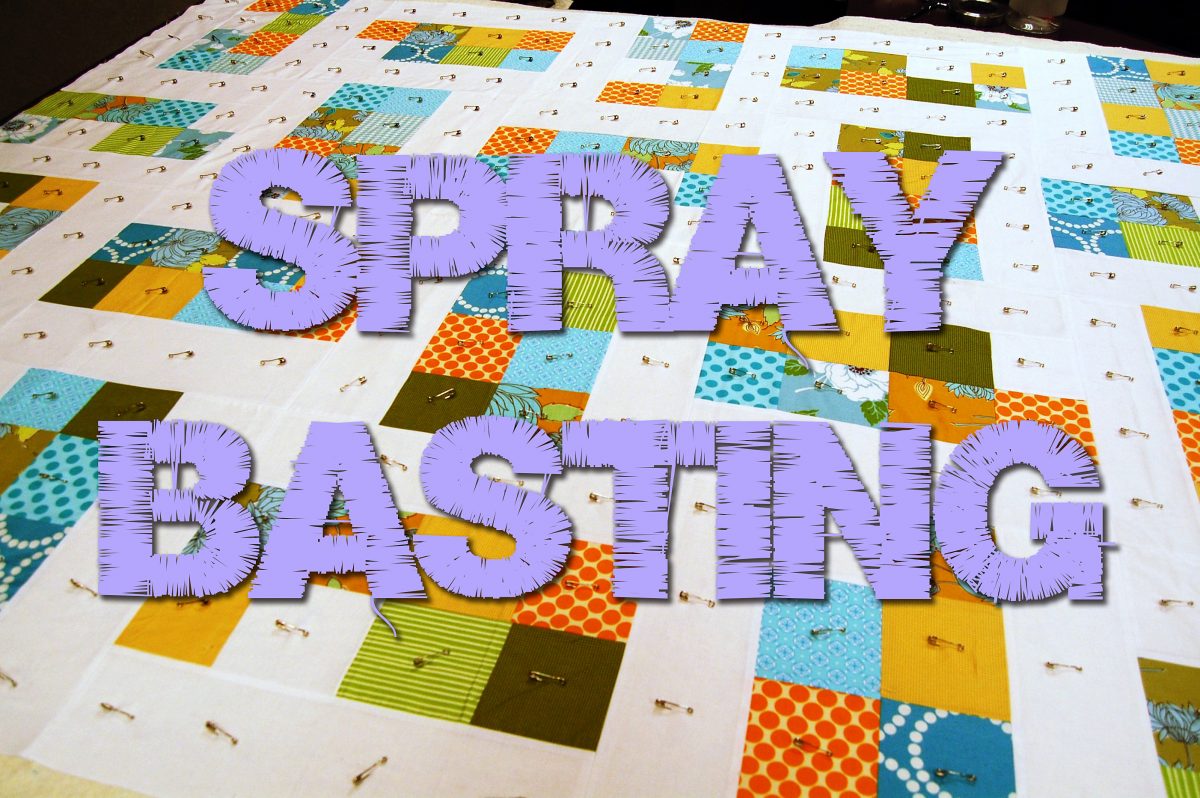
Coming off of the holidays, it might be easy to think of basting a turkey, but baking isn’t the only realm that has a form of basting! For quilting, this is the stage where you’re preparing to sew your quilt sandwich together. All of the layers are ready to be connected, and basting allows you to make sure those layers are level and even for sewing. You smooth them out, line them up, and do something to make sure they stay in line as you join the layers together through whatever method you choose.

It’s a simple idea, but there’s more than one way to keep those layers in line. For this particular post, two of those possibilities are the focus as I weigh the pros and cons of each to decide which option to use for my quilt. Those possibilities are straight pins and spray basting.

Straight pins:

I would think that straight pins would be the more recognizable and common of the two approaches. In fact, according to one source, straights pins (in some form) date all the way back to Ancient Egypt.
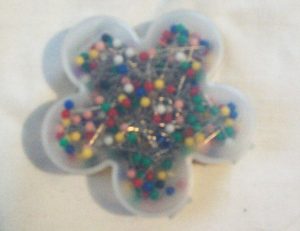
Straight pins are the more recognizable & common of the two approaches.

Straight pins are the more recognizable & common of the two approaches.

The benefits:

1) They’re financially friendly! You can pick up a pack of these for a small amount of money, which is wonderful for me since I am, like I’ve mentioned before, cheap.

2) They’re reusable! Unless you damage or lose the straight pin, you can pull it from the fabric when you no longer need it for a project, then you use it again and again for endeavors to come. So long as it’s in good shape, it doesn’t need to be replaced.

3) They’re common! Because of this trait, they’re easy to find at a store, meaning you might not have to go too far out of your way to pick up a set.

4) They’re easy to store! They’re small, after all, so you can keep them comfortably in your sewing kit.

Problems:

1) They’re easy to lose! I don’t know how many times I’ve spotted straight pins that have fallen around my sewing area when I’m finished working on a project for the day. Not only is this bad because losing them can lead to replacing them, but these pins are sharp! Losing them could equal pain if you accidentally find one in a not-good way!

2) They’re sharp! Yes, I stated this in the last detail, but it’s worth noting as its own issue. Just like your needle can cause pain if you let it slip, straight pins can do some finger-damage. Using a thimble might help, but I guess I’m a rebel since I don’t usually use one!

3) Quality varies! This is something I learned from my own experience. I have two different sizes of straight pins, and I’ve come to the conclusion that the tiny ones are lacking in comparison to the others. They potentially fall out more easily than the larger ones, which could leave extra spaces of fabric that are unpinned and straight pins that are lost in my workspace. Neither of those things are necessarily good!
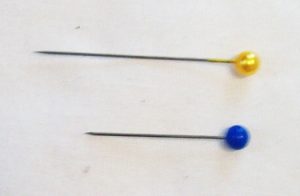
My two different sizes of straight pins.

My two different sizes of straight pins.

Spray Basting:

This is a method I haven’t tried, but I’ve done some research on it. I first became aware of it through a Craftsy.com class, and it intrigues/puzzles me. A spray that holds your quilt together? For some reason, that seems bizarre to me! Still, there are supporters for the spray basting method, so who am I to toss the possibility aside without considering it?
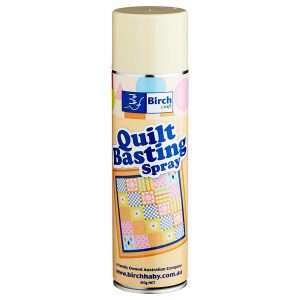
A spray that holds your quilt together.

A spray that holds your quilt together.

Benefits:

1) You won’t poke yourself with a straight pin! With how many times I’ve accidentally stabbed myself with a pin or needle, this is promising to me!

2) It’s less time consuming! You don’t have to go through the entire quilt to place pins all over it. You just have to even it out, spray sections at a time and smooth it back out. How easy is that?

3) The effect doesn’t seem to be permanent! Instead, it apparently washes out of your quilt, so its effects are temporary.
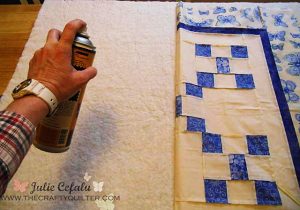
You just have to even it out, spray sections at a time and smooth it back out.

You just have to even it out, spray sections at a time and smooth it back out.

Problems:

1) It’s more expensive! A can of basting spray can cost more than a pack of straight pins. Remember how I’m cheap? Yeah…

2) It’s not reusable! Unlike pins, you can only use this product once. Sure, you might be able to space it out to use for more than one project, but once your can is empty, you have to replenish your supply (if you want to keep using this method).

3) It’s messy! As with any spray product, there’s no guarantee that you’ll never get said product on things surrounding what you intended to spray. For this reason, you might have to do some cleaning once you finish your basting.

4) It’s dangerous to your lungs! The fumes can be hazardous, so it’s recommended that you only use this method in a well-ventilated space — like outside.

For me, I’m torn between wanting to dive into the ease of spray basting, but I can’t see myself being okay with hauling my quilt outside to spray it down. Sure, I might be able to find a suitable place indoors. I might even decide that working outside isn’t a big deal. For now though, I think the fume concern is significant enough to keep me unintentionally jabbing myself with straight pins! That’s not to say the day won’t come when I leap into the world of spray basting. It’s just a current decision to keep things a bit more tried, true, and non-toxic!

How to See in the Dark

How to See in the Dark

During the course of my career, I’ve had the good fortune to work on quite a few large film productions with some highly recognizable actors and actresses. Film-making is exciting and tedious all at once, both exhilarating and debilitating. It’s not a life choice to venture into lightly – at least not if you require a steady, dependable job and paycheck.

You’ll never work again…

In movie making, and even more so in television, nothing is ever a sure thing. Shows get cancelled or pushed (postponed), people get let go for various, and sometimes odd, political (company) and personal reasons. I, personally, never believe a gig is going to happen until I’m actually there on the first day, filling out the inevitable novel of start paperwork you must complete at the commencement of every single job.

I’ve worked like this for twenty-five years now and I can say only two things for sure. One, explaining to people not in the business, be it your family, friends, or the bank you want a mortgage from, what you do and how you are hired, is never an easy thing. And two, that weird space you enter when you’re between jobs and the phone isn’t ringing and the little voice inside your head whispers you’ll never work again, never gets easier, not really. It doesn’t matter that history has always proven that you will indeed work again; you simply believe, irrationally, that this time is different.

At least that’s how it usually is for me. Yet, at the same time, I can’t imagine doing anything else. I can’t fathom going to the same office every day for thirty years or more and doing the same thing over and over. It’s just not how I’m made. So I take the uncertainty and the freelance roller coaster ride in exchange for getting to do something that, most days, I love.

If you’re thinking of a freelance career in film, television and the theatre, you need to be really honest about whether or not you’re able to live with a heightened amount of insecurity.

I fought, bit, screamed, clawed and scratched my way in. There was no way I was giving up.

Here are a few of the things that I’ve found invaluable and helpful in surviving the freelance life.

1. Tenacity

Be determined. Wholly and truly give it your all. Remain persistent. Things don’t necessarily come easily. I remember a conversation I had long ago with a friend and colleague. We were talking about ‘breaking in’ to the movie business and how we landed our first job on a major film.

“I fought, bit, screamed, clawed and scratched my way in,” my friend said, “There was no way I was giving up.”

2. Resilience

It’s easy to believe in yourself and your talents when other people do. The true feat, though, is to believe in yourself and your abilities when no one else seems to. There will be failures and missteps and things that you wished had turned out differently. That’s all part of the whole thing.

There will, of course, always be that odd, seemingly infinitely lucky individual, who coasts, completely upright, into a successful freelance career with out skinning even one knee. But that’s the exception.

Most of us arrive a bit battered and disheveled with grass stains on our knees and twigs in our hair.

3. Vision

As the extremely successful celebrity stylist (and all around nice guy), Derek Roche has said, Build your own dreams or someone will hire you to build theirs.

 4. Learn how to see in the dark

When the darkness comes (and it will) you have to be able to navigate your way out and through it…

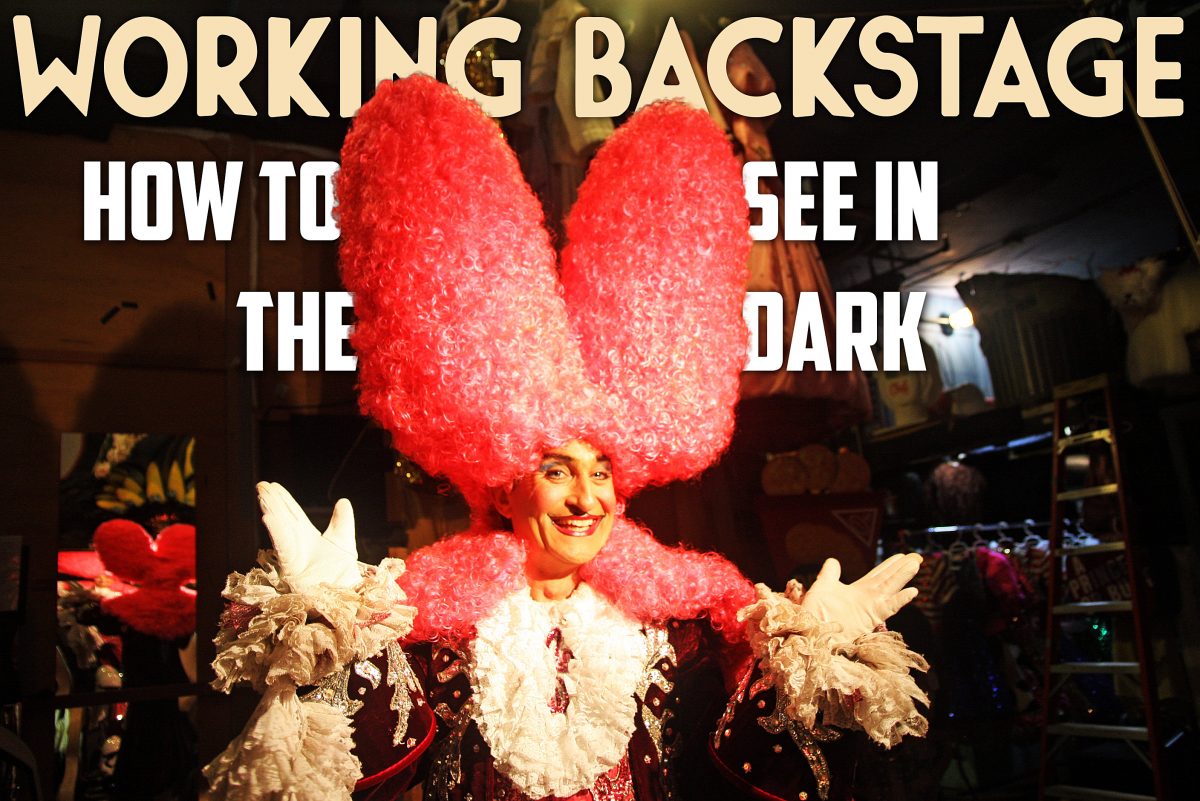
Some of my first theatre jobs were as a backstage dresser during live performances. This involved laundry and maintaining the costumes, as well as, helping the actors get dressed if needed (period things like corsets and garments with multiple back closures) and doing quick changes backstage in the dark.

Many backstage dressers use small bite lights to help them see while performing fast costume changes. I never really did. If you spend enough time in the wings in the dark, you eventually are able to see. I have no idea if this is a scientific fact; I only know that it was true for me. I have no problem finding zipper ends, or a slew of hooks or snaps in the dark.

Darkness, of course, can come in different forms – it can be literal like working backstage or it can be figurative like not being certain what your next move should be or being unable to see the path in front of you. When the darkness comes (and it will) you have to be able to navigate your way out and through it, you have to reach for that zipper and be able to insert one end into the other by feel.

Seeing in the dark is a tricky thing to master. It involves taking all your tenacity, resilience and vision at once and stepping forward, all the while trusting that the ground is indeed beneath your feet – just as it should be.