Cashmere Wall Art

Cashmere Wall Art

Blank Canvas

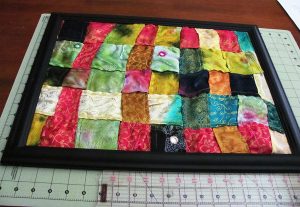
Cashmere wall art.

Cashmere wall art.

I really dislike drab walls. I’m always looking for cheap, out of the box ways to splash up my walls. I’ve never attempted any type of fabric wall hanging before, so I thought, “Throw caution to the wind and dress up that naked wall!”

I was given some really awesome cashmere materials in vibrant colors. Sadly, the pieces weren’t big enough to make a nice blouse or skirt out of. I’ve been searching for a great creative way to showcase this amazing material. This wall art turned out to be the perfect display piece.

**Tip: Wash all new materials prior to use to avoid shrinkage resulting from later washes.

**ProTip: Iron cut pieces before sewing and in between each step. This helps in the sewing process as well as setting the stitches to lessen unraveling with age. Often the end results tend to look more professional as well.

Level: Beginner

Time to Complete: 1 – 2 hours

Sewn By Machine: 1/4 in. straight stitch

Materials

  • 9 – 16″ W strips, varying lengths
  • 5 – 20″ L strips, varying widths
    • **I made 1″, 2″ and 3″ strips. I didn’t want a basic uniform checkerboard pattern and varying the strip size helped add some uniqueness to the finished design.
  • 1 – 14″ W x 18″ L Canvas Frame
  • 1 – 14″ W x 18″ L Cardboard for back of wall hanging

I measured an extra 1″ on all sides of the frame. I’d rather it be a little big than too small. It can be quickly cut down to fit the frame if too big.

Let’s Get Started

  1. Cut out strips and iron.
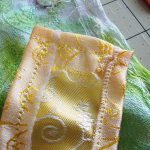
  2. Iron the 1/4″ seam on all four sides of the strips. Since this material is 100% cashmere, it doesn’t hold well when pinned, moved quite a lot during sewing. The pins were also falling out the second I moved my material to the sewing machine. I found ironing each seam on a wool heat setting helped secure the seam without using pins.

    Fabric strip seams.

    Fabric strip seams.

  3. Sew around all four sides of all fabric strips using the 1/4″ ironed seam.
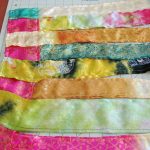
  4. Arrange the fabric strips in lines down and across. I arranged them, then put the frame over it to help visualize. It took me several times to find an arrangement I was happy with.
  5. Once you have the strips set up the way you want them, put them under and over each other to create a more defined checkerboard look.
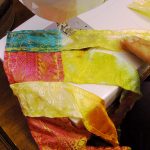
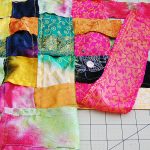
  6. Start sewing the fabric strips together. I pinned the various short strips to the first long strip. It took awhile to sew each individual strip onto the longer one but it paid off in the next step.
  7. Sew on the remaining long strips. Remember to keep the over/under pattern. This step went much easier. Since the smaller strips were already attached to the first and in order, all I had to do was sew around the 4 sides of the long strip. The smaller strips were all sewn on in one, quick easy step.

    Piecing together.

    Piecing together.

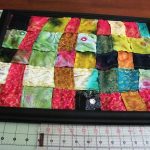
  8. Take the fabric piece to the frame. Place on the cardboard back piece. Cut the fabric on all sides about 1/4″ past the cardboard edge.

    Fit to the frame.

    Fit to the frame.

  9. Sew around the piece using the extra 1/4″ seam you just measured out.
  10. Attach fabric artwork to back of the cardboard. I used staples around the edges.
  11. Place into frame. I decided not to use the glass for the frame. I felt the way the fabric flowed without being pinned down by the glass really added some splashy appeal.
  12. Hang on your wall, plop into a chair, sip a cup of tea and enjoy the vibrant new addition to the room!

Stacey’s Stitches

Hi all! I’m Stacey Martinez 🙂
I love to design imaginative custom items for my active, crazy family. Bright colors and beautiful fabrics sing “Stacey, Stitch Me!” Let your imagination inspires you to breathe personality into every stitch!

Please feel free to comment with questions, suggestions, and pictures of your own creations. I can’t wait to see what you come up with!

Nature Tomorrow – NATURA DOMANI

Nature Tomorrow – NATURA DOMANI

I am so happy you stopped by. In my last post, “Nature Babe” I discussed finding different types of fabric to construct some little things for babies. Since then, I have been working on Bamboo Baby Wash Cloths as well as using Organic Cotton products.

I have been working on Bamboo Baby Wash Cloths as well as using Organic Cotton products

Bamboo. It’s Not Just Panda Food

I am always looking for ways I can trim things with lace or ribbon.

I am always looking for ways I can trim things with lace or ribbon.

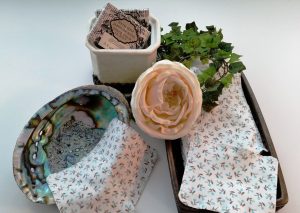
Can you see and feel the softness? It is tiny baby loop Bamboo. I edged it with an overcast stitch on my machine, so it gives the finished product a spa-quality look rather than serged edges. I prefer sewing a seam right sides together and reversing the fabric for larger articles, then I top-stitch for durability rather than using a serger. Plus, I am always looking for ways I can trim things with lace or ribbon. I should have lived in the Victorian era!

Research shows these products are becoming popular as there are many things that are being made in these environmental friendly fabrics. For instance, the softness of bamboo is exceptional for making burp cloths, diaper inserts, blankets, mattress covers and plush animals. Many companies that sell bamboo have great information on this fabric. According to the Bamboo Clothing website (a clothing line in the UK) there are many good points about using bamboo fabric.

Bamboo Fabric Facts:

  • Good for sensitive skin
  • Antibacterial – bacteria does not live well on the fabric
  • It acts as moisture wicking
  • It is 100% bio-degradable
  • Is the fastest growing plant and yield the same volume as cotton in only 10% of the land
  • Bamboo requires very little water or rain

Did you know bamboo is a species of the grass family?

And Now for Something Completely Different…

Tiny Towels.

Tiny Towels.

Next, I did something quite different. I used Organic Cotton knit and made what I call “Tiny Towels”. These itty-bitty towelettes are 5 x 4 inch wipes perfect for small messes. They could be used for washing baby faces, freshen up wipes or makeup application. I used a few myself and they are a wonderful change from shredding cotton balls or pads – and the great thing is these dry quickly!

Thinking of the Future

The reason I titled this blog post Nature Tomorrow is that while traveling in Italy and on a recent trip to Connecticut, I came to realize that there are just so many different ways to conserve our environment. Unfortunately, I just don’t think enough people are doing everything they can. Our beautiful green Earth is fill with so many beautiful forests, lakes and streams. So much waste and harmful chemicals drain into water from the production of products for our world. My only hope is that there will be Nature Tomorrow for our changing world. NATURA DOMANI… IN ITALIAN.

Back to Baby Basics

Diamond Soaker Thermal.

Diamond Soaker Thermal.

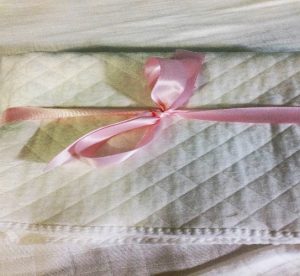
Next, I made a pad that provides extra protection for baby in the crib or just relaxing playing on the floor. It is made from Diamond Soaker Thermal. It is extremely soft as well and has three thin layers for warmth. It is made so that if water drops on it, it stays on top, however, pressure makes it absorb into the top – just not so much on the bottom. Its wicking quality is very good for under layers of clothing. The fabric is definitely water holding but not waterproof. Back in the day, I used a rubberized type of pad with a flannel top to keep the crib sheets and mattress from becoming wet. This is so much softer. I believe it would be good for diaper inserts as well, but I am not ready for a diaper business just yet. Baby steps to start!

I would love to hear your comments about bamboo and organic materials at the bottom of my blog. Ciao, Ciao!!

Picking the Perfect Sewing Notions

Picking the Perfect Sewing Notions

You’ve done it. You’ve got the pattern and the fabric to make a sewing project you’ll love. There’s just one more challenge remaining – picking the notions to compliment it. Whether it’s buttons, zippers, lacey bits or other accent pieces the right notions will give your finished project the final pop it needs to be truly special.

Zippers

It may seem like picking a zipper that matches your material, maybe even an invisible one is the best idea. And in many cases it may be. However, depending on the project and fabric, choosing a zipper that stands out can give your finished project some flair and style. If the fabric has a bright pattern, picking a zipper that matches one of the colors in the pattern can look really great when it’s done.

Buttons

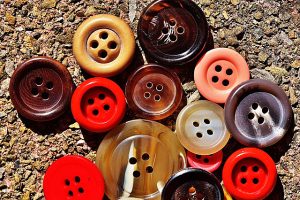
ButtonsButtons can seem like just an easy way to close a shirt or jacket, but they also impact the look of your completed project. A fabric with a simple pattern can sometimes benefits from fancy or flashy buttons while a fabric with a busy pattern may look better with simpler buttons.

Button size also matters. Bigger buttons will draw more attention than smaller ones. If you’re trying to bring focus away from something, say a floppy collar, using big buttons can help. On the other hand, if you want people to see your great shirt or jacket, using smaller buttons will ensure their eyes take in the entire piece.

Lacey Bits or Ribbons

Even if the pattern doesn’t call for them, lacey bits or ribbon strips can add interest to your project. Sometimes cutting apart a larger lace work for specific shapes works really well. You can use these smaller pieces to accent the points of a collar, cuffs of sleeves or pants or the hem of a skirt.

Ribbons can be used in short or long strips to add some color and interest. A long ribbon can go around the edge of a collar or cuffs. Longer ribbon strips also look great as an accent belt around waist lines or as accents on short or pant leg cuffs.

Smaller ribbon bits can be tacked on to the body of the project to create a pattern or letter. You can also use ribbons to create cute bows and strategically place them to add charm to your project.

Other Notions Notions (Ideas)

See what I did there? Haha. But seriously, there’s other cool notions ideas too. Beads or sequins strategically placed can add a bit of sparkle and glitz. Embroidery whether hand- or machine-done adds personalization. And, if you happen to also be a yarn worker, combing your knitting or crocheting skills with your sewing skills creates a totally unique piece. Instead of the fabric collar, you could knit or crochet one. Same with cuffs, waists and hems.

What other notion and accent ideas do you love to use on your projects?

A Few of My Favorite Things

A Few of My Favorite Things

I’m a bit of a dorky geek when it comes to sewing and pattern making (I’m actually probably a dorky geek when it comes to a lot of things). Here are a few of my favorite sewing related things.

The Double Needle

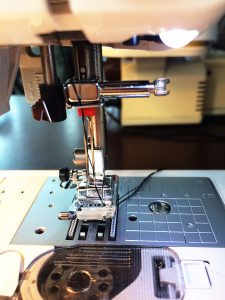
Twin needle in machine.

Twin needle in machine.

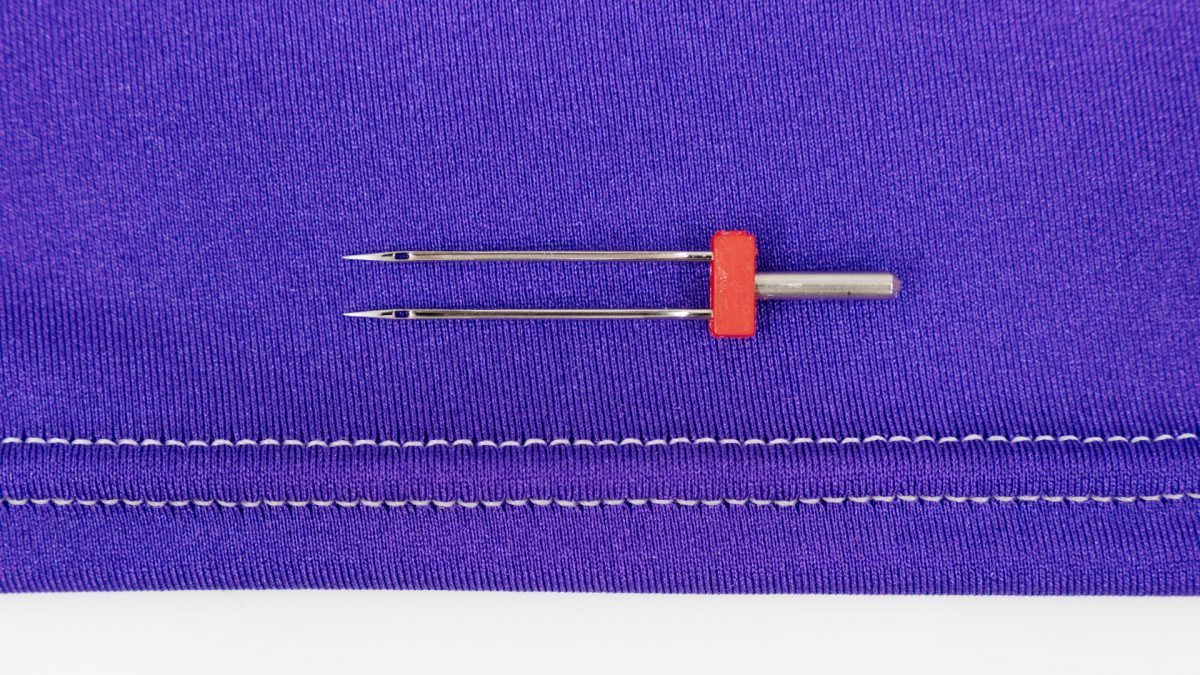
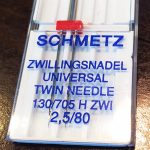
One of my favorite sewing related things is the Zwillings Nadel – or, if you prefer, the double needle. (Zwillings nadel is German for double needle.) A double needle is the perfect solution to hemming anything knit (or with any amount of stretch) if you don’t happen to own a machine that can do a cover stitch. I use them all the time to hem t-shirts, ribbed knit shirts, sweatshirts, sweaters, even jeans with an excessive amount of spandex.

Zwillings Nadel.

Zwillings Nadel.

Any domestic machine can use a double needle. How they work is with two top threads and one bottom thread. This creates a zig-zag in the bottom thread that allows for stretch. I often use a double needle and a stretch stitch at the same time. I find the stretch stitch produces a result with minimal puckering.

My trick for hemming most anything, but especially things that require a double needle, is to cut after I sew.

First, mark a nice clear line for your hem on the right side of your garment using wax or some kind of marking pen that will disappear when heat is applied. Press the hem along the line you have marked. Do not trim any excess away. Next, using a double needle, stitch up an inch from your pressed line, or whatever is your desired hem depth. Once you have sewn, trim the excess fabric away. Try to trim as close to your zig zag bobbin line as you can. The ziz zag will keep anything from raveling and fraying if that is a concern though many tightly knit fabrics won’t really fray (Sweaters and some loosely woven ribbed t-shirt knit will of course). I press the hem at this point as well to get rid of any puckering. If the hem is still a bit wavy, try spritzing with water and pressing dry with a press cloth.

Zwillings Nadels

come in varying widths, meaning the two needles can be further or closer together. I keep a variety of widths around. They are also sized like regular needles, 12/80, 14/90, etc.

Bias Tape Makers

Bias tape makers are one of the most brilliant inventions in ‘modern’ sewing. If you don’t own any, buy a set now. They are these cool little devices that you feed a strip of fabric into on one end and get a beautifully uniformly pressed bias tape out the other end. They come in varying sizes – ¼” ½” 3/8”, and on. I use bias to bind necklines and armholes. Pretty much every single slip we made on Boardwalk Empire has a bias bond neck and armhole.

Loop Turner

Ever tried to turn a very thin spaghetti strap? It can seem virtually impossible. Unless, you have this really cool thin metal rod with a hook on one end. Insert the loop turner all the way through your strap and hook the little crochet hook into the seam allowance at the very end of your strap. Then pull gently from the other side, turning the strap inside itself. Once you are able to pull the hook through the other end, you can hand turn the remaining part of the strap.

Wooden Dowel

A simple, 1/8” or ¼” round wooden dowel is very useful for pressing belts, straps, and ties that you are bagging out. Put the dowel inside your strap or tie before you have flipped it so you can press open your seam allowances from the wrong side. This will give you much nicer and crisper finished edge when you turn them right side out.

These simple, inexpensive tools will not only help you achieve cleaner more professional looking results, but will also (I think, anyway) make your sewing life a little easier.

Do you have a simple, favorite tool you think others would benefit from knowing about? Write about in the comments section.

What I Do at Work All Day (Part 2)

What I Do at Work All Day (Part 2)

(As promised) The Dart and Drop

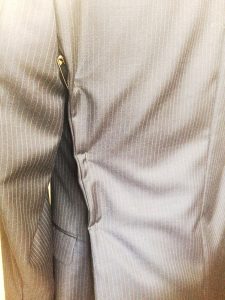
Pinned side back seam.

Pinned side back seam.

I do a lot of suit alterations. Sometimes I alter up to eight suits in a single day.

Often, suit jackets fit well in the shoulders but are a bit too roomy in the body. Because of the inner canvas and the inevitable front pocket, you can’t really successfully alter the front of a suit jacket. You need to take in at the center back or side back seams. While pinning, you’ll usually notice that you need to take in the side back seam all the way into the armseye.

This presents the conundrum of:

  1. Should I also take in the sleeve so it will still fit?
  2. Do I need to get into that seam at all?
  3. Do I really need to take the sleeve out?

The answers are no, yes and yes. Do not take in the sleeve. Do take the bottom part of the sleeve out.

Men’s suit jackets are traditionally cut without an actual side seam. The place where you really want/need to take a jacket in, though, is often in that invisible side seam. The way to accomplish this is by using the dart and drop method.

The Dart

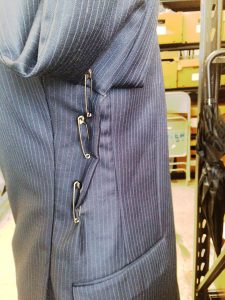
Dart pinned into side seam.

Dart pinned into side seam.

Take the lining out and the underarm sleeve apart from the side back seam to a few inches in the front of the side seam. There should be a notch in the jacket to indicate where the side seam would be if there were one. If no notch is present, lay the jacket flat on a table, buttoned up. Where the jacket naturally folds will indicate basically where that side seam is. Mark with chalk on the wrong side of the fabric in the coat body and in the sleeve.

Next, from the wrong side of the fabric, fold on the notch. At the top, measure in the amount you need to take in (as you determined by pinning your side back seam). Then draw a dart from that point down about 3 or 4 inches (or until you run into the top of the pocket). Sew the dart. You can put the same dart in the lining or you can simply do a tuck. Either is fine.

The Drop

The next step is to redraw your underarm seam. The armseye should remain the same size as it originally was. To do this, drop the underarm seam. I suspect there may be some actual formula for this but I’m more of an intuitive sewer. Dropping an inch is usually a good place to start. Use a curved ruler

to draw the new line making sure the connections are smooth. Pin your sleeve at your new side seam an inch below the original seam line. Then pin the rest. You might have to undo more of the original seam if the sleeve isn’t fitting. Do this in the back until you can easily fit the sleeve back in without any excessive easing.

Don’t Worry

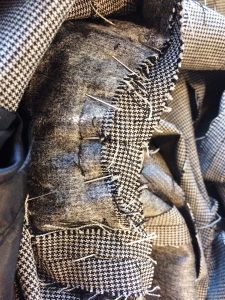
Pinned underarm seam.

Pinned underarm seam.

If you end up having to undo part of the shoulder pad and sleeve header, that’s fine. Just reattach them once you have put your sleeve back in.

You can apply the same principle to jackets (or really anything) that have side seams. Unless you want to narrow the sleeve, dropping the armseye is a more accurate way to accomplish this alteration.

At this point I also want to add a little something about the idea of ‘a right way’ to do something. I don’t believe there is only one right way to do things.

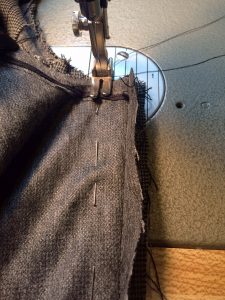
Sewing jacket with side seam.

Sewing jacket with side seam.

I ran the costume building shop for Boardwalk Empire for four years. It was a shop full of talented tailors from all sorts of backgrounds and places (Russia, Uzbekistan, Turkey, Tunisia & various U.S. states). We had a running joke about people who insist that their way of doing things is the only way (We even had a little song called, “There’s only one right way to do things. The other ways are wrong…”).

Walk Your Own Path

You need to figure out the way of doing things that works best for you while accomplishing the desired result. Sometimes someone can show you a whole new way of doing something that makes it easier for you. Sometimes not.

The tips and tricks I write about are the things I’ve learned work best for me over the years. Hopefully they will prove to be useful to someone else as well.

Missed Part 1? Check it out here!

Doggie Leggings Pillowcase

Doggie Leggings Pillowcase

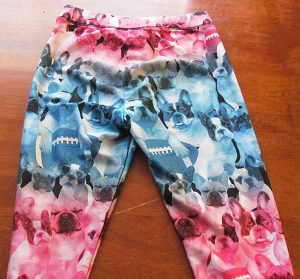
Awesome doggie leggings!

Awesome doggie leggings!

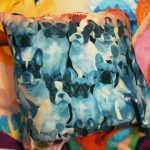
“Mom, my doggie leggings don’t fit anymore!! I love them, Mom, don’t throw them away!” To save these precious doggies for eternity, my daughter’s distress signal turned into the Doggie Leggings Pillowcase.

Leggings are a very popular fashion trend today. I’ve seen hundreds of unique, bright designs on websites, in stores, and worn by passers-by. I’ve admired many of the designs and agreed with my daughter that creating something with them would preserve their awesomeness 🙂

Fair warning, everything except the zipper was measured, cut, and sewn by my 7 yr old daughter. The pieces aren’t straight, the stitching is all off, the corners look funny. But that’s ok, it’s awesome the way it is because she made it. It turned out to be a great learning project for her. She’s super proud of it, and so am I.

Level: Beginner

Time to Complete: In An Evening

Sewn By Machine: 1/4 in. straight stitch

**Tip: Wash all new materials prior to use to avoid shrinkage when you wash it.

**ProTip: Iron cut pieces before sewing and in between each step. This helps in the sewing process as well as setting the stitches to lessen unraveling with age. Often, the end results tend to look more professional.

**All measurements based on a craft pillow I already had. Measurements should be adjusted to fit the size of the pillow you are working with. I typically add an extra 1/2″ to measurements when I do a zippered pillowcase to allow for the extra bulk of the pillow.

Materials:

1 – 13″ L x 13″ W  Leggings (side 2)

1 – 5″ L x 8″ W Leggings (side 1)

2 – 4″ L x 13″ W Pink/Purple Material (side 1)

2 – 6″ L x 3″ W Pink/Purple Material (side 1)

1 Zipper, Cut to Fit After Pillowcase is Finished – measuring for zipper after pillowcase is assembled helps ensure the zipper isn’t too short

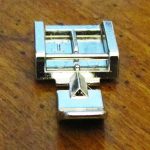
1 Zipper Foot – to use when sewing on zipper

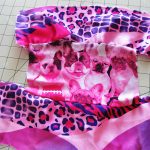
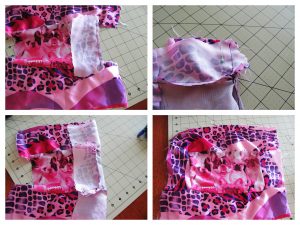
  1. Sew top strip to top of side 2 Leggings, right sides together. Repeat for bottom strip.

    Step 1

    Step 1

  2. Sew right side strip to right side 2 Leggings, right sides together.
  3. Sew top of side strip to bottom of top strip. Make sure corner with Legging is sewed shut.

    Attaching sides.

    Attaching sides.

  4. Sew bottom of side strip to top of bottom strip. Make sure corner with Legging is sewed shut.
  5. Repeat steps 2-4 for left side strip.

    Zipper foot.

    Zipper foot.

  6. Sew side 1 and side 2 right sides together on three sides only. Leave one side open for zipper.
  7. Trim corners. Turn right side out.
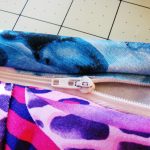
  8. Place open side of zipper on one open end of pillowcase and extend zipper to other end. Cut zipper about 3/8″ – 1/2″ past end of pillowcase. In this case, my zipper measured 12″. I usually buy longer zippers and keep several on hand so I can cut to fit for any project.
    Finished zipper.

    Finished zipper.

    Attaching the zipper.

    Attaching the zipper.

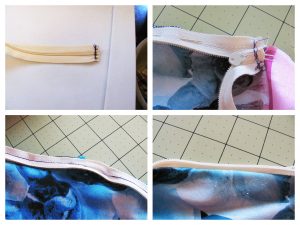
  9. Sew across zipper end several times to make sure the bottom of the zipper never unzips all the way.
  10. Switch to zipper foot on sewing machine.
  11. Unzip zipper.
  12. Place under side of zipper to right side of pillowcase, teeth side outside. Non-tooth side should be end to end with right side of pillowcase. Zipper will be upside down. Pin and sew.

    Naptime!

    Naptime!

  13. Do the same for the other side of the zipper. The placement will be the same, with the underside of zipper to right side of pillowcase, non-tooth side matching end of pillowcase.
  14. Stuff pillow inside the pillowcase, zip up, pop on the bed and take a nap!
Hi all! I’m Stacey Martinez 🙂
I love to design imaginative custom items for my active, crazy family. Bright colors and beautiful fabrics sing “Stacey, Stitch Me!” Let your imagination inspires you to breathe personality into every stitch!

Please leave comments, questions, helpful tips, or pictures of your pillowcase creations. I can’t wait to see what you come up with!

Sew Fine Dress Making

Sew Fine

Need the perfect dress for an upcoming special event? Instead of perusing rack after rack of unimaginative, pricey finery consider making it yourself. Not only will you get exactly what you’re looking for, it’s a sure thing that no one else will be wearing the same dress as you.

Points for Originality

Even if you’re not a someone who designs her own patterns, making and wearing your own dress will definitely get you noticed. You’ll look stunning and you’ll be wearing something completely unique. In this day and age when everyone wants to be recognized for their personality and individual contributions, you’ll certainly earn points for wearing something stunning that you made yourself.

Your Choice

Rather than trying to find something that shows off your style, fits your budget and looks great on you from the limited selections in department store – making a dress yourself means you’ll be able to choose the style, fit and fabric that’s best for you. Show off your natural beauty with a dress that accents your coloring and body type.

Works for Formal Functions Too

Formal events like galas or weddings may not seem like that best opportunity to make your own dress, but it’s actually a great time to do so. Making a more formal dress may take a bit longer, but the results will amaze everyone. If you’ve never taken on something like this, trust me, it’s not as hard as you think!

There are some extra steps like creating the tulle under layer(s), feeding the whale bone (plastic) bodice pieces and/or adding lace or other details. Although these seem intimidating, anyone with basic sewing skills can do them – you just have to be willing to try.

Show It Off

Show It OffAfter all the hard work you put in to making your amazing dress, show it off at the big event. Get up, dance, strut your stuff to and from the buffet table, and when people start complimenting you on your attire, don’t be afraid to say you made it. Although you don’t want to overshadow the guest of honor (unless it’s you, of course) there’s nothing wrong with showing off your finery.

If you can, add some handmade accessories to complete the look. Items like hand made, one-of-a-kind jewelry, scarves or shawls will give your dress the final splash and pizazz it needs. If you don’t make any of these items yourself, maybe you’ve got some crafty friends who do and would like to contribute to your amazing look.

Remember

A few points to remember:

  1. Hem with shoes in mind. If you’re wearing heals to the big event, make sure you have those shoes on when determining hem length so the dress will fall correctly.
  2. Event location. If the event is going to be indoors or outdoors, you may need incorporate layers or a cover up depending on the time of year and your sensitivity to cold/heat.
  3. Make a muslin first. If you’re at all unsure about the dress you’re going to make – how well it’ll fit or will look on you – take the time to make a muslin demo piece first. It does extend the length of time it takes you to arrive at the finished product, but it can also mean the difference between a project you love and one you don’t.

Project Rescue

Oh no! What a disaster!

Oh no! What a disaster!

Oh no! What a disaster! This whole project is ruined! Sound familiar? We’ve all had at least one project we think we’ve truly mangled. Thankfully, there are ways to save it. The best method to rescue your project depends on where the mistake occurred.

Cutting – Take Two

Did you misfold the fabric and now your cut pieces are all wrong? It may not be the giant disaster you think it is. If the fabric store has more of the fabric you’re using, it’s easy enough to get more and begin again. If not, you may be able to find it online or at another store. If that fails, treat this as an opportunity to find a new perfect fabric for your project (Don’t forget to exercise restraint, as we’ve looked at before).

Seams – Take Two

Did you missew a seam or several seams? If you can use your seam ripper to remove them and sew them again, this isn’t a big deal. However, if you’re not able to do that or did more damage to the fabric trying to pull out the seams, there are other options. If the item is too big, simply sew additional seams to make it smaller. On the other hand, if it’s too small you made need a more drastic solution.

Project – Take One and a Half

If your project is basically complete and you realize it’s too small, don’t worry! You may not have to redo the entire thing. Even if you’re not a tailor, it’s possible to alter your project to the larger size you intended. Best of all – you may not even need to buy more fabric to do it!

Remeasure

Figure out how much fabric your need to add to make the project fit and in which areas. For me, it’s usually the sides and/or bust area need an extra ½ inch or so (I blame patterns meant for smaller breasted women!).

No one, besides you, will ever know that it’s not exactly how it was planned to be.

Snip, Snip

Since you’re going to add more fabric, there’s no need to carefully rip out the seams. Instead, take your fabric scissors and carefully cut along the seams you need to alter, say the sides for example.

Add it up

Grab your left over fabric – the stuff that was destined to your stash pile. Making sure that it follows that pattern in your existing project, cut enough to add what you need to make your project fit, plus seam allowance on both sides.

Pinning and Sewing – Take Two

Pin the newly cut fabric additions to your project, right sides together and following the existing curves. If possible, try it on while it’s inside out to be sure it will fit better this time. Head over to your trusty sewing machine one more time and sew in the additional pieces. Viola! You’ve saved a project from the trash. No one, besides you, will ever know that it’s not exactly how it was planned to be. And what they don’t know, you don’t have to tell them, so wear it with pride.

What I Do At Work All Day (Part 2)

What I Do At Work All Day (Part 1)

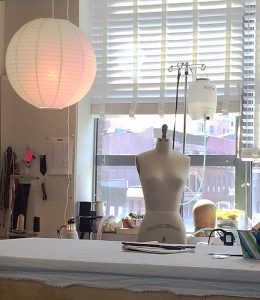
Just a view of my shop.

Just a view of my shop.

I’m currently the Key Tailor on a New York City based major network crime-procedural drama television show (Blindspot on NBC). I work mainly out of one of the Brooklyn studios with occasional on-set last minute fittings. Most of the work I do each day is for things that need to be ready for the actors to wear the next day on camera. What this means is that, over the years, I’ve become pretty fast at doing a variety of alterations (as well as patterning and constructing from thin air). In my industry, there are certainly a lot of excellent tailors but there aren’t all that many excellent and fast tailors. Here are a few of the tricks I’ve discovered along tQuhe way that help speed up some common alterations.

Shortening the Sleeves of a Men’s Suit Jacket (without fancy functioning buttonholes)

Topstitching on sleeve lining.

Topstitching on sleeve lining.

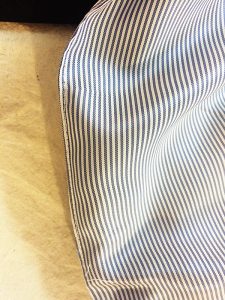
First, just go ahead and remove all the buttons. They’ll just be in your way. Turn the sleeve inside out and find the topstitching along the sleeve-lining seam. This is how the sleeve was originally put together. Open up that seam and turn your sleeve inside out. Take apart the mitered and straight corners but do not undo the lining from the rest of the hem. (Go ahead and release any stitching holding the actual hem up though.) Undo any fake buttonhole stitching that you need to. These should be on a chain stitch and easy to undo.

Press miter corner with point turner inside out.

Press miter corner with point turner inside out.

Measure up or down the distance you want to shorten or lengthen at your corners and redraw your miter line if you need it.

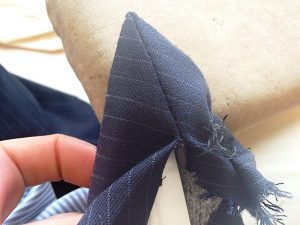
Re-stitch all corners at new hem marks. I flip everything back right side out at this time and press my corners and the new hemline. Use a handy point turner

Don’t undo original stitching at hem.

Don’t undo original stitching at hem.

and please don’t trim anything away from the mitered corner. If you press inside out first with the point turner inserted the fabric will go where it needs to. No need for trimming. One of the most annoying things is to go and alter a jacket sleeve only to find that someone has trimmed the miter corner, meaning I can’t lengthen the sleeve properly.

(Still don’t unattach the lining)

Redraw miter line.

Redraw miter line.

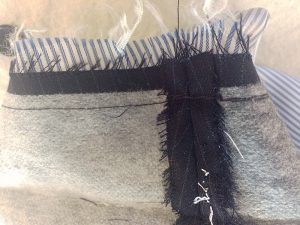
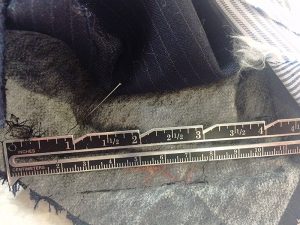
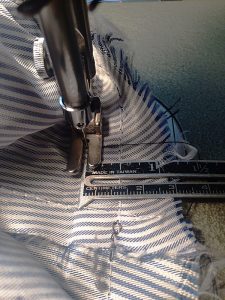
After pressing, turn inside out again. Then simply measure up or down (I use an old fashioned metal seam gauge) from the current stitching line the desired amount and sew along that line. If you are shortening, there is no need to undo the original stitching line. If you are lengthening, you will need to. Machine tack the seam allowances together at the seam to keep the hem up.

Sew new stitching line shortening hem.

Sew new stitching line shortening hem.

Turn everything back right side out and topstitch the seam of the sleeve lining closed, put your buttons back on and you’re done!

There are of course a few situations that will make this alteration a bit more challenging – such as functioning buttonholes or having to add fabric to the hem seam allowance because of lengthening. If I’m having a good day and nothing strange is going on inside the sleeve, I can usually do this alteration in 30 minutes.

Center Back or Side Back Alterations on a Suit Jacket

The time saving trick on this one is pretty simple. Open up the under vent seam and turn everything inside out through there. When done, just topstitch the vent closed again, no opening up the lining and sewing it back by hand.

Men’s Vest Alterations – Center Back or Side Seams

I’m a huge fan of bagging things out. Men’s vests are one of my favorite things because you can bag everything out through a mere 2 inches on one of the side seam linings. First, find the opening where the vest was bagged out originally, probably a small hand stitched couple inches on one of the inside side seams. If its not there (if the vest was bagged through the neck, make your own. Then pull the entire vest inside out through those two inches. It will fit.

Vest side seams are most usually put together with one stitching line through all 4 layers (fronts and backs with linings). On the side without the opening just stitch a new line taking in (or out, though most commercial vests don’t have a lot of seam allowance to let out) the desired amount. If the amount is significant, you may need to re-stitch the arms eye curve so that everything lines up properly under the arm.

If you need to take in the center back seams, undo at the neck and bottom hem, alter as desired, the re-sew what you released.

On the side with the opening, stitch in two sections, above and below the opening. In the 2 inch gap, sew through all layers except the back inside lining.

Pull everything back through your opening, press and voila!

I just topstitch my opening from the right side of the vest, hiding the stitches in the seam line.

Check out Part 2 here!

My next post will tell you about the one of the sneakier men’s suit alteration tricks – the old dart and drop! So keep a look out for the follow up and as always – keep sewing!

DIY - Keyboard Kozy

DIY – Keyboard Kozy

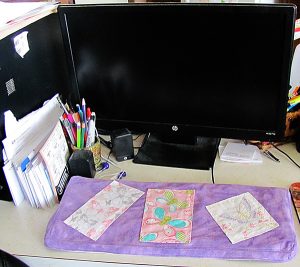
Ick, dust! I abhor dusty, dirty keyboards at work and at home. Those keyboard sprayers to get in between keys just aren’t enough for me. Time to make a cover to protect the keyboard while adding some flair to the office space!

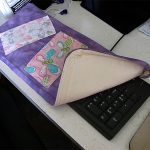
Keyboard Kozy

Keyboard Kozy

I love projects like this. I can create something useful while adding some personality to my space. I’m adding butterflies from different fabric I picked up here and there. I try to buy a quarter or half yard of the popular designs of the moment. Doing so helps add all sorts of different designs to my collection so I’m more likely to have what I want or need on hand. I have a decent collection of butterflies and have been waiting for the perfect project to showcase them.

Level: Beginner

Time to Complete: 1 hour

Sewn By Machine: 1/4 in. straight stitch

***Washing and ironing materials before sewing is extremely important!! Measurements are based on material already washed. If they aren’t washed before sewing, they may shrink by an inch or more when washed later on, resulting in being too small.

Materials:

  • 1 – 19″ L x 7 1/2″ W Material for top of keyboard
  • 1 – 19 ” L x 7 1/2″ W Underside material
  • 2 – 19″ L x 1 1/2″ W Material for long sides
  • 2 – 19″ L x 1 1/2″ W Underside material
  • 2 – 6 1/2″ L x 1 1/2″ W Material for short sides
  • 2 – 6 1/2″ L x 1 1/2″ W Underside material

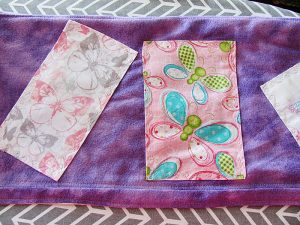
Any material to be used as accents on the keyboard cover – I used 3 rectangular butterflies.
I used two layers, the cover and then absorbent material for the underside of the cover. In my house spills are everyday events. I’ve learned to dual layer so spills are soaked up and less likely to damage anything. The keyboard cover can also be made with just one layer leaving off the underside backing. It’s totally up to the needs of your home or office space.

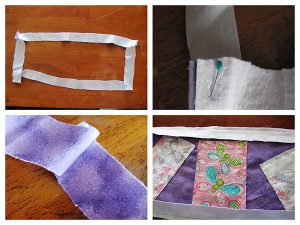
One Step Hem and Attach

One Step Hem and Attach

  1. Wash and iron all material.
  2. Measure and cut material.
  3. Sew accent pieces on cover top. I did not hem them beforehand. Instead, I hemmed and attached in one step.
  4. One Step Hem and Attach (see image)
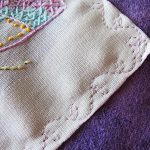
  5. I used a petal decorative stitch when attaching my accents to add a bit of flare.

    Petal Stitch

    Petal Stitch

  6. Petal Stitch (see image)
  7. Sew side pieces together at ends, right sides together. (It is possible to sew each side to the cover top individually, but I found this much quicker and easier.

    Attachment of sides

    Attachment of sides

  8. Attachment of sides (see image)
  9. Iron seams open, making attachment to cover easier.
  10. Pin and sew side rectangle to cover.
  11. Turn right side out and iron seams open.
  12. For the inside layer, repeat all above steps.
  13. Pin and sew outside cover and inside layer, right sides together. Make sure to leave a 2″ – 3″ opening to pull material right side out.

    Top Stitching

    Top Stitching

  14. Pull material right side out.
  15. Top stitch around outside of cover top, using 1/8″ edge.

    Finished Keyboard Kozy

    Finished Keyboard Kozy

  16. Top stitch around entire outside of cover, using 1/8″. Make sure to sew closed the opening left to pull material right side out.
  17. Top Stitching (see image)
  18. Place on keyboard and enjoy!
  19. Finished Keyboard Kozy (see image)

Stacey's StitchesStacey’s Stitches
Hi all! I’m Stacey Martinez 🙂
I love to design imaginative custom items for my active, crazy family. Bright
colors and beautiful fabrics sing “Stacey, Stitch Me!”
Let your imagination inspire you to breathe personality into every stitch!

**Please feel free to leave comments, questions, suggestions and pictures of your creations. I can’t wait to see what you come up with!