Finding the Fabrics

Finding the Fabrics

Sometimes, little decisions can make big impacts. Details that are minute and all but brushed aside as secondary could really have an effect on a life. Or in this case, a project! I’ve said before on this very blog that quilting is not baking, and it’s true! While I can guesstimate with my baking ingredients, specifics can be a serious deal when partaking in a sewing-related hobby. I’ve already covered that general topic, but for this blog post, I’d like to funnel that idea to one particular concept. That detail is picking out your fabrics for a project that requires more than one design of material.

In the world of sewing, matching isn’t the goal. Complementing is.

Now, I’m not saying that people don’t take this consideration seriously. I’m saying that in a world where you can find all kinds of free patterns online for sewing projects, this step is worth considering just as much as finding that right pattern, and that maybe there’s less help in regards to learning how to select a fabric set than—for instance— learning how to operate your sewing machine. After all, your fabric might not come with instructions or a series of recommendations for other fabrics to blend together into one project!

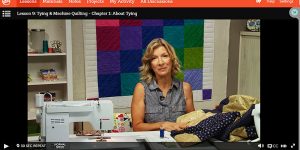
Gail Kesser helps you pick our your fabrics in her Craftsy series.

Gail Kesser helps you pick our your fabrics in her Craftsy series.

Luckily though, you don’t have to be completely alone in the matter! There are certain options for help—like asking friends, particularly ones who are involved with sewing. Likewise, you can find assistance online. Some of the best advice I’ve gotten in regards to picking out quilting fabrics came from a free class on Craftsy.com. The class was called “Piece, Patch, Quilt: Basic Quiltmaking Skills,” and in it, Gail Kesser—the instructor—has an entire section based on fabric selections called “Choosing Your Fabrics.”

In that lesson, Kesser advises the virtual student to choose a “mommy fabric” (Kesser, n.d., Lesson #3), then “walk it around the store” (Kesser, n.d., Lesson #3) to find fabrics that work well with the initial choice. Honestly, I don’t know that there’s better advice when it comes to putting together an entire quilt—or any other project with multiple types of fabric—but I’d like to expand on the overall idea just a bit. Maybe someone reading this post can look at the mentioned video for help, and possibly get a pointer or two from me as well 🙂

So, here are some thoughts to chew on!

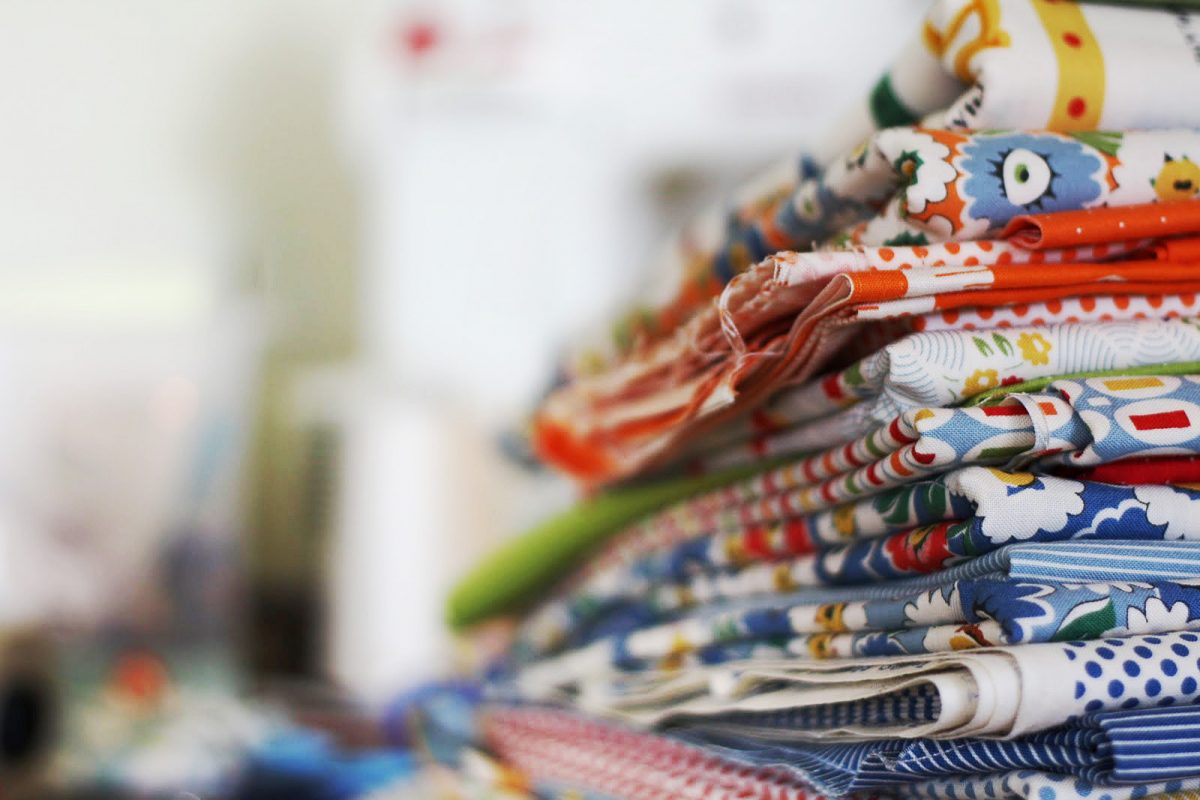
Picking out a series of fabrics to use in one cohesive work isn’t about making sure they match in the traditional sense. The situation isn’t like you’re planning an outfit to wear. When deciding on your clothes for the day, you might consider a list of details to make sure everything works together because the result is supposed to match. In the world of sewing, matching isn’t the goal. Complementing is. That idea of complementing can come in the form of sticking with similar colors, or even embracing an overall theme your pieces all agree with, so to speak. As long as it’s a unified idea or connected imagery throughout, you’re good to go!

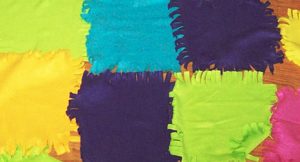
The quilting-for-kids project my niece got for her birthday.

The quilting-for-kids project my niece got for her birthday.

Don’t believe me? Even the people who created this quilting-for-kids project my niece got for her birthday knew that sometimes it isn’t about matching. This design is about complementing, or holding on to one specific theme—like the collection of different colors that my niece can put together!

This concept might seem unimportant, but it isn’t since the distinction is so clear. Think of it this way. If you were picking out an outfit for a typical day, you might not go with a floral pattern top and a polka dot bottom, even if both of them are pink. Why? Because while pink might match pink, the designs don’t match. That disconnect isn’t necessarily okay when putting together an outfit, but when sewing? All you need to do is check out a set of pre-cut shapes to find evidence that the same guidelines don’t apply to the hobby of sewing. All in all, it doesn’t matter if your fabrics match like your outfit would. They can vary in design, and even color, so long as they complement one another in some way.

And that aspect of the situation, my friends, leaves a whole lot of room for exploration and gives you plenty of room to make a design that’s all your own. To be truthful, that detail might be one of my favorite things about quilting and sewing. Whatever I come up with, it’s my design, I made it myself, and no one else likely has one like it. That feeling… That’s an okay thing!
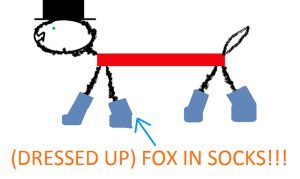
This image is based off of Dr. Seuss’s Fox in Socks, but I didn’t stop with socks! This fox is my “(Dressed Up) Fox in Socks” that was made by taking a general idea, and putting a hat and red attire on him.

This image is based off of Dr. Seuss’s Fox in Socks, but I didn’t stop with socks! This fox is my “(Dressed Up) Fox in Socks” that was made by taking a general idea, and putting a hat and red attire on him.

Anyway, a sewer or a quilter should really take charge in this detail, and maybe push it to unique, individual places. As an example, consider the work of art I created on the Paint program that came with my computer. This image is based off of Dr. Seuss’s Fox in Socks, but I didn’t stop with socks! This fox is my “(Dressed Up) Fox in Socks” that was made by taking a general idea, and putting a hat and red attire on him. It started off simple—just socks from the story—and imagination took it further. Disclaimer: I’m not saying this Paint project is actually impressive—just that it shows how a theme can grow with some thought and creativity!

That’s the kind of pushing I’m referring to when picking out fabrics. Consider what you’re going for, find that beginning fabric, and think outside of the box enough to choose those complementary fabrics to create a breathtaking piece of art. Don’t stay with the easy options all the time! Push yourself, because sometimes the unexpected and the outside-of-the-box things can be a whole lot of fun!

This post might be more centered around quilting, but it could be applied to different areas of sewing (or crocheting, or knitting…) that involve material. A purse that’s going to have more than one fabric, for example, could be planned out with the same guidelines. Any time you’re blending fabrics together, think it through to come up with a cohesive, beautiful work. Complement those designs and colors, or stick to a theme from start to finish. Either way, your work would come out cohesive with your final product being a one-of-a-kind gem that’s beautiful and looks just as put together as a well-planned outfit—just with different rules!

Reference:
Kesser, G. (n.d.) “Piece, Patch, Quilt: Basic Quiltmaking Skills.” Craftsy.com. Retrieved from www.craftsy.com/project/course/piece-patch-quilt-quiltmaking-skills/369
How to Store Your Fabric Stash

How to Store Your Fabric Stash

This is post one of a three part series on storing your fabric. Post two (how to store your works in progress) and post three (how to store your fabric scraps) are coming soon.

This is post one of a three part series on storing your fabric. Post two (how to store your works in progress) and post three (how to store your fabric scraps) are coming soon.

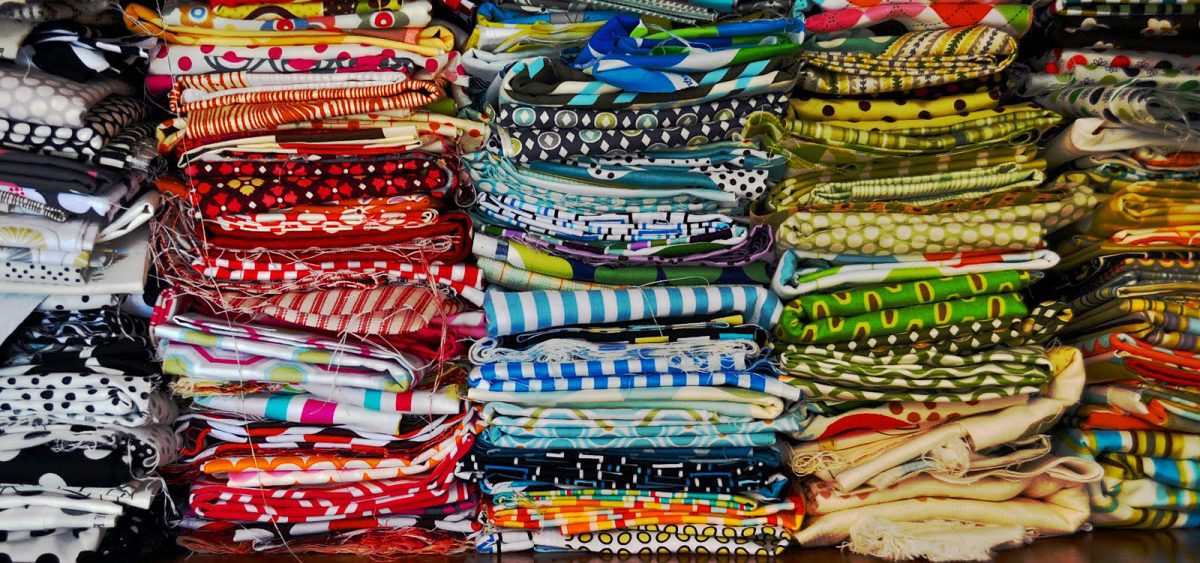
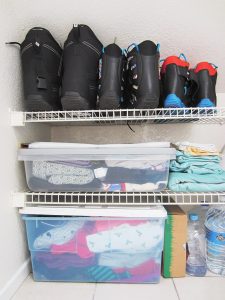
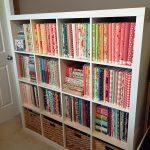
I keep my deep-storage and heirloom fabrics stored in a bin. Fabrics I'll use soon are simply folded neatly awaiting their use.

I keep my deep-storage and heirloom fabrics stored in a bin. Fabrics I’ll use soon are simply folded neatly awaiting their use.

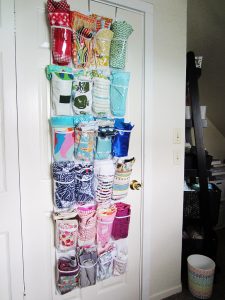
How do you store your fabric stash? I have seen some of the most creative ways while perusing through Pinterest, everything from tucked in the drawers of a dresser, folded neatly on the top of a bunk bed, or deftly displayed in KITCHEN, yes kitchen, cabinets. Who needs to eat when you have beautiful fabric to sustain your soul anyway?

No matter which way you decide to organize your fabric, you will need to keep several things in mind.

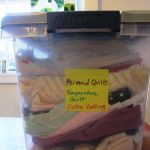
My works in progress are kept in a tall bin and labeled so I know where to easily find them.

My works in progress are kept in a tall bin and labeled so I know where to easily find them.

Store Covered

  1. If you decide to store your fabric in bins, consider using plastic instead of paper, or file boxes, or baskets. Keeping your fabric covered will better protect it but consider using a plastic container with tiny holes (or creating tiny holes) to allow the fabric to breathe and to prevent synthetics from yellowing.
  2. Tape a cedar block inside the container to help prevent moths and other insects from taking up residence.
  3. Store away from sunlight to prevent fabric from fading.

    My lovely stash. I do take the time to dust off the fabric about twice a month.

    My lovely stash. I do take the time to dust off the fabric about twice a month.

Display It

  1. I love the quick access that openly displayed fabric offers. However make sure to keep fabric away from direct sunlight.
  2. Dust! Your fabric will accumulate dust if displayed or left in the open. Keep it tidy with a frequent dusting or airing out.
  3. Keep it clean – little children love to touch and play with fabric and even some adults can’t help but reach up and touch gorgeous fabric. Be aware of where you display your fabric and how frequently it may be handled by people whose fingers could leave it soiled.
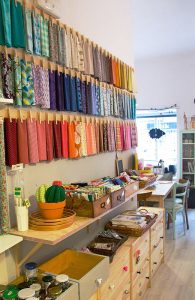
Fabric on display via MuyMolon.com.

Fabric on display via MuyMolon.com.

Additional Methods

  1. Color coded – perhaps the most method of organizing is a stash is by color. This is how I do it!
  2. By Designer or Project – some people also keep their stashes stored by Designer or even projects in progress.
  3. By Size – big, medium, little, tiny. Sometimes storing or displaying by size is also helpful.

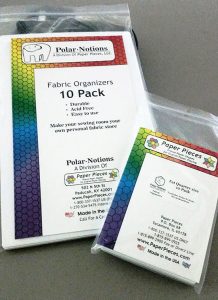
    Fabric organized and wrapped around Polar Notion's organizers.

    Fabric organized and wrapped around Polar Notion’s organizers.

Standout Idea: Acid-Free Fabric Organizers

I just discovered these puppies and as soon as we move to our new home and I start working on my sewing room, I plan on ordering some to start wrapping and displaying my stash. Unlike fabric-store pieces of cardboard, these organizers are sturdy and acid-free. Storing fabric wrapped around cardboard will eventually discolor your fabric since cardboard is not acid-free.

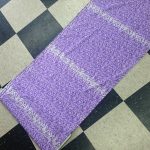
The sad result of what happens when you use regular cardboard to organize your fabric.

The sad result of what happens when you use regular cardboard to organize your fabric.

I’ve found two brands that offer this acid-free option. Polar Notion’s boards are made from plastic and The Fabric Organizer’s boards are made from an acid-free corrugated cardboard. Both look fantastic.

Think about which product would suit your needs and your stash better.

Think about which product would suit your needs and your stash better.

The larger Polar Notion holds up to 15 yards of wrapped fabric and the smaller one is perfect for fat quarters and smaller pieces of fabric.  The Fabric Organizer’s large size holds up to 10 yards. It is also cheaper than Polar Notions. Think about which product would suit your needs and your stash better.

Do you have a favorite method of storing your fabric? Let us know how you do it in the comments below.

Charlotte Kaufman is a writer and sewist in San Diego, California. She specializes in marine and home interiors and continues to fall more and more in love with quilting. You can follow her at charlottekaufman.com.

How Many Sewing Machines Do you Need?

How Many Sewing Machines Do you Need?

As a professional tailor and pattern maker in the film and television industry for about 25 years, I’m always on the lookout for a something that can make my job easier and more efficient.

As a professional tailor and pattern maker in the film and television industry for about 25 years, I’m always on the lookout for a something that can make my job easier and more efficient.

A subjective question, perhaps. In the cycling world, of which I am part, the number of bicycles is defined as x + 1 where x = the number of bikes you currently own. I suppose the same formula could be applied to sewing machine ownership. I’m continually fascinated by the scope and design of new machines and confess that, if I could, I would adopt one of virtually every machine I see.

As a professional tailor and pattern maker in the film and television industry for about 25 years, I’m always on the lookout for a something that can make my job easier and more efficient. I, as I suspect most tailors do, have a small collection of machines that I consider my “go-to’s”, that I can’t imagine doing my job without.

1. Juki High Speed Single Needle Straight Lockstitch Industrial Sewing Machine

I have an old model of this machine, the DDL-555-4. The beauty of this machine is that it only does one thing: sew in a straight line. And it does it exceptionally well. Even my old model is smoother and more sensitive than many domestic machines. Five layers of denim or a single layer of chiffon emerge from the presser foot with no complaint and straight, even, stitches. I rarely even have to adjust the tension. And the Juki is fast. The newer models have a speed adjustment on the motors so if you want to start out a little slower you can.


Check out the current models, the DDL-8700 and the DDL-5550N and go test drive one if you can. I think you’ll be able to tell right away that it’s a machine that will quickly pay for itself.

2. Brother lightweight Portable Machine

My SC9500, which is similar to the CS-5055, is the most incredible inexpensive machine I’ve come across in my twenty some years of sewing. Not only is it lightweight enough to put in a tote bag and carry on your shoulder but it also sews like a champ. I use it most often for its pre programmed buttonholes and stretch stitching. In my experience, a lot of domestic machines produce less than ideal buttonholes. The Brother never falters: each buttonhole is perfect and akin in quality to those in manufactured clothing (where they use a machine that does nothing but buttonholes).

3. Bernina

Everyone I know in the film business owns at least one Bernina.


Everyone I know in the film business owns at least one Bernina. For many, their Bernina is their prime machine, the one they use most often. I’ve yet to find a model, or hear of one, that doesn’t work well. I have an old mechanical model, which is still made in the form of a 1008. The advantages of a mechanical sewing machine lie in its durability and ease of use. I keep my old school Bernina mechanical on the wardrobe truck of whatever show I’m currently working on. I’ve had the same one for twenty years and its never ever failed me – despite years of being knocked around and asked to do impossible things like sewing through three layers of glued leather in an inordinate short amount of time.

4. Reliable Blind Hem Machine

A good blind hemmer that doesn’t snag or pull and is easily adjusted for varying fabric weights is essential to my tailoring work. The Reliable is just that, reliable. The setup is easy and the machine, though technically not a portable, does pack up nicely and can be transported to a work site.

5. Serger

There are so very many sergers to choose from. The first question to answer when choosing which one to buy is: what you will mainly be using the machine for? Do you need something to efficiently finish seams? Or will you be sewing entire garments with it? Do you want a machine that also does a cover stitch?

The automatic rolled hem feature is game changing.

My favorite is the Juki Garnet Line MO-623 1 needle 2/3 thread Serger. The machine is dependable, smooth, easy to thread, and fast. The automatic rolled hem feature is game changing. As opposed to many machines where you need to change the presser foot, with the Juki, you manipulate the fabric with built in fingertip control.

Methods to Conquer Half-Square Triangles (HSTs)

Methods to Conquer Half-Square Triangles (HSTs)

If you plan on diving into the world of quilting, you will soon run head first into half-square triangles, or HSTs in common quilting parlance.

These deceptively simple looking squares can be arranged innumerable ways to make an unending canvas of lovely. When you decide to tackle HSTs you are going to need figure out the best method for you. The most important thing to understand about HSTs is the math behind the size you want. This post does not cover that math. There are many, many charts available online to help you figure out what size triangles & squares to cut and sew in order to get the finished size you want.

Once you know your math, you’ll need to figure out your method. Here are a few to consider:

1. Tried and true

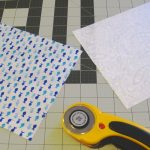
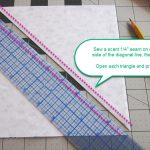
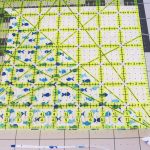
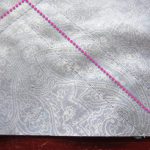
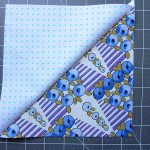
The most basic way for creating a HST is taking two squares of fabric, placing them right-sides-together (RST), drawing a line down the diagonal, and then sewing a scant ¼” on either side of the link. Cut the fabric along the center diagonal line, open and press.

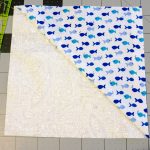
Square that puppy up and before you know it…

…voilà, lovely HSTs, just for you.

Works best: when you need to only do a few HSTs or when each HST you need to do is unique.

2. Make the Magic 8

When I sewed these together both squares were evenly on top of each other.

When I sewed these together both squares were evenly on top of each other.

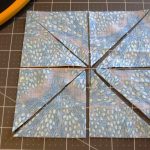
As soon as you see the visual on this you’ll get why they call it magic. Take two large squares, right sides together and draw lines down each diagonal. Sew a scant ¼” on both sides of each line for a total of 4 seams.

Start by cutting first along the two diagonal lines.

Start by cutting first along the two diagonal lines.

(For this tutorial I placed the two squares off center to show you the two fabrics. When I sewed these together both squares were evenly on top of each other.)

Carefully start cutting. Start by cutting first along the two diagonal lines.

Next cut down the center line of each side of the square.

Next cut down the center line of each side of the square.

Next cut down the center line of each side of the square. This will give you your magic 8!

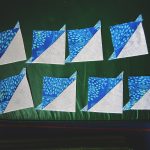
8 lovely matching HSTs

8 lovely matching HSTs

You’ll need to open, press, and square them up, but in no time flat you’ll have 8 lovely matching HSTs.

Works best: when you need more than a few. Some people can really churn out a lot of HSTs this way. If you have a bunch you need to make with the same fabrics, try this method.

3. Tube Method (Tube Quilting)

Use your ruler to cut out the size triangle you need.

Use your ruler to cut out the size triangle you need.

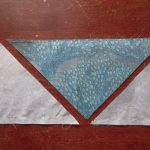
Sew two long strips together on the top and bottom edges. Then use your ruler to cut out the size triangle you need. Here I’ve shown you the tube I sewed and the triangles I cut (I flipped the top triangles over to show you the contrasting fabric).

Works best: when you need multiples of the same type of HST, this method is a production machine!
Note: it really helps to have the exact sized ruler you’ll need for cutting out the triangles.

4. Sewn Strips (Bias Strips)

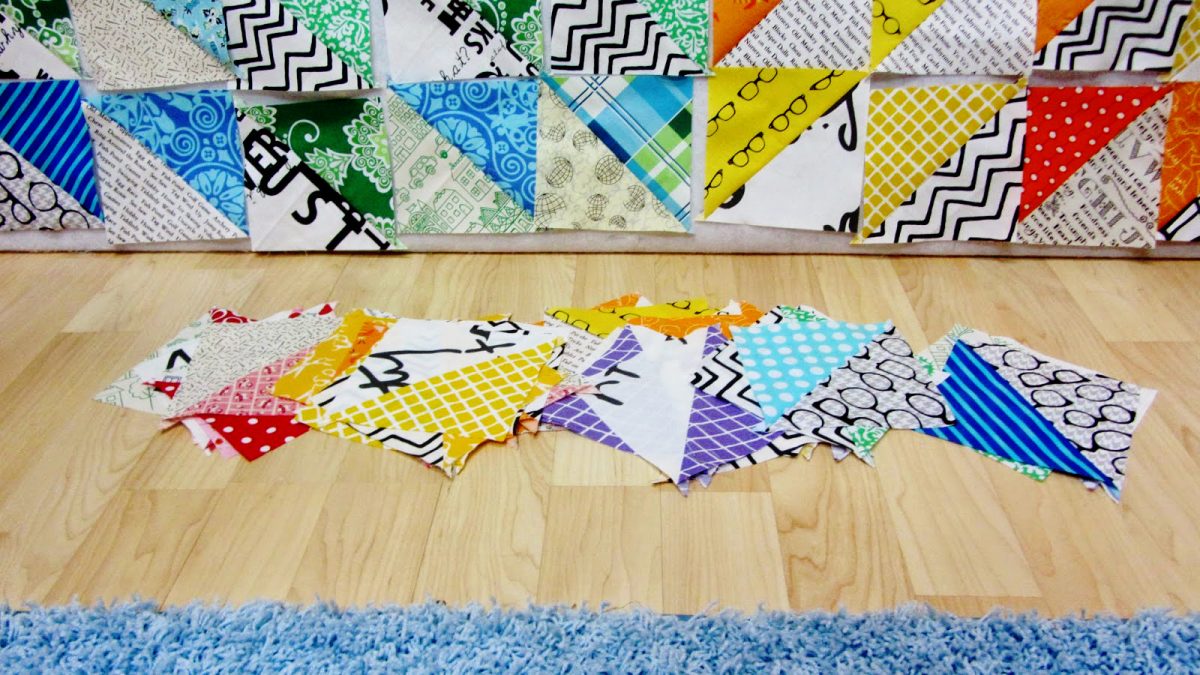
Create a massive amount of HSTs in a short time!

Create a massive amount of HSTs in a short time!

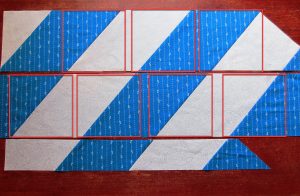
I found this the most challenging of all the techniques I’ve tried, but I’ve never been pro at cutting on the bias. There is incredible potential here, however, to create a massive amount of HSTs in a short time so I’m keeping this method tucked away for the next time I want to attempt it.

The concept is simple: take two large pieces of fabric and place them RST. Cut the fabric into bias strips (in the correct size you’ll need) and then sew the alternating colors together to create two pieces of fabric with bias strips in the colors you need.

If you did your math right, you can then cut strips of fabric that will have the HSTs already sewn together. As you can see above, I completely botched the math on this, but you live and you learn and like I said, POTENTIAL. This method has so much potential if I can just get right next time.

Works Best: when you need to make HSTs on a massive scale.
Note: take your time to get the measurements just right. If not, you’ll have a whole lot of messed up fabric on your hands. Additionally, there is fabric waste as you cut out the squares. Make sure to account for that when you buy the amount you may need.

Sew the Square

Sew the Square

5. Jenny Doan Method (Sew the Square)

I’m not sure if this method has an official name but I know it has become popularized by Jenny Doan of the Missouri Quilt Company. I consider this a cousin to the Magic 8 method. Perhaps we could even call it the Magic 4.

The Magic 4!

The Magic 4!

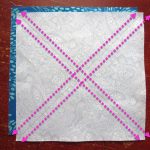
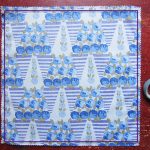
Take two pieces of fabric RST and sew a scant ¼” hem all the way around.

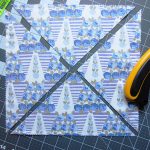
Carefully cut down the diagonals of the square and you’ll get four perfect HSTs.

You get four perfect HSTs.

You get four perfect HSTs.

Works best: this is a quick and easy method that could be easily mass produced especially when using pre-cuts.
Note: some don’t like this method means you are working on the bias. I haven’t found this to be a problem. Press carefully when you iron sew your HSTs together, without unnecessary stress or tugging, and you’ll be fine.

I hope you’ve found these methods useful. How about you? Do you use one of these methods already or do you have a different technique you prefer? Let us know in the comments!

Charlotte Kaufman is a writer and sewist in San Diego, California. She specializes in marine and home interiors and continues to fall more and more in love with quilting. You can follow her at charlottekaufman.com
Sharpen Your Scissors and Rotary Cutters

Sharpen Your Scissors and Rotary Cutters

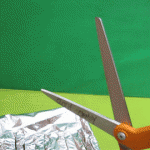
I keep my blades wicked sharp with my favorite technique: cutting aluminum foil.

I keep my blades wicked sharp with my favorite technique: cutting aluminum foil.

There is a man who comes to my local grocery store once a month and offers his services to sharpen your scissors and kitchen knives. I have never managed to make it to the store when he is there. When I kept missing his dates, I looked up ways to sharpen scissors myself. There are some surprising methods that are quite easy to do at home. Maybe one day I’ll get a professional to get these babies sharpened but until I do, I keep my blades wicked sharp with my favorite technique: cutting aluminum foil.

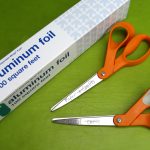
All you need is a piece of aluminum (tin) foil.

All you need is a piece of aluminum (tin) foil.

Cutting Aluminum Foil

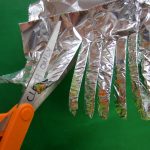
Cut thin strips with the scissors, making sure to cut from the tip of the blade all the way to the pivot points.

Cut thin strips with the scissors.

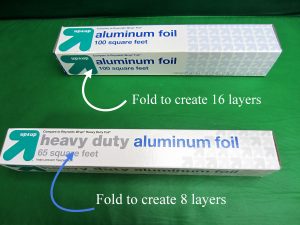
All you need is a piece of aluminum (tin) foil. Fold the foil up into 8 layers for heavy duty tin foil and 16 layers if you have regular weight.

Next, cut thin strips with the scissors, making sure to cut from the tip of the blade all the way to the pivot points. Use nice, open, broad cuts. This method also works for rotary cutters. Just run the blades over folded tin foil.

When you’ve finished cutting the tin foil, open your scissors all the way and then swiftly snap them shut.

When you’ve finished, open your scissors all the way and then swiftly snap them shut.

When you’ve finished cutting the tin foil, open your scissors all the way and then swiftly snap them shut. This will help to smooth out any tiny burs. I’ve been using the tin foil method for years now and my scissors are razor sharp after I do this.Keep your precious fabric scissors far away from children and partners who don’t understand how serious you are about your scissors.

Pro Tip: Always keep one pair of scissors reserved for paper only (so your fabric scissors don’t go dull too quickly.) Second pro tip: Keep your precious fabric scissors far away from children and partners who don’t understand how serious you are about your scissors.

Roll the foil into a ball and you now have a perfect scrubber for pots and pans.

Roll the foil into a ball and you now have a perfect scrubber for pots and pans.

Waste Not, Want Not: What to do with the tin foil you have just chopped into strips? Roll it up into a ball and you now have a perfect scrubber for pots and pans (not your non-stick, of course). You can also bring these along on camping trips for scouring out cast iron or other camping dishes.

Alternate Methods

Have a different method of scissor sharpening? Let us know your techniques.

Have a different method of scissor sharpening? Let us know!

Out of tin foil but still need to sharpen your scissors? You can use the same method with sand paper (the finer the grit, the smoother the blades). Or, you can cut up steel wool, though it will be considerably messier than the tin foil or sand paper methods.

Do you have a different method of scissor sharpening? Let us know your techniques in the comments below.

Charlotte Kaufman is a writer and sewist in San Diego, California. She specializes in marine and home interiors and continues to fall more and more in love with quilting. You can follow her at charlottekaufman.com
Reuse and Recycle...Material!

Reuse and Recycle…Material!

I had this piece of clothing that really wasn’t my style.

I had this piece of clothing that really wasn’t my style.

I’ve heard stories about my grandmother recycling material and such for the sake of future sewing projects. And, no, I’m not going give you a how-to of how to cut up your couch for the reusable material and filling! But the overall idea is a part of the general theme of today’s post: Reusing material for a new purpose.

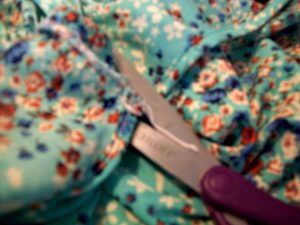
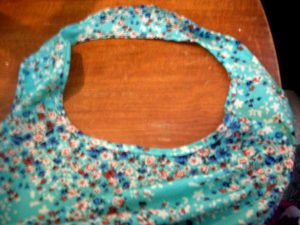
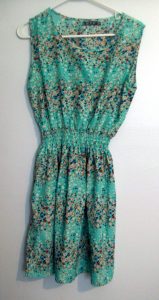
I had this piece of clothing that really wasn’t my style. It’s the green, flowery one in the picture, and it wasn’t something I felt was *me* enough to wear in public. BUT, it did get the gears in my head turning with possibility. Even though I didn’t want to wear this as a top or a dress, I was convinced it could make a fairly good apron. I decided to keep the material for future cutting/sewing use.

I think it was last week that I got around to working on the project, and the process wasn’t all that difficult. In fact, there’s a tip for new sewers: Keep an eye open for projects that wouldn’t be overly difficult to build your sewing skills. What I had in the beginning with this piece of material just looked like it could be an apron, with the style and the fabric. And, when thinking through how I’d go about turning the clothing into an apron, I realized the steps wouldn’t be that numerous. If you can catch enough finds like this one—things you might have around your house that you’re maybe planning on throwing away—you can reuse material, make projects for little to no money, and improve your sewing with what could amount to baby steps! Sounds like a win to me!

One side of the clothing had the seam along it, so I only had to follow the outline there.

One side of the clothing had the seam along it, so I only had to follow the outline there.

So what were the baby steps for this project? Well, they started with cutting, since I don’t know that I’ve ever seen an apron with a full back on it. One side of the clothing had the seam along it, so I only had to follow the outline there. The other side depended more on my judgment, but I do have a sewing mat and a rotary cutter now to hopefully help make more accurate cuts. Yay, sewing tools!

The material circling the neck could stay in place though, since aprons attach there anyway. That particular curve required a secondary round of cutting, which I’ll blame on my lack of experience with apron-making. I don’t usually have to make the right-place cuts for loops to go around my neck, so I won’t think too harshly about myself for going overboard on the first try. In the end, if you try for an apron, remember the loop should probably be no more than one inch thick once your sewing is finished, and make sure you’re keeping with the same general width range throughout your cutting. Otherwise, your backing might seem bulky overall, or just in parts. Neither is necessarily a good option!

Remember the loop should probably be no more than one inch thick once your sewing is finished.

Remember the loop should probably be no more than one inch thick once your sewing is finished.

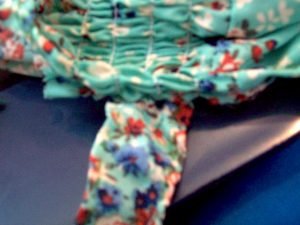
Once I was finished with the cutting, I sewed hems along the edges where I’d cut, and used some of the material I’d cut off for straps that I could use for the ties to attach to the waist. Honestly, that task was kind of frustrating since the straps were so small, and the thread kept bunching or wrapping around the fabric. Lesson I could potentially take from this experience: Tiny material should maybe be reserved for later use, like after I’ve gained more experience with sewing!

I sewed hems along the edges where I’d cut, and used some of the material I’d cut off for straps that I could use for the ties to attach to the waist.

I sewed hems along the edges where I’d cut, and used some of the material I’d cut off for straps that I could use for the ties to attach to the waist.

Possible lesson you could take from this experience, if you’re an early sewer: If you’re going to make an apron, start with thicker straps to go around the waist—maybe two inches or a bit more. As far as appearance goes, it might be better for those straps to be a little bulky than for them to have confusing thread patterns. As far as process goes, saving yourself the annoyance of fighting with your thread might be worth the extra material.

One more tip for the road: If you do a project like this one, make sure that when you can, you make use of the hem on the original clothing. It might seem like cheating, but saved effort and thread is saved effort and thread!

All in all, keep an eye out in your own house for things to recycle into sewing projects. You can learn to be a better sewer without breaking your bank account!

Learning Re-Learning

Learning & Re-Learning

Generally speaking, I can be more of a hand-sewer than a machine-sewer. Getting frustrated with a machine, to me, isn’t the most difficult task, so stepping back from one can be a fairly easy decision. What I’ve found in stepping away is that I actually like hand-sewing. Sure, the process might take longer, but there’s something relaxing about going one stitch at a time with my own hands.

And, believe it or not, I might actually be more likely to sew a straight-ish line by hand than I am with a machine! Weird? Maybe!

But stepping away from the machine has led to me trying to re-acquaint myself with my sewing machine, and what I found is that the time away caused me to potentially forget things—maybe keep me from fully learning all things—about my machine. Had I had (or kept) those things in mind, I suspect my sewing-machine-experiences might’ve gone a bit better—and a bit quicker.

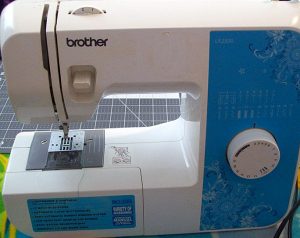
Brother LX2500

Brother LX2500

Now, don’t get me wrong! I’ve completed projects on my sewing machine. But I was potentially setting myself up for frustration by not really understanding or memorizing the details of this machine (Brother LX2500):

Imagine how far I could be with machine-sewing if I would’ve taken the time to learn more details and commit them to memory! So, for today, I’m going to give you that bit of information: Get to know your sewing machine! Even something as simple as realizing the thread-holder lifts higher could prevent grief, since you might not have as much issue with the thread falling off while you’re sewing or threading your bobbin. And, yes! That happened to me!

For me, figuring out the need-to-know details and letting the rest go might’ve been tempting. Do yourself a favor, and don’t keep that thought process. There might be aspects of your machine that make for easier sewing, or that advance your capabilities in a way that a basic “Hey! I can thread the needle and bobbin!” don’t quite cover. Possible examples: Apparently, I have a reverse button on my machine I maybe never knew about, and a way to alter the tension. Who knew?! And if you don’t get to know your machine, by the way, don’t be surprised if you come out with stitches that look like these:

If you buy your sewing machine brand new, check out any instruction manual that comes with it. The reading might seem tedious, but that tedious task could be worth it when you don’t hate your sewing machine, like, twelve times per use (Am I exaggerating??? You decide!). If you buy yours used, don’t have a manual, or lose the manual, try looking online. I think I threw mine away (don’t do that!), but luckily there are videos available on Youtube that show the basics of running my model. I can’t encourage you enough to look into such information to learn what you can about your sewing machine! Doing so could extend your possibilities and preserve your nerves!
Your sewing machine is only as good as your ability to use it, so don’t hold yourself back by not learning about it properly.

And even if you did know all there is to know about your machine, forgetting details after a limited amount of use isn’t out of the realm of possibility. Think about all the math classes you had over the years. Even though you might’ve had formulas in your head for a time—like, for an exam—how many do you still remember? After a while, your sewing machine’s details might be so burrowed into your thought process that you can be away for a time and remember them, but don’t be too embarrassed to rediscover those details if you can’t bring them to mind. Something like which way your bobbin’s thread goes could be so small that you don’t remember it, but not knowing could complicate your sewing.

So that’s lesson number two, one I had to learn when I came back to my sewing machine after time away: Don’t be afraid to admit you don’t remember, or be too proud to look into how to do these things again. Your sewing machine is only as good as your ability to use it, so don’t hold yourself back by not learning about it properly—even if it isn’t the first time you’re learning about it! Don’t stop until you know what every button, knob, or contraption does!
Paper N’ Plastic

Paper N’ Plastic

I don’t know about you, but I love to save time and room, especially when it comes to my sewing space. One of the best ways to save time when you are preparing or working on a sewing project is organization. I find it so much easier to move from one step to next when everything is not scattered all over the place. With that being said, I have a helpful organization tip about storing your pattern pieces.

I prefer the slider bags, but the snap bags work just as well.

I prefer the slider bags, but the snap bags work just as well.

Have you ever opened your sewing pattern and taken out the beautiful folded paper pattern inside of it? Doesn’t look it look neat and tidy?! Well, have you tried to refold the paper pattern once it has been unfolded and put it back into that same pattern pack? Or even worse, have you tried to refold it once you have cut out the pattern pieces you need for project? Those of you who have successfully refolded your paper pattern and neatly placed it back into its package…well done!!! I think you are amazing magicians with wonderful refolding powers.

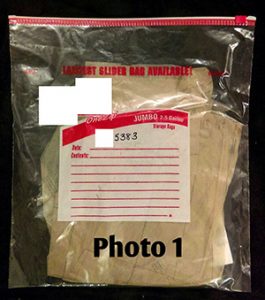
Sadly, for the rest of us (me included), it is a painful and tedious task (say that three times fast) to get the paper back into the pack. However, I have a found a solution that works great. All you need are permanent markers and plastic storage or freezer bags. I prefer the slider bags (see photo 1), but the snap bags work just as well. For one of my patterns, I used a 2.5-gallon jumbo slider bag because the pattern pieces were very large. You can adjust the size of your storage or freezer bag based on the size of your pattern pieces.

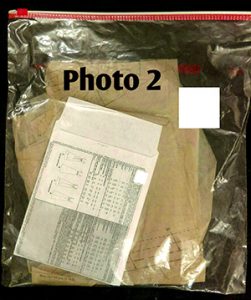
Place the pattern package in the bag with the paper pattern pieces (photo 2) in order to keep them all together.

Place the pattern package in the bag with the paper pattern pieces (photo 2) in order to keep them all together.

There are two ways that you can store your pattern pieces. The first way is to only cut out the pieces from the paper pattern that you will use for your sewing project. Then with remaining pattern paper, you can simply fold it to make it smaller and put it into the storage or freezer bag without having to make the shape precise in order to fit into the bag. The second way is to cut out all of the pieces found on the paper pattern and store them in the slider or snap plastic bag. The second way will also save you cutting time later should you decide to use the additional pattern pieces from the same sewing pattern for a future project. I also like to place the pattern package in the bag with the paper pattern pieces (photo 2) in order to keep them all together, especially because the pattern package contains fabric measurements and finished garment measurements that you may need to refer to in order to prepare for your sewing project.

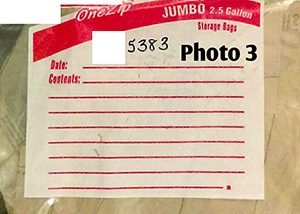
Once you have your paper pattern and package in the bag, I would suggest using a permanent marker to label the bag with the corresponding pattern number (photo 3).

Use a permanent marker to label the bag with the corresponding pattern number.

Use a permanent marker to label the bag with the corresponding pattern number.

Side note: If the paper pattern pieces do not have the pattern number printed on it, mark the number on the pieces themselves so you will know to which pattern package and bag they belong. Write the number in a place on the pattern pieces that does not interfere with the pattern markings.

The bonus of using the storage or freezer bag is that it also provides you with space to make notes right on the bag. If you have, for example, a fabric idea or found an easier way to put the pattern together why you were sewing, you can simply put a note or reminder on the bag without having to mark all over the pattern or the pattern package. So there you have it…a simple and inexpensive way to organize your paper pieces without all that refolding hassle. Sewing is fun so do not let refolding and refitting take the joy away from you.

The Final Touches (And Reinforced Lessons)

The Final Touches (And Reinforced Lessons)

Remember on my last blog post when I proclaimed that sewing isn’t baking? In the latest stages of my quilt, I’ve once again found myself facing similar details and thoughts as the ones I experienced earlier. Why? Because — as I said before — guesstimations and “until-it-looks-right” attitudes don’t necessarily spill over from the kitchen to the sewing area.

My homemade backing.

My homemade backing.

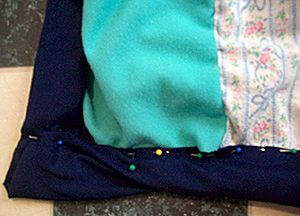
You see, I completed all the main lines of a nearly-finished quilt. What that meant, to me, was that it was time to sew on some kind of backing. My tactic for doing so? Getting a flat sheet, cutting it *very* generically around the exterior of the quilt, and trying to fold the excess material down in an appealing manner for the outer edges of the quilt. I ended up with a mess that looked something like this:

Not good, right? And I couldn’t seem to fix the issue with the backing/quilt this way. Whenever I would try to re-pin something so that the massive/slanted corner was more size-and-style-similar to the line leading up to it, the material would twist unpleasantly (like you can see). This blatant issue led me to undoing most of my pin-and-sew work connecting the backing to the actual quilt, in hopes that the lines and corners would better match up.

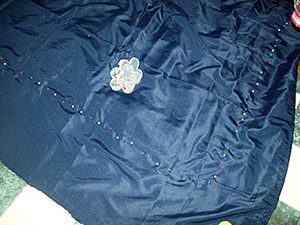
The process this go-round was a bit more precise, in that the original wrinkles in the sheet had fallen out, and the overall quilt was more carefully positioned under the sheet for more accurate results. That’s right. Under the sheet. Rather than focusing on exactly where the backing would overlap on the front, I concerned myself with making sure that the back portion was somewhat smooth against the quilt blocks. My rationale was that if I could get that territory as it should be, I could flip it over and fold over the ends with more confidence that what I couldn’t see on the back was proficient enough to allow my focus to safely fall on what I could see. Basically, if the backing was smooth, I could do things, like better decide how much material needed to be beyond the quilt blocks to fold over and work with, without worrying so much that the material on the underside was bunched or wrong in some way:

Pins, pins and more pins!

Pins, pins and more pins!

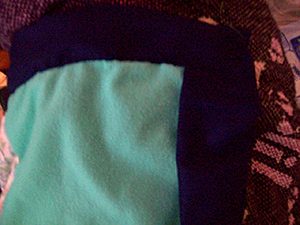
Once I flipped it over, I cut off a bit of the backing material, and I took out the pins from one side (and admittedly—accidentally—a number more!). Some of the quilt had already been sewn (I’m currently thinking of redoing that section, by the way), but beyond that stopping point, I could fold over the excess material, tuck it under itself, and pin it back down so it would create a more pleasing line and corner:

Progress is progress for an early quilter, right?

Progress is progress for an early quilter, right?

Perfect? Eh. But progress is progress for an early quilter, right? And, perfect or not, this strategy seems to have helped.

Still, knowing if the strategy will prove effective throughout the rest of the process might be something I judge later. After all, I’m less than one line into it, and there are over three sides to go (not to mention inner attachments).

In any event, this particular dilemma has led me to another tactic in learning to quilt better, and that’s to look for answers online. I’ve looked at a quilting video before, but a number of things that I’ve attempted to do are details I could’ve found assistance for online. There are charts, for instance, about how big to cut blocks, or how large a certain size of quilt should be. I might’ve literally been the girl who measured a bed with measuring tape (not sewing tape!) to see how big I should make a quilt, which I wouldn’t have had to do if I’d looked at a chart! I wouldn’t be too surprised if I took more of my sewing/quilting concerns online to try and find answers for them in the future!

Hopefully, this quilt will be finished soon, and I’ll be able to move on to another project with the skills and lessons I’ve learned up to this point. And maybe one day, I can become the quilter I want to be!

“Pin”ny Time Savers

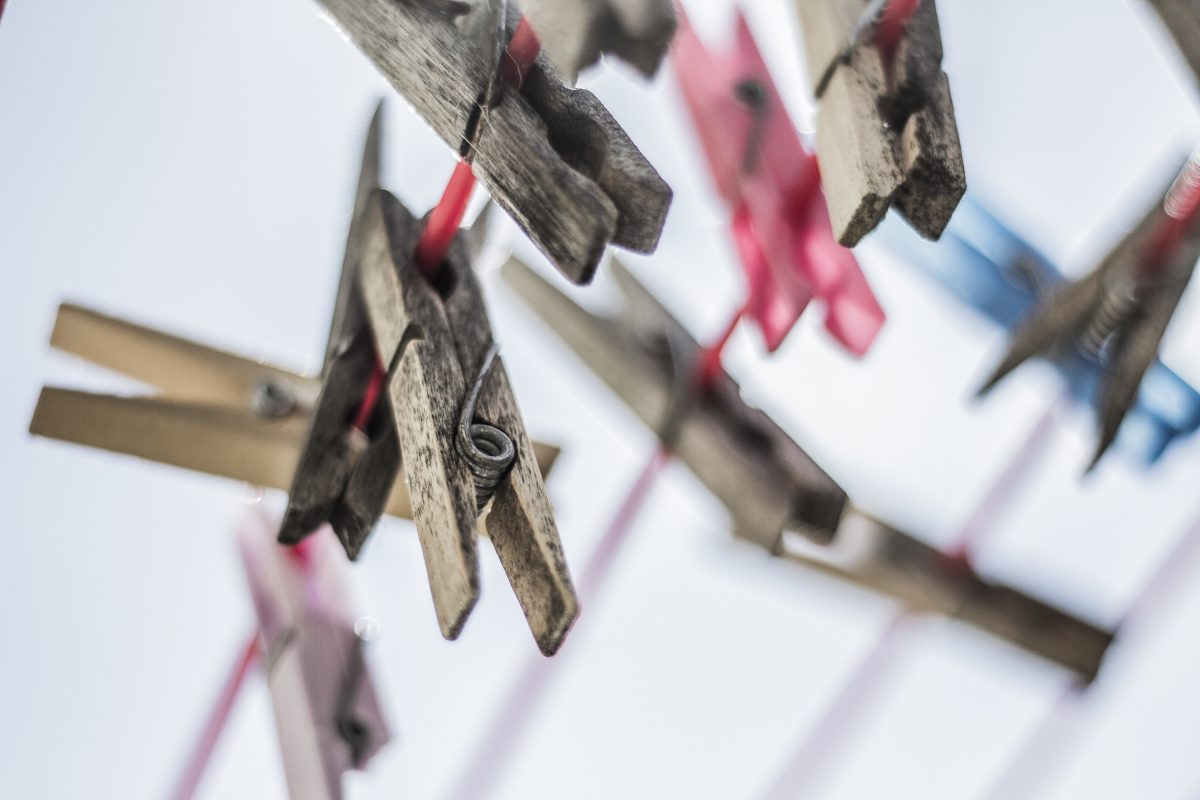
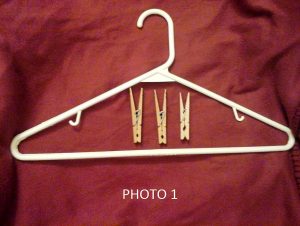
All you need are clothes hangers, clothespins, and a marker or pen (not pictured).

All you need are clothes hangers, clothespins, and a marker or pen (not pictured).

Whether you are new to sewing and quilting or just love to follow commercial patterns, you quickly find out that once you cut out your pattern pieces, they are EVERYWHERE. Along your pattern cutting journey, you may get a little lost, especially trying to keep track of “which piece goes where” and “what label is this piece?” After all your cutting is done and it is time to reach for your cut pattern pieces to begin sewing or quilting, you find you find yourself spending even more time figuring out which one is “A, B, C” or “1, 2, 3”. Here is a handy solution to help you organize your fabric pattern pieces with items you probably already have at home.

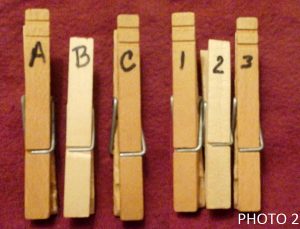
First, use a marker or pen to label the clothespins based on the labels found on the pattern pieces or the pattern guide.

First, use a marker or pen to label the clothespins based on the labels found on the pattern pieces or the pattern guide.

All you need are clothes hangers, clothespins, and a marker or pen (not pictured). First, use a marker or pen to label the clothespins based on the labels found on the pattern pieces or the pattern guide. Using a permanent marker may make it easier to write on the clothespin, especially if it is made out of plastic. When choosing the marker and pen, make sure that you choose an ink that will be very easy and quick to see on the clothespin. (The goal is to make find your pattern pieces easier.)

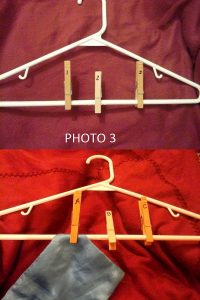
Second, once you have labeled the clothespins, clip them on the hanger. To make finding the pins easier, place the labeled clothespin in alphabetical and numerical order. Continue clipping the pins onto the hanger until you have all your pins in a row. If you run out of space, use additional hangers until you have all of our labeled clothespins on a hanger.

Once you have labeled the clothespins, clip them on the hanger. Finally, attach the cut fabric pieces to their corresponding labeled clothespin by clipping the fabric to the hanger.

Once you have labeled the clothespins, clip them on the hanger. Finally, attach the cut fabric pieces to their corresponding labeled clothespin by clipping the fabric to the hanger.

Finally, attach the cut fabric pieces to their corresponding labeled clothespin by clipping the fabric to the hanger. For quilting patterns, there may be many pieces that same labels (for example, a repeating quilting pattern). In those cases, clip several pieces with the same label on the same pin. If there are a large amount of pieces with the same label and the clothespin get too bulky, create several clothespins with the same label. Organize the clothespins with identical labels next to each other for convenient and quick access.

Now you can hang the hanger on a door handle, a rod, or a rack. Place your fabric pattern hanger in a location this close to your project a quick reach to start your sewing and quilting. This idea not only helps to organize your pattern pieces, but it also helps to organize your sewing process. It can be such a distraction to have pattern pieces scattered all over your sewing and quilting workspace. A great sewing and quilting project takes focus and time. Organization around you in the workshop help you focus on project and saves you the time of having to search for your pattern pieces and figure out which piece it is.

The beauty of sewing and quilting is its creativity, attention to detail, and precision. Let this handy solution give you the freedom to put all of your time and energy into those things. So check out your closets or laundry rooms for the clothespins and hangers that will save you sewing and quilting time. But, just in case you want to go a purchase new one just for your sewing and quilting space, have fun with colors, prints, textiles, and more. From hardware stores to houseware stores, the possibilities are endless. Spruce up your creative environment with fashionable hangers and fancy clothespins to create a simple gadget that will help to make your sewing and quilting experience less frustrating and more exciting.