Looking for the Light

Looking for the Light

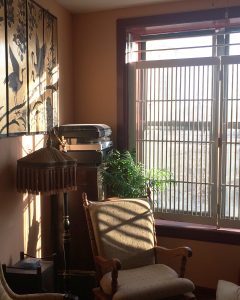
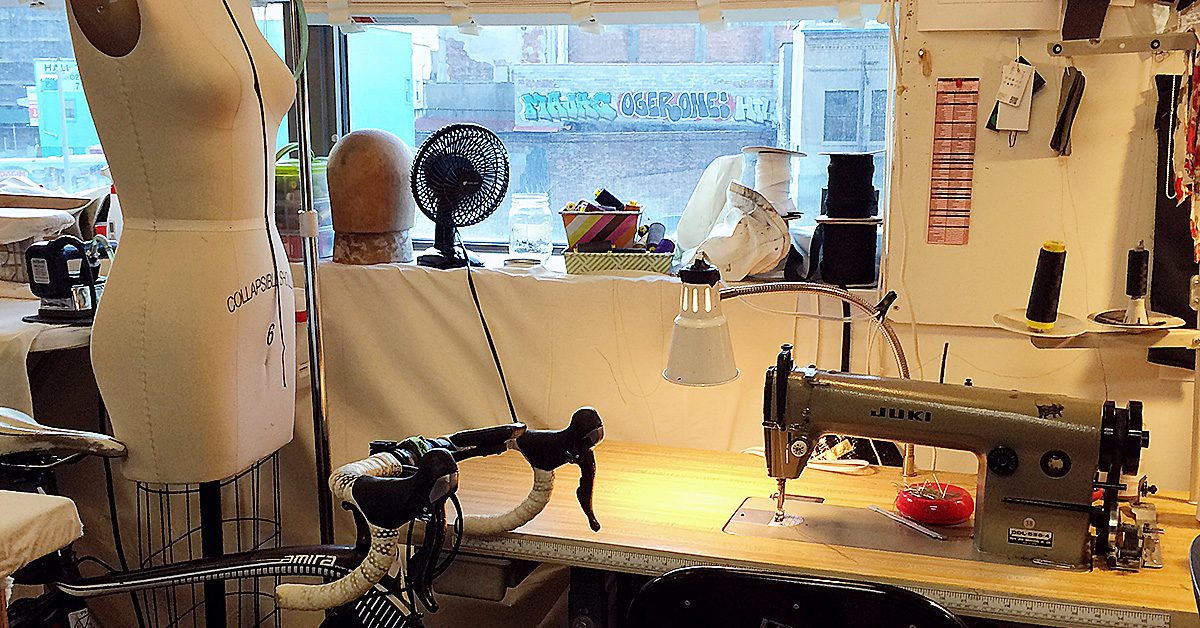
Unless I’m sewing in my lovely big-windowed space at Blindspot, I find that I’m constantly searching for more lamps.

Unless I’m sewing in my lovely big-windowed space at Blindspot, I find that I’m constantly searching for more lamps.

The older I get, the more light I need to sew – or so it seems. Perhaps the many years of sewing in dimly lit church basements and cramped corners surrounded by double racks of clothing and piles of waxed cardboard ‘chicken’ boxes has finally taken its toll.

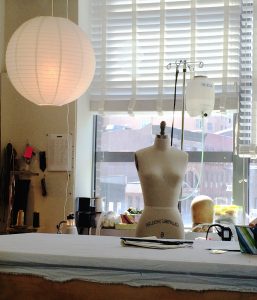
Unless I’m sewing in my lovely big-windowed space at Blindspot, I find that I’m constantly searching for more lamps. Even with the almost entire wall of windows in my shop I still have a couple white paper Chinese lanterns hanging from the ceiling, two floor lamps, and small gooseneck table lights next to the machines. The little lights in the domestic machines never seem to be quite enough. I’ve even been known to prop up my cell phone with the flashlight on under the top arm of machines, leaning it against the solid part with the controls and wheel.

Industrial machines come with moveable, bendable gooseneck lamps attached. I position mine low to the left of the machine, almost touching. I never have a problem seeing when sewing with the industrial.

There are countless types of table lamps out there but, for sewing purposes – and especially if you want to be able to angle the light beam under a sewing machine – a clamp-on style or one with a small base is the best. If the base is too big it’ll just get in your way when you’re trying to sew (especially with a machine). You also need one with a long, moveable goose neck or adjustable arm so you can point it where you need it.

Daylight Slimline LED table lamp

The Daylight Slimline LED table lamp is a great choice. It’s extremely narrow and clamps to a table edge. I like that it doesn’t take up excess space; it just does its intended job without being obtrusive and overbearing (and yes, I know I’m anthropomorphizing).

Daylight or full spectrum light sources are said to improve color perception and visual clarity, as well as, mood, productivity, and mental awareness. How valid these claims are depends on whom you’re talking to but, it is pretty well accepted that they do improve color perception. Here’s one study conducted by the Lighting Research Center at the Rensselaer Polytechnic Institute if you’re interested in that sort of thing.

Daylight Slimline floor lamp

The Daylight Slimline light also comes in a floor lamp version, which is also very useful as you can bend the arm over a chair or your shoulder to work.

Ottlight Creative HD

A really nice, easily portable light is the Ottlight Creative HD high definition natural light.

The Ottlight is named after the inventor of full spectrum lighting, Dr. John Ott.

Doc Ott

All living organisms needed the full spectrum of light provided by the sun.

All living organisms needed the full spectrum of light provided by the sun.

Dr. Ott was a banker who loved horticulture and time-lapse photography. This led him into a pioneering career in photobiology; the study of light on living cells.

Dr. Ott ended up working as a consultant for the Walt Disney “Secrets of Life” film series where he found that he couldn’t successfully grow plants indoors under normal everyday artificial lighting. His research showed that, in order to thrive, all living organisms needed the full spectrum of light provided by the sun. It was also during the making of this film that Dr. Ott pioneered the use of time lapse for film and television.

Moving through the spectrum

As his career progressed, Dr. Ott began monitoring the beneficial effects of full spectrum lighting on certain human physiological conditions. He discovered that light color temperatures affected mental health, with balanced light reducing hyperactivity in classrooms and negative behavior in prisons.

One of his biggest discoveries was that proper reproduction of individual cells (plant and animal) is affected by lighting variances. He also realized that the light entering our bodies through our eyes controls and regulates our brain chemistry.

Dr. Ott wrote tons of research as well as three books. He published a series of seven articles in the International Journal of Biosocial Research, titled Color and Light: Their Effects on Plants, Animals, and People. These articles summed up Dr. Ott’s decades of independent research, which, at the time, was contrary to the established wisdom of pharmaceutical companies who were intent on toting the negative effects of natural sunlight.

The Silent Epidemic
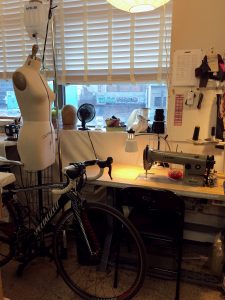
It’s a sunny morning here in Harlem, so I’m about to grab my bike & go spend some time out in the sun.

It’s a sunny morning here in Harlem, so I’m about to grab my bike & go spend some time out in the sun.

At first, Dr. Ott’s research was most often met with polite indifference from the scientific community. Soon, though, clinicians and medical professionals emerged who recognized and aligned with his theory of Mal-illumination or “the silent epidemic”.

Mal-illumination refers to the human trend of becoming ‘contemporary cave dwellers’ and spending the majority of their time indoors and away from natural light sources. Doesn’t sound good, does it?

So, in closing, don’t forget to go outside (outside and sunlight are still free after all!), open the shades, and consider buying yourself a full spectrum lamp if you don’t have one already.

It’s a sunny morning here in Harlem and I’m about to grab my bike and go spend some time out in the sun.

Master Your Serger with Tote-Making Class

Master Your Serger with Tote-Making Class

Sewing Machines Plus in San Marcos, CA has the perfect class to help you master your serger, use your fabric stash & walk away with a fabulous tote bag!

Sewing Machines Plus in San Marcos, CA has the perfect class to help you master your serger, use your fabric stash & walk away with a fabulous tote bag!

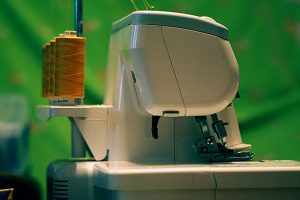
If you’ve been using your serger machine for a while now, you’ve probably mastered many of the basics. And if you’re like me, you’re completely in love with your serger! But you’ve probably also noticed there are a lot of features you’ve never used. Some of them you may not need, but wouldn’t it be cool to at least know a few of them? I think so too.

Sewing Machines Plus in San Marcos, CA has the perfect class to help you master your serger, use your fabric stash and walk away with a fabulous tote bag!

Serger Class Details

This class is 2-hours a day for three consecutive Wednesdays in May. May 17, 24 and 31 from 3:30 – 5:30. You’ll need to bring you serger including the power cord, foot pedal and cord. You’ll also need a variety of serger feet, including standard, cording, lace applicator, cover and chain, ruffler, elastic and clear. If you don’t have all of these serger feet, don’t worry, you can buy them at SMP before class.

Don’t forget the fabric! You’ll need at least 7 coordinating fat quarters or scraps and one yard of Soft and Stable.  To go along with the fabric, you’ll also need to bring thread, zipper, buttons, piping and cording. Full class supply list and registration instructions available here. It’s a fun, affordable way to learn the ins and outs of your serger, connect with other stitch aficionados and make an adorable tote bag project.

When your serger tote bag is done, it’ll be great for you or as a gift for a graduating student. Plus, you’ll have a much greater understanding of your serger machine and all its features and accessories.

Are there other classes you’d like to see offered? Let us know! We’ll do our best to accommodate and provide classes of interest.

Sewing Productivity Video: How to Make More Time to Sew Part 3

Sewing Productivity Video: How to Make More Time to Sew Part 3

We’ve been talking about sewing productivity and how to make more time to sew for the past few weeks. In case you missed them, here are links to part one and part two of this series.

Sewing Productivity Video: How to Make More Time to Sew Part 3

I have a few more tips and ideas to share today and I made a video to recap all these ideas for you.

Batch tasking

Batch tasking is a method you can employ in many systems to make more time.

Don’t run through the same series of steps many times; instead batch steps together and work on many items at once. Cut all those quilt or pattern pieces out at once. Load several bobbins at a time, since this will save you stopping to load another soon.

You can make more time for sewing when you free time from other tasks by batching, too. If you don’t already batch your errands, doing this will make more time for you.  Stop running daily errands, if you do, and run errands quickly on a designated day of the week. Or batch certain errands together more economically.

I usually batch task the bathing of children, baking, computer tasks, and lots of other things. In general, I find that making and doing things in batches helps me to make more time and do more things.

Chunking

Chunking is when you grab a chunk of time to focus on one project.

Flylady made the 15-minute time chunk a daily thing for millions by encouraging her followers to set a timer for 15 minutes and declutter.

While this is a good use of a time chunk, you can use this productivity trick to do anything you want. It’s a great option for getting started on a task you have been been procrastinating about; you can do anything for only 15 minutes.

Pomodoro

For tasks that require more work and focus than 15 minutes, try using pomodoro.

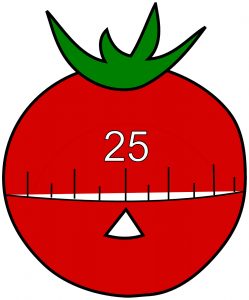
A pomodoro is a 25 minute time chunk. Set your timer for 25 minutes to focus on one specific task. When the timer rings, take a 5 minute break and follow with another pomodoro. You can do three or four rounds like this, and then follow with a longer break.

Pomodoro means tomato in Italian and was named after a kitchen timer like this one.

Pomodoro means tomato in Italian and was named after a kitchen timer like this one.

I have been amazed to find out just how much work I can get done on tough projects in only 25 minutes. I like pomodoros so much that my whole day is often made up of a long string of them.

Alternating between a 25 period or two at my desk and a 25 minute chunk for housework helps me to get everything done and fights burnout from sitting too long at my desk.

Resources and Inspiration

We’ve touched on a lot of topics in this sewing productivity series. Here are links to more information on some of the ideas and systems we have covered here:

Bullet Journal

Ryder Carroll created the bullet journal system, which is a fabulous way to organize your notebooks if you prefer to use pen and paper for your planning and lists. His quick video here is a great overview of the specifics for this easy system.

I use the bullet journal system like Ryder and scribble quick lists. But it is worth noting that the bujo can also be a creative outlet. Many people create beautiful notebooks with this system. You might like to check out Tiny Ray of Sunshine to see gorgeous examples of creative bullet journal layouts and lists.

Trello

If you would rather use kanban boards and a digital app to keep track of your great ideas and to do lists, Trello is an excellent option. I use free Trello boards for organizing and keeping track of lots of things. It definitely helps my sewing productivity by holding all my good ideas until I can find the time to get them done.

Eisenhower app

The Eisenhower matrix is easy to work with on paper. But if you prefer to go digital, now there is a free and easy-to-use application for making these four quadrant lists.

FlyLady and Kon Mari

If you are unable to achieve sewing productivity because of a messy house or too much clutter, I know a couple of ladies who may be able to help you.

Flylady has helped millions out of CHAOS (can’t have anyone over syndrome) and gently encourages better routines for keeping clean and organized. Just be aware that she will send you a LOT of emails if you sign up for her list.

While Flylady did help me, no one has helped me to create order in my home as much as Marie Kondo and her KonMari system. She wrote The Life Changing Magic of Tidying Up and its sequel, Spark Joy. I recommend these books to anyone who could use more order in their home.

Setting up this system will require significant time investment up front, but once you complete your konmari, you will save tons of time and trouble and your home will stay clean and organized with minimal maintenance. My own sewing productivity has increased at least tenfold since I invested the time to konmari my house.

Sewing productivity: make it a priority

Of course, dirty dishes and laundry are everyday things. It is easy to get caught up in all the things you have to do and never get around to sewing all the things you want to sew.

You can use these productivity tricks I have mentioned to minimize your work and make more time to sew. Or you can let the dishes and laundry pile up and make sewing your top priority. I have to admit that sometimes this is my favorite trick for better sewing productivity.

We all have lots to do and limited time. However you find the time, making is important and I encourage you to make more time to sew.

The Soul of Things: Or should I buy that old metal sewing machine?

A friend told me the other day she was going to start collecting sewing machines. I found this a bit odd, mainly because, though she can sew, she doesn’t on any sort of regular basis. She said she was cleaning her apartment and came across her sewing machine shoved way up on the top shelf of her closet and then, for some reason, had the thought she should start collecting them.

Old sewing machines, especially the really old ones, look quite interesting & cool.

Old sewing machines, especially the really old ones, look quite interesting & cool.

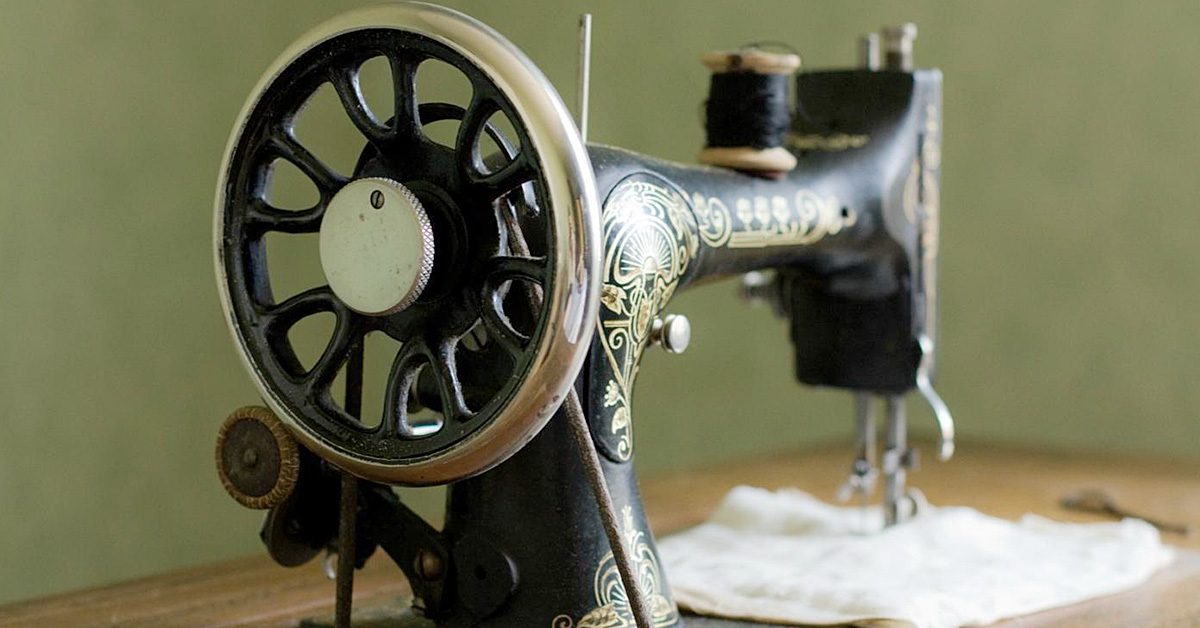
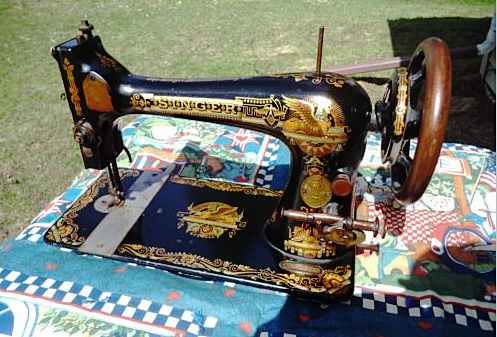
I get it; old sewing machines, especially the really old ones, look quite interesting and cool. They often have intricate decals and ornate brand badges. Most of them still work – mainly because they’re all metal and have less parts to break.

Oldie but a goodie

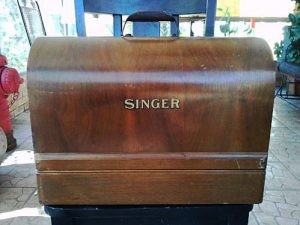
I used to have an old black iron Singer with a knee pedal. I don’t remember the model number but it was one of the first ‘portable’ models Singer made. The machine did run on electricity and came in a beautiful wood dome shaped case. In reality, it was actually a bit too heavy to be considered portable. I think I found it in the depths of some storage room in an old school building somewhere in Syracuse, NY. I was working for a costume designer, I think, for the opera. (Does Syracuse still have an opera? I can’t remember – it’s been so long).

We had been given the storage room as a work space and told we could have and/or use whatever was in it. I remember sitting in a corner, shelves and tables around me piled high with fabrics and boxes and just stuff, sewing tucks into big white cotton petticoats. I remember the machine being very fast. Unlike a lot of models today who have multiple speed settings, machines back then only had one: fast.

I honestly am not sure what happened to that machine. I know it made the move to Texas but it didn’t make the move to NYC, so it’s been gone from my life for almost fifteen years. I suspect I sold it at a garage sale for $20.00 or something. Or even gave it away to someone who would use it – which is sort of how I think antique sewing machines should navigate through life.

Value: only in the eye of the beholder

I know there are some ‘rare’ models that are perhaps ‘worth’ a lot of money but, all in all, I think people tend to pay entirely too much for used machines. Online auction sites such as Ebay certainly contribute to that. I suppose it’s nice that people can get some money for the old machine that’s been sitting in their basement or garage but, I also think those Ebay auctions get a bit out of hand. And they also trend, often for no discernable reason.

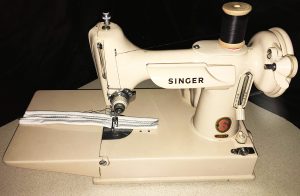
Featherweights are always a popular machine and sell routinely for over $500.00. I found one, which is rarer than the black ones, but it is currently listed on Ebay at $1280.00.

Featherweights are always a popular machine and sell routinely for over $500.00. I found one, which is rarer than the black ones, but it is currently listed on Ebay at $1280.00.

Featherweights are always a popular machine and sell routinely for over $500.00. I found one, which is rarer than the black ones, but it is currently listed on Ebay at $1280.00.

It’s a beautiful machine and comes with the carrying case but no accessories. I honestly think it’s priced too high but perhaps someone will buy it. The value of things is, of course, ultimately measured by what people will pay for that thing (just look at real estate prices in NYC).

The case is a nice touch, since that is all you will likely get with these older machines. Through the passage of time, included accessories & attachments become rare finds.

The case is a nice touch, since that is all you will likely get with these older machines. Through the passage of time, included accessories & attachments become rare finds.

What now?

So, what should you do if you really want to collect old machines but don’t want to spend all of your extra money on it?

Go to garage sales (or stoop sales if you live in the city). When I lived in Texas, I used to frequent yard and garage sales all the time. I almost always found at least one machine at each sale. Some of them I bought but they were never for more than $30.00 or $40.00. If you are buying a machine at sale, ask if you can plug it in to see if it works. Check to see if you can turn the wheel freely and, even if the belt happens to be cracked or broken (they often are as the belts are usually rubber) make sure the light comes on when plugged in.

So, what should you do if you really want to collect old machines but don’t want to spend all of your extra money on it?

So, what should you do if you really want to collect old machines but don’t want to spend all of your extra money on it?

The needle won’t go up and down if the belt is missing or damaged but belts are not an expensive or difficult thing to fix. Check for rust too. Machines that have been stored in a garage or barn often have too much rust damage to ever run well again.

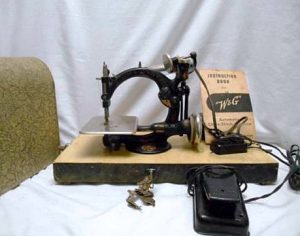
I’ve gotten out of the buy old sewing machines game (I live in a 5th floor walkup in NYC after all), especially on online auction sites. Although many of those machines are cosmetically extraordinary, they lack a “soul”. The only ‘antique’ machines I have now are my Nana’s old Singer 401K and a Singer hemstitcher we purchased for Boardwalk Empire. I’ll never get rid of Nana’s machine. Its sentimental value is immeasurable (even if it didn’t work though it does).

And that’s when things truly become priceless: when they somehow hold a collection of memories related to a person or time.

Sewing Seams That Stay Together

Sewing Seams That Stay Together

There’s nothing that makes more nuts than seams that come apart. I know it’s a small thing and they can easily be fixed, but it drives me nuts when seams don’t stay together. Over the years, I’ve come up with some techniques to keep seams together, even if the thread breaks. It saves my sanity, and my clothes, a lot of stress.

Fabric tape

Sewing Seams That Stay Together

This is my absolute favorite sewing cheat. Don’t get me wrong, I still sew the seams on my Singer, but before I do, I use double-sided fabric tape to hold it down. This way, if the thread breaks and the seam starts to come apart, my hems and side seams stay put. I don’t have to worry about splitting seams in the middle of a work day or outing. And it means I can take my time repairing the seam rather than having to fix it immediately.

Fabric tape doesn’t work with every seam. It works best with hems and cuffs, but I’ve come up with a way to use smaller pieces of it on side seams too. With side seams, I sew the tape right into the seam and cut the excess away while I’m trimming the fabric finishing up the piece.

Double stitches

As sewers, we all sew back and forth over seams at the beginning and end to lock them in. I use this same technique on areas of a seam that are likely to come apart due to stress. Inner thighs on pants, arm pits and elbow areas seem to be places that come apart a lot for me so I’ll often double stitch over them to prevent those areas from coming apart.

Over stitching

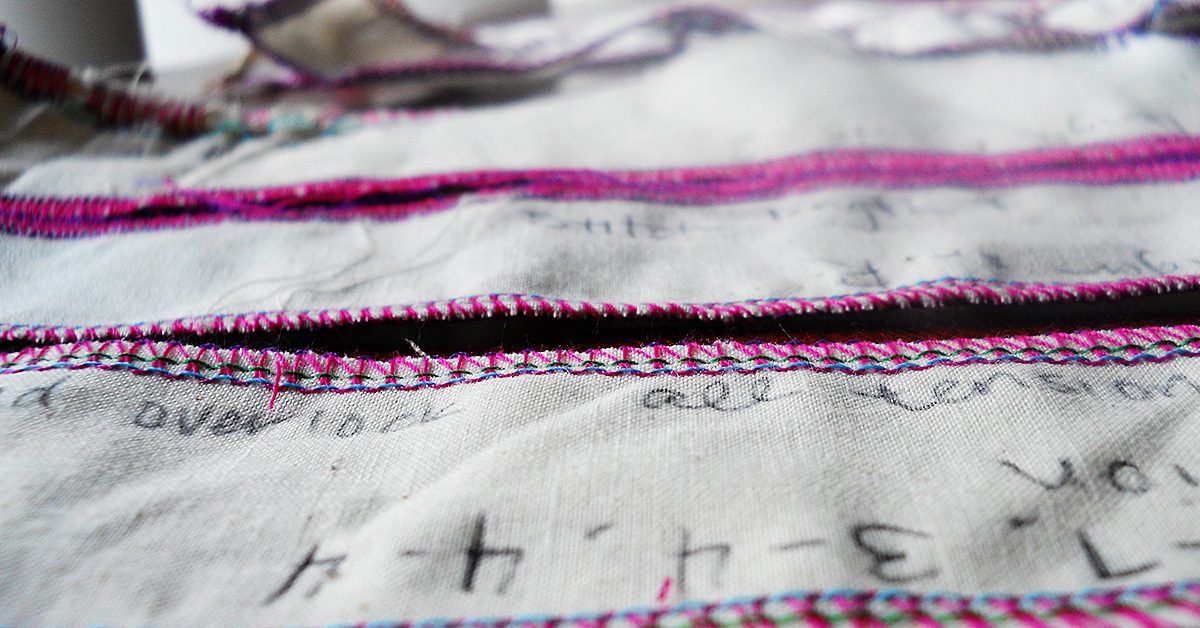
I often give those same high stress seam areas some extra attention by hand or using the over stitch function on my machine. By sewing over the fabric of those high stress areas, the seams are less likely to pull apart. There’s also more thread in that area, in different directions. The likelihood of them all breaking is slim to none.

I can’t promise you won’t ever have a seam come apart using these techniques, but I can promise they’ll be less likely to come apart. So if you have broken seams as much as I do, give them a try and let me know how it goes.

Sewing Project Kits: Weighing the Pros and Cons

Sewing Project Kits: Weighing the Pros and Cons

Like many things in life, sewing has a series of ways it can be done that could be different for each individual person. Once upon a time, I covered one of those details in my post about how to press your seams, and there are plenty of other ways that preference can sway the way a person sews.

Weighing the pros & cons of sewing project kits.

Weighing the pros & cons of sewing project kits.

This week, I found myself considering one of those preference details, and that involves pre-assembled kits for sewing projects. Some people might love these kits for their sewing craftiness, and others might feel that the kits come with more negative details than positive. So, as you might’ve guessed, this is the subject for today’s post: Weighing the pros and cons of sewing project kits.

Pros:

If you choose the right kit, you can have the fabric & pattern that you need to create an impressive project at your fingertips just by making this one purchase.

If you choose the right kit, you can have the fabric & pattern that you need to create an impressive project at your fingertips just by making this one purchase.

If you choose the right kit, you can have the fabric and pattern that you need to create an impressive project at your fingertips just by making this one purchase. That’s most of the project-specific details in one package, minus things like thread and general sewing requirements. All in all, these are really convenient in that regard!

You can see an example of your finished project goal before you start. In fact, you can browse project kits until you find one you feel is perfect for your taste and purpose, and you’ll have the fabric to replicate the picture without having to piece together the appearance for yourself. I can’t tell you the number of times I’ve seen a project online that I wanted to be able to create, but something as simple as not knowing or being able to find the right fabric can lead to a very different final product. The idea that a pre-assembled kit can cut out that possibility is worth thinking over.

Some of these project kits can be fairly cheap. I’ve found some online for around or under $20—which isn’t that pricey if they come with fabric. Other options can be pricier, but if you stick within your budget, you could find a project kit that doesn’t break your bank account. Even if they are pricier, it’s worth considering how much buying the individual pieces for the projects would be without the kits since the prices might still be reasonable under that kind of inspection.

Cons:

These kits can lessen your input in projects.

These kits can lessen your input in projects.

These kits can lessen your input in projects. While providing the fabric can be a pro, as I said before, it’s also a potential con if you want a project that’s more yours than the sewing kit allows. Maybe you want a gym bag like the kit shows, but you’d rather have star-print fabric than what was provided. If that’s the case, then you’d probably do better searching for a free or cheap pattern and buying your own fabric. In that scenario, even $20 could be a bit much to pay.

The process could be so specific that it doesn’t really challenge an advanced sewing enthusiast. I find the same notion to be true in regard to pre-cut blocks of fabric. If too much work is done for you, you might not be pushing yourself to grow in your craft. Like with a number of other details in life, you have to give yourself space to grow if you want to improve. If everything is given to you pre-ready for assembling, you’re cheating yourself out of bettering your own preparation skills.

Costly regrets

If you have the wrong fabric, after all, you can’t necessarily create the project you intended.

If you have the wrong fabric, after all, you can’t necessarily create the project you intended.

I’ve seen at least one review of a project kit where someone complained that the sent fabric didn’t match up perfectly to what was on the project kit image. I can’t say for sure if this is the case, and even it is, all kits wouldn’t automatically come with the same flaw. Still, it’s worth noting that at times, this could be an issue that makes the kit less impressive than expected. If you have the wrong fabric, after all, you can’t necessarily create the project you intended. Additionally, if the fabric you do receive is so against your taste that you have to replace it, then we’re back to point #1 on the cons list because removing the fabric from the kit lowers its value to where the price could be too much. Who wants to pay for a kit that’s supposed to include fabric, then have to buy extra fabric? Not me!

Given though that con #3 is based on a review that I can’t prove or disprove, I still feel like trying one of these project kits could be worth the money for a person who’s new to sewing, or at least new to sewing a specific product. I’d love to try to sew a purse, for instance, but it’s something I’ve never done. Using a kit could ease me through my first purse and help me get some familiarity with the process before I step into the world of purse-sewing more on my own.

So, I guess my thoughts now are that these sewing kits can be great for beginners, but those with more sewing experience might find them too simple and dictated to fully embrace.

Would you agree or disagree with those assessments? Are you pro-project kit? Let me know in a comment!

Magic Makers and Dreamers of Dreams

Magic Makers and Dreamers of Dreams

As the tailor in the costume department on a major network television show, I often am asked to do minor sewing repairs/favors for people in other departments. I mostly don’t mind, especially if the person who is actually in need of the favor comes to ask me in person. It’s usually small things like sewing on a button or repairing a seam that has split open. If I’m not too busy and the repair will take five to ten minutes, I’ll often go ahead and do it while they wait.

If the favor-seeker is a woman, they inevitably say something like, “I always wanted to learn how to sew,” or “My mom tried to teach me but I was never interested,” or “I wish I knew how to sew.”

You’re never too old to learn

I always want to ask why they didn’t, or why don’t they now and then. Sometimes, if I think about it too much, I become a bit sad as, once again, I realize that sewing really kind of is a dying art. Along with shop and industrial arts classes, sewing certainly isn’t taught anymore in most school systems. Many people view ‘maker’ type skills as not as prestigious or “smart” as careers in finance or marketing. There’s quite a bit of research on the subject and, also, apparently a “Maker Movement”. It seems maybe people are starting to realize how important and necessary building and making skills are and how much the world really does still need true craftspeople.

I’m fascinated by anyone who has practiced and honed their skills to the point of being able to create something beautiful and functional with just their hands. When it comes to making things out of fabric or wood or metal or whatever, the true magic is in watching the thing emerge from beneath your fingers.

The importance of guidance

Jorge, who was the man who taught me how to drape, always used to say, “Just cut away all the parts that aren’t a 1930s dress,” (or whatever it was I was endeavoring to make). I suppose it’s true that not everyone has the ability to see a 1930s dress in a pile of fabric: that’s what makes some drapers and pattern makers artists. But if you do have that ability, or the ability to see a three-dimensional object and know what it would look like as a two-dimensional pattern than you owe to yourself to develop that gift. Because it’s a rare thing indeed. Or if you know a young person who has expressed interest in sewing and making things, teach them and encourage them.

Sewing and patternmaking are incredible skills to have and you can make a very lucrative career out of them. When I met Christy Rilling years ago, she was working out of her tiny East Village apartment. Now, she has a full studio and a roster of talented tailors working for her. And she tailors Michelle Obama’s clothing.

Use your hands and make something

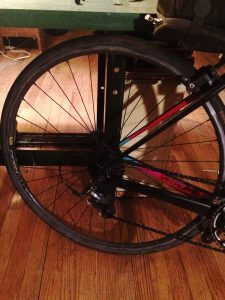
I ride my bike everywhere in the city, over all sorts of potholes and debris.

I ride my bike everywhere in the city, over all sorts of potholes and debris.

I wish more young people were interested in pursuing careers in things like furniture building, masonry, tailoring, and clock & watch repair though I do think that our schools systems are partially to blame for the lack of “interest”. The world is always in need of beautiful & unique things and the individuals who can make them. By beauty, I mean anything that is lovingly & expertly crafted – from a simple wood chair to an intricate mechanical pocket watch, to a bias cut dress that hugs the body it was made for just right to a hand built bicycle wheel.

Have you ever watched someone build a bicycle wheel? It’s kind of amazing. I recently had one built for my bike. When the wheel was done and on my bike, I was struck suddenly by the immense importance of that wheel to be well built. I mean, I ride my bike everywhere in the city, over all sorts of potholes and debris and I trust, completely without thinking, that that wheel will do its intended job and not suddenly crumple under the pressure. That’s a big trust when you really think about it.

I will say here that I do have a locally owned bike shop https://www.bicycleroots.com I always go to and my friend, who owns the shop, is the only one I’d trust to build me a wheel. Which brings me to my next point.

The most valuable commodity: People

Relationships and trust are key when it comes to building a business around your skill, sewing or otherwise. When it comes to sewing and patternmaking, your goal is most always to make a person look their very best. If you do that, they will come to realize the value in having something made or altered just for them and they’ll come back and they’ll also send their friends.

So encourage some aspiring maker today if you can and tell them it’s an extremely wonderful thing if they think they might want to do this making thing for a living someday. Because there’s always room for more magic makers in this world.

Make More Time to Sew, Part Two

Make More Time to Sew, Part Two

Here are more tips to make more time to sew

Here are more tips to make more time to sew.
Hi! I hope you found part one of this series helpful for making more time to sew. I saved my favorite productivity hacks for this week. Here are new ideas for how to make more time to sew; hopefully these will help you, too.

Automate systems

If you can’t get someone else to go for your groceries, could you streamline and automate your system by meal planning and ordering the groceries online, for example, rather than wandering grocery store aisles with your cart?

An easy system for meal planning definitely helps me to make more time.

Another example: some people do laundry on a certain day of the week, but I can’t imagine that. I do laundry every day, automatically. Or I did, anyway; I battled laundry and gave up significant amounts of time to taking care of laundry with love for my family.

Finally, I managed to eliminate laundry backups and piles by doing a load or two — through to completion of putting them away, without exception — every day.

And my work on getting this system into an automated rhythm paid off for me even further. My husband surprised me by offering to take over this daily management! I happily loaded laundry onto my don’t do list and that gives me more time every day.

Keep reading to see more ideas for easy automation of regularly recurring tasks.

Keep reading to see more ideas for easy automation of regularly recurring tasks.

Just having an automated system of where you always put your keys, phone, and other items, for example, could potentially save many minutes of time spent searching for your things.

The same goes for your sewing tools and space, of course. Keep your machines next to their thread, for example. Arrange a hot iron and pressing board within your reach from your sewing machine when you make patchwork. Always know exactly where everything you need is by having a dedicated place for everything and keep everything always in its place when not in use. These little tweaks can save a lot of time for more sewing.

Speaking of systems:

Take a tip from the king of Twitter. I am talking about Jack Dorsey. Dorsey is one of Twitter’s founders and its first CEO. And when Twitter performance was lagging in 2011, he came back as CEO to turn the company around. Dorsey also founded Square, the app that turns a cell phone into a card scanner and enabled everyday folks to easily accept credit card payments.  For a time, he was CEO of both giant operations.

This productivity whiz shared his secret by talking about how he themes his days. When I read his descriptions about how he handles marketing, communications, and growth on Wednesdays, and culture and recruiting on Fridays, for example, I sensed a way to make more time and I started thinking about this.

Keep it simple, silly: easy to remember themes

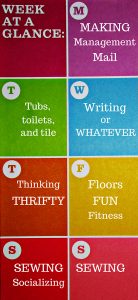
For this to work for me, it had to be simple and easy to remember. After working with different iterations of this idea, my current themes for my days include things like:

Monday

Mail and management on Mondays. Some folks might prefer to use the OHIO rule (only handle it once) for mail. For me, though, I prefer to deal with the last week’s incoming mail quickly and all at once on Mondays.

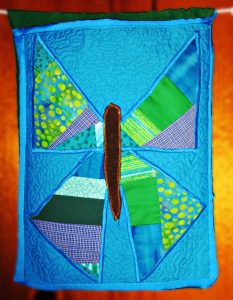
I made this butterfly organizer pocket to hold my mail for dealing with on Mondays.

I made this butterfly organizer pocket to hold my mail for dealing with on Mondays.

Management for me means I am paying bills, scheduling tasks, planning my next week and reviewing the previous week, following up on things, etc.

You could have Making on Mondays, and fit sewing and other projects in on this day every week.

Tuesday

I clean tubs, toilets, and tile on Tuesdays.

Or how about teaching on Tuesdays? You could teach yourself or someone else how to do something new.

Wednesday

For me, Wednesdays are devoted exclusively to writing, and I try to do not much else, because I am currently writing more than one book.

If you don’t have much writing to do, you might like to have whatever Wednesdays instead, for maximum scheduling freedom on hump days.

Sewing could definitely fit into Whatever Wednesday!

If you are in the once a week laundry camp, you could do your washing on Wednesdays.

Thursday

Thrifty Thursdays. I used to choose to do my shopping on this day, since following the thrifty theme helped me not to make impulse purchases or otherwise spend unwisely.

Now that shopping is on my don’t do list, I am helping to free time from excess management on Mondays by theming Thursdays for thinking, too. I allow myself to invest a larger percentage of this day for reading and learning new things.

Friday

Floors, FUN, fitness, and friends on Fridays- I use Fridays for fitting in all these things.

I try to schedule most of our outings, field trips, hikes and other outdoor activities, and also playdates or informal dinner parties with friends, on Fridays.

I also do a good bit of sewing under the umbrella of fun on Fridays. This would be for fun new project ideas, just playing with patchwork or starting a new quilt, stuff that is fun. I wouldn’t do mending on a Friday, since that isn’t as much fun.
We have family time every day here, but if yours doesn’t live with you, maybe you could use Fridays for family time, if this will help you.
I’ll also tell you about a tool that can save a ton of time from Friday’s floor cleaning task. I have a lot of hardwood and other hard floors, and also a pack of boys and a dog. So cleaning floors used to take up what felt like half my day on Fridays.

Luckily, a steam mop is a huge helper that cuts this task from tedious chore to so fast and effective it is almost fun to clean floors.

These are not all made equal, however. I love the well-designed Luna Plus steam mop system, especially because of its handy extra uses in the bathroom. This baby can save time on the floors on Fridays, and the tub and tile on Tuesdays, too.

It cleans twice as well as you can, and in half the time!

Saturday

Sew on Saturdays.

Here are some ideas to get you started thinking about your own themes for every day of the week.

Here are some ideas to get you started thinking about your own themes for every day of the week.

I would advise against any temptation to have Saturday shopping as a theme! That is based on my own opinions, however; you should do what makes you happy.

If you normally shop on Saturdays, could you move to using thrifty Thursdays for this? Then you could save money for more sewing equipment and supplies and a whole day of the week for sewing. I’d love to help you save time AND money, so do consider this option.

Some folks might like to theme their Saturdays for socializing. I do this some weeks myself.

Sunday

Sew on Sundays, too!

It is fortunate that there are two days of the week beginning with S! And it makes perfect sense when theming your days to plan two days of sewing, if you want to make more time to sew.

Of course you could also devote all or part of either Saturday or Sunday to Service or as your Sabbath day of rest and reflection.

And wait, there’s more!

This series will be continued to part three, next week, because I’ll like to show you a few more ways to make more time. And I’ll share a video I am working on for you, where I’ll give you more details and inspiration about all the ideas from this series.

Until then, happy sewing. I hope these tricks can help you to make more time for sewing this week, and I hope you get to enjoy making something you’ll love.

80s Prom Dress Hack

80s Prom Dress Hack

For the most part, I use my sewing skills for myself, and my immediate family. Sometimes, however, I get to help friends out. As was the case this week when my friend, Tania, asked if I could help her with a costume for a party this weekend. The theme was 80s Night and she had found an authentic 80s Prom Dress that ALMOST fit her. She just needed the dress to work for that one night. I was game to help her make it happen.

Verdict

When she brought over the dress I assessed three main issues:

  1. The zipper was broken on the left side of the plaque.
  2. There were two rips to the right of the right-side zipper.
  3. Her rib cage was wider than the fit of the dress. We would need to somehow expand the torso piece of the dress to get it to fit her for an evening.
I decided to extend the circumference of the dress by creating a fabric plaque that would be sewn onto the left side of the zipper opening.

I decided to extend the circumference of the dress by creating a fabric plaque that would be sewn onto the left side of the zipper opening.

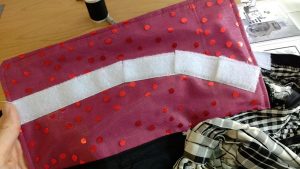
The good news is that these were all problems I could tackle. I decided to extend the circumference of the dress by creating a fabric plaque that would be sewn onto the left side of the zipper opening (I cut off the broken zipper) and would attach via Velcro to the right side of the zipper opening.

The good news is that these were all problems I could tackle.

The good news is that these were all problems I could tackle.

Resourceful fabric recycling

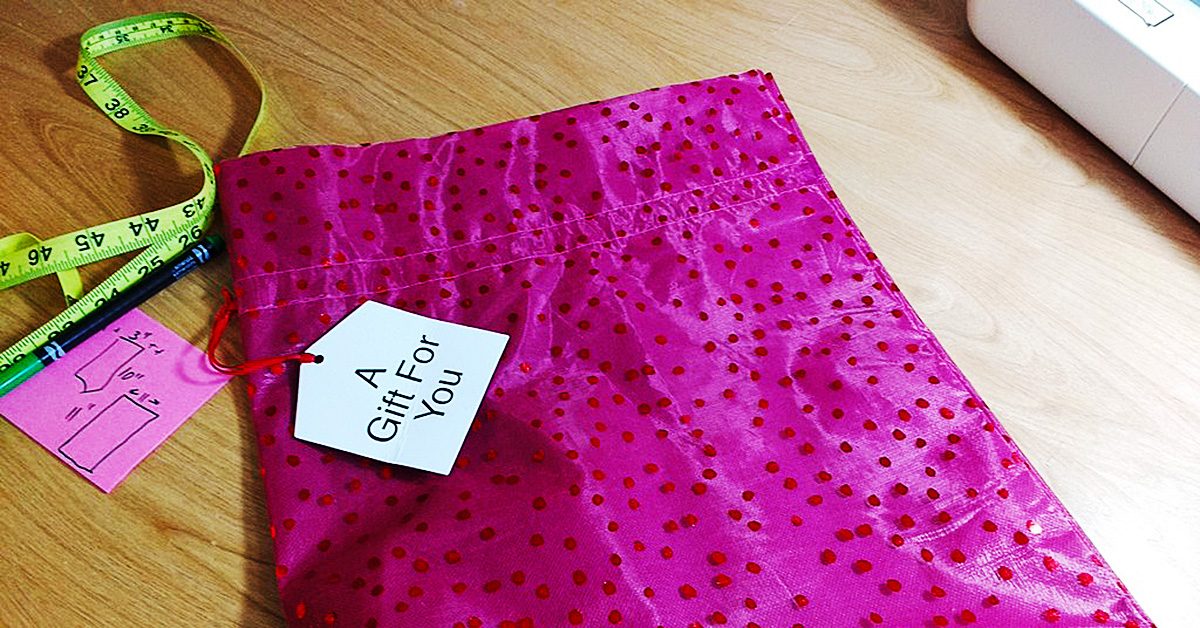
Tania brought two gift bags with her that we planned to use as extra fabric. They were glittery and shiny and would match the dress and the theme of the party. From the red bag I cut out the larger plaque.


I sewed it directly onto where the zipper would have zipped up on the left side of the dress opening.

I sewed it directly onto where the zipper would have zipped up on the left side of the dress opening.

I sewed it directly onto where the zipper would have zipped up on the left side of the dress opening.

Patches?! We don’t need no stinking patches

Then I tackled the holes. I used the gray gift bag fabric to support the fabric under where the rips were and then zig zag stitched several lines of stitching to patch the rips (Remember this just needed to work for one night).


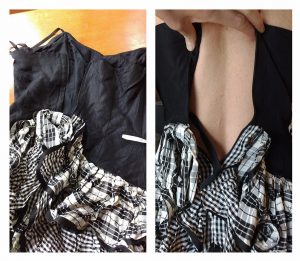
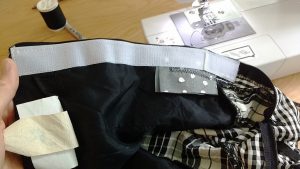
Here you can see the gray gift bag fabric on the underside of the dress. I sewed Velcro to the right side of the dress opening, sewing right over the invisible zipper.

Here you can see the gray gift bag fabric on the underside of the dress.

Here you can see the gray gift bag fabric on the underside of the dress.

Measure twice – cut once

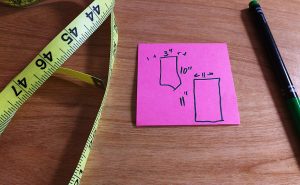
For this part, I had her put the dress on and then we fit the dress to exactly the width she felt comfortable in. I used my Clover Chaco-liner Pen to draw a line where the other side of the Velcro needed to be sewn on. The curve at the end is where the lower portion of the still working zipper zipped up to meet the straight line of the back piece.

The curve at the end is where the lower portion of the still working zipper zipped up to meet the straight line of the back piece.

The curve at the end is where the lower portion of the still working zipper zipped up to meet the straight line of the back piece.

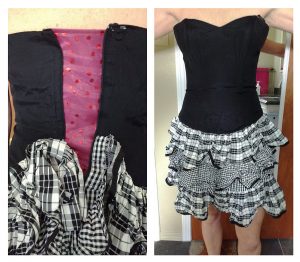
Ta da!!! The red fabric + Velcro expanded the corset piece perfectly. On the right you can see her in the dress after we’d finished. The dress is a little roomy in the bust, but she will be wearing a strapless bra to fill that in.

I’m so glad I could help my friend out with my sewing skills.

I’m so glad I could help my friend out with my sewing skills.

I’m so glad I could help my friend out with my sewing skills.

Have you ever helped someone DIY a costume?

———————————————————————————–
Charlotte Kaufman is a writer and sewist in Mammoth Lakes, California. She specializes in marine and home interiors and continues to fall more and more in love with quilting. You can follow her at charlottekaufman.com.
How to Make More Time to Sew

How to Make More Time to Sew

You can make more time to sew

Do you have more ideas and things you’d like to make than time to do them?

No matter how many ideas that is, the right answer is no.

You can make more time to do anything you want, including sewing.

Here are my tips & tricks for finding more time.

Here are my tips & tricks for finding more time.

Productivity has become one of my passions. In fact, I am outlining a book I’ll write about many productivity hacks I have learned. I’ll share a few of these with you.

Make More Time to Sew

Set up for success

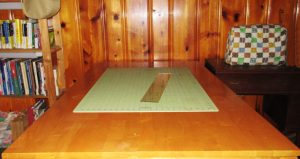
You need an efficient, working sewing system, including machines and workspace. That’s not to say that you can’t use a kitchen table if you don’t have dedicated space. In that case, a big part of your system would be keeping that kitchen table clean and never allowing piles of things to accumulate there. That way, you can whip out your sewing machine and get to work whenever you find a chunk of time to sew.

Keep work spaces clear & ready for working whenever you find time to sew.

Keep work spaces clear & ready for working whenever you find time to sew.

You do not want to waste time having to clear a space to sew. Keep your spaces clean and clear. Have backups of all machines, if you can. And keep them clean and in good working order. I gave tips about this when I laid out rules for keeping your sewing room in order.

The don’t-do list

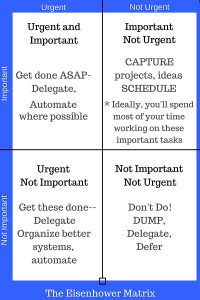
Use the Eisenhower Matrix for prioritizing tasks. Start your don’t do list by dumping all the tasks in the not important, not urgent quadrant.

Use the Eisenhower Matrix for prioritizing tasks. Start your don’t do list by dumping all the tasks in the not important, not urgent quadrant.

Here is a great way to grab all kinds of time.

What are you currently doing that someone else could do?

If you are a parent, for example, that job is about raising competent people. And doing things for kids is often a disservice to both of you. It was awfully helpful for me and my kids when I realized this.

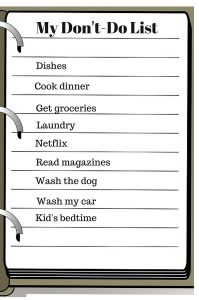
My own don’t do list started with only one item I could think to move there—washing dishes. It stayed like that for a long time. Gradually, I started finding things to add and helpers to give tasks to. My don’t do list is quite long by now.

My don’t do list now includes going shopping for groceries, for example. I order groceries online, and my husband is willing to go to the grocery store and pick them up. So I never go out for groceries at all anymore!

This is liberating and frees up all kinds of time to sew.

You can say no!

Do not feel obliged to accept all invitations or requests for your help. Be helpful and social, but remember the rule: don’t do for others what they can do for themselves.

Here is another helpful rule to keep in mind when thinking about your don’t do list: Only do what only you can do.

Right now, I’m busy doing so much that only I can do that I have delegated a lot of tasks to others & gained time by having a long don’t do list.

Right now, I’m busy doing so much that only I can do that I have delegated a lot of tasks to others & gained time by having a long don’t do list.

When you are looking at items on your plate and deciding which things to dump, it might be helpful to think of the 10-10-10 question. Just ask what difference a particular task will make in ten minutes, in ten months, and ten years. If it doesn’t matter much in any of these timelines, then perhaps that is a task you can let go and include on your don’t do list.

You can use this question to clearly see and reorder your priorities if necessary, so it is a helpful tool in other ways, too

Capture all your ideas

Achieve a mind like water that is free to flow in whatever container it finds itself by emptying it of all those things you do want to do.

Don’t use your brain power for keeping track of ideas and plans. Write these down. You need to regularly drain your brain, or download data to paper or digital file.

Use a notebook, card file, or organize lists on an app. The important thing is to have a system for tracking all your ideas, projects, and tasks. And use it!

How to Make More Time to Sew

I’ll recommend my two favorite ideas for this: a bullet journal or bujo, as these are affectionately known online, and a kanban, which comes from the system known as kaizen.

Bullet Journal

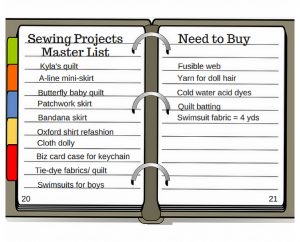
A bullet journal is a notebook with numbered pages and an index in the front. This helps to organize your lists and information so you can find it. You can have project lists, lists of next actions and Most Important Tasks, books you’d like to read, garments or quilts you want to sew, ideas, sketches. The point is to use it to capture everything you want to keep track of, rather than using your headspace for this.

Use an index in the front & number bullet journal pages to easily find all your lists.

Use an index in the front & number bullet journal pages to easily find all your lists.

Kanban

A kanban board is a central tool in the system known as kaizen (“change for better” or “continuous improvement). I find it to be incredibly helpful.

A kanban board is simply three columns: to-do, doing, and done. I have used a white board and also a tri fold board and post-it notes to organize a kanban for some big projects before. Now I use free Trello boards to do this digitally.

My kanban board for today.

My kanban board for today.

The trick to making kanban work for you is to limit the Doing column, and keep it moving. My advice would be to use no more than three doing cards at a time. I allow an absolute maximum of five on mine, but try to keep it to three or just two.

Move these doing cards quickly to done, in a continual stream. The way to successfully do this is to make highly actionable tasks. “Make a quilt,” for example is a PROJECT, not a task or next action. Break projects into next actions. So the first task for “make a quilt,” might be to settle on a design, or if you’ve done that, plan and buy all the fabrics. Next actions in order would then be, prewash fabrics, iron fabrics, cut patchwork pieces, assemble patchwork, finish quilt top, make a quilt sandwich and pin, quilt, bind.

I hope these time saving tips help you. There’s more; I saved my favorite productivity hacks for finding more time to sew for part two of this series, next week.