Common Ground - Women's Sewing Center in Pakistan

Common Ground – Women’s Sewing Center in Pakistan

The road on the way to Chirah.

The road on the way to Chirah.

The road from Gilgit, Pakistan to Chirah in the Bagrote Valley is not an easy one. It starts out easy enough: along the paved Karakorum Highway. But, a few kilometers outside of Gilgit, you take a left directly into the mountains. And then the road is dirt, gravel, large rock, and sand – and steep. Lung wrenchingly steep, if you’re on a bicycle as we were. It winds up and around the mountain, free of guardrails, devoid of almost all traffic except the occasional motorbike. There is nothing to filter the searing sun. The air is heavy and hot and the path always, always, leads upward.

Until finally, the road evens out, becomes almost flat. And green appears – grass, trees, gardens, rows and rows of vegetables spread out on both sides. The air becomes a bit cooler and the winds whistle down from the peaks, circling through the valley in a refreshing heavenly respite.

Chirah Sewing Centre

Chirah is a small village in the Bagrote Valley in the Gilgit-Baltistan region of Pakistan. The region, self-governing, receives very limited support from the central Pakistani government.

The Chirah Sewing Centre, opened in April of 2012, provides six month courses to the women of the region to learn sewing skills so that they may, if they wish, earn their own income.

The Sewing Centre is housed in a small space provided by a village resident.

The Sewing Centre is housed in a small space provided by a village resident.

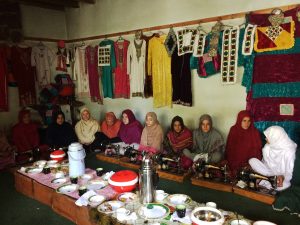
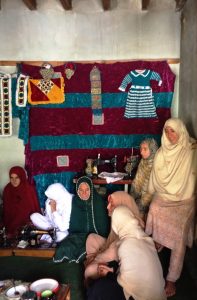
The Sewing Centre is housed in a small space provided by a village resident. The room is not very large at all, probably about 12-14 feet by 6-8 feet and there is no electricity. All the machines are treadle or hand operated. Only two of the machines were in cabinets – the rest were on the floor. They were all the old black Singer style machines in wooden cases. The women sit on the floor (or at the limited available tables) to sew, creating all kinds of garments and decorative textiles, a sampling of which hung on the walls of the room.

Little women

The women cooked breakfast for us the day we visited and we ate on the floor surrounded by their machines and sewing projects. The director of the Centre, a man, told us that they were hoping to acquire an overlock machine in the future. I wondered how that would work without electricity but didn’t get a chance to ask my question. Two of the women, the teachers we were told, sat in the corner of the room while we ate. They spoke quietly to each other from time to time but, as is often the case in Pakistan, they never directly addressed us.

I was the only woman in the cycling group of 7 plus 2 male Pakistani guides. We made eye contact, me and the two women in the corner, and they grinned at me when I waved.

After we ate, all the women who were enrolled in the sewing course, filed into the room to sit behind their machines. Everyone took pictures and the Director continued to talk about the women and the centre and what they were learning and what kinds of things they made.

Cultural differences

I tried to convey how I really enjoyed meeting the ladies at the Sewing Centre.

I tried to convey how I really enjoyed meeting the ladies at the Sewing Centre.

The men in my cycling group stood at the doorway and took photos of the women and their machines. I took some too but, after the men had gotten all the pictures they wanted, I went in to talk to the women directly. None of them knew much English and I, unfortunately, know very little Pakistani.

I did have pictures of my sewing machines and my studio on my phone though and I showed them those. One by one, as they scrolled through my photos and realized I sewed also, they smiled and grasped my hands, laughed, and talked excitedly with each other. I desperately wished we could communicate better. I wanted to talk to them about sewing, about the garments they made on machines without electricity. I also sort of wanted to apologize for all of my male companions taking photos of them as if they were in a zoo though I knew that none of them meant it that way. I also wanted to say that I wished they could tell me about the Centre in their own words, without the editing of a male spokesperson. But I couldn’t. So I had to settle for showing them as many pictures as I could and trying to convey how I really enjoyed meeting them and how much respect and admiration I had for them.

I wished that we could all sew together. I wished they were allowed to have their own voices in rooms full of men. I wished there was a way I could tell them how amazing I thought they all were. I wished they lived in a world where it was ok for women to talk to men freely, where they could look anyone they wanted in the eye, speak their minds. I wished they didn’t have to stay silent while someone described their lives. I wished I could spend more time with them but the group was getting ready to cycle on.

And so I got up to say goodbye. And every single one of them got up as well, hugged me as I left, and looked me directly in the eye, one tailor to another.

The Best Heavy Duty Sewing Machine: A Buyer's Guide to Value

The Best Heavy Duty Sewing Machine: A Buyer’s Guide to Value

What is the best heavy duty sewing machine? I’ve been looking at these machines for a while now, and I have formed some strong opinions on this subject.

The Best Heavy Duty Sewing Machine: A Buyer's Guide to Value

I sure need one. Twice now, I broke and caused expensive repairs to regular sewing machines by using them to sew projects that were too thick. Once it was a heavily pocketed and quilted bag (and piping! I should have known better). And the other was when I was experimenting on a new dog collar design and tried to sew too many layers of thick webbing and embroidered trim.

I have several project ideas that I have not been able to make yet because I don’t dare to without a heavy duty machine. After carefully shopping these, I have decided there are a couple of clear choices for which heavy duty sewing machine is best to buy. One is simply the best heavy duty sewing machine period, and the other is the best value economy option.

The best heavy duty sewing machine

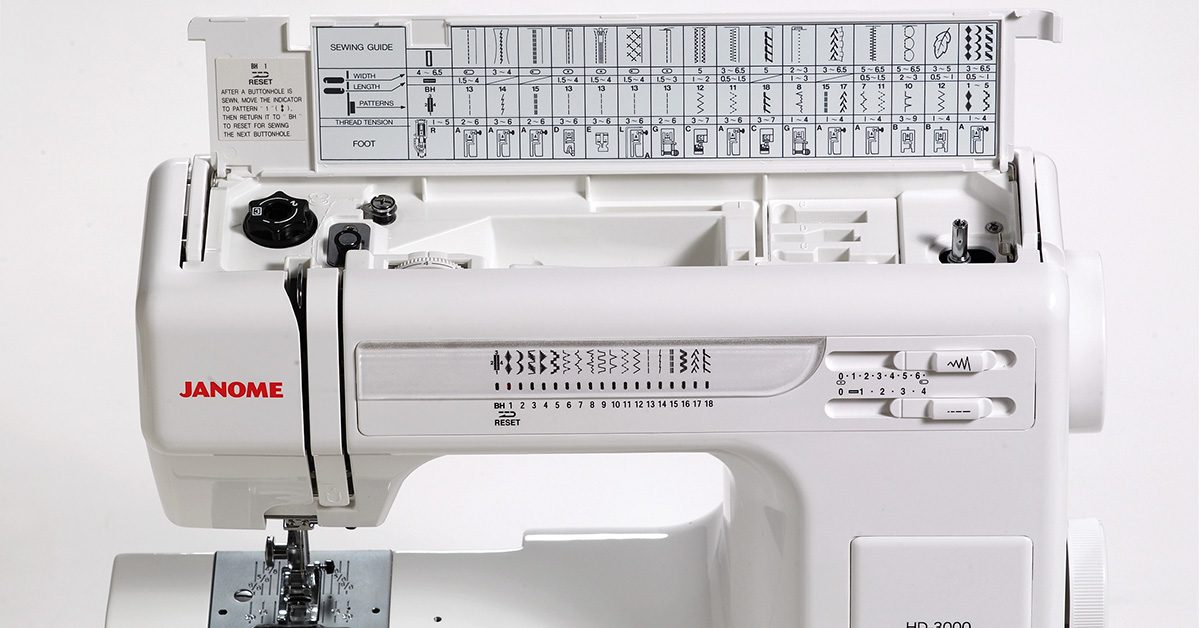
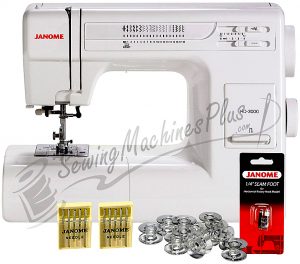
In my opinion, the Janome HD3000 is the best heavy duty home sewing machine on the market.

It is no secret that I love and trust Janome. I have never had any problem with a Janome machine other than the ones I caused myself, as mentioned above. And Janome has been making and improving on this model for more than 20 years now, so I know they have got it exactly right. Plenty of people are still sewing on those decades old machines today; they are high-quality machines that are built to last.

The HD3000 has so many features, functions, & stitches that it is a perfect choice for a primary machine.

The HD3000 has so many features, functions, & stitches that it is a perfect choice for a primary machine.

The HD3000 has so many features, functions, and stitches that it is a perfect choice for a primary machine. I am sure I would use it regularly for all kinds of sewing, rather than keeping it covered until I have a heavy duty type project.

Here is just a partial listing of the Janome HD3000 features and included accessories:

  • Built-in needle threader
  • Horizontal, drop-in bobbin
  • Snap-on presser feet
  • 18 stitches
  • One-step buttonholer
  • 7 piece feed dogs
  • Drop feed
  • Free arm
  • Extra-high presser foot lift
  • 5mm maximum stitch width, 4mm maximum stitch length
  • Blind hem foot
  • Overedge foot
  • Hemmer foot
  • Quilting bar
  • Hard cover

If you want the best heavy duty sewing machine, then you want to buy this one.

The best value economy choice

I also want a coverstitch machine, an embroidery machine, and I need a new serger. So, like with most of my buying, I need to make an economy choice and spend less money on my heavy duty sewing machine. I think the best value choice is a Toyota Super Jeans machine.

While these machines are not labeled as heavy duty sewing machines, they actually are. They are built to sew through up to twelve layers of denim. Denim is about as tough as fabric gets, so I know these machines will handle whatever I need them to sew.

The gliding foot that comes with these is really neat; it automatically adjusts when sewing layers of different thicknesses and makes for easy sewing on bulky projects.

I might have said that I wouldn’t buy any sewing machine except one made by Janome, but that was before I knew that Toyota makes sewing machines. Just as I have been loyal to Janome for buying sewing machines, I have been loyal to Toyota for buying cars. I know well from experience that Toyota offers superior quality and reliability at a good value.

The Toyota Production System

My trust in Toyota goes beyond my experience with their vehicles; I trust their production system and even use parts of it myself. When I wrote about productivity here, I mentioned the kanban system and that it comes from the system of kaizen. I did not mention this then, but kaizen is just one part of a larger system known as the Toyota Production System, or TPS.

Toyota pays careful attention to all steps in their manufacturing and other systems to ensure quality, efficiency, and value. It is a system that works so well that the system itself has become famous. This is why I know I can trust anything made by Toyota.

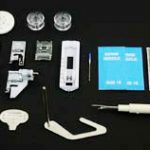
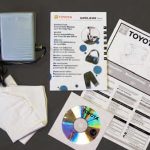
Any of the Super Jeans machines make an excellent choice for a heavy duty sewing machine. They each include utility and decorative stitches; a generous accessory package; and a 2-year warranty on the motor, wiring, light assembly, switches, and speed controls (and 5 years on the sewing machine head). You can also get an extension table for these to help with sewing large projects.

The J15 is the most economy model. It has 15 programs with 11 utility and 4 decorative stitches. It does not have a stretch stitch.

The J17 has 17 programs: 13 utility, 2 stretch, and 2 deco stitches.

The J34 is the luxury model in this Toyota line, and performs 34 programs, including 15 standard and 19 stretch and decorative stitches.

While the Janome HD3000 is the best heavy duty sewing machine to buy, I’ll be saving some money and going with what I think is the best value option, the Toyota J34. I can’t wait to use it! Which one are you getting?

How to Manage your Works in Progress (WIPs)

How to Manage your Works in Progress (WIPs)

I currently have at least a dozen WIPs in one stage or another.
I currently have at least a dozen WIPs in one stage or another.

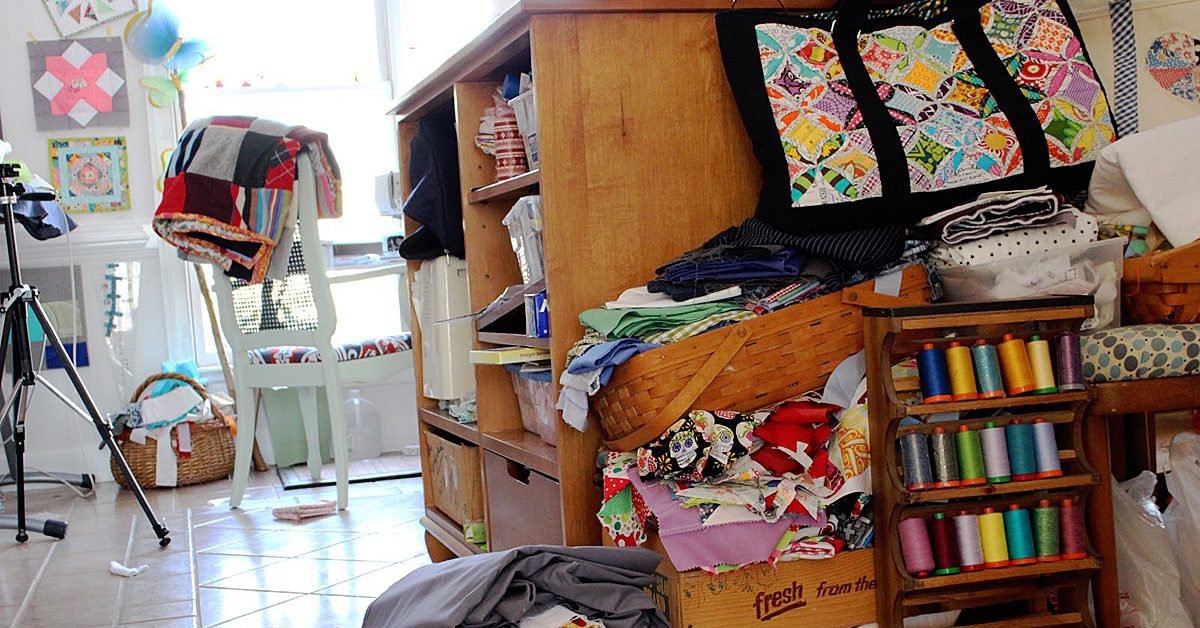
If you are like me and many other creative people, you have a long list of projects you are working on, planning, and just getting started. In the quilting community the term for these are WIPs, or ‘works in progress.’ I currently have at least a dozen WIPs in one stage or another (and not just quilts, but other sewing projects as well). Here’s how I manage the materials for each one.

Decorate

Remember that fabric is beautiful. Don’t hesitate to post photos of your ideas on a design board, or, like I’ve done here, with fabric samples that not only keep me motivated to work on my project, but look beautiful on my wall too.

Remember that fabric is beautiful.

Remember that fabric is beautiful.

Front and Center

Sometimes it’s best to keep your current WIP exactly front and center. I make a point of only keeping one project at a time on my work table. My mental message with this is that the only thing I’m working on is the project in front of me. This keeps me focused on the task at hand. If I truly want to work on something else, I put away the other project first.

Sometimes it’s best to keep your current WIP exactly front & center.

Sometimes it’s best to keep your current WIP exactly front & center.

Next Up

The small shelf to the left of my work table is where I keep my iron and my ‘next up’ project. This way I know what I have in my pipeline and can easily get to it once I’ve cleaned up the main table WIP.

I know what I have in my pipeline & can easily get to it.

I know what I have in my pipeline & can easily get to it.

Special Sections

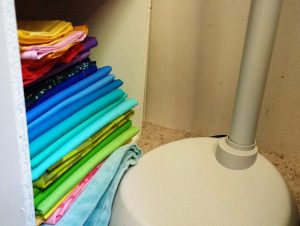
Some projects are so large that I keep them in their own shelves, away from my main fabric stash. The assortment you see here is allotted for my 2017 Temperature Quilt, which will feature 26 different fabrics to map out the daily high temperatures of my city.

The assortment you see here is allotted for my 2017 Temperature Quilt.

The assortment you see here is allotted for my 2017 Temperature Quilt.

Keep it Hidden

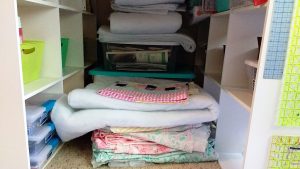
This is the view under my work table. Unless you pull out my chair, you can’t see these large pieces of batting, quilt tops, and backing fabrics I have sitting in wait. Sometimes your WIPs are big. Finding a place to tuck them away until you get to them will help keep your workspace clean and ready to use.

This is the view under my work table.

This is the view under my work table.

Fabric Stash

Sometimes my WIPs are tucked directly into my fabric stash. The top bin on the right is fabric I have pegged to become new bedding for the full-sized mattress in my room. It folded neatly and fit right in with the rest of the stash and no one is any more the wiser that I have it in my list of WIPs.

Sometimes my WIPs are tucked directly into my fabric stash.

Sometimes my WIPs are tucked directly into my fabric stash.

Deep Storage

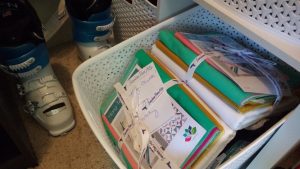
Sometimes you see a screaming deal on a quilt kit (or two) or you have WIPs that you know you won’t be able to get to for months or even years. I tuck these away in deep storage in my closet. I have a friend who stores them in bins under her guest bed.

I tuck these away in deep storage in my closet.

I tuck these away in deep storage in my closet.

Computer Files and Pinterest

Don’t forget that some WIPs are still just dreams and plans. Keep these twinkles in your eye safely organized in a documents folders on your computer that has patterns you plan to make or designs you want to pursue. Likewise, Pinterest is a great visual repository for storing images that link to websites with projects you are currently working on or plan to.

How do you manage your works in progress? Let us know what works for you.

———————————————————————————–
Charlotte Kaufman is a writer and sewist in Mammoth Lakes, California. She specializes in marine and home interiors and continues to fall more and more in love with quilting. You can follow her at charlottekaufman.com.
DIY: Reversible Tote Bag Tutorial

DIY: Reversible Tote Bag Tutorial

It is easy to sew a reversible tote bag; even beginners can make this project.

It is easy to sew a reversible tote bag; even beginners can make this project.

It is easy to sew a reversible tote bag; even beginners can make this project.

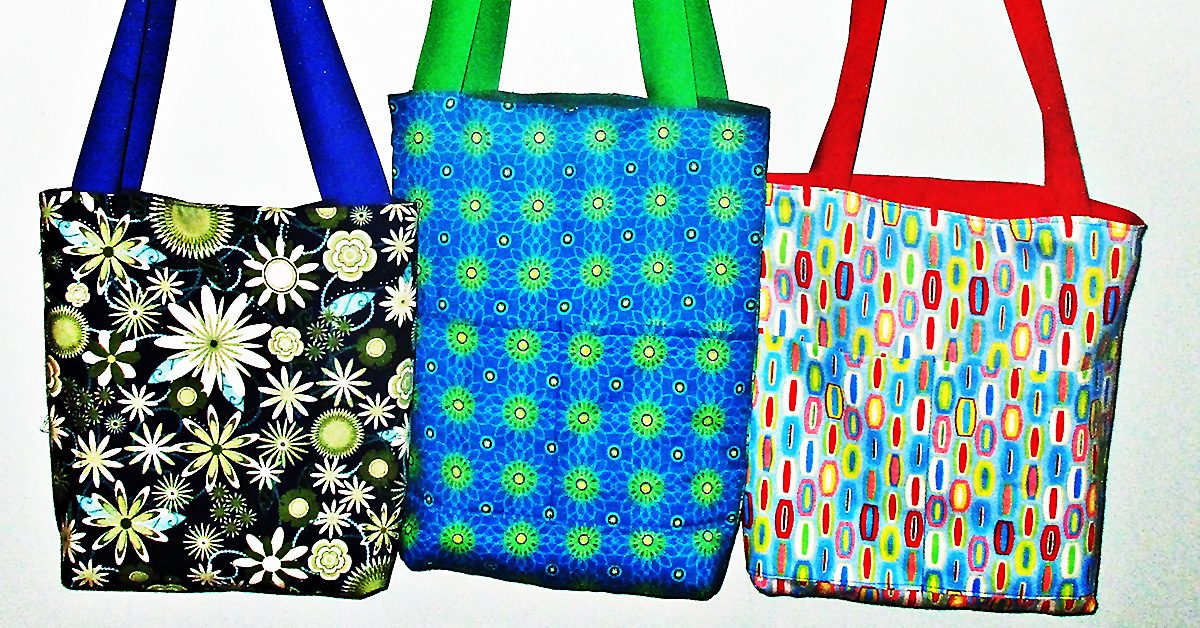
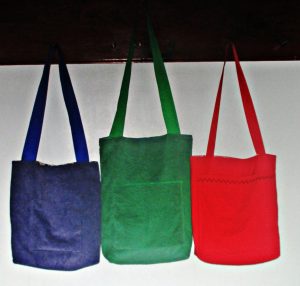
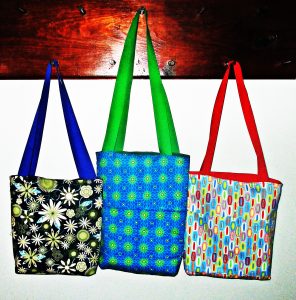
You can make these in any size. My three examples are each sized slightly differently.

To make one reversible tote bag, you need 2 different bag fabrics. Depending on the sturdiness of your fabrics, you may also need medium weight interfacing or fusible fleece. You can make your bag handles from long rectangles of one or both of these fabrics, or you can use grosgrain ribbon, as I have here.

Reversible tote bag step one: cut bag pieces

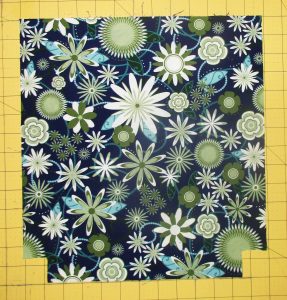
Measure & mark 1.5” from both sides of the bottom corners & cut these little squares out.

Measure & mark 1.5” from both sides of the bottom corners & cut these little squares out.

Cut two squares or rectangles of each fabric to your preferred dimensions. I made these using 13” x 14”, 14” x 15” and 13” x 17” rectangles, and I have made them both much smaller and much larger.  The 13” x 17” is big enough for my laptop. But ribbon handles aren’t a good idea for a laptop bag; follow the directions for making stronger fabric handles if you plan to carry your computer.

Then measure and mark 1.5” from both sides of the bottom corners and cut these little squares out. Do this for all four pieces of your bag fabric.

Step two, optional: interfacing

If you choose to make your reversible tote bag from home decor fabric and/or canvas, you won’t need to use interfacing.

If you are using quilter’s cottons or similar lightweight fabrics, cut fusible fleece or interfacing to fit two of the bag pieces. Follow package directions to fuse fleece or interfacing to the wrong side of both pieces of one bag fabric.

Step three, optional: pockets

You can make pockets on one or both sides of your reversible tote. The easiest way to make pockets is to start with a rectangle, fold it right sides together, and sew all around, leaving an opening for turning. First topstitch the opening closed, then pin and sew the bottom and sides of the pocket to the bag.

You can make a long rectangular pocket that stretches the full width of your bag, or make square patch pockets and sew them in the middle of one or more of the bag pieces.

Step four: sew two bag bodies

Take both pieces of one of the bag fabrics and sew along the bottom and side seams with right sides together. Press seams open. Now, miter the corners by lining up the side and bottom seams you just sewed at the middle of the new seam you will form from the square cut out. Sew these seams.
Repeat with the pieces of the second bag fabric.

Step five: handles

Use a soft measuring tape or even a string hung over your shoulder to determine how long you want your straps to be. I like long shoulder straps, so I usually cut mine about 30 inches long. If you prefer to carry your tote on your arm, cut yours shorter. You need two.

I saved time making these bags by using grosgrain ribbons to make easy straps. To do this, just cut two pieces of ribbon to your desired length.

To make fabric handles, cut two long rectangles to your desired length measurement by twice your desired strap width. Apply interfacing to the wrong side of your fabric if you like.  Fold lengthwise right sides together and press. Sew along the long open edge, then turn. Press again.  Now top-stitch along both long sides.

There is no need to finish the short ends as these will be concealed between the two sections of the bag.

Step six: assembly

They are handy for carrying books, notebooks, your computer, clothes for overnight or the gym.

They are handy for carrying books, notebooks, your computer, clothes for overnight or the gym.

Insert one bag into the other, with right sides together. If your placed pockets on one side of each bag body, insert them together so that the pockets are on opposite sides. Push down the corners to make sure both bag pieces are lined up well at the bottom. Then line up the side seams from both pieces and pin these together.
Take one strap and hold one end in each hand so that the loop hangs down. Be sure it isn’t twisted and insert it between the two bag parts on one side. Measure in from the pinned side seams on each side to be sure the straps are centered. About three inches in is a good guideline, but eyeball your bag to decide on exact strap placement. Just measure the distance between strap and side seam on both sides to be sure they are even. Pin, then repeat on the other side with the other strap.

Now sew together along the top edge.  You will have to leave an opening big enough for turning; I sew across all the straps and leave the opening on one side.  Turn everything right sides out. Both sides of the reversible tote will be pointing out.

Stick your hand into the opening and poke all the corners out from the inside. Then push one bag body into the other so that it becomes a bag with handles at the top. Return to your ironing board and press. Pay attention to the edges still open from turning; you want to press the raw edges inward and neatly align for top-stitching this opening closed.

Now stitch all the way around the top of the bag and you’re done.

Make more!

Reversible tote bags are easy to sew in a hurry & the possible variations are endless.

Reversible tote bags are easy to sew in a hurry & the possible variations are endless.

Reversible tote bags are easy to sew in a hurry and the possible variations are endless. Make them in different sizes and try different fabrics and trims. Use tie-dye, quilting, appliqué, fabric paints, or any other embellishment you like.

They are handy for carrying books, notebooks, your computer, clothes for overnight or the gym. You can use them as a shopping bag, your purse, or for handmade gift giving. Pick out some pretty fabrics and make a bunch. Happy sewing!

Working with Vinyl: Tips for a Beginner

Working with Vinyl: Tips for a Beginner

Imagine a summer day spent by the pool with your sunscreen on, your sunglasses perched on your nose, and a cup of your favorite drink beside you. A cool breeze blows by, and you can’t help but smile from your reclined position on your seat as you casually turn the page on the book you’ve been reading for the last half hour.
Then you set the book aside for the sake of refilling your drink — just when someone decides to do a cannonball into the swimming pool. The water flies upward and outward… and a huge splash lands right on your book. Suddenly, your poolside day of reading deteriorates with the knowledge that the book you were enjoying so very, very much has officially been subjected to the book-disease known as water damage.
This is not a good scenario for a book fan! In fact, it can put a damper on the rest of your poolside visit!

Splish splash

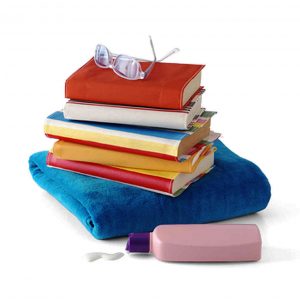
Create a waterproof book cover for relaxing day of reading by the pool.

Create a waterproof book cover for relaxing day of reading by the pool.

So how could this incident have been prevented? Well, you could’ve left the book at home, but there’s another possibility that would allow you that relaxing day of reading by the pool. That option is to create a waterproof book cover. You can find instructions for that concept here, but the step-by-step guide can lead to exploration if you want to properly create this book-protector.

That exploration centers around one important detail, and that’s the best approach for dealing with vinyl in regard to sewing. It is, after all, a much different texture and structure than more common possibilities like cotton and flannel, and if you want the best experience possible for putting together a vinyl-based book cover, looking into how it’s different and what to do about those differences can be beneficial.

Troubleshooting

It’s thick. While it’s not thick enough to be something that seems ridiculous to use, it’s thick enough to come with its own concerns. For instance, you might find that the needle you used to sew that cotton project doesn’t work very well for this vinyl concept. The thicker quality calls for something stronger to easily maneuver through the vinyl to create your book cover. According to one source, “[i]t’s best to use a needle designed for leather or vinyl…[like] Leather Needles from Schmetz” for the task so you don’t have to wrestle with your needle as you go — or maybe even ruin your needle because it bends under the pressure. If this is your first vinyl project, you might want to look for an applicable set of needles for the job!

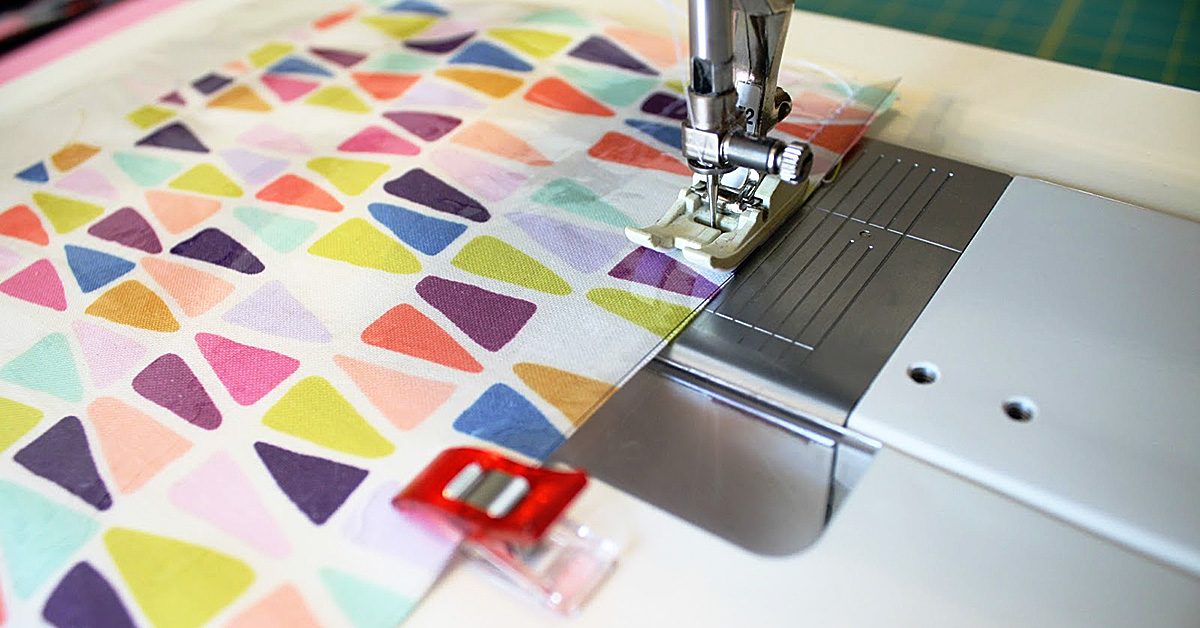
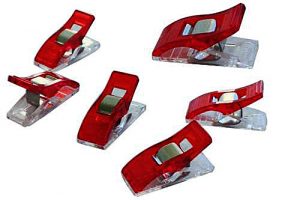
You may want to add Wonder Clips to your to-buy list for when you’re browsing through the store for your vinyl-sufficient needles.

You may want to add Wonder Clips to your to-buy list for when you’re browsing through the store for your vinyl-sufficient needles.

It’s not pin-cushion friendly. While the tiny holes that pin cushions can leave don’t really make much of a difference in flannel, they can make a very big difference in vinyl since they’re much more pronounced! To combat that issue, you might want to add Wonder Clips to your to-buy list for when you’re browsing through the store for your vinyl-sufficient needles. These things can keep your project on track by holding things in place without forever scarring the vinyl!

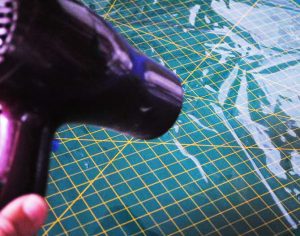
“You can’t iron your vinyl flat.” If there’s something that’s a staple in preparing material for sewing, it could be to iron all of the wrinkles out beforehand. Since that strategy doesn’t really work for vinyl (it “could melt” under the iron!), it leaves the question of what a person can do that make sure everything is even before that first stitch happens. A simple solution would be to use your hairdryer on the vinyl, which will cause it to “flatten out nicely.” No bends, no damage, and no worries as you dive into making your stitches for your waterproof book cover!

A simple solution would be to use your hairdryer on the vinyl

A simple solution would be to use your hairdryer on the vinyl

It might not stay in place. One of the things I personally don’t like about using a silk fabric is that it’s so easy for it to slip out of form and throw off your pinning, cutting, and sewing. And, well, vinyl doesn’t seem to want to stay in place either because of its texture. While this might make it perfect for the waterproof detail, it complicates the sewing process just a bit! This complication though is no reason to throw in the towel for this project since painter’s tape can be used to hold the vinyl in place without damaging it at all. It’s an extra purchase for the project, but it can keep things neat and orderly as you go to create a better, easier-made product.

Use tissue paper to preventing sticking.

Use tissue paper to preventing sticking.

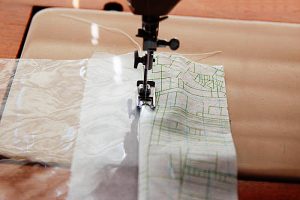
It might stick to your sewing machine. To my thinking, few things are more frustrating in the world of sewing than having material that won’t feed through your machine correctly, and since vinyl can stick, this could be a headache waiting to happen! It doesn’t have to ruin the experience though! You could use tissue paper on “the side [of the machine] that is having trouble” while you feed the vinyl through to keep it from touching that part of the machine, thus preventing the sticking. Once you’re finished, this tissue paper “will easily tear off” to become but a memory of a sewing hack you employed!

If you use these tips, tricks, and suggestions, you might find using vinyl is not so difficult that you have to remove it from your list of materials to use. And if you can use it, don’t hesitate in protecting that new paperback from the swimming pool splashes with its own book cover! It’s one step closer to that wonderful possibility of a summer vacation, poolside read!

Vintage Chic Embroidery Class in June

Vintage Chic Embroidery Class in June

Do you have memories of embroidery work your gram used to do? Maybe you’ve still got an item or two of clothing that she embroidered for you. These vintage embroidery designs are coming back into fashion. If you’ve been trying to recreate this look with your embroidery machine and haven’t had much luck, this upcoming class is for you!

Apparel

Vintage embroidery looks great on men’s and women’s clothing, children’s wear and home décor and accessories. Once you master the technique, you’ll be embroidering everything you can get your hands on.

What to Expect in Class

Vintage Chic Embroidery Class in June

Vintage Chic Embroidery Class in June

This four-hour class includes both lecture and interactive components. You’ll learn how to use the Vintage Software to create beautiful designs on anything you can image. You’ll play with colors and textures to create completely unique results. Learning the DIME way, you’ll master flawless borders. And you’ll learn the secrets behind embroidering on prints, nubby fabrics like knit work, and smooth fabrics like satins and sateens.

Not enough? How about also learning to with heavy thread and matte finishes? All this included for just $29. When you register online (here)  you’ll receive five specially digitized Vintage embroidery designs and get a free goody bag in class!

Register today to save your seat: http://www.inspiredbydime.com/events/sewing-machine-plus-vintage-chic-june-2017/

When is this Awesome Embroidery Class?

We’re glad you asked! The amazing Donna Siler is teaching this class on June 9 and June 10. Both days the class runs from 10am to 2pm. Four-hours of your time will have you embroidering vintage designs like a pro! Classes are held at our shop at 713 Center Drive in San Marcos, CA.

Don’t miss your chance to learn Vintage embroidery. The software makes it easy and this class gives you everything you need to know to create vintage designs on any fabric. They’re so fashionable now, your family and friends will want you to personalize their clothes and home décor.

Can I Take my Sewing Machine on an Airplane?

Can I Take my Sewing Machine on an Airplane?

I’ve been doing a good job this summer of satiating (at least a bit!) my ever-present wanderlust.

I’ve been doing a good job this summer of satiating (at least a bit!) my ever-present wanderlust.

I’ve been doing a good job this summer of satiating (at least a bit!) my ever-present wanderlust. I’ve been to the Dead Sea and the Red Sea and stood in the middle of the desert in Jordan. I’ve wandered down into the depths of a pyramid in Giza and hiked to the top of Mount Sinai.

Today, I’m preparing for a cycling trip to the Karakoram Mountains in Pakistan – during which we’re going to visit the local school and women’s sewing centre in Chirah (a vocational training project supported by the Red Spokes LVCF charity). You can read more about the center here. Red Spokes is also the company that’s organizing the cycling tour I’m about to embark on. If you happen to be interested in that, you can read about it here.

I’m super excited about both the cycling part and getting to visit the sewing center and will definitely try and spend some time communicating with the women there and learning about their lives and what sewing means to them.

Right now though, I’m exhausted after finally managing to (I think) get my bike packed up so it’ll survive both the TSA and the baggage handlers. (Wish me, or rather, my bike, luck).

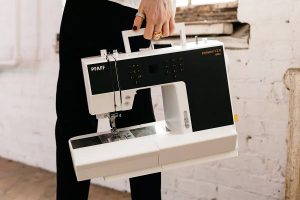
Wrestling with my bicycle and bike bag this morning got me thinking about flying with sewing machines.

Can I Take my Sewing Machine on an Airplane?

Can I Take my Sewing Machine on an Airplane?

When sewing machines fly

When sewing machines fly

It’s been quite a few years since I’ve flown with a machine in tow. I think the last time I did was almost 8 years ago – and security measures weren’t as strict as they are now. I had the machine packed in a rolling suitcase and I recall that I gate checked it with JetBlue. You can also buy great sewing machine specific bags to transport your machine: https://www.sewingmachinesplus.com/trolley-category.php

The important thing to remember though is to remove the needle and any other sharp tools if you’re going to bring as carry-on luggage.

A quick search on the TSA website does indeed confirm that you can bring a sewing machine in your carry on or checked bags.

The Sharp Objects List states that you can also bring knitting, crochet, and sewing needles and safety pins in your carry on but, scissors must be less than 4″ from the pivot point (like these):

TSA and contraband

I’ve been doing a good job this summer of satiating (at least a bit!) my ever-present wanderlust.

I’ve been doing a good job this summer of satiating (at least a bit!) my ever-present wanderlust.

Speaking of the TSA, they actually have a rather amusing Instagram account where they post pictures of confiscated items that people tried to bring on board airplanes as well as answer questions about whether or not specific items are allowed.

Travel tips

If you do happen to need to travel by air with your machine, here are a few tips:

  1. Take the lightest machine you own (only because it’ll be easier for you to carry through the airport. Most airlines don’t weight carry on bags). I know I talk about these Brother machines all the time but they really are incredibly lightweight and durable. And they sew well!
  2. Put your presser foot down on a piece of fabric and remove the needle. Make sure all your thread holders are folded or detracted if they’re foldable or retractable.
  3. Pack some foam or something else cushy around it in case it falls over on its side. I also like to put the machine inside some sort of plastic bag to protect it from water (just in case there’s a freak rain storm, or you drag it through a puddle or something is leaking somewhere).I’m a backpacker/hiker and bike commuter though so I pack everything into clear plastic drawstring bags. Because you just never know.If there’s extra or empty space in the bag or box with your machine, fill it up with something. Fabric, clothes, those air filled plastic pillows – whatever. The more secure a machine is in its case(or box) the less it’ll shift and bang around.
  4. If you happen to still have your machine’s original box and packing material, use that. You can tape the box up and either check it or carry it into the cabin with you. Be advised though, that if you’re taking it as a carry on, you’ll probably have to take it out of its box or case for security. So, bring a roll of packing tape with you so you can seal the box back up.
  5. Remember that the TSA officers are just doing their jobs and sometimes they have different interpretations of what that is or what items are allowed. I travel very often (mostly international) and if there is one thing I’ve learned it’s to always, always be kind and respectful (even if you think the person you’re dealing with doesn’t know what they’re talking about or are not understanding you). I spent almost twenty minutes at the Cairo airport explaining to an officer that I had metal bike pedals, metal clips in my bike shoes and a bicycle seat in my bag. By the end of it, we were both laughing and we both said thank you (I like to think that later, over dinner, he told his buddies or family about the crazy white girl who just biked across Jordan that went through his security line).

Fly, my pretties, fly!

I know that airport security measures can be annoying and I truly wish that there wasn’t the need for them (either real or imagined) but I’ve found time and time again that a pleasant thank you and a smile makes things go a lot more smoothly (and faster!) 😉

And with that, I’m off to JFK Airport. Safe and happy travels to all.

How to Sew a Fitted Sheet

DIY: Sew a Fitted Sheet (from a flat sheet)

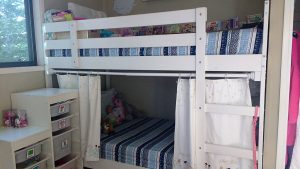
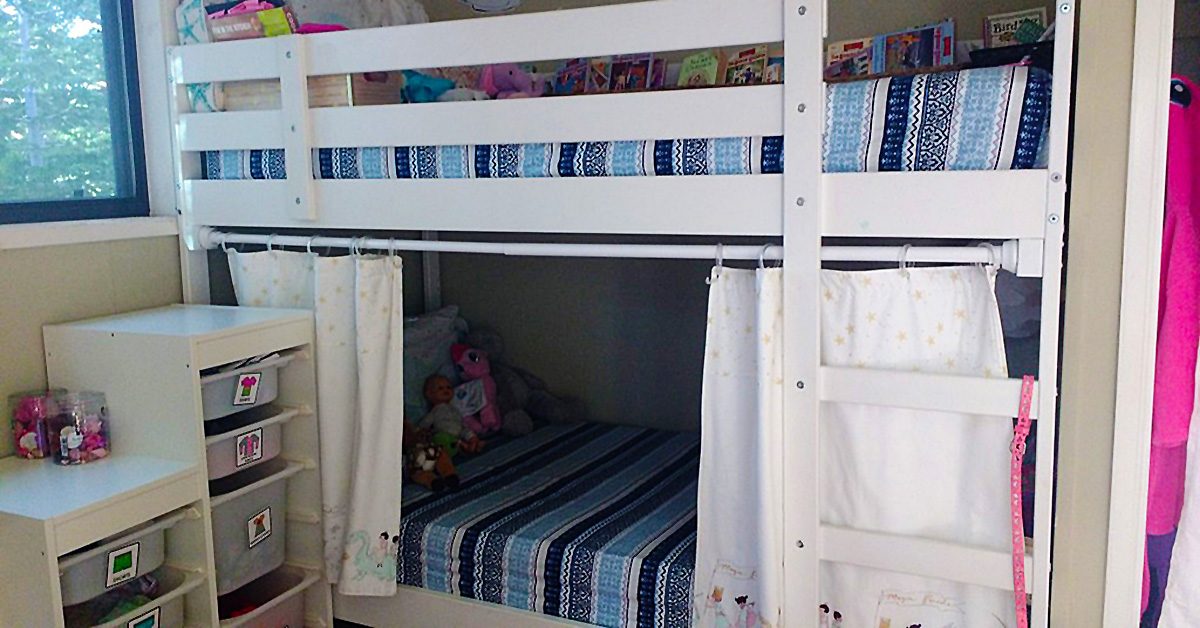
My daughters have bunk beds and I like them to have at least two sets of sheets (per bed) in the event of accidents, sickness, or just in general because kids get dirty.

Our family doesn’t use flat sheets. I always feel claustrophobic when I sleep with one and I end up pulling the sheet out of the bottom of the bed and using it more like a blanket. It’s also a pain to remake the bed every morning. Instead, we used fitted sheets and loose blankets and we wash them all frequently.

Because of this, I can buy one set of sheets, a fitted one and a flat one, and turn the flat sheet into another fitted sheet. That gives me two matching fitted sheets which is perfect for when you have bunk beds.

Measure twice, cut once

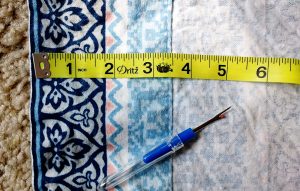
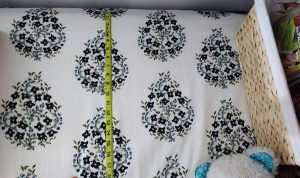
To make your own fitted sheet you need to measure the length and the wide of the top of the mattress you are using. You’ll also need to measure the sides.

This mattress is 38” x 75” and the sides are 7”.

To make your own fitted sheet, first measure the sides, length & width of the top of the mattress you are using.

To make your own fitted sheet, first measure the sides, length & width of the top of the mattress you are using.

To determine the rest, you need to add enough fabric to wrap around under the mattress plus seam allowance. I like anywhere between 3-4” for the bottom fabric (it may depend on the size of flat sheet you are working with) and I allow 1” on all sides for seam allowance. I fold the fabric over ½” and then again another ½”.

Your final equation to determine the size of rectangle you’ll need is:

Seam allowance + bottom fabric + length of side + width (or length) of top of mattress + length of other side + bottom fabric on other side + seam allowance on other side.

Repeat the same process for the length if you started with the width.

I had to take out the top folded seam in order to have a large enough rectangle to meet my measurement requirements.

I had to take out the top folded seam in order to have a large enough rectangle to meet my measurement requirements.

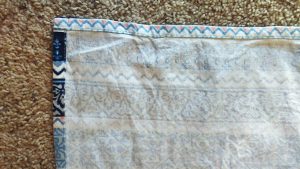
For this flat sheet, I had to take out the top folded seam in order to have a large enough rectangle to meet my measurement requirements. After I took out that seam, I ironed (after having prewashed before I got started).

I had to take out the top folded seam in order to have a large enough rectangle.

I had to take out the top folded seam in order to have a large enough rectangle.

I love it when a plan comes together

Sometimes I love how the universe works. The particular measurements on this flat sheet made it so I didn’t need to calculate seam allowance, other than for the one side I had to take the seam out of. I used all the pre-sewn hems and the measurements worked out perfectly.

I used all the pre-sewn hems & the measurements worked out perfectly.

I used all the pre-sewn hems & the measurements worked out perfectly.

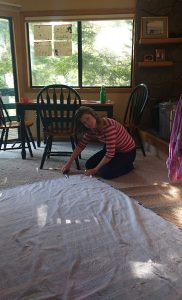
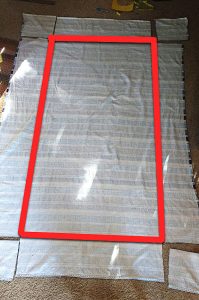
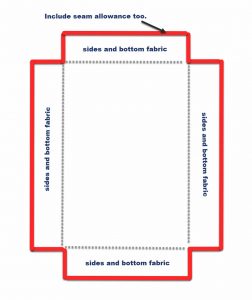
The one part that people might find tricky is cutting out the corners. Here you are going the exact measurement of where the fabric would rest on the top of the mattress, so you take into account: seam allowance + fabric on the bottom + fabric on the sides, on each corner of the square. Make the squares on all corners of your fabric and then cut.

Make the squares on all corners of your fabric & then cut.

Make the squares on all corners of your fabric & then cut.

The red box shows you the exact measurements of the top of the mattress.

The red box shows you the exact measurements of the top of the mattress.

The red box shows you the exact measurements of the top of the mattress.

On your mark.. Get set.. SEW!

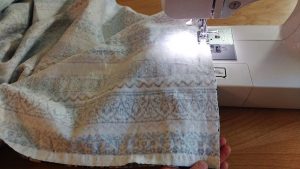
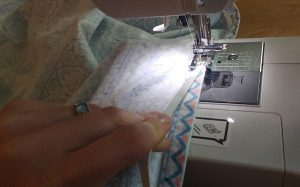
Now it’s time to sew! If it’s easier for you to pin the corners, go for it. This isn’t my first rodeo, so I just sew and go.

If it’s easier for you, just pin the corners.

If it’s easier for you, just pin the corners.

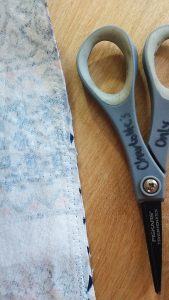
These corner seams ARE unfinished, so make sure you finish each of the four corners with a zigzag stitch to prevent unraveling.

Finish each corner with a zigzag stitch to prevent unraveling.

Finish each corner with a zigzag stitch to prevent unraveling.

The next step would be to create a hem all along the sheet. I’m skipping this part because I’m using the pre-sewn ones from the flat sheet. Normally I would finger fold the fabric over a ½”, and then another ½”, and sew all around the sheet.

After you have a hem, it’s time to add elastic. Some tutorials have you create a casing when you sew the hem and then you feed the elastic through. This method has never spoken to me. I just sew my hem and then sew the elastic directly on.

Making it stretch

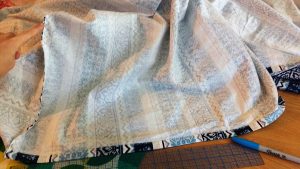
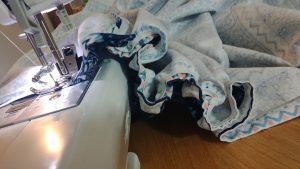
If I had enough elastic I would sew it on the entire hem, all the way around. I didn’t in this case so I measured out 16” from each corner and sewed my elastic around each corner.

I measured out 16” from each corner & sewed elastic around each.

I measured out 16” from each corner & sewed elastic around each.

Be careful not to pull your elastic too taught. You want it to have enough give that you can get it over the corners of your mattress without snapping any of your threads.

Be careful not to pull your elastic too taught.

Be careful not to pull your elastic too taught.

Looking good.

Looking good.

Looking good.

You’ve made your bed – now sleep on it

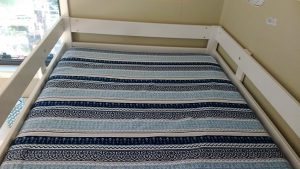
Moment of truth. Here it is on the top bunk. It looks great!

Here it is on the top bunk.

Here it is on the top bunk.

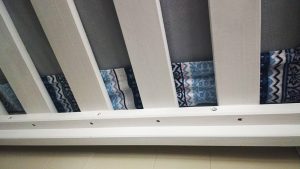
It even looks good from the bottom bunk looking up at the bottom of the mattress.

It even looks good from the bottom bunk looking up.

It even looks good from the bottom bunk looking up.

Added value

The best part is that these two fitted sheets are now interchangeable between the bottom and top bunk and I only had to buy one set of sheets to get matching bedding!

The best part is that these two fitted sheets are now interchangeable.

The best part is that these two fitted sheets are now interchangeable.

Do you make your own fitted sheets? What is your favorite method?

———————————————————————————–
Charlotte Kaufman is a writer and sewist in Mammoth Lakes, California. She specializes in marine and home interiors and continues to fall more and more in love with quilting. You can follow her at charlottekaufman.com.
The (sometimes scary) Life of a Freelancer

The (sometimes scary) Life of a Freelancer

Camel fashion in Petra.

Camel fashion in Petra.

If you hadn’t noticed, I’ve been traveling a bit recently (And I’m actually preparing to head out tonight for one more adventure in a far-flung land). I tend to go on trips solo, often joining an organized group expedition that most likely involves riding my bike through some foreign country.

…you can’t keep putting off the things you want to do or the places you want to go on the assumption you’ll have time in the future to do them.

I meet lots of different people on these trips from all sorts of places and backgrounds. But two of the questions that every single person on this planet always seems inclined to ask are:

(1) What do you do for work?

And (2) some variation of How do you get so much time off work?

Different strokes for different folks

How do you get so much time off work?

How do you get so much time off work?

I give different answers to the first question depending on who’s doing the asking. Sometimes I just say I’m a tailor and pattern maker, though this confuses many people, as the fact that such a thing could be a career never occurred to them. Their idea of a ‘tailor’ is someone like their grandmother sitting at home in a rocking chair darning socks and patching jeans.

Sometimes I say I’m a tailor for film and television shows which usually elicits an “oh wow, that’s interesting!” I always answer that sometimes it is but most times it isn’t all that glamorous (I spend a lot of time hemming jeans and shortening men’s jacket sleeves) though I do enjoy what I do.

If the conversation continues from there it usually enters into the murky waters of “so you’re a freelancer?” Well, yes, sort of. But also, sort of no.

Am I a freelancer?

I am a freelancer - in a sense.

I am a freelancer – in a sense.

I’m a freelancer in the sense that I’m never completely sure where my next job might come from but I’m not in the sense that I belong to a union and therefore have excellent benefits and salary protection. Not all movies and television shows are union ones (if they’re not we call them independent films.) My particular local in NYC does not have what they call ‘a hiring hall’, meaning I’m responsible for procuring my own jobs; the union doesn’t send me on jobs or anything like that.

And I’m also not a freelancer in the way I get normally get paid on a project. Almost all film and television jobs use one of two payroll companies: Entertainment Partners or Cast & Crew. I get paid through them with taxes taken out and a W-2 at the end of the year. The nice thing about both of these companies is that they keep track of all your earnings throughout the years with all the different shows you’ve worked on so you can use them for employment and salary verification when you’re applying for things like mortgages (banks like employment verification!). They are, legally and technically, your employer of record.

Each show or movie sets up its own production company (usually an LLC) independent from whatever parent company it may have (NBC Universal, Disney, etc.) that in turn, enters into contracts with the payroll company and the unions.

You’ve got to know when to hold ’em & know when to fold ’em

My answer is very simple: “I just say no.”

My answer is very simple: “I just say no.”

If I get through all this mumbo jumbo financial stuff and the person I’m talking to is still actually listening, they’ll then ask about how I get time off.

My answer is very simple: “I just say no.”

…its good not to be available all the time.

It’s taken me a very long time to get to the point where I’m able to say no to things. When I was just starting out, I said ‘yes’ to absolutely everything. You kind of have to when you’re beginning, before you’ve built up your reputation. But now that I’ve been doing this for a bit over 25 years, I can turn down things I don’t necessarily want to work on and say ‘no’ to gigs if I’ve planned a trip or vacation.

Free spirit

It’s a glorious thing to be able to say no to something that sounds horrifying (like, for instance: an over night shoot way out in Queens or a huge period television show that some network executive thinks can be made with half the manpower than what is really needed).

Nancy Reagan just says no - you can too!

Nancy Reagan just says no – you can too!

It can be scary, for sure, because I never truly, completely know if I’ll get another job (freelancing is wrought with all kinds of anxiety!). But, if history is any indication, I will. And I try to trust that.

Another thing I’ve learned is that you can’t keep putting off the things you want to do or the places you want to go on the assumption you’ll have time in the future to do them. Because you won’t. Sometimes you just have to have a little faith.

I’m not saying it’s easy to get to the place I’m at. It’s not. I worked extremely hard for almost 20 years while never taking any sort of vacation or going anywhere. But, in my old(er) age work/life balance has become more important to me and, my connections and work reputation are strong enough to allow me to leave town for a couple weeks without jeopardizing my career.

Plus, its good not to be available all the time. Unless they’re a close friend, I never tell people why I’m not available, I simply say, “Sorry, I’m booked up for the next two weeks.”

Booked up on my own personal vacation maybe,  but they don’t need to know that.

Don’t live the same year 75 times and call it a life.

Summer Trends: Embroidery

Summer Trends: Embroidery

Summer Vacation 2017 is upon us!

Summer Vacation 2017 is upon us!

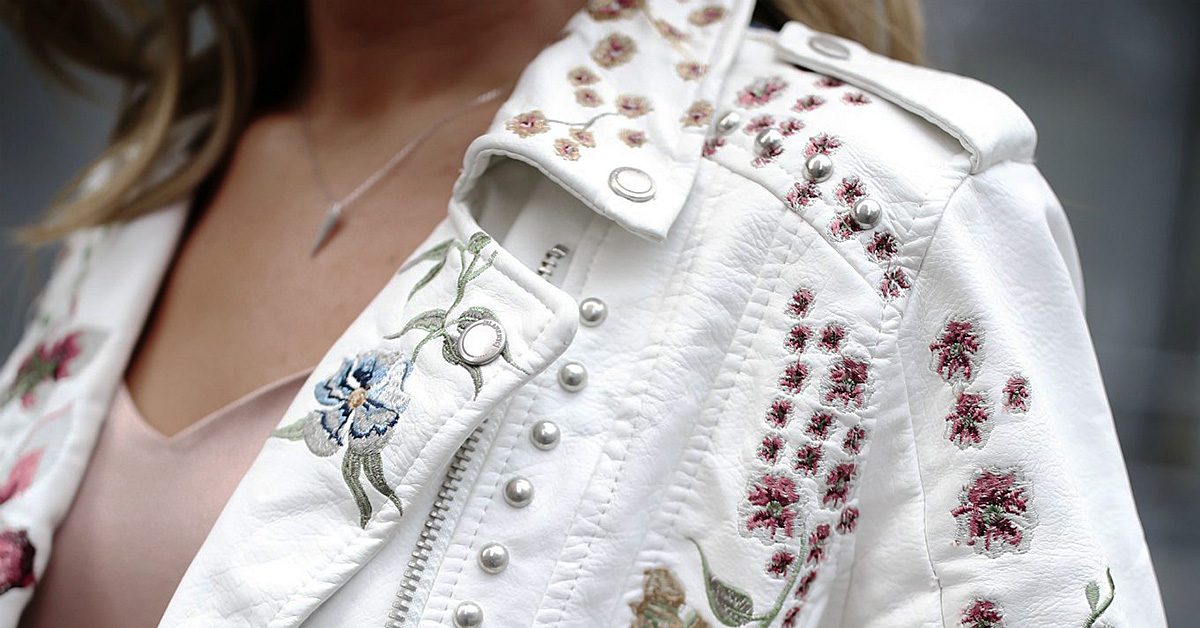
Summer Vacation 2017 is upon us, and as could be the case for any season and time frame, it’s showing up with its own trends. There are a number of these that you can apply to your sewing, but the one that I primarily want to focus on is embroidery. According to one source, “[t]he biggest trend that is coming in 2017 is definitely embroidery,” which makes it a popular topic to explore and try your hand at. For me personally though, it isn’t my main focus in sewing, so there’s plenty of room for me to learn and grow within that category. What better way could I have to do those things than to explore and research for the sake of a new blog post?

Start at the beginning

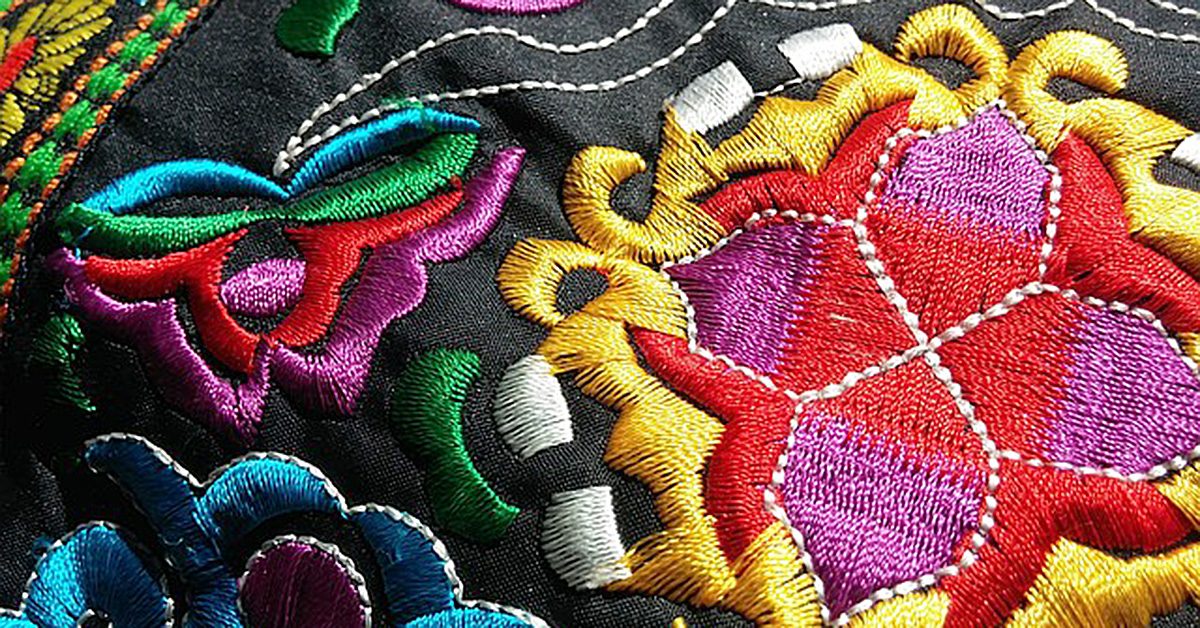
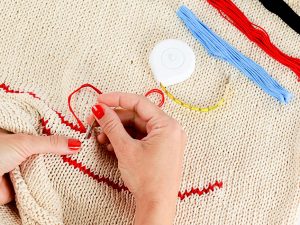
Let’s start with the very basics, like what exactly embroidery is. In regard to the world of sewing, that definition has been given as the following: “Embroidery is ‘thread art’ used to embellish a garment, hat or some other product by adding a sewn pattern. Generally, this sewn pattern includes a design and can also include lettering and/or monograms.” If you find that a bit too far-fetched of a definition though, think of it like drawing artwork on a product or fabric. Just as you would take a marker, colored pencil, or crayon to create an image on paper, “thread or yarn” can be used in embroidery to build the picture you mean to make.

Clearly, embroidery has changed over the years, but the long-reach of this style of artwork speaks volumes to its appeal & application.

Clearly, embroidery has changed over the years, but the long-reach of this style of artwork speaks volumes to its appeal & application.

Embroidery, as it happens, is not a new concept either. It dates back to prehistoric times — “to Cro-Magnon days or 30,000 BC” — so prominently that “fossilized remains of heavily hand-stitched and decorated clothing, boots and a hat [have been] found.” Clearly, embroidery has changed over the years, but the long-reach of this style of artwork speaks volumes to its appeal and application. If it has remained for so many millennia and through the technological changes within the later centuries, it’s safe to say that it’s a topic and technique that has captured interest through the passage of time!

Your only limitation is your own imagination

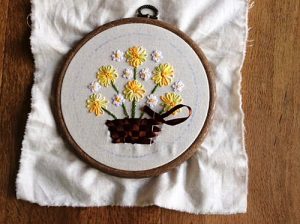
One reason for that appeal is clear since, because of the many forms embroidery can take, the possibilities for design are almost limitless. If you want a picture of a flower, a bird, a house, a doughnut, or a dragon on your work, you can add any of the above — or whatever else you have in mind — so long as you don’t over-exceed your own abilities. If you can physically create it, you can do it! It’s important to note though that this is one area that merits consideration since if you try for something too large-scale on your first embroidery project, you could fall short and become discouraged with the whole process. When you start off with such a bad experience, it can be a psychological obstacle to overcome if you want to better yourself in the field. Keep in mind then where you are with embroidery, and choose projects that are fitting for your level.

If you can physically create it, you can do it!

If you can physically create it, you can do it!

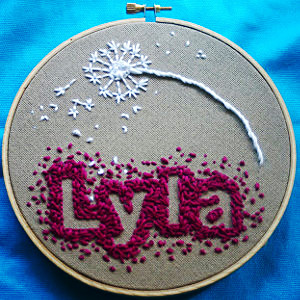
In essence though, embroidery can be incredibly personal and project-specific. You don’t just have to rely on the fabric at your disposal to create a work that’s perfect for you and your purpose. If you want to sew a blanket for a friend’s baby shower, for instance, you could add to whatever adorable fabric you use for that work by personalizing it with the baby’s name. If you’re making some kind of wedding gift, you could add the wedding date right onto the material. That truly is a beauty of embroidery. Whatever you want, if you physically can do it, it’s an option — even if you have to use an embroidery pattern to make it happen!

Unlock your creativity & see where it takes you

Add to whatever adorable fabric you use by personalizing it with a name.

Add to whatever adorable fabric you use by personalizing it with a name.

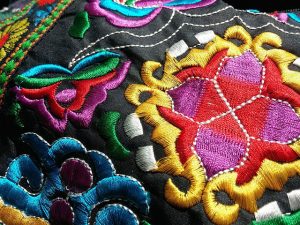
Of course, this can be applied to your clothing, as is evidenced by the notion that “Gucci, Dolce & Gabbana and McQueen” have all been credited with embracing this trend. The level of creativity involved with this clothing idea, again, can’t be overstated because you can tailor your designs to what you have in mind. If you want a blue top with a colorful butterfly on the left shoulder, you could make that happen even if you can’t find it in stores.

Overall, I honestly don’t know if there’s a more creative way to make your own items unique, so if you want to create a piece that’s as yours as you can manage, you might want to step into the world of embroidery! It’s trendy this summer, and a number of the popular embroidery concepts are very spring/summer-inspired — like flowers and birds. All in all, if ever there was a perfect time to step into this creative category, it’s now!