Blending Interests with Hobbies

Last time, I wrote about the art bug biting, and I’d like to continue with that theme this week. Why? Because when he does bite, it’s relevant to uncover what form of the virus you were infected with, and any particular interest you can bring into that hobby or artistic area.

Everyone isn’t involved with every artistic pursuit just because he or she was bitten by said art bug. Whereas one person might be a wonderful painter, another might excel at photography. One person who is awesome at sketching might be terrible at music, while a musician might not be able to draw a believable landscape. For this post, I’ll refer to this as the Artistic Division of Labor, or ADOL. Sound good? Okay!

ADOL can be driven by skill, in that someone might simply have a talent for a specific division. Maybe someone has been good at sculpting since his or her Play-Doh years, and that skill has grown in the years that followed. If such is the case, it wouldn’t be too surprising to find that said person was well-known among family and friends for that ability.

In other situations, eventual interest might lead to artistic pursuits, and that interest might be something a person has to explore to define. If that doesn’t make sense, hang on! I’m about to give you a real-world example—from my own life!

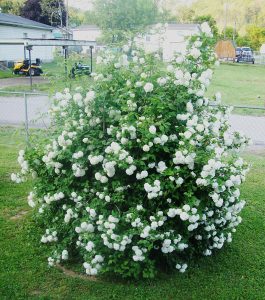
The inspirational snowball bush. So many flowers!

The inspirational snowball bush. So many flowers!

I remember picking flowers when I was younger, though they were admittedly mostly (if not completely) wildflowers. As far as actual gardening goes, one or two of the adults close to me at the time had some kind of flowers planted in a more deliberate fashion than renegade weeds springing up. Even now, my mom has this snowball bush in her front yard, which is flower-ish enough to make this post, and pretty enough when it’s in-bloom to catch my interest. Either way—whether wild or chosen—flowers were a part of my childhood, and I decided I was going to try my hand at flower gardening not too long ago. I got flowers from a store, planted them, watered them, and let them grow. And they were doing okay!

But I eventually realized I wasn’t interested enough in the gardening prospect to tend to it as much as a garden should ideally be cared for. Honestly, I don’t know that I watered the flowers at all after that initial amount, and there was little to no chance I was going to trim weeds away from them. At some point, I was told the weeds around them were moving—something that could be bad when you live in territory that has copperheads and rattlesnakes—so goodbye, flowers.

So far, what this situation amounts to is that I had a childhood interest that became an artsy pursuit I actually had the ability to see through, but didn’t have the focus to continue. The result of this predicament might seem simple: I could just give up on my flower-interest and try other ideas for artistic endeavors. The trouble though is that I still like flowers, even if I don’t have the desire to keep a garden healthy and catered to.

A possible solution then would be more along the lines of what I said earlier in this post. I could explore the topic to see if there was any flower-related ADOL that could hold my interest.

As I said in last week’s post, I tried my hand at floral arranging, and that was a fairly decent win for me. Overall, it was an ADOL I was kind of okay at, and one that could hold my interest enough to keep me involved with it. The idea has led into constructing floral arrangements for display outside of the house, as well as around-the-house projects that catch my eye. For instance, a broken down lamp could potentially use a little prettying up!

Is that a busted lamp? Or a new vase...

Is that a busted lamp? Or a new vase…

But that’s a pretty specific category, and if flowers are a particular interest of mine, that idea could surface in an ADOL that isn’t specifically built around floral arrangements and gardening. And they have! In fact, flowers have become a part of two of my primary ADOL pursuits: writing, and sewing/quilting. With writing, more than one set of lyrics I’ve written has incorporated flower and/or garden themes, including a song that a character of mine sings to his girl in Emblazed.

More than one set of lyrics I’ve written has incorporated flower and/or garden themes.

More than one set of lyrics I’ve written has incorporated flower and/or garden themes.

More importantly for this blog, floral options are available in sewing/quilting patterns, and of course there’s a number of fabrics that a person can buy with floral designs—which is okay with me! In fact, my current quilting project has had a floral arrangement design to it, in that every piece that’s been sewn on it so far has been a pattern that has some form of floral quality to it. The overall design, when all is said and done, will be floral-related from top to bottom (minus a potential border and back-overlap).

My current quilting project has had a floral arrangement design to it.

My current quilting project has had a floral arrangement design to it.

All in all, I may not have had the focus or interest to keep a flower garden going, but the world of art is so vast that there are plenty of ADOLs out there to try, and enough room to explore within each to come up with ways to utilize interests that maybe weren’t committed enough to make into their own hobbies.

Bottom line: If you’ve been bitten by the art bug, explore to find your ADOLs, and you can find ways to bring your interests into those ADOLs — even if they seem more fitting for another. For the flower-admirer who doesn’t garden, paint pictures! Make floral quilts! Do floral arrangements! Sculpt a flower! There are options to blend your interests into your art, if you look for them!

I Never Meant to Be a Tailor

I Never Meant to Be a Tailor

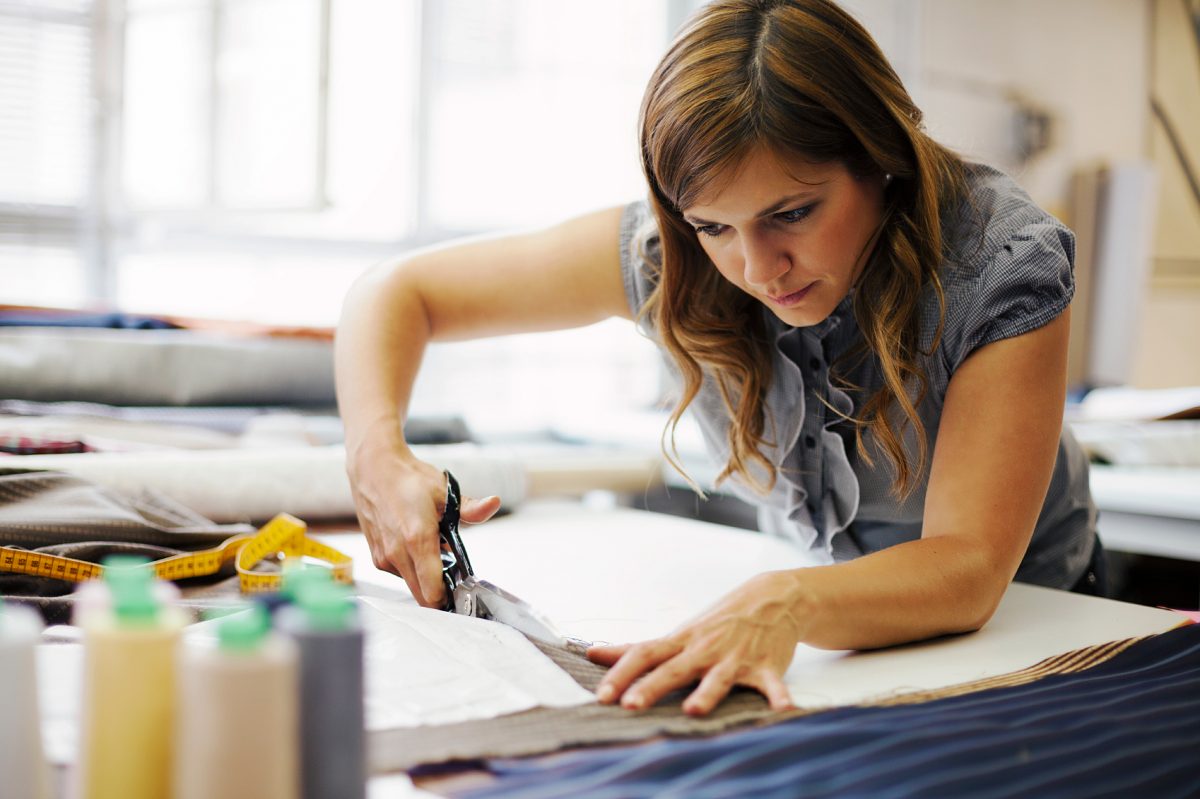
‘Tailor’ and ‘Pattern Maker’ never once made an appearance on my list of what I wanted to be when I grew up.

‘Tailor’ and ‘Pattern Maker’ never once made an appearance on my list of what I wanted to be when I grew up.

If someone had told me when I was young that I would end up making a career out of sewing, I would have told him or her they were being ridiculous. ‘Tailor’ and ‘Pattern Maker’ never once made an appearance on my list of what I wanted to be when I grew up. Not that any truly conventional careers were on my list – I wanted to be a professional musician, a flutist, or a writer, and maybe a fashion designer. I wanted to change the world, make it better. I wanted to be remembered.I come from a long line of talented seamstresses and tailors.

I come from a long line of talented seamstresses and tailors. My Mother, part of the Baby Boomer Generation, regularly made outfits for my brothers and me. When I visited my Nana, I slept in her sewing room next to the Singer machine in the brown wood cabinet. I don’t remember learning how to sew though I’m sure my Mother must have taught me. I just always could. Among numerous other projects, I made both my prom dresses in high school. Still, I didn’t consider sewing a marketable career skill.

I’m not even sure how it happened.

Sewing, and especially patterning, are now often, my escape from real life.

Sewing, and especially patterning, are now often, my escape from real life.

In college, I discovered the theatre and the costumes. I started working in the costume shop at Ohio University. Like most theatre costume shops everywhere, it was in the basement with only those small windows way up high on the walls that offered lovely views of feet passing by outside but little light. Then I got a paid summer internship helping two designers in Worcester, Massachusetts. The rest, as they say, is history, or my history at least. It’s all I’ve done workwise for the past 27 years.

The trick is knowing what to do when the fabric or garment or your machine throws you a curve ball.

The trick is knowing what to do when the fabric or garment or your machine throws you a curve ball.

Sewing, and especially patterning, are now often, my escape from real life. They are things that can be done fast or slow but never rushed. One of things I love most about building a garment, or even doing an alteration, is that it takes just as long as it takes. People hate that answer to the question, “How long will take you to x?” But that’s the neat thing about sewing: you just never know what might happen in the process.

The trick is knowing what to do when the fabric or garment or your machine throws you a curve ball.

To be happy in my life, I need both my hands and my mind to be busy. I need to make things. Flat patterning something I’ve never patterned before is my idea of a heavenly day at work. Looking at a picture of a dress in a magazine and working out how they made it do that, brings some of the best kind of joy. Figuring out a new technique that makes something I’ve done over and over easier and better calls for spontaneous furious dancing.

Sewing and tailoring and patterning are art forms, are skills that you can sustain you through life.

Sewing and tailoring and patterning are art forms, are skills that you can sustain you through life.

I think a lot can be learned with practice but I also believe that some people do just have an affinity for sewing and patterning. Some people speak the language of fabric. These are the people with callouses on their scissor fingers who know what an inch or a half inch or two inches looks like without measuring. These are the people who can look at a suit jacket and know exactly what alterations need to be done. My friend Anne and I often joke that we throw some pins in a thing just to make everyone else feel better. These are the people who find comfort in a plain old simple center back alteration and spend hours pouring over thread color charts. These are the people always looking for new ways to do and create things.

I worry that fewer and fewer young people are getting into tailoring and sewing. I think it’s a shame. Sewing and tailoring and patterning are art forms, are skills that you can sustain you through life. And the pride in creating something that you, or someone you love, or someone you don’t even know, can wear is simply priceless. I think it’s a pretty neat way to leave behind a bit of a legacy and be remembered

Pressing Forward – A New Idea

Pressing Forward – A New Idea

As I was organizing my new sewing room, I thought about what components I could use to make sewing organized and efficient. Sewing is my favorite part but keeping things in order can become a challenge.

Sewing is my favorite part but keeping things in order can become a challenge.

Sewing is my favorite part but keeping things in order can become a challenge.

Of course, quilting takes a few more supplies that some hobbies, but I was thinking specifically about how I can make the pressing of quilt squares and fabric as part of my desk area rather than an ironing board and standing each time I had to press.

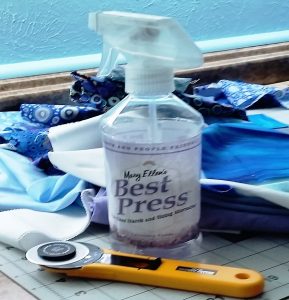
I made an ironing table on my counter top which has an insulated pad so I could sew and turn my chair to iron. It works fairly well but needs to be adjusted at times, as the pad wriggles around, and I thought there has to be something better.

I have to say that ironing is NOT my favorite past time with all the laundry we have, but somehow when I am making quilt squares, it is not too cumbersome. I use a fabric stabilizer when I iron that smells nice when it is heated so it, it gives me ambition to sew my squares and press them neatly to look professional as I go along. I have been thinking that an investment in a Home Pressing system will be beneficial.

Thinking back, actually, when I was a little girl, my Mom had what she called a “Mangle” Iron. I have not seen those again until recently in this website. I always wanted to help her press the sheets and pillow cases and my Dad’s handkerchiefs when she set up the what seemed to be an “ancient” machine. In fact, this type of machine was first used to wring out clothes by washer women beginning in 1843. Mom had hers in the late 1950’s, and used it often.

Sheets, tea towels, table cloths and fabric scraps would be so easy to run through the iron and save time to enable more sewing.

So, with that in mind, I have been researching Pressing Systems. I have come across some great reviews on the Magic Steam Press ESP2 Electronic Iron, and the Miele B990E Rotary Ironing Board. Check out the other brands here as well. The first is a small table model and the second is a rotary iron on a stand capable of ironing most everything. This is easy to use by sitting and makes ironing a breeze! Just be careful about the buttons and zippers, please!
I think these models would be particular good for bonding interfacings and stabilizers to fabric and to make quilt squares, totes, curtain panels and much more. Sheets, tea towels, table cloths and fabric scraps would be so easy to run through the iron and save time to enable more sewing.

Check out the irons on this website, and consider using a Pressing System for your sewing and ironing needs.

The reviews are helpful to see how valuable and what a time saver these systems are.

My next purchase will be to order for one of these products. With time saved and beautifully pressed quilts and clothes, it is an investment well worth the money with energy to spare! Press forward, and enjoy ironing! See you next time!

Sharpen Your Scissors and Rotary Cutters

Sharpen Your Scissors and Rotary Cutters

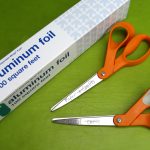
I keep my blades wicked sharp with my favorite technique: cutting aluminum foil.

I keep my blades wicked sharp with my favorite technique: cutting aluminum foil.

There is a man who comes to my local grocery store once a month and offers his services to sharpen your scissors and kitchen knives. I have never managed to make it to the store when he is there. When I kept missing his dates, I looked up ways to sharpen scissors myself. There are some surprising methods that are quite easy to do at home. Maybe one day I’ll get a professional to get these babies sharpened but until I do, I keep my blades wicked sharp with my favorite technique: cutting aluminum foil.

All you need is a piece of aluminum (tin) foil.

All you need is a piece of aluminum (tin) foil.

Cutting Aluminum Foil

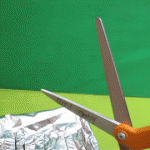
Cut thin strips with the scissors, making sure to cut from the tip of the blade all the way to the pivot points.

Cut thin strips with the scissors.

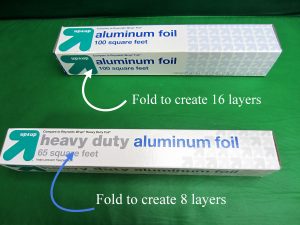
All you need is a piece of aluminum (tin) foil. Fold the foil up into 8 layers for heavy duty tin foil and 16 layers if you have regular weight.

Next, cut thin strips with the scissors, making sure to cut from the tip of the blade all the way to the pivot points. Use nice, open, broad cuts. This method also works for rotary cutters. Just run the blades over folded tin foil.

When you’ve finished cutting the tin foil, open your scissors all the way and then swiftly snap them shut.

When you’ve finished, open your scissors all the way and then swiftly snap them shut.

When you’ve finished cutting the tin foil, open your scissors all the way and then swiftly snap them shut. This will help to smooth out any tiny burs. I’ve been using the tin foil method for years now and my scissors are razor sharp after I do this.Keep your precious fabric scissors far away from children and partners who don’t understand how serious you are about your scissors.

Pro Tip: Always keep one pair of scissors reserved for paper only (so your fabric scissors don’t go dull too quickly.) Second pro tip: Keep your precious fabric scissors far away from children and partners who don’t understand how serious you are about your scissors.

Roll the foil into a ball and you now have a perfect scrubber for pots and pans.

Roll the foil into a ball and you now have a perfect scrubber for pots and pans.

Waste Not, Want Not: What to do with the tin foil you have just chopped into strips? Roll it up into a ball and you now have a perfect scrubber for pots and pans (not your non-stick, of course). You can also bring these along on camping trips for scouring out cast iron or other camping dishes.

Alternate Methods

Have a different method of scissor sharpening? Let us know your techniques.

Have a different method of scissor sharpening? Let us know!

Out of tin foil but still need to sharpen your scissors? You can use the same method with sand paper (the finer the grit, the smoother the blades). Or, you can cut up steel wool, though it will be considerably messier than the tin foil or sand paper methods.

Do you have a different method of scissor sharpening? Let us know your techniques in the comments below.

Charlotte Kaufman is a writer and sewist in San Diego, California. She specializes in marine and home interiors and continues to fall more and more in love with quilting. You can follow her at charlottekaufman.com
Reuse and Recycle...Material!

Reuse and Recycle…Material!

I had this piece of clothing that really wasn’t my style.

I had this piece of clothing that really wasn’t my style.

I’ve heard stories about my grandmother recycling material and such for the sake of future sewing projects. And, no, I’m not going give you a how-to of how to cut up your couch for the reusable material and filling! But the overall idea is a part of the general theme of today’s post: Reusing material for a new purpose.

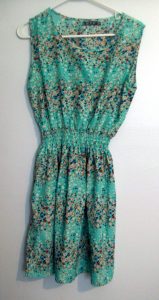
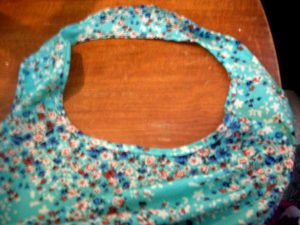
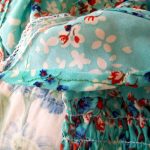
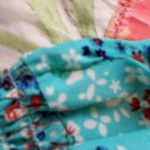
I had this piece of clothing that really wasn’t my style. It’s the green, flowery one in the picture, and it wasn’t something I felt was *me* enough to wear in public. BUT, it did get the gears in my head turning with possibility. Even though I didn’t want to wear this as a top or a dress, I was convinced it could make a fairly good apron. I decided to keep the material for future cutting/sewing use.

I think it was last week that I got around to working on the project, and the process wasn’t all that difficult. In fact, there’s a tip for new sewers: Keep an eye open for projects that wouldn’t be overly difficult to build your sewing skills. What I had in the beginning with this piece of material just looked like it could be an apron, with the style and the fabric. And, when thinking through how I’d go about turning the clothing into an apron, I realized the steps wouldn’t be that numerous. If you can catch enough finds like this one—things you might have around your house that you’re maybe planning on throwing away—you can reuse material, make projects for little to no money, and improve your sewing with what could amount to baby steps! Sounds like a win to me!

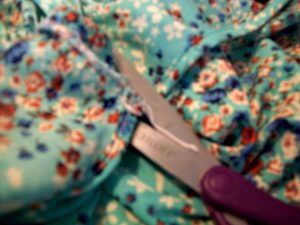
One side of the clothing had the seam along it, so I only had to follow the outline there.

One side of the clothing had the seam along it, so I only had to follow the outline there.

So what were the baby steps for this project? Well, they started with cutting, since I don’t know that I’ve ever seen an apron with a full back on it. One side of the clothing had the seam along it, so I only had to follow the outline there. The other side depended more on my judgment, but I do have a sewing mat and a rotary cutter now to hopefully help make more accurate cuts. Yay, sewing tools!

The material circling the neck could stay in place though, since aprons attach there anyway. That particular curve required a secondary round of cutting, which I’ll blame on my lack of experience with apron-making. I don’t usually have to make the right-place cuts for loops to go around my neck, so I won’t think too harshly about myself for going overboard on the first try. In the end, if you try for an apron, remember the loop should probably be no more than one inch thick once your sewing is finished, and make sure you’re keeping with the same general width range throughout your cutting. Otherwise, your backing might seem bulky overall, or just in parts. Neither is necessarily a good option!

Remember the loop should probably be no more than one inch thick once your sewing is finished.

Remember the loop should probably be no more than one inch thick once your sewing is finished.

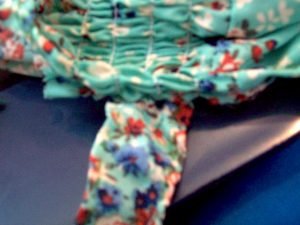
Once I was finished with the cutting, I sewed hems along the edges where I’d cut, and used some of the material I’d cut off for straps that I could use for the ties to attach to the waist. Honestly, that task was kind of frustrating since the straps were so small, and the thread kept bunching or wrapping around the fabric. Lesson I could potentially take from this experience: Tiny material should maybe be reserved for later use, like after I’ve gained more experience with sewing!

I sewed hems along the edges where I’d cut, and used some of the material I’d cut off for straps that I could use for the ties to attach to the waist.

I sewed hems along the edges where I’d cut, and used some of the material I’d cut off for straps that I could use for the ties to attach to the waist.

Possible lesson you could take from this experience, if you’re an early sewer: If you’re going to make an apron, start with thicker straps to go around the waist—maybe two inches or a bit more. As far as appearance goes, it might be better for those straps to be a little bulky than for them to have confusing thread patterns. As far as process goes, saving yourself the annoyance of fighting with your thread might be worth the extra material.

One more tip for the road: If you do a project like this one, make sure that when you can, you make use of the hem on the original clothing. It might seem like cheating, but saved effort and thread is saved effort and thread!

All in all, keep an eye out in your own house for things to recycle into sewing projects. You can learn to be a better sewer without breaking your bank account!

Quilt A String-Pieced Scrap Quilt For Baby

Quilt A String-Pieced Scrap Quilt For Baby

Here is an easy scrap quilt idea that is great fun to make.Here is an easy scrap quilt idea that is great fun to make.

You could clear out your scrap stash to make this gorgeous gift.

Blue is my favorite color, so I had heaps of blue scraps. That is what gave me the idea to make this crib sized quilt for a special new baby boy. You could choose a different color of scraps for this, or you could choose to not restrict your palette and clear out a random colorful scrap pile instead.

You will need:

  • A variety of cotton scraps
  • 48 5-inch cotton muslin squares
  • 12 2.5 inch muslin squares
  • 1 yard border fabric
  • Crib size batting
  • 1.5 yard backing fabric
  • Quilt binding or fabric to make binding

To make the patchwork squares:

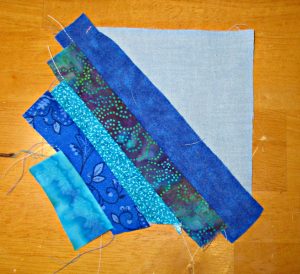
Press and cut your colorful scraps into approximately 1 inch wide strips. You will trim strips to the desired length as you construct the squares.

Take a muslin square and angle the first scrap strip diagonally, from the bottom left corner to the top right corner of the square. You can create a sort of uniformity in your blocks and allow for the Xs and squares effect achieved in this quilt by choosing one color scrap to use as this center piece in every square. In this case, I chose navy. All squares are made with navy as the longest, first piece in this quilt.

Next, choose another strip and place it right side down atop the first strip, then sew along one side using a quarter inch seam. Flip the second strip down to face up, then press.

Once you've added the last little strip to cover the corner, you can turn and repeat the process to fill in the other side of your square.

Once you’ve added the last little strip to cover the corner, you can turn and repeat the process to fill in the other side of your square.

Then add another strip, placing the third right side down atop the second, and sew using a quarter inch seam, then flip with right side up, and press.

Please do not skip the step of pressing each strip neatly down after sewing. Careful pressing makes the difference between neat and well made quilts and something that is more of a mess!

Repeat the process, using shorter strips and smaller scraps as you get close to the edges of the square. Once you’ve added the last little strip to cover the corner, you can turn and repeat the process to fill in the other side of your square.

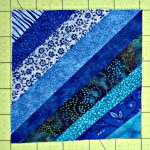
Now you have your first completed square.

You have your first completed square.

Place the square right side down and trim excess strip ends from the muslin square. This is most easily accomplished using a rotary cutter, or you can trim the excess with scissors instead.

Now make 47 more.

Now make 47 more.

Now you have your first completed square.

Make 47 more.

Assembling the quilt top:

Once you have completed all your patchwork squares, sew them together into rows.

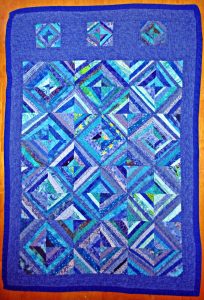
Different looks can be achieved by varying the placement of the squares. You could turn them all in the same direction or assemble them where they form the X’s and O’s pattern pictured here. This is one of the things that makes quilting so much fun, that the same simple block can be turned different ways to vary the look of the completed top.

When joining the squares, take extra care for the tiny corner triangles, as it can be easy to make a careless mistake and miss joining these “ears” properly. This is easy to avoid by being careful in joining the squares and avoiding rush.

You also have options in this design: once you have completed the joining of the strip patchwork, you could call the quilt top done. Or choose to border the patchwork with a solid fabric. You could make borders of equal widths, or you could choose to add an additional embellishment, as I have here, with smaller blocks set off with borders. I did mine this way to indicate the top of the quilt and bring the design to the right dimensions for a crib sized quilt..

To make this quilt as pictured, sew 3.5 inch border strips around all sides of the patchwork design.

Prepare the three smaller blocks in the same way as the larger ones, using 2.5 inch muslin squares for the base.

Join these into a row by alternating the small patchwork blocks with 4 4.5 inch squares of the border fabric.

Sew this strip to the top edge, and finish the top by adding one more 3.5 inch strip above this.

To make the “quilt sandwich”:

  1. Cut your backing fabric 3 inches bigger all around than the top, press well, and place it right side down on your table or workspace.
  2. Carefully smooth the batting atop the wrong side of the backing layer.
  3. Press the top and seams one more time, taking extra care, then layer it wrong side down on top of the batting layer. Smooth nicely.
  4. Then baste all three layers together, using either long running stitches or quilters safety pins.

Quilting:

Meandering stipple stitch.

Meandering stipple stitch.

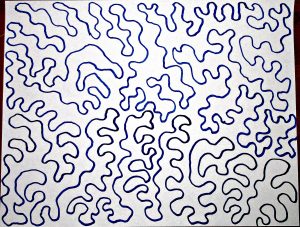
You can quilt this using the quick and easy route: the “stitch in the ditch” method of quilting over the seams that joined the individual blocks, or drop your feed dogs and use a meandering stipple stitch in one long line that (ideally) never crosses itself, guiding the quilt using your hands, working in sections until you have covered the entire quilt.  I quilted this pretty closely, like this:

Trim:

Trim the excess batting and backing, using your scissors or more quickly with your serger.

Bind:

Use prepackaged quilt binding or make your own. Sew binding strips together and then sew to quilt top, beginning along one side. Leave approximately an inch free at the beginning of this seam to join the binding ends once you have sewn it down all around. Join them, then fold over and sew the binding down on the back of the quilt using invisible whip stitches sewn by hand or using your machine if preferred.

Now you have made a beautiful heirloom gift that will be treasured forever!

Sewing for Myself, a Quilt for Me

Sewing for Myself, a Quilt for Me

Our December 2015 hand-made teacher gifts.

Our December 2015 hand-made teacher gifts.

Last December I found myself in the midst of a flurry of handmade gifts. I fussy cut fabric for 12 teacher presents and I laid out the plans for two quilts, one each for friends expecting babies.

When the holidays were over I took stock of both my fabric stash and my sanity and knew it was time to do something different. This time, no matter how long it took to finish, I was going to create something entirely for myself.

A few of the quilts that inspired my own. Images via Quilt for Keeps, Quilting is my Therapy, and Quilter’s Pastiche.

A few of the quilts that inspired my own. Images via Quilt for Keeps, Quilting is my Therapy, and Quilter’s Pastiche.

At the start of the New Year, in between raising my daughters, working part-time, being a friend, wife, and volunteer, I slowly brought to life a quilt that had been rumbling around in my head for ages. I’ve been salivating over quilts with negative space and dark background fabric.

Using my talent to treat myself is something I plan to try more often.

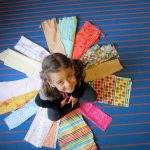
Five year old, C, sits center circle in the order of fabrics arranged solely by her.

Five year old, C, sits center circle in the order of fabrics arranged solely by her.

Out came my horded cache of cheery orange, yellow, pink, and blue fabric. I even engaged my oldest daughter, C, in the project, thus achieving both quality time spent with my kid while working on a project meant for me. C helped me pick all the fabrics for the giant star and then chose their side-by-side placement.

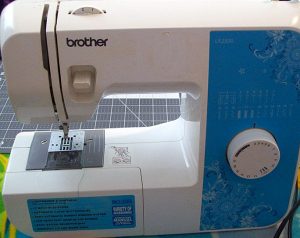
I do my home sewing on a Brother CS-6000i.

I do my home sewing on a Brother CS-6000i.

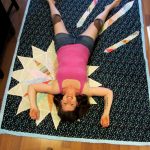
It took me six months of grabbing the time here and there, but finally, after a dozen or more hours, I manifested my dream into a reality. The final result is what I call the Starlight Quilt. It measures 66×89 and is backed with blue minky dot fabric. The main fabric is Floret in Turquoise by Aneela Honey for Cloud 9’s Vignette line. The star itself and its rays are pieced together with a mix of fabrics I’ve been hording and scraps that were too beautiful to let go.

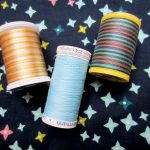
Spools of thread.Using my talent to treat myself is something I plan to try more often. The pleasure people get from receiving a hand-made gift was something almost novel when reflected back towards me. I’m re-energized now to finish my current works in progress if only to pass that feeling onto someone I love and care about. There is also the sentiment of a job well done and a heady sense of completion.

Now when I sleep, I have a small treasure of my own handiwork.I can go back to my usually scheduled program, of devoting time and energy to sewing gifts for friends and family. But now when I sleep, I have a small treasure of my own handiwork. For a brief moment, the expensive spools of variegated thread and the swaths of luxurious minky were spent on me. How about you? When was the last time you sewed for yourself? If you can’t remember when, then now is the perfect time to start.

Charlotte Kaufman is a writer and sewist in San Diego, California. She specializes in marine and home interiors and continues to fall more and more in love with quilting. You can follow her at charlottekaufman.com.
Learning Re-Learning

Learning & Re-Learning

Generally speaking, I can be more of a hand-sewer than a machine-sewer. Getting frustrated with a machine, to me, isn’t the most difficult task, so stepping back from one can be a fairly easy decision. What I’ve found in stepping away is that I actually like hand-sewing. Sure, the process might take longer, but there’s something relaxing about going one stitch at a time with my own hands.

And, believe it or not, I might actually be more likely to sew a straight-ish line by hand than I am with a machine! Weird? Maybe!

But stepping away from the machine has led to me trying to re-acquaint myself with my sewing machine, and what I found is that the time away caused me to potentially forget things—maybe keep me from fully learning all things—about my machine. Had I had (or kept) those things in mind, I suspect my sewing-machine-experiences might’ve gone a bit better—and a bit quicker.

Brother LX2500

Brother LX2500

Now, don’t get me wrong! I’ve completed projects on my sewing machine. But I was potentially setting myself up for frustration by not really understanding or memorizing the details of this machine (Brother LX2500):

Imagine how far I could be with machine-sewing if I would’ve taken the time to learn more details and commit them to memory! So, for today, I’m going to give you that bit of information: Get to know your sewing machine! Even something as simple as realizing the thread-holder lifts higher could prevent grief, since you might not have as much issue with the thread falling off while you’re sewing or threading your bobbin. And, yes! That happened to me!

For me, figuring out the need-to-know details and letting the rest go might’ve been tempting. Do yourself a favor, and don’t keep that thought process. There might be aspects of your machine that make for easier sewing, or that advance your capabilities in a way that a basic “Hey! I can thread the needle and bobbin!” don’t quite cover. Possible examples: Apparently, I have a reverse button on my machine I maybe never knew about, and a way to alter the tension. Who knew?! And if you don’t get to know your machine, by the way, don’t be surprised if you come out with stitches that look like these:

If you buy your sewing machine brand new, check out any instruction manual that comes with it. The reading might seem tedious, but that tedious task could be worth it when you don’t hate your sewing machine, like, twelve times per use (Am I exaggerating??? You decide!). If you buy yours used, don’t have a manual, or lose the manual, try looking online. I think I threw mine away (don’t do that!), but luckily there are videos available on Youtube that show the basics of running my model. I can’t encourage you enough to look into such information to learn what you can about your sewing machine! Doing so could extend your possibilities and preserve your nerves!

Your sewing machine is only as good as your ability to use it, so don’t hold yourself back by not learning about it properly.

And even if you did know all there is to know about your machine, forgetting details after a limited amount of use isn’t out of the realm of possibility. Think about all the math classes you had over the years. Even though you might’ve had formulas in your head for a time—like, for an exam—how many do you still remember? After a while, your sewing machine’s details might be so burrowed into your thought process that you can be away for a time and remember them, but don’t be too embarrassed to rediscover those details if you can’t bring them to mind. Something like which way your bobbin’s thread goes could be so small that you don’t remember it, but not knowing could complicate your sewing.

So that’s lesson number two, one I had to learn when I came back to my sewing machine after time away: Don’t be afraid to admit you don’t remember, or be too proud to look into how to do these things again. Your sewing machine is only as good as your ability to use it, so don’t hold yourself back by not learning about it properly—even if it isn’t the first time you’re learning about it! Don’t stop until you know what every button, knob, or contraption does!

Luxury Textiles in Italy


Buongiorno from Italy! I am writing the second of my posts about my Fabric Frenzy this time in Italy!

Walking along the shops of Roma and Florence, each window brought new and unusual surprises.

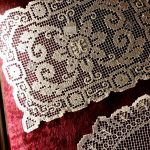
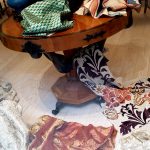
My focus was to look for Italian cloth and textiles to compare to those at home. The lace articles were lovely, but I found a few exquisite and expensive treasures as well.  As I admired them, I thought about how they belonged here in the midst of people of high culture and class.  So many curtains in the windows were lace in even smaller villages I saw, a common elegance for many.

I wanted so much to buy yards and yards of the Hermes fabric and turn our home into one of Italian distinction.  I knew, however, it was only something I could dream about for that moment like the wonderful taste of the gelato I was eating as I strolled by the shops.

Only once did I come upon a shop that made curtains. It was a small establishment with racks of special order designs and a small loft above where the owner did the sewing. I was curious to ask what he charged to make drapes for the home, but my Italian was slight compared to his. So I just admired and appreciated his capability to create many yards of fabric into personal tastes for his clients.  Sewing is certainly not just a hobby here. It can be a “life line” for many.

Paper N’ Plastic

Paper N’ Plastic

I don’t know about you, but I love to save time and room, especially when it comes to my sewing space. One of the best ways to save time when you are preparing or working on a sewing project is organization. I find it so much easier to move from one step to next when everything is not scattered all over the place. With that being said, I have a helpful organization tip about storing your pattern pieces.

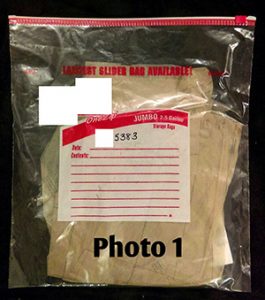
I prefer the slider bags, but the snap bags work just as well.

I prefer the slider bags, but the snap bags work just as well.

Have you ever opened your sewing pattern and taken out the beautiful folded paper pattern inside of it? Doesn’t look it look neat and tidy?! Well, have you tried to refold the paper pattern once it has been unfolded and put it back into that same pattern pack? Or even worse, have you tried to refold it once you have cut out the pattern pieces you need for project? Those of you who have successfully refolded your paper pattern and neatly placed it back into its package…well done!!! I think you are amazing magicians with wonderful refolding powers.

Sadly, for the rest of us (me included), it is a painful and tedious task (say that three times fast) to get the paper back into the pack. However, I have a found a solution that works great. All you need are permanent markers and plastic storage or freezer bags. I prefer the slider bags (see photo 1), but the snap bags work just as well. For one of my patterns, I used a 2.5-gallon jumbo slider bag because the pattern pieces were very large. You can adjust the size of your storage or freezer bag based on the size of your pattern pieces.

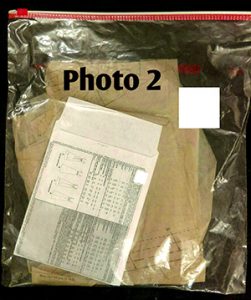
Place the pattern package in the bag with the paper pattern pieces (photo 2) in order to keep them all together.

Place the pattern package in the bag with the paper pattern pieces (photo 2) in order to keep them all together.

There are two ways that you can store your pattern pieces. The first way is to only cut out the pieces from the paper pattern that you will use for your sewing project. Then with remaining pattern paper, you can simply fold it to make it smaller and put it into the storage or freezer bag without having to make the shape precise in order to fit into the bag. The second way is to cut out all of the pieces found on the paper pattern and store them in the slider or snap plastic bag. The second way will also save you cutting time later should you decide to use the additional pattern pieces from the same sewing pattern for a future project. I also like to place the pattern package in the bag with the paper pattern pieces (photo 2) in order to keep them all together, especially because the pattern package contains fabric measurements and finished garment measurements that you may need to refer to in order to prepare for your sewing project.

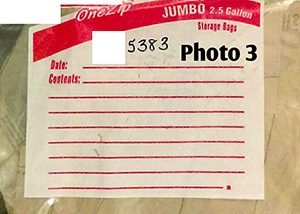
Once you have your paper pattern and package in the bag, I would suggest using a permanent marker to label the bag with the corresponding pattern number (photo 3).

Use a permanent marker to label the bag with the corresponding pattern number.

Use a permanent marker to label the bag with the corresponding pattern number.

Side note: If the paper pattern pieces do not have the pattern number printed on it, mark the number on the pieces themselves so you will know to which pattern package and bag they belong. Write the number in a place on the pattern pieces that does not interfere with the pattern markings.

The bonus of using the storage or freezer bag is that it also provides you with space to make notes right on the bag. If you have, for example, a fabric idea or found an easier way to put the pattern together why you were sewing, you can simply put a note or reminder on the bag without having to mark all over the pattern or the pattern package. So there you have it…a simple and inexpensive way to organize your paper pieces without all that refolding hassle. Sewing is fun so do not let refolding and refitting take the joy away from you.