Tutorial: 3 Ideas for Using Japanese Bento Bags

Tutorial: 3 Ways to Sew Japanese Bento Bags

Bento bags, AKA azuma bukuro

Bento bags are a popular Japanese style of bag, more properly called azuma bukuro (or fukuro. Bukuro and fukuru are different pronunciations of the same word, which is a blend of two words that translate to “good fortune” and “bag.” Azuma is the historical name for the eastern region in Japan now known as Kanto and Tohoku).

These are also sometimes called Japanese market bags, triangle bags, even origami bags, although there are other styles called origami bags, too.

I discovered bento bags a few weeks ago myself, and I am so glad that I did, because these are incredibly useful. I told you in January that I planned to sew for Christmas in July, and I’ve actually been doing this since June. So I’ve been making lots of bento bags as wrappings for the gifts I am sewing now. And for my own personal and household use, too.

There are different ways to sew bento bags. Whichever method you use, they end up the same shape. It is useful to know how to make these both ways, though, so that you can use scraps to make them. You might choose one way over the other depending on what size fabric scrap you have.

How to sew bento bags from rectangles

To make a bento bag from rectangles, you need two same sized rectangles that are three times as long as they are wide. Your rectangles could be 5″ x 15″ for a small bento bag, 6″ x 18″, 7″ x 21″, 8″ x 24″, 9″ x 27″, or any size, as long as it is three times as long as it wide.

Choose most any fabric you like to make these. Use 2 layers of cotton or linen for a soft and relaxed bag, or try denim or canvas for a sturdier bag that holds its shape well.

One rectangle will be the outside of your bento bag; the other is the lining. Align these with right sides together and sew around all four sides, leaving an opening for turning. Turn, press, and sew this opening closed.

Now place this lined rectangle with the outer fabric on top, and fold into thirds, with the lining fabric folded over the front. Sew two seams attaching each outer third of the rectangle to the center at opposite ends.

Then, sew across the two outer corners of the bag to box the corners. The shape and size of the bag will differ depending on how deeply you box these corners. Or you can choose not to box them at all.

Turn right side out and your first bento bag sewn from rectangles is complete. I’m betting you will make many more.

rectangle bentos

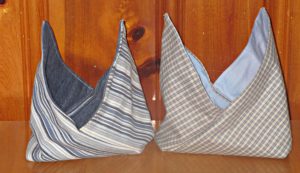
I made these bento bags from rectangles.

Sew bento bags from squares or triangles

There a couple of different ways to construct these from squares and triangles. Here are two slightly different variations on one method:

Take two same sized squares of fabric. They could be the same fabric for a bag with outsides and linings the same, or two different fabrics for a bag that will show both fabrics on both sides. If you want to use this method to make a bag with one fabric showing on the outside and one other fabric for the lining, you will need to first cut a square of each fabric in half diagonally and start the next step with four triangles rather than two squares.

Now you will either fold your squares in half diagonally with right sides together to form right triangles, or lay two different triangles right sides together, if you cut them as described above. Sew these together with an opening. Turn triangles right sides out, press, and sew the opening closed.

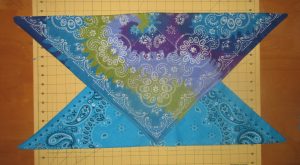
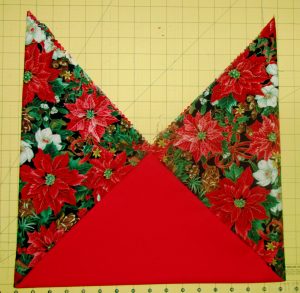
Then lay one triangle on top of the other at the right angles, forming a square where they overlap. Sew down along the edges of this square.

bandana bento

Overlap triangles at the 90 degree angles,and sew the square these form.

Now fold bag with right sides together and sew along both side seams. Box the corners and turn right sides out.

One More Way

Yet another way to make these is to start with three same sized squares, or six for a lined bag. You can use smaller scrap squares for this method than you can for the previous method, since this way uses more of them.

Sew two sides of one square to two sides of another square. Then sew two sides of the third square to the other two sides of the middle square.

You could line these as in the above methods, by sewing outer and lining squares right sides together and turning. Make three of these lined squares and then sew together.

This one is made from three squares. I'll make the lining the same way & sew the two together.

This one is made from three squares. I’ll make the lining the same way & sew the two together.

Or you could sew the bag and lining pieces separately, forming two bags. Then put them right sides together and sew, leaving an opening. Turn, press,and stitch opening closed. Sewing it this way creates a reversible bag, by the way.

What to do with bento bags

Now you know a few different ways to sew bento bags. You can probably think of plenty of things to do with them on your own, but here are quite a few ideas from me for how to make use of these handy bags.

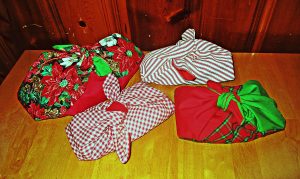
Gift bags

These make “re-useful” wrappings because rather than just being a fabric gift bag, the recipient can then use it for some handy purpose like any of the ideas below.

Lunch sack

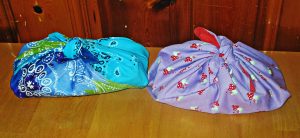
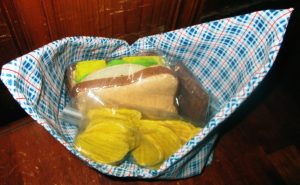
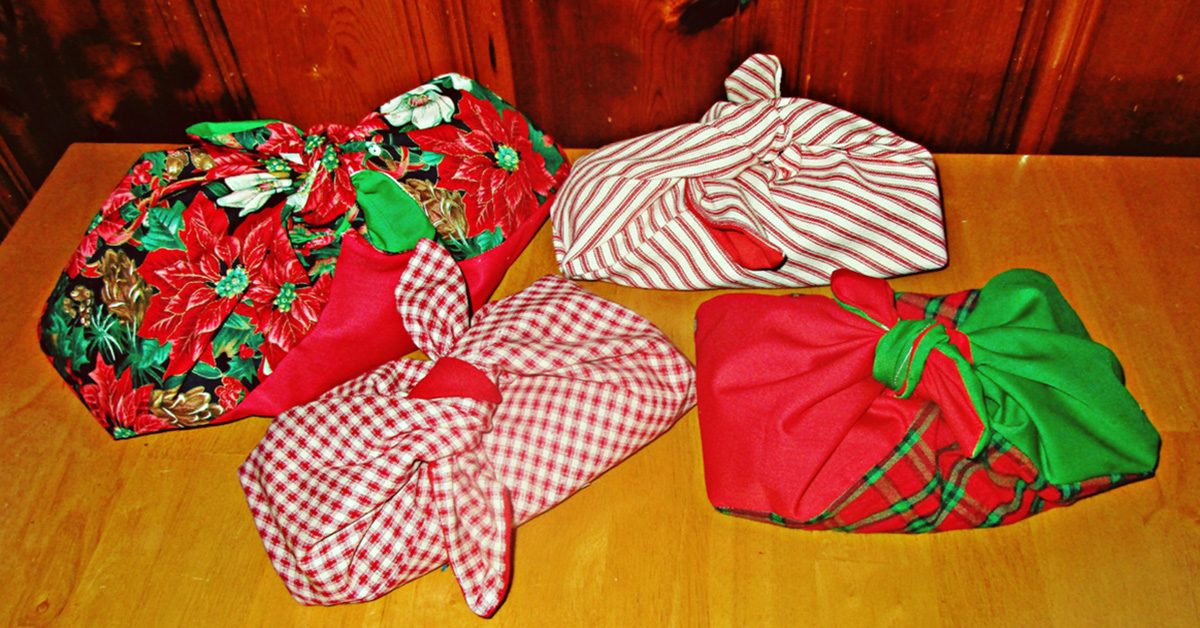
I first found out about these bags when I saw an anime character on TV using one to carry her bento boxed lunch. You can use these to carry your lunch as a pretty package whether you also use a bento box or not.

Your lunch will taste much better than this felt example lunch! Just tie bag closed to carry.

Your lunch will taste much better than this felt example lunch! Just tie bag closed to carry.

Bread basket and cloth all-in-one

I’m thinking they are perfect for wrapping loaves of bread as gifts, and these can go straight to the table for serving the bread and keeping it covered, too

Grab and go sack

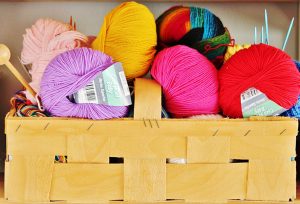
For pencils, yarn or knitting supplies, small patchwork pieces, works-in-progress: anything you need to keep together and carry along.

Sort-able storage

Make a set for sorting nails or other hardware; fabric, scraps, or trim; cords, wires, or anything else. I plan to make a rainbow set for myself to sort small pieces of fabric and scraps by color. This could be a solution for organizing tools, a kitchen junk drawer, or bead and jewelry supplies collection, too.

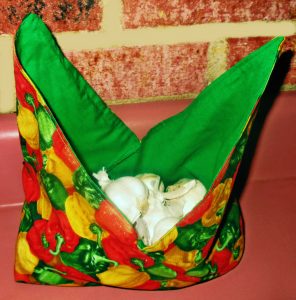
Basket / bin

You can make these with interfacing or even quilted for sturdiness. Especially when these are small, they will nicely stand up and hold things on a bureau, desk, counter, or table. Or stand one in a dresser drawer or cabinet.

Harvest bucket

Sew another strip of fabric to connect the two ends and it becomes a handy tool for harvesting your garden.

Produce bags

For separating fruits and vegetables on the counter or to use while shopping. Unlike many reusable bags, bento bags are easily machine washable.

Use them to harvest or store produce.

Use them to harvest or store produce.

Purse or shopping bag

Sew a strip for a handle and carry a bento bag, small or large, as a casual purse or a shopping bag.
Make a strap by sewing a wide or two narrow rectangles into a tube, then tuck raw ends under & insert the ends of your bento bag, then sew.

Make a strap by sewing a wide or two narrow rectangles into a tube, then tuck raw ends under & insert the ends of your bento bag, then sew.

Add to this list by sharing your ideas for how you will use these in the comments below. Happy sewing!

Sew a DIY Sunbrella Table Cloth with Insul-Brite

Sew a DIY Sunbrella Table Cloth with Insul-Brite

I would need a place to serve the hot lasagnas we had ordered.

I would need a place to serve the hot lasagnas we had ordered.

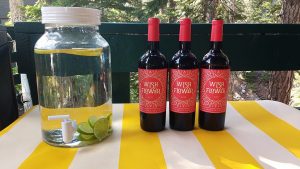
This weekend I hosted 17 women at my home for a women’s writing workshop with bestselling author, Amy Ferris. We had lunch each day and we ate outside on my lower deck. Lunch was catered and I knew I would need a place to serve the hot lasagnas we had ordered.

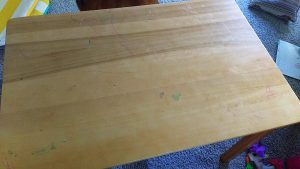
Enter my daughter’s art table: I thought it would be perfect for staging food on the deck but it’s covered in marks and squiggles and I didn’t want hot food to hurt its surface. I’ve been on a role using up my Sunbrella stash (you can read about the outdoor Sunbrella pillows I recently made here and here.) So I dug into my Sunbrella stash again.

Enter my daughter’s art table.

Enter my daughter’s art table.

This wide striped yellow Sunbrella fabric was a perfect choice. Sunbrella is water resistant and stain resistant. I also had some Insul-Brite batting in my stash too. Insul-Brite is amazing and is what home sewers use to make DIY pot holders and ironing boards.

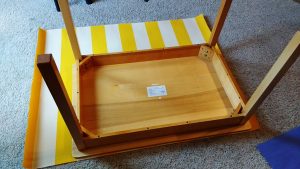
To get started, I turned the table over and used it to make a pattern on the fabric.

This wide striped yellow Sunbrella fabric was a perfect choice.

This wide striped yellow Sunbrella fabric was a perfect choice.

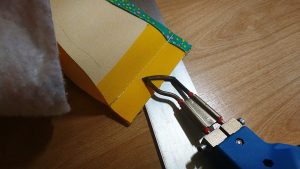
I used a ½” seam around the pattern. I also only had one yard of the fabric so on the remaining portion I had to do some math to make sure I had enough left to make strips for the sides of the table cloth. I figured out that I could do three strips at 4.25” each. I cut out the tablecloth top and the strips with a hot knife.

I used a ½” seam around the pattern.

I used a ½” seam around the pattern.

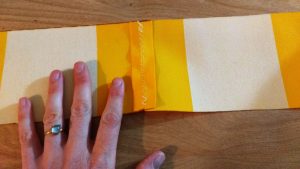
Next I joined the three strips together, opening the seams and finishing them with a zig zag stitch to help keep the joins as flat as possible.

Next I joined the three strips together.

Next I joined the three strips together.

I really wanted to add pom pom trim but I didn’t have enough to go around the table cloth so I used some of this handmade trim I had from a quilt I made earlier.

I used some of this handmade trim I had from a quilt I made earlier.

I used some of this handmade trim I had from a quilt I made earlier.

How beautiful is that?

How beautiful is that?

How beautiful is that?

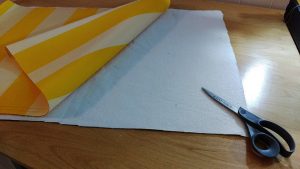
Now that the side fabric had the trim attached, I busted out the Insul-Brite. You want to put the shinier side of the fabric toward the heat source. I cut out a piece that was slightly larger on all sides of the top of the tablecloth.

I cut out a piece that was slightly larger on all sides of the top of the tablecloth.

I cut out a piece that was slightly larger on all sides of the top of the tablecloth.

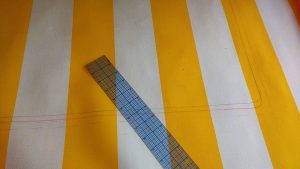
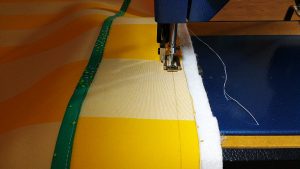
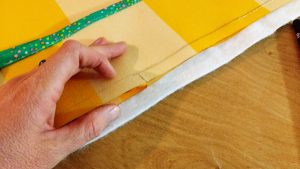
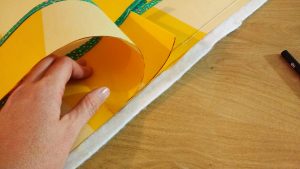
To attach the side piece to the top I made a sandwich of first the Insul-Brite, and then the Sunbrella top. The side piece went on top of the table cloth top, right sides together. Before I started I drew a ½” seam on the side piece so I knew I was sewing correctly to the pattern I’d created for the tablecloth top.

Before I started I drew a ½" seam on the side piece so I knew I was sewing correctly to the pattern I’d created for the tablecloth top.

Before I started I drew a ½” seam on the side piece so I knew I was sewing correctly to the pattern I’d created for the tablecloth top.

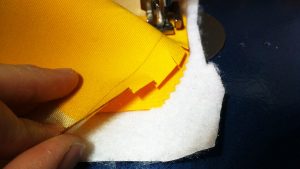
Cut snips into the fabric as you go around the corners.

Cut snips into the fabric as you go around the corners.

Cut snips into the fabric as you go around the corners.

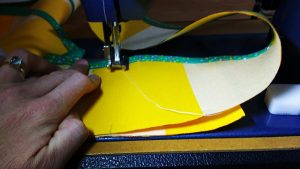
When you get close to the other end of the trim, pull it off of the machine, join the two pieces and fold them back and forth, marking where they should be sewn together.


When you have those marks, bring the top over to your machine and sew the join on the side piece.

When you have those marks, bring the top over to your machine & sew the join on the side piece.

When you have those marks, bring the top over to your machine & sew the join on the side piece.

Use your hot knife to trim the join. Then sew the rest of the side piece down to the tablecloth.

Use your hot knife to trim the join.

Use your hot knife to trim the join.

Next I tried it on the table to make sure I had it correctly sized. I had not yet trimmed any excess Insul-Brite. Here you can see both my darling daughter and that the tablecloth fits. What it is missing is topstitching. Topstitching is magical, not just for the finishing touch it gives but because it helps give support and structure.

Here you can see both my darling daughter & that the tablecloth fits.

Here you can see both my darling daughter & that the tablecloth fits.

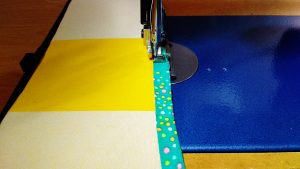
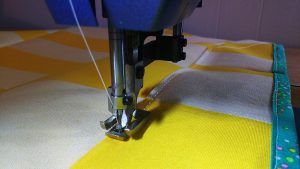
I chose to topstitch on the side piece versus the top and fold the Insul-Brite down toward the sides.

I chose to topstitch on the side piece versus the top & fold the Insul-Brite down toward the sides.

I chose to topstitch on the side piece versus the top & fold the Insul-Brite down toward the sides.

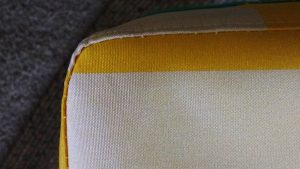
That nice, clean line is exactly what will take this project to the next level.

That nice, clean line is exactly what will take this project to the next level.

That nice, clean line is exactly what will take this project to the next level.

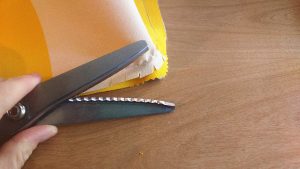
Finally, I trimmed the Insul-Brite to match up with the seams and then used pinking shears on the corners where I had made snips to help prevent fraying.

I trimmed the Insul-Brite to match up with the seams & then used pinking shears on the corners where I had made snips to help prevent fraying.

I trimmed the Insul-Brite to match up with the seams & then used pinking shears on the corners where I had made snips to help prevent fraying.

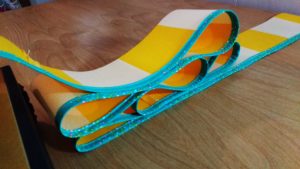
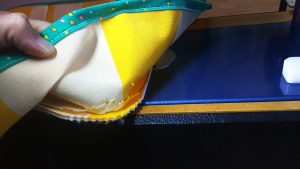
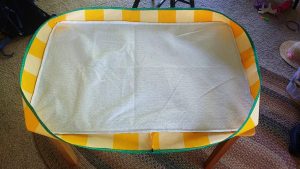
Here’s what the finished piece looks like on the underneath.

Here’s what the finished piece looks like on the underneath.

Here’s what the finished piece looks like on the underneath.

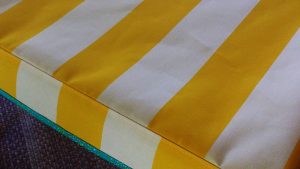
Flipped over and on the table, you can see how much more snugly the tablecloth fits because of the topstitching.

Flipped over & on the table, you can see how much more snugly the tablecloth fits because of the topstitching.

Flipped over & on the table, you can see how much more snugly the tablecloth fits because of the topstitching.

How darling is this?

How darling is this?

How darling is this?

This is a quick pic of it inside.

This is a quick pic of it inside.

This is a quick pic of it inside.

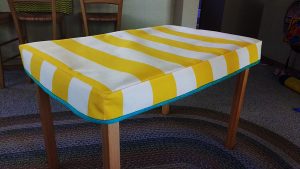
And at last, my idea worked out great on the deck where I served lasagna for my guests and later, cheese and wine. I love it when a project works out!

I love it when a project works out!

I love it when a project works out!

———————————————————————————–
Charlotte Kaufman is a writer and sewist in Mammoth Lakes, California. She specializes in marine and home interiors and continues to fall more and more in love with quilting. You can follow her at charlottekaufman.com.
Having a Friend who Sews

Having a Friend who Sews

Some things just work better in pairs.

Some things just work better in pairs.

Some things just work better in pairs—like shoes, socks, friendship bracelets, and the Everly Brothers. Often though, even our pastimes can be enhanced by the addition of another human being. Going to the movies, as an example, is more fun with a friend to offer ridiculous comments to or to discuss the movie with after the credits roll. Another example would be hiking. It could be great for you to wander through nature while getting a workout, but if you have someone to share the experience with, that company provides another level of goodness.

Sewing, too, can benefit from the presence of another person, even if people often think of it like a solo task. Things like classes based on sewing show evidence of this since you’ll be learning—should you take one—in the midst of other people who are interested in the same craft, but the reasons behind sewing non-solo are applicable beyond the notion of gathering in dozens in a classroom. Truthfully, there are common, day-to-day rationales for having a sewing friend or two in your life that you could find useful even if you don’t want to leave your house for your projects. You can pick up your phone, call them, and invite them over for sewing assistance.

And that sewing assistance can come in three specific forms that we’ll cover in this post. Ready to dive in? Then let’s go!

Taking Measurements

You might find that getting your measurements on your own can be complicated.

You might find that getting your measurements on your own can be complicated.

If you’re the type of person who sews your own clothes, you might find that getting your measurements on your own can be complicated. If you try to measure from shoulder to shoulder, for instance, you pretty much have to lift at least one shoulder, and that can throw off your measurement. It helps then to have a second person around who can step in and help you. Now, sure, you can recruit whoever is around to help you get that shoulder measurement, but it’s still best to have that someone be a person who’s familiar with sewing.

The reason for that detail is because people who are accustomed to taking measurements won’t need an explanation about how to take the measurement. They’ll understand, if you want help with your waist measurement, that the sewing tape should be at the smallest part of your waist. The process is familiar, and they’re accustomed enough to know how tight the tape should be held as well as where the cut off is in regard to any kind of tape-overlap. That familiarity can make for not only an easier sewing experience, but also a more accurate one. A non-sewing friend might allow too much slack and cause your clothes to be too big. To go Goldilocks, the sewing friend might measure just right.

Sharing sewing supplies

Sharing is caring.

Sharing is caring.

Sure, you shouldn’t be the person who constantly asks to borrow things—particularly if you don’t return them. But if you’re in a situation where you’re friends with someone you share an interest with and both of you trust the other enough to loan supplies, this can be a very real benefit for you and the person your friends with. If you don’t have the right shade of blue in thread, maybe your friend has it! If your friend doesn’t have a specific sewing needle for a task, perhaps you have one! It’s a great back-and-forth situation where you’re being afforded the opportunity to have a go-to for supplies you need who’s just a phone call away.

This dips into shopping as well since shopping with your friend could help each of you be aware of what the other has in their supply for these sharing moments. Of course, this wouldn’t be the only reason to go shopping for sewing supplies together, but it’s a definite plus! Either way though, in addition to sharing the supplies, you can share the experience of finding the right supplies with a good friend—and what shopping trip isn’t more fun with a friend?!

Socializing

Brainstorm ideas to come up with the best projects you can make.

Brainstorm ideas to come up with the best projects you can make.

Any time you have an interest, it can be nice to have someone to talk to about that aspect of your life. Otherwise, you might find that you have nowhere to turn to discuss interesting or pressing matters in regard to the field. It’s like being an avid reader who finishes a really great book, but then has no one to talk to about that book. You have all of these thoughts, opinions, and reactions, and where exactly are you supposed to send them?

Sewing can be so similar because you pour so much of yourself and your time into your projects. It helps to have someone there to talk to about your progress, your confusions, or your plans. The process can help you brainstorm ideas to come up with the best projects you can make, and it can give you a place to offer your complications in a way where you can ease your tension. You might even get some insight about what to do to fix those complications rather than bottling them up until they potentially run you down so much that you throw in your sewing thread. This social quality can then better your sewing experiences, and it can also increase your odds of continuing your sewing endeavors. That makes it a definite advantage of having a friend who sews!

Bottom line? Don’t think of sewing as an exclusively solo gig! Having that sewing friend can make for a brighter, easier sewing experience—from shopping for supplies to putting together your projects. You might have to sign up for a class to find that friend, but trust me! They could be worth their weight in sewing thread!

Flat Patterning: Nothing to Fear

Flat Patterning: Nothing to Fear

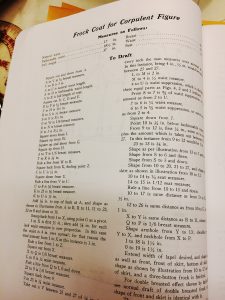
I spent part of last week flat patterning a period vest and coat for a ten year old actor for a new Amazon series based on the book Dangerous Book For Boys by Conn and Hal Iggulden.

Let’s get technical

Flat patterning is one of my most favorite things to do. It’s very mathematical & systematic.

Flat patterning is one of my most favorite things to do. It’s very mathematical & systematic.

Flat patterning is one of my most favorite things to do. It’s very mathematical and systematic. I find it strangely soothing. Many people are intimidated by flat patterning and don’t think it’s something they would ever be able to do themselves. But, the thing about flat patterning is, if you’re good at following directions, anyone can do it.

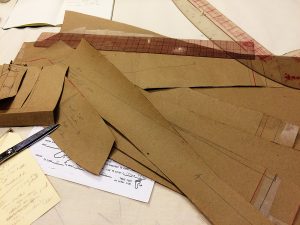
Have you ever seen the opening sequence for the movie Tailor of Panama? In it, you see a hand drawing in chalk on a piece of fabric. The hand presumably belongs to the tailor who appears to be free handing the outline of a suit jacket front. Now, that’s something you probably won’t be able to do until you’ve drafted some thousands of suit jacket fronts but, flat patterning onto a piece of brown paper by following the instructions in a flat patterning system book is something you can do.

Take a look – it’s in a book

Every person who starts out flat patterning is following someone else’s directions on how to do so.

Every person who starts out flat patterning is following someone else’s directions on how to do so.

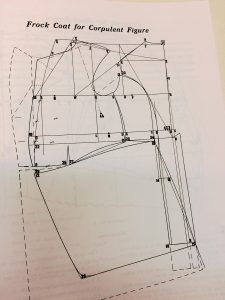
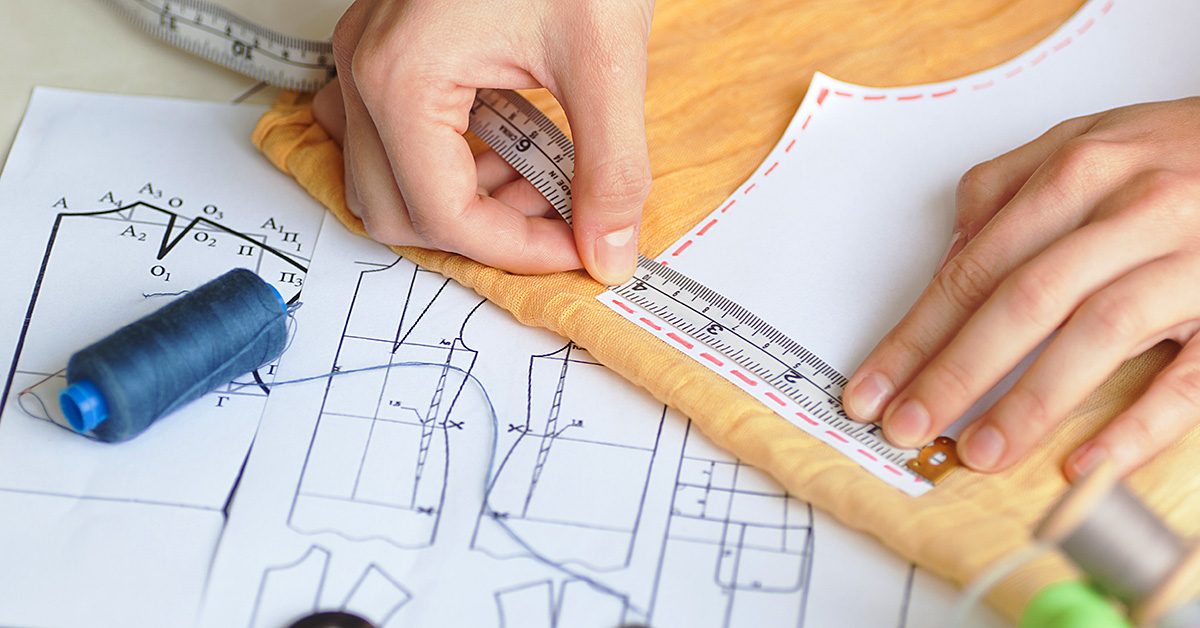
Every person who starts out flat patterning is following someone else’s directions on how to do so. If you take a flat patterning class you’ll work from whatever book the instructor likes. A flat patterning book provides step by step instructions for drawing specific pieces of clothing – things like draw a line equal to back neck to waist and square off from both ends (a and b).

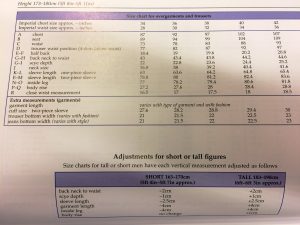
What this means is you need to know the measurement from the neck to the waist of the person you’re drafting for. You can also use standardized measurement charts (which is how commercial patterns are made). Most flat patterning books include such charts, or you can do a search online for them. The instructions for drawing the pattern will continue with the labeling of points by letters using measurements. Directions will say things like: connect e and f with a curved line or mark a point 3/8″ from g and square out.

The right pattern book for the right job

Each flat patterning will produce slightly different results as they are each based on a system developed by the author. Some systems factor in more ease than others, depending on what period the clothing is. For instance, a book on flat patterning a man’s suit jacket from the 1880s will produce a garment different than one written for patterning contemporary men’s suit jackets.

You can also use standardized measurement charts (which is how commercial patterns are made).

You can also use standardized measurement charts (which is how commercial patterns are made).

So, how do you know which book to work from? It honestly doesn’t matter all that much when you’re first starting out. But as you get more comfortable with it, you can try different books to see what end results you like better.

One of my most favorite patterning books is Dress Design: Draping and Flat Patterning Method by Hillhouse and Mansfield. The book, written in 1948, gives instructions for a variety of really cool 1940s dresses and suits. It’s not always useful if I’m making something that isn’t a 1940s garment but it’s a wonderful book to study and try out different techniques.

Some other excellent patterning books that are used often in colleges are Norma R. Hollin’s Pattern Making by the Flat Pattern Method and Designing Apparel through the Flat Pattern by Rolfo, Kopp, Gross, and Zelin.

I also like Metric Pattern Cutting books by Winifred Aldrich, though these do require being able to convert your measurements into the metric system. Some pattern makers believe that the metric system allows for increased accuracy when patterning.

Pattern Making by Tomoko Nakamichi is a creative non-traditional approach to patterning and gives instructions for unique geometric Japanese garments.

Tools

A few other tools that are handy to have when you’re flat patterning are a clear see-through ruler, a curved ruler, & an L-shaped ruler.

A few other tools that are handy to have when you’re flat patterning are a clear see-through ruler, a curved ruler, & an L-shaped ruler.

A few other tools that are handy to have when you’re flat patterning are a clear see-through ruler, a curved ruler, and an L-shaped ruler.

Most pattern makers use a regular old pencil to draft the initial pattern. If they need to go back and make corrections, they’ll often use a red or blue pencil so they’ll know which line is the new line. I, personally, am a fan of the red pencil for corrections as it’s easier to see than a blue one.

If you’ve been wanting to try your hand at flat patterning but didn’t know where to start now’s the time to get yourself a book and start learning! If you don’t want to purchase a book (some of them can be quite expensive), check out your local library. You can, also, of course find used pattern books on Ebay – just don’t get too caught up in auction frenzy and pay too much.

Happy patterning!

Cat Sewing Projects

Cat Sewing Projects

I love my cats. They’re like children to me. I wake up in the morning to purring and got to bed at night with them cuddled around me. Some people think cats are aloof, but mine are anything but! I think the more affection you give cats, they more they give you. Since my cats are my family, I can’t think of a single reason not to sew for them. Can you? I didn’t think so! I love these cat sewing projects, but I make no promises that your cats (or mine) will enjoy them as much as we’ll enjoy making them.

Purrty as a Flower

Add a little pizzazz to your cat’s collar with this adorable flower collar pattern. Your fur baby’s sweet face becomes the center of the flower while the soft petals surround them. It’s perfect for spring and summer. See if you can pose them with some flower cuttings and post a picture in the comments.

Ball Toy

To reward your sweet kitty for tolerating the petal costume, make them a patchwork ball toy. This is also a great way to use up some fabric scraps. If you’ve got young children, they can help stuff the balls and then play with kitty when they’re done. Add a bell inside to grab kitty’s attention and they’ll likely play with this for hours.

Cat House

Sometimes cats just need a space of their own. With this neat cat house pattern, you can give them their own special hiding place. Put it next to their favorite heat source and they might even use it the way you expect! And with fleece inside, you can bet they’re going to paw and claw it.

Catnip Mouse

What cat can resist catnip? These catnip mice are easy to make from fabric and ribbon scraps. In less than an hour, you can provide your feline friend with a toy that will give them hours of joy.

Chair Cushion

My cats are constantly sitting on my dining room chair cushions. I don’t mind, but my guests don’t always enjoy standing up and walking away with their pants full of fur. Here’s the perfect solution! Non-slip cushions just for the cats. When I have guests, I can simply replace these with clean ones for the humans. Best of all, the cat cushions have a removable cover for easy cleaning.

Show your cat some love and sew them one, or more, of these projects. If nothing else, you’ll smile while you do!

Butterfly Bag, Small and Large, and Blue Patchwork Purse

Butterfly Bag, Small and Large, and Blue Patchwork Purse

Reversible butterfly tote.

Reversible butterfly tote.

I have been making lots of bags lately, and I have a few tutorials and different bag patterns coming up here soon. This week, though, I’m showing a couple examples of butterfly bag and another variation of a simple tote bag purse.

First, I used my crazy patch butterfly appliqué blocks to make two different sizes of bags recently.

I made a butterfly bag tote as a gift for my niece’s sixth birthday. It’s a reversible tote big enough to carry coloring books and crayons to the ball park, where her brother plays nearly every day. There’s also room for a small quick quilt I made that she can use to sit on the bleachers or the ground while she’s there.

Baylee quilt, caption, I made this quick scrap quilt in only about an hour & a half.

Baylee quilt, caption, I made this quick scrap quilt in only about an hour & a half.

Here are the step-by-step instructions for making a reversible tote like this. You can use the strip piece method linked as a video below for making the patchwork straps.

Butterfly bag small purse

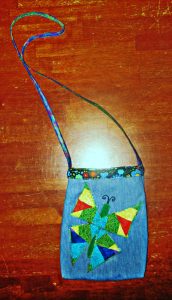
Then I found a single stray rainbow strip pieced block at the bottom of my scrap bin and I decided to make a small denim bag with a butterfly, too.

This will be a gift for a teenage girl.

This will be a gift for a teenage girl.

I used a rainbow variegated thread in the needle for the butterfly appliqué and also the strap and topstitching for this bag. This is probably my favorite decorative thread, and I have used it in a lot of projects.

To show off the lining fabric, I sewed the bag and lining together without straps, then folded over the top. I sewed the strap to the outside, with the raw edges under the fold. Then I used two rows of topstitching around the whole bag. I made the strap with a wider blue and narrower green piece of bias tape, covered by wide zigzag stitches up and down about five times.

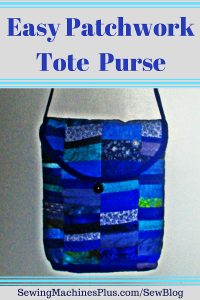
Blue patchwork tote purse

Here is a purse I made for myself last week. It is just a simple tote with the addition of a curved, bias- edged flap at the top. I quilted the patchwork using horizontal rows of a wavy decorative stitch that reminds me, like these blue fabrics, of the ocean.

This one is mine.

This one is mine.

To make the flap, just quilt together a rectangle of patchwork with batting and your lining fabric. Make it about an inch narrower than one side of the bag. Then you can fold it in half and cut the corners into curves. Then bind the curved edge and short ends with bias binding.

I used half of a thick turquoise ponytail elastic and a half-ball style button for a closure. I just sewed down the elastic to the lining side of the flap when I attached the bias edging. It also has a large zippered pocket inside, with patch pockets for cards inside that larger pocket.

Just baste the flap to the bag, and then tuck it between the bag layers when you sew the bag and lining together.

If you don’t know how to make this strip style patchwork, which I also used for the straps on the large butterfly tote above, here’s a video of me explaining how to do this.

I actually made this piece of patchwork some time ago. The blue quilt pattern I showed here was for my baby’s crib, and I made bumper pads, too. We didn’t really use these, so I decided to reuse the patchwork to make bags. This is the first one I have done; I plan to do a bigger laptop tote or backpack with the next one.

Like Amish quilts, these bags include mistakes!

I have to say that each one of these bags includes some little issue that I am not happy with. For example, the lining I chose for my blue bag is a gorgeous midnight blue print. But, especially with the flap, too, it is pretty impossible to see what’s in my bag without shining a light. It’s not a huge issue, since I usually just stick my hand in my bag and grab what I need by feel, anyway.

I boxed the corners too deeply on my niece’s butterfly tote and gave it a different shape than I intended. But this worked out, because the unintended bucket shape of the bag is what inspired me to make the quilt that I otherwise might not have included with this gift. And while I probably won’t ever make a strap like the one I made for the rainbow butterfly bag again, it is interesting and different looking and it works just fine.

The Amish include mistakes in their quilts on purpose. My mistakes were more accidental. The thing is though, all these little issues are lessons learned. I’ll never use a dark fabric as a bag lining again. Maybe I’ll make a post about more of these kinds of lessons I have learned the hard way soon. I’d be happy to save someone from making some of these mistakes.

In the meantime, I hope you will join me in bag making. Happy sewing!
How to Sew a Zippered Outdoor Pillow Cover with Sunbrella

How to Sew a Zippered Outdoor Pillow Cover with Sunbrella

I made those pillows with an envelope-style close on the back.

I made those pillows with an envelope-style close on the back.

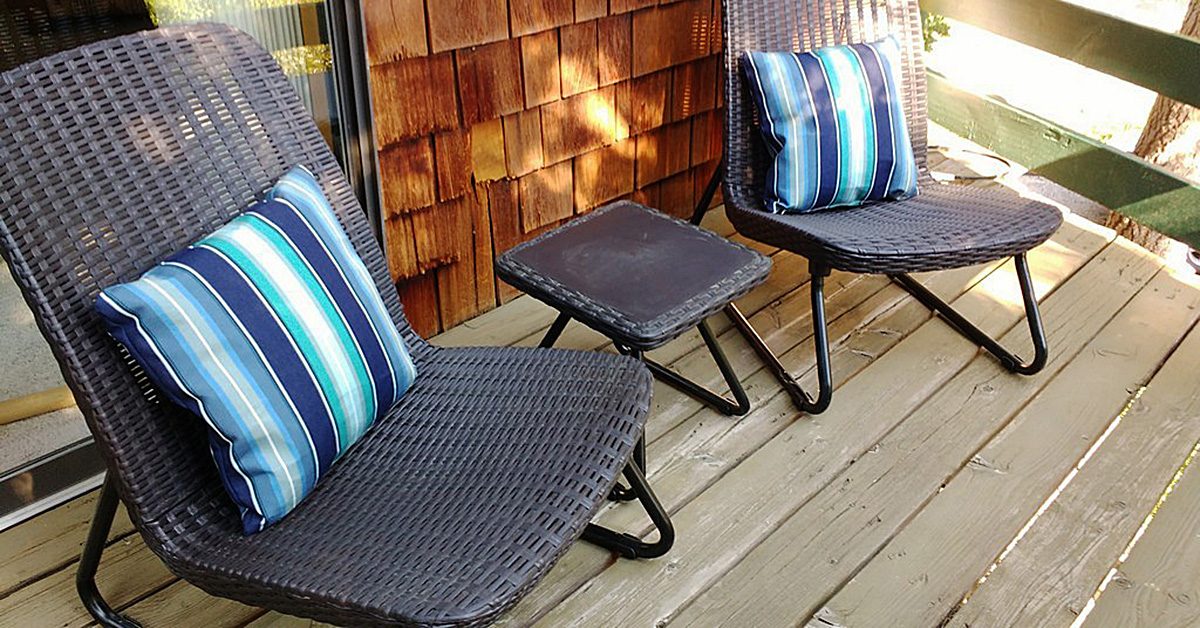
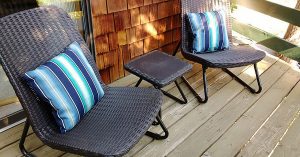
Last week I shared how I made outdoor pillows out of Sunbrella fabric for my front porch chairs. I made those pillows with an envelope-style close on the back. The pillows on the front porch do not get as much direct sun exposure as the chairs on the back deck. For those chairs I wanted to use the same fabric, but to make pillows with a zippered close so I could flip the pillows between the front and the back to evenly distribute sun exposure over time to the fabric.

For pillows with a zipper close you will cut out the same size of front & back panels.

For pillows with a zipper close you will cut out the same size of front & back panels.

For pillows with a zipper close you will cut out the same size of front and back panels. I was making two pillows for 18” x 18” pillow forms so I needed four 17” x 17” panels. With ½” seams, the finished covers would be 16” x 16”, perfect for stuffing a slightly larger pillow in to make the pillow case fluff up and fill out nicely.

Pro Tip: plan ahead when working with stripes or patterns and cut out your panels to match on all sides (if this is important to you).

Plan ahead when working with stripes or patterns & cut out your panels to match on all sides.

Plan ahead when working with stripes or patterns & cut out your panels to match on all sides.

Like a hot knife through butter

Sunbrella is perfect for cutting with a hot knife. It seals the edges for you. Just watch out as the edges can be sharp.

Sunbrella is perfect for cutting with a hot knife.

Sunbrella is perfect for cutting with a hot knife.

Sunbrella outdoor fabric has no right or wrong side. I clipped two panels together and the other two panels together using my Wonder Clips. They are available at SewingMachinesPlus.com and I love them!\

Pro Tip: if you are working with stripes or a pattern, make sure you place the panels together correctly to match the stripes or pattern.

Round off your corners. I talk about the importance of rounding your corners in this post. Not everyone does it but I think it makes for a more beautiful pillow. On dark fabrics, I use my Clover Chaco Liner pen.

Round off your corners.

Round off your corners.

Zippers!
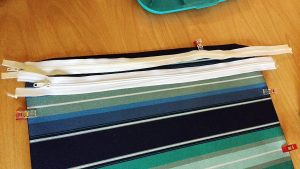
I’m using two different zippers from my stash. They are both long enough to fit the 18”x18” pillows and that’s all that matters.

I’m using two different zippers from my stash.

I’m using two different zippers from my stash.

Determine what side is the bottom of your pillow. This might depend on how you want your stripes to run or your pattern to be displayed. I’m working with ½” seams all around the pillow. On the side where you will place the pattern, mark about 2” in on both sides and sew and back-tack on both ends along that 2” line.

Determine what side is the bottom of your pillow.

Determine what side is the bottom of your pillow.

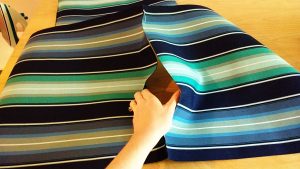
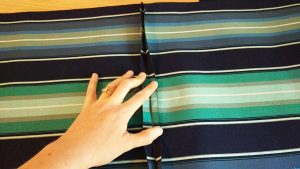
Now your seam will look like this, with an opening in the middle.

Now your seam will look like this, with an opening in the middle.

Now your seam will look like this, with an opening in the middle.

Sunbrella is perfect for finger creasing. Crease down both seams. Here you could stick the seam down with basting tape if you didn’t feel super confident going forward to the next step.

Sunbrella is perfect for finger creasing.

Sunbrella is perfect for finger creasing.

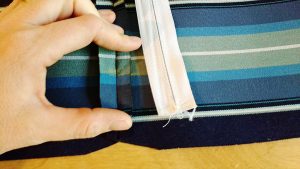
With my Clover Chaco Liner pen, I mark on both sides of the seam where the stitching ends. This will show me where I’m going to start and stop my zipper (just past that stitching on either end).

Pro Tip: make sure you place your zipper with the zipper pull facing down so it can be accessed from the right side of the pillow.

You zipper is marked up – so let’s sew it on!

I mark on both sides of the seam where the stitching ends.

I mark on both sides of the seam where the stitching ends.

I started at the bottom of the zipper and sewed it down just past the yellow mark I’d made. Then I roll up both sides of the fabric and use Wonder Clips to hold the fabric in place so I don’t have fabric all over the place as I’m sewing in the zipper.

I started at the bottom of the zipper & sewed it down just past the yellow mark I’d made.

I started at the bottom of the zipper & sewed it down just past the yellow mark I’d made.

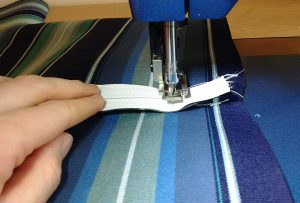
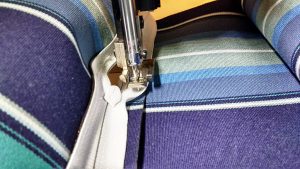
Next I carefully sewed the zipper to either side of the folded seams. When you get to the zipper pull, leave your needle down and lift up the foot, then slide the pull past and away from where you’re sewing. Back tack thoroughly at the top and bottom of the zipper.

I carefully sewed the zipper to either side of the folded seams.

I carefully sewed the zipper to either side of the folded seams.

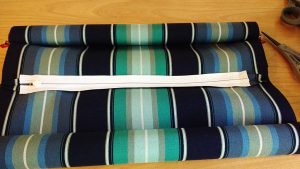
Now the two pieces are fully joined with the zipper in the middle.

Now the two pieces are fully joined with the zipper in the middle.

Now the two pieces are fully joined with the zipper in the middle.

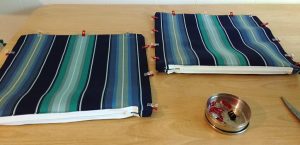
Next, unroll your fabric and clip the panels right-sides together. Sew all around the other three sides.

Pro Tip: unzip your zippers enough to be able to fully unzip them once you’ve sewn the other seams shut.

Unroll your fabric and clip the panels right-sides together.

Unroll your fabric and clip the panels right-sides together.

Before you turn your pillows right sides out, always, always, always check your work. Go over all the sewn seams and corners to make sure you didn’t miss anything.

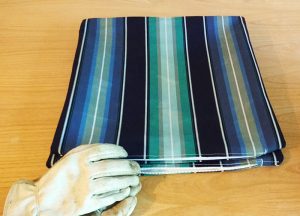
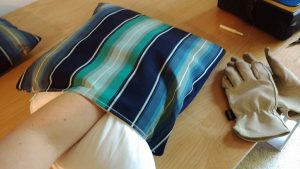
Then turn! Watch out because Sunbrella cut with a hot knife can be a bit sharp. I use my leather garden gloves to turn them right sides out.

Watch out because Sunbrella cut with a hot knife can be a bit sharp.

Watch out because Sunbrella cut with a hot knife can be a bit sharp.

Use something sharp but not too sharp, like a Sharpie marker with the lid on to poke and fully round the edges of your pillow. Now you have a Sunbrella pillow case with a zippered close!

Now you have a Sunbrella pillow case with a zippered close!

Now you have a Sunbrella pillow case with a zippered close!

Walk it in

Add your pillow form. Remember, your pillow is bigger than your pillow case. You need to move the pillow in gently but firmly. You are in charge! I call this action ‘walking it in.’ Just keep moving it until it’s fully in the case. Then grab each corner and really match it corner to corner.

You need to move the pillow in gently but firmly.

You need to move the pillow in gently but firmly.

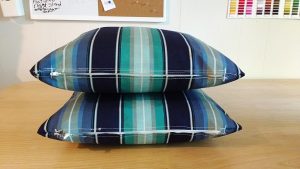
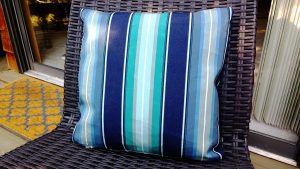
And there you have it. Two puffy pillow cases with zippered closes that are the same front and back. Perfect for distributing sun exposure on a deck.

Two puffy pillow cases with zippered closes that are the same front & back.

Two puffy pillow cases with zippered closes that are the same front & back.

Ready for its close up!

Ready for its close up!

Ready for its close up!

Do you have any tips for working with Sunbrella? Tell us about them in comments!

Do you have any tips for working with Sunbrella? Tell us about them in comments!

Do you have any tips for working with Sunbrella? Tell us about them in comments!

———————————————————————————–
Charlotte Kaufman is a writer and sewist in Mammoth Lakes, California. She specializes in marine and home interiors and continues to fall more and more in love with quilting. You can follow her at charlottekaufman.com.

Strip Piecing for a Postage Stamp Quilt

Strip Piecing for a Postage Stamp Quilt

It seems the more I dig into the world of quilting, the more things I find that I never knew about it in the first place. The brand of creativity is like a well of opportunities, or a garden that you can browse until you find the right flower to plant in your yard. Each project and possibility is its own type of craft, and the quilter has to figure out which of them is intriguing enough to try a hand at.

This idea is essentially what I’m doing for this blog when I explore new quilt types. I look at new possibilities, and when one catches my interest, I dig deeper!

For this blog post, that’s exactly what I’ll do for what’s known as a postage stamp quilt.

Postage stamp quilt

A postage stamp quilt.

A postage stamp quilt.

If you’re wondering what a postage stamp quilt is, it’s actually not that complicated of a style to explain! Think of a roll of postage stamps waiting to be applied to envelopes, and you’ll have a good grasp on what they can look like. It’s one small block of fabric after another, like the patchwork quilt I invested time in, but with much smaller pieces. In fact, that seems to be the main difference in the top layer of a postage stamp quilt and one for a general patchwork quilt if they’re both basic block formats. For the stamp quilt, the blocks are smaller—potentially only a couple of inches!

When I was first introduced to this concept, I was a little intimidated. The reason for that intimidation was that I know by experience how much time can be spent assembling the outer layer of a larger-block quilt (something closer to ten inches), so the idea of putting together pieces that are this small felt overwhelming. Taking the process one piece at a time would require a long, long time for me, and the strategy would be so focused on such a smaller area that it would almost have to be tedious. As intrigued as I was, I figured it would be a frustrating task!

Strip piecing

Then I did a bit more research, and I realized you don’t have to sew these pieces one at a time. Another strategy is to strip piece them together.

All strip piecing means is that, rather than focusing on one square block of fabric, you’re using longer sections to sew together  — rectangles in place of squares.

All strip piecing means is that, rather than focusing on one square block of fabric, you’re using longer sections to sew together
— rectangles in place of squares.

All strip piecing means is that, rather than focusing on one square block of fabric, you’re using longer sections to sew together—rectangles in place of squares. For example, if you choose to use two-inch blocks of fabric for your stamp blocks, make sure the width of each strip of fabric is two inches, but don’t worry about creating the two-inch length yet. Rather, keep those strips longer!

As one source pointed out, how long the strips are can depend on you, what you’re able to handle, and how long you can keep cutting in a straight line (Quilt Videos, 2016). If you can go from the top to the bottom of three feet of fabric, you can have three-foot strips of fabric to work with. But if you find that you tend to get shaky or swerve-prone with extended cutting, you might want to keep those strips smaller. For me, I probably wouldn’t go beyond ten or twelve inches, but if you’re a more advanced quilter, you can try for more.

Time to put these pieces together

Once you have your strips, line them up side-by-side and sew them together in a chain fashion, two strips at a time.

Once you have your strips, line them up side-by-side and sew them together in a chain fashion, two strips at a time.

Once you have your strips, line them up side-by-side and sew them together in a chain fashion, two strips at a time. Begin with your first two strips, sewing them along their long sides so that they’re linked with both of their primary images being showcased, and then do the same with one of those linked pieces and a new strip. Once you finish, you should have a series of fabrics connected in long strips that are small enough, width-wise, to embrace the postage stamp quality in a quilt.

Once you finish, you will have a series of fabrics connected in long strips.

Once you finish, you will have a series of fabrics connected in long strips.

From strips to squares

After you’ve sewn a number of strips together—again, it can depend on how much you’re comfortable with working on at a time—it’s time to make those rectangles into squares! If your fabric strips were two inches in width, measure and cut across your connected fabric strips at every two-inch interval from top to bottom, length-wise. At that point, you should have a series of new strips, though these will be made of a series of smaller blocks of fabric—as many blocks as fabric types that you used.

If your fabric strips were two inches in width, measure & cut across your connected fabric strips at every two-inch interval from top to bottom, length-wise.

If your fabric strips were two inches in width, measure & cut across your connected fabric strips at every two-inch interval from top to bottom, length-wise.

You should repeat this process through all of the fabric you plan to use for your quilt until all of it has been transformed into these multi-fabric strips. From there, it’s time to start piecing them together into the top layer of your quilt. All you need to do is arrange them together in a way that looks appealing to you until you reach the width and depth you were looking to achieve in your quilt.

All you need to do is arrange them together in a way that looks appealing.

All you need to do is arrange them together in a way that looks appealing.

The process might sound a bit complicated, but once you get the hang of it, you might be surprised at how quickly your stamp quilt comes together!


References
Quilt Videos. (2016, March 24). Quilt Monkey – Episode 301 – Easy, Strip Pieced Postage Stamp Quilt Block [Video File]. Retrieved from https://www.youtube.com/watch?v=j3N7al2V8C8
Witherby, S. (2011, October 27). Dead Simple Christmas Quilt mock up [Electronic Image]. Retrieved from https://www.flickr.com/photos/inkyswot/6285898784
Picking the Right Sundress Pattern

Picking the Right Sundress Pattern

Picking the Right Sundress Pattern

The hot weather means flowing, loose clothes that keep you cool while flattering your body. For me, it also means it’s time to sew! Sundresses are some of my favorite things to make. I’ve lost count of how many I’ve made over the years – most of them I still wear! The key to success with making a sundress is choosing the right pattern. The right sundress pattern will flatter your body.

Think About What You Want to Accentuate

We all have things about our bodies we like…and things we don’t. Start by thinking about the things you like about your body. Great legs? Go with a shorter length dress. Love your flat stomach? Make sure the dress is fitted at the waist. Adore your curves? Don’t be afraid to show them off with some well-placed darts. Keep all of these things in mind as you search for your sundress pattern. It’s easy to get pulled into a pattern that looks great on the package or model, but by keeping in mind what flatters YOUR body, you’ll be able to set aside any that won’t work.

Figure Out What You Want to Cover Up

Now, think about those parts of your body you want to cover up. Tummy not as flat as it used to be? Try an empire waist to accentuate other curves and avoid the cling around your stomach. Wish you were a little less curvy? Try something loose and flowy with material to match. Wish your legs were longer or skinnier? Go with a long sundress.

Pro tip: If you don’t like your arms, add a sheer shawl to the ensemble. Some patterns even come with the shawl included.

Match Your Skill Level

Picking the Right Sundress Pattern

When you’ve determined the style of sundress you want to make based on your body and what you like and dislike about it, look at patterns that match your sewing skill level. You’ll find that using these three factors it’s easy to narrow down your sundress pattern options to a manageable number. Then, pick the one you like best and hit the fabric aisles!

Every sundress I’ve made from a pattern chosen this way is one I still wear. Sundresses where I picked the pattern simply because I liked it and didn’t think about my body or my abilities were worn once, at best, and discarded. No one wants to see that happen after the effort of making a sundress. Instead, make a sundress you’ll love to wear using these simple steps to pick your pattern.

Grain Line? What Grain Line?

Grain Line? What Grain Line?

Last week, I spent a couple days making six silk dresses for a freelance client. I did the work at home, in my fifth floor walkup apartment in New York City. I only mention this because the dresses were made from silk charmeuse and I don’t, interestingly enough, have a proper cutting table at home. This really isn’t so much interesting as it is unfortunate and slightly annoying. Because, as anyone who has ever cut silk charmeuse knows, it’s a slippery sliding thing.

I cut the first dress out on the floor. Not ideal but it does work, as long as you use enough weights to keep it from shifting around. I usually cut things on the double with the fabric folded, selvedge edge to selvedge edge, which is how most consumer patterns instruct you to cut. Silk charmeuse can be a bit woodgy (yes, that’s a technical term) but the weave tends to be tight enough that you can confidently cut on the fold.

Some fabrics with an especially loose weave where it’s hard to keep the lengthwise grain line (and cross grain) straight are best cut in a single layer.

Shall we

Grain Line? What Grain Line?

To begin cutting, I tear a straight cross grain so I have a right angle to work from. Almost all fabric can be torn in this way. The cross grain of a fabric is made from the yarns woven over and under the lengthwise fabric grain at a 90 degree angle. The over under weaving provides less tension so crosswise grains have a tiny bit more stretch than the lengthwise grain. They normally run around a person’s body.

The lengthwise grain is the one that runs parallel to the selvedge edge and is the grain marked by the arrow on every pattern piece.

After tearing the the cross grain so I have a straight line, I fold my fabric in half right sides together, selvedge to selvedge. Once I have the fabric relatively flat and smooth on my cutting surface, I place a long metal ruler about an inch or two from my torn crosswise edge. I use a metal ruler because they’re heavy enough to act like a weight.

I line up the edge of the ruler perpendicular to the selvedge edge and across the full width of both layers of fabric. Then I make sure that the edge of the fabric that extends past the ruler is even. I do this to ensure that my cross grain is lined up correctly and not sloping down or up in relation to the selvedge.

I cut the next five dresses out on my old wood dining room table. It has leaves that fold up to make it almost six feet wide. At about 39” high, my cutting tables at work are higher than a standard dining room table. This height means I don’t have to bend so far over a table when cutting and, ultimately saves my back from hurting. If you don’t spend entire days cutting out garments, a dining room table usually works just as well.

You can also buy one of the cool folding style cutting tables available.

Grain line

So, what about grain line? Do you need to always pay attention to it?

That depends. At Boardwalk Empire, we would sometimes jest (when we didn’t have enough fabric and had to get creative with our cutting layouts), “Grain lines are for suckers.”

What we really meant, though, was “As long as you know what you’re doing, you can manipulate and vary the placement of your pattern pieces.”

If you happen to have a striped fabric, playing with the grain line can be fun. Thomas Pink, who makes high end men’s dress shirts will sometimes cut one side of the front on the lengthwise grain and the other on the cross for a quirky asymmetrical look.

Striped fabrics will also naturally chevron at the side seams if you match them up correctly when cutting and sewing.

You can also turn collars, cuff pieces, and/or pockets of striped fabrics on a different grain to add an interesting design effect.

All of these things are most easily done with a fabric that doesn’t have a lot of give, like a tightly woven cotton.

Measure up

If you’re interested in getting a little creative with your next project, you may want to invest in a quilter’s ruler. These rulers have 45 and 30-degree angles marked which is helpful when adjusting grain lines.

If you’re matching stripes or other patterns, you’ll find it much easier to cut in a single layer so you see everything clearly.

This may seem obvious, but if you’re experimenting, it’s always good practice to test things out first. If you have plenty of fabric, you can use some of it to do a little practice run. If not, you can use muslin or something similar to try out your idea. If you’re using a striped fabric, you can mark lines on your muslin before cutting to show you how everything will line up.

Bias

Bias is the diagonal angle across your fabric. The bias grain has quite a bit of stretch. A dress that clings to the body closely without having multiple seams is very likely cut on the bias. When you’re making a bias garment, especially a dress or slip, you’ll want to let the bias hang out for a while if possible as it will stretch out. You’ll notice that the bottom edge of your pieces will end up uneven if you do this, which is exactly what you want. You’ll need to remark your hemline after you’ve put together the garment.

I usually stay stitch my arm and neck holes, then pin my cut pieces on a form and, if time permits, let them hang over night. It’s also beneficial to then pin the seams together while they are hanging on a form to help alleviate any puckering.

Once you have a good understanding of grain lines, there’s no reason why you can’t try different things. Get creative (just remember that bias does stretch a lot more than something on the straight so you may need to stabilize with a lightweight fusible interfacing).