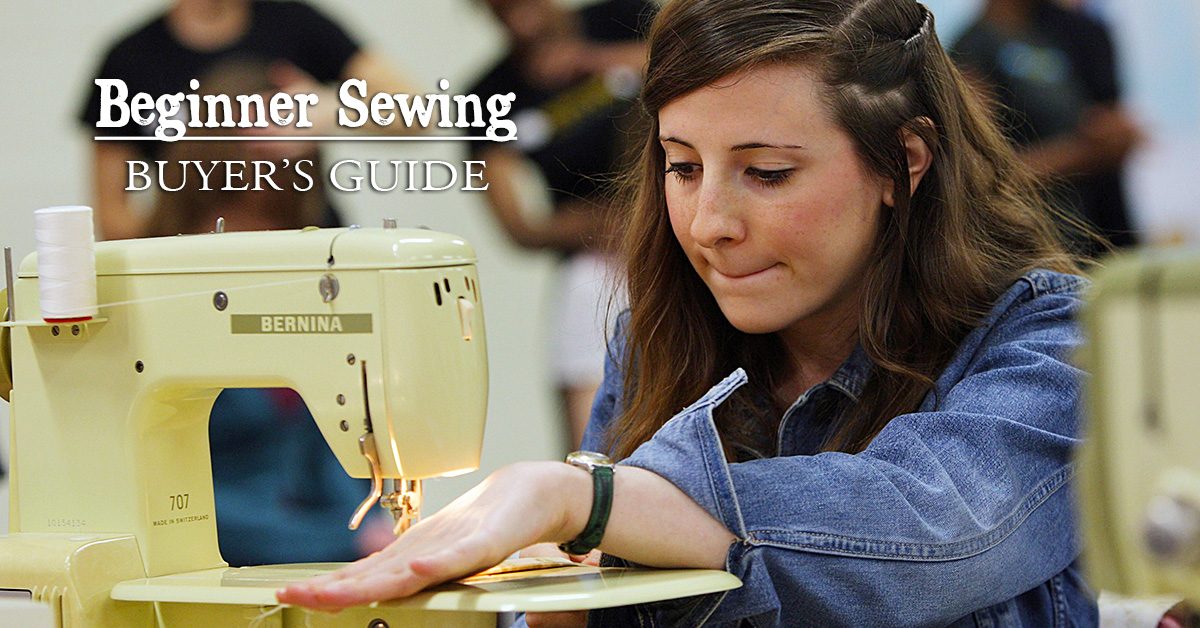
Beginner Sewing Machine Buying Guide

Beginner Sewing Machine Buying Guide

Buying a beginner sewing machine is an exciting decision that will impact your future in wonderful ways, but only if you choose a good beginner machine.

There is a huge difference between a great sewing machine and a not-so-great machine

Beginner Sewing Machine Buying Guide

The difference a well designed machine makes to a sewing beginner’s journey will save an enormous amount of frustration.  With a good machine, you will enjoy the process and learn to sew without trouble. With a poorly designed nightmare of a machine, your progress will not be near as fast. That is, if you progress at all; many beginners have thrown up their hands and given up on learning to sew thanks to an overly complicated or inferior beginner sewing machine, and this is a shame.

I’m speaking from experience here. If someone had told me these things I could have been spared an awful lot of trouble and tears. I’m not exaggerating to say tears, either; I not only cried but also screamed and wanted to tear out my hair in frustration when I was learning to sew. Learning to sew seemed so hard to do, but this was only because I was trying to teach myself on a terrible machine. I bought it at the same store where I shopped for groceries and it was, to put it mildly, a piece of junk!

If I had only known that I could have bought a much better machine for about the same amount of money, I could have enjoyed my beginner sewing experiences so much more. I’d love to save someone else that same trouble.

Start with a mechanical model sewing machine

My first recommendation is to start with a mechanical-only model. There are awesome computerized and electrical sewing machines available, and soon you will definitely want to add one of these to your collection, too. But I recommend you start with a mechanical model for two reasons.

First of all, you don’t want to confuse yourself with too many options and features when you first start sewing. I think it is best to focus on learning the basics of sewing on a good, basic machine.

And perhaps more importantly, you need to have a mechanical back-up machine in your collection before you buy an electronic or computerized machine. That’s because computerized machines require regular maintenance that you cannot do yourself. Nor can you repair any problem that might arise on a computerized machine at home.

When your machine is away, sometimes for as long as a few weeks, you cannot sew—unless you have a mechanical backup. So I think this needs to be the first sewing machine you buy.

I’d think I was sewing and then realize that I was sewing without thread! Argh, this is what made me scream and want to tear out my hair when using that machine!

Don’t buy a beginner sewing machine without these features:

Built-in needle threader

You’ll be threading your machine every time you sew.  With an easy machine, you are going to love sewing and want to make lots of things, so you will thread your machine thousands or even ten-thousands of times.

Save yourself a lot of time and trouble by getting a machine with a handy dandy built-in needle threader. Even if you are young with great eyesight and steady hands, this will still make needle threading go a lot faster for you. I wouldn’t buy a machine without this feature.

Top loading drop-in bobbin

The poorly designed bobbin system was the thing that caused me the most frustration on my first sewing machine. On that thing, the bobbin was concealed inside the front of the machine. To change it, I had to take the case off the front and then remove the bobbin casing to get to the bobbin which was held vertically inside.

Besides all those extra steps, the problem with this system was that there was no way to see that my bobbin was running low on thread. So what would happen is that my bobbin would run out without me knowing it. I’d think I was sewing and then realize that I was sewing without thread! Argh, this is what made me scream and want to tear out my hair when using that machine! I’d have to remove my project from the machine, rewind and replace the bobbin, and then start all over again. NOT fun!

A top loading bobbin system is so much better. With this system, the bobbin just pops out and drops into place without your having to disassemble a bobbin casing to get to it. Even better, this kind of system is accompanied by a see through cover plate. So you can see at a glance when your bobbin thread is low. Believe me, you want to get a machine with this feature.

Free arm capability

With a free arm, you can sew narrow, round garment pieces such as sleeves and pant hems. If a sewing machine won’t convert to free arm sewing you can’t sew these things easily, if at all.

As a beginner sewist, you will want to make many small projects. That’s because they are easy and satisfying, not to mention useful. Not having the ability for free arm sewing is unnecessarily limiting. There are basic beginner sewing machines that do limit you in this way. Be sure the machine you buy includes this important feature.

My recommendations for your beginner sewing machine:

I always recommend Janome brand machines. That is because I have seen for myself that Janome offers the best quality and the best value, by far. From my experiences with my own nightmare first machine to my experiences helping others with frustrating machines when I teach sewing classes, I have seen clearly that there is a big difference in user friendliness between different makes of machines. I can’t imagine buying any other brand and I recommend them as being the best choice for beginners and experienced sewists alike.

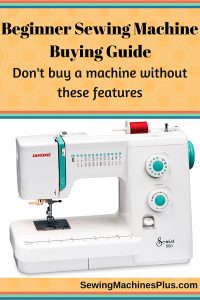
Janome Sewist 500

If I were buying a beginner machine, I would buy the Janome Sewist 500. I like this one because, besides offering my must-have features listed above, it goes beyond being a basic machine and offers a lot of options without being overly complicated. It has 25 different stitches, including some decorative stitches, and a one step buttonholer. I love this option on Janome machines, it makes sewing buttonholes as easy as pie.

Janome Jem Gold 660

I would also recommend this machine as being a great choice for a beginner sewing machine. It too includes all the features I would demand. And besides the fact that the price is nice, this machine is also lightweight. This makes it easy to grab and go to class or wherever else you’d like to take it. While it only has eight stitches to choose from, these include everything you need. Almost all sewing uses either a stretch or a zigzag stitch. This machine performs both, and with adjustable stitch length and width. It also has two different useful stretch stitches and a buttonhole stitch.

With either of these as your beginner sewing machine, you will be sure to enjoy learning to sew and you won’t have to suffer needless frustration. Either of these high-quality Janome machines will continue to serve you well long beyond your brief time as a beginner.

To save yourself another easily avoided frustration, be sure to read my guide to machine needle selection, too. Besides using a poorly designed beginner sewing machine, nothing else can cause you as much trouble as using the wrong size or type of needle. You won’t have to suffer this problem when you clearly understand which needle to use when.

Happy sewing to you!

Embroidery Software and Designs Guide

Embroidery Software and Designs Guide

There is a wide array of embroidery software and design choices available

Embroidery Software Pin

Embroidery Software Pin

When I shared an embroidery machine buyer’s guide last week, I did not touch on the subject of embroidery software and downloadable designs. That’s because you don’t need to buy any software or additional designs to start creating on an embroidery machine.

But once you have gotten comfortable with your machine, chances are you will want to expand your capabilities and design options by investing in more designs and/or software.

Without a good understanding of the different options, this subject can be just as confusing as choosing a machine. Let’s look at the different types of embroidery software and additional designs available in order to gain a clear view of the different types of software and other options available for extending your possible embroidery designs. Your choices include:

  • Design collections
  • Membership club
  • Digital downloads
  • Editing software
  • Lettering software
  • Digitizing software
  • Thumbnailers
  • Cataloging programs

Designs on disc

An easy investment to start building a larger library of embroidery designs is to purchase collections on CD-ROM. There are a ton of options to choose from in this category. Each will include many designs within a particular theme.

A great choice for these is Anita Goodesigns, which offers a huge collection of gorgeous designs. Sewing Machines Plus has fifteen pages of different Anita Goodesigns to choose from, including:

  • Baby designs, from vintage to cartoon-style, and everything in between
  • Holiday, seasonal, and religious motifs
  • Animal designs, both whimsical and realistic
  • Butterflies, dragonflies, and bugs
  • Fruits, vegetables, and baked goods such as cupcakes and donuts
  • Foliage and flowers galore
  • Faeries
  • Customizable designs for your sewing club
  • Mandalas
  • And plenty more
Anita Goodesigns Sun

Anita Goodesigns Sun

These collections work for many different machine formats: ART, DST, EMD, EXP, HUS, JEF, PCS, PES, SEW, SHV, VIP, and XXX.

You may also like to check out design collections from Amazing Designs, Dakota Collectibles,  Michelle’s Designs and Notcina.

VIP Club

Individual design collections on disc are an inexpensive way to start expanding your design library. But if you are like me, you will want them all! Buying all the individual collections separately would require a tremendous investment. But luckily, the folks at Anita Goodesigns realize that we will want them all, and so they made it easy for us to get them with their membership club.

The VIP club gives you ALL of the designs previously released, and then sends you the new designs that are released throughout the year. Plus, they include more member benefits, such as all the quilt and cutwork designs, as well. To read about all these benefits and extras, head over to the Anita Goodesigns Club page.

Digital downloads

You can find many designs online, through Etsy and elsewhere, available as digital downloads.

You need to know which file format your embroidery machine requires before downloading designs. Different machines require different formats and other formats are not compatible. For example, most Janome machines use .JEF files, Singer uses .XXX, Brother and Babylock generally use .PES format. Be sure to choose the correct format for your machine when downloading designs. However, if you own editing software, which we will discuss next, you can convert design formats.

You can find some free designs for digital download online. It is also possible to get premium designs for free. For example, Floriani includes a POP coupon code for a free design download on the label inside each package of their stabilizers. Once you collect ten of these codes, you can redeem them for ten design downloads. You will need stabilizer for all your embroidery designs. Floriani stabilizers are high-quality and are available in all types and weights. So the free download bonus packaged inside makes choosing these stabilizers a no-brainer.

You can also get five free Floriani downloads every month after you buy their Total Control software, which we will discuss soon.
Embroidery software for editing

Editing software will allow you to do many things, such as:

  • Resize designs and recalculate stitches
  • Merge designs
  • Convert thread brands
  • Colorize
  • Add lettering, including large letters
  • Convert design formats to the type your machine accepts
  • Overlap designs
  • Change or remove individual colors in a design
  • And more

Editing software is available in a wide range of prices. Embrilliance Essentials is an awesome option that is super affordable and will allow you to easily do all of the above, plus more. This program works on both Windows and MAC operating systems, too.
Embroidery software for digitizing

If you want to stretch your creativity further and make your own designs, then you need digitizing software. This type of software will take a piece of clipart, a vector drawing, or other image and convert it into an embroidery design.  Digitizing software will also convert fonts from your computer into letter embroidery. They can do lots of other amazing things, too; for example, you can use them to convert regular embroidery designs into cross stitch.

Many folks consider Floriani digitizing software to be the best. It is a super high quality all-in-one program which covers every possible editing and digitizing function. It also comes with the added benefits of having tons of tutorials and other help available online, and the five free design downloads a month that I mentioned previously here.

I prefer a different option, however.  I’ll be going with the Artistic Suite and Artistic Premium upgrade for my own embroidery software, and here’s why:

The Artistic Suite and Premium software costs less and includes more. This software goes beyond embroidery and includes a slew of helpful applications for quilting, appliqué, reverse appliqué, fabric cutting, heat transfer, and making elaborate rhinestone designs.  It is also useful for scrapbooking applications, and will make cut-outs from most anything, including paper, foam, and even balsa wood.

Artistic Suite does all these things as an editor, and the Premium upgrade adds digitizing capabilities. I’m amazed by everything I can do with these programs, and I can buy both of them without spending an arm and a leg! The Artistic program is available for both single needle and multi-needle machines.

Embroidery software: thumbnailers and cataloging

The Embrilliance thumbnailer is a little program that you won’t want to be without. And the price is so nice that there is no need not to pick this up right away.

This program collects all your embroidery designs into one place on your computer and lines them up as thumbnail images so that you can easily them all. Without it, you have to search and view every design individually, which can cost a lot of time and cause much frustration. But there is no need to waste any time or be frustrated at all when this solution is so simple. It is compatible with both PC and MAC.

There is another option for cataloging your designs into categories on your computer. That is Floriani’s My Design Album. This program is easy to install and will find all the various embroidery designs on your computer and compile them into one easy-to-find place. Then you can set up categories to find these designs more easily. The Design Album includes some editing capabilities as well.

Now is the best time to buy

February is National Embroidery Month, and Sewing Machines Plus is celebrating by offering big discounts on all embroidery equipment and supplies. So now is a great time to invest in additional embroidery designs and embroidery software. Take advantage of these great deals and expand your design library and capabilities today!

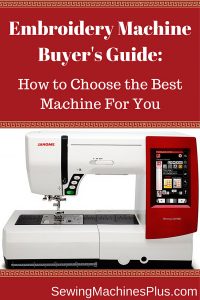
Embroidery Machine Buyer’s Guide

Embroidery Machine Buyer’s Guide

Which embroidery machine should you buy?

Here’s an embroidery machine buyer’s guide to help you decide

Which embroidery machine should you buy? Here’s an embroidery machine buyer’s guide to help you decide.

Which embroidery machine should you buy? Here’s an embroidery machine buyer’s guide to help you decide.

Choosing an embroidery machine can be confusing. There is a dizzying array of model choices and feature options available.

But there is no need to be overwhelmed. For the last several weeks, I have studied this issue to get a clear idea of how to choose the best embroidery machine. I have tested and played with every machine I could get my hands on. I also poured over the details for most every embroidery machine on the market.

And I talked to Torrie Root, the super helpful Sales Manager at Sewing Machines Plus. We talked more than once for a long time and I asked her a ton of questions.  She answered all my questions in depth. She also sent me more info so I could study this question further.

I have compiled everything I learned into this embroidery machine buyer’s guide. Hopefully this will help you decide which embroidery machine to buy to suit your needs best.

Embroidery machine considerations

There are several things to consider when buying an embroidery machine. These include:

  • Cost and Value
  • Embroidery field and hoop sizes
  • Design library
  • Connectivity
  • Display quality
  • Embroidery only vs combo machine
  • Extra features

Cost and value

Because embroidery machines tend to cost more than regular sewing machines, you want to get the most value for your money. You also want to ensure that you choose a machine that will serve you happily for many years. It would be a waste of your money to go for a model that you will soon outgrow.

Your embroidery machine is an investment and you want to choose the best machine you can afford.

For me, I know an entry-level machine will not satisfy me for long.  I will want more and better features than a basic machine comes equipped with. So I would rather save up for a little while to be able to afford a higher quality machine that I can grow with, rather than one I will soon outgrow.

Embroidery field and hoop sizes

Many embroidery machines are limited and can embroider only a small area. Some of these lower priced machines have an embroidery field of only four inches square!

I know I will want more creative freedom than a four inch square field, and I bet you will too.

There are many options for machines that come packaged with multiple hoops in different sizes. And most of these machines offer other hoop sizes and shapes that you can purchase separately to use with these machines, too. I definitely recommend choosing a machine that offers you multiple options for hooping.

Design options and connectivity

Different machines are loaded with different sized libraries of embroidery designs. Some have many more than others. And some offer prettier and more useful designs. I looked at a few machines that had boring designs and nothing much that I would actually want to use. Of course you will want to choose a machine that offers you plenty of embroidery designs that you like and will want to use.

However, you can also download and/or purchase additional designs online or on disc, so you will not be limited to the design library that comes with your machine.

Some machines make this easier to do than others, however. There are some embroidery machines which require an actual computer connection for additional designs, while others have a USB port so that you can use a little flash drive for transferring extra designs, instead.

This makes more sense if your computer is a desktop in the den, for example. I wouldn’t want to have to connect my embroidery machine in the den; that computer desk doesn’t have enough space for an embroidery machine. So I’ll definitely buy one with a USB port so I can sit at my computer in the den to shop and download designs and then easily bring the designs to my sewing room on a thumb drive.

Display

Here’s another reason why I know I don’t want a basic model embroidery machine: there is a drastic difference between the displays of different machines. Some offer only a tiny window and no clear picture of the designs to choose from.

I want a clear view of the design I am embroidering, and I don’t want to have to consult the book or connect to the computer every time I use my machine. This is an important consideration when you are making multi colored designs, for example.  I want a display where I can see at a glance an actual picture of the design in full color.

Take a look at the difference between the displays on these two machines, for example, and you’ll see just what I mean:

Embroidery only or combo machine?

Since I already have a sewing machine that I really love, I was thinking that I would be able to get the best value for my money by going with an embroidery only machine. I figured I didn’t need to spend money on sewing capabilities when I am already well equipped for sewing. I also thought it would be more efficient to switch between two adjacent machines for two functions rather than having to switch functions on the same machine between tasks.

I’ve changed my mind about this, however. That’s because most of the better machines are combination sewing and embroidery machines. This is great because a machine that both sews and embroiders offers more bang for your buck. And these machines are larger with more sewing features and space than most regular sewing machines have.

If you are a quilter like me, you will really appreciate the extra space these machines offer. It is not likely that your favorite sewing machine is as nice as your new sewing and embroidery machine will be! So in addition to adding an embroidery machine to your collection, you will be adding your new favorite sewing machine, too.

There is one reason you might prefer to go with an embroidery-only machine, however. If you plan to operate a home business and do a ton of embroidery, you may want to consider a multi-needle machine.  This kind of home embroidery machine will complete your designs more quickly.

Multi-needle embroidery machines are also the only machines that will do a good job with embroidering hats. Torrie told me that all the combination models have a little trouble with this task, so if you think you will want or need to do embroidery on hats, you will want to consider this type of embroidery-only machine.

Helpful features:

Some embroidery machines are complicated to use. Extra features ensure ease of use and add a lot of extra value to some machines. Here are some helpful features that you might really want your machine to have:

  • Automatic thread tension – When your machine automatically adjusts the thread tension, there is no chance of mistakes due to improper tension.
  • Thread trimming – Trimming all your threads by hand can be a pain. A machine that automatically clips all your threads for you will save a lot of time.
  • Embellishment capability – In addition to regular embroidering, you may also want to be able to do sequins and beadings. Some machines offer attachments that will enable you to attach these.
  • Archable fonts – Allow you to curve your lettering. This offers more design freedom and can look a whole lot more attractive than straight monogramming when combined with other designs.
  • Onscreen editing – On some machines, you can’t edit designs much, if at all. Many machines allow size editing of no more than 20%. A few machines offer greater size editing, and some allow you to create your own designs by offering corners and borders which can be combined with other design parts.
  • Variable speed – Some machines have variable speed controls, which you can set to start slowly and gradually speed up.
  • Knee lifter – This handy gadget lets you use your knee to lift the presser foot, leaving your hands free.

My choice:

I thought I was in the market for an embroidery-only machine, but after carefully considering every option available, my choice for the best machine for me is the Janome Memory Craft 9900 combo machine. On this machine, you can sew with the embroidery unit attached, so you don’t need to reconfigure the machine when switching between functions.

The Memory Craft 9900 offers 175 different embroidery designs, including pieces and parts for creating your own designs, and 200 sewing and quilting stitches. It has archable monograms, a knee lifter, and all the other helpful extra features I have already listed. Plus a full color display and much more.

This exceptional machine is packed full of value with way too many extra features for me to list here. Instead, I’ll invite you to check out this page at Sewing Machines Plus to read all about it.

I am a Janome loyalist because I have consistently found Janome machines to offer the most user-friendly features and best value for my money. Though the MC9900 is not Janome’s most expensive machine, it offers top-of-the-line features. And Sewing Machines Plus is throwing in hundreds of dollars worth of extra attachments, for free. All this is why I see this model embroidery machine as clearly the best choice for me.  If you are looking for a great value for an exceptional machine, I recommend that you choose this one, too.

Fabric Trend: Cats and Things Cats Love

Fabric Trend: Cats and Things Cats Love

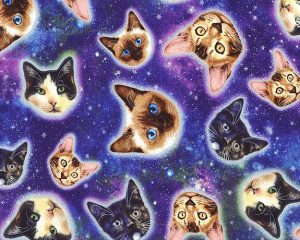
Galaxy Cat fabric by Timeless Treasures

Galaxy Cat fabric by Timeless Treasures

Last October, I highlighted three lines of cat fabric for you including From Porto with Love, Cat Lady, and Meow or Never.

I should be honest however, and not call cat fabric a trend because our love for cats will never go away. To prove this, here are more cat fabric lines for you, including fabrics with things cats love.

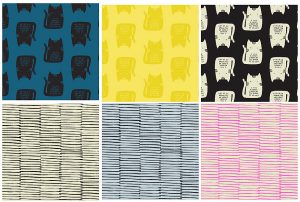
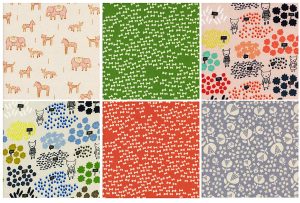
Maker Maker by Andover Fabrics

From Andover Fabrics, you’ll find cats in blue, black and yellow. Along with their coordinating cat scratches.

From Andover Fabrics, you’ll find cats in blue, black and yellow.

From Andover Fabrics, you’ll find cats in blue, black and yellow.

Flower Shop by Alexia Marcelle Abegg

Inspired by walks through Mexico’s outdoor flower markets, Flower Shop brings you cats amongst flowers, bow ties, thistle, and cats with foxes, elephants & donkeys.

Flower Shop brings you cats amongst flowers, bow ties, thistle, and cats with foxes, elephants & donkeys.

Flower Shop brings you cats amongst flowers, bow ties, thistle, and cats with foxes, elephants & donkeys.

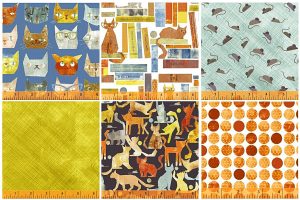
Smarty Cats by Maria Carluccio

Maria Carluccio’s Smarty Cats fabric line is for the true lover of traditional fabrics and traditional cats. You’ve got cats on books, playful cats, smarty cats, and mice, string and balls.

Maria Carluccio’s Smarty Cats fabric line is for the true lover of traditional fabrics & traditional cats.

Maria Carluccio’s Smarty Cats fabric line is for the true lover of traditional fabrics & traditional cats.

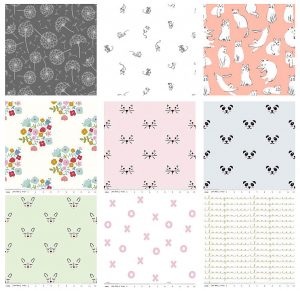
Whisper by Dear Stella and Riley Blake’s Double Gauze

These two fabric lines seem to coordinate seamlessly. Add a dash of Dear Stella with Riley Blake and you have the quilting cottons of Dear Stella on the top row in cats, mice, and dandelions, and the double gauze dreaminess of Riley Blake, featuring delicate cat, deer, and panda faces, with tiny Xs and Os and I Love You’s.

These two fabric lines seem to coordinate seamlessly.

These two fabric lines seem to coordinate seamlessly.

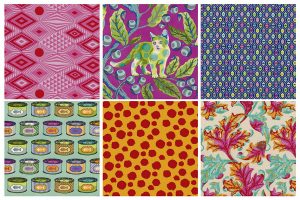
Tabby Road by Tula Pink

Tula Pink takes their coolness to the next level by combining cats + The Beatles. This psychedelic fabric line will arrive in most stores by March and perfectly blends your feline friends with the some of the trippiest nods to Abbey Road. Fabric names include: Tangerine, Strawberry Fields, Fur ball, Lucy, Cat Snacks, Blue Bird and Disco Kitty.

Tula Pink takes their coolness to the next level by combining cats + The Beatles.

Tula Pink takes their coolness to the next level by combining cats + The Beatles.

Pura Vida by Hawthorne Threads

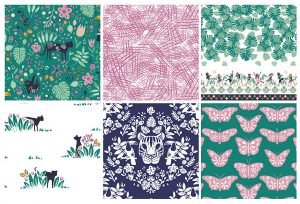
Hawthorne Threads Pura Vida line is reminiscent of a Central American jungle and features wild cats and their surroundings.

Hawthorne Threads Pura Vida line is reminiscent of a Central American jungle & features wild cats.

Hawthorne Threads Pura Vida line is reminiscent of a Central American jungle & features wild cats.

Hemma by Lotta Jansdotter

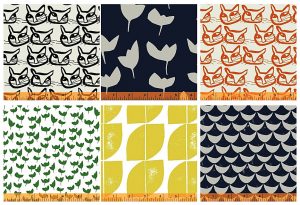
For the lovers of all things Scandinavian, Lotta Jansdotter fabric line, Hemma, combines cat faces, tulips, lemons, half-moons, and clean & classic colors to give you a modern twist on cat fabric.

For the lovers of all things Scandinavian, Lotta Jansdotter fabric line, Hemma.

For the lovers of all things Scandinavian, Lotta Jansdotter fabric line, Hemma.

Do you have any cat fabric lines you love? Please share them with us in comments!

———————————————————————————–
Charlotte Kaufman is a writer and sewist in Mammoth Lakes, California. She specializes in marine and home interiors and continues to fall more and more in love with quilting. You can follow her at charlottekaufman.com.
Should you buy an Industrial Machine?

Should you buy an Industrial Machine?

One of the questions I often get when I tell people that I sew for a living is: What sewing machine do you like the best?

I usually respond that it all depends on what I’m doing and I use different machines for different things. Which is mostly true. But if I’m being completely honest, I do have a favorite. Well, actually two favorites.

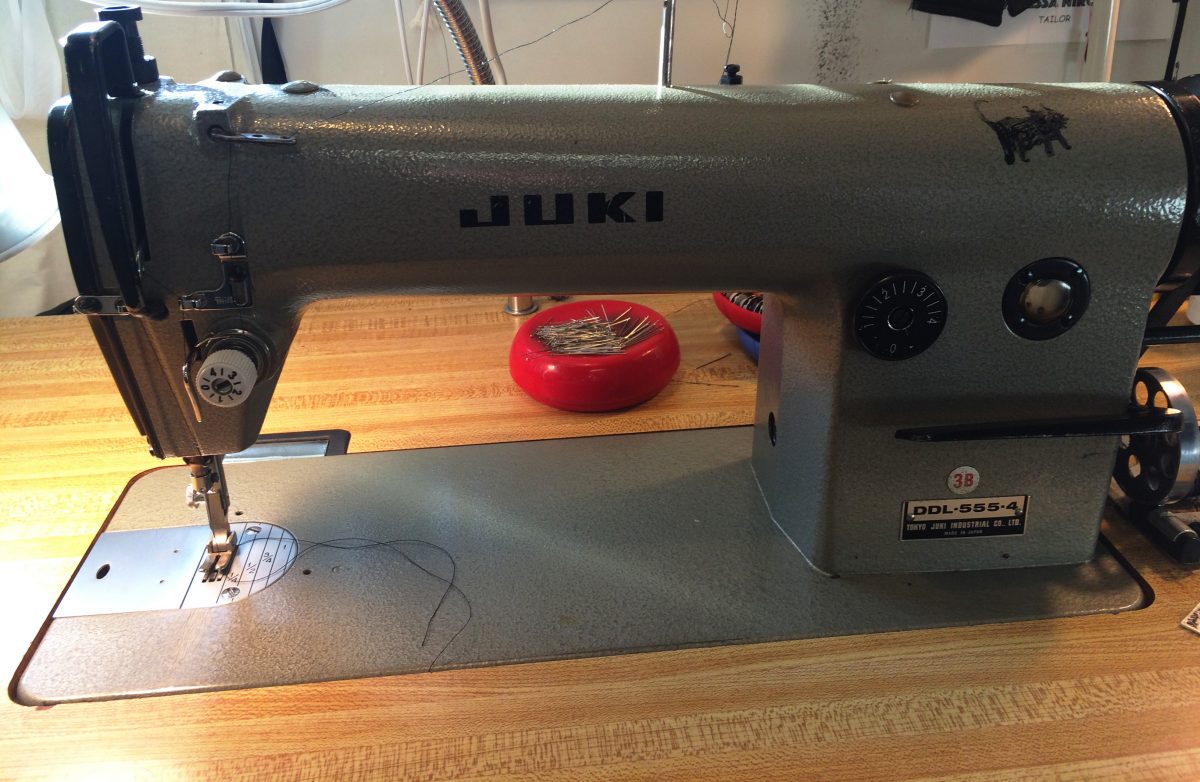
The first is my Juki straight stitch industrial. Mine is an older model, the DDL-555-4, which is no longer made.

The first is my Juki straight stitch industrial. Mine is an older model, the DDL-555-4, which is no longer made.

The first is my Juki straight stitch industrial. Mine is an older model, the DDL-555-4, which is no longer made. Juki does though, of course, still make straight stitch industrial machines (the updated models for mine are the DDL-8700 and DDL 5550-N).

Many people are a bit hesitant about buying an industrial machine. Lots of people have told me that industrials frighten them because they’re so fast. Well, these days, a lot of industrials come with a speed setting so you can control how fast it goes (even if you accidentally push all the way down on pedal the machine will not ‘take off’ if you have the speed set to ‘slow’). Nothing to fear. You can start out slow and, as you gain confidence, crank up the speed.

It is important to note, though, that the older models, like mine, do not have this feature. And each machine is a bit different in how it responds to the pressure of your foot.

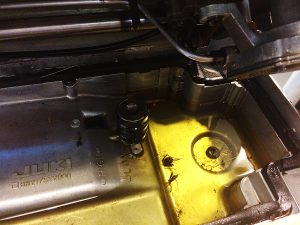
One of the most crucial things to know about using an industrial machine is that, unlike the majority of domestic machines these days, it does indeed need oil to run properly. Once your machine is all assembled, with the machine head sitting securing in the table, simply tip the machine backwards. Underneath, you’ll see a metal bed. Fill it with machine oil.

Underneath, you’ll see a metal bed. Fill it with machine oil.

Underneath, you’ll see a metal bed. Fill it with machine oil.

I think the new models have a line indicating how much oil you should put in. Mine does not but I fill it so that the deeper part of oil pan (the right side) is about half full.

The next thing to remember is that, if you ever have to transport the machine, you need to drain the oil first. Or you’ll end up with quite the mess. On the right side there will a black screw in plug you can loosen and take out (make sure you have a bowl or plan positioned underneath to catch the oil) to drain the oil from the bed.

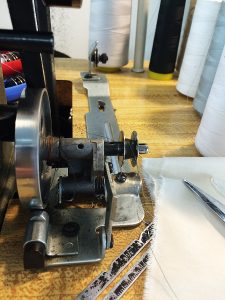
One of my favorite things about industrial machines is that you can wind a bobbin while sewing. Most industrial come with a two spool thread stand and the bobbin winding mechanism is separate from the machine on the right side. Place a spool in the thread stand, then thread from back to front through the bobbin stand tension. Pull the thread to the front and around the bobbin. You’ll need to engage the bobbin by pushing it backwards so that the wheel connects with the belt of the machine.

You’ll need to engage the bobbin by pushing it backwards so that the wheel connects with the belt of the machine.

You’ll need to engage the bobbin by pushing it backwards so that the wheel connects with the belt of the machine.

Unlike, domestic machines, there is no disengaging of the machine needle when bobbin winding so if you are winding a bobbin while not sewing make sure you take the bobbin case out and unthread at least to the pick up thread pick up lever.

The beauty of the industrial machine is that, once you are comfortable with it, they are so much faster than domestic machines. You’ll get a lot more done in a shorter amount of time. They also sew through many layers of fabric without complaining. I find that I never have to mess with the tension on my Juki, it’ll sew through light weight chiffon and six layers of denim without needing any adjustment. Brilliant.

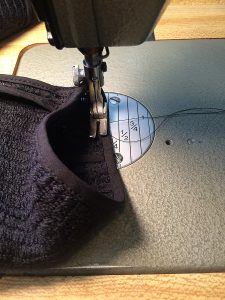
Sometimes people are concerned about the lack of a free arm but I can confidently say that you don’t need one. If you need to sew a small circumference like a sleeve hem, turn it the opposite way out you would if you were using a free arm: meaning if you want to stitch on the wrong side or inside of the hem, leave the sleeve right side out, then position it under the presser foot like so:

If you need to sew a small circumference like a sleeve hem, turn it the opposite way out you would if you were using a free arm.

If you need to sew a small circumference like a sleeve hem, turn it the opposite way out you would if you were using a free arm.

See, easy!

If you’ve been debating about getting an industrial, debate no more! Take the plunge. You won’t regret it.

PS: I’ll tell you all about my other favorite machine next week: a vintage Sing

New Year, New Challenges: The Psychology of Sewing

New Year, New Challenges: The Psychology of Sewing

How many times do we seriously plan things, and within days or hours, our plans change. I used to think I prefer knowing what will happen ahead of time so I can grasp the idea, plan it to my specifications, and control the outcome. Not very many things happen that way.

So last time I wrote, I had a nice New Year’s Resolution list made up for myself. I was ready to learn new things, implement new creative expressions, and sew a rug made of scraps. That was a few days before New Year’s Day.

Now, the middle of January, about 2 days ago, I was able to sit and sew a project I have been thinking about. Sewing is so therapeutic, you forget where you are and the daily chores of life. But now, my Resolutions have been pretty much scrapped. Time changes things so quickly.

Turn that frown upside down

Now, I’m finding myself in a position to decide how to decorate a new home we are building. “Wonderful, you say! Congratulations!” Blushing but thankful, I tell you, “Thank you, but the downside is I’m losing my room for sewing.” For now, I have a countertop that wraps around half the room where I can cut, sew, press, lay out patterns, and holds my computer. Plus tons of shelves for fabric, ribbon, thread, and many other non-sewing related supplies. What will I do?

We determined that I will use the large guest room upstairs for my sewing projects, but it will be deemed a guest bedroom as well. So, gone are the days, of leaving my projects in different stages, and not worrying about things left out. I have to be neat and organized ie. (no thread on the floor) so if we should get company, (my daughter visits frequently) that room will be presentable. OMG, such pressure! I’m already stressed. I can’t even get away and be creative because my room has to be in picture perfect order and stay that way (much like the rest of the house by the way, as my in-laws will be living with us).

So, I need your help! I will explain later. I’m making a checklist of some things, I need to purchase if I am going to continue my psychological sewing retreat. At least I have until late July to decide.

Making a list – checking it twice

First is a desk. I like this one. Nice and neat!

See it here:

Fashion Sewing Cabinets of America 8300 Cloud 9

Or:

Sylvia Design Model 1520 Quilters Work Station

Then a rolling bag to store the sewing machine out of sight while my guest suite is being occupied.

Bluefig TB 23Travel Bag 23″ Julie

Also a box of Aerofil Incredible Threadable Quilt Box Maderia Thread so I can keep the thread bobbins and thread and neatly put away.

Then there’s the fabric and trims, buttons and numerous other collections. That worries me most. I would love to hear your suggestions on how to scale back and organize and still have the ability to retreat to my passion in my changing lifestyle. I hope all will not be lost even with a more spacious house and elder care ahead. One never knows! As for you, my advice is:

Keep sewing, it’s good for the soul! Until next time.

9 Cutting Tools for your Sewing Room

9 Cutting Tools for your Sewing Room

Do you know the difference between scissors and shears? I didn’t so I looked it up and now I can edify us all. Scissors usually have equal-sized finger holes and are under 6″ in length. Shears have one hole that is bigger than the other and their blade lengths are normally longer than 6″. The terms scissors and shears are often used interchangeably and for the purposes of this article, I flip back and forth between them.

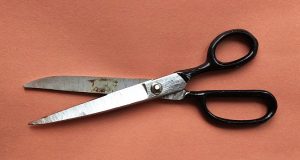
Fabric scissors

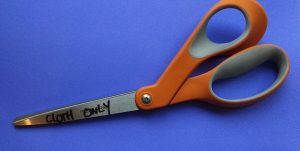
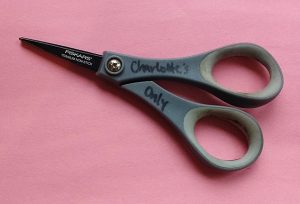
These are the scissors you hide. Or keep locked away. Or you write in Sharpie on them. DO NOT USE. CLOTH ONLY. MOVE AWAY FROM MY SCISSORS. If you haven’t convinced your family to stay away from your fabric scissors, then move to the second pair below.

These are the scissors you hide.

These are the scissors you hide.

All purpose scissors

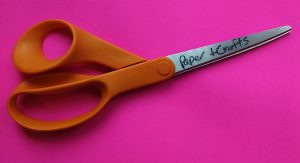
THESE are the pair you hand people who want to use your fabric scissors. Keep them sharp so no one is ever tempted to grab the pair you keep for working on your stash.

THESE are the pair you hand people who want to use your fabric scissors.

THESE are the pair you hand people who want to use your fabric scissors.

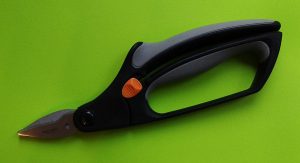
Heavy duty shears

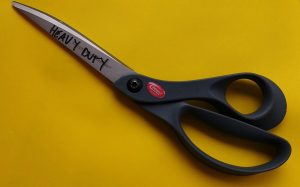
When your regular fabric scissors won’t cut it. I’ve used these to cut canvas, Sunbrella, and leather. Don’t let your friends or family use these for everyday use. They’re heavy duty. Emphasize that by saying it in a low voice, “Sorry, these are heavy duty.”

Don't let your friends or family use these for everyday use.

Don’t let your friends or family use these for everyday use.

Snipping scissors

Snipping scissors, or scissors with very short, sharp blades are genius for cutting threads as you sew.

Snipping scissors, or scissors with very short, sharp blades are genius for cutting threads as you sew.

Snipping scissors, or scissors with very short, sharp blades are genius for cutting threads as you sew.

Pinking shears

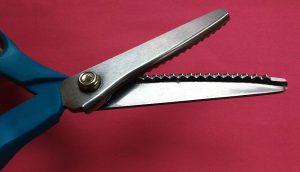
Pinking shears are what you need if you are working with fabric that ravels or if you plan to leave a cut edge exposed. Pinking shears do what zig zag stitching or serging does, they stop fabric from unraveling. They are genius. You should get a pair.

You should get a pair.

You should get a pair.

Herb cutters, fringe scissors

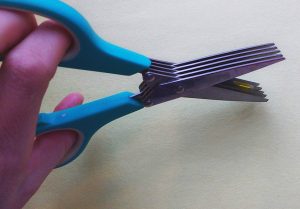
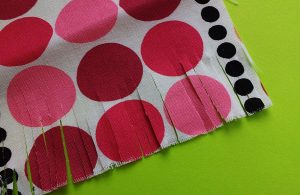
Yes, bring the kitchen into the sewing workshop. These scissors are frequently used to quickly chop up herbs, but in the sewing room they create fringe.

Bring the kitchen into the sewing workshop.

Bring the kitchen into the sewing workshop.

Perhaps you want to make some fringe-cut garland? These would be your tool. They work best when you put the fabric back towards the center of the scissors and stop cutting before you reach the tips. If you have a LOT of tiny snips like this to make, however, you’ll want to see the next pair of scissors.

If you have a LOT of tiny snips like this to make you'll want to see the next pair of scissors.

If you have a LOT of tiny snips like this to make you’ll want to see the next pair of scissors.

Rag quilt scissors

For when you aren’t messing around. Rag quilt scissors have short, sharp blades that let you snip through chunks of fabric to create the famous look of rag quilts.

For when you aren't messing around.

For when you aren’t messing around.

Pro Tip: If you get a pair, make sure to get them spring loaded. Your hands will thank you!

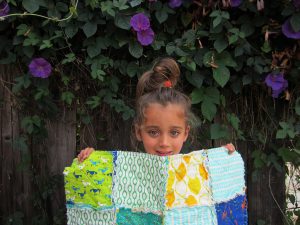
My oldest made this rag quilt with and I snipped it right up with rag quilt scissors. Just put on a TV show you can zone out to and start clipping.

My oldest made this rag quilt with and I snipped it right up with rag quilt scissors.

My oldest made this rag quilt with and I snipped it right up with rag quilt scissors.

Rotary cutter

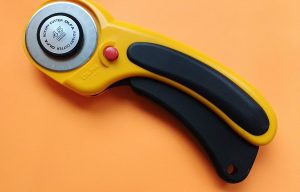
Rotary cutters are becoming more and more popular. Once you learn how to cut fabric with them, your fabric scissors may start to see a lot less use.

Goodbye fabric scissors!

Goodbye fabric scissors!

Ye olde kitchen drawer scissors

Also known as ‘household scissors’ or ‘the scissors you can do just about anything with and mom won’t get mad.’ They are the unsung hero of your scissors quiver because they keep the rest of your tools safe.

The scissors you can do just about anything with and mom won't get mad.

The scissors you can do just about anything with and mom won’t get mad.

What types of cutting tools do you use in your sewing room? Let us know in comments!

—————————–
Charlotte Kaufman is a writer and sewist in Mammoth Lakes, California. She specializes in marine and home interiors and continues to fall more and more in love with quilting. You can follow her at charlottekaufman.com.
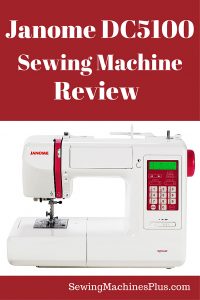
Janome DC5100 Sewing Machine Review

Janome DC5100 Sewing Machine Review

The Janome DC5100 is Super Sweet

The Janome DC5100 is super sweet!

The Janome DC5100 is super sweet!

When I decided to upgrade my basic machine several years ago, I took a lot of time investigating all the different options. At first I felt overwhelmed by the huge selection of makes and models available.

But then I discovered the Janome DC5100 with its impressive features. This was the clear choice as the right sewing machine for me.

I love this machine; it’s the sweetest sewing machine I have ever used. I have been sewing on mine for several years now and I have only grown fonder of this dear friend.

What’s so great about it?

Like all Janome machines, the DC5100 is well designed with user friendly features. Like other Janomes, it has a horizontally loaded bobbin with see-through cover, built-in needle threader, snap-on presser feet, one-step buttonholer attachment and more.

But the DC5100 is even more special than all the other lovely Janome sewing machines I have used, for quite a few reasons:

Variable Speed Controls and Quiet DC Motor

I love it because it is fast. It will sew 820 stitches per minute. But it also has a helpful speed adjustment switch which I can use to set the machine to sew more slowly. This helps me in sewing curves or other delicate tasks, since I have a tendency to have a lead foot on the sewing pedal. I can slide this easy control all the way to the left and force myself and the machine to go very slowly, toggle towards the middle for a moderate speed, or I can do what I usually do and slide it all the way to the right and run through projects with super fast speed. The Janome DC5100 sews well at all these different speeds because it has a powerful DC motor.

It sews quietly, too. The Janome DC5100 is the quietest machine I have ever used. Because I have little kids who keep me busy during the day, I often stay up quite late at night to do my sewing, and my husband used to complain about the noise. Now that I have this machine, when I come to bed, he asks “What have you been doing?” That’s because the Janome DC5100 is so quiet that no one outside of my sewing room can even hear it.

A Wide Variety of Stitches and Programmable Memory

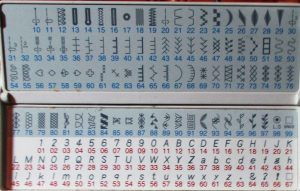
Janome DC5100 has 167 different built-in stitches and 215 stitch functions.

Janome DC5100 has 167 different built-in stitches and 215 stitch functions.

What has made this my all time favorite sewing machine, besides its smoothness and speed, is its wide variety of functional and decorative stitches. This machine has 167 different built-in stitches and 215 stitch functions. It includes many quilting, blanket, heirloom, embroidery, home deco, and garment sewing stitches, as well as both upper and lower case alphabets, numerals, and punctuation. It can even cross-stitch.  And it can make five different types of easy one-step buttonholes.

The Janome DC5100 also has a programmable memory which holds up to fifty different patterns. I use this both for programming stitch patterns combining multiple decorative stitches, and also for remembering my favorite zig-zag stitch length and widths. The programmable needle up/down function allows you set the machine to stop sewing with the needle in either position.

Includes a Huge Selection of Feet

It also came with a great selection of feet. Besides the impressive variety of stitches, this detail was the selling point for me. No other machine I looked at included so many feet. The Janome DC5100 comes factory packaged with ten different feet. These include a ¼ inch seam foot, straight stitch foot, a zigzag foot, a satin stitch foot, a zipper foot, the one-step automatic buttonholer foot, overedge foot, adjustable blind hem foot, darning foot, and even a walking foot.

That darning foot is darn helpful, too. I use it with the feed dogs dropped for both free motion quilting and embroidery. The foot package also includes a handy quilting bar. And if you buy this machine from Sewing Machines Plus, they even include three additional feet in their bonus package: a ditch quilting foot, a concealed zipper foot, and my favorite, a see-through appliqué foot.

And More

Other user-friendly features include a built-in needle threader, thread cutter, jam-proof magnetic drop-in horizontal loading bobbin, super fast automatic declutch bobbin winding, auto-lock button for securing seams, easy reverse button, superior feed system, seven piece feed dogs, easy drop feed switch for free motion sewing, stitch length up to 5mm and width up to 7mm, backlit LCD screen and touchpad, hardcover, automatic presser foot tension which you never need adjust, roomy accessory storage compartment, and more.

The push button controls are easy to use and intuitive; the display even shows what foot to use after you select your stitch. This machine also comes with an excellent manual that covers everything in depth. Another special feature that I especially appreciate is the extra high presser foot lift.

Excellent Value

After sewing on mine for several years, I have zero complaints and nothing but raves.

I heartily recommend the Janome DC5100 as an amazing value. It’s a sweet, reliable, powerful machine that can increase your creativity with its wide variety of stitch functions and accessories. And the price is pretty sweet, too. After sewing on mine for several years, I have zero complaints and nothing but raves; I fell in love with it the first time I used it and I can’t imagine loving any machine more.

You will love it, too. Now is a great time to upgrade from a basic machine to expand your capabilities with a computerized Janome DC5100. You will be amazed by the difference this machine will make for your stitching and your creativity. Act now to take advantage of Sewing Machines Plus’ great price on this Janome and get the free bonus package with three additional feet and two kinds of needles while this hot deal is still available.

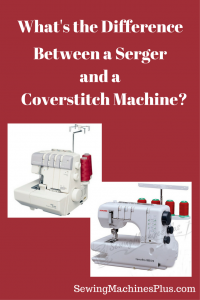
Overlocker / Serger Vs Coverstitch Machine -- What's the Difference?

Overlocker/ Serger Vs Coverstitch Machine — What’s the Difference?

Overlocker/ Serger Vs Coverstitch Machine -- What's the Difference?

Overlocker/ Serger Vs Coverstitch Machine — What’s the Difference?

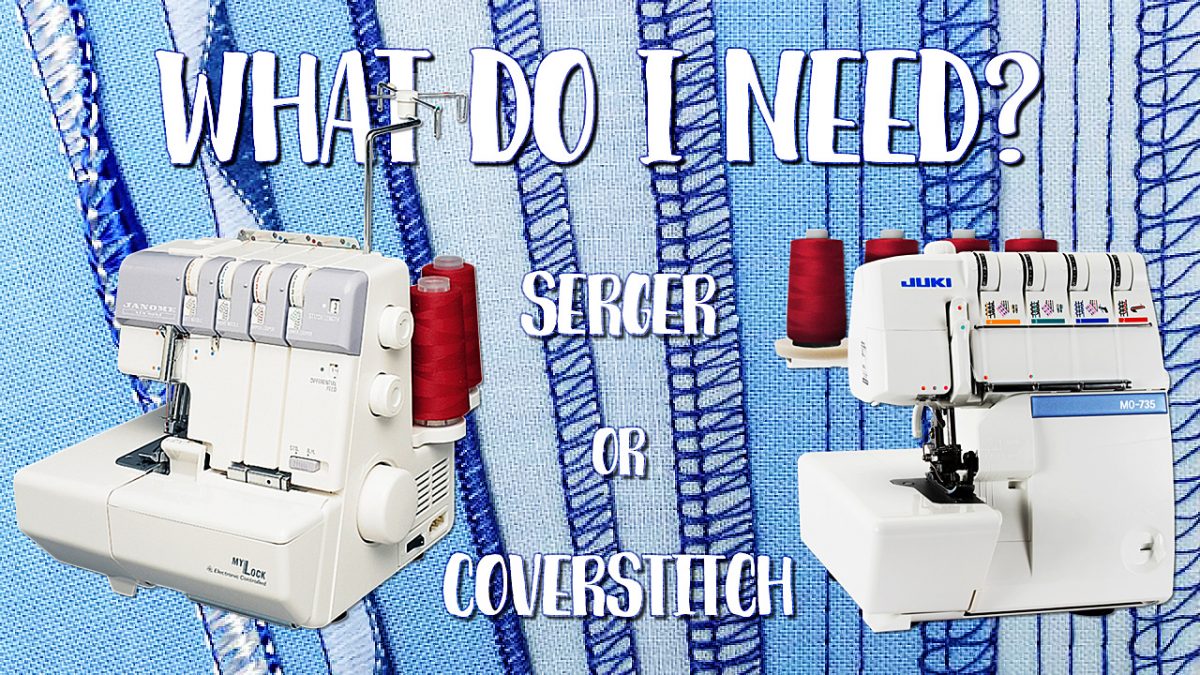
Serger vs. Coverstitch Machine — Do you need both?

What is the difference between a serger, an overlocker, and a cover stitch machine?

Serger vs Coverstitch: The Serger / Overlocking Machine

A serger and an overlocker are different names for the same machine. Americans generally refer to these as sergers, and nearly everyone else refers to them as overlockers. A serger performs an overlocking stitch, which is really more like knitting than sewing.

Overlocking, or serging, trims and binds seams so that the fabric can not unravel. It professionally finishes the insides of garments. There are rare occasions when one might use a serger to embellish outside seams or to finish hems, such as with rolled hemming, but in general the serger or overlocker is used in construction rather than finishing.

The serger is quite a different machine than a sewing machine, and requires threading of three or four pathways, including two loopers. These loopers accomplish the knitting involved in the overlock stitch. A serger also has knives, which cut seam allowances as it serges them. This machine does not replace the sewing machine, but works beside it accomplishing tasks no sewing machine can do.

The Janome 634D is my choice recommendation for the serger to buy. Here is my review of this model.

Serger vs Coverstitch: The Coverstitch Machine

A coverstitcher really takes all the trouble and error out of this otherwise tricky task.

The coverstitch machine is the star of the machine line-up for finishing tasks. A coverstitch machine beautifully finishes hems on most types of garments, especially knits. Many would-be seamstresses shy away from sewing knit garments because sewing stretchy fabrics using a sewing machine alone is decidedly tricky. While a serger is certainly helpful (some would say essential) in sewing with knits, nothing is as helpful for working with knits as a coverstitch machine. These sweeties allow knits to be turned and hemmed beautifully and quickly, with a stretchy seam that will not break.

For me, hems are perhaps the most difficult task in garment sewing, but the only reason I feel this way is because my machine arsenal has not previously included a coverstitch machine. A coverstitcher really takes all the trouble and error out of this otherwise tricky task. And speaking of tricky tasks, a coverstitch machine can also attach lace, elastic, or other trim to any garment in a hurry, again with a stretchable seam that will not break. It can even take the trouble out of attaching bindings.

When looking at the serger vs coverstitch machine, a coverstitch machine looks more like a sewing machine than a serger does. And a coverstitch machine is similarly uncomplicated. A coverstitcher only has one looper, and it doesn’t have any knives. This makes the threading of a coverstitch machine straightforward and easy to do. You may leave the coverstitch machine threaded and waiting to perform its hemming whenever you need it. I love the simplicity of a machine that can sit patiently waiting to perform its job beautifully and quickly. Having a coverstitch machine waiting to hem garments means you will actually make garments, rather than being daunted by the trouble of hems!

Coverstitch Machines: Simple yet Versatile

A coverstitching machine is versatile, despite its simplicity. With most, you can use one, two, or three needles. There are also a couple of different configurations that you can use with two needles, to make narrow or wide rows of hem stitches. A single needle can be used to knit the chainstitch, which is a beautiful stretchy seam. A chainstitch can be used for both utility and decorative effects.

I recommend the Janome 1000CPX CoverPro as the best coverstitcher to buy. As I have said before, I really trust Janome. I prefer this brand as being the best value for user-friendly, high-quality machines.

You can begin using your coverstitch machine immediately, and use it often, without ever needing to buy attachments or extra feet. However, you can get the most from your coverstitcher and do lots of things with different attachments.  A clear foot is nice to have. You can get a binder attachment which will neatly attach binding to most any project. You can also buy cording and gathering feet, a pintucking bar, a feller, belt looping folder, and more. None of these are necessary, although you will really appreciate having a clear foot.

Serger vs Coverstitch: Combo Models

One choice when thinking about the serger vs. coverstitch machine is to buy one machine to perform both functions. For folks without the room for multiple machines, there are combination models that will perform both overlocking and coverstitching.  This may be a sensible choice for you, rather than buying two machines.

I recommend this choice only for someone with quite limited space or budget; my preference is to have separate serger and coverstitch machines if possible. That’s because it is more expedient to have each machine set up and ready to do its job. Then you can just move back and forth quickly between the two machines as you need each. This is easier than having to reconfigure a complicated serger when moving back and forth between tasks. I’m told it really only takes a moment and is an easy chore to do, however. I know many sewists love their combo serger/ coverstitch machine and use it regularly for both tasks.

A combo model is a good budget choice for people who want to make garments and need both overlock and coverstitch capability, without spending a lot of money.

Be aware that this choice is a compromise. A serger with coverstitching capability won’t have a free arm. This feature makes a separate coverstitch machine a useful joy for hemming. Nor can combo machines perform as perfect an overlock or coverstitch as separate machines will. To get the best of both worlds, buying a separate serger and coverstitch machine is the way to go.

Serger vs Coverstitch: You Need Both!

So now you know that it is not a question of which machine to choose, serger vs. coverstitch machine. To beautifully and professionally produce and finish quality garments, you need both. You can choose to satisfy this need with a complicated serger that performs both functions. Or you can satisfy both needs with a separate serger and coverstitch machine. Either way, upgrade your machine arsenal and uplevel your sewing by including overlock / serging and coverstitch capabilities to your lineup. You and your wardrobe will be glad that you did!

Overlocker / Serger Vs Coverstitch Machine — You want both!

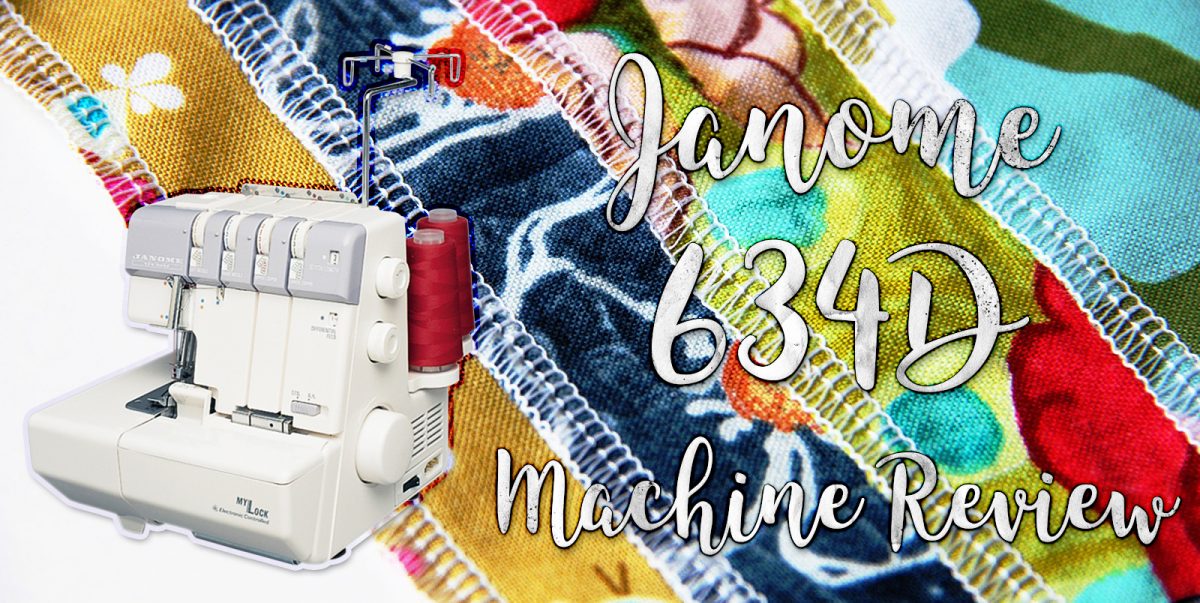
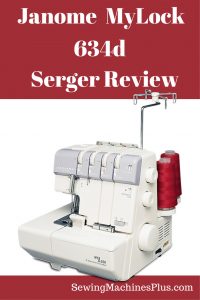
Janome 634D Serger Review

Janome 634D Serger Review

Why should you buy a Janome 634D serger? A serger is the one tool that can quickly boost your sewing to pro level, and the Janome 634D serger is my choice for the serger to buy. Janome has earned my loyalty with their always well-designed machines; I know I can trust this brand to provide high performance and quality. Janome packs all their machines with user friendly features, and the 634D is no exception:

Janome 634D features

  • 1 or 2 needle serging
  • Serge with 2, 3, or 4 threads
  • Lay-in threading
  • Automatic threader for lower looper
  • Retractable cutting blade
  • Easy switch between serging and rolled hemming
  • Adjustable stitch length
  • Variable differential feed: from 0.5 to 2.25
  • Cutting width adjusts from 2.0 to 5.7 mm
  • Spool pins, caps, and nets for greater thread choice
  • High presser foot clearance
  • Snap-on presser feet
  • Thread cutter
  • Seam guide
  • Waste catcher
  • Accessory box
  • 2 access doors
  • Convenient carry handle

While this impressive list of features is enough to convince anyone that the Janome 634D is an excellent value, choice machine, there is more to it than this.

Janome 634D is fast, quiet, compact and smooth

Janome 634D Serger Review

Janome 634D Serger Review

This sweet baby sews 1,300 stitches per minute, which means you can get a lot more done in a fraction of the time. For comparison, most regular sewing machines sew between 700-900 stitches per minute. It sews quickly but quietly, and makes much less noise than many other sergers.

Though the 634D is equipped with a strong motor, its housing is compact for easy portability. Measuring just 16x16x16 inches, it easily fits a small table and is not a monster to move. It weighs in at less than 21lbs, so it won’t hurt your back to carry it with the convenient, built-in handle.

That strong motor serges smoothly. My first Janome serger was a more economy model, and while it works well, I had to place a thick rubber pad underneath it to prevent it from jiggling all over the table. No mat is needed with this Janome, however; the 634D is a smooth operator.

I would describe the motor on the economy Janome machines as being like a Honda Civic; they are dependable and sturdy and a great and affordable way to get you where you want to go. In contrast, the Janome 634D “drives” more like an Acura, with more power, speed, and a smoother ride.

The Janome 634D offers more options

This machine offers almost endless options for serging. It can do a 2 thread stitch, whereas lesser models need at least 3 threads.  The Janome 634D can use from 2, 3, or 4 threads. It can also use either 1 or 2 needles. The cutting width is highly adjustable, offering a wide range of possible options. You can even disengage the cutting blade entirely and serge without cutting at all.

The Janome 634D can also further save on thread, because it comes standard with 4 spool caps and nets, allowing you to use regular spools of thread as an alternative to larger serger cones.  The spool pins will  accommodate the serger cones, too, of course; you can use either type of thread with this serger.

The Janome 634D is especially easy to use

Other makes of serger require you to change plates when switching between conventional sergering and rolled hemming. It is common to move back and forth between these two options, and Janome makes this much easier to do. Instead of having to switch out plates, you simply move a switch to change between serging and rolled hemming. The presser feet are easy to change, too; they simply snap on and off, with no trouble at all.

This serger also has automatic threading for the lower looper. It takes a lot of patience and attention to thread the loopers on other machines, but threading the Janome 634D couldn’t be easier. There are clear diagrams printed right on the inside of the machine for ease in threading the guides. And instead of praying for patience to thread a tricky lower looper, you just push a button and  it is magically threaded for you!

Another thing that I really appreciate about the Janome 634D is it that it is neater and easier to clean than other models. It has a handy waste-catching tray built in, so your sewing room floor will not be littered with thread tails and the trimmings your serger cuts from your seams and projects. Furthermore, it includes 2 doors, one on the front and one on the side, which more easily enables thorough cleaning.

Buy yours now

This machine could quickly take you from home sewist to professional seamstress. You need this reliable workhorse machine and now is a great time to buy it, since it is on sale at a great price. Quit wishing for one and go ahead and order yours now!