 Here is an easy scrap quilt idea that is great fun to make.
You could clear out your scrap stash to make this gorgeous gift.
Blue is my favorite color, so I had heaps of blue scraps. That is what gave me the idea to make this crib sized quilt for a special new baby boy. You could choose a different color of scraps for this, or you could choose to not restrict your palette and clear out a random colorful scrap pile instead.
You will need:
- A variety of cotton scraps
- 48 5-inch cotton muslin squares
- 12 2.5 inch muslin squares
- 1 yard border fabric
- Crib size batting
- 1.5 yard backing fabric
- Quilt binding or fabric to make binding
To make the patchwork squares:
Press and cut your colorful scraps into approximately 1 inch wide strips. You will trim strips to the desired length as you construct the squares.
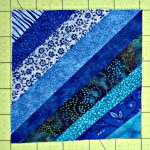
Take a muslin square and angle the first scrap strip diagonally, from the bottom left corner to the top right corner of the square. You can create a sort of uniformity in your blocks and allow for the Xs and squares effect achieved in this quilt by choosing one color scrap to use as this center piece in every square. In this case, I chose navy. All squares are made with navy as the longest, first piece in this quilt.
Next, choose another strip and place it right side down atop the first strip, then sew along one side using a quarter inch seam. Flip the second strip down to face up, then press.
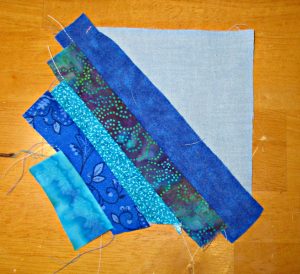
Once you’ve added the last little strip to cover the corner, you can turn and repeat the process to fill in the other side of your square.
Then add another strip, placing the third right side down atop the second, and sew using a quarter inch seam, then flip with right side up, and press.
Please do not skip the step of pressing each strip neatly down after sewing. Careful pressing makes the difference between neat and well made quilts and something that is more of a mess!
Repeat the process, using shorter strips and smaller scraps as you get close to the edges of the square. Once you’ve added the last little strip to cover the corner, you can turn and repeat the process to fill in the other side of your square.
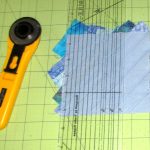
Place the square right side down and trim excess strip ends from the muslin square. This is most easily accomplished using a rotary cutter, or you can trim the excess with scissors instead.
Now you have your first completed square.
Make 47 more.
Assembling the quilt top:
Once you have completed all your patchwork squares, sew them together into rows.
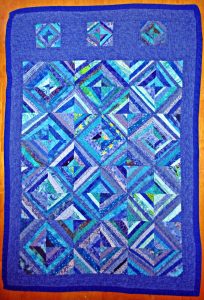
Different looks can be achieved by varying the placement of the squares. You could turn them all in the same direction or assemble them where they form the X’s and O’s pattern pictured here. This is one of the things that makes quilting so much fun, that the same simple block can be turned different ways to vary the look of the completed top.
When joining the squares, take extra care for the tiny corner triangles, as it can be easy to make a careless mistake and miss joining these “ears” properly. This is easy to avoid by being careful in joining the squares and avoiding rush.
You also have options in this design: once you have completed the joining of the strip patchwork, you could call the quilt top done. Or choose to border the patchwork with a solid fabric. You could make borders of equal widths, or you could choose to add an additional embellishment, as I have here, with smaller blocks set off with borders. I did mine this way to indicate the top of the quilt and bring the design to the right dimensions for a crib sized quilt..
To make this quilt as pictured, sew 3.5 inch border strips around all sides of the patchwork design.
Prepare the three smaller blocks in the same way as the larger ones, using 2.5 inch muslin squares for the base.
Join these into a row by alternating the small patchwork blocks with 4 4.5 inch squares of the border fabric.
Sew this strip to the top edge, and finish the top by adding one more 3.5 inch strip above this.
To make the “quilt sandwich”:
- Cut your backing fabric 3 inches bigger all around than the top, press well, and place it right side down on your table or workspace.
- Carefully smooth the batting atop the wrong side of the backing layer.
- Press the top and seams one more time, taking extra care, then layer it wrong side down on top of the batting layer. Smooth nicely.
- Then baste all three layers together, using either long running stitches or quilters safety pins.
Quilting:
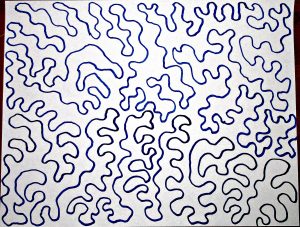
You can quilt this using the quick and easy route: the “stitch in the ditch” method of quilting over the seams that joined the individual blocks, or drop your feed dogs and use a meandering stipple stitch in one long line that (ideally) never crosses itself, guiding the quilt using your hands, working in sections until you have covered the entire quilt. I quilted this pretty closely, like this:
Trim:
Trim the excess batting and backing, using your scissors or more quickly with your serger.
Bind:
Use prepackaged quilt binding or make your own. Sew binding strips together and then sew to quilt top, beginning along one side. Leave approximately an inch free at the beginning of this seam to join the binding ends once you have sewn it down all around. Join them, then fold over and sew the binding down on the back of the quilt using invisible whip stitches sewn by hand or using your machine if preferred.
Now you have made a beautiful heirloom gift that will be treasured forever!

