Sewing Baby Toys

Sewing Baby Toys

I just learned that a dear friend of mine is pregnant. After the announcement and our subsequent celebratory lunch, my mind starting thinking about what I could make to welcome her child into the world. It’s too early on to know if it will be a boy or a girl, which also means I’ve got plenty of time to make something by hand and from the heart. Here’s a few of the baby toys I’m thinking about making. I’d love to hear your thoughts on them!

adorable-20374_640

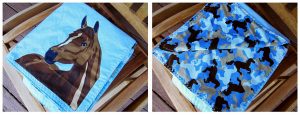
Two-Sided Baby Blanket

I love this idea. I used to love my two-sided comforter because I could flip it around based on my mood (and also based on which side had less cat hair…) My friend and her man are super unique, so I know their baby’s room is going to have flair and style. A reversible baby blanket would be right up their alley. Of course, I’d want it to match the colors they choose for the nursery, so I’ll have to check about that before I start.

Super Soft Receiving Blanket

Like all babies, I’m sure my friend’s bundle of joy is going to want to be held A LOT. And I know my friend is up to the task. She’s going to be an amazing mom! The new arrival is due in the February/March timeframe, so it will still be cool where we live. It makes me think that a super soft, and warm receiving blanket will help new mom and baby snuggle and bond.

Crunchy Jellyfish

It won’t be long before that new bundle of joy is putting everything in his or her mouth. (By the way, I’m certain it will be a girl.) Between teething and the need to understand the world using all her senses, her mouth is going to be full of all sorts of stuff. I love this crunchy jellyfish pattern because it will give her something safe to mouth on and it’s so cute!

Sun Toy

Along the same lines as the crunchy jellyfish, this sun toy is super cute and great for littles ones putting everything in their mouths. It’s got loads of textures too, making it entertaining in many ways. And when baby decides it’s time to throw her toys, it’s soft and won’t hurt or damage anyone or anything.

So, if it was your friend having a baby, which of these cool baby gifts would you make?

Easy, Easier, Easiest Ways to Sew Baby Blankets

Easy, Easier, and Easiest Ways to Sew Baby Blankets

My favorite ways to sew baby blankets

Every baby needs blankets and these make wonderful gifts. There are lots of ways to sew baby blankets, but after making dozens over the years, both for my own babies and for gifts, I have settled on three basic ways that I prefer to make them. These three types of blankets are each useful in their own way, and any new parent will appreciate any one or all of these styles.

Baby quilts are easy to make!

If you ever wanted to get into quilting, a baby quilt is a great place to start. Because baby quilts are small, you won’t have to wrestle with these on a regular sewing machine, as you might for a larger quilt. Start with a simple pattern which uses just squares or rectangles if this will be your first quilt.
Easy,Easier,and Easiest Ways to Sew Baby Blankets

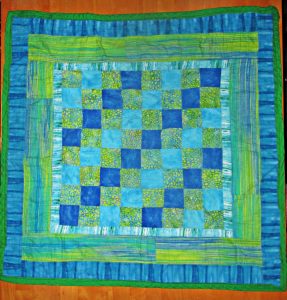
This tiny baby quilt is wrinkled to high heaven because baby outgrew it years ago and I pulled it from a box to show you!

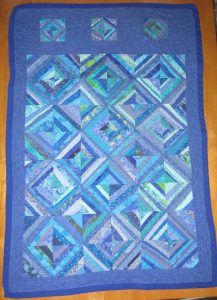
You can choose a quilt with many small pieces if you have plenty of time to finish the quilt before baby’s arrival. I made this blue strip pieced crib quilt while I was waiting for my youngest baby’s birth. This quilt is 100% easy, but it is not the speediest of quilt projects.
Easy, Easier, and Easiest Ways to Sew Baby Blankets

See link for tutorial for this quilt.

Bigger blocks make quicker quilts

If you’d like to make a baby quilt in a hurry, choose a design with fewer and larger blocks.  For a great example of a quick and easy baby quilt, check out Jera Brandvig’s Log Cabin baby quilt at Quilting in the Rain. Her project includes instructions for quilting as-you-go, and this is a particularly speedy method of quilt construction.

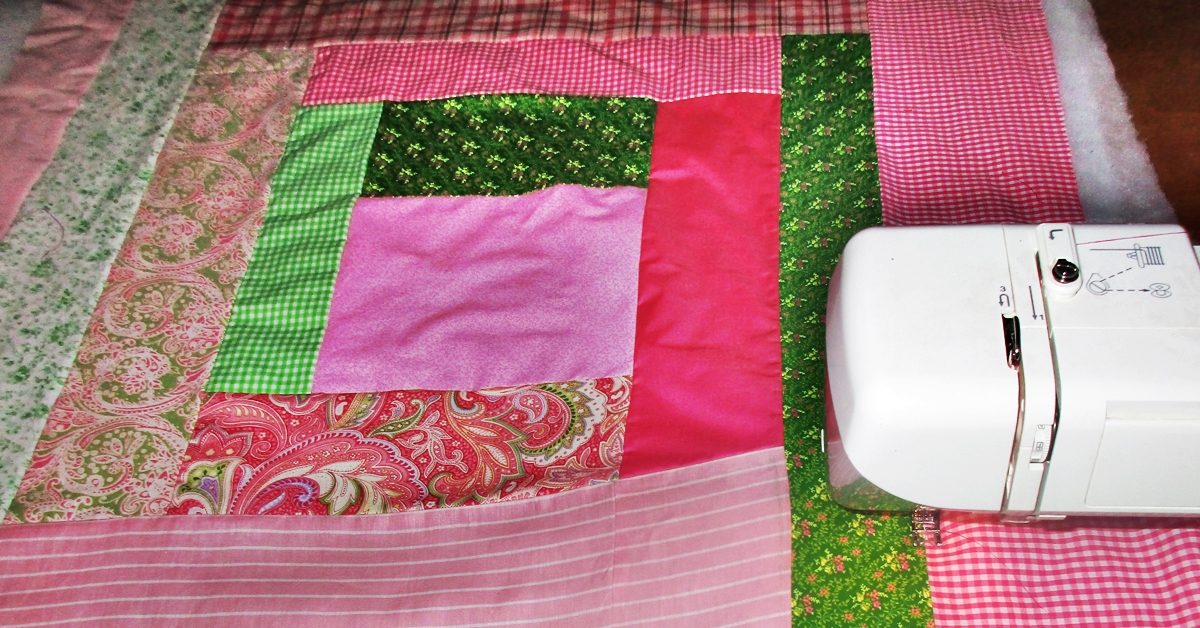
I used Jera’s idea for making one large log cabin rectangle to piece a baby quilt top this morning in about an hour. I didn’t use the quilt as-you-go method on this, however; I’m quilting it all at once using free motion quilting.

This one will be an oversized baby quilt with a super soft flannel backing. The larger size means she won’t outgrow it as fast and can enjoy it into childhood, too.
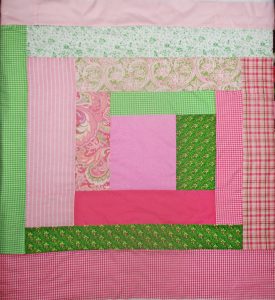
baby log cabin 1

With large pieces and no precise cutting or corners, this large baby quilt top came together really quickly.

Here’s more from me on making quick quilts. Baby quilts are easy, and if you want to make one, you should. Please don’t be afraid of making quilts, it’s fun!
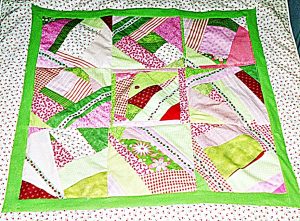
Easy, Easier, and Easiest Ways to Sew Baby Blankets

Crazy patchwork in large blocks makes an easy baby quilt, too.

An even easier way to sew baby blankets

If you don’t have the time or trouble to spare for making a baby quilt, you can sew a soft and sweet reversible baby blanket in a fraction of the time it would take to make even a simple quilt.
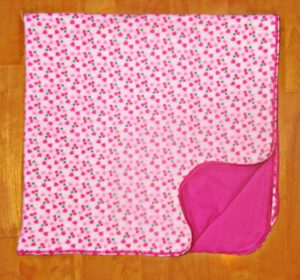
Easy, Easier, Easiest Ways to Sew Baby Blankets

To do this, you need two same sized pieces of fabric. One yard square is a nice size, or you can make it larger, perhaps to fit a crib mattress (27″ x 52″, plus a few inches on all sides to hang over the sides). You will want at least one of these to be a soft flannel. I prefer to use flannel for both sides, but they are nice when made with quilter’s cotton on one side and flannel on the other, too.

Feel free to applique or embroider the front of one of the fabrics before assembly. This looks really sweet in the bottom corner.

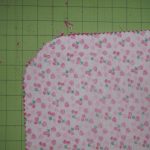
Cut the two fabrics to match and place them right sides together.  Then, using a dessert plate or saucer as a guide, curve the corners.
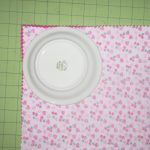
Easy, Easier, Easiest Ways to Sew Baby Blankets Easy, Easier, Easiest Ways to Sew Baby Blankets

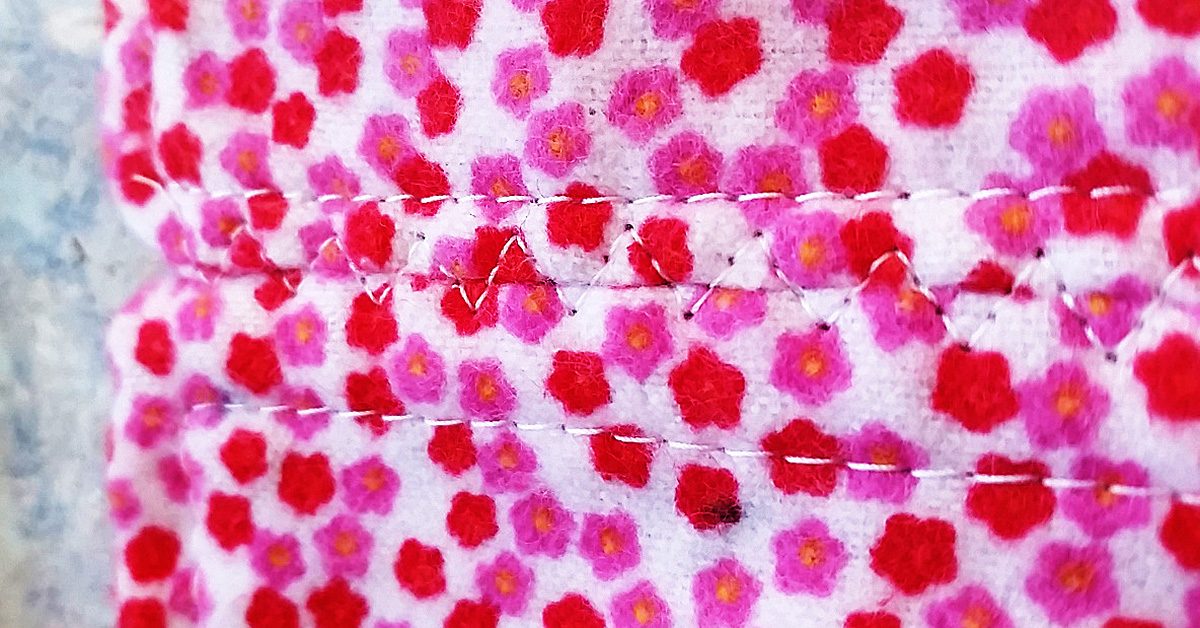
Sew the two pieces together all the way around, except for an opening to turn. Turn right sides out and press. Then set your machine to make a wide, short zigzag stitch. I set mine with to a width of 5.0 and a length of 0.5. Zigzag around the edges of the blanket, about 1/8” from the edge. Be patient; stitching like this takes a lot longer than straight stitching does, so it will take quite a few minutes to go all the way around.

Or use binding instead

Another easy way to make this kind of double sided blanket is to layer the two fabrics wrong sides together and use bias binding all around to join them together.

I give these reversible blankets to every baby I know. Their mothers have often told me that these wind up being baby’s favorite blanket. My own boys liked these double sided flannel blankets so much that I made them to fit their beds.

Using a serger is the quickest and easiest way to sew baby blankets

Parents of babies who like to be swaddled will need lots of single layer receiving blankets. These are also nice to have in warmer weather and for on-the-go. I always kept at least one in the diaper bag and one in the car. They couldn’t be easier to make and take less than ten minutes, including cutting and pressing time.
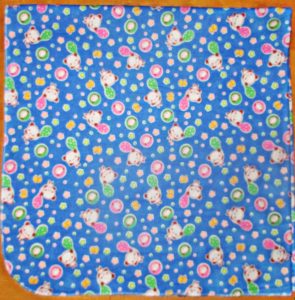
Easiest Baby Blanket

Folded in fourths here to show the corner curve. These will fold down really small to fit in your diaper bag or even the glove box.

Simply cut one piece of flannel to your desired size (one yard square is my favorite size), curve the corners, and serge all around. I set my serger to its narrowest width overlock stitch.

If you are not comfortable serging around curves, then skip the curving of the corners. To do this, just serge four straight sides, burying the end of each chain under the beginning of the stitches on the next side. Then use a tapestry needle to bury the last thread chain under your previous serging.

If you don’t have a serger yet, this is one of many reasons you will want one. Here’s my recommendation for which one to buy.

It’s easy to sew baby blankets

You can sew a quick baby quilt, a soft double-sided blanket, and a single-layer receiving blanket (or several) all in the same day. These little projects are so satisfying that I bet, like me, you’ll want to sew some for every baby you know.

Happy sewing!

Repurposing Flannel Baby Wipes to A Snuggle Blanket

Repurposing Flannel Baby Wipes to A Snuggle Blanket

Hello there! I’ve been playing with something I would like to share with you.
Stitch the right sides together on all 4 sides, leaving a small space open on the last side.

Stitch the right sides together on all 4 sides, leaving a small space open on the last side.

Let me warn you, it is rather novel, as I haven’t seen this done before in sewing blogs or other instructions, but it works pretty well I think.

Recently, I several kinds of small baby wipes made from soft, warm flannel. Rather than 1 layer of flannel, and just a simple serger stitch, I designed them to be thicker and have no fraying edges when washed. Each square is approximately 9″ x 9″ finished as below.

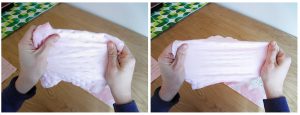
So, I used 2 pieces of the fabric, and I stitched the right sides together on all four sides, leaving a small space open on the last side to place my hand inside and pull the fabric’s right sides to the outside. What? (I heard you thinking there!)

Think of throwing a pillow case in the dryer with the inside seams showing. When dried in the dryer and smelling like Snuggle, you put your arms inside, find both far corners of the pillow case, and pull them forward to you drawing the right sides of the pillowcase to the outside or the top side. So then, I carefully ironed the edges down so I could put top-stitching about one-quarter inch from the edge of the wipe. Finished product soft, bright, cuddly wipe.

BUT WAIT! There’s more

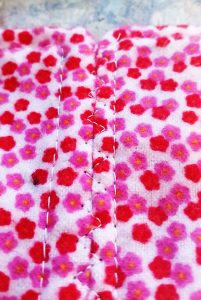
This shows how the seam was done, & it is sturdy like seam made in the traditional way.

This shows how the seam was done, & it is sturdy like seam made in the traditional way.

I thought why can’t I repurpose these cloths into something larger. It’s a small baby print, and with soft flannel on both sides, I brainstormed about how I can piece the two squares together without having to take the stitching apart of one side of each square to join them. That would involve doing all the squares accordingly, and would destroy my top-stitching.

This shows how the seam was done, and it is sturdy like seam made in the traditional way. This finished end to end seam reminds me of flat feld seams as used in my Pojagi pieces, although not quite. It also could be an alternate seam method for quilts without using a backing. A piece of batting could be added to each square to give a more padded feel to this alternate way of quilting, (like rag quilts but no raw edges or fringe.)

I hope you enjoyed my blog today, and I hope to see you again soon. I always welcome your experiences in sewing. After all, what would we do if we didn’t sew?

Take care for now.

Do NOT iron minky directly!

Tips for Sewing with Minky Fabric (Cuddle or Plush Fabric)

Tips for Sewing with Minky Fabric (Cuddle or Plush Fabric)

I know a lot of people that shy away from sewing or quilting with minky but I’m here to tell you that minky is not the bogey-woman some people make it out to be, as long as you follow some important tips to make your sewing with it a success.

1. Pre-washing is not needed. Well, at least for the minky that is. Plush fabrics are made from polyester so they don’t shrink. If you’ll be pairing with fabrics that do shrink, then pre-wash the other fabrics in advance.

Minky bumps

2. Nap! Minky has a nap. Nap is the raised or fuzzy/bumpy parts you find on certain fabric (think velvet). If you brush your hand one way on minky, it will be soft, if you brush it the other way, it will be rougher. Take the direction of the nap into the consideration when cutting out your project.

Take the direction of the nap into the consideration when cutting out your project.

Take the direction of the nap into the consideration when cutting out your project.

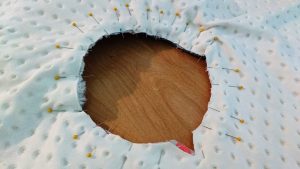
3. Minky can STRETCH! But only from one direction. Take a piece of the fabric you are working with and stretch it one direction and then the other. You’ll find the stretchy side very quickly. I make sure to not ever leave my hole for turning on the super stretchy side.

Minky can STRETCH! But only from one direction.

Minky can STRETCH! But only from one direction.

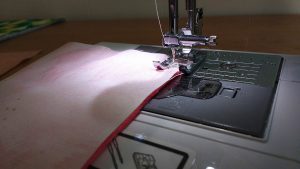
4. Use the right needle and correct sewing foot. A lot of guides will recommend a universal needle size of 12. I prefer size 14, but find what works for you. Additionally, if you have a walking foot, use it! If you are too lazy to use your walking foot (or don’t have one), I find minky sews better when you place it on the bottom and the regular fabric on the top.

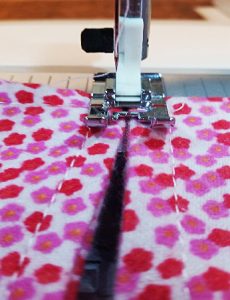
Use a walking foot. I find minky sews better when you place it on the bottom and the regular fabric on the top.

Use a walking foot. I find minky sews better when you place it on the bottom and the regular fabric on the top.

5. Seam allowance and stitch length – I tend to give myself more room with minky and usually use a 1/2” seam allowance. I also use a longer stitch length, around 4.

6. DO NOT IRON MINKY DIRECTLY. It will melt. I promise you. You need to even be careful ironing with another fabric placed on top as pressing too hard or with too much heat will ruin the nap or little bumps of the minky underneath.

7. Pins, clips and washable basting spray or this Wash-A-Way Wonder Tape are your friends with minky. Use them excessively and you’ll get much better results.

https://www.sewingmachinesplus.com/tacony-BT14.php

Pins, clips and washable basting spray or this Wash-A-Way Wonder Tape are your friends with minky.

Pins, clips and washable basting spray or this Wash-A-Way Wonder Tape are your friends with minky.

8. Top stitch!! Top stitching minky will really help to remove bulk, keep the seams in line and make your project look more professional.

Top stitching minky will really help to remove bulk, keep the seams in line and make your project look more professional.

Top stitching minky will really help to remove bulk, keep the seams in line and make your project look more professional.

9. Use a rotary cutter and a vacuum. Rotary cutters help make very exact cuts with minky. I also suggest having your vacuum nearby to clean up after cutting and to clean out your machine as you sew. SewingMachinesPlus.com has a variety of vacuum cleaners for your sewing room.

https://www.sewingmachinesplus.com/tacony-fb-gim.php

10. Practice! You’ll get better the more you use it. Soon, you’ll be wondering what all the fuss is about when others say they shy away from sewing with plush fabrics.

Do you have any tips for making sewing with cuddle fabrics a success? Let us know what works for you in comments!

———————————————————————————–
Charlotte Kaufman is a writer and sewist in Mammoth Lakes, California. She specializes in marine and home interiors and continues to fall more and more in love with quilting. You can follow her at charlottekaufman.com.
A Christmas Carol

A Christmas Carol

LET ME SEW!! LET ME SEW! LET ME SEW!!

LET ME SEW!! LET ME SEW! LET ME SEW!!

The Holiday Season is here. Traffic is fearful! The malls are busy. The wine I just drank is making me dizzy. I’m stressing about the time, it is getting too near. What on earth can I give to my “people” this year?

The house is a mess with all the sewing I’ve done, scraps and pins on the floor, dozens of threads on the chairs. It is too overwhelming, sometimes I want to run!

The tree is not up, the cookies not done. I’m afraid this Christmas will not be any FUN!

The “walking” foot broke, and I cried, “OH GREAT”! Now, I have to be careful to sew these dang top-stitches super, super straight. It HAD to break now, it was truly my fate!

A little more Vin Brulee, and I start reviewing my stash. I got to find some things I can take to this family Christmas bash!

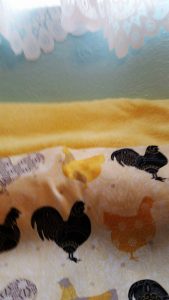
Gina wants napkins, roosters and hens, I have to make 4 more, and I’ll be finished with them.

Gina wants napkins, Roosters and hens, I have to make 4 more, And I’ll be finished with them.

UNPAPER TOWELS SEEM TO BE A BIG HIT!

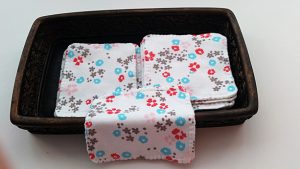
These Cotton Organic Tiny Towels would be a great fit, for the all the girls in the family, for make up and noses, especially for Robyn, when her man proposes!

These Cotton Organic Tiny Towels would be a great fit, for the all the girls in the family, for make up and noses, especially for Robyn, when her man proposes!

Now, I hear a baby crying. I think its next door. This young girl had twins, I hope there won’t be more.

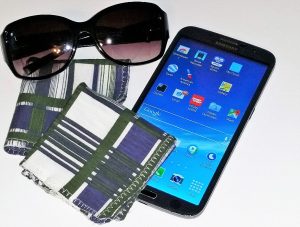
Great! I found some wipes for the GUYS. Soft Organic cotton jersey as well, so very well made, for noses, and devices, I’ll give them a pair, to carry in their pocket for even their sunwear!

Great! I found some wipes for the GUYS. Soft Organic cotton jersey as well, so very well made, for noses, and devices, I’ll give them a pair, to carry in their pocket for even their sunwear!

I am sure by now, she is needing a break. So what do I have here that she would gladly take? Not just a blanket, or a quilt that she would put away. Something useful, and helpful and durable too.

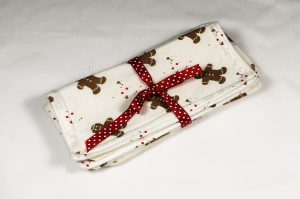
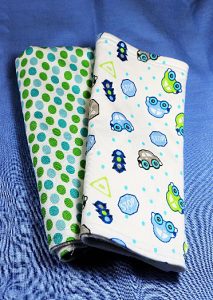
Cute little gingerbread wipes for  tiny, tiny fingers, and nice thirsty burp cloths to pat out the bubbles, if the milk still lingers!

I still have more presents to make, so, let me bid you adieu.

My very best wishes and the Merriest of Holidays from my house to you!

Nature Tomorrow – NATURA DOMANI

Nature Tomorrow – NATURA DOMANI

I am so happy you stopped by. In my last post, “Nature Babe” I discussed finding different types of fabric to construct some little things for babies. Since then, I have been working on Bamboo Baby Wash Cloths as well as using Organic Cotton products.

I have been working on Bamboo Baby Wash Cloths as well as using Organic Cotton products

Bamboo. It’s Not Just Panda Food

I am always looking for ways I can trim things with lace or ribbon.

I am always looking for ways I can trim things with lace or ribbon.

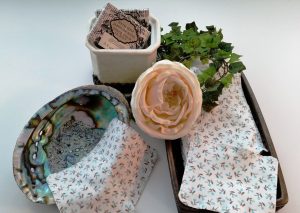
Can you see and feel the softness? It is tiny baby loop Bamboo. I edged it with an overcast stitch on my machine, so it gives the finished product a spa-quality look rather than serged edges. I prefer sewing a seam right sides together and reversing the fabric for larger articles, then I top-stitch for durability rather than using a serger. Plus, I am always looking for ways I can trim things with lace or ribbon. I should have lived in the Victorian era!

Research shows these products are becoming popular as there are many things that are being made in these environmental friendly fabrics. For instance, the softness of bamboo is exceptional for making burp cloths, diaper inserts, blankets, mattress covers and plush animals. Many companies that sell bamboo have great information on this fabric. According to the Bamboo Clothing website (a clothing line in the UK) there are many good points about using bamboo fabric.

Bamboo Fabric Facts:

  • Good for sensitive skin
  • Antibacterial – bacteria does not live well on the fabric
  • It acts as moisture wicking
  • It is 100% bio-degradable
  • Is the fastest growing plant and yield the same volume as cotton in only 10% of the land
  • Bamboo requires very little water or rain

Did you know bamboo is a species of the grass family?

And Now for Something Completely Different…

Tiny Towels.

Tiny Towels.

Next, I did something quite different. I used Organic Cotton knit and made what I call “Tiny Towels”. These itty-bitty towelettes are 5 x 4 inch wipes perfect for small messes. They could be used for washing baby faces, freshen up wipes or makeup application. I used a few myself and they are a wonderful change from shredding cotton balls or pads – and the great thing is these dry quickly!

Thinking of the Future

The reason I titled this blog post Nature Tomorrow is that while traveling in Italy and on a recent trip to Connecticut, I came to realize that there are just so many different ways to conserve our environment. Unfortunately, I just don’t think enough people are doing everything they can. Our beautiful green Earth is fill with so many beautiful forests, lakes and streams. So much waste and harmful chemicals drain into water from the production of products for our world. My only hope is that there will be Nature Tomorrow for our changing world. NATURA DOMANI… IN ITALIAN.

Back to Baby Basics

Diamond Soaker Thermal.

Diamond Soaker Thermal.

Next, I made a pad that provides extra protection for baby in the crib or just relaxing playing on the floor. It is made from Diamond Soaker Thermal. It is extremely soft as well and has three thin layers for warmth. It is made so that if water drops on it, it stays on top, however, pressure makes it absorb into the top – just not so much on the bottom. Its wicking quality is very good for under layers of clothing. The fabric is definitely water holding but not waterproof. Back in the day, I used a rubberized type of pad with a flannel top to keep the crib sheets and mattress from becoming wet. This is so much softer. I believe it would be good for diaper inserts as well, but I am not ready for a diaper business just yet. Baby steps to start!

I would love to hear your comments about bamboo and organic materials at the bottom of my blog. Ciao, Ciao!!

Quilt A String-Pieced Scrap Quilt For Baby

Quilt A String-Pieced Scrap Quilt For Baby

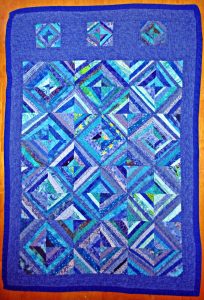
Here is an easy scrap quilt idea that is great fun to make.Here is an easy scrap quilt idea that is great fun to make.

You could clear out your scrap stash to make this gorgeous gift.

Blue is my favorite color, so I had heaps of blue scraps. That is what gave me the idea to make this crib sized quilt for a special new baby boy. You could choose a different color of scraps for this, or you could choose to not restrict your palette and clear out a random colorful scrap pile instead.

You will need:

  • A variety of cotton scraps
  • 48 5-inch cotton muslin squares
  • 12 2.5 inch muslin squares
  • 1 yard border fabric
  • Crib size batting
  • 1.5 yard backing fabric
  • Quilt binding or fabric to make binding

To make the patchwork squares:

Press and cut your colorful scraps into approximately 1 inch wide strips. You will trim strips to the desired length as you construct the squares.

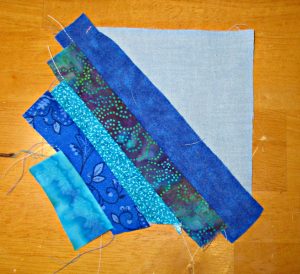
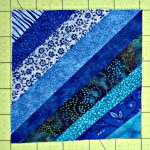
Take a muslin square and angle the first scrap strip diagonally, from the bottom left corner to the top right corner of the square. You can create a sort of uniformity in your blocks and allow for the Xs and squares effect achieved in this quilt by choosing one color scrap to use as this center piece in every square. In this case, I chose navy. All squares are made with navy as the longest, first piece in this quilt.

Next, choose another strip and place it right side down atop the first strip, then sew along one side using a quarter inch seam. Flip the second strip down to face up, then press.

Once you've added the last little strip to cover the corner, you can turn and repeat the process to fill in the other side of your square.

Once you’ve added the last little strip to cover the corner, you can turn and repeat the process to fill in the other side of your square.

Then add another strip, placing the third right side down atop the second, and sew using a quarter inch seam, then flip with right side up, and press.

Please do not skip the step of pressing each strip neatly down after sewing. Careful pressing makes the difference between neat and well made quilts and something that is more of a mess!

Repeat the process, using shorter strips and smaller scraps as you get close to the edges of the square. Once you’ve added the last little strip to cover the corner, you can turn and repeat the process to fill in the other side of your square.

Now you have your first completed square.

You have your first completed square.

Place the square right side down and trim excess strip ends from the muslin square. This is most easily accomplished using a rotary cutter, or you can trim the excess with scissors instead.

Now make 47 more.

Now make 47 more.

Now you have your first completed square.

Make 47 more.

Assembling the quilt top:

Once you have completed all your patchwork squares, sew them together into rows.

Different looks can be achieved by varying the placement of the squares. You could turn them all in the same direction or assemble them where they form the X’s and O’s pattern pictured here. This is one of the things that makes quilting so much fun, that the same simple block can be turned different ways to vary the look of the completed top.

When joining the squares, take extra care for the tiny corner triangles, as it can be easy to make a careless mistake and miss joining these “ears” properly. This is easy to avoid by being careful in joining the squares and avoiding rush.

You also have options in this design: once you have completed the joining of the strip patchwork, you could call the quilt top done. Or choose to border the patchwork with a solid fabric. You could make borders of equal widths, or you could choose to add an additional embellishment, as I have here, with smaller blocks set off with borders. I did mine this way to indicate the top of the quilt and bring the design to the right dimensions for a crib sized quilt..

To make this quilt as pictured, sew 3.5 inch border strips around all sides of the patchwork design.

Prepare the three smaller blocks in the same way as the larger ones, using 2.5 inch muslin squares for the base.

Join these into a row by alternating the small patchwork blocks with 4 4.5 inch squares of the border fabric.

Sew this strip to the top edge, and finish the top by adding one more 3.5 inch strip above this.

To make the “quilt sandwich”:

  1. Cut your backing fabric 3 inches bigger all around than the top, press well, and place it right side down on your table or workspace.
  2. Carefully smooth the batting atop the wrong side of the backing layer.
  3. Press the top and seams one more time, taking extra care, then layer it wrong side down on top of the batting layer. Smooth nicely.
  4. Then baste all three layers together, using either long running stitches or quilters safety pins.

Quilting:

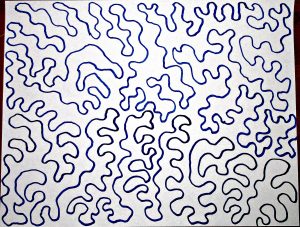
Meandering stipple stitch.

Meandering stipple stitch.

You can quilt this using the quick and easy route: the “stitch in the ditch” method of quilting over the seams that joined the individual blocks, or drop your feed dogs and use a meandering stipple stitch in one long line that (ideally) never crosses itself, guiding the quilt using your hands, working in sections until you have covered the entire quilt.  I quilted this pretty closely, like this:

Trim:

Trim the excess batting and backing, using your scissors or more quickly with your serger.

Bind:

Use prepackaged quilt binding or make your own. Sew binding strips together and then sew to quilt top, beginning along one side. Leave approximately an inch free at the beginning of this seam to join the binding ends once you have sewn it down all around. Join them, then fold over and sew the binding down on the back of the quilt using invisible whip stitches sewn by hand or using your machine if preferred.

Now you have made a beautiful heirloom gift that will be treasured forever!