The Basics of Cathedral Window Quilts

The Basics of Cathedral Window Quilts

The time has come to explore yet another quilt type, and this one seems a bit less known than your standard patchworks and rag quilts. In fact, until I was doing brainstorm-browsing for this post, I don’t recall having ever heard of this kind of quilt, but the style is noteworthy enough to merit looking into. Through repetition, pattern, and color, quilts of this variety can have an interesting look to them that makes them stand out in similar fashion to the architectural designs of their namesakes.

The type of quilt I’m referring to is a cathedral window quilt.

The type of quilt I’m referring to is a cathedral window quilt.

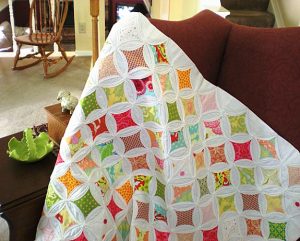
The type of quilt I’m referring to is a cathedral window quilt, and as distinctive as cathedrals themselves could prove, these sewing products can be straightforwardly identifiable once you know the traits to search for. Those traits, as with the artistic and structural wonder of cathedrals themselves, can catch the eye with their composition and beauty like few other quilt styles — in my opinion — are capable of doing. In this post, we’ll go through a list of typical characteristics that you can spot in a cathedral window quilt that provide evidence of its type so you can more easily identify one in a crowd of variously styled quilts. In particular, we’ll focus on four distinctive features of cathedral window quilts, starting with their…

These quilts are not necessarily known for bright coloring.

These quilts are not necessarily known for bright coloring.

Bold colors

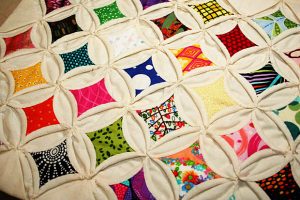
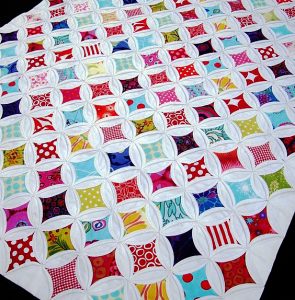
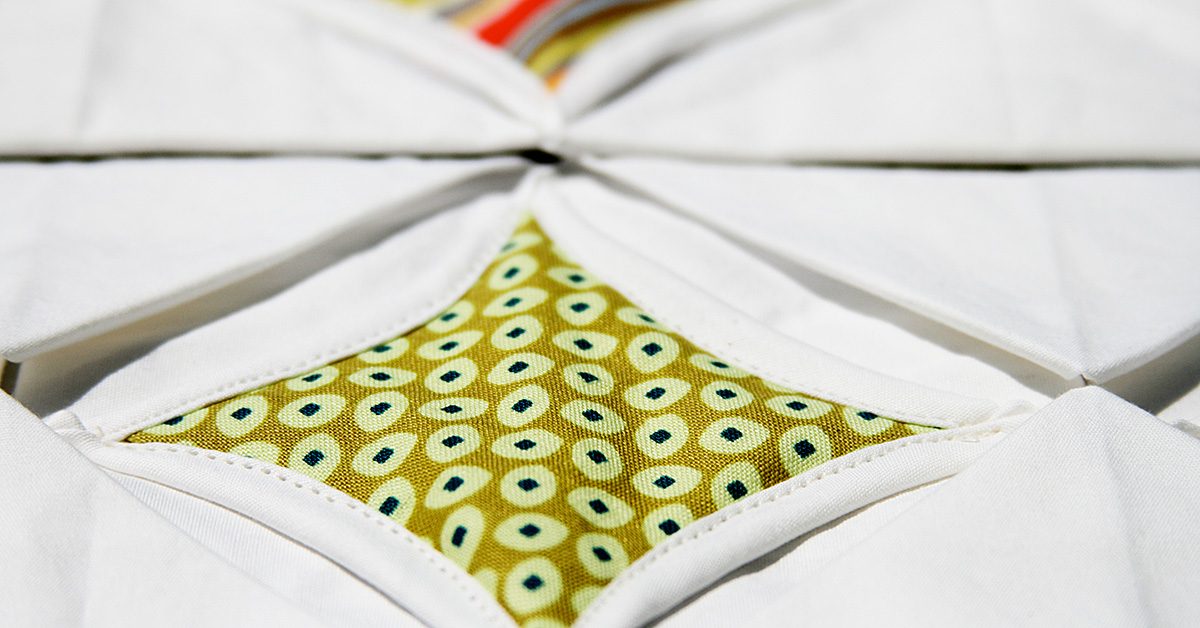
These quilts are not necessarily known for bright coloring, but a good percentage of the fabric used in creating a work of this category could be very bold, like dark blues, greens, and reds that give their sections a real pop. Even with the cathedral window quilts that use more pastel-based colors, those color options are still varied and strong, and they could build centralized sparks of color in certain patterns. If you’re going to make a cathedral window quilt, be sure to include some very dynamic colors to give these defined and robust splashes of color throughout the product. These bits of color, to construct the right design, “are folded precisely and sewn with curves to create small windows,” and “folded blocks are added together until the quilt is the desired size.” This sounds very direct and uncomplicated, but what are those bold-colored fabric pieces added to? That would be…

The overall point though is that the juxtaposition of light & dark make each section stand out.

The overall point though is that the juxtaposition of light & dark make each section stand out.

White fabric

Along with varied colors, it’s also a good idea to snatch up some white fabric if you intend to make a cathedral window quilt. That white fabric added in contrast to the bold colors already mentioned helps to cement the notion of having stand-out sections of color on your quilt. Typically, the white fabric can completely surround portions of bold-colored fabric, but the reverse can be true as well if bold colors appear to surround the white fabric. The overall point though is that the juxtaposition of light and dark make each section stand out — the bold colors and the white sections — to result in a quilt that doesn’t necessarily have a single piece of it that isn’t remarkable and noteworthy.  The consequence is a repetitious design that follows a…
These quilts can employ very specific shapes in their overall design—ones that can be mimicked in pillows.

These quilts can employ very specific shapes in their overall design—ones that can be mimicked in pillows.

Definite pattern

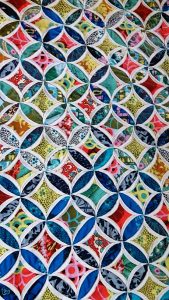
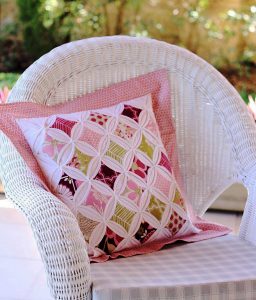
Often, these quilts can employ very specific shapes in their overall design — ones that can be mimicked in pillows. Specifically, the bold colors are often in the shape of near-diamonds, but those diamonds’ sides invert inward to create a swooping motion along all four sides. That diamond-esque shape is surrounded by a circle — one that can be ringed — and those circles can overlap throughout the entirety of the project. Is this the only way that a cathedral window quilt can take shape? Well, it’s not set in concrete! But if you see this general pattern, you have very real evidence that you’re looking at a cathedral window quilt since the pattern is so common for the style. Another trademark is that it has…
If you neglect a layer of quilt, that’s a layer of quilt that isn’t available to strategically cover mistakes & such, so the work could feel more vulnerable.

If you neglect a layer of quilt, that’s a layer of quilt that isn’t available to strategically cover mistakes & such, so the work could feel more vulnerable.

No backing

That’s right! With this quilt variety, you can forego the backing detail since the “quilt blocks… stand alone as is” without that extra detail. Does that factor make for an easier project? Maybe not! If you neglect a layer of quilt, that’s a layer of quilt that isn’t available to strategically cover mistakes and such, so the work could feel more vulnerable. Once you get the hang of the process though and make the adjustment, it might actually lead to an easier quilting experience because “you simply iron down your edges and sew.” Considering the level of beauty that these quilts can achieve, it seems like a sensible prospect to push through the confusion of learning to construct a quilt without a backing in order to eventually fashion such a lovely and reportedly easy project.

With these guidelines in mind, you could be able to spot a standard cathedral window quilt among other quilt options with scarce effort. In fact, coming to that conclusion of quilt style could become almost instinct where you look at a product and say, “Yeah! That’s a cathedral window quilt!” since the appearance is so very individual — and lovely!

Choosing the Right Batting

Choosing the Right Batting

I have definite plans and goals for the new year, and not just the ones that I’ve mentioned in previous posts. I want to take another class. I want take better care of myself. I want to read more. But one thing that I want to do under the sewing umbrella is to finish up the quilt I’ve been working on for a while now. That goal happens to come in steps. Firstly, I need to finish with the patchwork design I have going on (the goal is to have twelve rows of patches) to get this top layer ready for the next two.

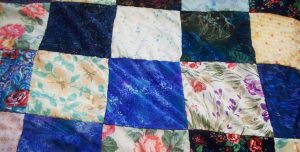
The quilt I’ve been working on for a while now.

The quilt I’ve been working on for a while now.

That step, though it’ll take time, is pretty cut and dry. I plan, I pin and I sew.

The steps that follow are the ones that merit consideration beyond those general details — like how I plan to join my quilt sandwich. Do I stitch? Do I tie? Do I spray? Decisions! (Details can be found here).

Hungry? Have a sandwich

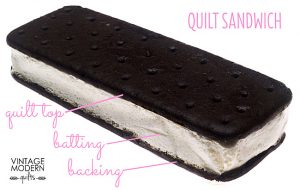
Quilt sandwich.

The more immediate topic to debate is what kind of batting I’m going to use for the middle of my quilt sandwich. This will be, by the way, the first time I’ve used batting since I only recently realized that quilts do, in fact, need three layers to fit the official definition, thus the term “quilt sandwich.” Before, I just used the backing and the front, but I want to be more by-the-books for this one! Given that I have little to no experience with batting though, it seemed reasonable to do a bit of research on the matter so that I could make the best decision for me.

Research, I did, and I’ve come to a potential fabric for the job: Cotton.

The fabric of our lives

There are plenty of batting types to choose from.

There are plenty of batting types to choose from.

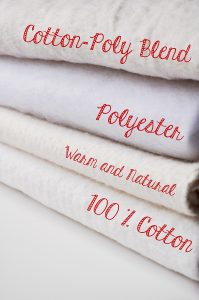
There are a number of reasons for this choice, and I urge anyone who is going to make a quilt to consider their own purposes and situations when choosing the right batting. While cotton might be a good choice for me, it might not be the best option for another person or another project. There are plenty of batting types to choose from — polyester, wool, blends — and to make the best decision, maybe spend some time looking into the pros and cons of each. You can find details about the possibilities here and here.

So with those other possibilities in mind, why did I choose cotton? There are a number of reasons. For one, it’s cheap. Yes, I know, cheaper isn’t always better, but for a learner on a budget, price can definitely be something worth considering! Remember that this is my first time adding batting, so it would be not-so-good to spend a bigger amount on a batting type just to mess the whole thing up! It’s also worth noting that this quilt will be for personal use, which leads into the reasoning that everything doesn’t have to be top-of-the-line quality like I might strive for if a company name was on the line. It’s for me, it’s my first experience with batting, and I think testing the waters on a smaller money scale is a good idea!

Synthetic but equal

Now, this might make you wonder why I didn’t go with polyester. Simple answer: Itchiness leads to polyester not always being my best friend! This is a personal decision, but the idea is something to keep in mind should you choose to make any kind of sewn product. If you have an allergy or a bad reaction to a certain fabric, keep that in mind so you can steer clear of it!

Choosing the Right Batting

There’s also the issue of loft, or how thick the batting is. Something like wool is high loft, meaning it’s very thick, so a quilt made with wool would be thicker. If you’re a person who gets cold all the time, wool might be your fabric for batting! For me, I want something with a lower loft so that the final product will be thinner. For one thing, I like the size that the first layer of my quilt will be, and I don’t want to shrink it too much by having it cover a thicker middle layer. For another thing, to me, higher loft looks more like a comforter, and I don’t want to go that route with this product.

Cotton is a better choice then, and it’s a fabric that I know is easy to work with on sewing projects. There’s no known itchy detail that I need to worry about, and I can feel comfortable knowing that I’m accustomed to it. I like cotton and — as weird as it might sound — I trust cotton. In addition, the recommended stitching distance for cotton is wider than other fabrics, giving more freedom in that respect.

And all of that, my readers, is a pleasant combination to deal with for my first dive into batting! How about you? Do you have a preferred batting option?

Quilt A String-Pieced Scrap Quilt For Baby

Quilt A String-Pieced Scrap Quilt For Baby

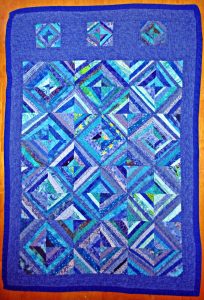
Here is an easy scrap quilt idea that is great fun to make.Here is an easy scrap quilt idea that is great fun to make.

You could clear out your scrap stash to make this gorgeous gift.

Blue is my favorite color, so I had heaps of blue scraps. That is what gave me the idea to make this crib sized quilt for a special new baby boy. You could choose a different color of scraps for this, or you could choose to not restrict your palette and clear out a random colorful scrap pile instead.

You will need:

  • A variety of cotton scraps
  • 48 5-inch cotton muslin squares
  • 12 2.5 inch muslin squares
  • 1 yard border fabric
  • Crib size batting
  • 1.5 yard backing fabric
  • Quilt binding or fabric to make binding

To make the patchwork squares:

Press and cut your colorful scraps into approximately 1 inch wide strips. You will trim strips to the desired length as you construct the squares.

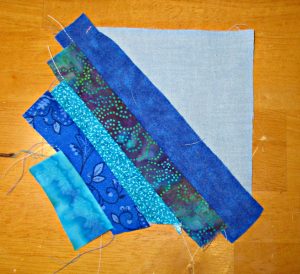
Take a muslin square and angle the first scrap strip diagonally, from the bottom left corner to the top right corner of the square. You can create a sort of uniformity in your blocks and allow for the Xs and squares effect achieved in this quilt by choosing one color scrap to use as this center piece in every square. In this case, I chose navy. All squares are made with navy as the longest, first piece in this quilt.

Next, choose another strip and place it right side down atop the first strip, then sew along one side using a quarter inch seam. Flip the second strip down to face up, then press.

Once you've added the last little strip to cover the corner, you can turn and repeat the process to fill in the other side of your square.

Once you’ve added the last little strip to cover the corner, you can turn and repeat the process to fill in the other side of your square.

Then add another strip, placing the third right side down atop the second, and sew using a quarter inch seam, then flip with right side up, and press.

Please do not skip the step of pressing each strip neatly down after sewing. Careful pressing makes the difference between neat and well made quilts and something that is more of a mess!

Repeat the process, using shorter strips and smaller scraps as you get close to the edges of the square. Once you’ve added the last little strip to cover the corner, you can turn and repeat the process to fill in the other side of your square.

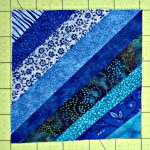
Now you have your first completed square.

You have your first completed square.

Place the square right side down and trim excess strip ends from the muslin square. This is most easily accomplished using a rotary cutter, or you can trim the excess with scissors instead.

Now make 47 more.

Now make 47 more.

Now you have your first completed square.

Make 47 more.

Assembling the quilt top:

Once you have completed all your patchwork squares, sew them together into rows.

Different looks can be achieved by varying the placement of the squares. You could turn them all in the same direction or assemble them where they form the X’s and O’s pattern pictured here. This is one of the things that makes quilting so much fun, that the same simple block can be turned different ways to vary the look of the completed top.

When joining the squares, take extra care for the tiny corner triangles, as it can be easy to make a careless mistake and miss joining these “ears” properly. This is easy to avoid by being careful in joining the squares and avoiding rush.

You also have options in this design: once you have completed the joining of the strip patchwork, you could call the quilt top done. Or choose to border the patchwork with a solid fabric. You could make borders of equal widths, or you could choose to add an additional embellishment, as I have here, with smaller blocks set off with borders. I did mine this way to indicate the top of the quilt and bring the design to the right dimensions for a crib sized quilt..

To make this quilt as pictured, sew 3.5 inch border strips around all sides of the patchwork design.

Prepare the three smaller blocks in the same way as the larger ones, using 2.5 inch muslin squares for the base.

Join these into a row by alternating the small patchwork blocks with 4 4.5 inch squares of the border fabric.

Sew this strip to the top edge, and finish the top by adding one more 3.5 inch strip above this.

To make the “quilt sandwich”:

  1. Cut your backing fabric 3 inches bigger all around than the top, press well, and place it right side down on your table or workspace.
  2. Carefully smooth the batting atop the wrong side of the backing layer.
  3. Press the top and seams one more time, taking extra care, then layer it wrong side down on top of the batting layer. Smooth nicely.
  4. Then baste all three layers together, using either long running stitches or quilters safety pins.

Quilting:

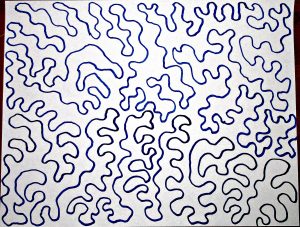
Meandering stipple stitch.

Meandering stipple stitch.

You can quilt this using the quick and easy route: the “stitch in the ditch” method of quilting over the seams that joined the individual blocks, or drop your feed dogs and use a meandering stipple stitch in one long line that (ideally) never crosses itself, guiding the quilt using your hands, working in sections until you have covered the entire quilt.  I quilted this pretty closely, like this:

Trim:

Trim the excess batting and backing, using your scissors or more quickly with your serger.

Bind:

Use prepackaged quilt binding or make your own. Sew binding strips together and then sew to quilt top, beginning along one side. Leave approximately an inch free at the beginning of this seam to join the binding ends once you have sewn it down all around. Join them, then fold over and sew the binding down on the back of the quilt using invisible whip stitches sewn by hand or using your machine if preferred.

Now you have made a beautiful heirloom gift that will be treasured forever!

The Final Touches (And Reinforced Lessons)

The Final Touches (And Reinforced Lessons)

Remember on my last blog post when I proclaimed that sewing isn’t baking? In the latest stages of my quilt, I’ve once again found myself facing similar details and thoughts as the ones I experienced earlier. Why? Because — as I said before — guesstimations and “until-it-looks-right” attitudes don’t necessarily spill over from the kitchen to the sewing area.

My homemade backing.

My homemade backing.

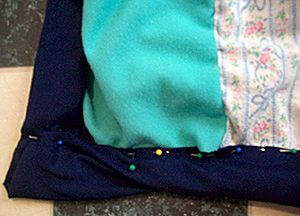
You see, I completed all the main lines of a nearly-finished quilt. What that meant, to me, was that it was time to sew on some kind of backing. My tactic for doing so? Getting a flat sheet, cutting it *very* generically around the exterior of the quilt, and trying to fold the excess material down in an appealing manner for the outer edges of the quilt. I ended up with a mess that looked something like this:

Not good, right? And I couldn’t seem to fix the issue with the backing/quilt this way. Whenever I would try to re-pin something so that the massive/slanted corner was more size-and-style-similar to the line leading up to it, the material would twist unpleasantly (like you can see). This blatant issue led me to undoing most of my pin-and-sew work connecting the backing to the actual quilt, in hopes that the lines and corners would better match up.

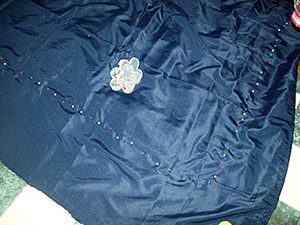
The process this go-round was a bit more precise, in that the original wrinkles in the sheet had fallen out, and the overall quilt was more carefully positioned under the sheet for more accurate results. That’s right. Under the sheet. Rather than focusing on exactly where the backing would overlap on the front, I concerned myself with making sure that the back portion was somewhat smooth against the quilt blocks. My rationale was that if I could get that territory as it should be, I could flip it over and fold over the ends with more confidence that what I couldn’t see on the back was proficient enough to allow my focus to safely fall on what I could see. Basically, if the backing was smooth, I could do things, like better decide how much material needed to be beyond the quilt blocks to fold over and work with, without worrying so much that the material on the underside was bunched or wrong in some way:

Pins, pins and more pins!

Pins, pins and more pins!

Once I flipped it over, I cut off a bit of the backing material, and I took out the pins from one side (and admittedly—accidentally—a number more!). Some of the quilt had already been sewn (I’m currently thinking of redoing that section, by the way), but beyond that stopping point, I could fold over the excess material, tuck it under itself, and pin it back down so it would create a more pleasing line and corner:

Progress is progress for an early quilter, right?

Progress is progress for an early quilter, right?

Perfect? Eh. But progress is progress for an early quilter, right? And, perfect or not, this strategy seems to have helped.

Still, knowing if the strategy will prove effective throughout the rest of the process might be something I judge later. After all, I’m less than one line into it, and there are over three sides to go (not to mention inner attachments).

In any event, this particular dilemma has led me to another tactic in learning to quilt better, and that’s to look for answers online. I’ve looked at a quilting video before, but a number of things that I’ve attempted to do are details I could’ve found assistance for online. There are charts, for instance, about how big to cut blocks, or how large a certain size of quilt should be. I might’ve literally been the girl who measured a bed with measuring tape (not sewing tape!) to see how big I should make a quilt, which I wouldn’t have had to do if I’d looked at a chart! I wouldn’t be too surprised if I took more of my sewing/quilting concerns online to try and find answers for them in the future!

Hopefully, this quilt will be finished soon, and I’ll be able to move on to another project with the skills and lessons I’ve learned up to this point. And maybe one day, I can become the quilter I want to be!