Five Sewing Tools that will take your Sewing to the Next Level

Five Sewing Tools that will take your Sewing to the Next Level

I love the feeling of getting sewing packages in the mail, don’t you? This particular box included a new tool that I’ve been excited to try. It is part of my top five sewing tools that will take your sewing to the next level, or at the very least, make your sewing more efficient and enjoyable.

I love the feeling of getting sewing packages in the mail, don’t you?

I love the feeling of getting sewing packages in the mail, don’t you?

1. A sewing mini iron

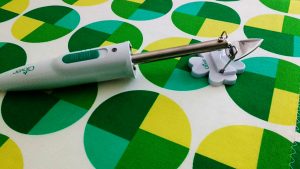
This is the Clover Mini-Iron. Isn’t it precious? I ordered it from SewingMachinesPlus.com and it is more than just an adorable accessory to your ironing board. A mini iron lets you iron hard-to-get-to seams or helps iron tiny seams on things like mini quilts.

It even comes with a little stand. Awwww.

It even comes with a little stand. Awwww.

It even comes with a little stand. Awwww.

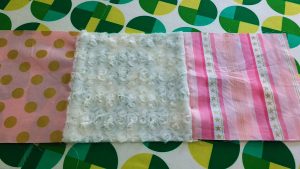
While I know I’ll have many opportunities to use this, I specifically bought it for this current project. My girls and I are working on BFF (best friends forever) quilts and the squares alternate with minky fabric.

My girls & I are working on BFF quilts with alternating minky blocks.

My girls & I are working on BFF quilts with alternating minky blocks.

Using a regular iron to iron over the seams would be a challenge. Hot irons can melt or destroy minky fabric. (For more on how to sew with minky, check out my post here).

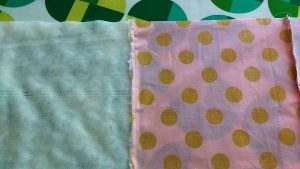
Here I folded the cotton fabric seam over the minky fabric and then placed a scrap of fabric over both. Then I ironed the seam down.

That’s what I’m talking about! This mini-iron is worth its weight in gold.

This mini-iron is worth its weight in gold.

This mini-iron is worth its weight in gold.

For fans of mini-quilts, or anyone who wants to iron their seams open, the mini-iron makes short work of it.
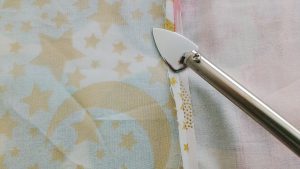
For fans of mini-quilts, or anyone who wants to iron their seams open, the mini-iron makes short work of it.

For fans of mini-quilts, or anyone who wants to iron their seams open, the mini-iron makes short work of it.

2. A rotating (rotary) cutting mat

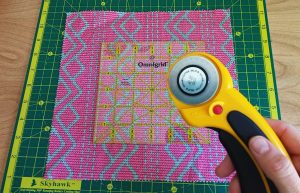
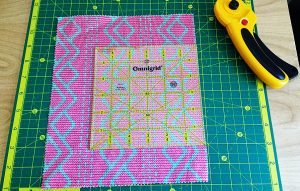
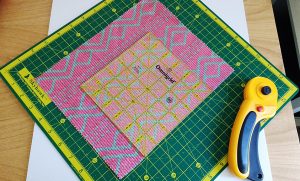
Yep, you heard me correctly. This is a cutting board that rotates on its base. If you’ve ever had a pile of HSTs (half-square triangles) or any other type of project that involved a lot of trimming, you will never look back from making this purchase. SewingMachinesPlus.com sells several different sizes.

This is a cutting board that rotates on its base.

This is a cutting board that rotates on its base.

Here you can see I’ve cut one side of the fabric square. Prior to owning a rotary mat I would have had to move my body or the fabric and the ruler to make the subsequent cuts.

Here you can see I’ve cut one side of the fabric square.

Here you can see I’ve cut one side of the fabric square.

Not anymore. Look how it spins!! The base stays put while the cutting board goes for a walk.

The base stays put while the cutting board goes for a walk.

The base stays put while the cutting board goes for a walk.

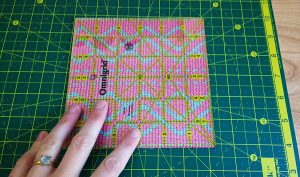
Here is my square fully cut. It’s a thing of beauty, no?

Here is my square fully cut.

Here is my square fully cut.

3. Rulers and grids

This is my assortment of rulers and grids. There is nothing like having the right tools for the job. The two square grids were purchases for projects whose final size HSTs needed to be trimmed exactly to the size of the grid.

The large grid on the bottom is 24” long and my primary ruler for measuring and cutting out my fabric. The 2” ruler is my workhorse, everyday ruler.

Lastly, I had to include a classic measuring tape. I have about seven floating around the house and in my backpack and car. You never know when you might need to measure something!

The small, black and silver ruler below the measuring tape is a seam gauge. It helps you mark precise seams at a variety of lengths.

SewingMachinesPlus.com has a wide assortment of rulers and grids: https://www.sewingmachinesplus.com/searchresults.php?search_field=omnigrid

SewingMachinesPlus.com has a wide assortment of rulers & grids.

SewingMachinesPlus.com has a wide assortment of rulers & grids.

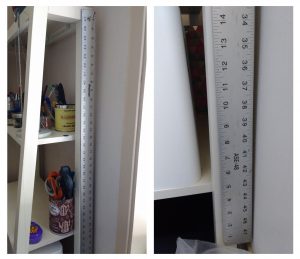
I also have this heavy, metal, 48” ruler that I use for canvas and large home interior projects, or when cutting very large lengths of fabric.

I also have this heavy, metal, 48” ruler.

I also have this heavy, metal, 48” ruler.

4. A walking foot

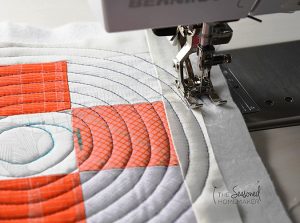
I mention my walking foot a lot in my posts here and that’s because I use it a lot. In fact as a rule, I have it installed as my go-to sewing foot and only switch out to other feet as needed. Your machine probably came with one and you tucked it away not knowing what the strange, Star Wars-like contraption was.

Get it out of the box and learn to use it! If you quilt or work with thicker fabric, your walking foot will be your best friend.

Get it out of the box & learn to use it!

Get it out of the box & learn to use it!

If your machine didn’t come with one, I guarantee the maker of your machine sells one as an accessory. Check out all the options available on SewingMachinesPlus.com here.

Image via The Seasoned Homemaker.

Image via The Seasoned Homemaker.

5. A bias tape maker

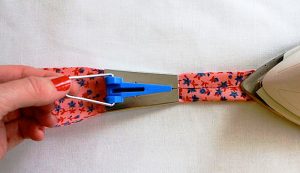
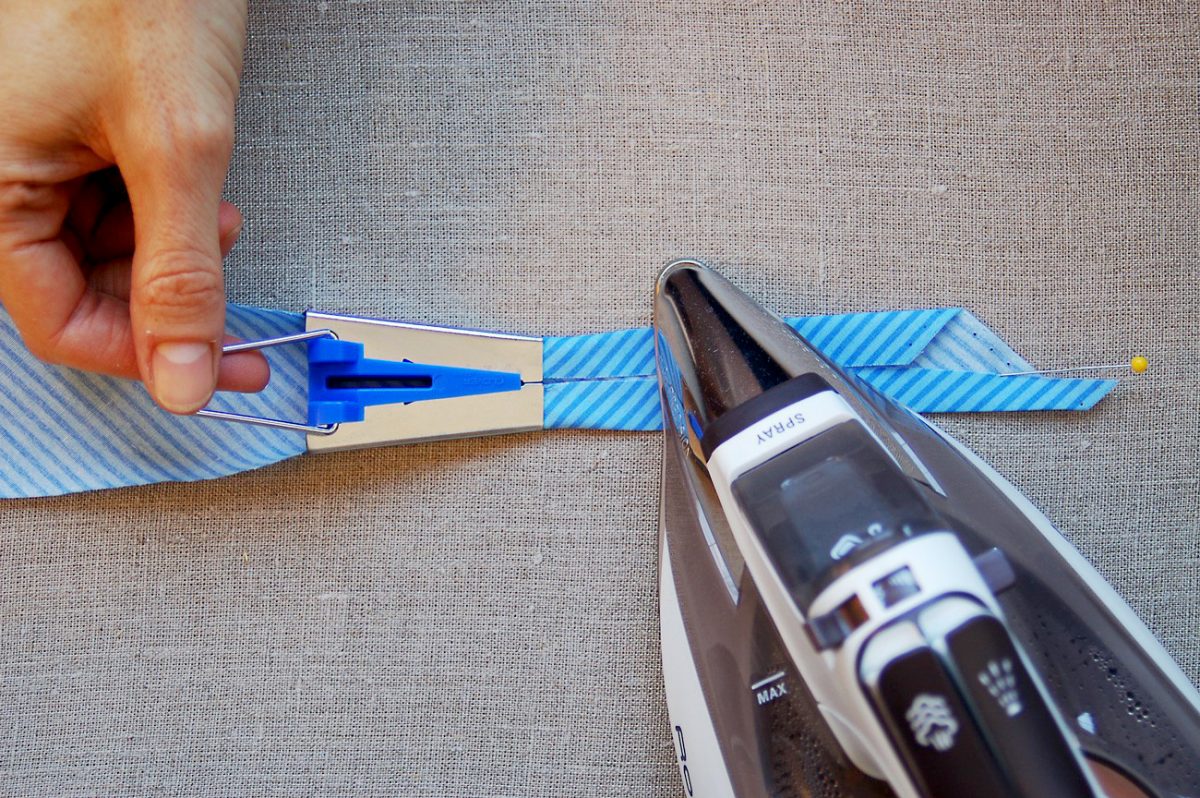
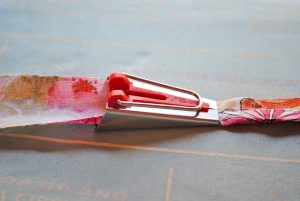
There will come a point in your sewing career when the pre-made bias tape available in stores and online just doesn’t meet your needs. When you get to that point, grab a bias tape maker, in fact, grab a few (they make different sizes of tape). With one of these humble tools you can make both single and double-fold bias tape and the sky is pretty much the limit as far as your creativity goes.

When you get to that point, grab a bias tape maker, in fact, grab a few (they make different sizes of tape).

When you get to that point, grab a bias tape maker, in fact, grab a few (they make different sizes of tape).

You can make coordinating, contrasting, or complimenting colors of bias tape to match your projects and the process is extremely quick. It won’t be as fast as using premade, but I promise it will be worth it.

Image via Made Everyday with Dana.

Image via Made Everyday with Dana.

Do you use any of these tools already in your sewing projects? What other tools would you add to a list like this? Let us know in comments!

———————————————————————————–
Charlotte Kaufman is a writer and sewist in Mammoth Lakes, California. She specializes in marine and home interiors and continues to fall more and more in love with quilting. You can follow her at charlottekaufman.com.
A Few of My Favorite Things

A Few of My Favorite Things

I’m a bit of a dorky geek when it comes to sewing and pattern making (I’m actually probably a dorky geek when it comes to a lot of things). Here are a few of my favorite sewing related things.

The Double Needle

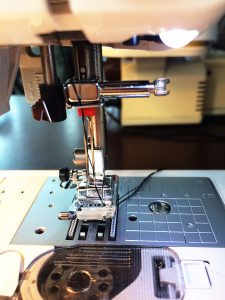
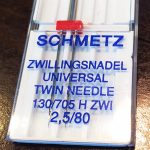
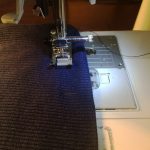
Twin needle in machine.

Twin needle in machine.

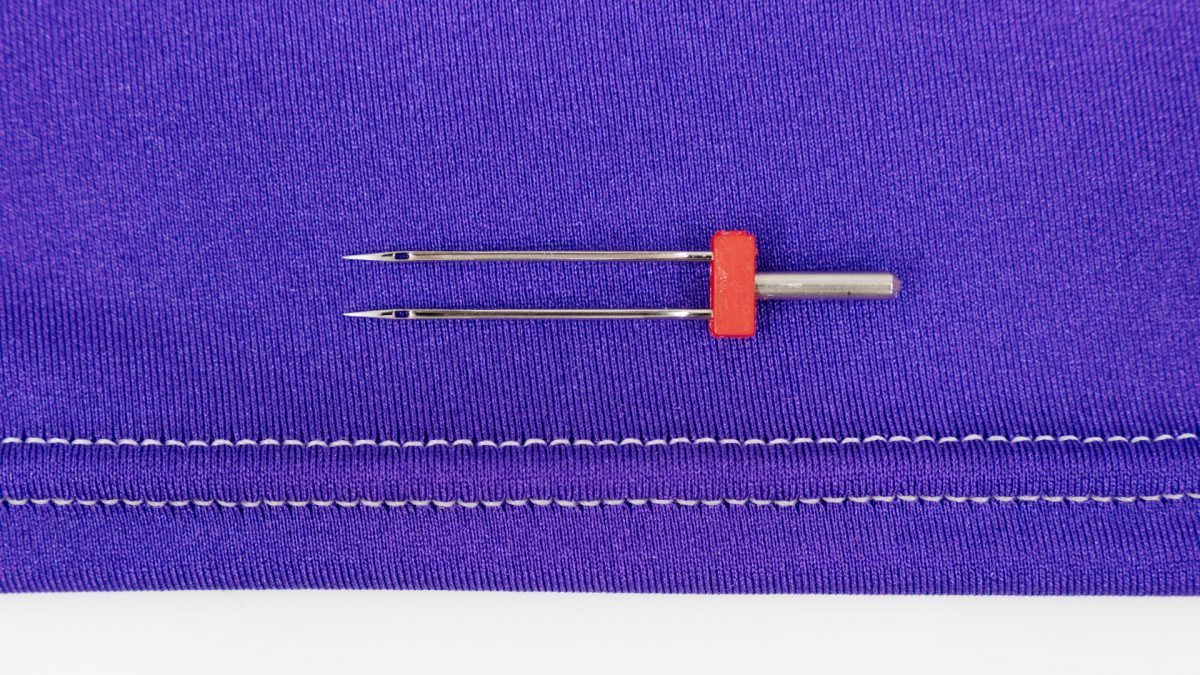
One of my favorite sewing related things is the Zwillings Nadel – or, if you prefer, the double needle. (Zwillings nadel is German for double needle.) A double needle is the perfect solution to hemming anything knit (or with any amount of stretch) if you don’t happen to own a machine that can do a cover stitch. I use them all the time to hem t-shirts, ribbed knit shirts, sweatshirts, sweaters, even jeans with an excessive amount of spandex.

Zwillings Nadel.

Zwillings Nadel.

Any domestic machine can use a double needle. How they work is with two top threads and one bottom thread. This creates a zig-zag in the bottom thread that allows for stretch. I often use a double needle and a stretch stitch at the same time. I find the stretch stitch produces a result with minimal puckering.

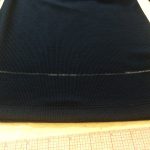
My trick for hemming most anything, but especially things that require a double needle, is to cut after I sew.

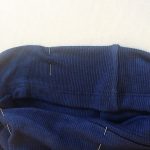
First, mark a nice clear line for your hem on the right side of your garment using wax or some kind of marking pen that will disappear when heat is applied. Press the hem along the line you have marked. Do not trim any excess away. Next, using a double needle, stitch up an inch from your pressed line, or whatever is your desired hem depth. Once you have sewn, trim the excess fabric away. Try to trim as close to your zig zag bobbin line as you can. The ziz zag will keep anything from raveling and fraying if that is a concern though many tightly knit fabrics won’t really fray (Sweaters and some loosely woven ribbed t-shirt knit will of course). I press the hem at this point as well to get rid of any puckering. If the hem is still a bit wavy, try spritzing with water and pressing dry with a press cloth.

Zwillings Nadels

come in varying widths, meaning the two needles can be further or closer together. I keep a variety of widths around. They are also sized like regular needles, 12/80, 14/90, etc.

Bias Tape Makers

Bias tape makers are one of the most brilliant inventions in ‘modern’ sewing. If you don’t own any, buy a set now. They are these cool little devices that you feed a strip of fabric into on one end and get a beautifully uniformly pressed bias tape out the other end. They come in varying sizes – ¼” ½” 3/8”, and on. I use bias to bind necklines and armholes. Pretty much every single slip we made on Boardwalk Empire has a bias bond neck and armhole.

Loop Turner

Ever tried to turn a very thin spaghetti strap? It can seem virtually impossible. Unless, you have this really cool thin metal rod with a hook on one end. Insert the loop turner all the way through your strap and hook the little crochet hook into the seam allowance at the very end of your strap. Then pull gently from the other side, turning the strap inside itself. Once you are able to pull the hook through the other end, you can hand turn the remaining part of the strap.

Wooden Dowel

A simple, 1/8” or ¼” round wooden dowel is very useful for pressing belts, straps, and ties that you are bagging out. Put the dowel inside your strap or tie before you have flipped it so you can press open your seam allowances from the wrong side. This will give you much nicer and crisper finished edge when you turn them right side out.

These simple, inexpensive tools will not only help you achieve cleaner more professional looking results, but will also (I think, anyway) make your sewing life a little easier.

Do you have a simple, favorite tool you think others would benefit from knowing about? Write about in the comments section.

DIY - Bias Tape with a Bias Tape Maker Tool

10 Steps to Making & Sewing Bias Tape

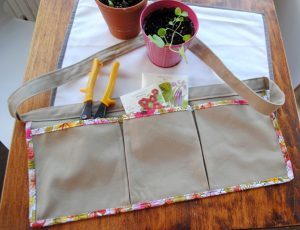
Gardening Apron, pattern from “Sewing for All Seasons” by Susan Beal.

Gardening Apron, pattern from “Sewing for All Seasons” by Susan Beal.

You might appreciate a well-stocked sewing shop, but don’t you get bored with the limited choices for bias and binding tape? The standard spectrum of hues leaves little room for imaginative and interesting ideas.

If you’re sure the best binding for your project isn’t on the notions shelf, consider making it yourself. Although it’s possible to create tape with only an iron and your fingers, the process will go more smoothly and be more fun with a special tool called a bias tape maker. These little aluminum color-coded gadgets are sold at most sewing shops, including Sewingmachinesplus.com. They come in widths ranging from two inches all the way down to one-quarter inch and can be purchased individually or as a set. Save the instructions that come with the tool—you’ll need its measurement guide when cutting strips.

With a small tool that costs under $10, you can conquer the bias tape bores.

My curiosity about homemade tape led me to Susan Beal’s book “Sewing for All Seasons,” where I found a pattern for a canvas gardening apron made with DIY binding tape. My tape edging was folded from a poplin just slighter lighter than the canvas used for the apron body. I used a three-quarter-inch bias tape maker by Clover, and I even have some tape left over for a matching hat.

When making your own projects with DIY tape,
follow these 10 steps:

  1. Select similar fabrics. Cut swatches from your stash and consider how each would work as either the tape or the body fabric. As a general rule, your tape should be the same weight or just slightly lighter than the body fabric. Avoid using silky fabrics because you’ll have trouble keeping the tape in place when sewing. Also avoid transparent or translucent material that will show seams and frayed edges.
  2. Determine measurements. Refer to your pattern’s specifications – what size bias or binding is required? Use the guide that comes with your tool to determine how wide your strips should be in order to achieve the proper finished size. For example, if you need three-quarter-inch binding, your strip width (for medium weight fabric) would be one and three-eights. Make sure you have the right size bias-making tool for the size you need.
  3. Measure and cut your strips. If your tape will be sewn around curved edges, such as with a circle-shaped potholder or Christmas tree skirt, your strips should be cut on the bias (at a 45-degree angle against the fabric grain). If your project is made of only straight lines like the gardening apron in the photos, you can cut strips horizontally from selvage to selvage.
  4. Prepare the strips. If your pattern requires many yards of tape, you can sew long strips together with a three-quarter-inch seam allowance. Open and gently press the seam before using the tool.

    Run the strips through the tool to create perfectly folded tape.

    Run the strips through the tool to create perfectly folded tape.

  5. Press perfectly. Use an iron at the appropriate setting for your fabric to flatten the tape as you pull it though the tool. Take your time and use your fingers to hold the tape in position before applying steam. Store the finished tape so it doesn’t lose shape when you’re working on other aspects of the project.
  6. Check your machine’s needle and thread. You’ll be sewing through many layers, so make sure your needle is up to the challenge. Likewise, consider your thread color. A thread that looks good with the body fabric might not look as good when sewn into your bias tape.
  7. Pin the tape into position. Use plenty of pins with the head accessible in the direction you plan to sew. Use small pins that won’t distort the shape of your project. The flatter, the better. In some cases, you might want to baste the tape into place.

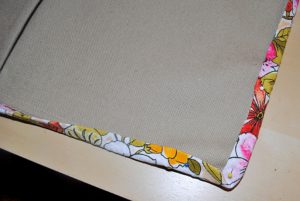
    Create a folded angle at corners.

    Create a folded angle at corners.

  8. Be careful at corners. Fold the tape at an angle, making sure it doesn’t slip. When sewing on the machine, sew one half of the corner and stop to pivot the project to the other direction before beginning again. Do not rush—take your time and concentrate on keeping the tape in place.
  9. Cut with caution. If your pattern asks you to cut the tape at particular points, don’t cut exactly flush to the body fabric. Leave a millimeter or two in case the next part of the process pulls your tape more taut than expected.
  10. Press gently. Resist the temptation to vigorously iron the tape after it’s sewn on. Give the project some time to settle into its seams, then use light steam to gently coax out lumps and wrinkles.

With a small tool that costs under $10, you can conquer the bias tape bores. New doors open with tape made from abstract prints, solids, florals, and plaids. A fancy or patterned bias edge against a plain fabric is a fun and interesting take on cosmetic bags, T-shirts, placemats, table runners or blanket edges. Make your own tape and take your project from OK to extraordinary.