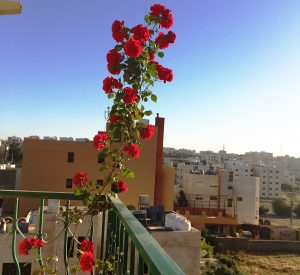
Here’s a picture from my balcony in Madaba, Jordan. I hope to find some interesting textiles in the bazaars as I travel through the country.
I’m in Jordan today. Yes, the Jordan in the Middle East, northeast of Egypt and Israel. I woke up in Madaba to a beautiful sunrise and rose blooms over the desert. I’m here on holiday, to ride my bike and spend the later afternoons looking for textiles in the bazaars.
The Middle East has always been a nexus of textile production. Trade routes commonly known as the Silk Road terminated on their western end in the eastern Mediterranean ports. As a result, these markets were also the centers of textile production.
Textiles of the Middle East during the Middle Ages were highly prized goods. I’d venture to say they still are. Many of the words we use to describe textiles in the English language are derived from Persian, Arabic, and Turkish – terms like damask, taffeta, cotton, muslin, seersucker, and mohair.
Historical value
Long ago, textiles in this region were also often accepted as payment of taxes or other moneys owed. Visiting officials and ambassadors were given gifts of cloth or garments. In a part of the world where much of the population was once primarily nomadic, interiors were furnished with textiles used to cover floors, walls, cushions, and to create beds and storage of all kinds.
Traditionally, gifts of any kind were also presented in a textile wrapper. The more elaborate the wrapper the greater honor was intended. Textiles were thought to be able to hold powers of protection or harm, depending on the symbols and inscriptions incorporated into them.
After the death of Muhammad, representation of living creatures was banned in most cultures of the region. As a result, Islamic design developed a beautiful metaphorical language all its own, utilizing geometry, calligraphy, vegetal, and architectural forms (though in many Persian & Central Asian silks and carpets, human and animal figures do appear).
Silk
Elaborately patterned silks were produced throughout the Middle East in all sorts of complex weaves – such as twills, lampas, and brocades. Silks of a more simple nature, tafta and satin weaves, were also quite numerous. A cloth made from a silk warp and a cotton weft, known as alaca, produced a more “economical” textile.
Tiraz textiles are a silk fabric, particularly important from the tenth to the fourteenth centuries, embellished with a border containing inscriptions of religious quotations and often woven in gold thread. Baghdad was the best known source of tiraz but it was produced in many other Middle Eastern locations. The borders appear most commonly on upper sleeve bands. They are were also found on burial shrouds and ceremonial textiles.
Cotton and linen
Both cotton and linen, ranging more heavy canvas to lightweight gauze, were widely produced in the Middle East. Textile printing also existed and, by the sixteenth century, a printing industry existed in Syria, later expanding into Anatolia.
Mohair and wool
Mohair, camel hair, and goat hair – referred to as cashmere or pashima, is used to weave soft and beautifully patterned shawls throughout the region. These shawls became very popular in the west during the nineteenth century.
The patterns, woven in twill tapestry or other complex compound weaves, featured colorful and elaborate designs. One such design was a complex vegetal one known as boteh. In the west this design became to be known as the paisley motif, named after Paisley, Scotland where textile mills produced copies of the design in the latter nineteenth century.
The best known wool textiles of the region are the pile and flat cloths made as rugs, bags, wall coverings, and the like. The oldest surviving example of Islamic carpet weaving is the “Fostat” fragment from the ninth century found in Cairo.
Carpet design can be divided into 3 categories
- Tribal carpets, produced by nomadic or village households for their own use, tend to be geometric in design and reflect regional affiliations.
- Court carpets, created by the finest artists of the day, are usually the most intricate and finely knotted.
- Urban manufactured carpets are the third category. These are often technically fine but most often have less intricate designs.
Adventure time!
I’m excited to see what kinds of things I’ll be able to unearth over the next week as I wander about Jordan. Hopefully, I’ll have some interesting finds to share with you!
Textiles, especially those that are handmade, have such a deep history. I love learning about a design or technique that is unique or specific to a certain village or area. I also enjoy meeting local artisans who still produce works of art in the same way their ancestors always have.
This all ties into one of my previous posts about passing on skilled expertise to younger generations. Its a tradition pretty much as old as human civilization and one very much worth sustaining.
I wish you all a week of amazing discoveries (whether they be ancient or not). Next week I’ll be posting from Cairo. Arak qaribanaan.

