Sewing Baby Toys

Sewing Baby Toys

I just learned that a dear friend of mine is pregnant. After the announcement and our subsequent celebratory lunch, my mind starting thinking about what I could make to welcome her child into the world. It’s too early on to know if it will be a boy or a girl, which also means I’ve got plenty of time to make something by hand and from the heart. Here’s a few of the baby toys I’m thinking about making. I’d love to hear your thoughts on them!

adorable-20374_640

Two-Sided Baby Blanket

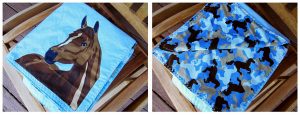
I love this idea. I used to love my two-sided comforter because I could flip it around based on my mood (and also based on which side had less cat hair…) My friend and her man are super unique, so I know their baby’s room is going to have flair and style. A reversible baby blanket would be right up their alley. Of course, I’d want it to match the colors they choose for the nursery, so I’ll have to check about that before I start.

Super Soft Receiving Blanket

Like all babies, I’m sure my friend’s bundle of joy is going to want to be held A LOT. And I know my friend is up to the task. She’s going to be an amazing mom! The new arrival is due in the February/March timeframe, so it will still be cool where we live. It makes me think that a super soft, and warm receiving blanket will help new mom and baby snuggle and bond.

Crunchy Jellyfish

It won’t be long before that new bundle of joy is putting everything in his or her mouth. (By the way, I’m certain it will be a girl.) Between teething and the need to understand the world using all her senses, her mouth is going to be full of all sorts of stuff. I love this crunchy jellyfish pattern because it will give her something safe to mouth on and it’s so cute!

Sun Toy

Along the same lines as the crunchy jellyfish, this sun toy is super cute and great for littles ones putting everything in their mouths. It’s got loads of textures too, making it entertaining in many ways. And when baby decides it’s time to throw her toys, it’s soft and won’t hurt or damage anyone or anything.

So, if it was your friend having a baby, which of these cool baby gifts would you make?

My Little Pony Blankets and Pillows

My Little Pony Blankets and Pillows

These are my daughters’ favorite toys.

These are my daughters’ favorite toys.

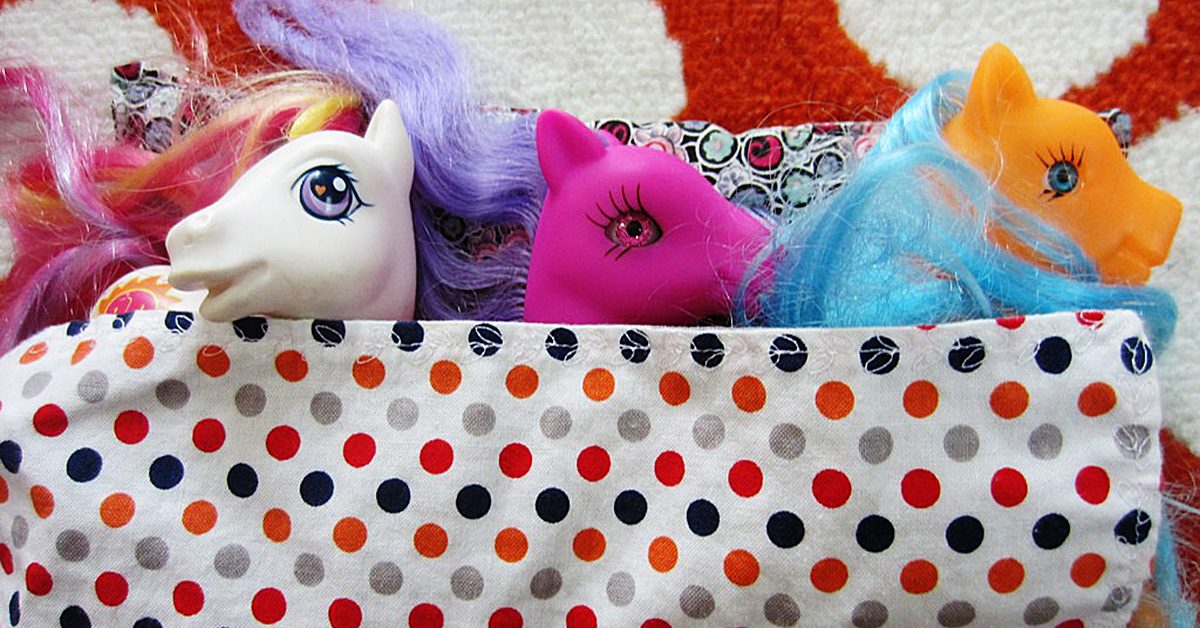
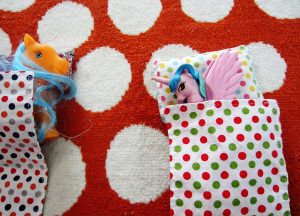
These are my daughters’ favorite toys. These ladies and gents can be found all around our house, in all manner of adventures. Sometimes, they even go to sleep. The problem with this was that my youngest was using tissues to make blankets and pillows for them. All of them. Every day. That’s a lot of tissues.

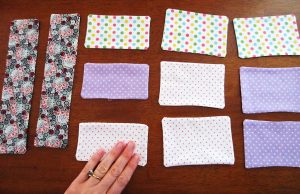
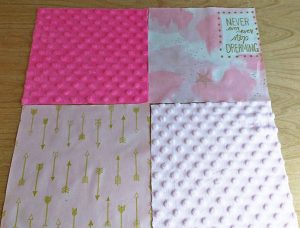
Enter my layer cake stash. ‘Layer cake’ means a precut stack of fabric cut in 10” x 10” squares. I asked my daughter to look and find a selection of fabrics she liked and I turned them into blankets and pillows for her My Little Pony and tiny doll friends.

Enter my layer cake stash.

Enter my layer cake stash.

Downton Abbey

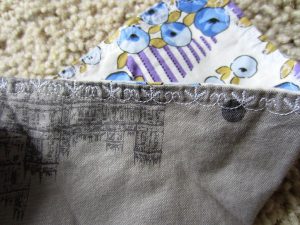
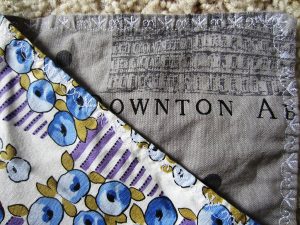
She picked several pieces from my Downton Abbey collection (yes, they have Downton Abbey-themed fabric and yes, I bought some!) I made her eight reversible blankets. This was a fun chance to use the variety of decorative stitches on my machine. The decorative stitches available on modern sewing machines is incredible. SewingMachinesPlus.com has a wide assortment you can view here: https://www.sewingmachinesplus.com/computerized-sewing-machines.php

She picked several pieces from my Downton Abbey collection.

She picked several pieces from my Downton Abbey collection.

Next I made small and large-sized pillows. She had asked for ‘big’ pillows so some of her ponies could go to sleep together. So sweet!

Nap time

Next I made small & large-sized pillows.

Next I made small & large-sized pillows.

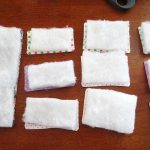
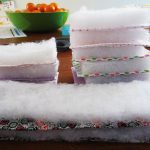
I left an opening in each piece to stuff them and cut the batting to size.


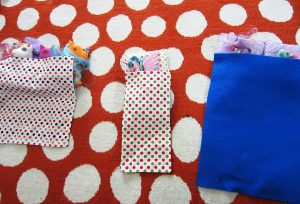
Here you see how they got put into action. My youngest, especially, was thrilled.

Here you see how they got put into action.

Here you see how they got put into action.

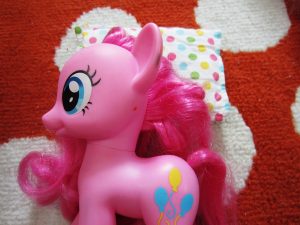
The big pillows and the little pillows are used equally. So are some squares of felt I keep on hand for crafting.

The big pillows & the little pillows are used equally.

The big pillows & the little pillows are used equally.

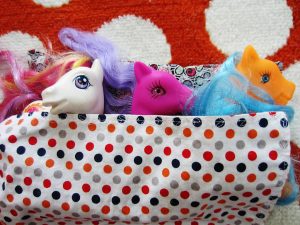
Even ponies need their beauty rest.

Even ponies need their beauty rest.

Even ponies need their beauty rest.

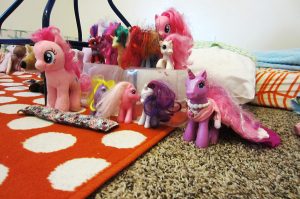
These handmade blankets and pillows have been used for all kinds of imaginative play, including as rivers and lakes in Lego houses they’ve built.

These handmade blankets & pillows have been used for all kinds of imaginative play.

These handmade blankets & pillows have been used for all kinds of imaginative play.

What kind of handmade items have you sewn to supplement your children’s or grandchildren’s toy supply? Let us know in comments!

What kind of handmade items have you sewn to supplement your children’s or grandchildren’s toy supply?

What kind of handmade items have you sewn to supplement your children’s or grandchildren’s toy supply?

———————————————————————————–
Charlotte Kaufman is a writer and sewist in Mammoth Lakes, California. She specializes in marine and home interiors and continues to fall more and more in love with quilting. You can follow her at charlottekaufman.com.
DIY Car Seat Poncho

DIY Car Seat Poncho

Did you know it is not safe to put kids in winter jackets in car seats? It’s true. Winter jackets are so puffy that parents need to loosen the seat belts to accommodate them, however this loosening makes the child unsafe in their car seat should they be in an accident. The jackets would compress but the child would move too far forward for safety due to the loosened seat belts.

Snow day!

So what’s a parent to do who lives in cold weather?

So what’s a parent to do who lives in cold weather?

So what’s a parent to do who lives in cold weather? The good news is that you can still put snow pants on them. So use a pair of snow pants and a car seat poncho and all your problems are solved!

I’ve never sewed a hood before so I was excited to try something new and make one with this project. I used the pattern for the hood from Oliver & S’s Little Things To Sew Book and then attached the hood to my own design for the poncho.
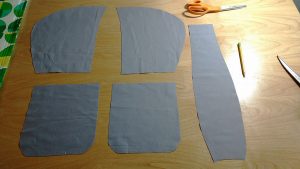
I used the pattern for the hood from Oliver & S’s Little Things To Sew Book and then attached the hood to my own design for the poncho.

I used the pattern for the hood from Oliver & S’s Little Things To Sew Book and then attached the hood to my own design for the poncho.

Cozy pockets

I also wanted to make lined pockets on the inside of the poncho, so she could slide her hands inside them and keep toasty while the car warmed up.
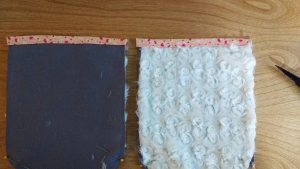
I also wanted to make lined pockets on the inside of the poncho, so she could slide her hands inside them and keep toasty while the car warmed up.

I also wanted to make lined pockets on the inside of the poncho, so she could slide her hands inside them and keep toasty while the car warmed up.

I’ve been trying very hard lately to make my projects with materials I already have on hand. Everything you see for this car seat poncho, I already had in my stash.

If you’ve never sewn with minky or cuddle fabrics, I’m here to tell you that it’s time to try. They are so warm and cozy and people always like when you make gifts with minky. If you have a walking foot, use it when you’re sewing fabrics like these. For more on how to sew with minky, check out my post here.

Grab that pincushion
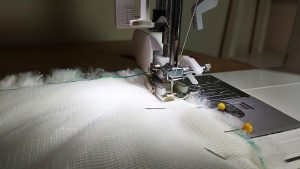
If you have a walking foot, use it when you're sewing fabrics like these. For more on how to sew with minky, check out my post here.

If you have a walking foot, use it when you’re sewing fabrics like these. For more on how to sew with minky, check out my post here.

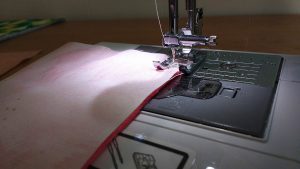
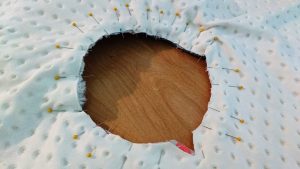
When working with minky, you definitely need to pin things in place. I’m not a big fan of pins, except when you really do need them; sewing the hood and the neckline of the poncho was a definite need.

Tip: if you are going to add a ribbon so you can hang the jacket from the back of the neckline, this is the moment to do it.
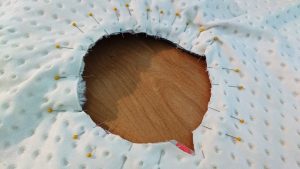
When working with minky, you definitely need to pin things in place.

When working with minky, you definitely need to pin things in place.

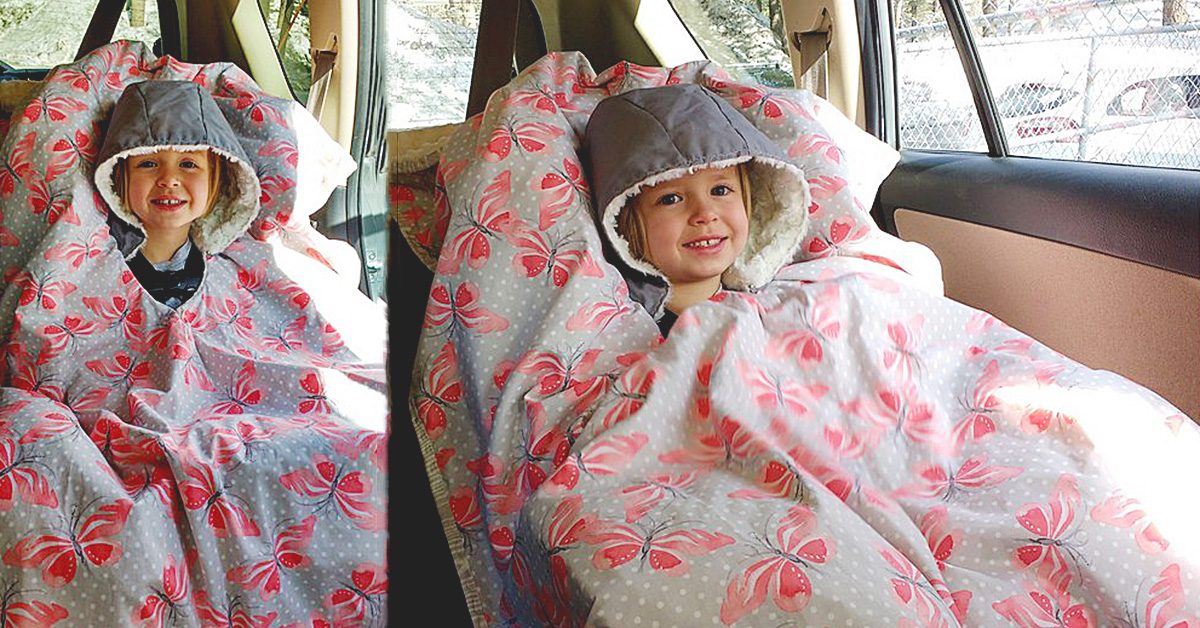
Ta da!!! The hood is lined with a gorgeous cuddle fabric that looks like rose swirls. I used minky dot fabric on the underside of the poncho. The butterfly fabric is left over from a baby quilt I made last year.
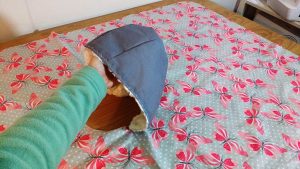
The hood is lined with a gorgeous cuddle fabric that looks like rose swirls.

The hood is lined with a gorgeous cuddle fabric that looks like rose swirls.

Tales from the hood

When I tried the poncho on my youngest, the neckline was too big. No problem. I used my buttonhole foot to make two button holes right at the v of the neckline like this.
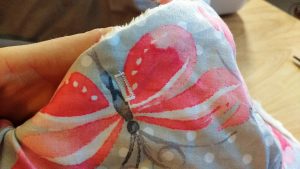
The butterfly fabric is left over from a baby quilt I made last year.

The butterfly fabric is left over from a baby quilt I made last year.

Next I threaded elastic through two buttons and tied knots on each side. This tightened up the neckline but still allowed her to easily pull it over her noggin.
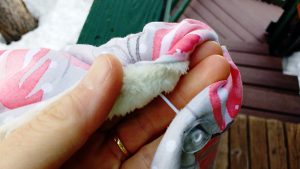
Next I threaded elastic through two buttons & tied knots on each side.

Next I threaded elastic through two buttons & tied knots on each side.

Lovely, no?
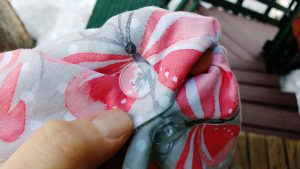
Lovely, no?

Lovely, no?

Once the hood and neckline were complete I smoothed out the top and bottom fabrics and made sure they fully matched. Any parts that extended past each other got chopped. Then I pinned the HECK out of the entire poncho before adding binding (See all those pins?).
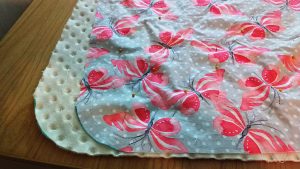
See all those pins?

See all those pins?

Put a clip on it

I used these awesome Wonder Clips by Clover to keep the edges in place as I added the binding.
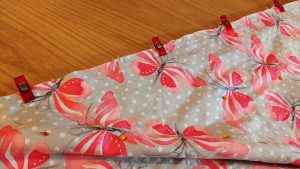
I used these awesome Wonder Clips by Clover to keep the edges in place as I added the binding.

I used these awesome Wonder Clips by Clover to keep the edges in place as I added the binding.

This binding was extra I had made for a quilt last December. It matched the project perfectly.
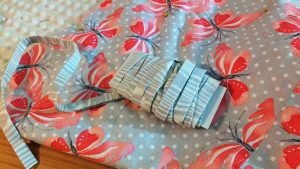
This binding was extra I had made for a quilt last December.

This binding was extra I had made for a quilt last December.

Momma’s little helper

When everything was sewn, I enlisted the help of my six year old to remove all the pins and then get off any remaining fuzzies from sewing with minky.
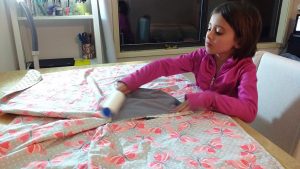
I enlisted the help of my six year old to remove all the pins & then get off any remaining fuzzies from sewing with minky.

I enlisted the help of my six year old to remove all the pins & then get off any remaining fuzzies from sewing with minky.

Lastly, I ironed. Always, always iron. It takes your project to the next level!

Pro Tip: never iron on minky directly. Do not press too hard because you’ll ruin the pattern on the minky dots (you’ll flatten the dots). I ironed the top side with steam on a wool setting.
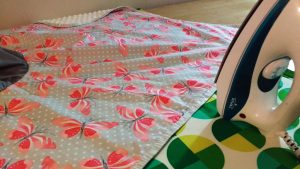
Never iron on minky directly.

Never iron on minky directly.

Here’s the finished project. My 4 year old absolutely loves what she calls her ‘car blanket.’
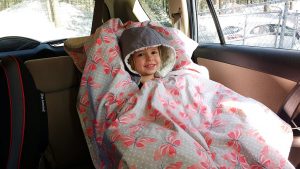
My 4 year old absolutely loves what she calls her ‘car blanket.’

My 4 year old absolutely loves what she calls her ‘car blanket.’

Safety first

See how she is safely buckled underneath the poncho?
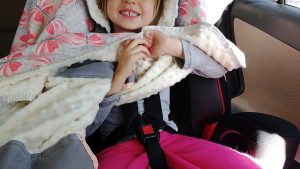
See how she is safely buckled underneath the poncho?

See how she is safely buckled underneath the poncho?

The back of the poncho just drapes up and over the back of the car seat.
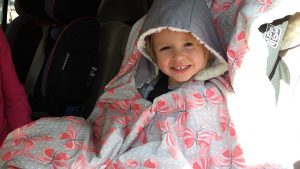
The back of the poncho just drapes up and over the back of the car seat.

The back of the poncho just drapes up and over the back of the car seat.

Here she is modeling it next to her daddy. Adding the elastic and buttons at the neckline was the perfect solution.
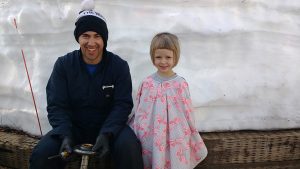
Here she is modeling it next to her daddy.

Here she is modeling it next to her daddy.

Under the hood

And here you can see the pockets that are on the underside.
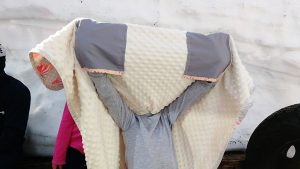
And here you can see the pockets that are on the underside.

And here you can see the pockets that are on the underside.

Yep, this project was a hit. And she has plenty of room to grow with it.
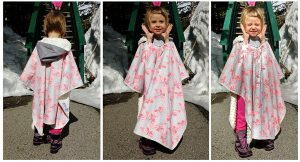
Yep, this project was a hit. And she has plenty of room to grow with it.

Yep, this project was a hit. And she has plenty of room to grow with it.

I’m so glad I took the time to add something to hang it with.
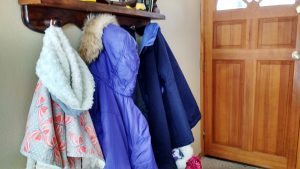
I’m so glad I took the time to add something to hang it with.

I’m so glad I took the time to add something to hang it with.

Have you made your own car seat poncho? How do you like it? Let us know in comments!

———————————————————————————–
Charlotte Kaufman is a writer and sewist in Mammoth Lakes, California. She specializes in marine and home interiors and continues to fall more and more in love with quilting. You can follow her at charlottekaufman.com.

Leftover Fabric: The Toss Across Edition

I think I’ve mentioned before that I have quite a bit of fabric leftover from the top layer of my quilt, right? Well, I do, and it’s interesting to come up with practical, usable projects that could give that fabric a purpose. This week, I did exactly that, and I’m going to share the idea that was a two-fold win for me: Using a little bit of fabric and creating something that I had a genuine reason for making.

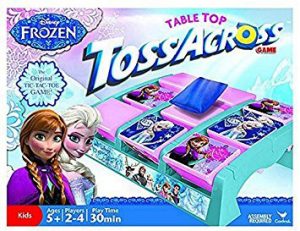
Frozen Toss Across set , and it comes with simple blue throwing bags.

Frozen Toss Across set , and it comes with simple blue throwing bags.

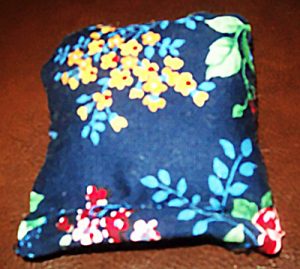
So, my niece has this Frozen Toss Across set , and it comes with simple blue throwing bags. The idea is to tic-tac-toe with Anna or Elsa (whichever character you are) to win, but the thing is that we currently only have three throwing bags out of the original set that we can use. What that boils down to is that the two of us would play the game one toss at a time, and we’d have to keep going over to the board to retrieve the bags for the next round. Sure, it’s doable, but it isn’t as convenient as only having to go bag-retrieving every third toss or so!

Get resourceful

Yesterday, it occurred to me that I have small pieces of material and fewer throwing bags than we used to have. Why not use some of that fabric to make new throwing bags?

It’s a simple idea, and the process was fairly to-the-point. All I needed beyond the sewing essentials of fabric, needles, thread, and pins was something to fill up the bag, which I honestly had to think on for a while — maybe until I was ready to fill the throwing bag. I thought about trying small rocks, but I was sewing at night. Since I didn’t want to wait until morning to finish my trial sewing bag or go rock hunting at night, I needed another option. At some point, it dawned on me that I have blue sand that could work, but you might find something just as fitting for the purpose around your house. Just think a little outside of the box, and the fillings might take shape!

Time to begin

I took one of the pieces of fabric & folded it in half since the fabric size was nearly ideal to make two separate throwing bags.

I took one of the pieces of fabric & folded it in half since the fabric size was nearly ideal to make two separate throwing bags.

Now that we have the list of supplies, it’s time to get into how all of them came together into a Toss Across throwing bag. First, I took one of the pieces of fabric and folded it in half since the fabric size was nearly ideal to make two separate throwing bags. These bags needed to be small enough to flip spaces on the board, after all! Once I cut the fabric in half, I again cut it in the opposite direction so that what started as one piece of material was now four individual pieces — two for each throwing bag.

Luckily, these are small products, so I only needed about three pins to hold them!

Luckily, these are small products, so I only needed about three pins to hold them!

Then it was time to pin them. Luckily, these are small products, so I only needed about three pins to hold them! I took two pieces of the fabric and placed them together so that their printed sides were facing one another and pinned them on three sides to hold them steady. Note: This is also a good time to trim off any excess fabric on the ends if they’re terribly uneven with one another, though these seams will be inside the bag anyway. You don’t have to be too careful to make things perfect!

From there, it was time to sew, which was a pretty straightforward process! Three sides needed to be closed up completely, but I needed to keep that fourth side open to fill the sewing bag before I closed it as well. I simply sewed one side, then the next, and then the next. Then, it was time to flip the bag so that the printed fabric was now on the outside and add in what I decided would be blue sand to fill it. Again though, you can try a different tactic to fill the throwing bag — sand, beads, etc.

You can try a different tactics to fill the throwing bag — sand, beads, etc.

You can try a different tactics to fill the throwing bag — sand, beads, etc.

Be sure though while you’re filling the throwing bag that you don’t fill it too full. It’s important that it’s weighty enough to be able to turn one of the Toss Across spaces, but if it’s too full, you might have a hard time sewing that final side together. As it happens, I ended up towing the line, so for future projects, I might use a little less filling!

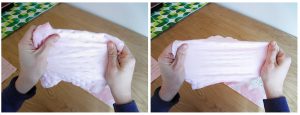
Once I’d finished with the filling, I sewed that final line together. I did this by folding the edges inward, kind of like I was wrapping a present, then folded the line downward to pin it in place. After that, I just had to sew what I’d pinned and cut the thread.

I did this by folding the edges inward, kind of like I was wrapping a present, then folded the line downward to pin it in place.

I did this by folding the edges inward, kind of like I was wrapping a present, then folded the line downward to pin it in place.

I have plenty of fabric to keep making these, but already with this one bag, I’ve evened up the throwing bag numbers so we can play two rounds at a time!

Do NOT iron minky directly!

Tips for Sewing with Minky Fabric (Cuddle or Plush Fabric)

Tips for Sewing with Minky Fabric (Cuddle or Plush Fabric)

I know a lot of people that shy away from sewing or quilting with minky but I’m here to tell you that minky is not the bogey-woman some people make it out to be, as long as you follow some important tips to make your sewing with it a success.

1. Pre-washing is not needed. Well, at least for the minky that is. Plush fabrics are made from polyester so they don’t shrink. If you’ll be pairing with fabrics that do shrink, then pre-wash the other fabrics in advance.

Minky bumps

2. Nap! Minky has a nap. Nap is the raised or fuzzy/bumpy parts you find on certain fabric (think velvet). If you brush your hand one way on minky, it will be soft, if you brush it the other way, it will be rougher. Take the direction of the nap into the consideration when cutting out your project.

Take the direction of the nap into the consideration when cutting out your project.

Take the direction of the nap into the consideration when cutting out your project.

3. Minky can STRETCH! But only from one direction. Take a piece of the fabric you are working with and stretch it one direction and then the other. You’ll find the stretchy side very quickly. I make sure to not ever leave my hole for turning on the super stretchy side.

Minky can STRETCH! But only from one direction.

Minky can STRETCH! But only from one direction.

4. Use the right needle and correct sewing foot. A lot of guides will recommend a universal needle size of 12. I prefer size 14, but find what works for you. Additionally, if you have a walking foot, use it! If you are too lazy to use your walking foot (or don’t have one), I find minky sews better when you place it on the bottom and the regular fabric on the top.

Use a walking foot. I find minky sews better when you place it on the bottom and the regular fabric on the top.

Use a walking foot. I find minky sews better when you place it on the bottom and the regular fabric on the top.

5. Seam allowance and stitch length – I tend to give myself more room with minky and usually use a 1/2” seam allowance. I also use a longer stitch length, around 4.

6. DO NOT IRON MINKY DIRECTLY. It will melt. I promise you. You need to even be careful ironing with another fabric placed on top as pressing too hard or with too much heat will ruin the nap or little bumps of the minky underneath.

7. Pins, clips and washable basting spray or this Wash-A-Way Wonder Tape are your friends with minky. Use them excessively and you’ll get much better results.

https://www.sewingmachinesplus.com/tacony-BT14.php

Pins, clips and washable basting spray or this Wash-A-Way Wonder Tape are your friends with minky.

Pins, clips and washable basting spray or this Wash-A-Way Wonder Tape are your friends with minky.

8. Top stitch!! Top stitching minky will really help to remove bulk, keep the seams in line and make your project look more professional.

Top stitching minky will really help to remove bulk, keep the seams in line and make your project look more professional.

Top stitching minky will really help to remove bulk, keep the seams in line and make your project look more professional.

9. Use a rotary cutter and a vacuum. Rotary cutters help make very exact cuts with minky. I also suggest having your vacuum nearby to clean up after cutting and to clean out your machine as you sew. SewingMachinesPlus.com has a variety of vacuum cleaners for your sewing room.

https://www.sewingmachinesplus.com/tacony-fb-gim.php

10. Practice! You’ll get better the more you use it. Soon, you’ll be wondering what all the fuss is about when others say they shy away from sewing with plush fabrics.

Do you have any tips for making sewing with cuddle fabrics a success? Let us know what works for you in comments!

———————————————————————————–
Charlotte Kaufman is a writer and sewist in Mammoth Lakes, California. She specializes in marine and home interiors and continues to fall more and more in love with quilting. You can follow her at charlottekaufman.com.
The Art of Christmas Ornaments

The Art of Christmas Ornaments

We’re getting closer to that Christmas mark! I actually have a Netflix Christmas movie playing while I write out this post, so clearly I’m in holiday mode! Now, if I only had some hot chocolate…

As has been the case with my last couple of posts, I’m sticking to the holiday theme for this week as well. This is an easy thing to do, by the way, because there are so many options for Christmas projects that require a needle and thread. Honestly, a person could come up with months’ worth of topics just from this category!

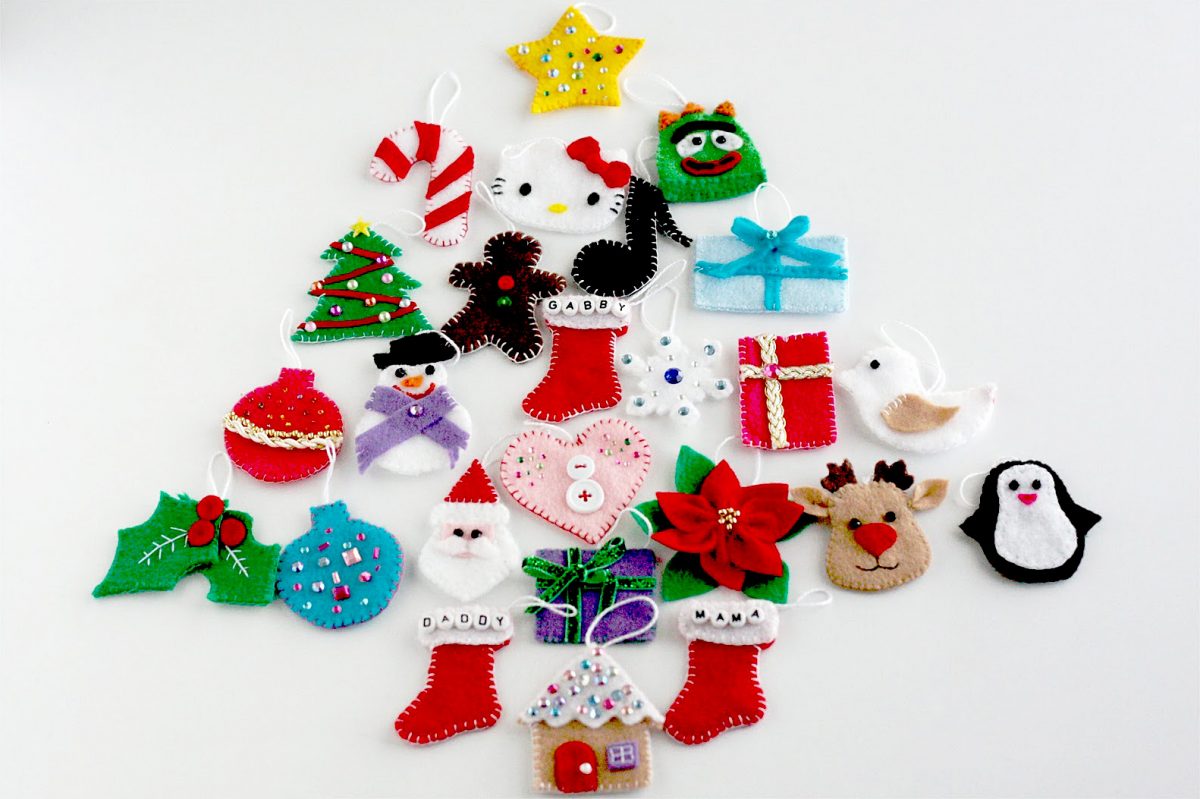
So, with a variety of things to choose from, I’ve decided to focus on Christmas ornaments for this post. Obviously, you can go out to your local department store and buy ornaments — you can even shop online to find them — but there’s something satisfying about looking at a tree and knowing you made something that’s on there.

Let’s decorate!

And since this is a sewing blog, let’s focus on sewn ornaments, shall we? These are wonderful things to successfully complete for more than one reason. First, as I said, it’s satisfying to see something you crafted on the tree! They’re also potentially simple patterns, and you could finish a number of these in a small amount of time. That simplicity leads to plenty of ornaments for just a percentage of your day because the technique can be so basic! You cut the fabric pieces, you sew the fabric pieces, you tend to final/additional touches, and you attach ribbon/yard/etc. to hang it from the tree. Who can’t do that?!

Possibly the most fantastic element of this idea is that these ornaments can be so cheap to make. If you recall, I can be a frugal person, so I adore this detail! If you think about the process itself, you might see how wallet-friendly it can be. What do you need besides a needle, thread, fabric and ribbon (or yarn, etc.) to hang it from your tree? There might be additional details for each individual type of ornament, but you could easily pick something that’s limited enough in those additional supplies to be within your budget. And think about that fabric and ribbon. If you just have one yard of fabric and one roll of ribbon, consider how many three-inch ornaments you can make out of that!

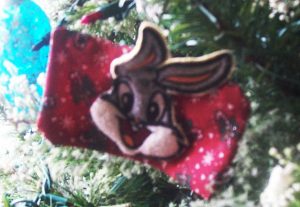
Honestly, I can’t endorse this concept enough because it’s fantastic on so many sides. It’s easy enough for a beginner to try, it’s cheap enough for someone on a budget, and it’s sentimental enough to have personal meaning as it hangs from the tree. You can even make these ornaments more heartfelt by using material connected to someone close to you, like a child. One old outfit that your child has outgrown can be cut into a desired shape and design, like the Bugs Bunny ornament shown.

Bugs Bunny ornament.

Bugs Bunny ornament.

Fabric ornaments

While it might be too late this year to hand-sew a collection of ornaments, you could invest in some Christmas fabric and such this season to make some of these for next year’s festivities.

So what are some good ideas for sewn Christmas ornaments? There are plenty out there that you can find with a little Google time, but I’ll share some of my favorites that I found.

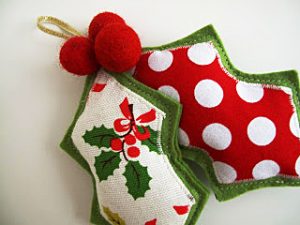
Fabric holly be for your tree.

Fabric holly be for your tree.

1. Holly: There simply aren’t words for how adorable I find this ornament, and it looks relatively simple — stitch, cut, sew, applique, stuff… This doesn’t look as complex as, say, making your own outfit, so it might be worth trying! Besides, how unique would fabric holly be for your tree?!

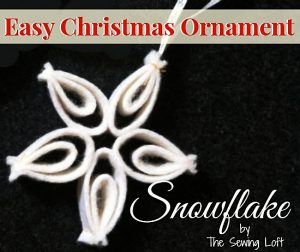
This one requires a bit of glue and folding, but look how pretty it is!

This one requires a bit of glue and folding, but look how pretty it is!

2. Snowflake: This one requires a bit of glue and folding, but look how pretty it is! I can even see adding some glitter and a bit of coloring to give it a two-tone look! Even if this one is a bit more tedious than some of the simpler options, the final product could be wonderful enough to make the effort worth it!

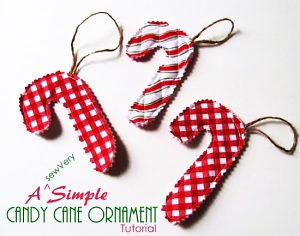
Candy canes themselves are kind of a Christmas classic, so why not have some homemade ones hanging on your tree?

Candy canes themselves are kind of a Christmas classic, so why not have some homemade ones hanging on your tree?

3. Candy canes: Candy canes themselves are kind of a Christmas classic, so why not have some homemade ones hanging on your tree? And if you wanted to branch out from the standard look of a standard candy cane, you could use more general Christmas fabric — like material covered in poinsettias or bells to cut in candy-cane shapes. The options are so vast, and the technique is very simple!

These are just a few possibilities, but there are plenty more on this site alone! You can tailor them to your wants and work on them at your convenience, so why not give it a try?

Teaching Kids to Sew

Teaching Kids to Sew

How Young is Too Young

Does your daughter (or son) hang around while you’re sewing? Do they seem really interested? Maybe they even beg you to show them or let them help? If you’re like most parents, this makes you happy that they’re interested, but unsure when is the right time to get them involved in your hobby.

Like many things in the course of childhood, the decision of when to teach your child to sew isn’t as much about chronological age as it as about maturity level. Before you teach your child to sew, they need to exhibit patience and ability to sit still and pay attention for an hour or so at a stretch. Manual dexterity helps, but isn’t absolutely necessary since you’ll be there to help with items like pinning and cutting.

Step 1: KISS

Even if your child doesn’t love momma kisses and hugs, keeping their first sewing project simple and fun will help keep their interest. Bean bags, doll pillows, and similar items are a great way to engage your child’s interest and help them learn basic sewing skills. They’re small enough to be completed quickly and not overwhelm your child with several steps.

Bean bags can be cut freehand without the benefit of a pattern. Depending your comfort level and your child’s interest and abilities, you can guide them through the setup and use of the sewing machine. At the end, you can both have a great time stuffing the bean bags and playing a game of bean bag tag.

Step 2: A Tougher ProjectHelp your child learn to read the pattern and understand how to lay out the pattern pieces.


Assuming the first project went well and they’re still interested, you can help your child pick a simple pattern to work on. Projects like simple doll clothes for American Girl sized dolls or a basic stuff animal can be great options. Give them some guidelines and set them free to pick out fabric.


Help your child learn to read the pattern and understand how to lay out the pattern pieces. If they’re up to it, explain about the different ways to fold the fabric based on how the pattern needs to be laid out. If you think they’ve got the dexterity, it might be appropriate to let them help you pin and/or cut the pieces. As with the simple first project, let them help you with the sewing machine if it seems appropriate to do so.

Things to Remember When Teaching Your Child to Sew

  • Every sewing project is unique – so is your child
    • Go at their pace
    • Keep their physical needs/abilities in mind
  • Start small
    • Keep it simple with an easy, fun project
    • Judge their interest and only move on to a tougher project if they want
  • Be patient
    • Just as many parents can’t teach their kids to drive, teaching your kid to sew may not work out
    • If teaching your child to sew is too stressful for both of you, check around for classes. Often places like the local YMCA will offer sewing classes for kids.
Quilt A String-Pieced Scrap Quilt For Baby

Quilt A String-Pieced Scrap Quilt For Baby

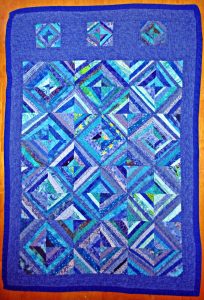
Here is an easy scrap quilt idea that is great fun to make.Here is an easy scrap quilt idea that is great fun to make.

You could clear out your scrap stash to make this gorgeous gift.

Blue is my favorite color, so I had heaps of blue scraps. That is what gave me the idea to make this crib sized quilt for a special new baby boy. You could choose a different color of scraps for this, or you could choose to not restrict your palette and clear out a random colorful scrap pile instead.

You will need:

  • A variety of cotton scraps
  • 48 5-inch cotton muslin squares
  • 12 2.5 inch muslin squares
  • 1 yard border fabric
  • Crib size batting
  • 1.5 yard backing fabric
  • Quilt binding or fabric to make binding

To make the patchwork squares:

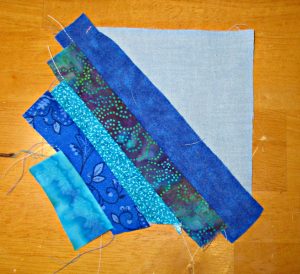
Press and cut your colorful scraps into approximately 1 inch wide strips. You will trim strips to the desired length as you construct the squares.

Take a muslin square and angle the first scrap strip diagonally, from the bottom left corner to the top right corner of the square. You can create a sort of uniformity in your blocks and allow for the Xs and squares effect achieved in this quilt by choosing one color scrap to use as this center piece in every square. In this case, I chose navy. All squares are made with navy as the longest, first piece in this quilt.

Next, choose another strip and place it right side down atop the first strip, then sew along one side using a quarter inch seam. Flip the second strip down to face up, then press.
Once you've added the last little strip to cover the corner, you can turn and repeat the process to fill in the other side of your square.

Once you’ve added the last little strip to cover the corner, you can turn and repeat the process to fill in the other side of your square.

Then add another strip, placing the third right side down atop the second, and sew using a quarter inch seam, then flip with right side up, and press.

Please do not skip the step of pressing each strip neatly down after sewing. Careful pressing makes the difference between neat and well made quilts and something that is more of a mess!

Repeat the process, using shorter strips and smaller scraps as you get close to the edges of the square. Once you’ve added the last little strip to cover the corner, you can turn and repeat the process to fill in the other side of your square.

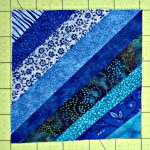
Now you have your first completed square.

You have your first completed square.

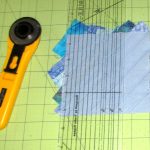
Place the square right side down and trim excess strip ends from the muslin square. This is most easily accomplished using a rotary cutter, or you can trim the excess with scissors instead.

Now make 47 more.

Now make 47 more.

Now you have your first completed square.

Make 47 more.

Assembling the quilt top:

Once you have completed all your patchwork squares, sew them together into rows.

Different looks can be achieved by varying the placement of the squares. You could turn them all in the same direction or assemble them where they form the X’s and O’s pattern pictured here. This is one of the things that makes quilting so much fun, that the same simple block can be turned different ways to vary the look of the completed top.

When joining the squares, take extra care for the tiny corner triangles, as it can be easy to make a careless mistake and miss joining these “ears” properly. This is easy to avoid by being careful in joining the squares and avoiding rush.

You also have options in this design: once you have completed the joining of the strip patchwork, you could call the quilt top done. Or choose to border the patchwork with a solid fabric. You could make borders of equal widths, or you could choose to add an additional embellishment, as I have here, with smaller blocks set off with borders. I did mine this way to indicate the top of the quilt and bring the design to the right dimensions for a crib sized quilt..

To make this quilt as pictured, sew 3.5 inch border strips around all sides of the patchwork design.

Prepare the three smaller blocks in the same way as the larger ones, using 2.5 inch muslin squares for the base.

Join these into a row by alternating the small patchwork blocks with 4 4.5 inch squares of the border fabric.

Sew this strip to the top edge, and finish the top by adding one more 3.5 inch strip above this.

To make the “quilt sandwich”:

  1. Cut your backing fabric 3 inches bigger all around than the top, press well, and place it right side down on your table or workspace.
  2. Carefully smooth the batting atop the wrong side of the backing layer.
  3. Press the top and seams one more time, taking extra care, then layer it wrong side down on top of the batting layer. Smooth nicely.
  4. Then baste all three layers together, using either long running stitches or quilters safety pins.

Quilting:

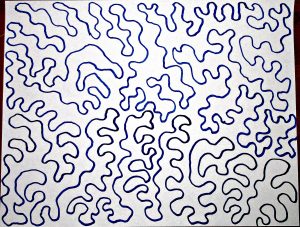
Meandering stipple stitch.

Meandering stipple stitch.

You can quilt this using the quick and easy route: the “stitch in the ditch” method of quilting over the seams that joined the individual blocks, or drop your feed dogs and use a meandering stipple stitch in one long line that (ideally) never crosses itself, guiding the quilt using your hands, working in sections until you have covered the entire quilt.  I quilted this pretty closely, like this:

Trim:

Trim the excess batting and backing, using your scissors or more quickly with your serger.

Bind:

Use prepackaged quilt binding or make your own. Sew binding strips together and then sew to quilt top, beginning along one side. Leave approximately an inch free at the beginning of this seam to join the binding ends once you have sewn it down all around. Join them, then fold over and sew the binding down on the back of the quilt using invisible whip stitches sewn by hand or using your machine if preferred.

Now you have made a beautiful heirloom gift that will be treasured forever!