DIY – Elegant Upscale Apron

Elegant upscale apron

Elegant upscale apron

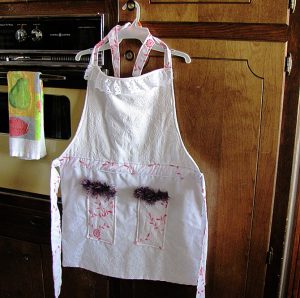
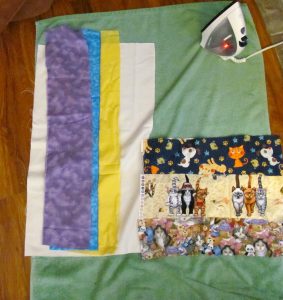
A cherished friend gifted me some very beautiful, elegant materials. She purchased them long ago with the intention of making an apron but never got around to it. I thought, “How wonderful, I’ll surprise her by making it for her!” I designed this apron to be elegant and classy while also being functional. This Elegant Upscale Apron really hit the spot. She adores it and I hope you will too!

***ProTip: When making clothes of any type, washing and ironing before sewing are extremely important!! Measurements are based on material already washed. If they aren’t washed before sewing, they may shrink by an inch or more when washed later on, resulting in the clothing being too small to wear.

Level: Beginner
Time to Complete: In A Weekend
Sewn By Machine: 3/8″ straight stitch unless otherwise specified
Sewn By Hand: Purple thread to sew pocket accents

**Tip: Iron cut pieces before sewing and in between each step. This helps in the sewing process as well as setting the stitches to lessen unraveling with age. And the extra bonus-the end results tend to look more professional as a result. 


Materials:

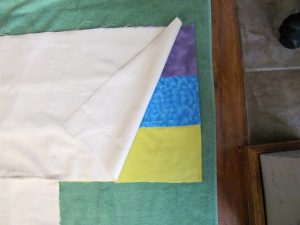
These fabrics are relatively thin. Aprons generally require a thicker material to help resist staining of clothing underneath. I used a piece of thicker off-white fabric as the backing to keep the elegant style while serving as an effective apron as well. The thicker backing also eliminates the need for a middle layer of batting. 

Top:

Measurements for Top – 14″ W<
Measurements for Bottom End – 23″ W
Length at middle – 18″ L

Skirt:

1 – 23″ W x 18″ L – Lace Fabric
1 – 23″ W x 18″ L – Backing

Neck Ties:

2 – 3″ W x  20″ L – Same material as used for Pockets

Waist Ties:

2 – 4″ W x 23″ L -Same material as used for Pockets

Neck Accent:

– 13″ W

Waist Accent:

1 – 23″ W x 3″ L Accent-Same material as used for Pockets

Pockets:

25″ W x 14″ L – Same material as used for Waist Accent
2 – 5″ W x 14″ L – Backing

Pocket Accents:

2 – 5″ W – Snazzy Boa

Purple Thread:

To sew pocket accents (boa) on by hand
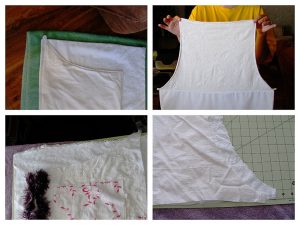
Cut fabric pieces.

Cut fabric pieces.

**Tip: When I’m  ready to cut my fabric, I place the line to be cut at the end of my cutting board. I use the end of the board to guide the scissors. This results in a straighter, cleaner cut.

Instructions:

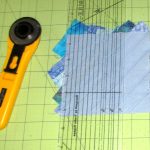
I recommend using fabric scissors instead of a roller when cutting these materials. I found the embroidery and embellishments in these materials are a little too much for the roller to cut through with one or even two strokes.

These are my favorite fabric scissors. Great slicing with minimal fraying.

  1. Wash and iron all material except pocket accents unless you use a washable material for pocket accents.
  2. Cut out all material using the above measurements.
    • I cut the boa accent pieces a couple of inches longer than needed, about 7 in. in case the hand sewing with the clear thread makes it a little shorter. When done, I cut off the extra.
    • After I measured the top section of the apron, I used a pencil to trace the curve from top to bottom. Then I folded the top in half and cut the curve on both sides so they would be symmetrical.
  3. Skirt
    • Pin and sew with the lacy fabric and backing right sides together, leaving a couple inches on one end to pull the fabric right side out after sewing. Cut diagonally outside the corners to help create more well-shaped corners after turning right side out. Turn right side out and iron.
  4. Top
    • Pin and sew fabric and backing for top, right sides together. Leave an opening to pull the top right side out. Trim corners. Turn right side out.
    • Top stitch around the top part of the apron, making sure to stitch closed the opening used to pull the fabric through.

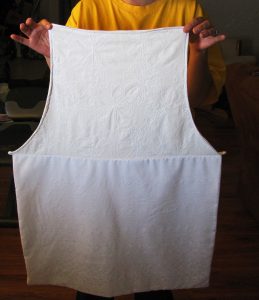
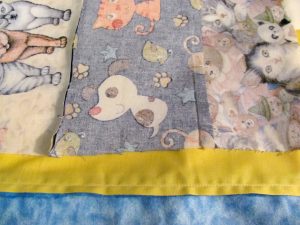
      Top and skirt sewn into one piece.

      Top and skirt sewn into one piece.

  5. Sew the top and skirt together, right sides together. Iron with the seam pointed down.
  6. Pockets
    • Pin and sew with 1/8″ seam the fabric and backing for the two pockets right sides in. Leave an opening in the top of the pockets. Trim corners, turn right side out and iron.
    • Top stitch with 1/8″ seam the top of the pockets only, making sure to sew the opening closed.
  7. Waist Accent Piece
    • Fold accent piece in half, right sides together. Iron to make crease for accurate sewing. Sew with 1/8″ seam the length or the strip, leaving one end open. Trim corners and turn right side out. Iron to create flat strip. Top stitch with 1/8 in. seam the open end closed.
      **DO NOT top stitch around strip yet. That will be done when sewing the accent piece to the apron.
  8. Waist and Neck Ties
    • Fold all 4 waist and neck straps in half, right sides together. Iron to make crease to help with accurate sewing.
    • Sew 1/8″ the length of the strip, leaving one end open. Trim corners and turn right side out. Iron to create flat straps.
    • Top stitch 3/8″ around each strap.
  9. Time to put all the pieces together. Yay!!
    • Place the accent strip on top of the apron over the seam where top and bottom pieces were joined.
    • Place one of the waist ties at the same spot but on the underside of the apron.
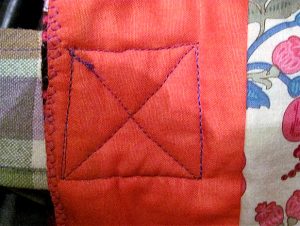
    • Sew the accent strip and waist tie with the X box often found to be used for ties since it creates a stronger hold.
    • Pin accent strip over the seam of the apron, making sure it is straight and level. Iron.
    • Top stitch the accent piece to the apron.
    • Sew the other waist tie on back of apron. Top stitch accent strip with waist tie behind, the same as with the other, using the X box to secure the waist tie.

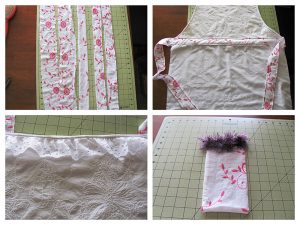
      Putting it all together.

      Putting it all together.

    • Sew neck ties onto the top corners of the apron using the same X box.
  10. Hand sew boa pieces onto pockets. If you have a material more suited for machine, sew them on.
    • I couldn’t find clear thread anywhere, which is what I prefer to use with embellishments like these. So instead I used a purple thread closely matching the color of the boa.
  11. Sew both pockets on the apron using 1/8″ seam.

Pre-heat the oven. Put on your new Elegant Upscale Apron. Time to bake!

Stacey's Stitches

Stacey’s Stitches 

Hi all! I’m Stacey Martinez 🙂

I love to design imaginative custom items for my active, crazy family. Bright

colors and beautiful fabrics sing “Stacey, Stitch Me!”

Let your imagination inspire you to breathe personality into every stitch!

Please feel free to post comments, questions, and pictures of your own Elegant Upscale Aprons. I can’t wait to see your creations!

Sharpen Your Scissors and Rotary Cutters

Sharpen Your Scissors and Rotary Cutters

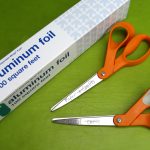
I keep my blades wicked sharp with my favorite technique: cutting aluminum foil.

I keep my blades wicked sharp with my favorite technique: cutting aluminum foil.

There is a man who comes to my local grocery store once a month and offers his services to sharpen your scissors and kitchen knives. I have never managed to make it to the store when he is there. When I kept missing his dates, I looked up ways to sharpen scissors myself. There are some surprising methods that are quite easy to do at home. Maybe one day I’ll get a professional to get these babies sharpened but until I do, I keep my blades wicked sharp with my favorite technique: cutting aluminum foil.

All you need is a piece of aluminum (tin) foil.

All you need is a piece of aluminum (tin) foil.

Cutting Aluminum Foil

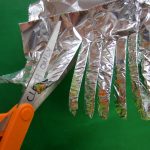
Cut thin strips with the scissors, making sure to cut from the tip of the blade all the way to the pivot points.

Cut thin strips with the scissors.

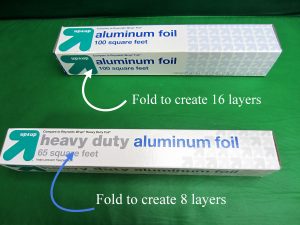
All you need is a piece of aluminum (tin) foil. Fold the foil up into 8 layers for heavy duty tin foil and 16 layers if you have regular weight.

Next, cut thin strips with the scissors, making sure to cut from the tip of the blade all the way to the pivot points. Use nice, open, broad cuts. This method also works for rotary cutters. Just run the blades over folded tin foil.

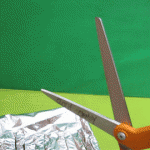
When you’ve finished cutting the tin foil, open your scissors all the way and then swiftly snap them shut.

When you’ve finished, open your scissors all the way and then swiftly snap them shut.

When you’ve finished cutting the tin foil, open your scissors all the way and then swiftly snap them shut. This will help to smooth out any tiny burs. I’ve been using the tin foil method for years now and my scissors are razor sharp after I do this.Keep your precious fabric scissors far away from children and partners who don’t understand how serious you are about your scissors.

Pro Tip: Always keep one pair of scissors reserved for paper only (so your fabric scissors don’t go dull too quickly.) Second pro tip: Keep your precious fabric scissors far away from children and partners who don’t understand how serious you are about your scissors.

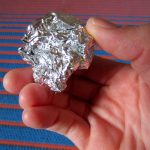
Roll the foil into a ball and you now have a perfect scrubber for pots and pans.

Roll the foil into a ball and you now have a perfect scrubber for pots and pans.

Waste Not, Want Not: What to do with the tin foil you have just chopped into strips? Roll it up into a ball and you now have a perfect scrubber for pots and pans (not your non-stick, of course). You can also bring these along on camping trips for scouring out cast iron or other camping dishes.

Alternate Methods

Have a different method of scissor sharpening? Let us know your techniques.

Have a different method of scissor sharpening? Let us know!

Out of tin foil but still need to sharpen your scissors? You can use the same method with sand paper (the finer the grit, the smoother the blades). Or, you can cut up steel wool, though it will be considerably messier than the tin foil or sand paper methods.

Do you have a different method of scissor sharpening? Let us know your techniques in the comments below.

Charlotte Kaufman is a writer and sewist in San Diego, California. She specializes in marine and home interiors and continues to fall more and more in love with quilting. You can follow her at charlottekaufman.com
Reuse and Recycle...Material!

Reuse and Recycle…Material!

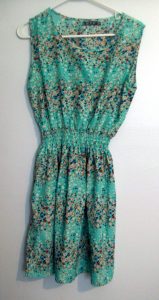
I had this piece of clothing that really wasn’t my style.

I had this piece of clothing that really wasn’t my style.

I’ve heard stories about my grandmother recycling material and such for the sake of future sewing projects. And, no, I’m not going give you a how-to of how to cut up your couch for the reusable material and filling! But the overall idea is a part of the general theme of today’s post: Reusing material for a new purpose.

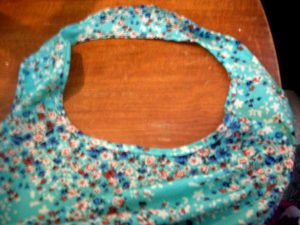
I had this piece of clothing that really wasn’t my style. It’s the green, flowery one in the picture, and it wasn’t something I felt was *me* enough to wear in public. BUT, it did get the gears in my head turning with possibility. Even though I didn’t want to wear this as a top or a dress, I was convinced it could make a fairly good apron. I decided to keep the material for future cutting/sewing use.

I think it was last week that I got around to working on the project, and the process wasn’t all that difficult. In fact, there’s a tip for new sewers: Keep an eye open for projects that wouldn’t be overly difficult to build your sewing skills. What I had in the beginning with this piece of material just looked like it could be an apron, with the style and the fabric. And, when thinking through how I’d go about turning the clothing into an apron, I realized the steps wouldn’t be that numerous. If you can catch enough finds like this one—things you might have around your house that you’re maybe planning on throwing away—you can reuse material, make projects for little to no money, and improve your sewing with what could amount to baby steps! Sounds like a win to me!
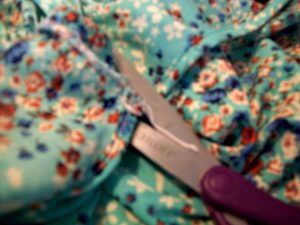
One side of the clothing had the seam along it, so I only had to follow the outline there.

One side of the clothing had the seam along it, so I only had to follow the outline there.

So what were the baby steps for this project? Well, they started with cutting, since I don’t know that I’ve ever seen an apron with a full back on it. One side of the clothing had the seam along it, so I only had to follow the outline there. The other side depended more on my judgment, but I do have a sewing mat and a rotary cutter now to hopefully help make more accurate cuts. Yay, sewing tools!

The material circling the neck could stay in place though, since aprons attach there anyway. That particular curve required a secondary round of cutting, which I’ll blame on my lack of experience with apron-making. I don’t usually have to make the right-place cuts for loops to go around my neck, so I won’t think too harshly about myself for going overboard on the first try. In the end, if you try for an apron, remember the loop should probably be no more than one inch thick once your sewing is finished, and make sure you’re keeping with the same general width range throughout your cutting. Otherwise, your backing might seem bulky overall, or just in parts. Neither is necessarily a good option!

Remember the loop should probably be no more than one inch thick once your sewing is finished.

Remember the loop should probably be no more than one inch thick once your sewing is finished.

Once I was finished with the cutting, I sewed hems along the edges where I’d cut, and used some of the material I’d cut off for straps that I could use for the ties to attach to the waist. Honestly, that task was kind of frustrating since the straps were so small, and the thread kept bunching or wrapping around the fabric. Lesson I could potentially take from this experience: Tiny material should maybe be reserved for later use, like after I’ve gained more experience with sewing!

I sewed hems along the edges where I’d cut, and used some of the material I’d cut off for straps that I could use for the ties to attach to the waist.

I sewed hems along the edges where I’d cut, and used some of the material I’d cut off for straps that I could use for the ties to attach to the waist.

Possible lesson you could take from this experience, if you’re an early sewer: If you’re going to make an apron, start with thicker straps to go around the waist—maybe two inches or a bit more. As far as appearance goes, it might be better for those straps to be a little bulky than for them to have confusing thread patterns. As far as process goes, saving yourself the annoyance of fighting with your thread might be worth the extra material.

One more tip for the road: If you do a project like this one, make sure that when you can, you make use of the hem on the original clothing. It might seem like cheating, but saved effort and thread is saved effort and thread!

All in all, keep an eye out in your own house for things to recycle into sewing projects. You can learn to be a better sewer without breaking your bank account!

Quilt A String-Pieced Scrap Quilt For Baby

Quilt A String-Pieced Scrap Quilt For Baby

Here is an easy scrap quilt idea that is great fun to make.Here is an easy scrap quilt idea that is great fun to make.

You could clear out your scrap stash to make this gorgeous gift.

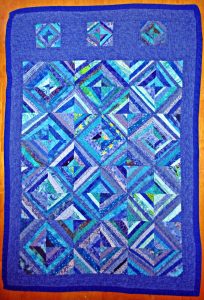
Blue is my favorite color, so I had heaps of blue scraps. That is what gave me the idea to make this crib sized quilt for a special new baby boy. You could choose a different color of scraps for this, or you could choose to not restrict your palette and clear out a random colorful scrap pile instead.

You will need:

  • A variety of cotton scraps
  • 48 5-inch cotton muslin squares
  • 12 2.5 inch muslin squares
  • 1 yard border fabric
  • Crib size batting
  • 1.5 yard backing fabric
  • Quilt binding or fabric to make binding

To make the patchwork squares:

Press and cut your colorful scraps into approximately 1 inch wide strips. You will trim strips to the desired length as you construct the squares.

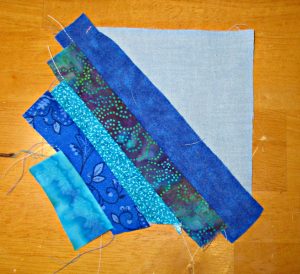
Take a muslin square and angle the first scrap strip diagonally, from the bottom left corner to the top right corner of the square. You can create a sort of uniformity in your blocks and allow for the Xs and squares effect achieved in this quilt by choosing one color scrap to use as this center piece in every square. In this case, I chose navy. All squares are made with navy as the longest, first piece in this quilt.

Next, choose another strip and place it right side down atop the first strip, then sew along one side using a quarter inch seam. Flip the second strip down to face up, then press.

Once you've added the last little strip to cover the corner, you can turn and repeat the process to fill in the other side of your square.

Once you’ve added the last little strip to cover the corner, you can turn and repeat the process to fill in the other side of your square.

Then add another strip, placing the third right side down atop the second, and sew using a quarter inch seam, then flip with right side up, and press.

Please do not skip the step of pressing each strip neatly down after sewing. Careful pressing makes the difference between neat and well made quilts and something that is more of a mess!

Repeat the process, using shorter strips and smaller scraps as you get close to the edges of the square. Once you’ve added the last little strip to cover the corner, you can turn and repeat the process to fill in the other side of your square.

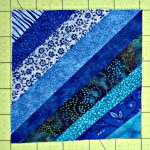
Now you have your first completed square.

You have your first completed square.

Place the square right side down and trim excess strip ends from the muslin square. This is most easily accomplished using a rotary cutter, or you can trim the excess with scissors instead.

Now make 47 more.

Now make 47 more.

Now you have your first completed square.

Make 47 more.

Assembling the quilt top:

Once you have completed all your patchwork squares, sew them together into rows.

Different looks can be achieved by varying the placement of the squares. You could turn them all in the same direction or assemble them where they form the X’s and O’s pattern pictured here. This is one of the things that makes quilting so much fun, that the same simple block can be turned different ways to vary the look of the completed top.

When joining the squares, take extra care for the tiny corner triangles, as it can be easy to make a careless mistake and miss joining these “ears” properly. This is easy to avoid by being careful in joining the squares and avoiding rush.

You also have options in this design: once you have completed the joining of the strip patchwork, you could call the quilt top done. Or choose to border the patchwork with a solid fabric. You could make borders of equal widths, or you could choose to add an additional embellishment, as I have here, with smaller blocks set off with borders. I did mine this way to indicate the top of the quilt and bring the design to the right dimensions for a crib sized quilt..

To make this quilt as pictured, sew 3.5 inch border strips around all sides of the patchwork design.

Prepare the three smaller blocks in the same way as the larger ones, using 2.5 inch muslin squares for the base.

Join these into a row by alternating the small patchwork blocks with 4 4.5 inch squares of the border fabric.

Sew this strip to the top edge, and finish the top by adding one more 3.5 inch strip above this.

To make the “quilt sandwich”:

  1. Cut your backing fabric 3 inches bigger all around than the top, press well, and place it right side down on your table or workspace.
  2. Carefully smooth the batting atop the wrong side of the backing layer.
  3. Press the top and seams one more time, taking extra care, then layer it wrong side down on top of the batting layer. Smooth nicely.
  4. Then baste all three layers together, using either long running stitches or quilters safety pins.

Quilting:

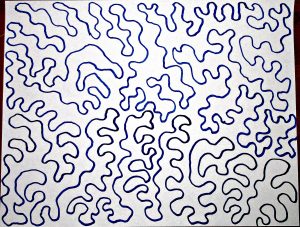
Meandering stipple stitch.

Meandering stipple stitch.

You can quilt this using the quick and easy route: the “stitch in the ditch” method of quilting over the seams that joined the individual blocks, or drop your feed dogs and use a meandering stipple stitch in one long line that (ideally) never crosses itself, guiding the quilt using your hands, working in sections until you have covered the entire quilt.  I quilted this pretty closely, like this:

Trim:

Trim the excess batting and backing, using your scissors or more quickly with your serger.

Bind:

Use prepackaged quilt binding or make your own. Sew binding strips together and then sew to quilt top, beginning along one side. Leave approximately an inch free at the beginning of this seam to join the binding ends once you have sewn it down all around. Join them, then fold over and sew the binding down on the back of the quilt using invisible whip stitches sewn by hand or using your machine if preferred.

Now you have made a beautiful heirloom gift that will be treasured forever!

“Pin”ny Time Savers

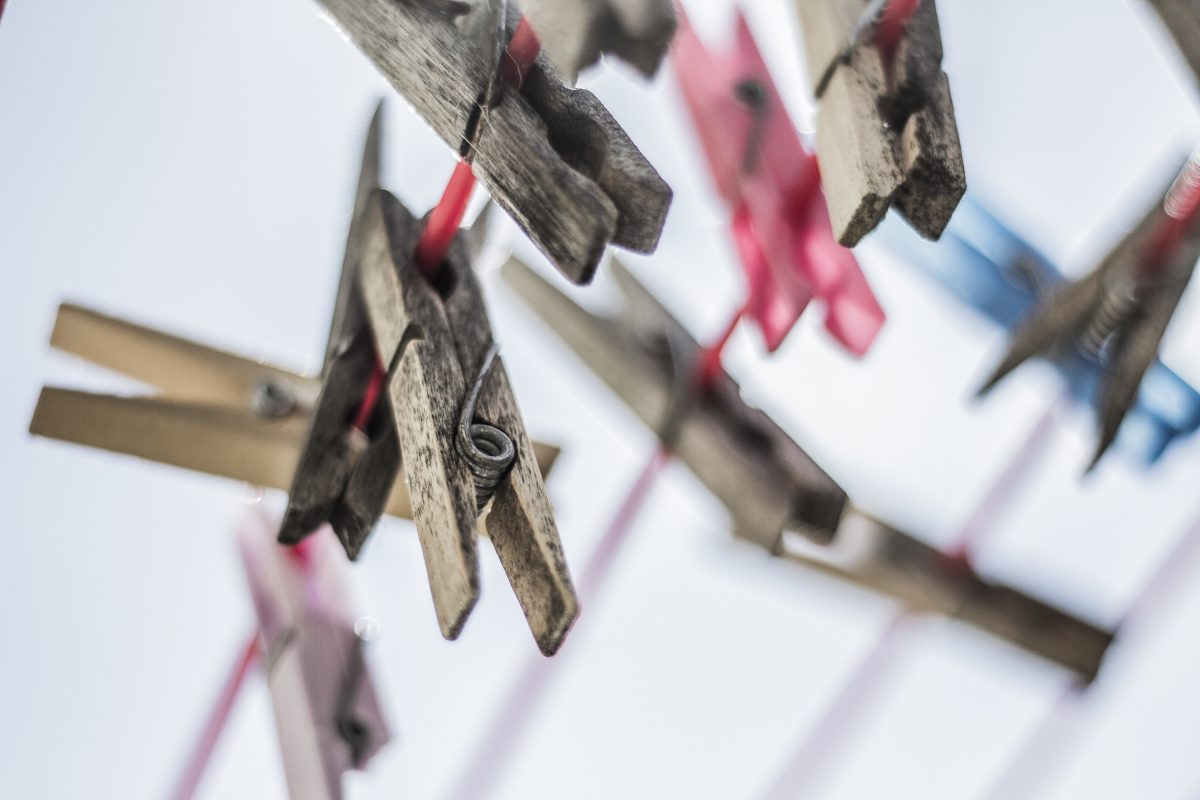
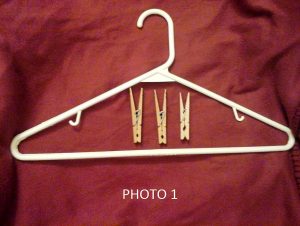
All you need are clothes hangers, clothespins, and a marker or pen (not pictured).

All you need are clothes hangers, clothespins, and a marker or pen (not pictured).

Whether you are new to sewing and quilting or just love to follow commercial patterns, you quickly find out that once you cut out your pattern pieces, they are EVERYWHERE. Along your pattern cutting journey, you may get a little lost, especially trying to keep track of “which piece goes where” and “what label is this piece?” After all your cutting is done and it is time to reach for your cut pattern pieces to begin sewing or quilting, you find you find yourself spending even more time figuring out which one is “A, B, C” or “1, 2, 3”. Here is a handy solution to help you organize your fabric pattern pieces with items you probably already have at home.

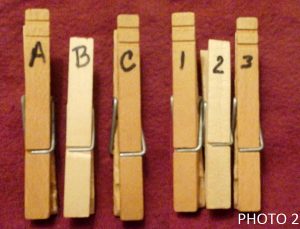
First, use a marker or pen to label the clothespins based on the labels found on the pattern pieces or the pattern guide.

First, use a marker or pen to label the clothespins based on the labels found on the pattern pieces or the pattern guide.

All you need are clothes hangers, clothespins, and a marker or pen (not pictured). First, use a marker or pen to label the clothespins based on the labels found on the pattern pieces or the pattern guide. Using a permanent marker may make it easier to write on the clothespin, especially if it is made out of plastic. When choosing the marker and pen, make sure that you choose an ink that will be very easy and quick to see on the clothespin. (The goal is to make find your pattern pieces easier.)

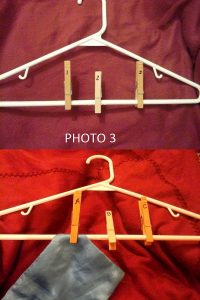
Second, once you have labeled the clothespins, clip them on the hanger. To make finding the pins easier, place the labeled clothespin in alphabetical and numerical order. Continue clipping the pins onto the hanger until you have all your pins in a row. If you run out of space, use additional hangers until you have all of our labeled clothespins on a hanger.

Once you have labeled the clothespins, clip them on the hanger. Finally, attach the cut fabric pieces to their corresponding labeled clothespin by clipping the fabric to the hanger.

Once you have labeled the clothespins, clip them on the hanger. Finally, attach the cut fabric pieces to their corresponding labeled clothespin by clipping the fabric to the hanger.

Finally, attach the cut fabric pieces to their corresponding labeled clothespin by clipping the fabric to the hanger. For quilting patterns, there may be many pieces that same labels (for example, a repeating quilting pattern). In those cases, clip several pieces with the same label on the same pin. If there are a large amount of pieces with the same label and the clothespin get too bulky, create several clothespins with the same label. Organize the clothespins with identical labels next to each other for convenient and quick access.

Now you can hang the hanger on a door handle, a rod, or a rack. Place your fabric pattern hanger in a location this close to your project a quick reach to start your sewing and quilting. This idea not only helps to organize your pattern pieces, but it also helps to organize your sewing process. It can be such a distraction to have pattern pieces scattered all over your sewing and quilting workspace. A great sewing and quilting project takes focus and time. Organization around you in the workshop help you focus on project and saves you the time of having to search for your pattern pieces and figure out which piece it is.

The beauty of sewing and quilting is its creativity, attention to detail, and precision. Let this handy solution give you the freedom to put all of your time and energy into those things. So check out your closets or laundry rooms for the clothespins and hangers that will save you sewing and quilting time. But, just in case you want to go a purchase new one just for your sewing and quilting space, have fun with colors, prints, textiles, and more. From hardware stores to houseware stores, the possibilities are endless. Spruce up your creative environment with fashionable hangers and fancy clothespins to create a simple gadget that will help to make your sewing and quilting experience less frustrating and more exciting.

Country Kitchen Mug Rug

DIY – Country Kitchen Mug Rug

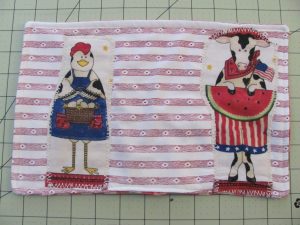
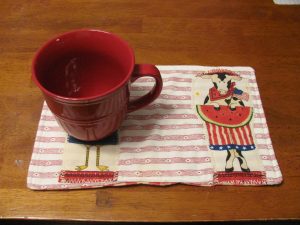
Country Kitchen Mug Rug.

Country Kitchen Mug Rug.

Mug rugs are extremely popular in the sewing world. They are usually fairly easy to sew and are generally easy to customize. Mug rugs make quick, easy, fabulous personalized gifts. I made a bunch of them personalized to the tastes and colors of each individual for friends and family. It wasn’t long before the requests for a second for work or for a child or friend of theirs came in. I absolutely love designing these. They don’t take long to make and I get to play with all sorts of fabric designs. They’re a wonderful project to add personality and flare to.

“Okay,” you say, “this sounds wonderful, fabulous, awesome. But what in the world is a mug rug?”

What is a Mug Rug? A Mug Rug is a cross between a full size place mat and a coaster. Smaller than a place mat, there is usually just enough room for a coffee or tea mug and a snack. They work perfectly for that breakfast coffee or an afternoon snack of tea and cookies. Typically the front side is the focus of designs and decals. The back is usually just one piece of decent fabric. The back fabric can match the colors or design on the front or can be completely different. If spills occur, just flip it over and finish your cup before tossing it in the dirty laundry.

Country Kitchen Mug Rug

Level: Beginner

Time to Complete: In an Hour

Sewn by: Machine-1/4 in. straight stitch except where indicated

**Tip** Wash all new materials prior to use to avoid shrinkage when you wash it later on.

**Tip** Iron cut pieces before sewing and in between each step. This helps in the sewing process and the end results will look more professional.

Country Kitchen Mug Rug.

Country Kitchen Mug Rug.

Materials:

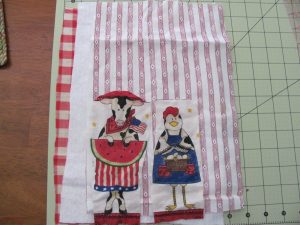
  • 2 – 12″ L x 8″ W  Front/Back
  • 1 – 12″ L x 8″ W Cotton Batting
  • 2 –   7″ L x 2 1/2″ W Farm Animals

**Tip** I used material in my massive fabric collection. I always get new ideas every time I dig into my stash. It’s a great way to dream up new projects.

  1. Cut out fabric.
  2. Place front piece and batting together, right sides out.
  3. Pin farm animals to front and batting pieces and sew with 1/8 in. seam allowance. Any stitch is fine. I like to get creative and use the more decorative stitches when attaching smaller pieces to the overall product. I used a basic zig zag stitch.

    Panel of common stitches.

    Panel of common stitches.

  4. **Tip** I’ve been experimenting with decorative stitches I’ve never used. My Singer Advance has tons of decorative stitches. The owner’s manual describes the use of each stitch. I’ve also gone online to research stitches and to see how and for what projects others used them. Pay attention to the manual for any adjustments to stitch length or tension. Some stitches require adjustment changes. And, don’t forget to change settings back to auto when moving back to a straight stitch.  
  5. I used a basic zig zag stitch.
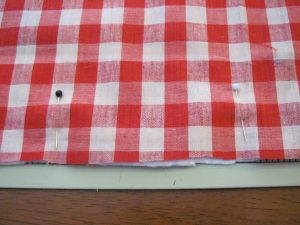
  6. Place front and back right sides together. Make sure to mark a 3 in. to 4 in. opening to pull the fabric right side out. I place pins vertical instead of horizontal pins at the opening so I know where to stop.

    Mark area to be left open.

    Mark area to be left open.

  7.  At this stage the cotton batting should be on the outside. We need it inside when we pull the fabric right side out.
  8. Sew with 1/4 in. seam allowance, leaving the open space.
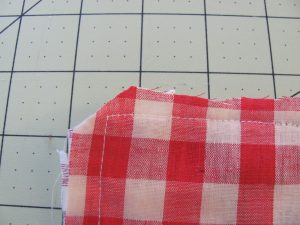
  9. Cut corners. Turn fabric right side out. Shape mug rug and push out       corners.
  10. ** Tip** Cutting a small amount off the corners before turning material right side out allows for better-shaped corners when turned right side out. I use a pencil to shape the corners.

    Cut corners close to stitching.

    Cut corners close to stitching.

  11. Iron. Ironing at this stage is important to flatten material and inside seams before top stitching.
  12. Top stitch with 1/8 in. allowance around entire front side to give it a finished look as well as hold down your seams on the inside. Also make sure to stitch over the opening used to pull the fabric right side out. Iron.
  13. Viola! Finished!

Time to celebrate. Take a well-deserved break, make some coffee or tea, sit back and ENJOY!

Coffee break!

Coffee break!

I hope you enjoyed this project. If you have any questions or comments, please share! Any ideas, shortcuts, or other contributions are welcome.

I would love receiving picture posts showcasing your Country Kitchen Mug Rug creations 🙂

You are more than welcome to suggest project ideas. What would you like to see and learn? Let’s journey together!

Dashing Dish Mat

DIY – Dashing Dish Mat

Dishes everywhere! I’ve been learning how to cook from scratch. I also made the wonderful journey into the world of baking bread. Yay, so much fun! Boo, so many dishes that must be hand-washed. Oh no, can’t just throw them in the dishwasher!  My beloved husband’s coffee pot may only be moved upon threat of death, so I created a dish mat to fit our small, unique space.

Viola! The Dashing Dish Mat!

Before:

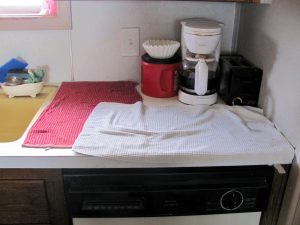
Impossible dish counter space.

Impossible dish counter space.

After:

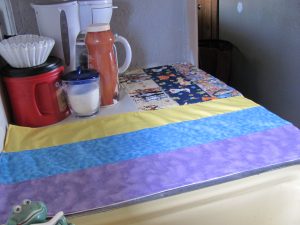
Beautiful organization, bright space.

Beautiful organization, bright space.

Level: Beginner

Time to Complete: In an hour

Sewn By Machine: 1/4 in. straight stitch except where indicated

**Tip: Wash all new materials prior to use to avoid shrinkage when you wash it later on.

**Tip: Iron cut pieces before sewing and in between each step. This helps in the sewing process and the end results will look more professional.

Materials.

Materials.

Materials:

1 – 26 1/2″ L x 14 1/2″ W     Terry Cloth long part of L- for back side

1 – 13″ L x 17″ W                 Terry Cloth short part of L- for back side

3 – 27″ L x  5″ W                  Colorful fabric strips

3 – 5″ L x 17″ W                   Colorful fabric strips

  1. Measure the area where the dish mat will be. My dish mat will be L-shaped so I had to take measurements for each side. Final measurements – For lengthwise section, 26 1/2″ L x 14 1/2″ W. For L piece, 13″ L x 17″ W. I always use measuring tape instead of a ruler when measuring spaces. Measuring tape is flexible and much longer than most rulers. I add an 1/2″ to 1″ in. depending on the project to account for the material that will be used for seams. Otherwise the end project will be shorter than I want.
  2. Cut the terry cloth for the back side. Cut fabric strips.
  3. Sew two pieces of terry cloth together, right side together 1/4″ with regular straight stitch.
    • **Tip: Make sure you have the smaller L portion of the terry cloth on the correct side. This can be tricky. When you match right side together with terry cloth and fabric sides, make sure they are both on the correct side. I had to rip stitches and sew the terry cloth on the other side. I use a seam ripper with a safety ball so I cut only what I want and don’t end up ripping other areas of the fabric. 
    • **Tip: Don’t let mistakes discourage you. I make mistakes all the time, as is obvious with my terry cloth L error. Rip stitches, go back a step, start from scratch. Sewing is an adventure, and sometimes those mistakes turn into great ideas!

      Example of strip stitching.

      Example of strip stitching.

  4. Sew the vertical strips together, right sides together. Sew the horizontal strips together, right sides together. Then sew the vertical strips and horizontal strips together, on the right side.
  5. Sew the terry cloth back and the striped front together right sides together. Leave one end open to pull the fabric through.

    Outside pieces facing together.

    Outside pieces facing together.

  6. Cut off the corners before pulling the fabric through.
  7. Pull the fabric through. Iron.
  8. Top stitch all the seams for the strips. This adds a professional look as well as making sure the seams don’t cause problems later. Iron.
  9. Top stitch all around the outside. Make sure to sew the side that was left open to pull the fabric through. Iron.
    Top stitching seams.

    Top stitching seams.

    • **Tip: A creative use of thread colors can really make a project pop. Top stitching any of the seams in different colors or in a color that would really stand out against the fabric can be that “extra touch” that makes everyone say “Wow, you made that? Could you make one for me?”
    • Place on your kitchen counter and enjoy washing dishes!

I hope you enjoyed this project. If you have any questions or comments, please share! Any ideas, shortcuts, or other contributions are welcome.

I would love receiving picture posts from you showcasing your dish mat creations 🙂

Oui, Oui – A Sheer Evening Bolero With French Seams

Oui, Oui – A Sheer Evening Bolero With French Seams

When the weather gets warmer, weddings and graduation party announcements arrive. This means strapless dresses, tanks, low necklines and open backs that get chilly in air conditioning and cool nights. An evening bolero or cropped jacket sewn with sheer fabric is a terrific solution: Small and light, you can fold it into your purse when the dance floor calls and pull it out again for a walk in the moonlight. Plus you can brag about your sewing skills to anyone who compliments your look.

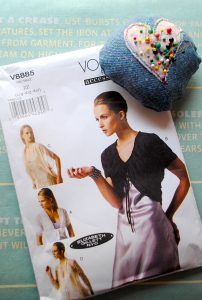
What could be more evening elegant than a bolero by Vogue?

What could be more evening elegant than a bolero by Vogue?

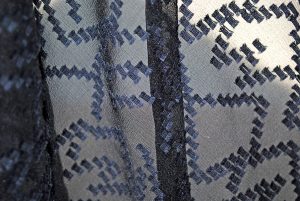
Lace, chiffon, silk voile, and layered tulle are good choices for an evening jacket, but working with delicate fabric often requires French seaming, a couture technique that hides ragged edges and stray threads that would otherwise show through and destroy the elegant effect. The pattern I chose for my bolero, Vogue 8885/View C, required only one French seam (and only one big piece to cut), so I dared give it a try. In my sewing stash I found a few yards of black chiffon from Mood Fabrics. I’d fallen in love with its zigzagging details on a January evening when I’d been strolling their aisles. In retrospect, black wasn’t a good color choice for a first French seam attempt. A light color would have been easier to see and sew precisely.

After cutting the pattern piece – a gigantic parallelogram – with a one-half inch seam allowance and transferring marks with white tracing paper, I was ready to attempt my début French seam. Here’s how it works:

  1. The first step in sewing a French seam is to put the wrong sides of the fabric together. You must disregard the worry you’re sewing on the incorrect side. You are sewing on the incorrect side. Sew just one-quarter inch from the cutting line, then trim close to stitching.

    French seams hide ragged edges and stray threads.

    French seams hide ragged edges and stray threads.

  2. With low heat, press the seam to one side. Then flip to the wrong side. You will see the “right” side of the seam on the wrong side. This is normal, so don’t panic.
  3. Fold the fabric along the seam and stitch again at one-half inch. This hides the seam inside another seam. The new seam is on the wrong side as it should be. Press the French seam to one side. That’s all there is to it!
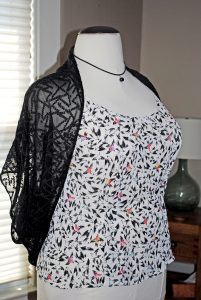
A sheer black bolero compliments a camisole.

A sheer black bolero compliments a camisole.

With the French seam complete, I had to finish other aspects of the bolero such as stitching a narrow hem along the edges. For this I used a rolled hem foot that came with my Singer Quantum Stylist. Rolling the hem is fun once you get the hang of it and the results are astonishingly professional. If you don’t have a rolled hem foot, you can buy one at sewing shops or online at Sewingmachinesplus.com. I also had to stitch along the back of the bolero and gather a section by pulling along the bobbin thread. The chiffon was uncooperative – I should have used a longer stitch length to make it easier. As a last step, I joined the center back section together to create “sleeves.” Doing this caused the French seam to present itself in a diagonal direction through the back, which looks pretty cool.

As the final step, I tried it on! The loose fit looks a little better on my dress form (her name is Aretha) than it does on me, so here’s Aretha:

I’m happy with the bolero, but I’m curious about some of the other views included with Vogue 8885. It looks like a few yards of lace and more French seams are in my future. Here’s to Paris . . .

DIY Tutorial - Striped Tote

DIY Tutorial – Striped Tote

Stacey’s Stitches

DIY - The Striped Tote

DIY – The Striped Tote

Level: Beginner
Time to Complete: In A Weekend
Machine: Singer Advance
Sewn By Machine – 1/4 in. straight stitch

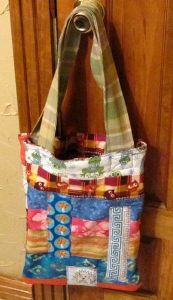
I’ve suddenly found myself traipsing to multiple appointments on a regular basis. After dropping an important file in the middle of a parking lot on a windy day, I decided I needed one simple tote for carrying any and everything. Thus the Striped Tote was born 🙂

Let your imagination breathe personality into every stitch!

Materials:

  • 2 — 19 in. x 15 in. Inside fabric lining
  • 2 — 19 in. x 15 in. Cotton Batting
  • 14 — 15 in. x 4 in. Misc. horizontal fabric strips (amount is flexible depending on size and position of strips)
  • 4 — 3 in. x 6 in. Vertical fabric strips
  • 2 — 4in. x 30 in. Handles, preferably strong, durable fabric
  • 2 — Accent pieces, any size or shape

    Hi all! I'm Stacey Martinez :)

    Hi all! I’m Stacey Martinez 🙂 I love to design fun, imaginative custom items for my active, crazy family. Bright colors and beautiful fabrics sing “Stacey, Stitch Me!”

IMPORTANT:
**Wash all fabric prior to sewing to avoid shrinkage of the finished product.
**Ironing recommended before sewing and after each step. Makes fabric easier to sew and adds a professional look to the end product.

  1. Measure and cut all fabric and batting. I used Warm White batting but thin fusible works just as well.
  2. Pin and sew (1/4 in. with regular straight stitch) inside lining and batting insides together. Side shouldn’t matter for batting but make sure lining is facing inside. Leave a gap in the top for pulling fabric right side out. Repeat for other side of bag as well. Pull fabric right side out for both sides. Leave top holes open, they will be stitched later.
    • **Tip** Cut off the corners before turning right side out. This makes the corners easier to form.
  3. Pin and sew at 1/4″ all fabric strips together for each side of the bag. Iron all seams.
  4. Pin and sew with the front side (strip side) and the inside lining together for both sides of the bag. Make sure front sides are right side together. Leave an opening on the top of both sides to pull the material through. Leave top holes open, they will be stitched later.
  5. Pull the fabric out to right side out on both sides. Iron.
  6. Fold and sew 1/8 in. around four vertical strips and two accent pieces with regular straight stitch.
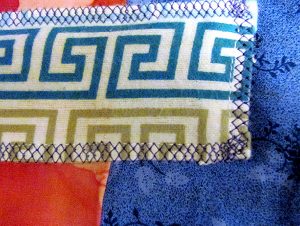
  7. Pin two vertical strips and one accent piece on each side of bag. Sew with any fancy stitch of choice, with any thread color of choice. I used the Honeycomb stitch since it looks intricate and can be used for edging. I used purple as my accent stitch because I wanted the stitching to stand out, not blend in.
    Sew accent stripes and other pieces after all side layers have been sewn together and pulled right side out.

    Sew accent stripes and other pieces after all side layers have been sewn together and pulled right side out.

    • **Tip** Sewing accent stripes and other pieces after all side layers have been sewn together and pulled right side out accomplishes one important feature: This ensures that all 3 layers are stitched together more thoroughly and prevent material slippage during constant use or after a few washes. This simple step helps the tote keep shape and strength much longer.
  8. Sew the top edge of each bag side with the same accent stitch and thread color.
  9. Pin the two sides outside facing together. Iron. The material will be much thicker with so many layers coming together. Ironing helps flatten down all the layers for easier sewing. I also switched to a 100/16 denim needle to handle the extra thickness.
  10. Sew three sides together, leaving the open. Pull right side out.
  11. Fold tote handles in half, sew right sides together (using straight stitch). Sew only one end. Leave the other end open. Pull the handles right side out using the open end.
  12. Iron handles and sew around all four sides, sewing the open end closed in the process.

    Attach handles to tote, using this X design.

    Attach handles to tote, using this X design.

  13. Attach handles to tote, using this X design. The X design creates a stronger stitch often used so handles on totes and purses easily handle more weight.

Throw what you need in your new tote and take off!