Raggedy Coasters

Raggedy Coasters

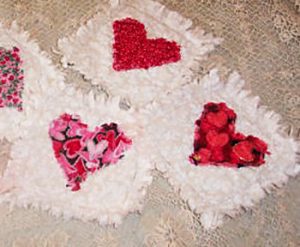
Valentine’s Day is around the corner, and as you might know from previous posts, I’m a holiday fan! In fact, I spent time researching Valentine’s Day projects for a post, and I chose one specific sewing craft that I thought was a cute idea. That concept is a raggedy coaster with a heart in the middle, which seemed simple and pretty. It was also useful since I have a Valentine’s Day party coming up with my nieces and nephew. I have plenty of leftover fabric from my latest quilt, so using it for homemade décor for the party sounded like a good notion!

That concept is a raggedy coaster with a heart in the middle, which seemed simple & pretty.

That concept is a raggedy coaster with a heart in the middle, which seemed simple & pretty.

Unfortunately though, one detail of the project did get derailed because I decided I didn’t like the Cupid cutout that I had planned to use in the center of my coaster. It looked amateur and out of place, so I made the executive decision not to use it. That meant that the coaster wasn’t very Valentine’s Day-ish since the top portion is a general floral pattern, but I was still interested to see how things would play out. And, as I’d been wanting to try a rag quilt for a while, this was a good time to test the waters. If I didn’t like the process of making one rag coaster, an entire rag quilt might not be something I wanted to dive into!

Stock up

The needed supplies are fairly minimal. All you really need are the bare essentials of a sewing project, like a needle, thread, fabric, pins, and scissors. Once you have those, you’re ready to start work on your coaster!

First, pick out the material you’ll use. Ideally, you would have batting in between the top and bottom layers because this raggedy craft can be, in truth, a miniature quilt sandwich. For me though, I didn’t have any batting available, so I decided to layer four pieces of fabric together. That way, there’s more thickness than what I would’ve gotten from just three pieces of thin fabric.

Let’s get started

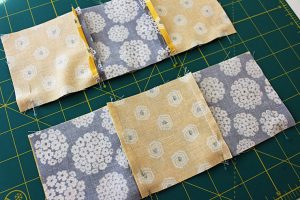
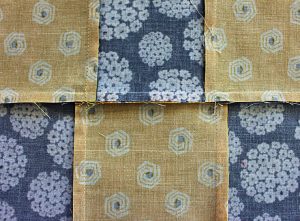
Once you choose your material, make sure the pieces are cut into similar-sized bits that are more or less quadrilaterals. This is actually one benefit of a rag coaster or quilt. You’ll be shredding the ends anyway, so it doesn’t matter if they’re the exact same length at every point. Just make sure they’re close enough that, with the raggedy edges, they’ll look the same!

You’ll need to allow extra space beyond where you sew the pieces together for your ragged edges.

You’ll need to allow extra space beyond where you sew the pieces together for your ragged edges.

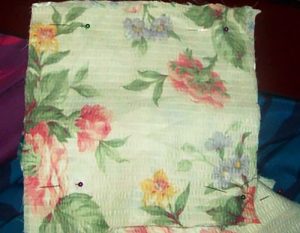
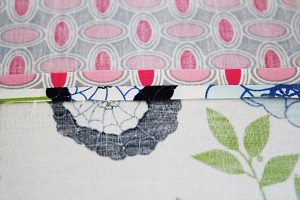
From there, you layer those fabric/batting pieces in the correct order and pin them together — but not necessarily right at the ends of the material. You’ll need to allow extra space beyond where you sew the pieces together for your ragged edges. Also, if you find after pinning that you have a bit of extra material that’s going to really stick out once your coaster has been shredded, feel free to trim off those ends.

Feel free to trim off those ends.

Feel free to trim off those ends.

Time to sew

Then you can start sewing! Remember to try for a box shape within your block of fabric, and to keep that space away from the edges. After you’ve sewn all the way around to finish that box shape, cut off the excess thread and get ready to do some shredding!
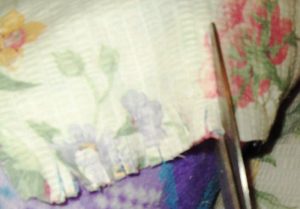
Be careful to give a decent number of cuts as you go around the fabric because the more you cut, the more thorough your raggedy quality could be!

Be careful to give a decent number of cuts as you go around the fabric because the more you cut, the more thorough your raggedy quality could be!

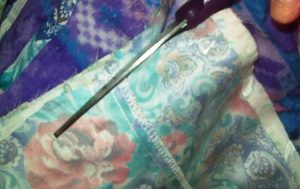
Now, shredding happens to be a bit more time consuming than I expected, but it’s a simple process! All you do is take your scissors and cut from the edges of the fabric inward, but never so far that you cut your stitches since that can seriously damage your final product! Also, be careful to give a decent number of cuts as you go around the fabric because the more you cut, the more thorough your raggedy quality could be!

Common mistake

Another tip on shredding is to make sure that you’re cutting through all layers of your coaster or quilt. I noticed a time or two that I’d left the bottom layer uncut for some of my shreds, so missing a space here or there is an easy thing to do! For a thorough job, check your results as you go along!

Once the shreds are finished, you’re ready to throw your product in the washing machine! Believe it or not, the washing and drying process makes those simple cuts attain that raggedy appearance!

What I learned from this experience is that making a rag quilt is going to be more complex than I expected. I’ll need to cut fabric, layer it, sew it, then shred it, and shredding is pretty tedious! I honestly wasn’t mentally prepared for what awaited me, and I think I have a better idea now. Although it’s different than the quilts/blankets I’ve made before, I’m still interested in making one. So, basically, the hunt for a Valentine’s Day project worked out differently than I thought — but still well!

Do My Seams Have to Be Perfect?

I hear this question a lot from my sewing students. Beginning sewers are nervous about their ability to sew along the line without small bobbles. They’re worried that any imperfections will ruin their sewing project. I’m going to tell you the same thing I tell them.

Do My Seams Have to Be Perfect?

Do My Seams Have to Be Perfect?

Do your seams have to be perfect? No. Ninety degree jogs in and out probably won’t look right, but a slight wavering here and there usually isn’t a problem. If you’re making something that’s skin-tight kind of fitted, it matters a lot more than if you’re making something loose fitting or flowy.

Since the first project I have my sewing students make is a bean bag or pillow, I tell them to play around with it. PURPOSELY mess up a seam and see how it looks on the finished project. I suggest you try it too. You don’t have to make a beanbag, use a piece of scrap material that’s the same fabric as you’ll be using for your finished project. Pull the seam really tight – you’ll be able to see exactly how any imperfections in the seam line will appear. Most of the time, it’s not noticeable.

A few exceptions: skin tight clothing, spandex or other elastic materials, seams sewn in a contrasting color that are seen on the outside of your completed work. In each of these cases, the seams are quite noticeable. Take your time with them.

Don’t forget, if you sew a seam and discover you’re not happy with it, you can always rip it out. I know it’s not ideal, but one of the things I love about sewing is there’s nothing that’s not correctable. For me, it takes away some of the stress.

If fear of not having perfect seams has been holding you back from starting a sewing project, or learning to sew at all, set that fear aside and give it a try! You’ll be glad you did.
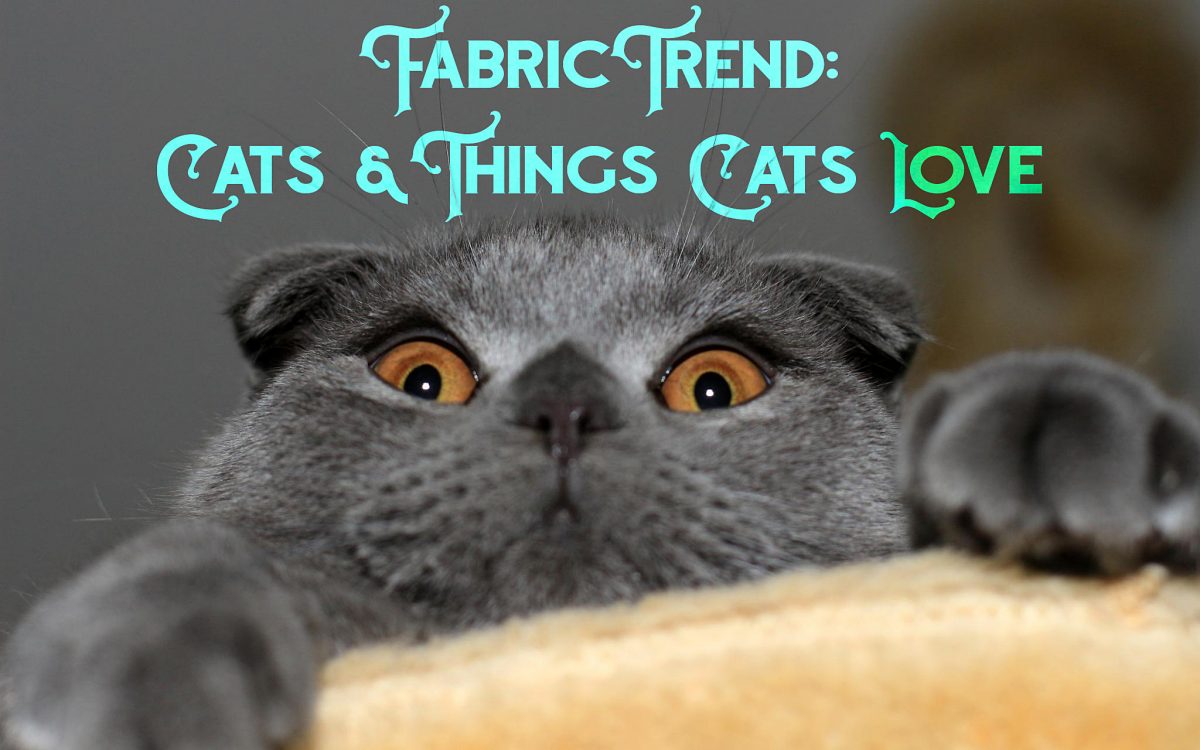
Fabric Trend: Cats and Things Cats Love

Fabric Trend: Cats and Things Cats Love

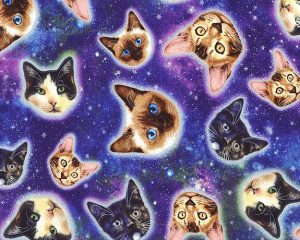
Galaxy Cat fabric by Timeless Treasures

Galaxy Cat fabric by Timeless Treasures

Last October, I highlighted three lines of cat fabric for you including From Porto with Love, Cat Lady, and Meow or Never.

I should be honest however, and not call cat fabric a trend because our love for cats will never go away. To prove this, here are more cat fabric lines for you, including fabrics with things cats love.

Maker Maker by Andover Fabrics

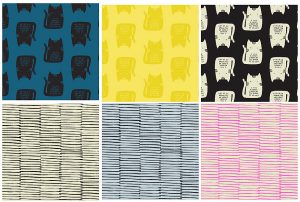
From Andover Fabrics, you’ll find cats in blue, black and yellow. Along with their coordinating cat scratches.

From Andover Fabrics, you’ll find cats in blue, black and yellow.

From Andover Fabrics, you’ll find cats in blue, black and yellow.

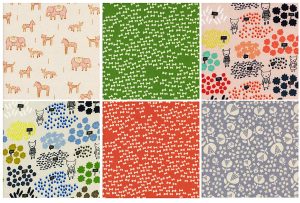
Flower Shop by Alexia Marcelle Abegg

Inspired by walks through Mexico’s outdoor flower markets, Flower Shop brings you cats amongst flowers, bow ties, thistle, and cats with foxes, elephants & donkeys.

Flower Shop brings you cats amongst flowers, bow ties, thistle, and cats with foxes, elephants & donkeys.

Flower Shop brings you cats amongst flowers, bow ties, thistle, and cats with foxes, elephants & donkeys.

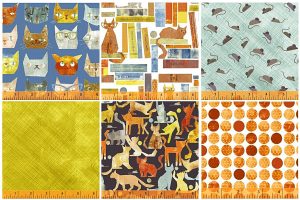
Smarty Cats by Maria Carluccio

Maria Carluccio’s Smarty Cats fabric line is for the true lover of traditional fabrics and traditional cats. You’ve got cats on books, playful cats, smarty cats, and mice, string and balls.

Maria Carluccio’s Smarty Cats fabric line is for the true lover of traditional fabrics & traditional cats.

Maria Carluccio’s Smarty Cats fabric line is for the true lover of traditional fabrics & traditional cats.

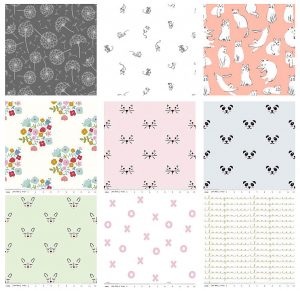
Whisper by Dear Stella and Riley Blake’s Double Gauze

These two fabric lines seem to coordinate seamlessly. Add a dash of Dear Stella with Riley Blake and you have the quilting cottons of Dear Stella on the top row in cats, mice, and dandelions, and the double gauze dreaminess of Riley Blake, featuring delicate cat, deer, and panda faces, with tiny Xs and Os and I Love You’s.

These two fabric lines seem to coordinate seamlessly.

These two fabric lines seem to coordinate seamlessly.

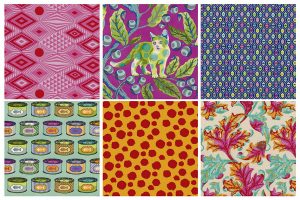
Tabby Road by Tula Pink

Tula Pink takes their coolness to the next level by combining cats + The Beatles. This psychedelic fabric line will arrive in most stores by March and perfectly blends your feline friends with the some of the trippiest nods to Abbey Road. Fabric names include: Tangerine, Strawberry Fields, Fur ball, Lucy, Cat Snacks, Blue Bird and Disco Kitty.

Tula Pink takes their coolness to the next level by combining cats + The Beatles.

Tula Pink takes their coolness to the next level by combining cats + The Beatles.

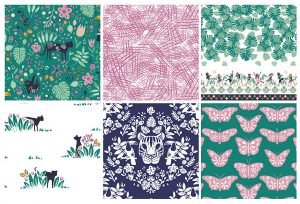
Pura Vida by Hawthorne Threads

Hawthorne Threads Pura Vida line is reminiscent of a Central American jungle and features wild cats and their surroundings.

Hawthorne Threads Pura Vida line is reminiscent of a Central American jungle & features wild cats.

Hawthorne Threads Pura Vida line is reminiscent of a Central American jungle & features wild cats.

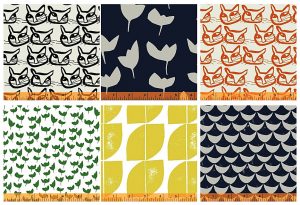
Hemma by Lotta Jansdotter

For the lovers of all things Scandinavian, Lotta Jansdotter fabric line, Hemma, combines cat faces, tulips, lemons, half-moons, and clean & classic colors to give you a modern twist on cat fabric.

For the lovers of all things Scandinavian, Lotta Jansdotter fabric line, Hemma.

For the lovers of all things Scandinavian, Lotta Jansdotter fabric line, Hemma.

Do you have any cat fabric lines you love? Please share them with us in comments!

———————————————————————————–
Charlotte Kaufman is a writer and sewist in Mammoth Lakes, California. She specializes in marine and home interiors and continues to fall more and more in love with quilting. You can follow her at charlottekaufman.com.
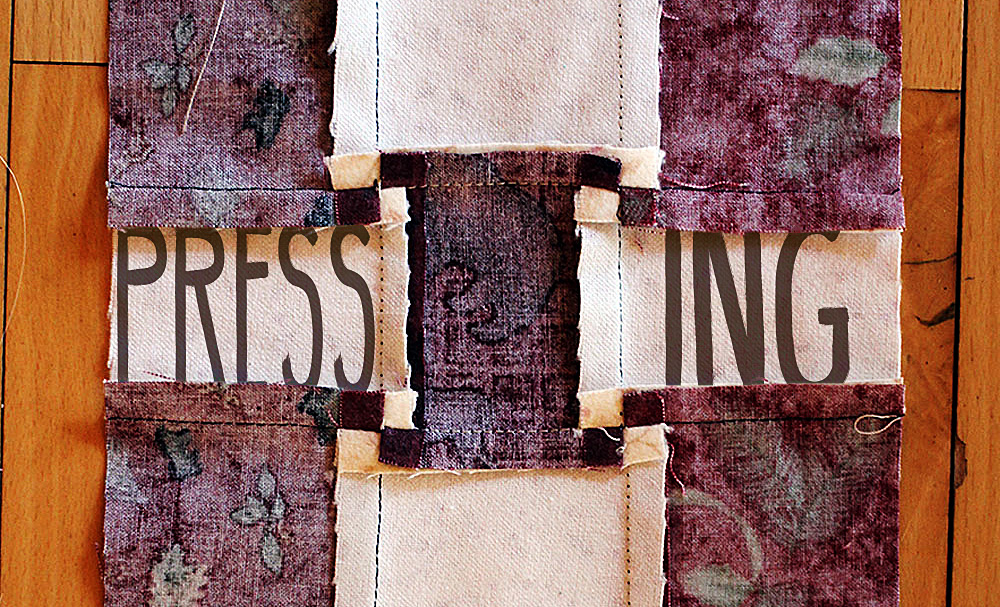
Pressing: Side or Open?

Pressing: Side or Open?

Once upon a time, I had an extended conversation (argument?) with a friend as we — as adults — threw all of our cards on the table in regard to the matter of who had it worse: Pluto or Goofy.

The point of referencing this conversation is that sometimes some of the smallest details can be points of major debate, and that idea is as true in the sewing world as it is for preferred cartoon characters. For instance, pressing your seams while sewing is a common thing, but there are two methods that are seemingly at odds among seam-pressers: side pressing and open pressing. It’s a small detail, but both sides have very real support! Don’t believe me? Do some Googling!

Some of the smallest details can be points of major debate.

Some of the smallest details can be points of major debate.

I’m not sure I personally lean too heavily in either direction, so let’s go through them and see if we can come up with a winning method! The competition will be based on a point-gained system, and it will include the understood sewing project of a quilt for reference. Sound good? Then let’s go!

Let us begin

How about we start with the to-the-side method?

How about we start with the to-the-side method?

How about we start with the to-the-side method? One advantage would be that it’s easier to push the material to a single side for ironing than to force the pieces apart and iron openly. That’s something that, to me, a general consideration of the matter would support. You don’t have to hold both pieces of fabric in separate places like you might with the open method, so one point for side pressing!

Another benefit would be that, as a certain source pointed out, open pressing would logically weaken your product. With that technique, you would have an easier time seeing your stitches after the pressing because there isn’t that barrier of fabric to snuggly nestle them. Stitches are more protected with material covering them, and with the effort you put into your quilt, simple things to keep it intact are good! So, two points for the to-the-side notion!

One nice aspect about pressing to the sides is once you start pinning it's much simpler than pinning fabric pressed in the open fashion.

One nice aspect about pressing to the sides is once you start pinning it’s much simpler than pinning fabric pressed in the open fashion.

One other aspect about pressing to the sides is that, should you need to pin things following the pressing, doing so is much simpler than if you attempt it once it’s been pressed in the open fashion. Since I’ve been known to take a straight pin to the finger anyway, this advantage seems very tempting! Side pressing 3, open pressing 0!

Let’s open up

The open method isn’t altogether a bad idea.

The open method isn’t altogether a bad idea.

But, then again, the open method isn’t altogether a bad idea. For one thing, you don’t have to concern yourself with what direction you’re pressing your material. There’s no need to go back and see how you pressed a nearby seam because you can just assume it was open, like the rest. The uniformity is already there without having to come up with a pattern. Point one for the open strategy, then!

Another detail worth mentioning about this open approach is that you might find that you have a less lumpy final product. Again, this is logical. If you press your material to the right, then on the right, you have both sides of the seam and the fabric it’s laying against. That situation makes for three layers of fabric on the right for every pressed seam (not including batting and backing) while the left side — the one you pressed away from — would only have one. And that’s not counting places where your seams would overlap with other seams. Now, of course, the open approach doesn’t make everything equal across the quilt as not every piece of overlying material would have a seam pressed behind it. Still, for the areas where those seams would be present, having two pieces of material on one side and two on the other would be a more balanced situation and could lead to a smoother quilt (though as one source pointed out, “smooth” might not be your goal). So, one more point for this method!

The open approach doesn’t make everything equal across the quilt as not every piece of overlying material would have a seam pressed behind it.

The open approach doesn’t make everything equal across the quilt as not every piece of overlying material would have a seam pressed behind it.

An additional benefit of open pressing is that it’s more convenient when dealing with different colors of fabric, particularly if you’re pairing a dark one with a light one. If you press them to the side, there’s the chance that you’ll end up seeing darker fabric through a lighter one if you don’t plan and choose the correct side to press to. If you’re pressing them openly though, each color could be behind its own pattern, potentially hiding your dark fabric behind the same type of dark fabric. Seeing as how noticing a different pattern through the top of your quilt might not be aesthetically pleasing, I think the open method gets one more point in this contest!

And the winner is…

That makes the score three-to-three. So, what’s the tiebreaker?

Preference! I can toss all kinds of facts and details at you, but in the end, your quilt is, in fact, yours! Work with what makes you feel the most comfortable for these aspects. For some people, habit might lead the way. For others, it might be a logical deduction of what seems best. In the end though, there’s not an across-the-board right or wrong answer to this dilemma. Either/or, sometimes this one and sometimes that one… Sewing is a world of opportunity, and this small factor is one of the many to choose from!

How to Make a Hidden Button Placket

How to Make a Hidden Button Placket

Last week, I waxed on about all the endearing qualities of my Industrial Juki straight stitch machine and I promised that, next, I’d write a little bit about my other favorite sewing machine, a vintage tan and white Singer 401K.

But then, this week at work, I spent a couple days making women’s button front cotton shirts for the character of Zapata on Blindspot. I’ve made her quite a few shirts over the course of this season. I created the pattern from her measurements and referencing how she liked the fit of a few off the rack shirts. She doesn’t fit into any brand without altering (she has a very small waist but is still curvy) so the costume designer and I decided we might as well make custom shirts for her.

So far it seems to be turning out quite well:

http://www.imdb.com/title/tt4474344/mediaviewer/rm2804286976

http://www.imdb.com/title/tt4474344/mediaviewer/rm3758241792

Shirt making

I am not, by any means, a master shirt-maker (those do exist like the man who wrote Shirtmaking, developing skills for fine sewing). His name is David Page Coffin and he is definitely a shirt-making master. His book is filled with many helpful tips and suggestions. I reference it now mainly for the sleeve placket instructions and pattern. For some reason, no matter how many times I make a shirt, I always need a little reminder as to which way to begin a proper sleeve placket attachment.

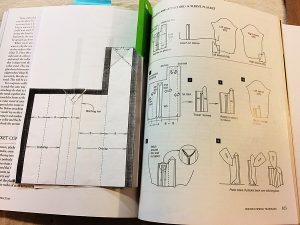
Sleeve placket instructions from David Page Coffin’s book.

Sleeve placket instructions from David Page Coffin’s book.

Never feel bad if you need to look something up, especially if it’s a technique you don’t do on a regular basis. There are always new things to learn (or remember).

Concealed buttonhole placket

Another element of shirt making that took me awhile to be able to do without looking up a reference picture was making a concealed buttonhole placket. I’ve finally got it etched in my brain though – at least I think so.

The first step is to decide how wide you want to finished placket to be. I use an inch (1″) for ladies’ shirts but some people do an inch and ¼ (1 ¼”) or an inch and ½ (1 ½”).

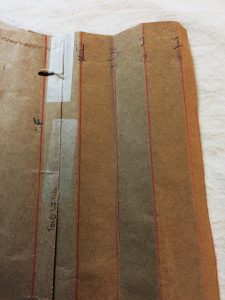
Next mark out your fold lines on your pattern or fabric. You’ll need an extra four to six inches past the center fold/finish line.

Fold lines marked a numbered on pattern piece.

Fold lines marked a numbered on pattern piece.

Starting out from the center fold line, measure out ½” and draw a parallel line. This is the seam allowance line. Many commercial patterns use 5/8″ as a standard seam allowance so if you’re adding a hidden placket to a store bought pattern, check to see what they’ve used and do the same.

Then draw three more lines, each 1″ apart. Finally, mark your cutting line ½” from the last line (or whatever seam allowance you’re using).

To help explain and keep track of your folds, number your lines starting with the outermost one: 1, 2, 3 and 4.

Press lines 1 and 2, wrong sides together. This is the part that will get the buttonholes. You can mark and do them now or, as I usually do, you can wait until you’ve got everything pressed and secured. I also press the 1/2″ outer seam allowance but do not leave it folded under – it’ll get caught inside the seam once you’re done.

Almost there

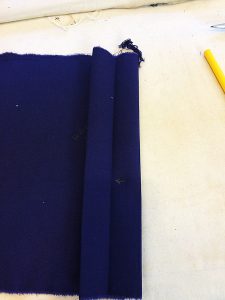
Fold along lines 1 and 2.

Fold along lines 1 and 2.

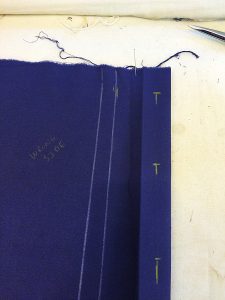
Next, accordion fold the remaining fabric. Fold along line 3, right sides together, then line 4, wrong sides together. Press.

Once you’ve done this, open the placket up so that its double wide with the seam allowance toward the front edge of the shirt. Topstitch along line 3 (which will be 1″ or however wide your placket is from the fold center fold line).

Open the placket up to topstitch.

Open the placket up to topstitch.

Once you’ve done your button holes, you’ll need to sew small hand tacks in between each hole to keep the placket from opening up (and essentially defeating its purpose of being hidden).

Voila!

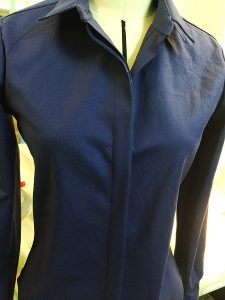
Shirt almost finished in dress form.

Shirt almost finished in dress form.

And next week, unless something more interesting comes up, I’ll continue on with my favorite sewing machine ruminations.

Different Types of Thread and When to Use Them

Different Types of Thread and When to Use Them

Have you ever gone to the fabric store and been overwhelmed looking at the vast assortment of thread for sale? If so, then fear not, for I will help to break down the mystery of thread and how to use it in all its various types.

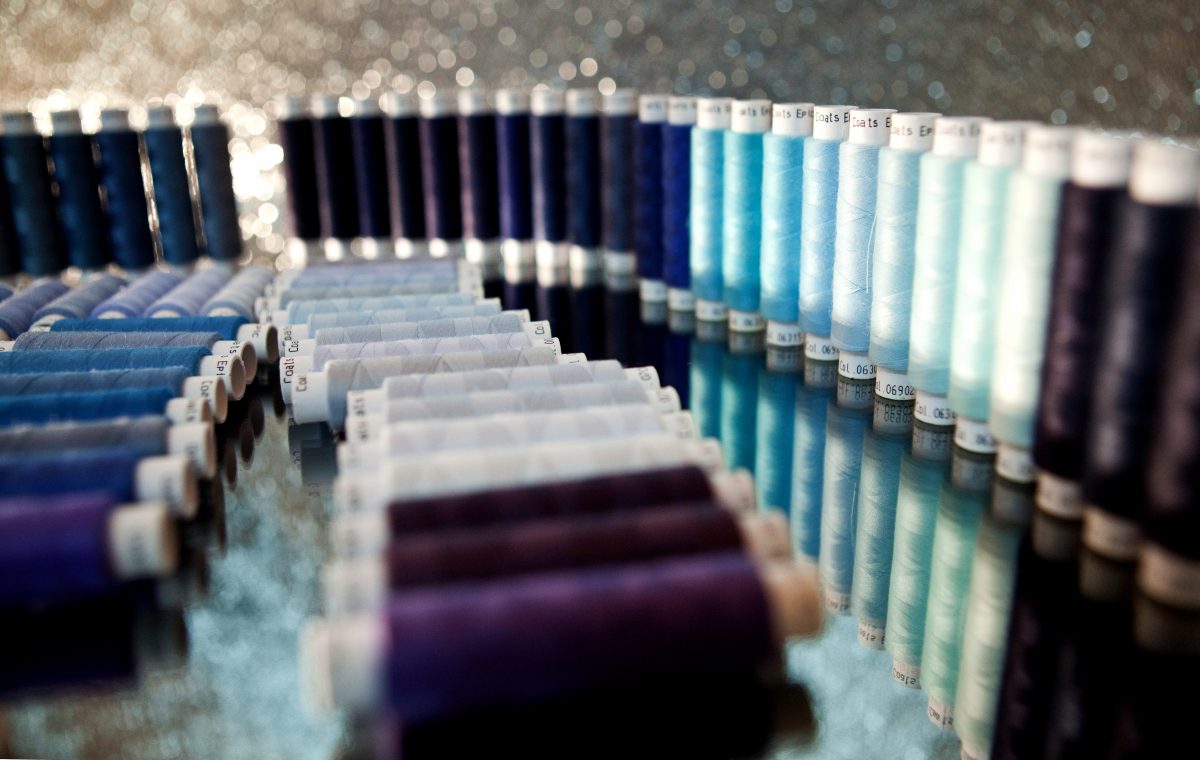
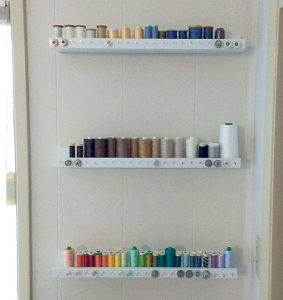
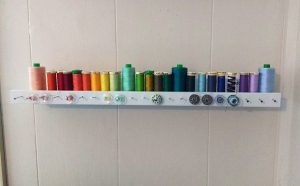
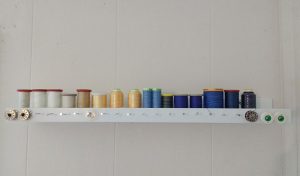
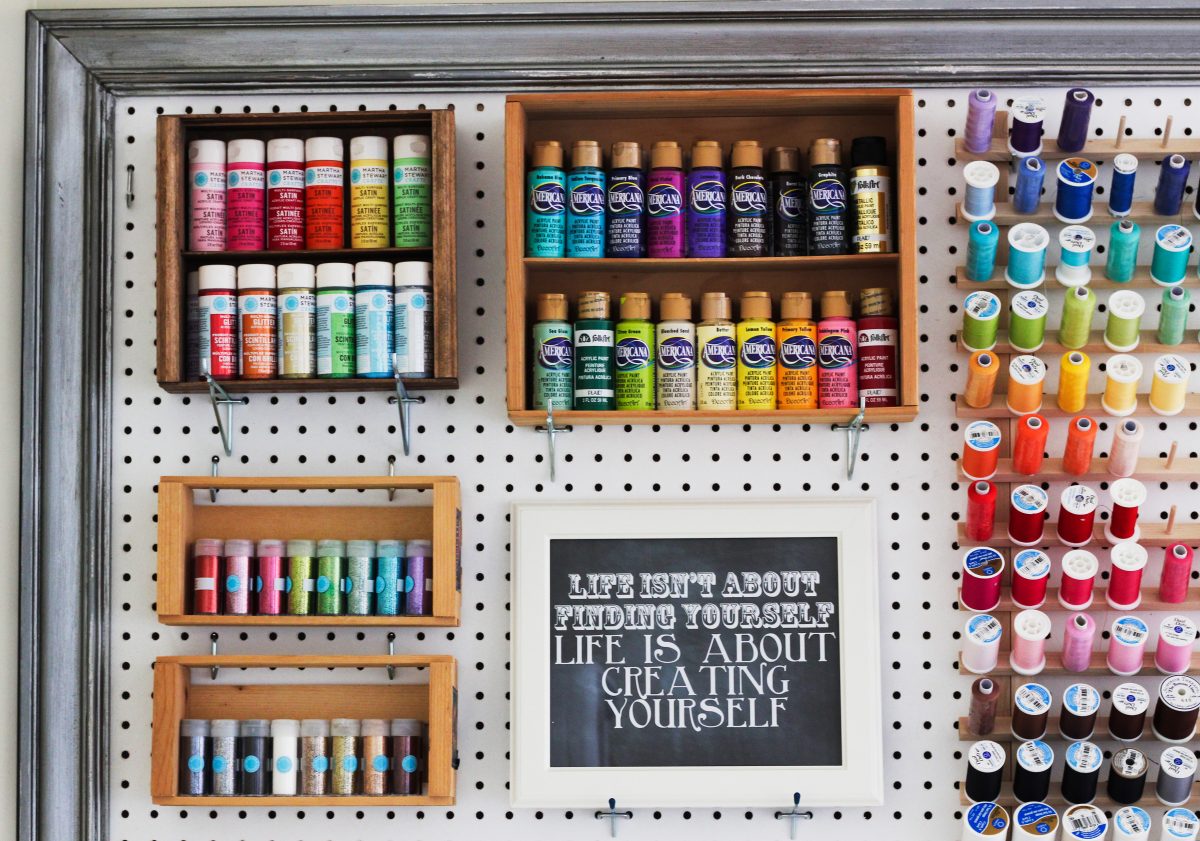
To start, consider where you are going to store your thread. I’m a highly visual person and I like to see what I have on hand. I also find looking at thread to sometimes motivate me or inspires me to begin on new projects. I created this thread display in my sewing room using Ikea picture frame shelves (Ikea Ribba) and I added small nails to hang my bobbins by the corresponding color of thread.

I added small nails to hang my bobbins by the corresponding color of thread.

I added small nails to hang my bobbins by the corresponding color of thread.

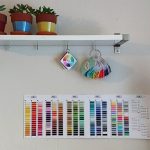
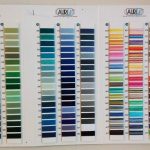
I live in a rural area, three hours from the nearest Joann Fabrics. Because of that I keep an Aurifil Thread Color Card so I can easily order the exact shade of thread I need. It also looks beautiful too, no?

Thread Weight

When choosing thread, consider the thread weight. A quick breakdown of Aurifil’s brand thread weights (and their many great brands of thread, including Guterman and Coats & Clark) looks like this:

12wt: Use it for sashiko & red work stitchery. This is the thickest thread in the Mako’ range.

28wt: It is strong enough to withstand the stress of hand quilting without needing to be glazed or waxed.

40wt: Favorite thread for machine quilting and all-purpose sewing. A little heavier to show off the quilting stitches.

50wt: Quilters love it for its piecing and quilting. A staple for every sewing studio.

80wt: This is the finest Egyptian cotton, for use by hand or machine. Your new ‘go to’ thread for applique and much more.

~ Thread descriptions from Hawthorne Threads

Buying at a fabric store is actually a little easier than sussing things out online because they divide thread into sections so you can quickly scan for ‘quilting’ or ‘embroidery’ or ‘heavy duty/jeans.’

I keep my standard, quilting cotton weight threads organized by ROYGBIV (red, orange, yellow, green, blue, indigo, violet).

I keep my standard, quilting cotton weight threads organized by ROYGBIV (red, orange, yellow, green, blue, indigo, violet).

ROYGBIV: red, orange, yellow, green, blue, indigo, violet.

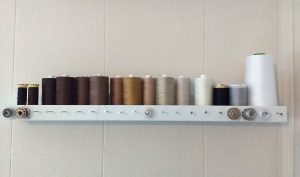
I also keep my neutrals and browns organized by gradient.

I keep my neutrals & browns organized by gradient.

I keep my neutrals & browns organized by gradient.

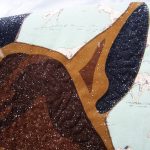
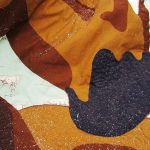
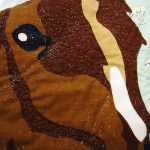
Buying a lot of shades of one color can greatly help when working on projects with a ton of variation in the same tone, like in this quilt I recently finished. I used five different shades of brown and black to finish the horse.


Utility/Novelty Threads

These are threads you reach for when you need to pull out the big guns or you are just doing something different. I use some of these heavy weight threads for upholstery, corduroy, vinyl, or very thick or unique fabrics.

I use some of these heavy weight threads for upholstery, corduroy, vinyl, or very thick or unique fabrics.

I use some of these heavy weight threads for upholstery, corduroy, vinyl, or very thick or unique fabrics.

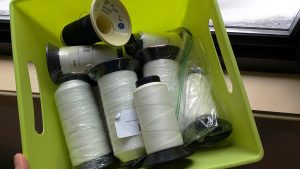
This is my tub of very heavy duty threads. I use them on marine projects and with my industrial sewing machine.

This is my tub of very heavy duty threads.

This is my tub of very heavy duty threads.

Variegated Thread

I saved these threads for last because they are my favorite. If you haven’t tried sewing with them yet, I encourage you to start today. The richness of their color variation is an absolute delight to the eye and often can take your projects to a whole other level.

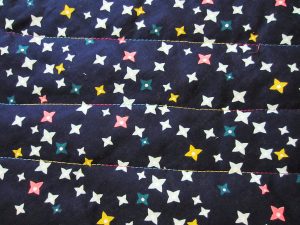
I used two spools of variegated thread on this quilt. The blue/rainbow you can see here.

The blue/rainbow you can see here.

The blue/rainbow you can see here.

And the gorgeous bright yellow here.

You can see the gorgeous bright yellow here.

You can see the gorgeous bright yellow here.

Of course, with different threads you will need different needles, but I’ll save the topic of needles sizes and shapes for another post. What are your favorite types of threads? Let us know in comments!

—————————–
Charlotte Kaufman is a writer and sewist in Mammoth Lakes, California. She specializes in marine and home interiors and continues to fall more and more in love with quilting. You can follow her at charlottekaufman.com.

Storing Your Fabric

As I wind down in the steps for making my quilt, I’m finding that I have fabric scraps left over from the endeavor that I really don’t want to toss. One of the problems though is that I have a very lacking fabric storage setup. In fact, it consists of stuffing fabric into a remarkably unprofessional Hello Kitty pail (Note: I don’t even like Hello Kitty). Once that happens, I put the pail into my closet. Since said closet kind of overflows at times, the method is even more lacking than it would otherwise be.

I want to keep this fabric, but I’d like to have a better strategy of doing so. That idea had me browsing some possibilities online, and some of the options I saw were pretty basic.

Simple Solutions

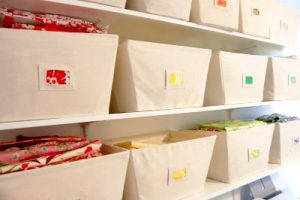
For instance, clear storage bins or canvas bins.

For instance, clear storage bins or canvas bins.

For instance, clear storage bins or canvas bins. While these are simple and efficient ideas for keeping my fabric in order, the truth of the matter is that they’re also, at the moment, things that would probably end up getting stashed away in my closet. As one of the qualms is that my fabric is stored in my closet, neither option fixes that detail.

At least, not alone. If I had a method of storing those bins out in the open, they’d work fine. In any event, the insufficiency could certainly lead to more searching in regard to the best (complete) fabric storage option.

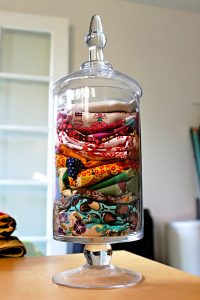
The most fitting right now is the notion of keeping excess fabric pieces in a jar.

The most fitting right now is the notion of keeping excess fabric pieces in a jar.

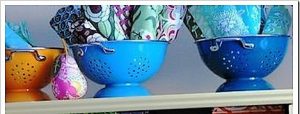
So during my search, did I have find the perfect one? That might be a complex question since I’m not sure there is a perfect one, but I did find some that are worth mentioning. The most fitting right now is the notion of keeping excess fabric pieces in a jar. I’m not sure I’d ever considered using my extra fabric in a way that actually makes it decorative even before I use it for a sewing project, but I like this concept. Most of the fabric that I have remaining is block-ish, and that smallness of leftovers seems spot-on for the store-in-a-jar method. All I’d have to do is get a jar, fold up my scraps nicely, and let the storage add accent to a room before the pieces potentially add accent to a future project. A similar idea is to store those scraps in kitchen bowls or strainers, like you can find here, or maybe a flower vase.

A similar idea is to store those scraps in kitchen bowls or strainers, like you can find here, or maybe a flower vase.

A similar idea is to store those scraps in kitchen bowls or strainers, like you can find here, or maybe a flower vase.

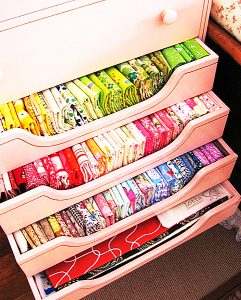
One is to take the drawers out of a dresser, and once the furniture has been treated so that it looks finished and ready, fabric can be stashed where the drawers used to be.

One is to take the drawers out of a dresser, & once the furniture has been treated so that it looks finished and ready, fabric can be stashed where the drawers used to be.

Two of the more intriguing fabric storage options I found might be more suitable for a time when/if I have more room and/or extra cash. One is to take the drawers out of a dresser, and once the furniture has been treated so that it looks finished and ready, fabric can be stashed where the drawers used to be. I adore this idea, but it’s a project itself! Be aware though that if you don’t want to go through all the sanding and painting to prepare the furniture, you could still use a dresser, drawers intact.

Be aware though that if you don’t want to go through all the sanding and painting to prepare the furniture, you could still use a dresser, drawers intact.

Be aware though that if you don’t want to go through all the sanding and painting to prepare the furniture, you could still use a dresser, drawers intact.

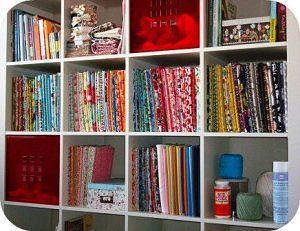
Another option is this square shelf idea that hangs on the wall. This one is particularly of interest if, like me, your bedroom, sewing room, etc. is already pretty full of furniture. When that’s the case, going upward seems like a reasonable option, and that’s exactly what this shelf would do! Being the nerd I am, this square setup appeals to me more than a different shelf idea might because it’s comic-book-ish, but that’s not to say that squares are the only possibility for this method. In fact, you might find that you have some kind of old furniture around your house that can be repurposed for this prospect — like a headboard. There might be plenty of possibilities if you spread your imagination to find them!

Another option is this square shelf idea that hangs on the wall.

Another option is this square shelf idea that hangs on the wall.

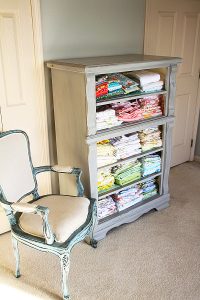
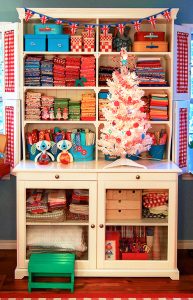
Another option is a lot simpler, but might cost more — and that’s to buy a piece of furniture that’s specifically for this purpose. This hutch, for instance, makes a wonderful and aesthetically pleasing storage area for fabric, and other than price and space, I wouldn’t hesitate to have one of these in my home.

This hutch makes a wonderful storage area for fabric, and other than price & space, I wouldn’t hesitate to have one of these in my home.

This hutch makes a wonderful storage area for fabric, and other than price & space, I wouldn’t hesitate to have one of these in my home.

But as breathtaking as these furniture options are, the truth of the matter is that I’ll probably have to start with something easier and more money-friendly. Given that the majority of my current fabric collection is scraps and/or block-ish pieces, my best bet for advancement might be the jar or strainer method, which I’m okay with!

Still, someday, that hutch, that shelf, or that dresser would be a wonderful addition to my sewing life!

New Year Resolutions

New Year Resolutions

Where has the time gone? This year is almost over, and has gone by so fast. The last week of the year is my time to regroup, reduce (stuff) and reorganize for the coming year. A fresh start, another chance, a new agenda and personal growth. What a great idea! Moving forward in positive movement to find ways I can inspire people to continue their love of sewing by finding interesting facts and ideas to share. I am EXCITED!!

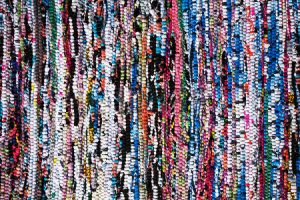
Take scraps and make a woven rag rug with a wonderful and colorful texture!

Take scraps and make a woven rag rug with a wonderful and colorful texture!

My Plan is the following:

  1. Research textiles and discover ways they are used in various applications in sewing and other art forms. My favorite is mixed media using sewing, quilting, tie dying plain fabric and other ways to create 3D artwork.
  2. Make new curtains for my sewing studio using drapery fabric. Choosing one is the hardest task!
  3. Experiment with different types of sewing feet like the Narrow Hem Foot to make professionally stitched napkins, table cloths and handmade scarves that will make people think you bought them from expensive designers! And some are very expensive!
  4. Use the wide variety of stitches on my machine to create interesting embroidery on quilt squares to piece together to create a scene or story. It is amazing how many things you can do. It may be a great time to upgrade your sewing machine to a designer model next year! Check this website for your choices! Sewingmachinesplus.com is the best place to buy. They offer many great choices!!
  5. Reduce scraps, and pieces of fabric that can be made into a crazy quilt, or used for small projects for a children’s class project. (This is difficult for me because I always think of something I can make from them.
  6. Design fresh ideas for NaturaDomani, my online Etsy Store. I hope to make a difference in the interest of organic fabrics, bamboo, hemp, and other eco-friendly textiles to save trees, water conservation and hazardous working conditions and to preserve beautiful things of Nature.
  7. Find outlets for charitable giving to pay forward Etsy sales and products.
  8. MOST IMPORTANT! Inspire my readers to use your creativity in sewing, and in life, to find happiness in yourself by learning new things and enjoying your achievements. Also, to embrace love and the love of others so that 2017 will become one of your very BEST YEARS!
I find it fun to share my sewing experiences with you as I am building an online presence at Etsy.com. While I sew, I realize that as careful as I stitch, handmade things are never perfect. It’s the challenge and effort that counts.

I find it fun to share my sewing experiences with you as I am building an online presence at Etsy.com. While I sew, I realize that as careful as I stitch, handmade things are never perfect. It’s the challenge and effort that counts.

HAPPY NEW YEAR AND BEST WISHES FOR 2017

Choosing the Right Batting

Choosing the Right Batting

I have definite plans and goals for the new year, and not just the ones that I’ve mentioned in previous posts. I want to take another class. I want take better care of myself. I want to read more. But one thing that I want to do under the sewing umbrella is to finish up the quilt I’ve been working on for a while now. That goal happens to come in steps. Firstly, I need to finish with the patchwork design I have going on (the goal is to have twelve rows of patches) to get this top layer ready for the next two.

The quilt I’ve been working on for a while now.

The quilt I’ve been working on for a while now.

That step, though it’ll take time, is pretty cut and dry. I plan, I pin and I sew.

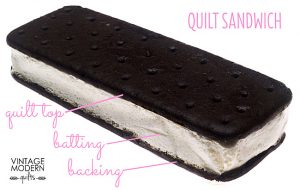
The steps that follow are the ones that merit consideration beyond those general details — like how I plan to join my quilt sandwich. Do I stitch? Do I tie? Do I spray? Decisions! (Details can be found here).

Hungry? Have a sandwich

Quilt sandwich.

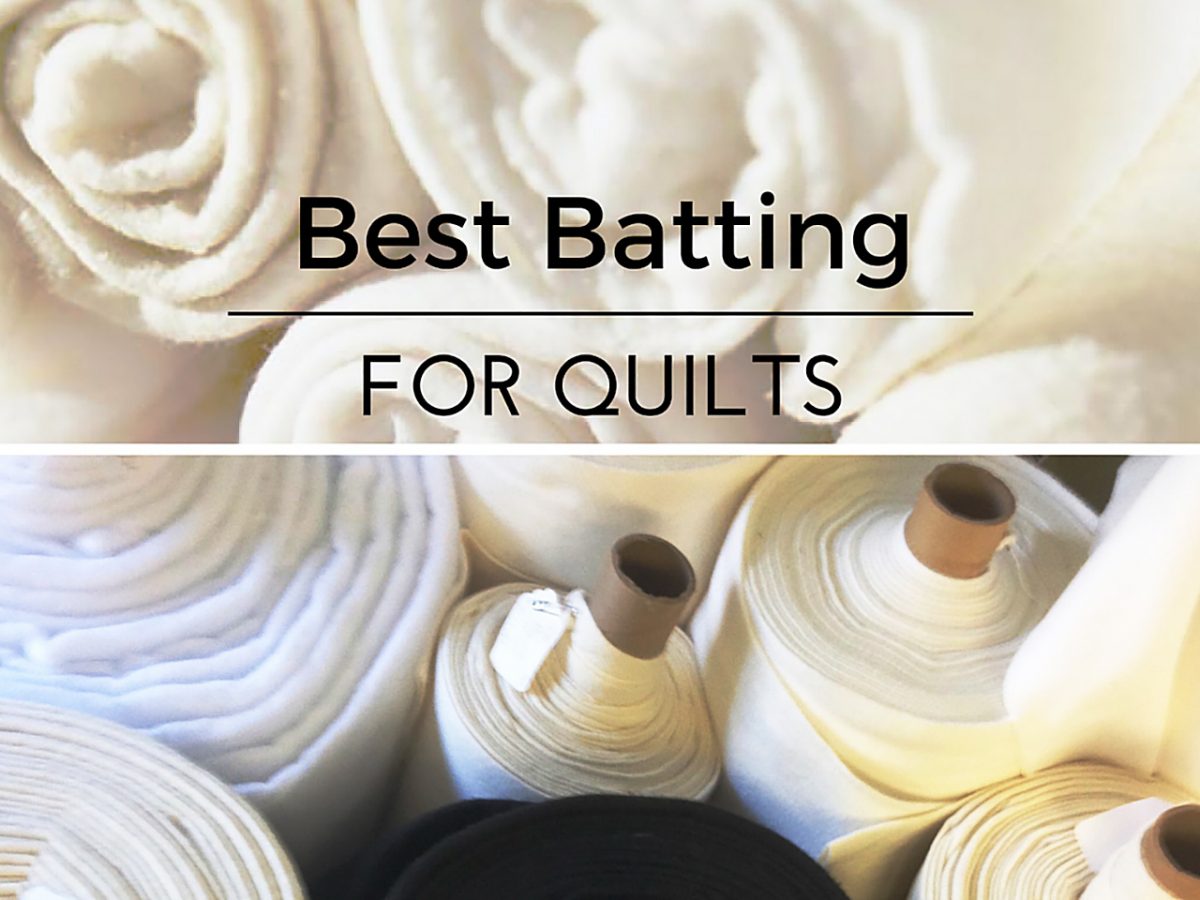
The more immediate topic to debate is what kind of batting I’m going to use for the middle of my quilt sandwich. This will be, by the way, the first time I’ve used batting since I only recently realized that quilts do, in fact, need three layers to fit the official definition, thus the term “quilt sandwich.” Before, I just used the backing and the front, but I want to be more by-the-books for this one! Given that I have little to no experience with batting though, it seemed reasonable to do a bit of research on the matter so that I could make the best decision for me.

Research, I did, and I’ve come to a potential fabric for the job: Cotton.

The fabric of our lives

There are plenty of batting types to choose from.

There are plenty of batting types to choose from.

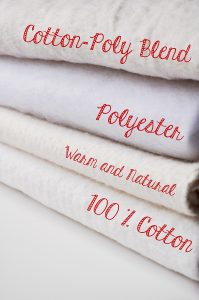
There are a number of reasons for this choice, and I urge anyone who is going to make a quilt to consider their own purposes and situations when choosing the right batting. While cotton might be a good choice for me, it might not be the best option for another person or another project. There are plenty of batting types to choose from — polyester, wool, blends — and to make the best decision, maybe spend some time looking into the pros and cons of each. You can find details about the possibilities here and here.

So with those other possibilities in mind, why did I choose cotton? There are a number of reasons. For one, it’s cheap. Yes, I know, cheaper isn’t always better, but for a learner on a budget, price can definitely be something worth considering! Remember that this is my first time adding batting, so it would be not-so-good to spend a bigger amount on a batting type just to mess the whole thing up! It’s also worth noting that this quilt will be for personal use, which leads into the reasoning that everything doesn’t have to be top-of-the-line quality like I might strive for if a company name was on the line. It’s for me, it’s my first experience with batting, and I think testing the waters on a smaller money scale is a good idea!

Synthetic but equal

Now, this might make you wonder why I didn’t go with polyester. Simple answer: Itchiness leads to polyester not always being my best friend! This is a personal decision, but the idea is something to keep in mind should you choose to make any kind of sewn product. If you have an allergy or a bad reaction to a certain fabric, keep that in mind so you can steer clear of it!

Choosing the Right Batting

There’s also the issue of loft, or how thick the batting is. Something like wool is high loft, meaning it’s very thick, so a quilt made with wool would be thicker. If you’re a person who gets cold all the time, wool might be your fabric for batting! For me, I want something with a lower loft so that the final product will be thinner. For one thing, I like the size that the first layer of my quilt will be, and I don’t want to shrink it too much by having it cover a thicker middle layer. For another thing, to me, higher loft looks more like a comforter, and I don’t want to go that route with this product.

Cotton is a better choice then, and it’s a fabric that I know is easy to work with on sewing projects. There’s no known itchy detail that I need to worry about, and I can feel comfortable knowing that I’m accustomed to it. I like cotton and — as weird as it might sound — I trust cotton. In addition, the recommended stitching distance for cotton is wider than other fabrics, giving more freedom in that respect.

And all of that, my readers, is a pleasant combination to deal with for my first dive into batting! How about you? Do you have a preferred batting option?

All I Want for Christmas

All I Want for Christmas

There’s not all that much I need these days. Often, I feel as if I have entirely too much stuff. A year and half ago, I bought my apartment in New York City moved from Brooklyn (where I had lived for fifteen) up to Harlem.

There’s not all that much I need these days.

There’s not all that much I need these days.

I had accumulated a lot of stuff in those fifteen years and almost half of it seemed to be sewing related. This wasn’t even counting the storage space I had. Storage spaces are quite common in NYC as the apartments are notoriously small and no one ever seems to have enough room to keep all their stuff.

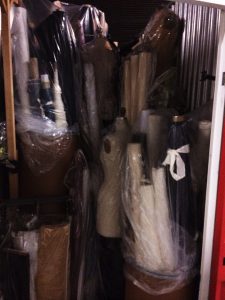
I literally had more fabric than I could ever, ever, use in my lifetime.

I literally had more fabric than I could ever, ever, use in my lifetime.

It’s not a problem

I decide that instead of moving all of my stuff, I was gong to get rid of some of it and I was going to empty my storage space so that everything I owned actually fit in one 800 square foot apartment.

I managed to get everything I owned to fit in one 800 square foot apartment.

I managed to get everything I owned to fit in one 800 square foot apartment.

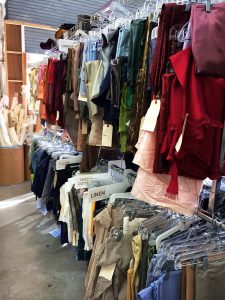
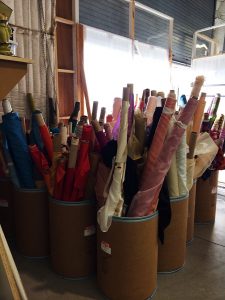
It took some doing but I managed to accomplish this task. The biggest challenge was figuring out what to do with all the sewing related things. I really didn’t need fifteen pairs of scissors, four bins of bias tape, an entire box of rick rack and eight foot by ten foot cubicle packed to the ceiling with box after box of fabric.

Good places to donate fabric to are universities or schools with arts’ programs or assisted living homes.

Of course, I kept some things. I do, after all, possess that fabric-hoarding tendency that most tailors and pattern makers do. But I literally had more fabric than I could ever, ever, use in my lifetime – even if all I did for the next thirty years was sit in my apartment and make things. I kept the truly special stuff, the pieces that I might never be able to find (or afford) again. But the bulk of it I donated.

Giving back

Good places to donate fabric to are universities or schools with arts’ programs or assisted living homes. Even some prisons accept fabric donations.

One of the best organizations like this in New York City is Material For the Arts. They accept unneeded items from businesses and individuals, and make the donations available for free to nonprofit organizations with arts programming, government agencies and public schools. If you have a large donation (like an entire SUV full), call ahead to schedule a time to drop off.

Some other places that accept fabric donations are GrowNYC and Quilts of Valor.

The Humane Society and the ASPCA will take linens and clothing for bedding and bathing animals – especially towels.

GrowNYC used to take bags of fabric scraps of any size (that’s where most of the small scraps from Boardwalk Empire ended up) but their website now says they only want large usable pieces.

Quilts for Valor makes quilts for service members and will take most remnants as long as they are clean and free from oil stains & the like.

A few companies that offer take back and reuse options are:

  • Design Tex can provide ship-to information for recycling or reclamation of many of their upholstery, panel and drapery fabrics.
  • The Nike Reuse-A-Shoe Program recycles the rubber, foam and fabric from any brand of used sneakers into padded flooring.
  • The Patagonia Common Threads Garment Recycling Program recycles Polartec fleece, Patagonia organic t-shirts and Capilene Performance Baselayers into new Patagonia clothing.

If you’re doing some clearing out of your fabric stash this season, there are lots of opportunities to send your unwanted textiles somewhere they’ll be wanted. Please donate.

I do have to confess though, that there is one sewing related thing I’m hoping to purchase in the next year: A Juki MF 7923 Coverstitch Machine.

I figure I’ve donated just about enough fabric and other supplies to make room for a new machine.

And so the cycle continues 🙂