Price of Fashion

The Price of Fashion

As a tailor for film and television, I often work with a lot of really high-end designer clothing. Sometimes I look at a price tag on something I’m in the process of taking apart and think, “That’s an awful lot of money for an article of clothing.” As a person who spends a lot of time taking things apart and putting them back together, I’ve got a pretty good idea of long it takes to make things. I wholeheartedly believe in paying tailors, pattern makers, and the like a respectable wage (as I’ve said before it is very skilled labor and deserves to be paid just as much as you would pay a plumber or someone to fix your car).

However, we all know that most mass produced clothing is made in factories where the workers aren’t getting much more than minimum wage (if they’re lucky). But what about the really expensive, designer stuff? Is it worth the extra money? Is it justified?

To a certain point, I think it is. If a brand uses high quality fabrics and notions, some of the extra cost makes sense. I try and think about how long it would take me to make a certain thing like, for example, a pair of pants. Not including patterning or cutting and if I were sewing at a pretty brisk pace and had made a bunch more of the exact same pants before, I’d say it’d take me anywhere from two to four hours (depending on how many pockets, if there’s top stitching anywhere, if they have a lining, and so on.) If a person working in a factory actually made a reasonable wage, that would certainly put the price point of those pants at somewhere between $80.00 and $200.00. You’d also need to factor in the time needed to cut out the pants, and pattern them, as well as the design process. So maybe then, you’d end up with a $150.00 to $400.00 pair of pants. Fairly reasonable, I’d say. It’s when you get up into the $1,000.00 range for a single pair of pants that I start to wonder.

I get that, when it comes to designer clothing, much of what you’re paying for is the name, or the design. And I’m ok with that but, is that label really worth $600.00 or more?

Again, I think it depends.

Boris Bidjan Saberi

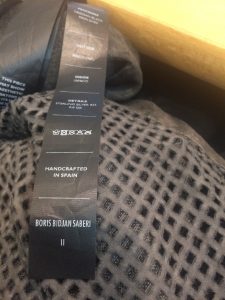
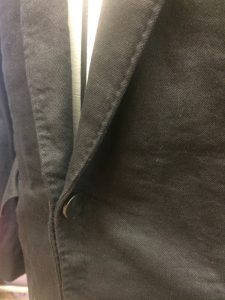
I’ve done quite a few alterations lately on Boris Bidjan Saberi men’s clothing. I just shortened the sleeves on one of his suit jackets. The jacket is very well made and the fabrics of a really high quality. The ‘buttons’ are cool metal cufflinks – real metal, not plastic. The label says the jacket was handcrafted in Spain. A big part of Boris apparel is that each piece is supposedly a ‘one-off’, which means it’s unique and no one will have exactly the same one as you. That’s pretty cool, I think. The suit jackets are priced starting at around $1,100.00. This price seems quite reasonable to me if it really is a handcrafted garment (which it certainly seems to be).


'hand crafted in spain'

‘Hand crafted in spain’.

metal cuff link style buttons

Metal cuff link style buttons.

What would you pay?

I guess my point in all of this is that there are some clothing brands and designers that may very well be ‘worth’ the high price, especially if their manufacturing processes align with your own ideas of ethics and sustainable businesses. If you care about these kinds of things, it is important to do your own research and make your own decisions (as it is with most things in life, I suppose).

There’s an interesting fashion show event happening this week called Wear Your Values. The event, on September 14th, will showcase 15 ethical fashion clothing brands and portray the life cycle of a garment to show how, when, and where human rights abuses take place in apparel manufacturing. There will also be a film on a day in the life of a garment worker. The show is presented by the Oslo Freedom Forum, an annual conference hosted by the Human Rights Foundation and Remake, a group of fashion enthusiasts that strive to inspire consumers to research the brands they buy (something I think is really important).

If you happen to be in New York City, try and go check out this event yourself.

Back to School and My First Alteration

Back to School and My First Alteration

It’s the middle of August and, according to the Internet, Back to School time.

It’s the middle of August and, according to the Internet, Back to School time.

I was such a geeky, nerdy kid that I always loved going back to school in the fall. And I always liked autumn clothing better than summer clothing. Probably because I have a soft spot for anything plaid and earth toned, both of which tend to be predominate in fall fashions.

Turn back the clock


I grew up in the 70s and 80s when J. C. Penney and Sears still put out their big book catalogues. I spent hours going through those, ear marking the pages that pictured the clothing items I most wanted. We never actually ordered anything from the catalogues. My mom was a big proponent of in-person shopping. Even to this day, she’s not so keen on ordering things from the internet.

Instead, on a Saturday or Sunday in August, she’d load all four of us kids into the van for a trip to Midway Mall or, if we were feeling fancier, Great Northern Mall. Midway Mall is in Elyria, Ohio and it had a Penney’s and a Sears. (I suspect it still does.) Great Northern Mall is in North Olmstead. We always thought of it as being a bit more high end the Midway Mall though I have no idea if that was true or not. Great Northern had a Penney’s and Sears as well but, it also had a Macy’s.

I would spend hours searching the racks for the garments I had identified in the catalogues, or something as similar as I could find. Then I’d try on a pile of clothing in the dressing room. I always wanted much more than Mom’s budget would allow so then I’d go through a lengthy editing process until my choices added up to what Mom was able to spend. Every year there was one thing I desperately wanted that Mom didn’t want to buy for me because she thought it was too trendy and I’d lose interest in it after a month or two.

Every year there was one thing I desperately wanted that Mom didn’t want to buy for me because she thought it was too trendy and I’d lose interest in it after a month or two.

Every year there was one thing I desperately wanted that Mom didn’t want to buy for me because she thought it was too trendy and I’d lose interest in it after a month or two.

Pin striped adventures

When I was 12 or 13 and in junior high school, I was obsessed with pin striped pants and ties. Mom agreed to buy me one pair of pin striped jeans but told me if I wanted any more, especially the wide legged, pleated pair, I’d have to figure out how to make them myself. As for the ties, she had some old ones from her father I could have.

I had no idea at this time how to go about making a pair of pants. I also didn’t happen to have any pinstriped fabric lying around.

But my Dad did, at least he had some pinstriped pants shoved deep into his closet that he never wore. The pair I liked the most were rust and brown and one Saturday afternoon when both he and my Mom were at work, I extracted them from the closet.

They were, of course, humongous on me but I knew how to sew so I figured I could alter them to fit. I was afraid that someone would come home and stop me mid alteration so I didn’t bother taking anything apart first. I just started adding pleats to the waistband, two to each side that I topstitched all the way down the legs. Then two in the back. I chopped off the hem, unintentionally rendering the pants capri-length. When I put them on, I decided the capri-length made them more fashion-y and I was going to wear them to school the next day.

Zero photo evidence

I wish there was a photo of me in these pants but there is not.

I wish there was a photo of me in these pants but there is not.

I wish there was a photo of me in these pants but there is not. I did put them on Monday morning, along with a brown turtleneck, a brown belt, and my flat brown capezio lace up shoes. The pants were bulky since I hadn’t trimmed any of the fabric out when I altered them and the legs stuck out because of the same but I thought they looked cool. When I walked into the kitchen, my Mom did a double take. She opened her mouth to say something then closed it again. I waited for her to yell at me or, worse yet, to give me the “I’m so disappointed in you” look.

But, instead, she stifled a laugh and said, “Well that explains why there was brown thread all over the sewing room. Next time, you really should trim out some of the excess fabric. That waistband wouldn’t be so bulky then.”

“You’re not mad?” I asked.

I’m not. I’ve been telling your father for years to get rid of those pants. But we should probably ask him if it’s ok.”

And there marked a three or four year period of me altering my father’s 1960s clothing to fit me. My mom was happy that I didn’t ask her to buy me as much at Penney’s and Sears. I was happy that I had clothes that were not like everyone else’s. And my dad was just happy that me repurposing his old trousers gave my mom one less thing to nag him about (my father was never very good at throwing “perfectly good” old items away).
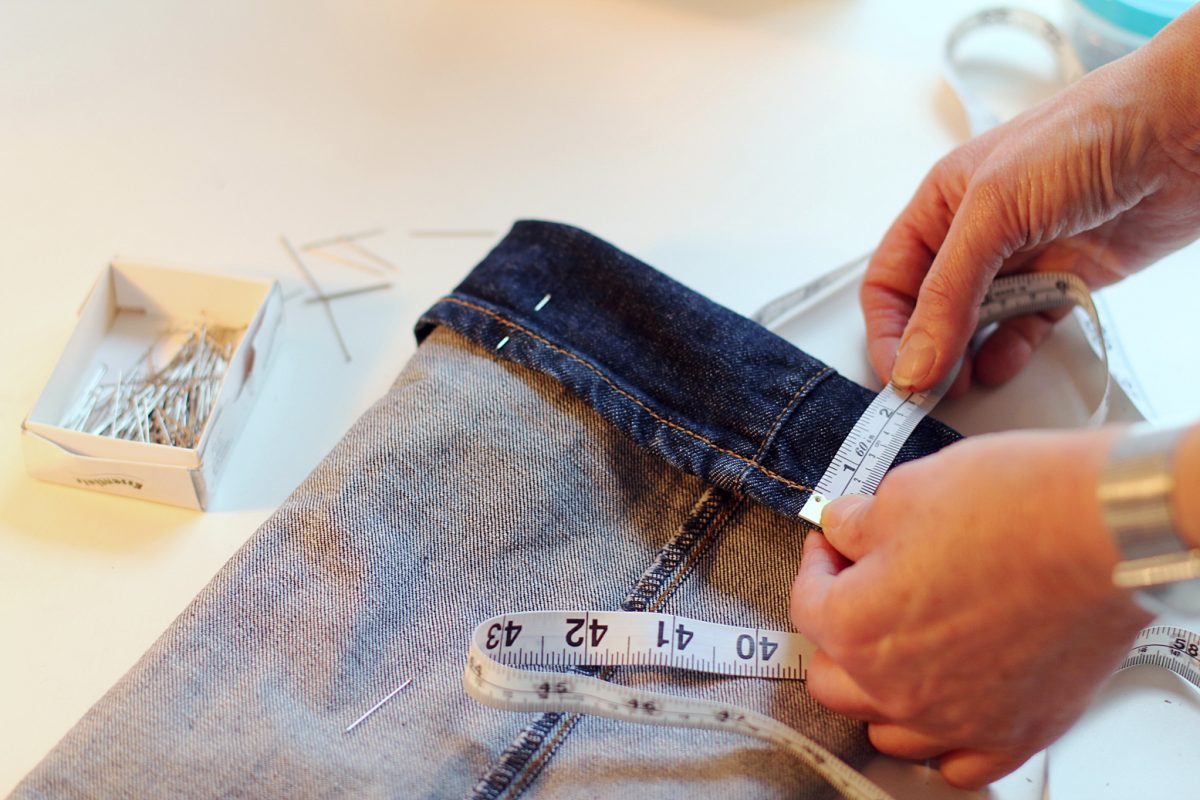
I don’t know what the other kids at school really thought about my vintage dad wardrobe. I was already considered weird before I started donning old pinstriped pants so I suspect it just solidified that sentiment. I am, though, forever thankful to my parents for letting me develop my own little bizarre fashion style, and for encouraging my sewing habit.
Whoever would’ve thought it would turn into a lucrative career.

One Day Sewing Projects

One Day Sewing Projects

one-day-sewing

Sometimes I don’t want a big sewing project. If I’m pressed for time or simply need to fill an afternoon or one day out of the weekend, I don’t necessarily want to start a project that will take days, weeks, or months to complete. Nor do I want the hassle and expense of shopping for supplies for a larger project. I just want to sew for a couple of hours and have something to show for it. If that’s ever happened to you, these sewing projects you can do in a day are the perfect solution.

Circle Skirt

Make this for yourself or your daughter…or making a matching mother/daughter pair. This circle skirt can be done in just a couple of hours and it’s perfect for whirling and twirling when it’s done. Unless you have large amounts of the same fabric on hand (cause you just buy fabrics you like when you see them, maybe?) you’ll need to hit the store for material. If you’ve got enough fabric on hand, you’re good to go.

Vendor Apron

Are you the one they ask to help out with bake sales, garage sales, and other school fund raisers? You need this vendor apron to keep your notepads, pens, and other supplies close at hand. It’s super simple to make with an old pillowcase or one you fell in love with at the thrift store and now need a use for. Make a bunch so the whole PTA will have one.

Trendy Fashion Tank

With this awesome pattern there’s no need to spend your hard earned money on brand name t-shirts and tanks. The trendy fashion tank is patterned after a popular JCrew top, but made by you. You’ll need jersey sheets or another source of that same material to make this pattern. Flat jersey sheets can be bought at discount stores for around $7, so it’s well worth the investment to make this shirt yourself.

Hair Bows

Not only do these work up fast, they’re a great way to use up your scraps. Hair bows never really go out of style, so make a bunch. Give them as gifts or sell them at craft fairs. Depending on the material you choose they can be vintage, modern, or anything in between. No matter what, they’re sure to be a hit!

The next time you’re looking for a quick project, try one of these projects. They take a day (or less in most cases) and leave you with a great finished piece, a feeling of accomplishment, and instant gratification. Many of these projects are also great for sew sewers since they can quickly see the results of their efforts.

All in the Family

All in the Family

One of my work colleagues is currently in the process of setting up a costume shop for a new period television show. Setting up a new shop is a pretty big job. There is so much to do and lots of decisions to make.

Setting up a new shop is a pretty big job.

Setting up a new shop is a pretty big job.

My colleague asked about sourcing options for rolls of muslin and whether buying online or locally in the city made more sense. I actually have some very strong opinions on the subject. I believe very much in supporting local and family owned businesses. Sewing Machines Plus is a family owned company in San Marcos, California and I am happy to contribute to their blog. If you are local to that area, or if you live in a place where sewing supplies are not plentiful, or your only choice is a big name chain store, I encourage you to check out the Sewing Machines Plus website as an alternative.

If I can make it there, I’ll make it anywhere

I happen to be lucky enough to live in New York City where there is still a garment district. In the city, it is still possible to get pretty much anything you need sewing-wise from the garment district or other local businesses, though it does sometimes take a bit more time/legwork and actually talking to a real live human in person to procure what you need.

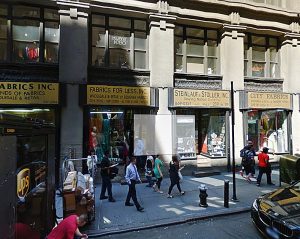
I always get my muslin from Steinlauf and Stoller on 39th Street. It’s a small, narrow store with not much of a traditional showroom. You have to ask one of the crotchety older gentlemen behind the counter for what you need. He’ll probably grumble a bit at you and ask you what you’re making and what you need the thing for but he’ll eventually reach into some drawer or cupboard, or disappear into the depths of the storeroom and pull out the thing you need. All in all, it makes for a very authentic New York experience.

Another one of my favorite supply places in the city is Oshman Brothers in the Lower East Side. They’re a third generation family business and are always super helpful with digging out the specific supplies you’re looking for. They are, though, closed on Saturdays.

Andy’s

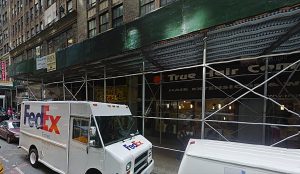
In true NYC style, Andy’s is not actually a store but rather a workshop in the back of another store (True Hair Company) at the end of a hallway lined with random dress form parts.

In true NYC style, Andy’s is not actually a store but rather a workshop in the back of another store (True Hair Company) at the end of a hallway lined with random dress form parts.

Andy’s dress forms is the last dress form manufacturer left in New York City. They also repair forms. Their website cautions you to call before coming by the store. In true NYC style, Andy’s is not actually a store but rather a workshop in the back of another store (True Hair Company) at the end of a hallway lined with random dress form parts. Going for a visit is always an adventure. But if you’ve been once, they are likely to recall your name and know what show, or shows you work on, and treat you like one of the family.

Another store with limited hours and a recommendation to call before stopping by. Manny’s was once one of the most magical stores in the city, with shelves stuffed full of amazing millinery trims and notions. The place used to offer a bit of a treasure hunt. Now, they are much more streamlined and organized and don’t stock as many things as they once did. Sadly, this is the result of the decreasing demand for millinery supplies and the consumer trend of shopping at big name “convenient” outlets.

The New York City garment district isn’t dead yet but it has certainly suffered somewhat of a decline, as have many family owned and run businesses in the U.S. If you can, get out and support your local fabric and sewing supply store. And if there isn’t one nearby, check out an online family owned store such as Sewing Machines Plus who still believe in the personal touch. You’ll be glad you did.

Free Brother Sewing Projects

Free Brother Sewing Projects

Free Brother Sewing Projects

How cool is this? Project Runway uses Brother sewing machines to create their fabulous fashions. To celebrate, we’ve got some amazing Free Brother Sewing Projects right from Project Runway. You’ll love making them and wearing them!

Feathered Skirt

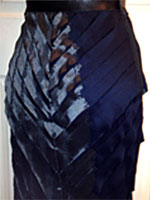
Free pencil skirt pattern by Christopher Palu.

Free pencil skirt pattern by Christopher Palu.

Christopher Palu shares his amazing feathering technique. It’s easier than you might think and makes any fabric look gorgeous. He teaches it to you in this free pencil skirt pattern. You’ll need two different fabrics, one solid and one patterned, that look well together and a zipper. Give it a shot and share a picture of your results!

Makeup Bag

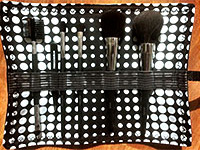
Seth Aaron’s free makeup bag pattern.

Seth Aaron’s free makeup bag pattern.

No fashionista’s get up is complete without makeup and way to touch up imperfections on the go. Seth Aaron’s makeup bag pattern is the ultimate in makeup carry-alls. There’s room for all your makeup essentials inside the bag and the exterior strap holds all the brushes you’ll need to keep your face looking its best all day and night long.

Custom Laptop Case

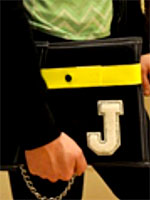
Joshua Cook’s custom laptop case free pattern.

Joshua Cook’s custom laptop case free pattern.

In the on-the-go world we live in, most people carry their laptop with them at some point. This is simply another way to show your style. Forget those laptop cases you can buy at any retailer. Instead, create a custom laptop case with Joshua Cook’s pattern. It works up quickly in less than 20 steps.

Earrings

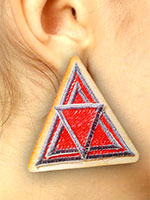
Anthony Auld’s free Embroidered Earrings pattern.

Anthony Auld’s free Embroidered Earrings pattern.

Yes, that’s right, you can make earrings with your Brother sewing machine. They’re a great way to practice your embroidery skills. Anthony Auld shows you how to get fashion on your ears using your Brother in this free Embroidered Earrings pattern. Make sure to share pictures of your amazing earring creations.

Whether you’re looking to practice your sewing skills or learn some new ones, these fabulous Project Runway Free sewing patterns for Brother are a great place to start. They’ll add some class and style to your wardrobe, too – you’ll feel like you just stepped off the runway!

What’s In Style for Spring Sewing?

What’s In Style for Spring Sewing?

Spring sewing for your wardrobe is one of the best ways to chase away the end of winter woes.

What’s in style and on trend? What should you sew for this year?

What's In Style pin

Spring sewing: what’s still in style

There a few trends that popped up last year that we saw again this year on Spring runways, namely:

Lingerie-inspired fashions

Romantic and baby doll style lingerie continues to be a fashionable influence, with nightgown style dresses, both short and long, and even pajama styles being featured by many designers this year.

New this year to this category are wraps and dresses that mimic menswear-style silk robes.

Paper bag waists

These came back last year and we are still seeing them now. Luckily for us, they are easy to sew, especially for elastic waist skirts and pants. Just fold over the top of your garment an inch or more farther than you would normally fold over for an elastic casing, sew a line of stitching slightly lower than the fold to create the casing, insert your elastic, and voila.

Or sew a paper bag neck; higher necklines are on trend this year, too.

Or sew a paper bag neck; higher necklines are on trend this year, too.

Metallic shimmer and shine

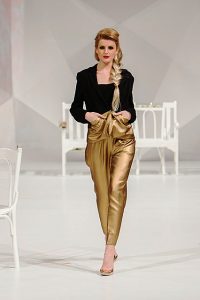
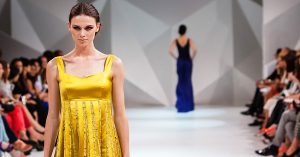
Metallics started popping up everywhere last year, and these are still in now. You can sew most any garment in a lamé or other metallic fabric now.

Gold lamé? More like gold fabulous!

Gold lamé? More like gold fabulous!

Midi lengths

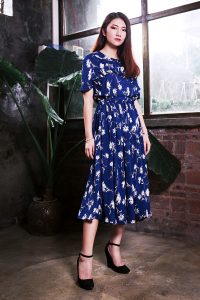
The flattering midi-length skirt is still where it’s at this year. We also see midi length cropped pants and jumpsuits cut to this length now.

The flattering midi-length skirt is still where it’s at this year.

The flattering midi-length skirt is still where it’s at this year.

Pleats

Last year we saw these primarily as small, accordion style pleats. This year, these are still in style. But so are pleats of slightly wider widths.

Plaids

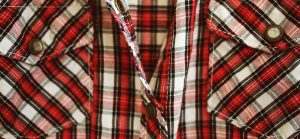
Where large plaids were the rage last year, this year the trend is toward smaller plaids. You’ll also see a mixing and matching of similar plaids in differing scales worn together.

Forget the large plaids; small plaids are where it's at this year.

Forget the large plaids; small plaids are where it’s at this year.

Florals

Florals are usually everywhere in Spring. This year, they are trending a few different ways. Designers continued last year’s trend of using small scale florals in romantic, feminine style, though they’ve sometimes paired them with edgier pieces. The small scale romantic florals are particularly popular for jumpsuits now.

Larger, 70’s style florals are also popping up all over this year.

Larger, 70’s style florals are also popping up all over this year.

Ruffles

Large and wide ruffles continue to trend this year. Use these on blouses, skirts, and dresses.

Stripes

Stripes were featured widely last year, and they are still big. We saw stripes on Spring runways this year in different ways. Vertical stripes in navy or black and white are in, and so are colorful, wide horizontal rugby stripes.  Pinstripes also featured widely in men’s shirt style dresses.

Use black & white stripes vertically this year.

Use black & white stripes vertically this year.

What’s New for Spring sewing 2017

Embroidery and embellishments everywhere

You can put your embroidery machine and embellishment software to good use in your Spring wardrobe now.

You can embroider any garment this year.

You can embroider any garment this year.

We saw embroidered motifs here and there last year, but it is more widely featured this year. Designers paired embroidered vests with embroidered pants and emblazoned dresses and blouses with heavy embroidery. Handbags especially were covered with embroidery designs this year.

Bags, blouses, dresses, jackets, and pants also saw lots of beading and sequins in designers’ Spring collections. From beaded and sequin designs such as florals to covered sleeves, embellishments are on trend.

Bold prints

Besides the kitschy 70’s style florals already mentioned here, other 70’s style prints are in. Also make use of graphic geometric prints this year, especially large scale prints.

Higher necklines

Mock turtlenecks are in, even on bathing suits. Boatneck styles are cut higher than usual, too, right at the neckline.  For necklines cut a bit lower, designers paired these with silk scarves wrapped tightly around the neck, to imitate the turtleneck style.

Pair dresses with less coverage, such as spaghetti straps, with higher necked tops worn underneath.

Shoulders out

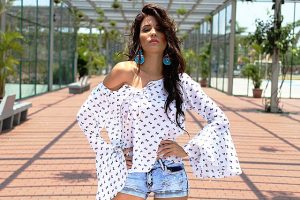
There are also plenty of shoulder-baring styles this year. Off the shoulder cuts are popular, especially for peasant blouses and dresses.

Off the shoulder peasant top.

Off the shoulder peasant top.

Hopefully you still have the patterns you bought in 2011, because one shouldered designs are in again. One sleeved styles are trending, too.

A-line mini skirts

Cut these on the bias. A-line minis are my absolute favorite skirts to sew; I’ll share how to draft your own pattern for a perfectly fitting bias skirt here on the blog soon .

Sheers

Sheer skirts over leotard style tops. Even sheer hoodies!

Sheers and cutouts are big this year, along with higher necklines.

Sheers and cutouts are big this year, along with higher necklines.

Glam

In tribute to David Bowie, 80’s style glam is trending now, especially with puffed-at-the shoulder sleeves and wide ruffles.

Flared hems

Both ankle flare pants hems and bell sleeved blouses are in style now.

Flared bell sleeves on a one-shouldered design.

Flared bell sleeves on a one-shouldered design.

Jumpsuits

Here is another major way what was hot in 2011 is back again today. Jumpsuits are big now, in all lengths, particularly wide legged midi styles, in floral prints.

Patchwork

Runways this year featured patchwork dresses of all kinds. From a mix of solids reminiscent of Amish quilts, to patchworks of patterns and florals, any kind of patchwork can work in your Spring sewing and wardrobe this year.

Feathery fringe

Feathery fringe is everywhere now, from necklines and sleeves to bags, even dresses covered in tiers of brightly colored feathered fringe.

Feathery trim.

Feathery trim.

BIG bags

While smaller handbags with heavy embroidery are in style, super XL bags are all the rage.

Spring sewing: color trends

Spring sewing: color trends

Besides the florals, bold patterns, and stripes trends already discussed, here are the color trends for this season:

  • Khaki – it’s everywhere
  • Pinks – pale pinks, mauves, raspberry
  • Blue – all shades of blue, especially several different blues worn together
  • Neutrals – these are featured more often than usual this year
  • Gold – metallics are hot in general, but especially gold
  • Yellow – while orange was hot last year, yellow seems to be the it color this year
  • Neons – these bright colors are coming back again now
Yellow & blue are both hot colors now.

Yellow & blue are both hot colors now.

I’m excited that patchwork and embroidery are trending now, and I’ll be adding more of these pieces to my closet. On the other hand, in style or not, you’ll never see me wearing yellow, gold, or feathery fringe!

Which of these styles are you excited to sew for your wardrobe now and which trends would you rather skip?

The Safety Pin

The Safety Pin

I try to collect them all in one drawer, but they escaping & disburse themselves all about the apartment.

I try to collect them all in one drawer, but they escaping & disburse themselves all about the apartment.

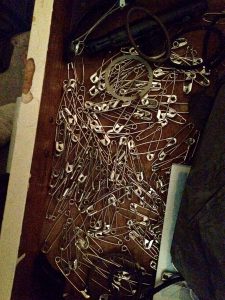
Almost every pocket in every article of clothing I own, there are a couple of safety pins. I can also usually find at least three of four of the little buggers on the bedroom floor. Sometimes they end up outside my apartment door because I reached for my keys and pulled out a fistful of safety pins instead. I try to collect them all together in one drawer but seem intent on escaping and disbursing themselves all about the apartment.

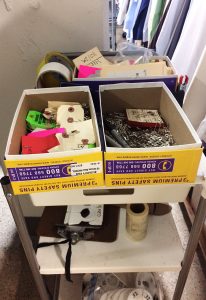
I use safety pins for fitting clothing, for hanging patterns, to attaching notes to things. Of course, there are different sizes and flavors of safety pins.

Size matters

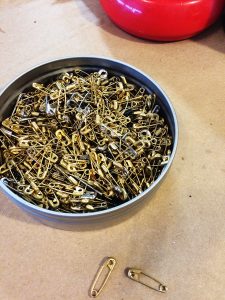
I use the tiny gold ones when I’m fitting something very delicate like silk or gauze so that they don’t make an unsightly pin hole.

I use the tiny gold ones when I’m fitting something very delicate like silk or gauze so that they don’t make an unsightly pin hole.

I use the tiny gold ones when I’m fitting something very delicate like silk or gauze so that they don’t make an unsightly pin hole. For some reason, someone thought that gold pins without the end spiral were good idea. I suspect because sometimes things snag on the little coil but, without that coil, the pin is free to slide about so it’s hard to know exactly where/what the mark is.

I use the big number 3s for the majority of my fitting needs. And the number 2s if I need a thinner pin.

History Hunt

Walter Hunt invented the safety pin in 1849. He was the first one to create a pin with the coiled spring on one end and the clasp or catch on the other end to keep the pointy bit safe from tender fingers. Hunt sold his idea outright for $400.00 so never collected any royalties or anything from it. Legend has it that he needed to pay off a debt and thus invented the safety pin and sold the rights within a few hours.

I use safety pins for fitting clothing, for hanging patterns, to attaching notes to things.

I use safety pins for fitting clothing, for hanging patterns, to attaching notes to things.

Selling his safety pin idea wasn’t Hunt’s only unfortunate business decision though. He was also the first one to invent many of the significant parts of the sewing machine, including a curved needle and a shuttle. Hunt created the first sewing machine prototype in wood, which didn’t work all that well so he ended up selling his idea to Elias Howe and Isaac Singer.

Hunt invented a plethora of other things including a streetcar bell, a knife sharpener, paper collars, and an antipodean walking device – or suction cup shoes!

Alas, Hunt didn’t seem to have much business savvy or any true idea of what his inventions could be worth, and just how wide spread and common place they would become.

A modern twist

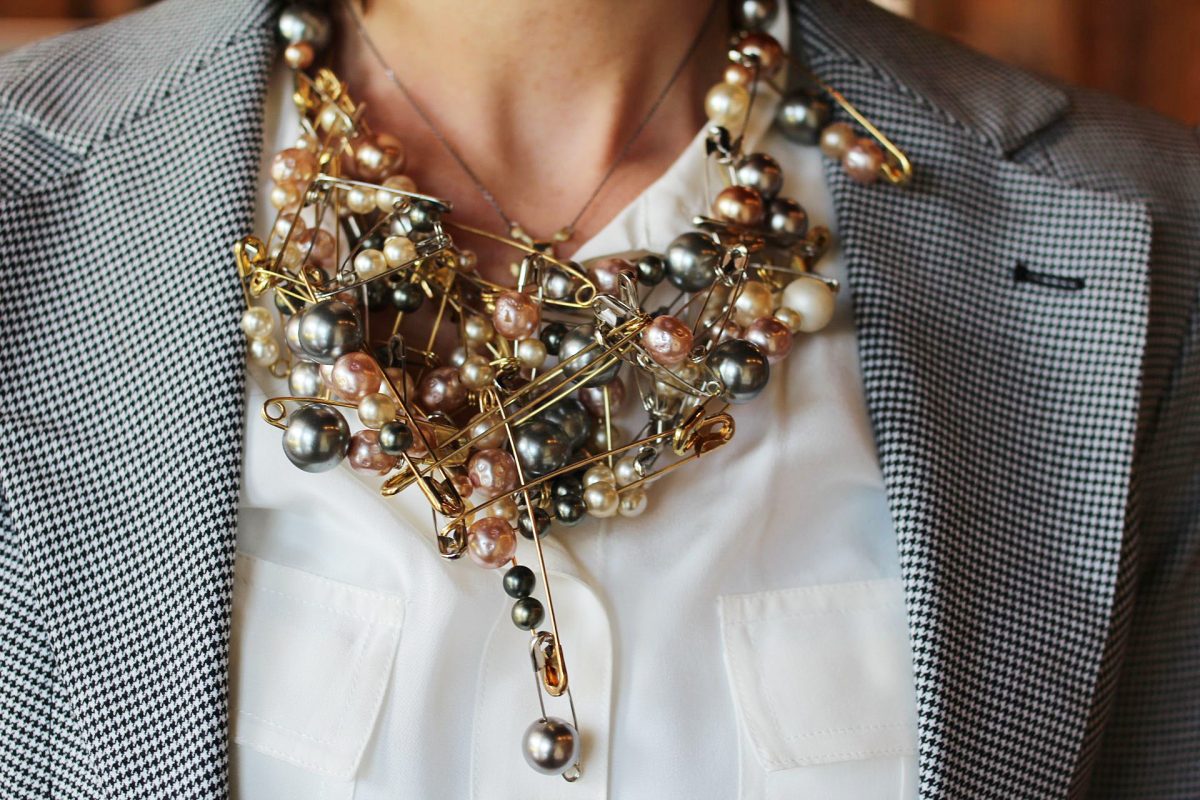
The safety pin has found its way onto the catwalk and into high fashion with decorated, embellished safety pin broaches and large dangling safety pin earrings.

The safety pin returns as punk becomes more relevant than ever – via Independent.

The humble safety pin also has a rich symbolic history and significance. Punk culture has long used the safety pin as an expression of individual freedom and DIY culture. In the wake of the UK’s Brexit and the US presidential election it has come to symbolize tolerance and unity with all people.

Wonder what Walter Hunt would have sold his idea for back in 1849 if he had been able to foresee even a small fraction of what his pin would become.

Spicing It Up! DIY Skirt Alteration

Sometimes, there are things in life that are pretty fantastic, but a bit of extra effort could make them even more so. That mentality can lead to furthering an education or moving to a different city…

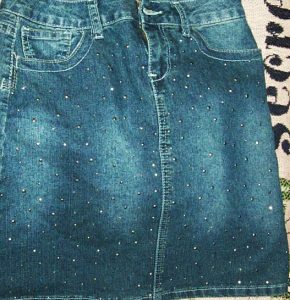
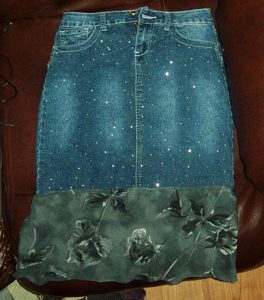
This skirt belongs to one of the nieces & the sparkly glam is enough to make me jealous!

This skirt belongs to one of the nieces & the sparkly glam is enough to make me jealous!

Or adding fabrics. What looks remarkable in and of itself can take on a whole new level of beauty with a bit of thought or creativity. Example? This skirt. It belongs to one of the nieces, and the sparkly prettiness is enough to make me jealous that I don’t have a skirt like this one. What I do have though is material from my own clothing that zipper-made holes ruined, and the color scheme was kind of perfect to go along with the niece’s pretty, sparkly skirt.

Well, there was no sense in throwing away usable material that could be a sewing project, right? This might or might not have been my logic before diving into said project.

So, let’s break this down, shall we?

Let’s begin! Step-by-Step

The mission: Use the zippered-up material on the already wonderful and sparkly skirt.

The process: Simple, but effective!

Step 1: Cut the zippered-up material into usable pieces. To do this, I first cut away the zipper territory, then cut along the clothing’s seam. That seam was easier to follow than an imagined line, so there was less chance of me getting waaaaay off in my cutting. The results weren’t small enough to use at this point, but they were flat enough to help me gauge what I needed to do for the future.

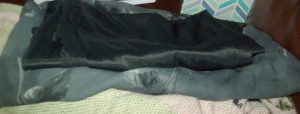
Cut off the underlining black fabric from my ripper-ruined clothing.

Cut off the underlining black fabric from my ripper-ruined clothing.

Step 2: Cut off the underlining black fabric from my ripper-ruined clothing. This way, it was completely separate from the pattern I wanted to use, and it was handy for an underlining detail for the skirt. Win/win, right?

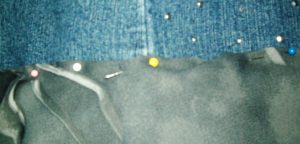
Step 3: Pin the underlining material to the skirt using straight pins. Luckily, it didn’t matter (since I didn’t think about it) if the line from my sewing matched to any line in the skirt because the floral pattern would cover it anyway. I just needed to make sure I stayed in the vicinity of the skirt’s already-present hem in order to not go so off-base with my sewing that the end result looked crooked.

Step 4: Hem the underlining fabric and make sure it came together when it needed to overlap at the end of its line. Again, it’s a good thing no one is supposed to see this piece of material because the section I used needed an extra piece sewn on to make it all the way around. That random addition might stick out, but who knows if I don’t tell them, right? Hey! You live and learn! I also made sure to cut away extra bits of material after I’d sewn so that there wasn’t excess falling well below the hem I’d created.

Step 5: Move on to the patterned fabric! After I looked over my options with the material I had, I decided on the piece that was at the bottom of the underlining black material so I could make use of the manufactured hem of the fabric. In addition, the material would already be set up for equal enough proportions since it began and ended in generally the same way from start to finish. All I needed to do was follow the same lines of the material to get a decent look for the skirt.

It's time to straight pin the skirt!

It’s time to straight pin the skirt!

Step 6: Once I’d selected the fabric I would use, it was time to straight pin it to the skirt! I kept it loose enough that the skirt didn’t bunch (if you pin it too tightly, you might end up with a pinched look you don’t care for) and made sure the fabric was being sewn above the underlining material. I also considered, this round, where my seam would be since A) I actually remembered, and B) it mattered since people would be able to see it. While the seam isn’t in exact line with the skirt’s side seam, at least it didn’t randomly show up in the front or something!

Almost there…

The final step of the process!

The final step of the process!

Step 7: Sew along the general area of those straight pins, and to piece together the floral fabric itself at the right moment when the sides would overlap. I did, however, have to make sure that the edges at the very bottom of that overlap would even out by adding a small hem. Since the overall hem was already there from the original clothing’s design though, that would be the final step of the process!

And, there you go! A pretty, sparkly skirt that has been upgraded into a pretty, sparkly skirt with matching material as an accessory!

What do you think?

Oui, Oui – A Sheer Evening Bolero With French Seams

Oui, Oui – A Sheer Evening Bolero With French Seams

When the weather gets warmer, weddings and graduation party announcements arrive. This means strapless dresses, tanks, low necklines and open backs that get chilly in air conditioning and cool nights. An evening bolero or cropped jacket sewn with sheer fabric is a terrific solution: Small and light, you can fold it into your purse when the dance floor calls and pull it out again for a walk in the moonlight. Plus you can brag about your sewing skills to anyone who compliments your look.

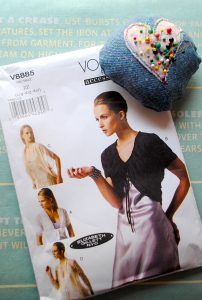
What could be more evening elegant than a bolero by Vogue?

What could be more evening elegant than a bolero by Vogue?

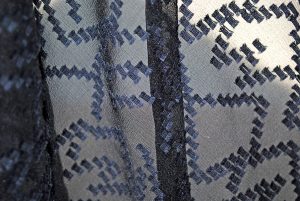
Lace, chiffon, silk voile, and layered tulle are good choices for an evening jacket, but working with delicate fabric often requires French seaming, a couture technique that hides ragged edges and stray threads that would otherwise show through and destroy the elegant effect. The pattern I chose for my bolero, Vogue 8885/View C, required only one French seam (and only one big piece to cut), so I dared give it a try. In my sewing stash I found a few yards of black chiffon from Mood Fabrics. I’d fallen in love with its zigzagging details on a January evening when I’d been strolling their aisles. In retrospect, black wasn’t a good color choice for a first French seam attempt. A light color would have been easier to see and sew precisely.

After cutting the pattern piece – a gigantic parallelogram – with a one-half inch seam allowance and transferring marks with white tracing paper, I was ready to attempt my début French seam. Here’s how it works:

  1. The first step in sewing a French seam is to put the wrong sides of the fabric together. You must disregard the worry you’re sewing on the incorrect side. You are sewing on the incorrect side. Sew just one-quarter inch from the cutting line, then trim close to stitching.

    French seams hide ragged edges and stray threads.

    French seams hide ragged edges and stray threads.

  2. With low heat, press the seam to one side. Then flip to the wrong side. You will see the “right” side of the seam on the wrong side. This is normal, so don’t panic.
  3. Fold the fabric along the seam and stitch again at one-half inch. This hides the seam inside another seam. The new seam is on the wrong side as it should be. Press the French seam to one side. That’s all there is to it!
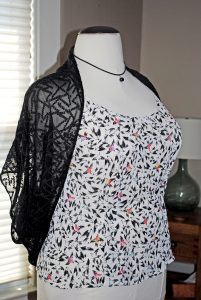
A sheer black bolero compliments a camisole.

A sheer black bolero compliments a camisole.

With the French seam complete, I had to finish other aspects of the bolero such as stitching a narrow hem along the edges. For this I used a rolled hem foot that came with my Singer Quantum Stylist. Rolling the hem is fun once you get the hang of it and the results are astonishingly professional. If you don’t have a rolled hem foot, you can buy one at sewing shops or online at Sewingmachinesplus.com. I also had to stitch along the back of the bolero and gather a section by pulling along the bobbin thread. The chiffon was uncooperative – I should have used a longer stitch length to make it easier. As a last step, I joined the center back section together to create “sleeves.” Doing this caused the French seam to present itself in a diagonal direction through the back, which looks pretty cool.

As the final step, I tried it on! The loose fit looks a little better on my dress form (her name is Aretha) than it does on me, so here’s Aretha:

I’m happy with the bolero, but I’m curious about some of the other views included with Vogue 8885. It looks like a few yards of lace and more French seams are in my future. Here’s to Paris . . .