Sew a DIY Sunbrella Table Cloth with Insul-Brite

Sew a DIY Sunbrella Table Cloth with Insul-Brite

I would need a place to serve the hot lasagnas we had ordered.

I would need a place to serve the hot lasagnas we had ordered.

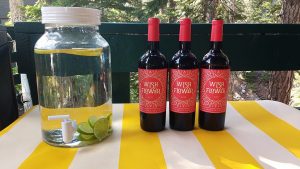
This weekend I hosted 17 women at my home for a women’s writing workshop with bestselling author, Amy Ferris. We had lunch each day and we ate outside on my lower deck. Lunch was catered and I knew I would need a place to serve the hot lasagnas we had ordered.

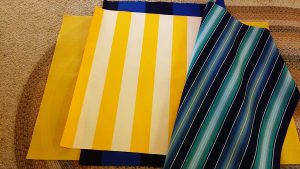
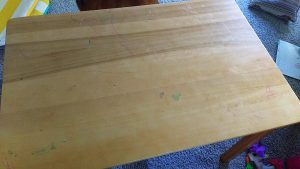
Enter my daughter’s art table: I thought it would be perfect for staging food on the deck but it’s covered in marks and squiggles and I didn’t want hot food to hurt its surface. I’ve been on a role using up my Sunbrella stash (you can read about the outdoor Sunbrella pillows I recently made here and here.) So I dug into my Sunbrella stash again.

Enter my daughter’s art table.

Enter my daughter’s art table.

This wide striped yellow Sunbrella fabric was a perfect choice. Sunbrella is water resistant and stain resistant. I also had some Insul-Brite batting in my stash too. Insul-Brite is amazing and is what home sewers use to make DIY pot holders and ironing boards.

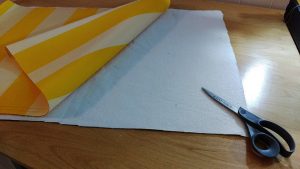
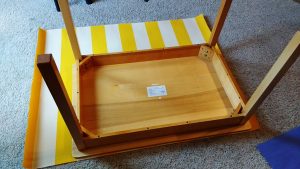
To get started, I turned the table over and used it to make a pattern on the fabric.

This wide striped yellow Sunbrella fabric was a perfect choice.

This wide striped yellow Sunbrella fabric was a perfect choice.

I used a ½” seam around the pattern. I also only had one yard of the fabric so on the remaining portion I had to do some math to make sure I had enough left to make strips for the sides of the table cloth. I figured out that I could do three strips at 4.25” each. I cut out the tablecloth top and the strips with a hot knife.

I used a ½” seam around the pattern.

I used a ½” seam around the pattern.

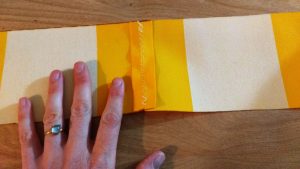
Next I joined the three strips together, opening the seams and finishing them with a zig zag stitch to help keep the joins as flat as possible.

Next I joined the three strips together.

Next I joined the three strips together.

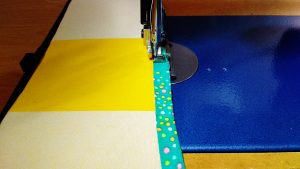
I really wanted to add pom pom trim but I didn’t have enough to go around the table cloth so I used some of this handmade trim I had from a quilt I made earlier.

I used some of this handmade trim I had from a quilt I made earlier.

I used some of this handmade trim I had from a quilt I made earlier.

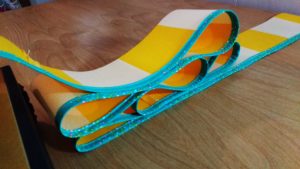
How beautiful is that?

How beautiful is that?

How beautiful is that?

Now that the side fabric had the trim attached, I busted out the Insul-Brite. You want to put the shinier side of the fabric toward the heat source. I cut out a piece that was slightly larger on all sides of the top of the tablecloth.

I cut out a piece that was slightly larger on all sides of the top of the tablecloth.

I cut out a piece that was slightly larger on all sides of the top of the tablecloth.

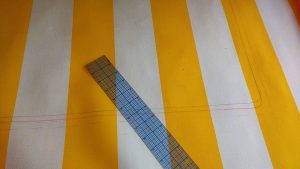
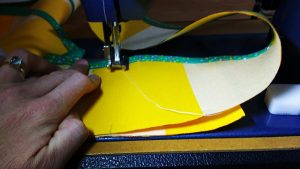
To attach the side piece to the top I made a sandwich of first the Insul-Brite, and then the Sunbrella top. The side piece went on top of the table cloth top, right sides together. Before I started I drew a ½” seam on the side piece so I knew I was sewing correctly to the pattern I’d created for the tablecloth top.
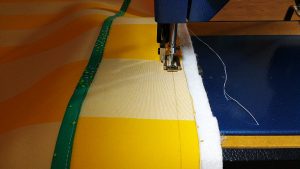
Before I started I drew a ½" seam on the side piece so I knew I was sewing correctly to the pattern I’d created for the tablecloth top.

Before I started I drew a ½” seam on the side piece so I knew I was sewing correctly to the pattern I’d created for the tablecloth top.

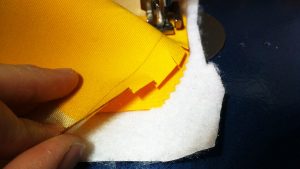
Cut snips into the fabric as you go around the corners.

Cut snips into the fabric as you go around the corners.

Cut snips into the fabric as you go around the corners.

When you get close to the other end of the trim, pull it off of the machine, join the two pieces and fold them back and forth, marking where they should be sewn together.


When you have those marks, bring the top over to your machine and sew the join on the side piece.

When you have those marks, bring the top over to your machine & sew the join on the side piece.

When you have those marks, bring the top over to your machine & sew the join on the side piece.

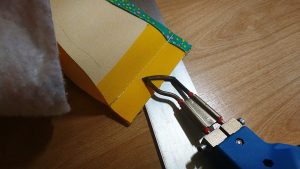
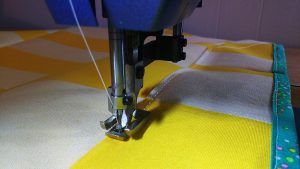
Use your hot knife to trim the join. Then sew the rest of the side piece down to the tablecloth.

Use your hot knife to trim the join.

Use your hot knife to trim the join.

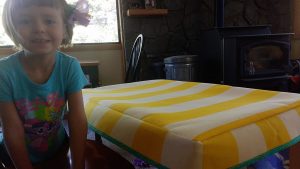
Next I tried it on the table to make sure I had it correctly sized. I had not yet trimmed any excess Insul-Brite. Here you can see both my darling daughter and that the tablecloth fits. What it is missing is topstitching. Topstitching is magical, not just for the finishing touch it gives but because it helps give support and structure.

Here you can see both my darling daughter & that the tablecloth fits.

Here you can see both my darling daughter & that the tablecloth fits.

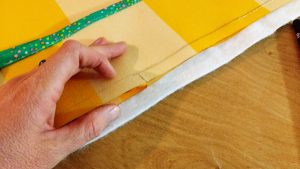
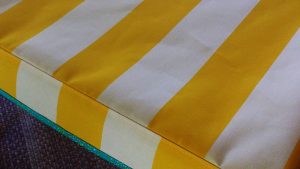
I chose to topstitch on the side piece versus the top and fold the Insul-Brite down toward the sides.

I chose to topstitch on the side piece versus the top & fold the Insul-Brite down toward the sides.

I chose to topstitch on the side piece versus the top & fold the Insul-Brite down toward the sides.

That nice, clean line is exactly what will take this project to the next level.

That nice, clean line is exactly what will take this project to the next level.

That nice, clean line is exactly what will take this project to the next level.

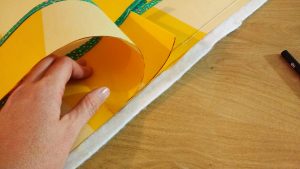
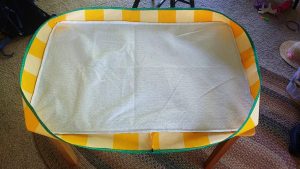
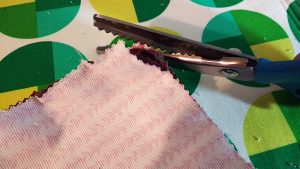
Finally, I trimmed the Insul-Brite to match up with the seams and then used pinking shears on the corners where I had made snips to help prevent fraying.
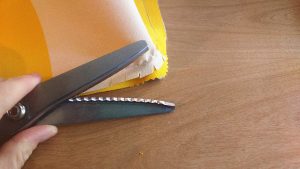
I trimmed the Insul-Brite to match up with the seams & then used pinking shears on the corners where I had made snips to help prevent fraying.

I trimmed the Insul-Brite to match up with the seams & then used pinking shears on the corners where I had made snips to help prevent fraying.

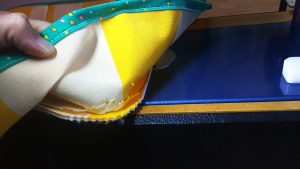
Here’s what the finished piece looks like on the underneath.

Here’s what the finished piece looks like on the underneath.

Here’s what the finished piece looks like on the underneath.

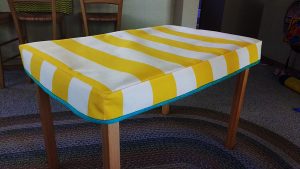
Flipped over and on the table, you can see how much more snugly the tablecloth fits because of the topstitching.
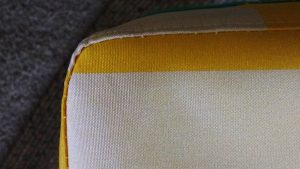
Flipped over & on the table, you can see how much more snugly the tablecloth fits because of the topstitching.

Flipped over & on the table, you can see how much more snugly the tablecloth fits because of the topstitching.

How darling is this?

How darling is this?

How darling is this?

This is a quick pic of it inside.

This is a quick pic of it inside.

This is a quick pic of it inside.

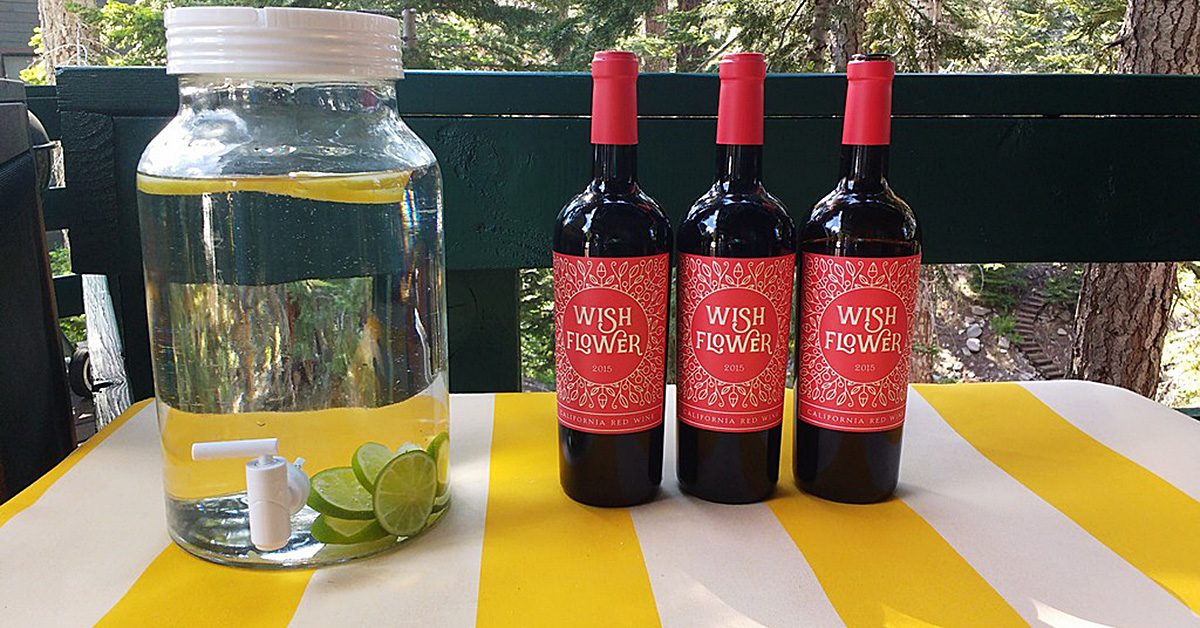
And at last, my idea worked out great on the deck where I served lasagna for my guests and later, cheese and wine. I love it when a project works out!

I love it when a project works out!
I love it when a project works out!
———————————————————————————–
Charlotte Kaufman is a writer and sewist in Mammoth Lakes, California. She specializes in marine and home interiors and continues to fall more and more in love with quilting. You can follow her at charlottekaufman.com.
How to Sew Sunbrella Fabric Outdoor Pillows

How to Sew Sunbrella Fabric Outdoor Pillows

How to sew Sunbrella fabric outdoor pillows.

How to sew Sunbrella fabric outdoor pillows.

After a record amount of snowfall this year and the ensuing snow melt and run off, my new home town of Mammoth Lakes, California is in full summer swing. We live at 8,000ft elevation. This means that while we’re high up amongst mountains and the trees, we’re also closer to the sun. UV exposure increases about 4% for every 1000 ft. (305 m) gain in elevation (source). So at my house, we are 32% more exposed to UV rays than at sea level.

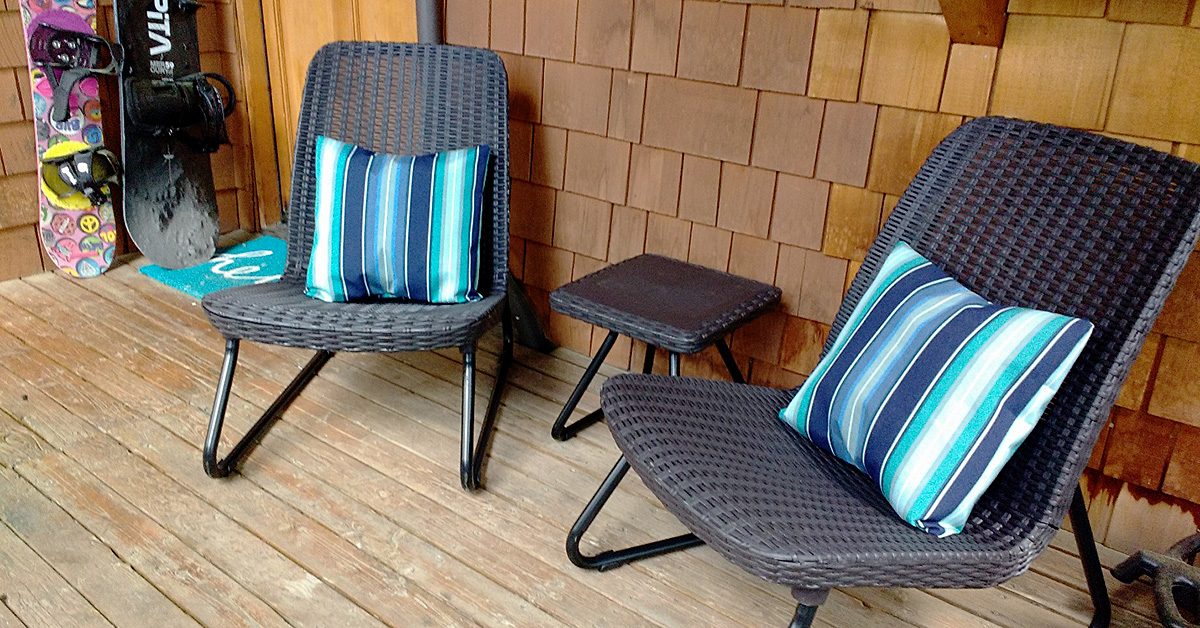
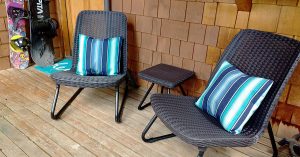
I mention this because I recently made some outdoor pillows for our patio furniture. I immediately chose Sunbrella fabric as my go-to because of its incredible sun resistance and durability (among many, many other factors. Seriously, read up on Glen Raven’s Sunbrella fabric and see why it’s the number one choice in marine environments).

Sunbrella

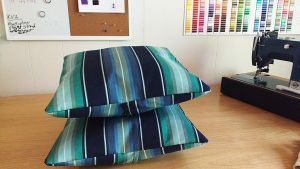
I dug through my stash of Sunbrella which is currently three yards of fabric. I settled on Sunbrella Saxon Cascade, both because I liked the pop of turquoise and how it matched with my welcome door mat, and because the other two pieces’ stripes were too big for the 18″ x 18″ pillow forms I planned to use.

Sunbrella is an acrylic fabric & hot knives cut through it like butter.

Sunbrella is an acrylic fabric & hot knives cut through it like butter.

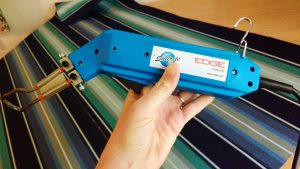
Sunbrella is an acrylic fabric and hot knives cut through it like butter. I love to use hot knives when I cut out my pieces because the knife seals the edges to prevent unraveling.

I love to use hot knives when I cut out my pieces because the knife seals the edges to prevent unraveling.

I love to use hot knives when I cut out my pieces because the knife seals the edges to prevent unraveling.

Clover Chaco Liner pen

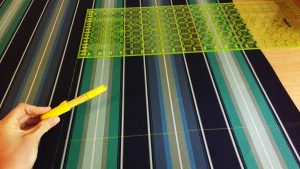
I planned to do envelope closes for these pillows so I marked out my two front pieces and four back panel pieces. For navy or black-colored fabric I use my Clover Chaco Liner pen in Yellow which is available from SewingMachinesPlus.com.

For navy or black-colored fabric I use my Clover Chaco Liner pen in Yellow.

For navy or black-colored fabric I use my Clover Chaco Liner pen in Yellow.

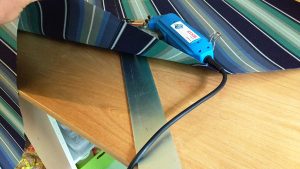
It’s super important that you put metal or ceramic, or something safe under the marked lines you’ll be using the hot knife on. I flip my 48” Starrett ruler over and cut on that.

It’s super important that you put something safe under the marked lines you’ll be using the hot knife on.

It’s super important that you put something safe under the marked lines you’ll be using the hot knife on.

Rounded corners

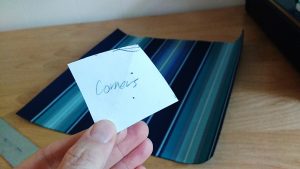
Next, I like to slightly round the corners of the pillow fronts (I’ll do it to the back pieces too once everything is sewn together.) I went over this method in my post here on how to sew square pillows with piping.

I like to slightly round the corners of the pillow fronts.

I like to slightly round the corners of the pillow fronts.

Now it’s time to finish the seams on your back panels. Sunbrella is great for finger folding over, plus working with stripes often makes marking your seams easy.

Tip: when you use a hot knife it can make the finished edges of Sunbrella fabric a little sharp. Be careful when finger folding that you don’t hurt your fingers!

Now is the time to sew in a tag if you have one.

Now is the time to sew in a tag if you have one.

Now is the time to sew in a tag if you have one.

Wonder Clips

Putting a regular sewing pin through Sunbrella is almost impossible. I use Wonder Clips on projects this small to hold my pieces together. SewingMachinesPlus.com has them available here.

I use Wonder Clips on projects this small to hold my pieces together.

I use Wonder Clips on projects this small to hold my pieces together.

Once sewn, I use the hot knife to round the corners of the back panels to match the top panels.

I use the hot knife to round the corners of the back panels to match the top panels.

I use the hot knife to round the corners of the back panels to match the top panels.

Now it’s time to turn. This will be crinkly!

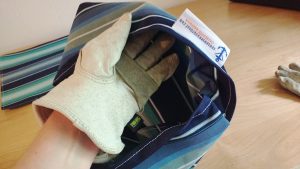
Tip: use leather gloves or gardening gloves while turning your fabric to avoid getting your skin cut or scratched from the hot-knifed edges of fabric.

Use leather gloves or gardening gloves while turning your fabric.

Use leather gloves or gardening gloves while turning your fabric.

Fluff time!

Slip in your pillow forms and enjoy!

Slip in your pillow forms and enjoy!

Slip in your pillow forms and enjoy!

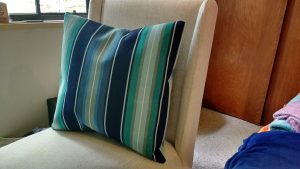
How gorgeous is that fabric? Truly!

How gorgeous is that fabric? Truly!

How gorgeous is that fabric? Truly!

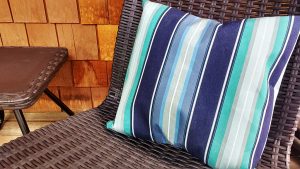
And an outside view.

And an outside view.

And an outside view.

Do you make your own outdoor furniture accessories? Tell us about it in comments!

Do you make your own outdoor furniture accessories?

Do you make your own outdoor furniture accessories?

———————————————————————————–
Charlotte Kaufman is a writer and sewist in Mammoth Lakes, California. She specializes in marine and home interiors and continues to fall more and more in love with quilting. You can follow her at charlottekaufman.com.

Gifts for Grads Who Love to Sew

Getting through school requires determination, persistence and intelligence.

Getting through school requires determination, persistence and intelligence.

Getting through school requires determination, persistence and intelligence. Graduating seniors have earned the recognition and gifts their family bestows. We’d like to throw our hat in the ring and congratulate all graduates this year too! To help them celebrate, we have some great gift suggestions for grads who love to sew.

Sewing Totes

As your graduate heads out into the world for the next phase of their life, they’ll want to have their sewing machine and supplies with them. Sewing totes are the perfect way for them to pack up all their sewing gear safely and transport it to this next step on their life and for all the subsequent moves to come. The variety of colors, styles and sizes means you’ll find the perfect sewing tote for your graduate.

Embroidery Hoops

Not all of this year’s grads will embroider, but those who do will love getting a gift of embroidery hoops. Try getting them a variety of shapes and sizes so they’ll have plenty on hand for future projects. And know that any time they use one of the hoops you gave them, they’ll think of you while working on their embroidery project. Those warm memories will work their way into the project, making it that much more special.

Sewing Furniture

Many new graduates begin by moving into a place of their own – with or without roommates. Help them get set up and make their place comfortable with sewing furniture. Whether they’ll have a separate sewing room or a small space in the corner of a shared apartment, the right sewing furniture will help them feel more comfortable and settle into their new living arrangements.

Garment Care

With luck, the graduate in your life has a job lined up. Whether they do or not, they’ll need to look their professional best on the on the job hunt and in the workplace. Garment care items will help them do just that. They work well on both store-bought and handmade items, so your graduate who loves to sew may wind up sharing these gifts with their roommates and coworkers.

Graduates who love to sew may also appreciate gift certificates to fabric stores or to our website. What will you buy your grad this year?

Cross Stitch Panel Pillows with Mitered Fabric Framing

Cross Stitch Panel Pillows with Mitered Fabric Framing

My sister, Sariah, and I are both talented sewists, though we tend to focus on sewing different types of things.

My sister, Sariah, and I are both talented sewists, though we tend to focus on sewing different types of things.

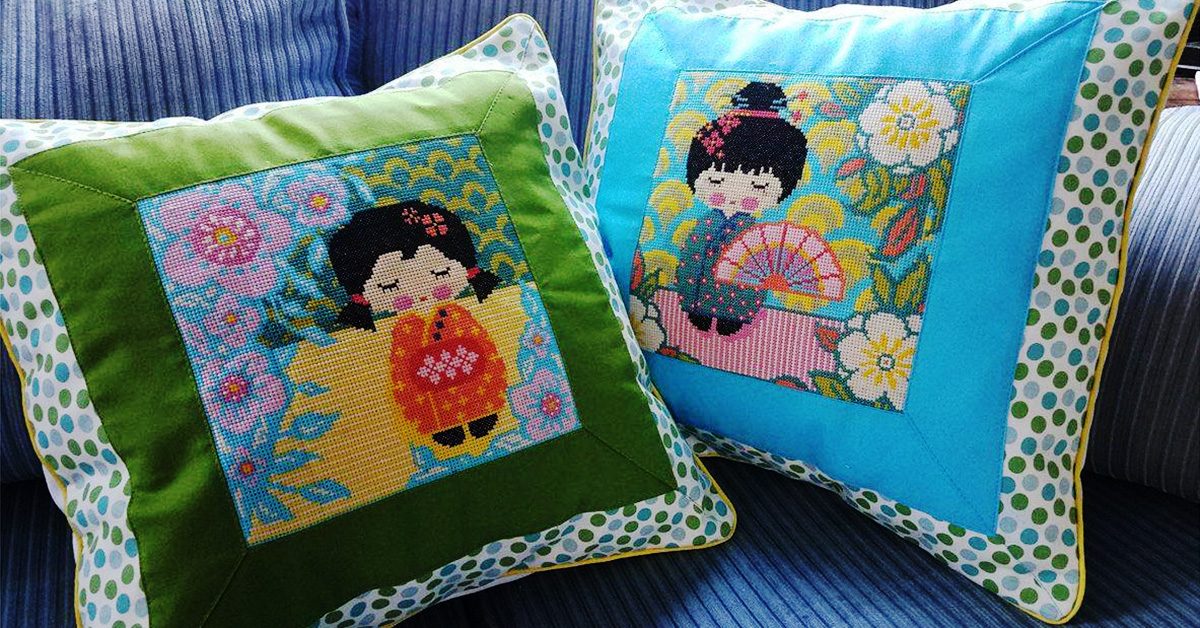
My sister, Sariah, and I are both talented sewists, though we tend to focus on sewing different types of things (however we both are unified in our love of quilting!). While my sister can sew entire outfits in mere hours, I don’t have the handmade clothing gene. Instead, I do pillows, cushions, drapes and other marine and home décor. Because our talents diverge, sometimes we collaborate. I will often send fabric to her and she will sew Halloween costumes for my girls, whereas, she will send me something like these two beautiful cross stitch panels, and I will turn them into decorative pillows.

Because cross stitch fabric is fairly sturdy, I used white canvas duck to match the fabric thickness.

Because cross stitch fabric is fairly sturdy, I used white canvas duck to match the fabric thickness.

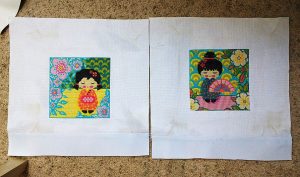
Sariah had purchased 16″ x 16″ pillow forms for these so I needed to add some fabric onto the bottom of each cross stitch panel to make them into large enough fabric squares for the pillows. Because cross stitch fabric is fairly sturdy, I used white canvas duck to match the fabric thickness.

Next up was taking a look at the fabric she had sent.

Next up was taking a look at the fabric she had sent.

Next up was taking a look at the fabric she had sent. She told me I could be as creative as I’d like and as soon as I saw her talented cross stitching, I knew I wanted to frame each one and to make sure the corners were mitered.

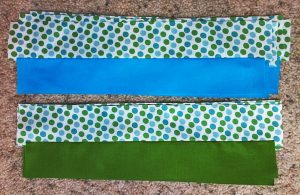
I assigned green to one of the dolls and blue to the other.

I assigned green to one of the dolls and blue to the other.

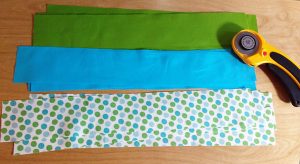
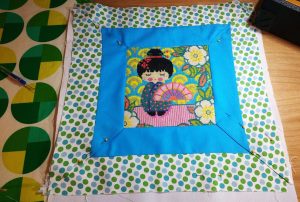
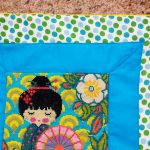
I assigned green to one of the dolls and blue to the other. Both panels got dots for the outer edging. Once I’d sewn the dots and blue and the dots and green into cohesive strips, I meticulously sewed the strips around all four sides of the dolls’ squares.

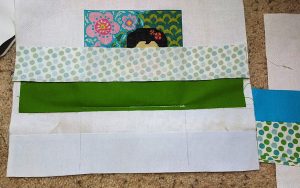
I only stitched around the actual cross stitching, leaving the rest of the fabric loose on all four sides like this.

I only stitched around the actual cross stitching, leaving the rest of the fabric loose on all four sides like this.

I only stitched around the actual cross stitching, leaving the rest of the fabric loose on all four sides like this.

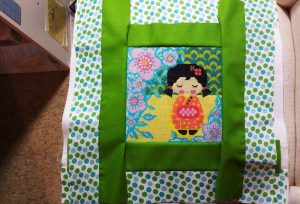
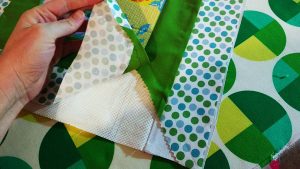
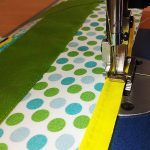
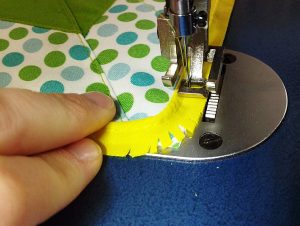
Next I hand folded the top and bottom panels back, using my fingers to crease the fabric exactly on the mitered corners, where each fabric strip met the next one.

Next I hand folded the top and bottom panels back, using my fingers to crease the fabric exactly on the mitered corners, where each fabric strip met the next one.

Next I hand folded the top and bottom panels back, using my fingers to crease the fabric exactly on the mitered corners, where each fabric strip met the next one.

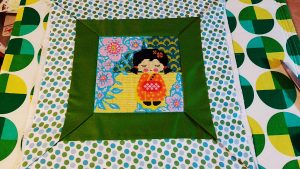
Once I was sure I’d nailed it, I ironed the panels and then trimmed off the extra fabric from all the strips.

Once I was sure I’d nailed it, I ironed the panels and then trimmed off the extra fabric from all the strips.

Once I was sure I’d nailed it, I ironed the panels and then trimmed off the extra fabric from all the strips.

The pieces were pinned until I could topstitch the mitered corners in place.

The pieces were pinned until I could topstitch the mitered corners in place.

The pieces were pinned until I could topstitch the mitered corners in place.

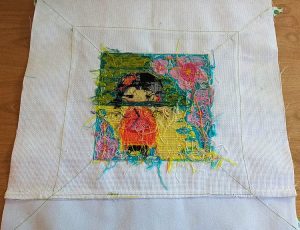
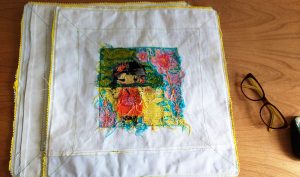
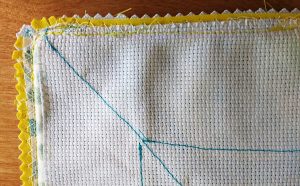
I love this shot from the wrong side of the fabric.

I love this shot from the wrong side of the fabric.

I love this shot from the wrong side of the fabric. The chaos of the underside of the cross stitching is very beautiful, and you can perfectly see the backside of the top stitching.

Once the panels were top stitched it was time to add piping.

Once the panels were top stitched it was time to add piping.

Once the panels were top stitched it was time to add piping. If your machine comes with a piping foot, now is when you would add one. I have two machines and I generally use my industrial one, a Sailrite LSZ-1 for piping and cording. Its standard foot has a built-in arch that makes sewing piping a dream.

https://www.sewingmachinesplus.com/4130971-45.php

When you come to corners, don’t forget to trim your piping right up, but not into, the stitching of the finished piping. This will help it to lay flat as you turn.

When both front panels were piped, I cut out four back panels to create an envelope close on their backs.

When both front panels were piped, I cut out four back panels to create an envelope close on their backs.

When both front panels were piped, I cut out four back panels to create an envelope close on their backs.

Here are the pillows fully sewn, but not yet turned right sides out.

Here are the pillows fully sewn, but not yet turned right sides out.

Here are the pillows fully sewn, but not yet turned right sides out. Before you turn your pillows out always double, and triple check your seams.

I like to reinforce each corner with additional stitching and often will sew around twice for added stability.

I like to reinforce each corner with additional stitching and often will sew around twice for added stability.

I like to reinforce each corner with additional stitching and often will sew around twice for added stability. I also zig zag stitch the very edge of the fabric to prevent future unraveling or fraying.

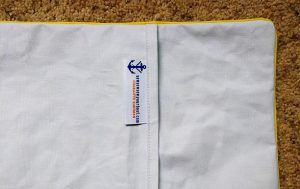
Here is a shot of the back of one of the pillows.

Here is a shot of the back of one of the pillows.

Here is a shot of the back of one of the pillows. Don’t forget to add your handmade tags!

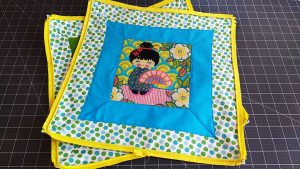
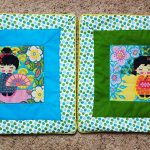
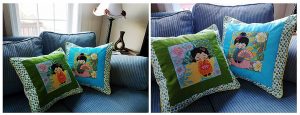
Ta-da! What a gorgeous, collaborative project.

Ta-da! What a gorgeous, collaborative project.

Ta-da! What a gorgeous, collaborative project.


I put these in the mail right away so she could get them on her couch and today while writing this post, I got pictures of the final product!
I put these in the mail right away so she could get them on her couch!

I put these in the mail right away so she could get them on her couch!

Do you ever collaborate on sewing projects? Tell us about your work in the comments!

———————————————————————————–
Charlotte Kaufman is a writer and sewist in Mammoth Lakes, California. She specializes in marine and home interiors and continues to fall more and more in love with quilting. You can follow her at charlottekaufman.com.
Design Your Dream Sewing Room

Design Your Dream Sewing Room

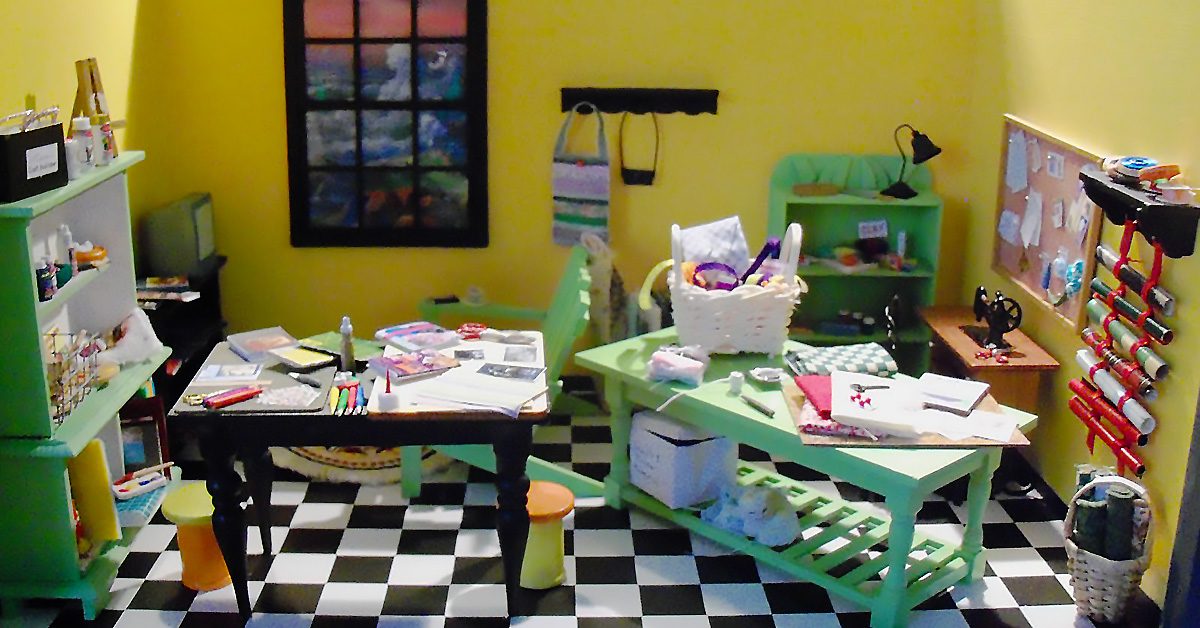
I’ve never been lucky enough to have a whole room dedicated to sewing. I’ve always kept my sewing machine and accompanying needs in a closet and pulled them out when needed. For a few hours, while I sew something, the machine takes up the dining room table. I also use the table for cutting and measuring. If it’s larger pieces, the floor gets called into action as a cutting surface. That hasn’t stopped me from thinking about what my dream sewing room would look like. Here’s what I’ve come up with. How does it align with your dream sewing room idea?

Storage

Organization and storage are critical in a sewing room. I’m not a fan of tangled thread spools or bobbins I can’t find. I hate having to search for my measuring tape and it really irks me when someone “borrows” my fabric scissors and uses them on something else. I bet you know that feeling! So, the first thing my dream sewing room would have is a way to organize all those supplies in a tidy and efficient manner. Something like this cabinet. I also adore this thread tray.

Sewing Table

It needs to be sturdy and stationary. I’m not a fan of things rolling away from me while I try to work.

Next, I’d want the perfect place for my sewing machine to sit permanently rather than pulling it out each use. It needs to be sturdy and stationary. I’m not a fan of things rolling away from me while I try to work. It also needs to be open in the back so I can stretch my legs without banging my knees or feet. Something like this adjustable height table would be ideal for me.

Cutting Surface

The final piece of furniture my dream sewing room needs is a cutting surface. I want it sturdy and stable, but also with the ability to measure and pin to. I’ve created this ideal using two pieces. First, a sturdy table with side extensions. I love that I can drop one or both sides down if I’m working on a smaller project. Second, a cutting mat. By laying this on top of the table and fastening it down with glue or Velcro or double sided tape, I’ll have a sewing surface with the ability to measure built in.

You may notice I didn’t include a chair. That’s because I already have my ideal sewing chair and it happens to live in my dining room.

What does your dream sewing room look like?

DIY Chair Cushions for Kids

DIY Chair Cushions for Kids

DIY Chair Cushions for Kids

DIY chair cushions for kids.

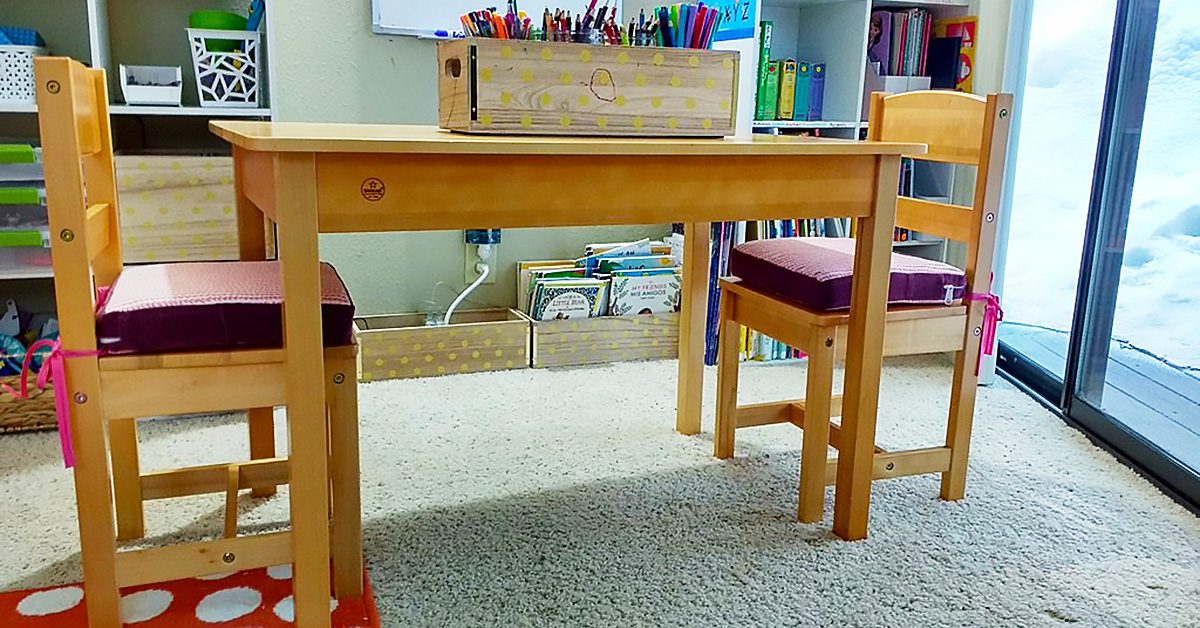
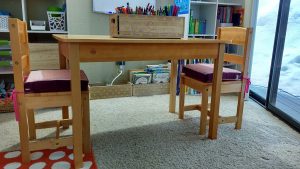
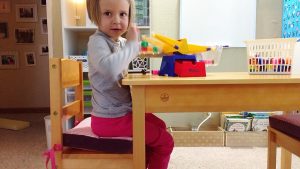
I’ve been wanting to make cushions for the art table chairs in our girls’ room for a while and I finally made it down to a craft store that sold foam this week to get started on the project.

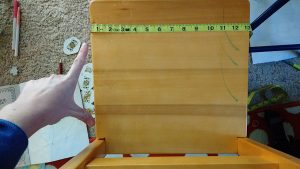
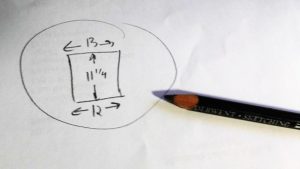
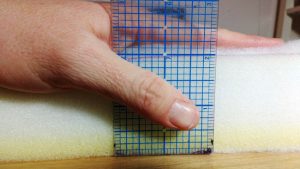
The first step in making custom cushions is accurate measurements. Notice how the chairs are not true squares? The front measurement was 13” and the back 12”. The distance between the front and back was 11 ¼”.

The first step in making custom cushions is accurate measurements.

The first step in making custom cushions is accurate measurements.

Want to know a trick with cushions? Cut your fabric to the exact size of the foam. I know this sounds counter-intuitive. ‘But what about seam allowance?’ you’re thinking. The thing is, foam compresses. If you cut your fabric to the size of the foam, and then sew ¼” seams (or ½” if using heavier duty fabric), the compression of the foam once it is in the cushion cover will more than cover the seam allowance you are used to providing on other sewing projects.

Want to know a trick with cushions? Cut your fabric to the exact size of the foam.

Want to know a trick with cushions? Cut your fabric to the exact size of the foam.

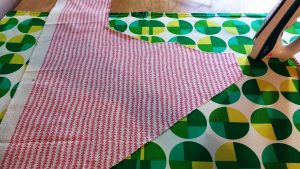
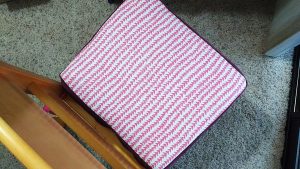
I’m trying to use up my fabric scraps this year, so I pulled out a few larger, odd-shaped scraps I had from this fabric and was able to cut out four top and bottom panels for the two chairs.

I’m trying to use up my fabric scraps this year, so I pulled out a few larger, odd-shaped scraps.

I’m trying to use up my fabric scraps this year, so I pulled out a few larger, odd-shaped scraps.

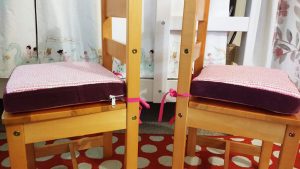
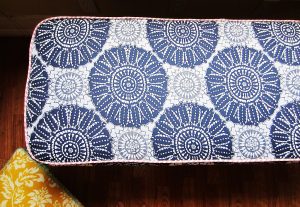
I used this fabric to make custom piping for a bench seat for the girls’ godmother. I like that they’ll have a small piece of the project I made for her in their own room. See the pink trim on the cushion below? That’s the same fabric.

See the pink trim on this cushion? That’s the same fabric.

See the pink trim on this cushion? That’s the same fabric.

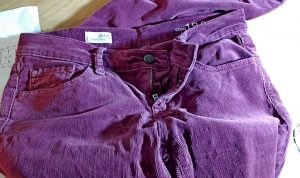
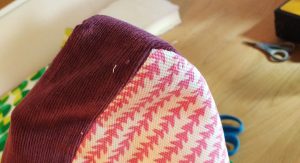
For the side panels I decided to use corduroy from an old pair of pants I’d been saving for just this kind of project. They’d developed holes along the belt loops so I had held onto them just for the pretty fabric.

For the side panels I decided to use corduroy from an old pair of pants I’d been saving for just this kind of project.

For the side panels I decided to use corduroy from an old pair of pants I’d been saving for just this kind of project.

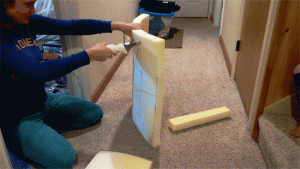
After marking the measurements with a Sharpie, I used an electric bread knife to cut the foam. It cuts through that stuff like butter. Here’s a gif as proof.

My electric bread knife cuts through the foam like butter.

My electric bread knife cuts through the foam like butter.

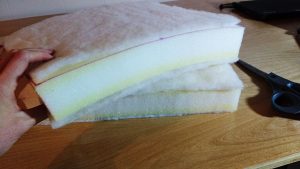
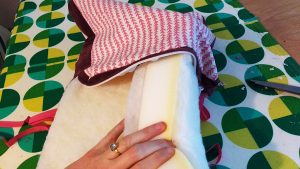
Another make-your-cushions-super-great secret is to use batting!! Wrapping them in batting or putting a layer on the top and bottom will improve how the puff up in your cushion covers. I used an adhesive spray to affix the batting to the top and bottom of each one.

I used an adhesive spray to affix the batting to the top and bottom of each one.

I used an adhesive spray to affix the batting to the top and bottom of each one.

Don’t measure the height of your sides until you’ve added batting. While the foam is 2”, adding the batting made the total measurement just under 2 ¼” (I should know what that measurement is, but I don’t. I just mark to the line under that ¼”).

While the foam is 2”, adding the batting made the total measurement just under 2 ¼”.

While the foam is 2”, adding the batting made the total measurement just under 2 ¼”.

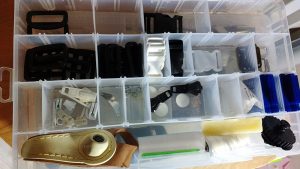
Grab your zippers and zipper pulls, or, if you aren’t like me with spares on hand, plan ahead and order them before you begin.

Grab your zippers and zipper pulls!

Grab your zippers and zipper pulls!

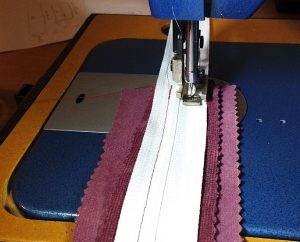
I like to sew the zipper plaques first. Use whichever technique you like. I generally use the first method shown in this video by Sailrite.

I like to sew the zipper plaques first.

I like to sew the zipper plaques first.

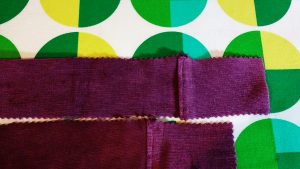
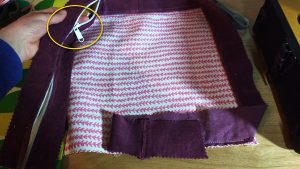
If you need to attach extra fabric to the side panels, consider adding it to the ends in small amounts so the joins don’t show on the front of the cushion.

If you need to attach extra fabric to the side panels, consider adding it to the ends in small amounts.

If you need to attach extra fabric to the side panels, consider adding it to the ends in small amounts.

Attach the zipper plaque to the side fabric and then sew onto the bottom fabric piece.

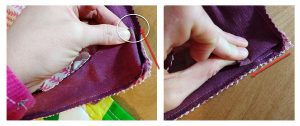
Before you begin sewing the top piece on, make sure to mark your corners accurately. Fold them to each seam to make sure they match (the yellow mark in the photo below is my matching point.)

Fold the corners to each seam to make sure they match (the yellow mark in the photo below is my matching point).

Fold the corners to each seam to make sure they match (the yellow mark in the photo below is my matching point).

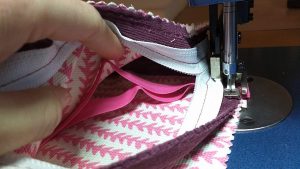
Next, make sure to slide on the zipper pulls BEFORE you sew the top piece onto the final assembly or you’ll be sad.

Next, make sure to slide on the zipper pulls BEFORE you sew the top piece onto the final assembly or you’ll be sad.

Next, make sure to slide on the zipper pulls BEFORE you sew the top piece onto the final assembly or you’ll be sad.

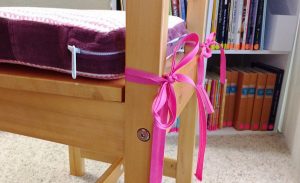
And finally, do not forget to sew your tie backs in between the seams as you go.

Do not forget to sew your tie backs in between the seams as you go.

Do not forget to sew your tie backs in between the seams as you go.

Whoohoo, you’re done! But, before you start celebrating, go over every seam to make sure they are secure.

Whoohoo, you’re done! Now, go over every seam to make sure they are secure.

Whoohoo, you’re done! Now, go over every seam to make sure they are secure.

Then take your scissors and round the corners so they turn prettier. I used pinking shears on the fabrics in this project. Check out my post from January to learn about their benefits, along with other important cutting tools for your sewing room.

Take your scissors and round the corners so they turn prettier.

Take your scissors and round the corners so they turn prettier.

When you turn the covers right-sides out, use your fingers to pop out each corner.

When you turn the covers right-sides out, use your fingers to pop out each corner.

When you turn the covers right-sides out, use your fingers to pop out each corner.

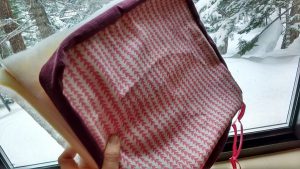
If you’ve done this right, your finished cover is going to look smaller than your foam; that’s because it is! Now is the time to put the cover on the cushion and here is where you’ll see how foam compresses to fit your new cover.

Now is the time to put the cover on the cushion & here is where you’ll see how foam compresses to fit your new cover.

Now is the time to put the cover on the cushion & here is where you’ll see how foam compresses to fit your new cover.

I’m going to use caps lock here to get across how important this next step is: DO NOT TUG OR PULL ON YOUR FABRIC TO GET IT ONTO YOUR CUSHION. I promise you, if you do that, your seams will pop. Instead, fold the cushion to slide it into the cover, and then slowly work the foam into the fabric, NOT the other way around. Just keep thinking ‘move the foam, not the fabric.’ Don’t be afraid to really get your hands deep into the cover and use them to maneuver the foam in place. Adjust, adjust, and adjust, until the cushion sits perfectly in the cover, with the lines of the foam matching the lines of the cover.

DO NOT TUG OR PULL ON YOUR FABRIC TO GET IT ONTO YOUR CUSHION!!!

DO NOT TUG OR PULL ON YOUR FABRIC TO GET IT ONTO YOUR CUSHION!!!

Ta-da!!!

Ta-da!

Ta-da!

This project turned out just darling. The corduroy almost looks like velvet and I love the effeminate touch it brings to the room.

The corduroy almost looks like velvet and I love the effeminate touch it brings to the room.

The corduroy almost looks like velvet and I love the effeminate touch it brings to the room.

These cushions will inevitably get marks on them. That’s okay, they have zippers so they can be washed, AND, they are reversible. I can just flip them over if I need to.

I can just flip them over if I need to.

I can just flip them over if I need to.

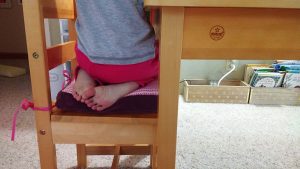
My daughters loved these and immediately hopped on and got cozy.

My daughters loved these and immediately hopped on and got cozy.

My daughters loved these and immediately hopped on and got cozy.

What DIY projects have you made for your home lately? Let us know in comments!

What DIY projects have you made for your home lately? Let us know in comments!

What DIY projects have you made for your home lately? Let us know in comments!

———————————————————————————–
Charlotte Kaufman is a writer and sewist in Mammoth Lakes, California. She specializes in marine and home interiors and continues to fall more and more in love with quilting. You can follow her at charlottekaufman.com.

Storing Your Fabric

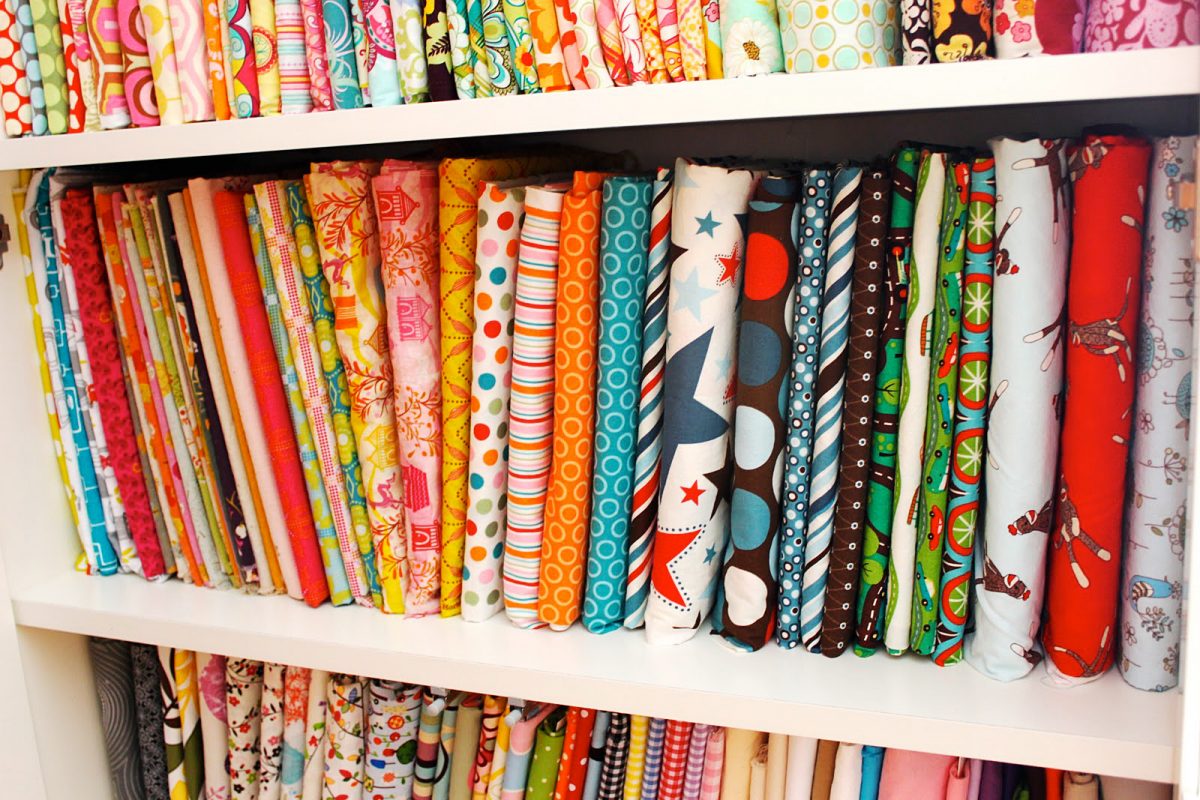
As I wind down in the steps for making my quilt, I’m finding that I have fabric scraps left over from the endeavor that I really don’t want to toss. One of the problems though is that I have a very lacking fabric storage setup. In fact, it consists of stuffing fabric into a remarkably unprofessional Hello Kitty pail (Note: I don’t even like Hello Kitty). Once that happens, I put the pail into my closet. Since said closet kind of overflows at times, the method is even more lacking than it would otherwise be.

I want to keep this fabric, but I’d like to have a better strategy of doing so. That idea had me browsing some possibilities online, and some of the options I saw were pretty basic.

Simple Solutions

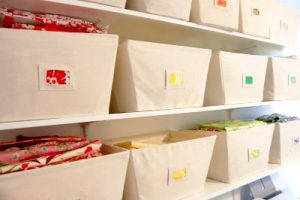
For instance, clear storage bins or canvas bins.

For instance, clear storage bins or canvas bins.

For instance, clear storage bins or canvas bins. While these are simple and efficient ideas for keeping my fabric in order, the truth of the matter is that they’re also, at the moment, things that would probably end up getting stashed away in my closet. As one of the qualms is that my fabric is stored in my closet, neither option fixes that detail.

At least, not alone. If I had a method of storing those bins out in the open, they’d work fine. In any event, the insufficiency could certainly lead to more searching in regard to the best (complete) fabric storage option.

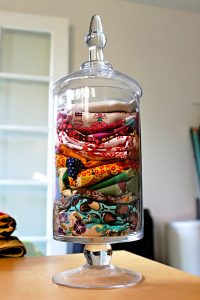
The most fitting right now is the notion of keeping excess fabric pieces in a jar.

The most fitting right now is the notion of keeping excess fabric pieces in a jar.

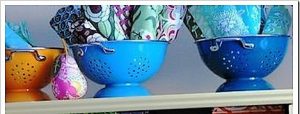
So during my search, did I have find the perfect one? That might be a complex question since I’m not sure there is a perfect one, but I did find some that are worth mentioning. The most fitting right now is the notion of keeping excess fabric pieces in a jar. I’m not sure I’d ever considered using my extra fabric in a way that actually makes it decorative even before I use it for a sewing project, but I like this concept. Most of the fabric that I have remaining is block-ish, and that smallness of leftovers seems spot-on for the store-in-a-jar method. All I’d have to do is get a jar, fold up my scraps nicely, and let the storage add accent to a room before the pieces potentially add accent to a future project. A similar idea is to store those scraps in kitchen bowls or strainers, like you can find here, or maybe a flower vase.

A similar idea is to store those scraps in kitchen bowls or strainers, like you can find here, or maybe a flower vase.

A similar idea is to store those scraps in kitchen bowls or strainers, like you can find here, or maybe a flower vase.

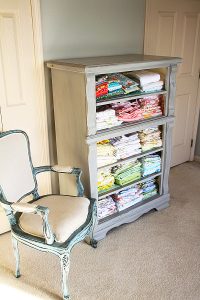
One is to take the drawers out of a dresser, and once the furniture has been treated so that it looks finished and ready, fabric can be stashed where the drawers used to be.

One is to take the drawers out of a dresser, & once the furniture has been treated so that it looks finished and ready, fabric can be stashed where the drawers used to be.

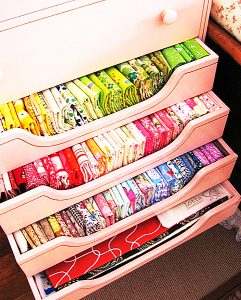
Two of the more intriguing fabric storage options I found might be more suitable for a time when/if I have more room and/or extra cash. One is to take the drawers out of a dresser, and once the furniture has been treated so that it looks finished and ready, fabric can be stashed where the drawers used to be. I adore this idea, but it’s a project itself! Be aware though that if you don’t want to go through all the sanding and painting to prepare the furniture, you could still use a dresser, drawers intact.

Be aware though that if you don’t want to go through all the sanding and painting to prepare the furniture, you could still use a dresser, drawers intact.

Be aware though that if you don’t want to go through all the sanding and painting to prepare the furniture, you could still use a dresser, drawers intact.

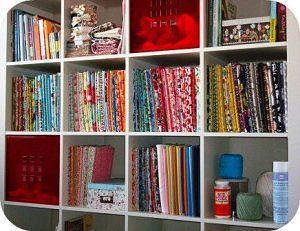
Another option is this square shelf idea that hangs on the wall. This one is particularly of interest if, like me, your bedroom, sewing room, etc. is already pretty full of furniture. When that’s the case, going upward seems like a reasonable option, and that’s exactly what this shelf would do! Being the nerd I am, this square setup appeals to me more than a different shelf idea might because it’s comic-book-ish, but that’s not to say that squares are the only possibility for this method. In fact, you might find that you have some kind of old furniture around your house that can be repurposed for this prospect — like a headboard. There might be plenty of possibilities if you spread your imagination to find them!

Another option is this square shelf idea that hangs on the wall.

Another option is this square shelf idea that hangs on the wall.

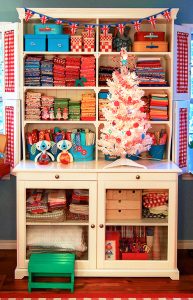
Another option is a lot simpler, but might cost more — and that’s to buy a piece of furniture that’s specifically for this purpose. This hutch, for instance, makes a wonderful and aesthetically pleasing storage area for fabric, and other than price and space, I wouldn’t hesitate to have one of these in my home.

This hutch makes a wonderful storage area for fabric, and other than price & space, I wouldn’t hesitate to have one of these in my home.

This hutch makes a wonderful storage area for fabric, and other than price & space, I wouldn’t hesitate to have one of these in my home.

But as breathtaking as these furniture options are, the truth of the matter is that I’ll probably have to start with something easier and more money-friendly. Given that the majority of my current fabric collection is scraps and/or block-ish pieces, my best bet for advancement might be the jar or strainer method, which I’m okay with!

Still, someday, that hutch, that shelf, or that dresser would be a wonderful addition to my sewing life!