Confetti Quilt-Art for Your Walls

Confetti Quilt-Art for Your Walls

Speaking of fall projects, I’ve recently come across a quilting technique that would be fantastic for creating a beautiful piece of autumn to use for wall décor. The problem, though, is that the technique used to build this work is a bit advanced, so it’s something I’m going to have to put on the back-burner for a bit until I potentially get the hang of more intricate workings of specific sewing processes.

The overall idea is out of my comfort zone right now, but it’s still something that seems like a great enough idea to share with those reading this blog post. Maybe you’re more advanced than I am in the sewing world, and this would be a simple project to you to bring fall coloring to your home’s interior. If so, gather your fabric and tulle, and get to working!


Project: Confetti-Quilted Wall Hanging


Tools and Supplies:

Sewing machine, scissors or rotary cutter, fabric (some for shredding purposes), tulle, and straight pins

The Idea:

Creating a work of art from bits of fabric
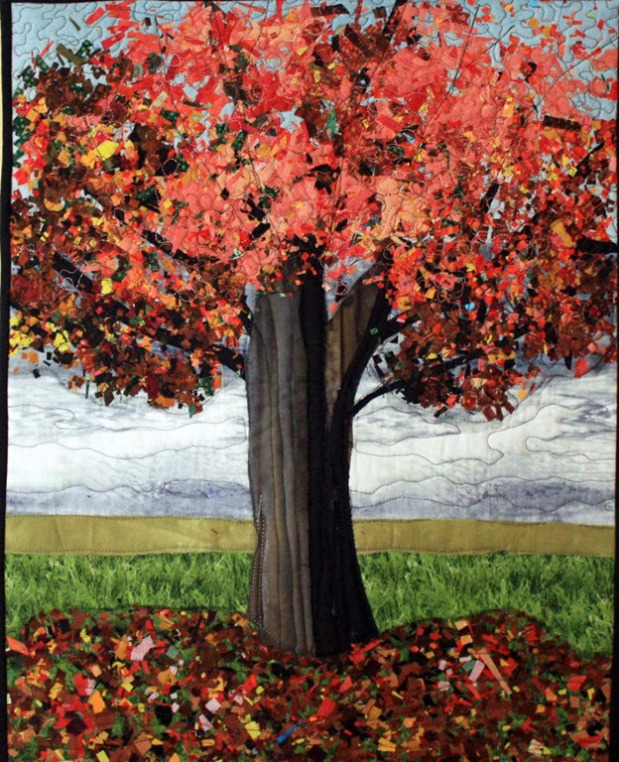
Mulberry Patch Quilts

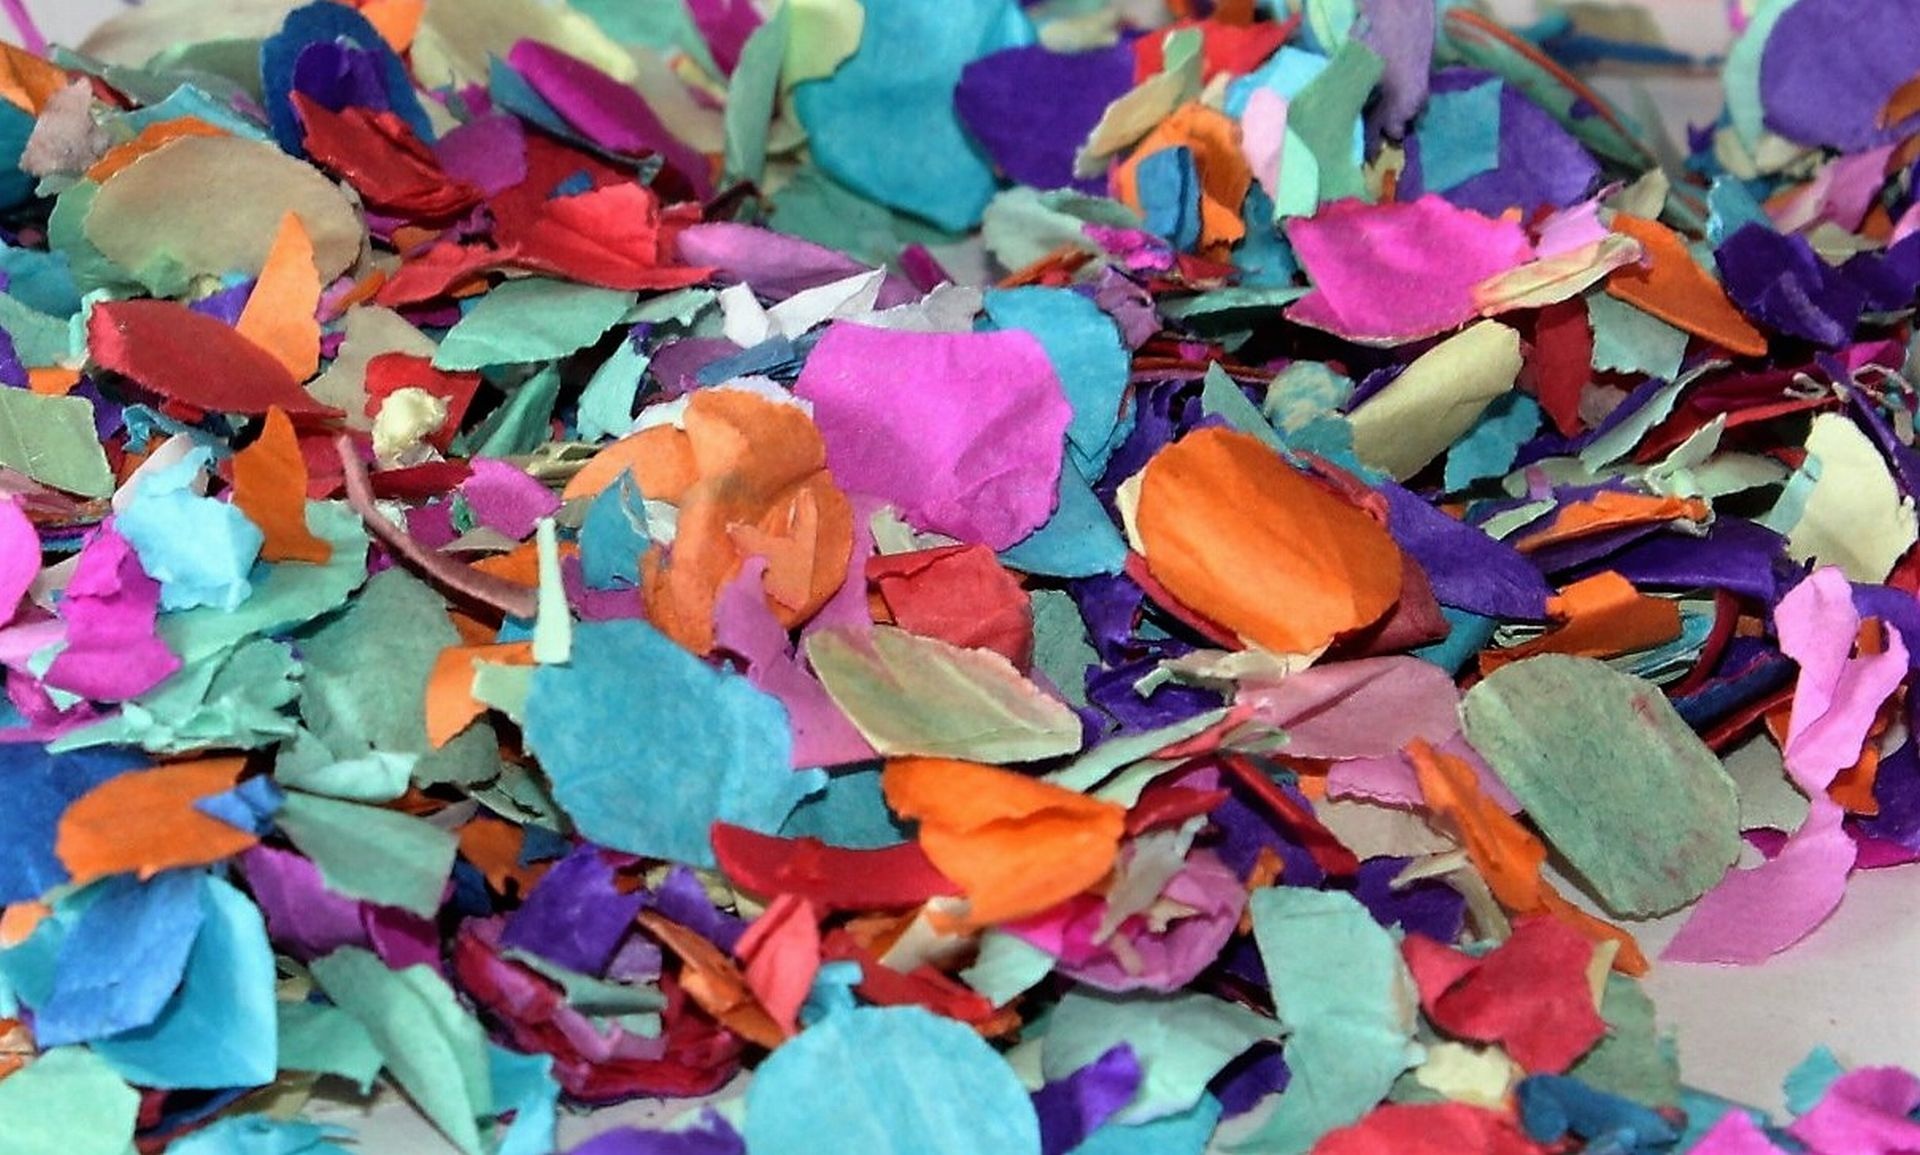
See all of these leaves? Those are tiny bits of fabric placed on the piece, or confetti fabric!

It would be easy to label this a mosaic-type project, and in a way it is because it’s a bigger picture that’s being constructed by smaller pieces. But the incredibly small sizes of these pieces are tiny enough to compare to confetti being tossed in the air, so the confetti name is actually more fitting than the mosaic title—especially since the confetti can bunch up and overlap on your design in contrast to the side-by-side nature of a mosaic piece.

This is an idea that can be put in practice to make a full quilt, but the number of times you’d have to go through the process to create enough blocks for a quilt sincerely escalates the amount of time you spend on a project. Considering fall is so close, using the one-block notion for a wall hanging is more reasonable—and it’ll create a one-of-a kind piece to show off to your home’s guests.

The advantage of confetti

The beauties here are that you can pick the size of the confetti art work, you can choose the image you want to depict, and you can even use scrap material from other projects that have little to no value for other concepts. These confetti dots are tiny, so it doesn’t take extended amounts of fabric to create them. You might want to keep that in mind as you trim up your fabric for other projects and stash away the scraps and remainders in some kind of a confetti-quilt container. That way, you can build your supply for a confetti project that pops in your head, giving you the ability to start constructing immediately rather than having to search for fabric bits.

plant-leaf-flower-petal-decoration-red-830896-pxhere.com

For a fall project, this is a good option because autumn comes with a great deal of outdoor imagery, like trees filled with colorful leaves or pumpkins placed in front of haystacks. Through the outdoor elements comes the prospect of movement and wind, so having the confetti scraps present to drizzle across your project can give the viewer that sense of movement in a display that’s random enough to highlight the notion.

Working with layers

You can layer the colors and fabrics to boost that realism until you have a strong tree covered in a series of leaves that are dropping to the ground and flying away, a pumpkin patch with dust and leaves blowing past it, a scarecrow that’s caught up in seeds that are breaking away from crops and sailing by… Lots of ways exist to put this idea into practice, and each has a look of intricate realism that’s sparked from the confetti approach.

tree-light-bench-night-photography-sunlight-1234-pxhere.com

The process to perform this task seems basic, if intricate, and so long as you keep the confetti pieces in their places with straight pins, tulle, and early sewing, you can make sure everything stays close enough to the arranged order to highlight the scene as you intended it above your mantle or over your couch—or wherever you choose to place the finished work!

Inspiration is key

If you want to find inspiration for what to depict in your confetti project, try going for a nature walk to look for signs of autumn’s approach, and when something particularly seasonal catches your eye, freeze that memory in your mind (or snap a photo) to remember it. As the month rolls on, nature itself can give you plenty of sights to choose from to be the main scene of your confetti project!

hand-screen-man-person-technology-camera-948351-pxhere.com

So, if your skills allow you to handle this intricate of a project, start looking for that autumn image to commit to a wall hanging!

The Dos and Don’ts of Sewing: Cinderella Style

The Dos and Don’ts of Sewing: Cinderella Style

One of the most classic Disney movies is Cinderella, the 1950’s cartoon version of the popular fairy tale. In this story, we see Cinderella go from being a young girl who loses her mother and has to live with an unloving step-family to a woman who’s optimistic enough to take a chance by going to a fancy ball and catching the prince’s eye.

Every detail about this story line isn’t perfect—if she’s Prince Charming’s love, why can’t he recognize her without this shoe business?—but it’s still a staple for a lot of people in regard to movies they adored as children.

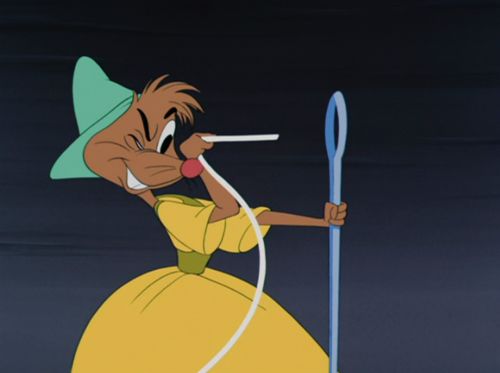
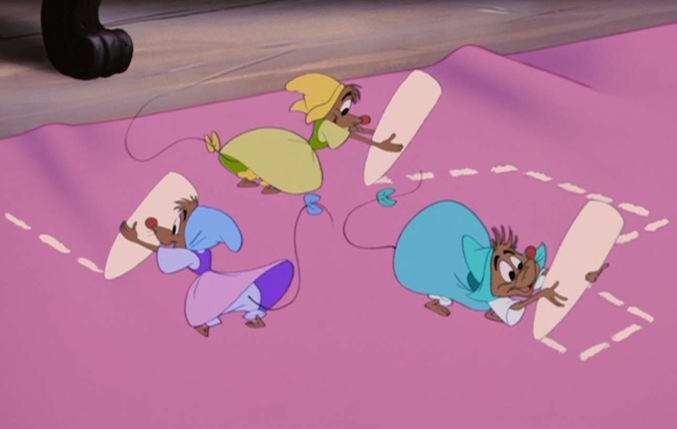
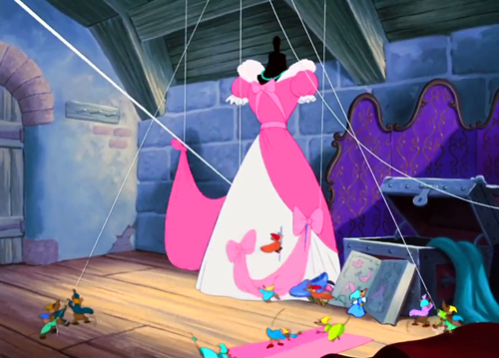
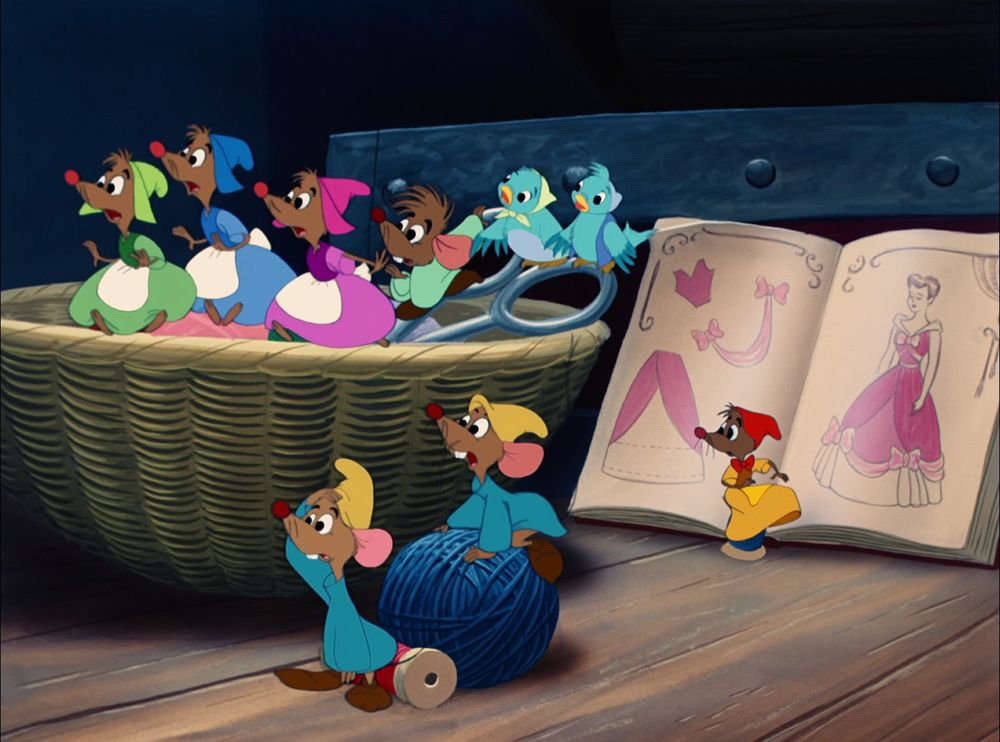
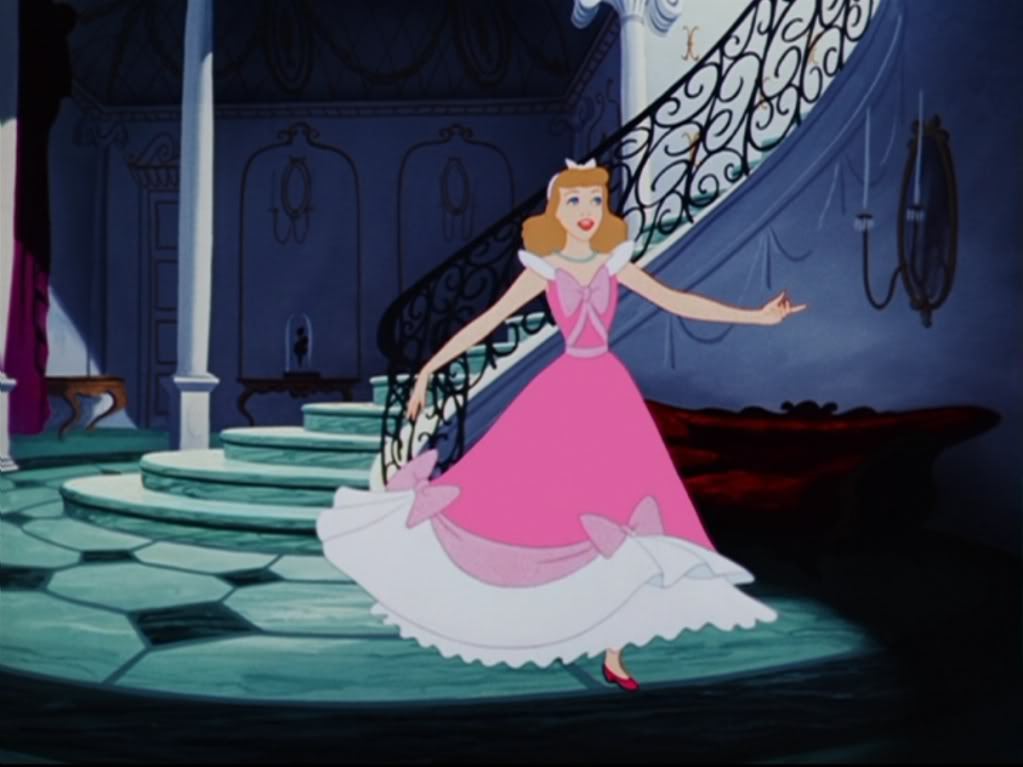
For a person who grows to appreciate sewing, the film can have another level of intrigue because sewing is a part of the story. Before the Fairy Godmother comes by to provide Cinderella her glittering, beautiful gown, she goes through the process of planning her own dress, which will be constructed from tools and materials within her home. The actual dressmaking happens at the hands of a team of friendly rodents once they realize Cinderella is too busy to finish the project herself, and the musical scene connected to their sewing is one of the most recognizable ones from Disney.Disney4

Beyond those aspects of familiarity and youth, there’s unique sewing advice happening within that dressmaking scene that you could apply to sewing endeavors. All it takes is a little consideration and a bit of imagination to find those gems of guidance within the lighthearted scenes of sewing.

For instance, these mice have applicable tools at their disposal to see this dress come to life. There’s no machine in sight, but you do see other sewing essentials, like needle, thread, scissors, and chalk, all of which can at least be representations of things that are useful for sewing. The chalk, as an example, can be replaced by soluble pencils to trace your cutting lines, and like the bulky chalk the mice are using, you can wash out the remnants later. With that strategy, you’re making sure you’re sewing in a more precise way without forever damaging the fabric. Good strategy, mice!Disney5

As the dress is being assembled through pulley systems and such, the mice have a dress form setup to keep the fabric in its most natural wearing position. This detail cannot be overstated if you’re going to sew clothing like Cinderella’s dress because it makes you able to see the dress as it should be rather than bunching it up or expanding it unnaturally on a flat surface. You can tell how the dress will look, and you could prevent a time or two of accidentally sewing your dress sides together in the wrong places. Like the mice, make sure you have that form for these purposes!Disney3

Unfortunately, though, the mice didn’t quite get everything right, and it makes sense to note those things as well. For example, you probably want to use a better method of organizing your supplies than a simple wicker basket that you can dive into. Even if you’re just tossing all of your supplies into a container like this and reaching in to gather what you need, if your organization is lacking, you could end up getting a sewing needle or straight pin in your hand. For the mice, this is particularly bad since the needle is about as tall as they are, but even for human-sized sewing fans, a straight pin in the hand can hurt!Disney2

For this reason, you should consider organizing your sewing utensils better than our Cinderella mice friends! Use different containers for different items, have shelves to display them, use chest drawers to keep them stored… Whatever your strategy, do yourself the favor of not piling everything into one area that’s dooming you to minor injury!

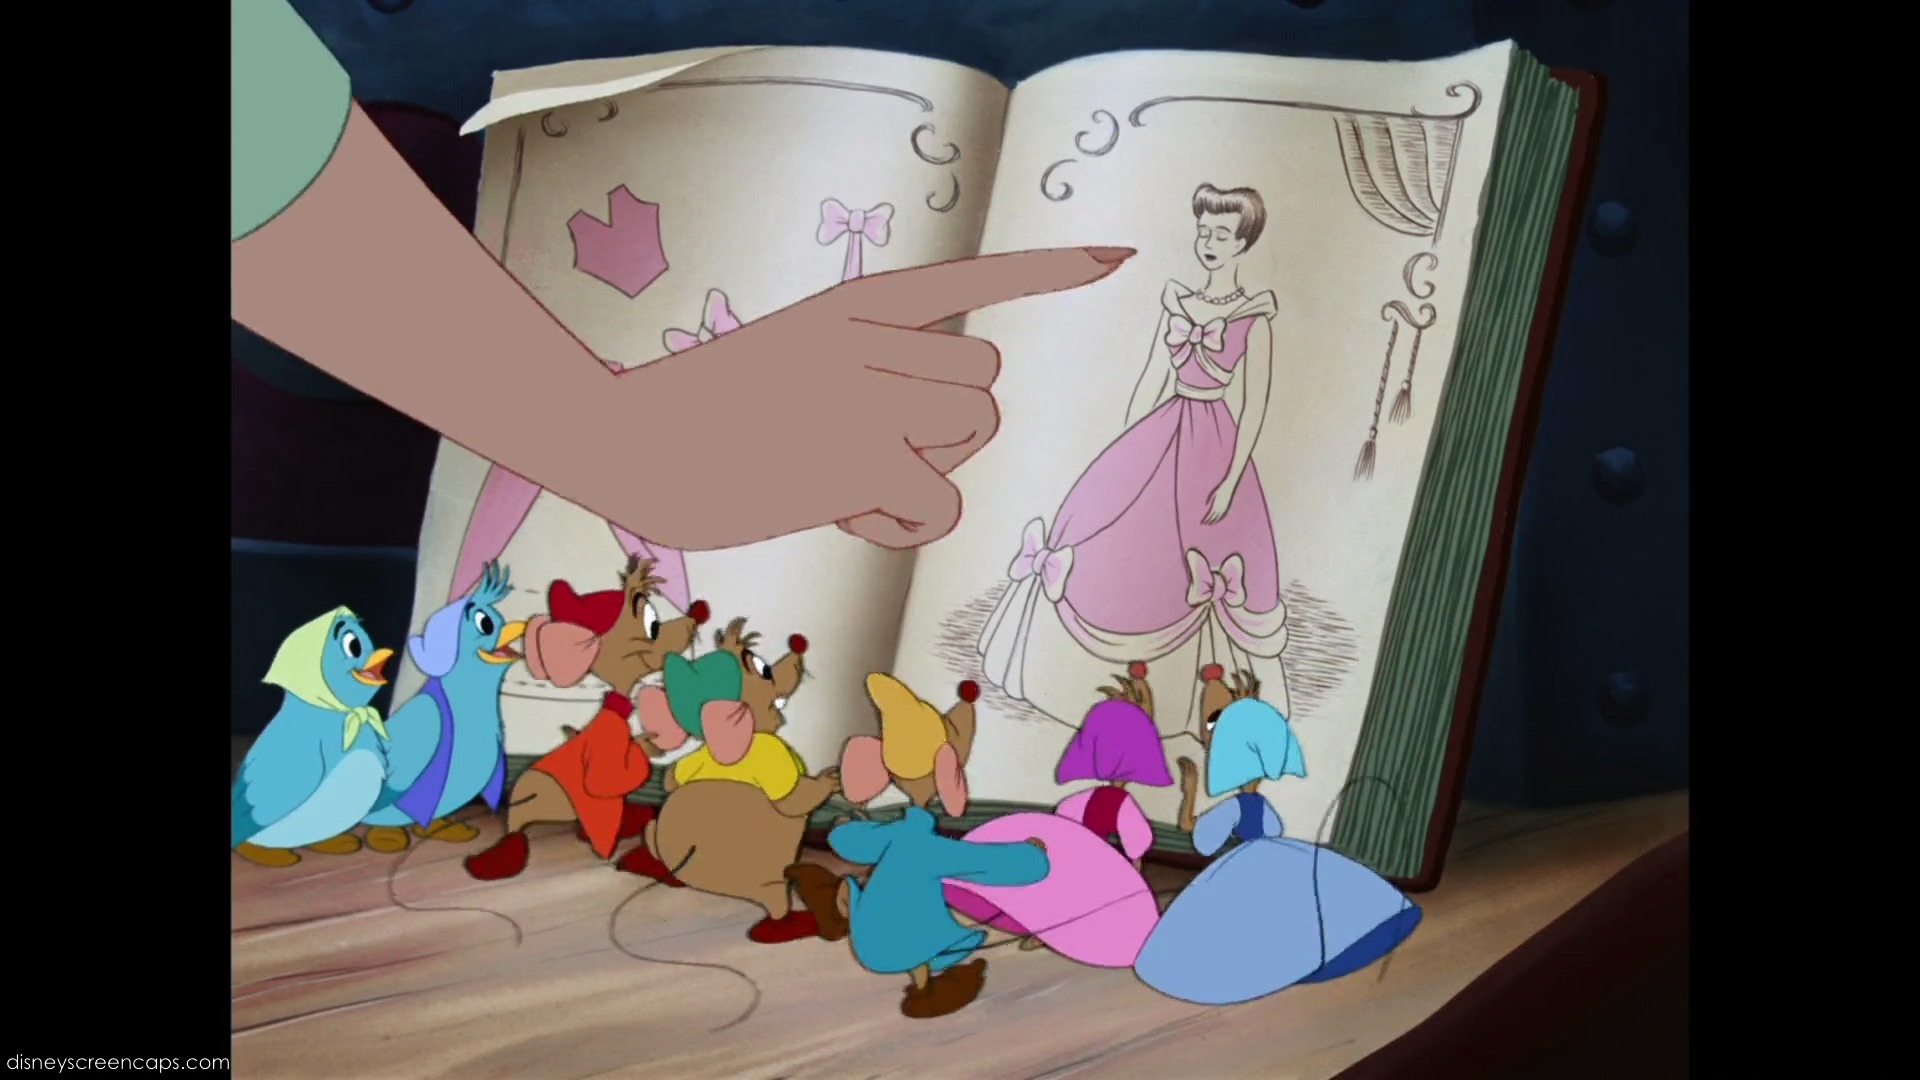
One more detail the mice get wrong is how simple they make assembling this dress seem. Sure, they employ pulleys that you probably won’t work with, but let’s be honest. Cinderella simply points out a picture in a book that she wants her dress to look like and gives very basic instructions about what needs to be done, and the mice infer all of the in-between information even though there are no measurements listed at all in the book.Disney

Fortunately for the mice, the foundation of this dress is already assembled since Cinderella is intending to alter something that she already has—another good tip from the mice: use what’s around you!—but if you take this at face value, the process is too simple. Without having measurements, at least, you could be setting yourself up to fail.Disney6

So rather than just picking a picture, use a pattern or at least take the measurements of the person who’s supposed to wear the finished product. Remember, after all, that the dress Cinderella intends to alter is her mother’s—not hers. There could’ve easily needed to be some redefining done to make it fit Cinderella just right, and the mice take a risk by not being more specific. On this, don’t be like the mice! Be measure-specific!

In the end, while the mice got some things very right and some things pretty wrong, it’s a catchy scene with an upbeat song that embraces sewing in a youthful manner. So, embrace the mice’s optimism, apply their useful techniques, and learn from what they did wrong.


Reference for all photos
Disney, W. (Producer), & Geronimi, C., Jackson, W., & Luske, H. (Directors). (1950). Cinderella [Motion Picture]. United States: Walt Disney Company.
Flat Patterning: Nothing to Fear

Flat Patterning: Nothing to Fear

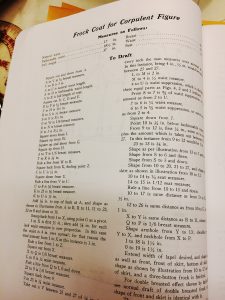
I spent part of last week flat patterning a period vest and coat for a ten year old actor for a new Amazon series based on the book Dangerous Book For Boys by Conn and Hal Iggulden.

Let’s get technical

Flat patterning is one of my most favorite things to do. It’s very mathematical & systematic.

Flat patterning is one of my most favorite things to do. It’s very mathematical & systematic.

Flat patterning is one of my most favorite things to do. It’s very mathematical and systematic. I find it strangely soothing. Many people are intimidated by flat patterning and don’t think it’s something they would ever be able to do themselves. But, the thing about flat patterning is, if you’re good at following directions, anyone can do it.

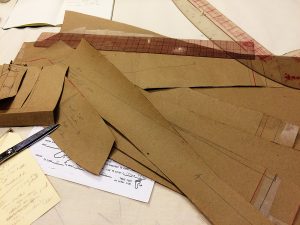
Have you ever seen the opening sequence for the movie Tailor of Panama? In it, you see a hand drawing in chalk on a piece of fabric. The hand presumably belongs to the tailor who appears to be free handing the outline of a suit jacket front. Now, that’s something you probably won’t be able to do until you’ve drafted some thousands of suit jacket fronts but, flat patterning onto a piece of brown paper by following the instructions in a flat patterning system book is something you can do.

Take a look – it’s in a book

Every person who starts out flat patterning is following someone else’s directions on how to do so.

Every person who starts out flat patterning is following someone else’s directions on how to do so.

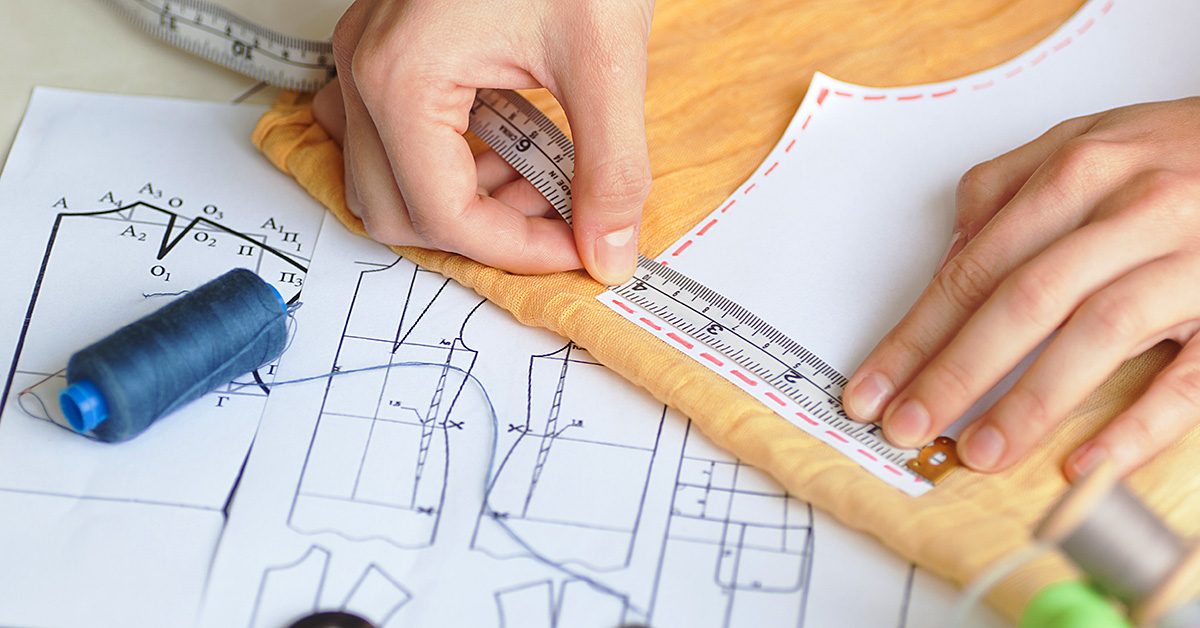
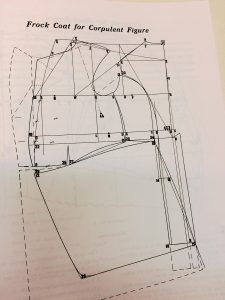
Every person who starts out flat patterning is following someone else’s directions on how to do so. If you take a flat patterning class you’ll work from whatever book the instructor likes. A flat patterning book provides step by step instructions for drawing specific pieces of clothing – things like draw a line equal to back neck to waist and square off from both ends (a and b).

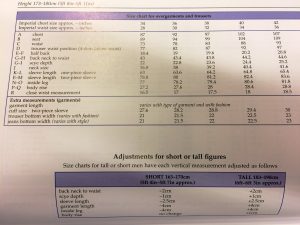
What this means is you need to know the measurement from the neck to the waist of the person you’re drafting for. You can also use standardized measurement charts (which is how commercial patterns are made). Most flat patterning books include such charts, or you can do a search online for them. The instructions for drawing the pattern will continue with the labeling of points by letters using measurements. Directions will say things like: connect e and f with a curved line or mark a point 3/8″ from g and square out.

The right pattern book for the right job

Each flat patterning will produce slightly different results as they are each based on a system developed by the author. Some systems factor in more ease than others, depending on what period the clothing is. For instance, a book on flat patterning a man’s suit jacket from the 1880s will produce a garment different than one written for patterning contemporary men’s suit jackets.

You can also use standardized measurement charts (which is how commercial patterns are made).

You can also use standardized measurement charts (which is how commercial patterns are made).

So, how do you know which book to work from? It honestly doesn’t matter all that much when you’re first starting out. But as you get more comfortable with it, you can try different books to see what end results you like better.

One of my most favorite patterning books is Dress Design: Draping and Flat Patterning Method by Hillhouse and Mansfield. The book, written in 1948, gives instructions for a variety of really cool 1940s dresses and suits. It’s not always useful if I’m making something that isn’t a 1940s garment but it’s a wonderful book to study and try out different techniques.

Some other excellent patterning books that are used often in colleges are Norma R. Hollin’s Pattern Making by the Flat Pattern Method and Designing Apparel through the Flat Pattern by Rolfo, Kopp, Gross, and Zelin.

I also like Metric Pattern Cutting books by Winifred Aldrich, though these do require being able to convert your measurements into the metric system. Some pattern makers believe that the metric system allows for increased accuracy when patterning.

Pattern Making by Tomoko Nakamichi is a creative non-traditional approach to patterning and gives instructions for unique geometric Japanese garments.

Tools

A few other tools that are handy to have when you’re flat patterning are a clear see-through ruler, a curved ruler, & an L-shaped ruler.

A few other tools that are handy to have when you’re flat patterning are a clear see-through ruler, a curved ruler, & an L-shaped ruler.

A few other tools that are handy to have when you’re flat patterning are a clear see-through ruler, a curved ruler, and an L-shaped ruler.

Most pattern makers use a regular old pencil to draft the initial pattern. If they need to go back and make corrections, they’ll often use a red or blue pencil so they’ll know which line is the new line. I, personally, am a fan of the red pencil for corrections as it’s easier to see than a blue one.

If you’ve been wanting to try your hand at flat patterning but didn’t know where to start now’s the time to get yourself a book and start learning! If you don’t want to purchase a book (some of them can be quite expensive), check out your local library. You can, also, of course find used pattern books on Ebay – just don’t get too caught up in auction frenzy and pay too much.

Happy patterning!

Fast and Easy Way to Hem Pants

Fast and Easy Way to Hem Pants

My fast and easy way to hem jeans & pants.

My fast and easy way to hem jeans & pants.

I’m barely over 5’ tall. It used to be that clothing companies made pants in “short” lengths to accommodate people of my stature. More and more often now, though, I’m finding that clothing companies, particularly jeans producers, make pants in “regular” and “tall.” I’m not sure why they think all the short (or as I prefer to call it, concentrated awesome) people no longer need pants, but there you have it. As you can imagine, this leaves me with the choice of either patching jeans and pants until there’s nothing left to them, or buying clothes that are too long and hemming them. Hemming something I’ve paid money for ticks me off, so I want to get it done and over with quickly. I developed a fast and easy way to hem jeans and pants.

First

Find a pair of pants that are a length you like. These will act as your template or guide. Lay them flat and smooth. If possible, I suggest pinning them down to keep them flat. Next, turn the pair of pants you’re going to hem inside out. Lay them on top of the pants that are the correct length.

Let’s begin

Choose a place on the leg of the pants where you’ll be okay with seeing a line. I often opt for the upper thigh. In that spot, pull the leg of the pants that are too long up, gathering the extra fabric in a straight fold that goes around the entire leg as you go. When the pants are the right length, pin this fold so that it comes directly out from the leg itself. Do this on both legs.

Almost done…

Sew around the fold to create your shortened pants, then cut off the extra fabric. Whip stitch around the cut edge for extra strength in the seam and reassurance that it won’t split apart while you’re wearing your new pants. Again, do the same thing on both legs.

Viola!

Hemmed pants, perfect for your height – no measuring or marking required. This is one of my favorite “sewing cheats” because it’s so quick and helps me buy pants and jeans affordably, even clothing companies no longer feel the need to cater to people my size. Give it a try next time you need to hem pants and let me know what you think!

How to Sew Buttonholes

How to Sew Buttonholes

Have you been avoiding learning how to sew buttonholes?

Have you been avoiding learning how to sew buttonholes?

Have you been avoiding learning how to sew buttonholes? If you have, I don’t blame you, they used to freak me out too. I had a friend once who lightly scoffed at how averse I was to learning how to sew them. “They’re easy!” she admonished me and I tucked that away and kept reminding myself that they were easy.

What type do you need?

Finally, I couldn’t avoid it any longer. I had a project that I really needed to sew a buttonhole on. It was time to learn.

I had a project that I really needed to sew a buttonhole on.

I had a project that I really needed to sew a buttonhole on.

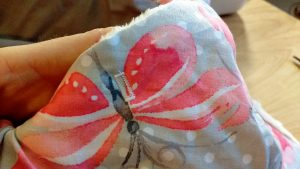
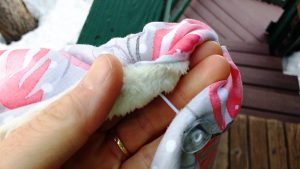
My machine has seven different buttonhole options. I read the manual and I watched a lot of how-to videos before I determined the hole I wanted to use for this project. This is a car seat poncho I made for my daughter to keep her warm in the car during the winter. You can read about it here.

This is a car seat poncho I made for my daughter to keep her warm in the car during the winter.

This is a car seat poncho I made for my daughter to keep her warm in the car during the winter.

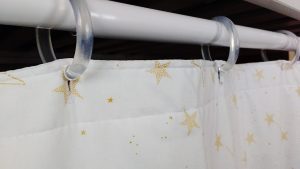
I also used the buttonhole option on my machine to make these openings for curtains in one of my girl’s bunk beds. Once I figured out how to use my buttonhole foot, truly I was unstoppable, and now I am the friend who can gently laugh and say, ‘buttonholes? They’re easy!’

I also used the buttonhole option on my machine to make these openings for curtains in one of my girl’s bunk beds.

I also used the buttonhole option on my machine to make these openings for curtains in one of my girl’s bunk beds.

Use a buttonhole foot

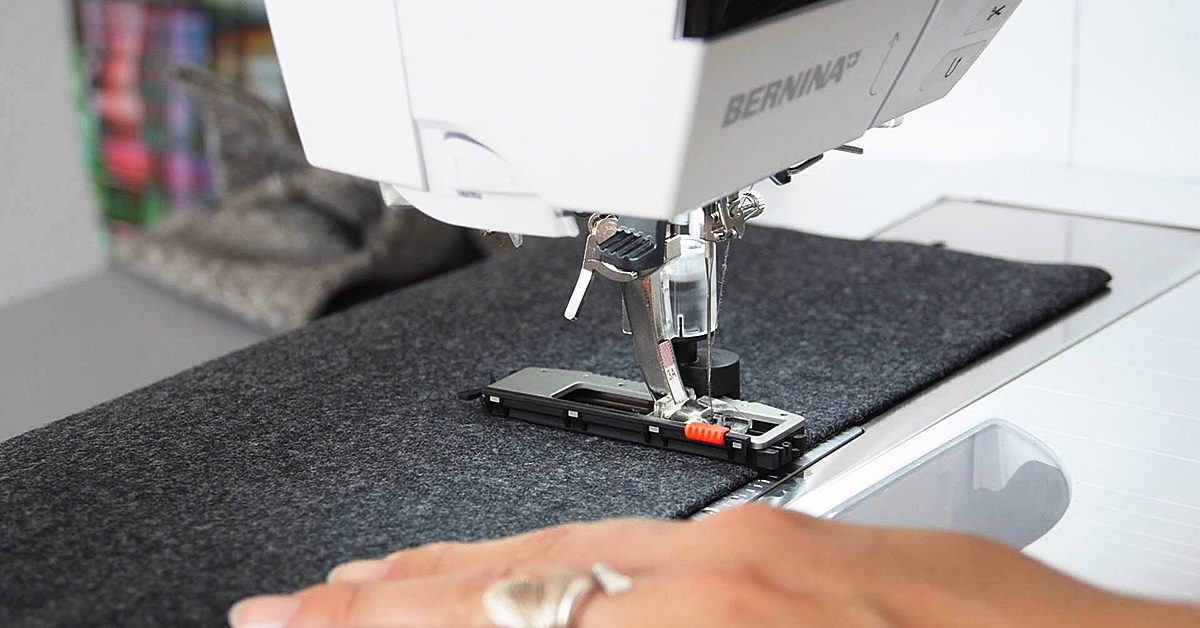
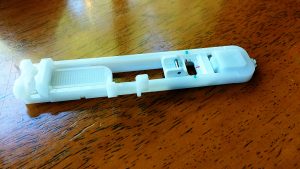
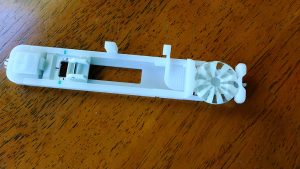
Most machines come with a buttonhole foot attachment. It is the long, weirdly shaped one.

Most machines come with a buttonhole foot attachment.

Most machines come with a buttonhole foot attachment.

The adjustable part in the back is where you’ll place the button you’ll be using on your project. It is there to sew the buttonhole to the correct size that the button can fit through. Genius, eh?

The adjustable part in the back is where you’ll place the button you’ll be using on your project.

The adjustable part in the back is where you’ll place the button you’ll be using on your project.

Your sewing machine manual is your friend

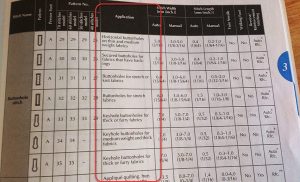
At first, you’re going to need your manual, or a really great how-to video. Your manual will tell you how to determine which buttonhole stitch to use. Pay careful attention to the Application portion. Is your fabric knit? Stretchy? Heavyweight?

Your manual will tell you how to determine which buttonhole stitch to use.

Your manual will tell you how to determine which buttonhole stitch to use.

Practice, practice, practice

Before you try a buttonhole for the first time, make sure you practice first! Don’t let your precious project be your battleground. Practice making the buttonhole on scrap fabric several times before you try on the real thing.
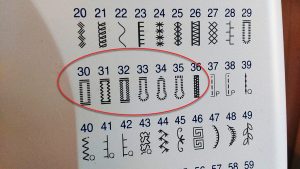
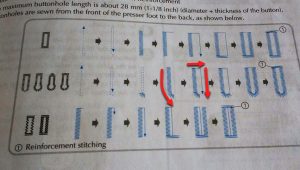
My manual even includes a visual of the way the buttonhole stitch will form with each stitch option. The most important thing I learned was to know exactly where I wanted the stitch to go and then to hold my foot down and not let it back up until the machine stopped itself. With modern machines, they do all the work for you. You just need to nail the placement and be patient.

My manual even includes a visual of the way the buttonhole stitch will form with each stitch option.

My manual even includes a visual of the way the buttonhole stitch will form with each stitch option.

Keyhole buttonholes

See the stitches that have little circles at the bottom instead of being perfect rectangles? Those are stitches for keyhole buttonholes. They are perfect for when you are using large, or heavy buttons; the circular shape at the bottom gives the button a place to rest in. Likewise, they are used for thick or furry fabrics, again to give the button more room to get through the hole.

Happy sewing. If you sew some buttonholes today, let us know!
———————————————————————————–
Charlotte Kaufman is a writer and sewist in Mammoth Lakes, California. She specializes in marine and home interiors and continues to fall more and more in love with quilting. You can follow her at charlottekaufman.com.

The Deconstruction (And Reconstruction) of Hello Kitty

Let’s same I’m thrifty, shall we? I like shopping at the Goodwill, and I’ve been known to make my way over to the clearance section in the clothes department of a non-Goodwill store. It’s a theme that’s pretty easy to spot if you look through my posts from the past. I reuse material, and updating my sewing supplies is something that I found reason to put on my 2017 goals list because I haven’t invested too much into it. I can be a bit of penny-pincher if the situation calls for it, so it’s no real shock that so much of my sewing experience involves reusing and repurposing.

Today, I offer you yet another example of that reusing and repurposing.

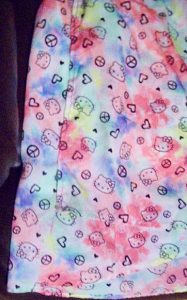
The bottom half in particular caught my interest.

The bottom half in particular caught my interest.

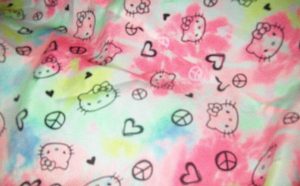
You see, I have a niece who had this Hello Kitty dress. Personally, I don’t get the interest in Hello Kitty—I’m more of a Tinker Bell kind of girl—but after the dress ended up getting ripped, my thoughts got to rolling about what could be done with the material that was left over. The bottom half in particular caught my interest. Even if I don’t particularly care for Hello Kitty myself, the material was colorful enough and in good enough shape, if you overlooked the rip, that it seemed a waste to just toss it out. My niece, after all, deserves her Hello Kitty attire!

In the end, the answer seemed simple. If the bottom half of the dress was salvageable, then a skirt was the perfect option! The white material underneath it was still in decently good shape, so I could use that like it’d been used for the dress itself. All I needed to do was plan, cut, figure, and reassemble.

Cutting was relatively easy when it came to the bottom half because I didn’t worry too much about getting straight edges. If I needed straight edges, I could do a touch-up job later. As it turned out, I wouldn’t I have to because the material was designed in a way that there wasn’t one side that specifically needed to be on the top or the bottom. See how Hello Kitty is in two different directions in the earlier picture? I could just use the more raggedy-edged side to fold over the elastic I would eventually use, and no one would see it anyway. The bottom part of the dress could be the actual line that was company-given by design.

The raggedy edges where the tear had been, I felt, could use hemming, so I saw to that. I wasn’t sure if I actually needed both sides to be hemmed, but since I was figuring it out as I went along, it seemed better to be safe than sorry! Once both sides were hemmed, I was ready to pin the Hello Kitty material onto the underlying fabric.

I opted to tack the end of the colored material to the section of Hello Kitty material beneath it.

I opted to tack the end of the colored material to the section of Hello Kitty material beneath it.

So I did! But as I’d already noticed, there was a bit of a design issue that would require an executive decision. You see, this Hello Kitty material was asymmetrical, meaning if I pinned it evenly at the top of the white material, the bottom of the Hello Kitty piece wouldn’t be even. My options then included either hemming the bottom for a symmetric look, or embracing the quirkiness of the not-so-symmetric hem.

In the end, I decided to go with the easier but more distinguishable option of letting the hem be asymmetric. I also made another executive decision to not cut off the extra side-to-side material once the white material had been completely covered. Instead, I opted to tack the end of the colored material to the section of Hello Kitty material beneath it, so the final result would seem more like a wrap-around skirt.

Once that step was finished, the top looked something like this.

Once that step was finished, the top looked something like this.

Once I’d made those decisions, sewn the raggedy edges where the tear had been on the dress, sewed all layers of material at the top, and tacked the material for that wrap-around look, all I had to do was add in the elastic. The process involved a one-section-at-a-time strategy of folding the top portion of material over the elastic, sewing so that the material overlapped the entire width of elastic, then moving to the next section—bit by bit, and at times pushing and pulling the elastic and/or fabric so that the entire top portion of the skirt was encasing that tiny piece of elastic. Once that step was finished, the top looked something like this.

And there you have it!

And there you have it!

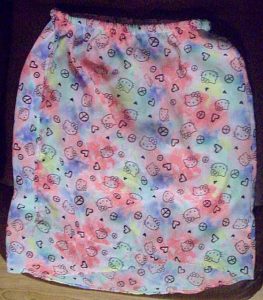
And with that step completed, the skirt was done!

And there you have it! A Hello Kitty skirt from the remnants of a Hello Kitty dress! I still have the top portion of the dress that could be used for something, but who knows? Maybe it’ll become a part of a project, and maybe it won’t 🙂

What do you guys think??? Like? Hate? Something in between? Let me know!

How to Exercise Self-Control in the Fabric Shop

How to Exercise Self-Control in the Fabric Shop

How to Exercise Self-Control in the Fabric ShopWith so many beautiful colors and textures, it can be really hard to resist buying up ALL the fabric in the store. Things like budget, project specifics, and potential use fly away in the midst of gorgeous bolts. If you’re like most people, though, buying every bolt of fabric isn’t actually feasible. Following these tips will help you stay in control of your bolt buying and your bank account.

Bring Your Pattern

Bring your pattern with you, even if you know how much fabric you need. Having it physically in your hands – in the way of grabbing endless bolts – helps you remember why you’re in the fabric shop and actually prevents you from grabbing every bolt you see. It’s a way to ground yourself in the heaven of the fabric store.

Don’t Drop In

It may be tempting when out running other errands to simply drop in to the fabric shop for a break. Don’t do this. Without a specific project in mind, it’s far too easy to buy reams and reams of fabric that will only wind up in your stash supply and may falter there for years without being used. Instead, schedule your fabric shop trips to coincide with specific projects.

Make Fabric Shopping an Event

Instead of making fabric shopping a stop on the tour de errands, make it a special event. Allow yourself lots of time to luxuriate in the bolts of fabric before you have to make a purchase. The more time you spend, the fewer “must have” fabrics will leap off the shelves and tables at you. When you’ve narrowed the selection down, it’ll be much easier to choose just the right one for your project without bringing home a bunch of other options too.

Bring Your Budget

Although it’s not possible to bring your bank or an ATM, you can bring other physical reminders of your budget. Even a piece of paper with a number on it would be sufficient. The goal is the same as with bringing your pattern – having something to hold on to helps you remember you can’t buy every bolt in the store and also keeps your hands busy so they can’t grab every bit of fabric in sight.

What else do you do to control yourself in the fabric shop?

Methods to Conquer Half-Square Triangles (HSTs)

Methods to Conquer Half-Square Triangles (HSTs)

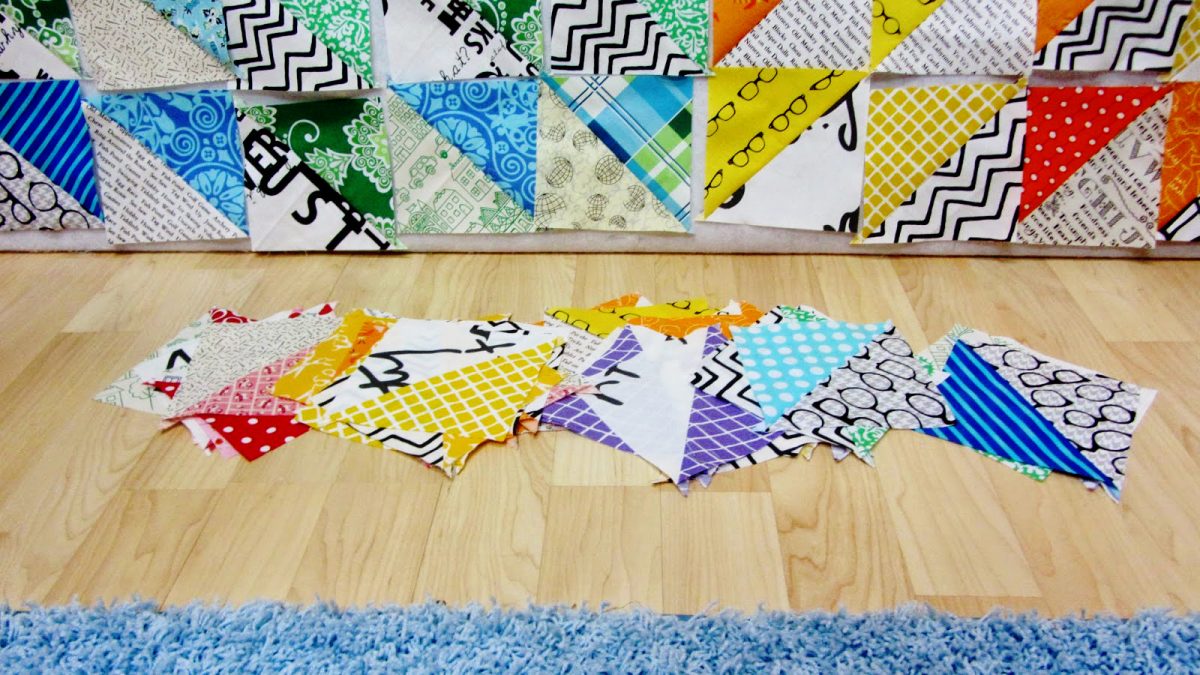
If you plan on diving into the world of quilting, you will soon run head first into half-square triangles, or HSTs in common quilting parlance.

These deceptively simple looking squares can be arranged innumerable ways to make an unending canvas of lovely. When you decide to tackle HSTs you are going to need figure out the best method for you. The most important thing to understand about HSTs is the math behind the size you want. This post does not cover that math. There are many, many charts available online to help you figure out what size triangles & squares to cut and sew in order to get the finished size you want.

Once you know your math, you’ll need to figure out your method. Here are a few to consider:

1. Tried and true

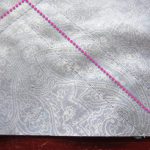
The most basic way for creating a HST is taking two squares of fabric, placing them right-sides-together (RST), drawing a line down the diagonal, and then sewing a scant ¼” on either side of the link. Cut the fabric along the center diagonal line, open and press.

Square that puppy up and before you know it…

…voilà, lovely HSTs, just for you.

Works best: when you need to only do a few HSTs or when each HST you need to do is unique.

2. Make the Magic 8

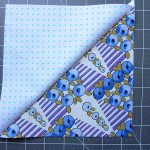
When I sewed these together both squares were evenly on top of each other.

When I sewed these together both squares were evenly on top of each other.

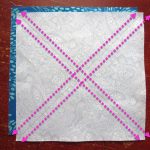
As soon as you see the visual on this you’ll get why they call it magic. Take two large squares, right sides together and draw lines down each diagonal. Sew a scant ¼” on both sides of each line for a total of 4 seams.

Start by cutting first along the two diagonal lines.

Start by cutting first along the two diagonal lines.

(For this tutorial I placed the two squares off center to show you the two fabrics. When I sewed these together both squares were evenly on top of each other.)

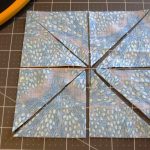
Carefully start cutting. Start by cutting first along the two diagonal lines.

Next cut down the center line of each side of the square.

Next cut down the center line of each side of the square.

Next cut down the center line of each side of the square. This will give you your magic 8!

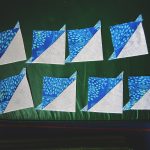
8 lovely matching HSTs

8 lovely matching HSTs

You’ll need to open, press, and square them up, but in no time flat you’ll have 8 lovely matching HSTs.

Works best: when you need more than a few. Some people can really churn out a lot of HSTs this way. If you have a bunch you need to make with the same fabrics, try this method.

3. Tube Method (Tube Quilting)

Use your ruler to cut out the size triangle you need.

Use your ruler to cut out the size triangle you need.

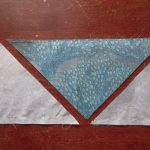
Sew two long strips together on the top and bottom edges. Then use your ruler to cut out the size triangle you need. Here I’ve shown you the tube I sewed and the triangles I cut (I flipped the top triangles over to show you the contrasting fabric).

Works best: when you need multiples of the same type of HST, this method is a production machine!
Note: it really helps to have the exact sized ruler you’ll need for cutting out the triangles.

4. Sewn Strips (Bias Strips)

Create a massive amount of HSTs in a short time!

Create a massive amount of HSTs in a short time!

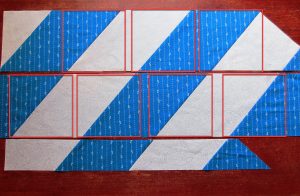
I found this the most challenging of all the techniques I’ve tried, but I’ve never been pro at cutting on the bias. There is incredible potential here, however, to create a massive amount of HSTs in a short time so I’m keeping this method tucked away for the next time I want to attempt it.

The concept is simple: take two large pieces of fabric and place them RST. Cut the fabric into bias strips (in the correct size you’ll need) and then sew the alternating colors together to create two pieces of fabric with bias strips in the colors you need.

If you did your math right, you can then cut strips of fabric that will have the HSTs already sewn together. As you can see above, I completely botched the math on this, but you live and you learn and like I said, POTENTIAL. This method has so much potential if I can just get right next time.

Works Best: when you need to make HSTs on a massive scale.
Note: take your time to get the measurements just right. If not, you’ll have a whole lot of messed up fabric on your hands. Additionally, there is fabric waste as you cut out the squares. Make sure to account for that when you buy the amount you may need.

Sew the Square

Sew the Square

5. Jenny Doan Method (Sew the Square)

I’m not sure if this method has an official name but I know it has become popularized by Jenny Doan of the Missouri Quilt Company. I consider this a cousin to the Magic 8 method. Perhaps we could even call it the Magic 4.

The Magic 4!

The Magic 4!

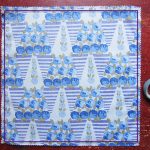
Take two pieces of fabric RST and sew a scant ¼” hem all the way around.

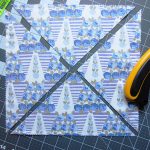
Carefully cut down the diagonals of the square and you’ll get four perfect HSTs.

You get four perfect HSTs.

You get four perfect HSTs.

Works best: this is a quick and easy method that could be easily mass produced especially when using pre-cuts.
Note: some don’t like this method means you are working on the bias. I haven’t found this to be a problem. Press carefully when you iron sew your HSTs together, without unnecessary stress or tugging, and you’ll be fine.

I hope you’ve found these methods useful. How about you? Do you use one of these methods already or do you have a different technique you prefer? Let us know in the comments!

Charlotte Kaufman is a writer and sewist in San Diego, California. She specializes in marine and home interiors and continues to fall more and more in love with quilting. You can follow her at charlottekaufman.com
Sharpen Your Scissors and Rotary Cutters

Sharpen Your Scissors and Rotary Cutters

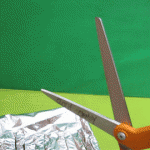
I keep my blades wicked sharp with my favorite technique: cutting aluminum foil.

I keep my blades wicked sharp with my favorite technique: cutting aluminum foil.

There is a man who comes to my local grocery store once a month and offers his services to sharpen your scissors and kitchen knives. I have never managed to make it to the store when he is there. When I kept missing his dates, I looked up ways to sharpen scissors myself. There are some surprising methods that are quite easy to do at home. Maybe one day I’ll get a professional to get these babies sharpened but until I do, I keep my blades wicked sharp with my favorite technique: cutting aluminum foil.

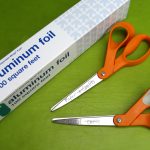
All you need is a piece of aluminum (tin) foil.

All you need is a piece of aluminum (tin) foil.

Cutting Aluminum Foil

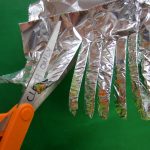
Cut thin strips with the scissors, making sure to cut from the tip of the blade all the way to the pivot points.

Cut thin strips with the scissors.

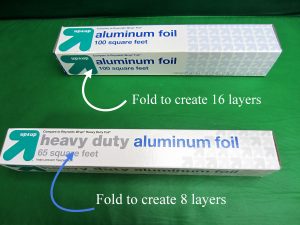
All you need is a piece of aluminum (tin) foil. Fold the foil up into 8 layers for heavy duty tin foil and 16 layers if you have regular weight.

Next, cut thin strips with the scissors, making sure to cut from the tip of the blade all the way to the pivot points. Use nice, open, broad cuts. This method also works for rotary cutters. Just run the blades over folded tin foil.

When you’ve finished cutting the tin foil, open your scissors all the way and then swiftly snap them shut.

When you’ve finished, open your scissors all the way and then swiftly snap them shut.

When you’ve finished cutting the tin foil, open your scissors all the way and then swiftly snap them shut. This will help to smooth out any tiny burs. I’ve been using the tin foil method for years now and my scissors are razor sharp after I do this.Keep your precious fabric scissors far away from children and partners who don’t understand how serious you are about your scissors.

Pro Tip: Always keep one pair of scissors reserved for paper only (so your fabric scissors don’t go dull too quickly.) Second pro tip: Keep your precious fabric scissors far away from children and partners who don’t understand how serious you are about your scissors.

Roll the foil into a ball and you now have a perfect scrubber for pots and pans.

Roll the foil into a ball and you now have a perfect scrubber for pots and pans.

Waste Not, Want Not: What to do with the tin foil you have just chopped into strips? Roll it up into a ball and you now have a perfect scrubber for pots and pans (not your non-stick, of course). You can also bring these along on camping trips for scouring out cast iron or other camping dishes.

Alternate Methods

Have a different method of scissor sharpening? Let us know your techniques.

Have a different method of scissor sharpening? Let us know!

Out of tin foil but still need to sharpen your scissors? You can use the same method with sand paper (the finer the grit, the smoother the blades). Or, you can cut up steel wool, though it will be considerably messier than the tin foil or sand paper methods.

Do you have a different method of scissor sharpening? Let us know your techniques in the comments below.

Charlotte Kaufman is a writer and sewist in San Diego, California. She specializes in marine and home interiors and continues to fall more and more in love with quilting. You can follow her at charlottekaufman.com
Dashing Dish Mat

DIY – Dashing Dish Mat

Dishes everywhere! I’ve been learning how to cook from scratch. I also made the wonderful journey into the world of baking bread. Yay, so much fun! Boo, so many dishes that must be hand-washed. Oh no, can’t just throw them in the dishwasher!  My beloved husband’s coffee pot may only be moved upon threat of death, so I created a dish mat to fit our small, unique space.

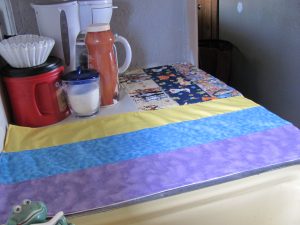
Viola! The Dashing Dish Mat!

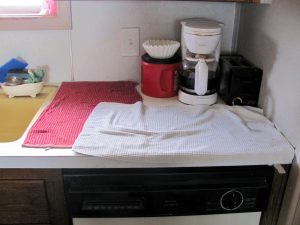
Before:

Impossible dish counter space.

Impossible dish counter space.

After:

Beautiful organization, bright space.

Beautiful organization, bright space.

Level: Beginner

Time to Complete: In an hour

Sewn By Machine: 1/4 in. straight stitch except where indicated

**Tip: Wash all new materials prior to use to avoid shrinkage when you wash it later on.

**Tip: Iron cut pieces before sewing and in between each step. This helps in the sewing process and the end results will look more professional.

Materials.

Materials.

Materials:

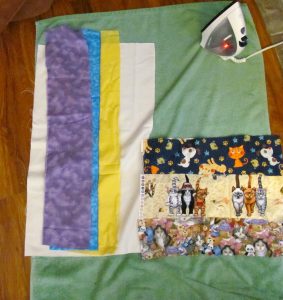
1 – 26 1/2″ L x 14 1/2″ W     Terry Cloth long part of L- for back side

1 – 13″ L x 17″ W                 Terry Cloth short part of L- for back side

3 – 27″ L x  5″ W                  Colorful fabric strips

3 – 5″ L x 17″ W                   Colorful fabric strips

  1. Measure the area where the dish mat will be. My dish mat will be L-shaped so I had to take measurements for each side. Final measurements – For lengthwise section, 26 1/2″ L x 14 1/2″ W. For L piece, 13″ L x 17″ W. I always use measuring tape instead of a ruler when measuring spaces. Measuring tape is flexible and much longer than most rulers. I add an 1/2″ to 1″ in. depending on the project to account for the material that will be used for seams. Otherwise the end project will be shorter than I want.
  2. Cut the terry cloth for the back side. Cut fabric strips.
  3. Sew two pieces of terry cloth together, right side together 1/4″ with regular straight stitch.
    • **Tip: Make sure you have the smaller L portion of the terry cloth on the correct side. This can be tricky. When you match right side together with terry cloth and fabric sides, make sure they are both on the correct side. I had to rip stitches and sew the terry cloth on the other side. I use a seam ripper with a safety ball so I cut only what I want and don’t end up ripping other areas of the fabric. 
    • **Tip: Don’t let mistakes discourage you. I make mistakes all the time, as is obvious with my terry cloth L error. Rip stitches, go back a step, start from scratch. Sewing is an adventure, and sometimes those mistakes turn into great ideas!

      Example of strip stitching.

      Example of strip stitching.

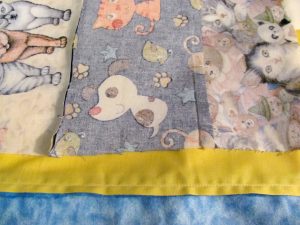
  4. Sew the vertical strips together, right sides together. Sew the horizontal strips together, right sides together. Then sew the vertical strips and horizontal strips together, on the right side.
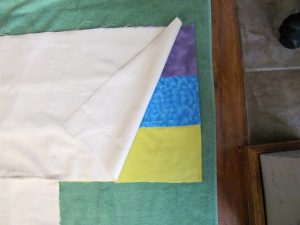
  5. Sew the terry cloth back and the striped front together right sides together. Leave one end open to pull the fabric through.

    Outside pieces facing together.

    Outside pieces facing together.

  6. Cut off the corners before pulling the fabric through.
  7. Pull the fabric through. Iron.
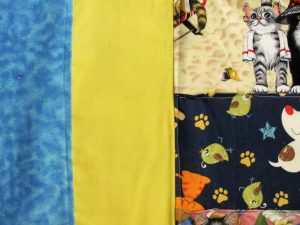
  8. Top stitch all the seams for the strips. This adds a professional look as well as making sure the seams don’t cause problems later. Iron.
  9. Top stitch all around the outside. Make sure to sew the side that was left open to pull the fabric through. Iron.
    Top stitching seams.

    Top stitching seams.

    • **Tip: A creative use of thread colors can really make a project pop. Top stitching any of the seams in different colors or in a color that would really stand out against the fabric can be that “extra touch” that makes everyone say “Wow, you made that? Could you make one for me?”
    • Place on your kitchen counter and enjoy washing dishes!

I hope you enjoyed this project. If you have any questions or comments, please share! Any ideas, shortcuts, or other contributions are welcome.

I would love receiving picture posts from you showcasing your dish mat creations 🙂