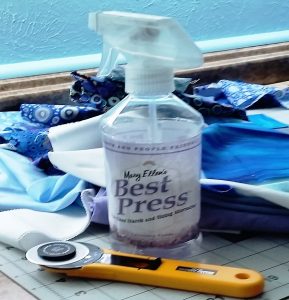
How to Sew Pocket Organizers

How to Sew Pocket Organizers

Sew pocket organizers to hold all your stuff!

Pockets are not only for clothes and bags.  You can sew pocket organizers for:

  • Shoes
  • Jewelry
  • Sewing supplies
  • Knitting or crochet supplies
  • Art supplies
  • Any other kind of supplies
  • Baby gear
  • Guitar gear
  • Other kinds of gear
  • Remotes
  • Cords or cables
  • Tools
  • Toiletries
  • First aid kit
  • Other kits
  • Frequently used pattern pieces
  • Bills or mail
  • Money
  • Magazines
  • Papers
  • Games
  • Toys

Those are just quick ideas off the top of my head; the possibilities are endless.

How to sew a single hanging pocket

Anyone can sew a pocket organizer, even absolute beginner sewists.  A basic hanging pocket is just two finished  squares or rectangles, one sewn down on three sides on top of the other.

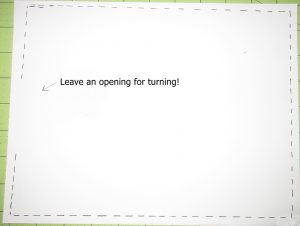
To finish the squares, you cut two identical layers and sew them around all four corners and sides with right sides together, leaving an opening for turning.

I drew this because the ink shows up better than my stitching in the photo.

I drew this because the ink shows up better than my stitching in the photo.

Clip the corners and turn right sides out. You can stick something inside to push the corners out.

Then stitch the opening closed. I usually just topstitch along that entire side. Sometimes I topstitch around all four sides.

Fold the top down an inch and a half or more towards the back and sew the edge down to form a casing for hanging. Then make a smaller finished square or rectangle pocket piece using the same directions as above.

Topstitch the pocket onto the larger panel along the sides and bottom. Don’t sew the top of the pocket closed!
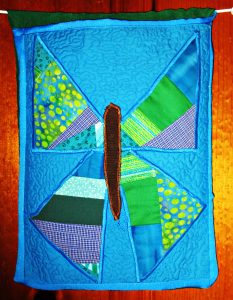
I made this pocket from my leftover butterfly block to hold mail, which used to pile up in my entryway.

I made this pocket from my leftover butterfly block to hold mail, which used to pile up in my entryway.

Or cheat and use jean pockets

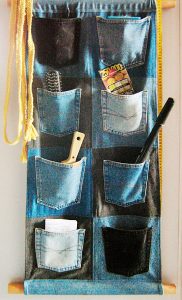
I did some searching to find some cute projects to recommend for you.  And I found some examples of organizers that were made by reusing jeans pockets. These save a step and so you can make these with super speed. Just be sure to use a jeans needle.

I think this one is a great idea for a closet organizer.

I think this one is a great idea for a closet organizer.

I will like to make a long double sided one of these to hang in the middle of a closet that’s shared by two boys at my house. This will solve a couple of different organizational challenges in that small closet nicely.

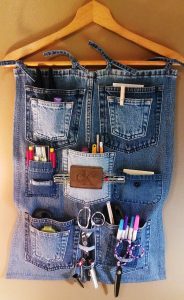
Here is one on a hanger that is being used for sewing supplies storage.

Here is one on a hanger that is being used for sewing supplies storage.

How to sew pocket organizers with multiple pockets

To start, make a backing panel. Cut two square or rectangular pieces to the desired size of your organizer pocket panel. Press interfacing to the wrong side of one of the two square or rectangular pieces. Then layer the two pieces right sides together and sew around, leaving an opening for turning.  Turn right side out, push the corners out well from the inside, press, and then sew closed.

To allow for hanging, you can simply fold over at the top and sew a casing, or you can make hanging loops and attach these by tucking between the two pieces when you sew them together in the steps above.

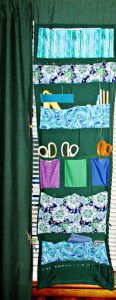
My sewing room curtain organizer panels use all of the above kinds of pockets.

My sewing room curtain organizer panels use all of the above kinds of pockets.

For the pockets, you could make several or many individual pockets in the same way as the larger backing piece and topstitch each pocket onto the backing panel separately. Or you could make long pockets the width of the backing panel. You can then topstitch to divide these long pockets into shorter sections.  You can also make your pockets slightly wider than your backing panel.  Then pleat them at the bottom and add elastic casings along the top edges, to build roomier pockets with more holding power.

My sewing room curtain organizer panels use all of the above kinds of pockets. I also stuffed a long one and sewed it closed around all sides to make a pin cushion way up high and out of the reach of grabby kids.

You can customize your pocket panels to suit your organizational challenges, no matter what they are.

Sew a money bag pocket

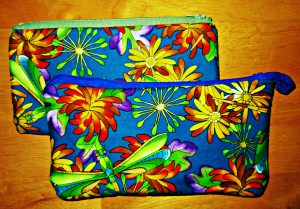
Maybe you’d call it a bag, but this project is simply a big pocket with a zipper at the top. You could use these as bank bags for deposits or otherwise holding cash. I made them big enough to hold multiple envelopes for monthly budgeting.

For stashing cash or other goodies.

For stashing cash or other goodies.

Or you could make these zippered pockets to hold your pencils or some other small collection.  I’m using one of mine for stashing my jewelry pliers set where no kids can reach them. Keeping my things out of the reach of children seems to be the major part of my own organizational challenges!

Favorite pocket organizers from around the web

If I haven’t given you enough inspiration to sew pocket organizers yet, check out these other ideas and tutorials that I found and collected from around the web. I will make the handy ironing board pockets right away, I can’t believe I have never thought of this simple solution before. And I think the pocketed towel will make a great gift for a sunbather I know and love.

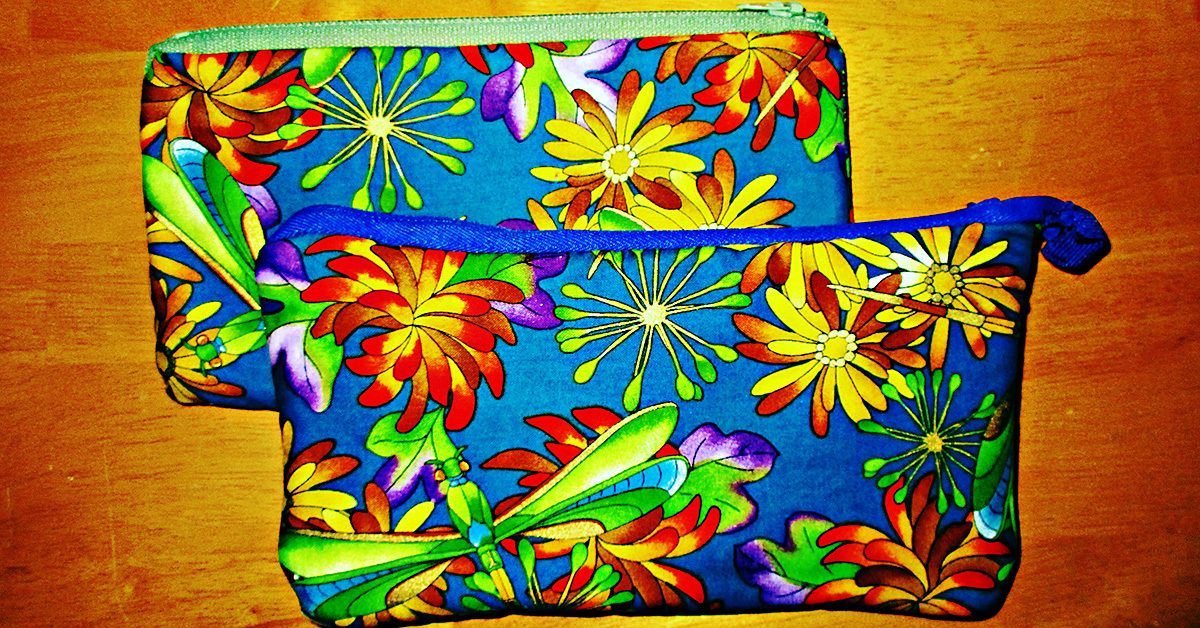
Are the gears in your brain turning now? What problems could you solve if you sew pocket organizers to keep things in place?

The Lost Straight Pin Dilemma

The Lost Straight Pin Dilemma

Let’s be honest. Sewing isn’t the most dangerous hobby. I’m not driving a Nascar race, flipping in the air off of a dirt bike, or taming poisonous reptiles. Overall, it’s a safe assumption that I’m not chancing my life by trying to finish a sewing project! But that doesn’t mean that there isn’t room for smaller injuries in the world of sewing, and one of those possibilities has surfaced a number of times on this blog: Accidentally sticking yourself with a straight pin.

Ouch!

Don't misplace your straight pin container!

Don’t misplace your straight pin container!

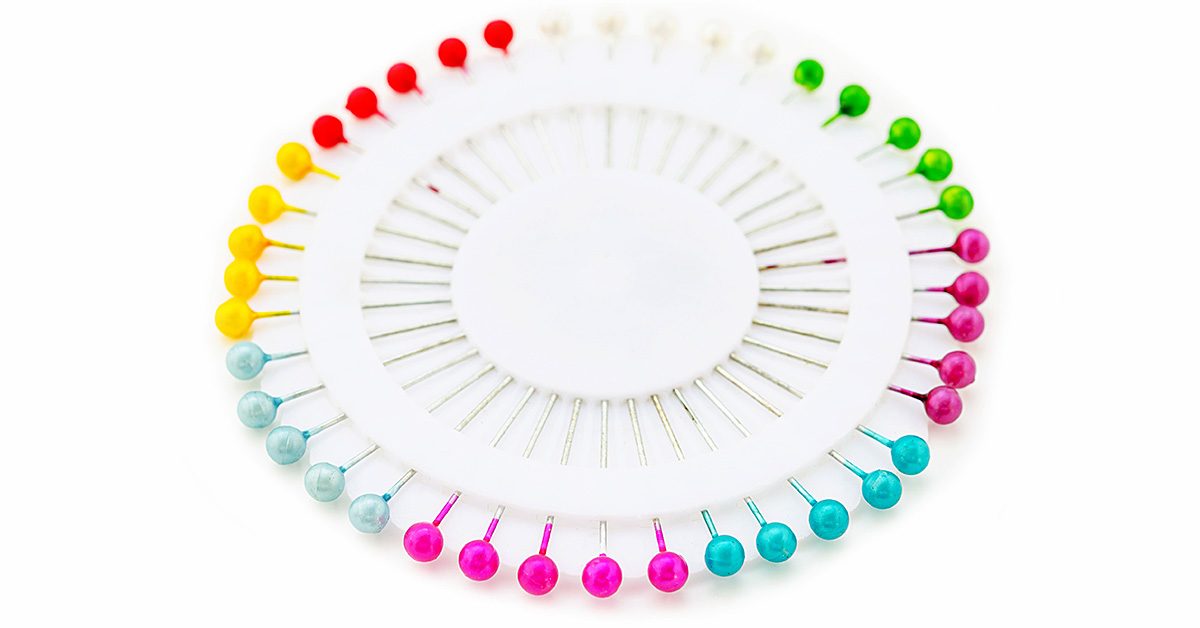
Sure, it’s a minor injury. There’s no need to rush to the hospital, and you probably won’t break out a Tylenol bottle to help with the pain. Regardless, it is a discomfort, and the possibility of enduring that discomfort extends beyond your sewing session if you do what I’ve found to be one of the easiest missteps in sewing, which is losing your straight pins. I don’t mean misplacing your straight pin container either! I mean that once you put away your sewing materials and supplies, you find that there is at least one straight pin lingering in or around your sewing area.  Each of those straight pins could be a future discomfort waiting to happen, and every one could also bring you one step closer to buying more straight pins.

But it’s sooo easy to lose these things! How can a person keep from having it happen?

Like with thread and material, the type of straight pin you get can matter, so be sure you’re making a good choice!

Like with thread and material, the type of straight pin you get can matter, so be sure you’re making a good choice!

Sometimes it’s unavoidable…

For me, personally, I’m leaning toward the idea that I can’t completely prevent it. In fact, my leaving straight pins behind is kind of a running joke in my house. Other than using a pin cushion, the only advice I have to offer on that detail is to make the right choice when buying your pins. Like with thread and material, the type of straight pin you get can matter, so be sure you’re making a good choice! In my experience, ones with a bit more length to them seem to hold their places better than the shorter ones, and I think logic backs that up. The longer the pin, the more space you have to lock it in place in your fabric. If it’s locked in place, there’s less risk of it working its way back out of the material, which lessens the risk of a loose straight pin.

If it’s locked in place, there’s less risk of it working its way back out of the material, which lessens the risk of a loose straight pin.

If it’s locked in place, there’s less risk of it working its way back out of the material, which lessens the risk of a loose straight pin.

Even with those longer pins and pin cushion though, pins still might end up scattered around your work area. So when nothing you’ve done keeps your straight pins from falling to the floor, seat, etc., how do you find them to put them away and prevent someone from accidentally coming across one in a not-so-pleasant fashion? Here are some ideas!

Your own senses

This one is obvious, so let’s begin with it. Sometimes, just looking around your sewing area can let you find loose straight pins, and gently patting your hand (not pressing too hard since pins are, indeed, sharp) could help you detect them as well. I honestly don’t know how many pins I’ve found with these tactics, and I didn’t have to buy anything for them!

Found ya!

Found ya!

Shine a flashlight

Objects that are the color and/or texture of a straight pin reflect light, so if you shine a flashlight, you might get a glimmer in response that will lead you to a loose straight pin. Take your time as you do this so that you don’t look right over the pin! A few extra seconds for a better-done job could save you hassle and, as I mentioned, discomfort, in the future!

Use a vacuum cleaner

Okay, clearly, you might not want to vacuum up a straight pin for the sake of your vacuum cleaner! But as the link says, if you use an extension hose from your vacuum, you just need to put some kind of barrier over it to keep the pin out. A piece of cloth would work, and using the vacuum in this fashion would pull the straight pin out of whatever hiding place it’s in to a very obvious spot without damaging your vacuum cleaner. Simple, right?

Use a magnet

This method is plain, but effective! Just move a magnet around your work area, and any metal pin that’s close enough should be drawn to it. The strategy comes with very little hassle, and very little room for error unless your magnet is too far away from the pin. But so long as you’re thorough with covering the area, this is — in my opinion — the best tactic of the listed ones. It’s not as iffy as missing a flashlight glimmer, as unsure as eyeballing the area, or as cumbersome as breaking out (and readying) your vacuum cleaner. It’s so low-tech, most people can use it easily, and it’s cheap! What more could you ask for?

With these methods at your disposal, hopefully most of your loose straight pins can be found and preserved for future use instead of laying around for future injury!

Do you have a preference among them or know any other strategies for locating loose straight pins? If so, share your thoughts!

How to Store Your Fabric Scraps

How to Store Your Fabric Scraps

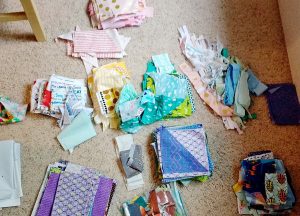
It only took me six months, but I finally organized my fabric scraps after our move.
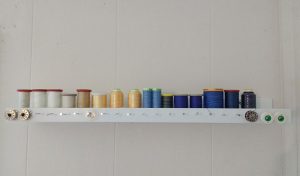
It only took me six months, but I finally organized my fabric scraps after our move.
It only took me six months, but I finally organized my fabric scraps after our move to this new town and new house. When we made the move, I dumped my two huge bins of scraps into a few shopping bags and tucked them away until this glorious moment when they would not only be sorted, but have a place to reside.
Bits and pieces

Why should one keep & organize fabric scraps?

Why should one keep & organize fabric scraps?

Why should one keep and organize fabric scraps? Here are some reasons to consider.

  1. Fabric is expensive. Long sized strips, and smaller pieces can be reused for a vast amount of projects. The internet is a trove of fabric scrap project ideas.
  2. Out of sight, out of mind. The reverse of this is true as well. When you have your scraps visible, you are much more likely to use them and be aware of what you have available.
  3. Have a favorite color? It probably shows in the types of fabric you buy. Take a look at your pile of scraps and try to use up more of that color before you buy a few more yards.
  4. Many people cut their scraps to standard sizes. If you have a size of fabric you constantly seem to go to, make your life easier by making your own pre-cuts out of scraps.

Scrap bags

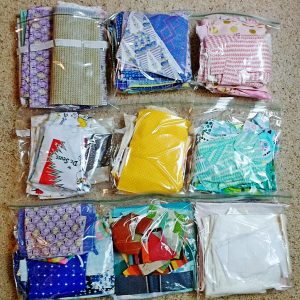
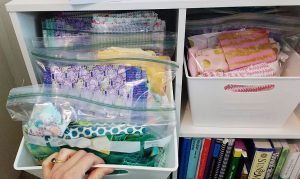
I ultimately made 9 bags of folded scraps.

I ultimately made 9 bags of folded scraps.

I ultimately made 9 bags of folded scraps. They included the following (from left to right):

  1. All of my precut Layer Cakes (10” x 10” squares)
  2. All of my other-sized precuts
  3. Pinks
  4. Whites
  5. Yellows, tans and oranges
  6. Greens, teals and aquas
  7. Blues and purples
  8. Heavy duty fabric scraps (canvas, Sunbrella, etc)
  9. Utility fabric scraps (batting, white out fabric, mesh, etc.)

One of these things is not like the others…

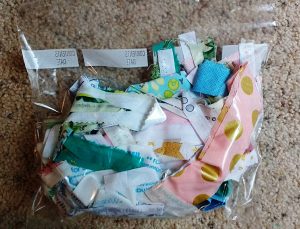
Bag #10 holds all of my selvage edges & very thin strips of fabric.

Bag #10 holds all of my selvage edges & very thin strips of fabric.

There is also a 10th bag (but it didn’t fit well in the group photo above). This holds all of my selvage edges and very thin strips of fabric. I have a huge wish list of projects to make from selvage edges. Perhaps I’ll write a post soon showing you the world of possibility with saving those thin strips!

A place of and for my own making

Welcome to my fabric corner.

Welcome to my fabric corner.

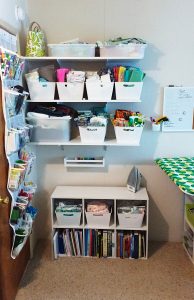
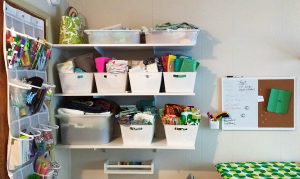
This is my fabric corner. The upper shelves hold my larger stash of fabrics, so pieces that are a fat quarter size or larger. The lower shelves hold my iron on top, and my fabric scraps in the bins below.

Dirty little secret: I just tuck larger pieces in wherever I find room.

Dirty little secret: I just tuck larger pieces in wherever I find room.

I’d love to tell you that I have my larger pieces organized in some kind of fancy way, but I really don’t. I just tuck them in wherever I find room.

Behold! A place for everything & everything in its place.

Behold! A place for everything & everything in its place.

Can you see how lovely the organization of these scraps is? The easy access and keeping them visible by my work space means I’m often including them in my daydreaming when it comes to new sewing projects.

Do you store your fabric scraps? If so, tell us where or how you do!

———————————————————————————–
Charlotte Kaufman is a writer and sewist in Mammoth Lakes, California. She specializes in marine and home interiors and continues to fall more and more in love with quilting. You can follow her at charlottekaufman.com.
Design Your Dream Sewing Room

Design Your Dream Sewing Room

I’ve never been lucky enough to have a whole room dedicated to sewing. I’ve always kept my sewing machine and accompanying needs in a closet and pulled them out when needed. For a few hours, while I sew something, the machine takes up the dining room table. I also use the table for cutting and measuring. If it’s larger pieces, the floor gets called into action as a cutting surface. That hasn’t stopped me from thinking about what my dream sewing room would look like. Here’s what I’ve come up with. How does it align with your dream sewing room idea?

Storage

Organization and storage are critical in a sewing room. I’m not a fan of tangled thread spools or bobbins I can’t find. I hate having to search for my measuring tape and it really irks me when someone “borrows” my fabric scissors and uses them on something else. I bet you know that feeling! So, the first thing my dream sewing room would have is a way to organize all those supplies in a tidy and efficient manner. Something like this cabinet. I also adore this thread tray.

Sewing Table

It needs to be sturdy and stationary. I’m not a fan of things rolling away from me while I try to work.

Next, I’d want the perfect place for my sewing machine to sit permanently rather than pulling it out each use. It needs to be sturdy and stationary. I’m not a fan of things rolling away from me while I try to work. It also needs to be open in the back so I can stretch my legs without banging my knees or feet. Something like this adjustable height table would be ideal for me.

Cutting Surface

The final piece of furniture my dream sewing room needs is a cutting surface. I want it sturdy and stable, but also with the ability to measure and pin to. I’ve created this ideal using two pieces. First, a sturdy table with side extensions. I love that I can drop one or both sides down if I’m working on a smaller project. Second, a cutting mat. By laying this on top of the table and fastening it down with glue or Velcro or double sided tape, I’ll have a sewing surface with the ability to measure built in.

You may notice I didn’t include a chair. That’s because I already have my ideal sewing chair and it happens to live in my dining room.

What does your dream sewing room look like?

Planning Your Pieces

Planning Your Pieces

One of the most important things you can do when beginning a quilt is to plan out your pattern. By this idea, I don’t just mean picking what pattern you want to buy in a store, but also planning out how the pieces of your project will fit together. That kind of pre-thought can make a difference in the appearance of a final product!

Let’s say, for instance, you decided to make a blue-based quilt, and you have a number of types of fabric to use for the product. If you don’t plan out how the pieces will go, you could end up running out of one particular style before the end, so the final portion is suddenly void of that one fabric. If you, like me, want a quilt that looks more balanced than that, then planning ahead can give you that quality.

Let’s think about where this is going…

Beyond that point, making these decisions beforehand can also ensure that you don’t pile a series of similar fabric all in one area. Otherwise, your product could look like this not-so-beautiful piece of artwork I created with my not-so-wonderful skills at Paint.

Otherwise, your product could look like this not-so-beautiful piece of artwork I created with my not-so-wonderful skills at Paint.

Otherwise, your product could look like this not-so-beautiful piece of artwork I created with my not-so-wonderful skills at Paint.

See how the same shades of blue are really close together? Now, imagine, what it would look like had I just mixed the fabrics in a more thorough way. The overall result could’ve been much more balanced, which to me, is a better strategy! And that’s the beauty of planning: No matter what your preference is, you can make sure you end up with a quilt that reflects it!

Lay out your quilt pieces on the floor & continue to adjust them until you come to a pattern you decide is right.

Lay out your quilt pieces on the floor & continue to adjust them until you come to a pattern you decide is right.

Options

So the question arises about how to plan out those details. There are a couple of options available that you can use right in your own home! The easiest and least-costly method between the two I’ll cover is to lay out your quilt pieces on the floor and continue to adjust them until you come to a pattern you decide is right. You don’t need any extra materials for this stage at all, and so long as you have the free floor space, you have this opportunity right at your fingertips!

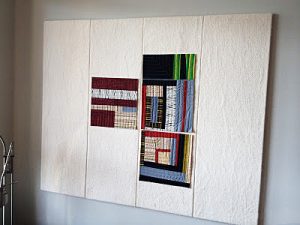
A quilt design area on your wall.

A quilt design area on your wall.

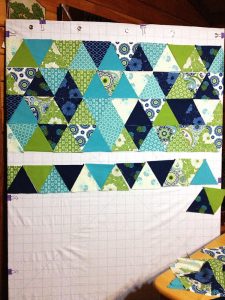
The other option is a quilt design area on your wall. This one might cost you a bit of money since you have to buy the supplies for it (though those supplies can be as simple as clips!), and you might find that you have to rearrange your wall décor to make room for it. Still, it’s a better candidate than the floor method if you want to eliminate the possibility of having your quilt-in-progress trampled by feet or if you just don’t have the right amount of space available for a clear plan-out area. Once you construct the design wall, you can start pinning and planning, shifting around your fabric blocks until everything fits in a way you’re comfortable with!

Start pinning & planning, shifting around your fabric blocks until everything fits in a way you’re comfortable with!

Start pinning & planning, shifting around your fabric blocks until everything fits in a way you’re comfortable with!

From that point, there are a number of ways to remember the quilt structure that you’ve planned out. Sure, if you’re using a quilt design wall, you could take it a bit at a time over to your sewing machine and just leave the extra pieces in place on the wall until the time comes to use them. But if you want a method that doesn’t involve leaving your pieces there — or if you’re using the floor method — you might want to think about alternative tactics!

One idea is to take a picture of what you come up with. If you do that, you can use it as a point of reference as you go through piecing your quilt together. By following the design you created, your quilt can turn out just as beautiful as you meant for it to!

Collate your blocks

Another option would be to keep your pieces in the order that you’re going to use them. As you take them up from the floor or off the wall, make sure you’re doing so in the exact order they’ll appear. You could start from the top or the bottom corner and progressively layer your quilt pieces on top of one another as you go. With this strategy, your blocks are in the order you wanted them, so you can just go through your stack one piece at a time to recreate your pattern!

But whatever your planning and preserving methods are, the important thing is to be thorough with them. Take your time, both in pinning or sorting those pieces, and in keeping them in sequence, so that errors are less likely to happen. When you have a well-balanced and well-considered quilt as the reward for your efforts, you’ll be glad you did!

Different Types of Thread and When to Use Them

Different Types of Thread and When to Use Them

Have you ever gone to the fabric store and been overwhelmed looking at the vast assortment of thread for sale? If so, then fear not, for I will help to break down the mystery of thread and how to use it in all its various types.

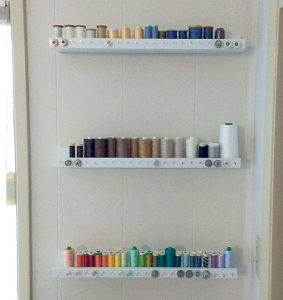
To start, consider where you are going to store your thread. I’m a highly visual person and I like to see what I have on hand. I also find looking at thread to sometimes motivate me or inspires me to begin on new projects. I created this thread display in my sewing room using Ikea picture frame shelves (Ikea Ribba) and I added small nails to hang my bobbins by the corresponding color of thread.

I added small nails to hang my bobbins by the corresponding color of thread.

I added small nails to hang my bobbins by the corresponding color of thread.

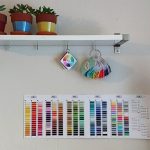
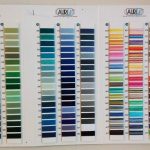
I live in a rural area, three hours from the nearest Joann Fabrics. Because of that I keep an Aurifil Thread Color Card so I can easily order the exact shade of thread I need. It also looks beautiful too, no?

Thread Weight

When choosing thread, consider the thread weight. A quick breakdown of Aurifil’s brand thread weights (and their many great brands of thread, including Guterman and Coats & Clark) looks like this:

12wt: Use it for sashiko & red work stitchery. This is the thickest thread in the Mako’ range.

28wt: It is strong enough to withstand the stress of hand quilting without needing to be glazed or waxed.

40wt: Favorite thread for machine quilting and all-purpose sewing. A little heavier to show off the quilting stitches.

50wt: Quilters love it for its piecing and quilting. A staple for every sewing studio.

80wt: This is the finest Egyptian cotton, for use by hand or machine. Your new ‘go to’ thread for applique and much more.

~ Thread descriptions from Hawthorne Threads

Buying at a fabric store is actually a little easier than sussing things out online because they divide thread into sections so you can quickly scan for ‘quilting’ or ‘embroidery’ or ‘heavy duty/jeans.’

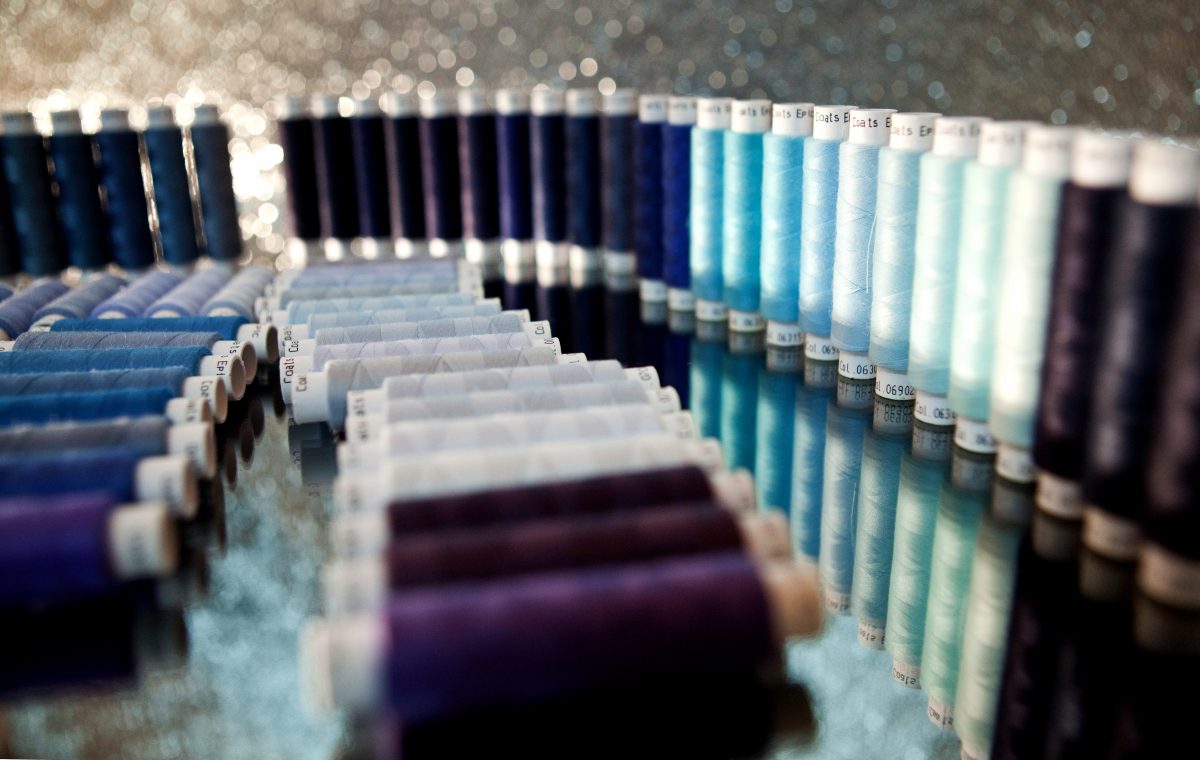
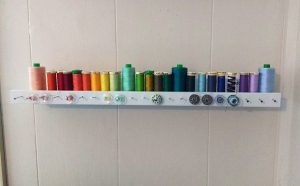
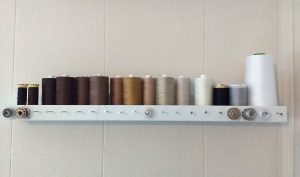
I keep my standard, quilting cotton weight threads organized by ROYGBIV (red, orange, yellow, green, blue, indigo, violet).

I keep my standard, quilting cotton weight threads organized by ROYGBIV (red, orange, yellow, green, blue, indigo, violet).

ROYGBIV: red, orange, yellow, green, blue, indigo, violet.

I also keep my neutrals and browns organized by gradient.

I keep my neutrals & browns organized by gradient.

I keep my neutrals & browns organized by gradient.

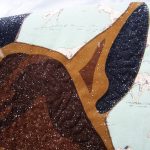
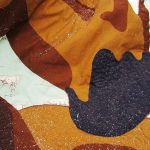
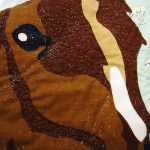
Buying a lot of shades of one color can greatly help when working on projects with a ton of variation in the same tone, like in this quilt I recently finished. I used five different shades of brown and black to finish the horse.


Utility/Novelty Threads

These are threads you reach for when you need to pull out the big guns or you are just doing something different. I use some of these heavy weight threads for upholstery, corduroy, vinyl, or very thick or unique fabrics.

I use some of these heavy weight threads for upholstery, corduroy, vinyl, or very thick or unique fabrics.

I use some of these heavy weight threads for upholstery, corduroy, vinyl, or very thick or unique fabrics.

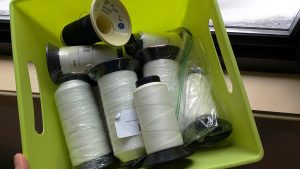
This is my tub of very heavy duty threads. I use them on marine projects and with my industrial sewing machine.

This is my tub of very heavy duty threads.

This is my tub of very heavy duty threads.

Variegated Thread

I saved these threads for last because they are my favorite. If you haven’t tried sewing with them yet, I encourage you to start today. The richness of their color variation is an absolute delight to the eye and often can take your projects to a whole other level.

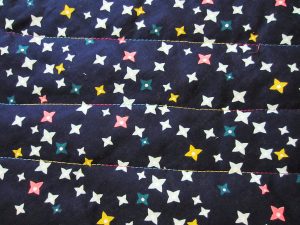
I used two spools of variegated thread on this quilt. The blue/rainbow you can see here.

The blue/rainbow you can see here.

The blue/rainbow you can see here.

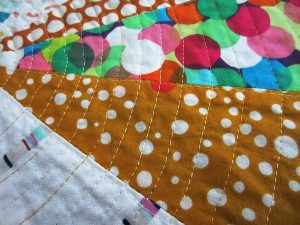
And the gorgeous bright yellow here.

You can see the gorgeous bright yellow here.

You can see the gorgeous bright yellow here.

Of course, with different threads you will need different needles, but I’ll save the topic of needles sizes and shapes for another post. What are your favorite types of threads? Let us know in comments!

—————————–
Charlotte Kaufman is a writer and sewist in Mammoth Lakes, California. She specializes in marine and home interiors and continues to fall more and more in love with quilting. You can follow her at charlottekaufman.com.

Storing Your Fabric

As I wind down in the steps for making my quilt, I’m finding that I have fabric scraps left over from the endeavor that I really don’t want to toss. One of the problems though is that I have a very lacking fabric storage setup. In fact, it consists of stuffing fabric into a remarkably unprofessional Hello Kitty pail (Note: I don’t even like Hello Kitty). Once that happens, I put the pail into my closet. Since said closet kind of overflows at times, the method is even more lacking than it would otherwise be.

I want to keep this fabric, but I’d like to have a better strategy of doing so. That idea had me browsing some possibilities online, and some of the options I saw were pretty basic.

Simple Solutions

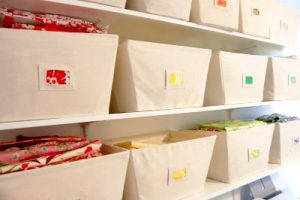
For instance, clear storage bins or canvas bins.

For instance, clear storage bins or canvas bins.

For instance, clear storage bins or canvas bins. While these are simple and efficient ideas for keeping my fabric in order, the truth of the matter is that they’re also, at the moment, things that would probably end up getting stashed away in my closet. As one of the qualms is that my fabric is stored in my closet, neither option fixes that detail.

At least, not alone. If I had a method of storing those bins out in the open, they’d work fine. In any event, the insufficiency could certainly lead to more searching in regard to the best (complete) fabric storage option.

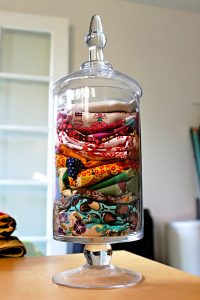
The most fitting right now is the notion of keeping excess fabric pieces in a jar.

The most fitting right now is the notion of keeping excess fabric pieces in a jar.

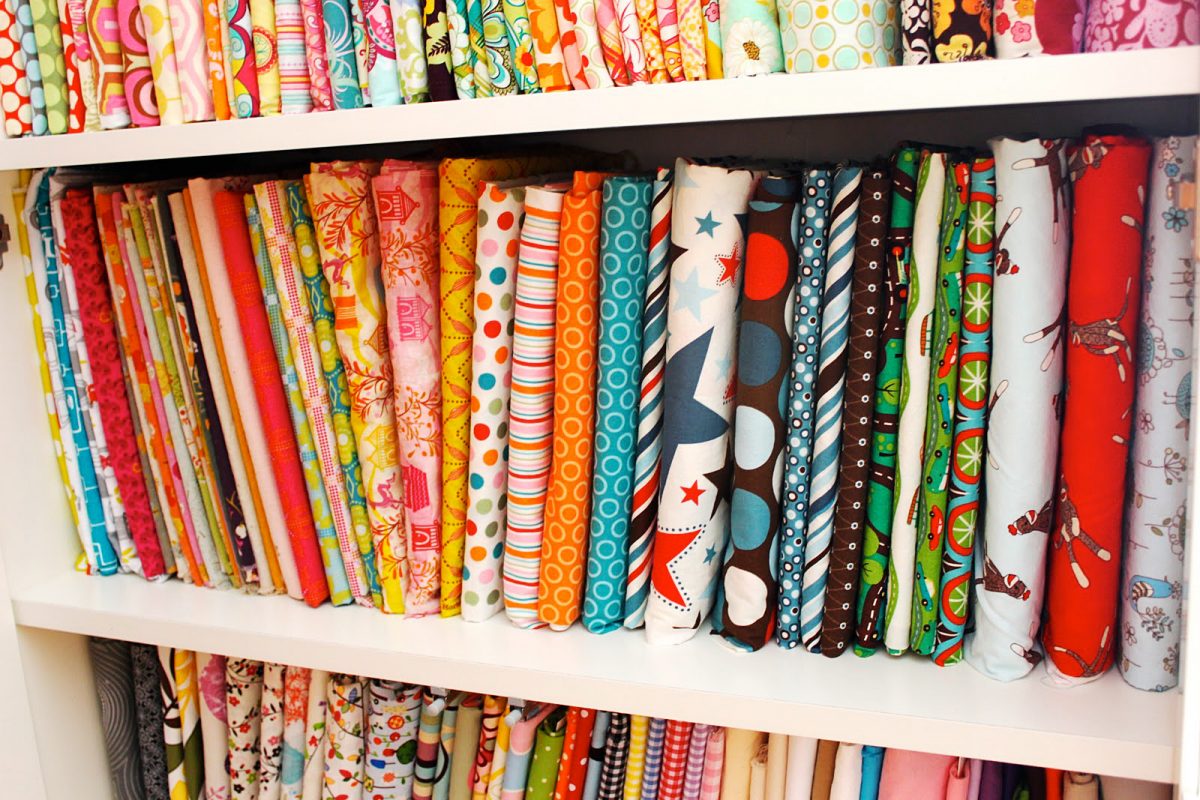
So during my search, did I have find the perfect one? That might be a complex question since I’m not sure there is a perfect one, but I did find some that are worth mentioning. The most fitting right now is the notion of keeping excess fabric pieces in a jar. I’m not sure I’d ever considered using my extra fabric in a way that actually makes it decorative even before I use it for a sewing project, but I like this concept. Most of the fabric that I have remaining is block-ish, and that smallness of leftovers seems spot-on for the store-in-a-jar method. All I’d have to do is get a jar, fold up my scraps nicely, and let the storage add accent to a room before the pieces potentially add accent to a future project. A similar idea is to store those scraps in kitchen bowls or strainers, like you can find here, or maybe a flower vase.

A similar idea is to store those scraps in kitchen bowls or strainers, like you can find here, or maybe a flower vase.

A similar idea is to store those scraps in kitchen bowls or strainers, like you can find here, or maybe a flower vase.

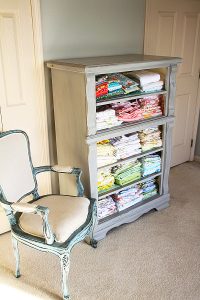
One is to take the drawers out of a dresser, and once the furniture has been treated so that it looks finished and ready, fabric can be stashed where the drawers used to be.

One is to take the drawers out of a dresser, & once the furniture has been treated so that it looks finished and ready, fabric can be stashed where the drawers used to be.

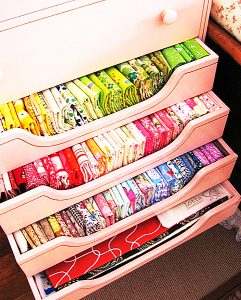
Two of the more intriguing fabric storage options I found might be more suitable for a time when/if I have more room and/or extra cash. One is to take the drawers out of a dresser, and once the furniture has been treated so that it looks finished and ready, fabric can be stashed where the drawers used to be. I adore this idea, but it’s a project itself! Be aware though that if you don’t want to go through all the sanding and painting to prepare the furniture, you could still use a dresser, drawers intact.

Be aware though that if you don’t want to go through all the sanding and painting to prepare the furniture, you could still use a dresser, drawers intact.

Be aware though that if you don’t want to go through all the sanding and painting to prepare the furniture, you could still use a dresser, drawers intact.

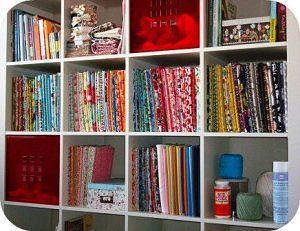
Another option is this square shelf idea that hangs on the wall. This one is particularly of interest if, like me, your bedroom, sewing room, etc. is already pretty full of furniture. When that’s the case, going upward seems like a reasonable option, and that’s exactly what this shelf would do! Being the nerd I am, this square setup appeals to me more than a different shelf idea might because it’s comic-book-ish, but that’s not to say that squares are the only possibility for this method. In fact, you might find that you have some kind of old furniture around your house that can be repurposed for this prospect — like a headboard. There might be plenty of possibilities if you spread your imagination to find them!

Another option is this square shelf idea that hangs on the wall.

Another option is this square shelf idea that hangs on the wall.

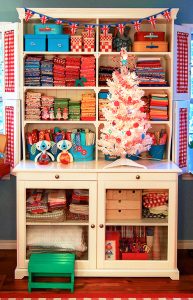
Another option is a lot simpler, but might cost more — and that’s to buy a piece of furniture that’s specifically for this purpose. This hutch, for instance, makes a wonderful and aesthetically pleasing storage area for fabric, and other than price and space, I wouldn’t hesitate to have one of these in my home.

This hutch makes a wonderful storage area for fabric, and other than price & space, I wouldn’t hesitate to have one of these in my home.

This hutch makes a wonderful storage area for fabric, and other than price & space, I wouldn’t hesitate to have one of these in my home.

But as breathtaking as these furniture options are, the truth of the matter is that I’ll probably have to start with something easier and more money-friendly. Given that the majority of my current fabric collection is scraps and/or block-ish pieces, my best bet for advancement might be the jar or strainer method, which I’m okay with!

Still, someday, that hutch, that shelf, or that dresser would be a wonderful addition to my sewing life!

Sewing Goals for the New Year

Sewing Goals for the New Year

This time of year I start to think about what goals I want to achieve in the upcoming year. I usually break them down into three categories. One, career. Two, personal life. And three, hobbies. Over the years, hobby goals have included everything from beekeeping to knitting. This year, I’m thinking about setting sewing goals.

Attempt Something I’ve Never Made Before

Sewing Goals for the New Year

My typical sewing projects are dresses and skirts or modifying existing clothing. I’ve also made a few home décor items like curtains and pillow covers. I’ve never done a shirt or anything with a button hole. I’ve never made a jacket or anything with super thick material. I have made a wedding gown, so I know I can take on complex projects requiring me to learn new things. Next year may just be the year I master button holes, or least attempt a shirt.

Find More Scrap Fabric Uses

I not only have my own fabric scraps, I also have scraps from my mother and great grandmother. If I was a quilter, I could make a fabulous memory quilt with all of it, but that’s not really my thing. For the upcoming year, I’d like to use up my scraps so that I can use the closet space for other things.

Organize Thread Spools

Right now, my spools are tossed in a plastic bin with a bunch of other sewing related supplies. I have a terrible time finding the colors I want and an even harder time untangling the threads from each other when I do find the right color. Next year, I want to get my thread organized in such a way that they’re easy to find and aren’t all tangled together.

Expand My Color Palate

I seem to always be drawn to the same colors in the fabric store. This means I wind up with a fairly monochrome wardrobe. For next year, I’m going to set a rule for myself about how much of any one color palate I’m allowed to purchase in an effort to force myself to expand my choices. Purple and blue are pretty, but so are all the other colors. And I do get sick of wearing the same colors over and over, so maybe this will help.

Buy a Fabric Board

I used to have this awesome cardboard mat that made it easy to lay out fabric and measure it against the lines on the board. It kept the fabric off the floor too. Sadly, it got wet at some point and became useless. I never got around to replacing it. Next year, that will change. I do miss the ease it provided as well as the solid surface. Because it was cardboard, I could pin the fabric to it so it wouldn’t slip around like it does on my wood floors or on the table top.

What are you sewing goals for the upcoming year?

Fabric Stash Ideas

Fabric Stash Ideas

If you’re like me you’ve got a giant bin (or two) of left over fabric from projects dating back to the stone age. It takes up valuable closet space, but you refuse to let it go. Maybe it’s even a point of contention with your spouse/partner. With these fun ideas you can free up your closet space, make some fun projects, and maybe make a little money on the side too.

Fabric Stash Cash Wallet

Fabric Stash Cash Wallet

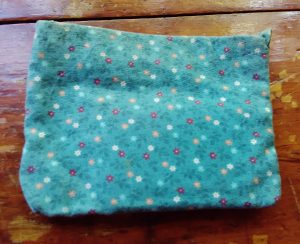
With just a small bit of fabric scraps, some ribbon, and a quick row of stitches you can make a unique cash or coin wallet. Measure out your scrap so that it is the dimensions of a credit card (2x height), plus seam allowances and room for a ½ inch ribbon. Fold it in half with right sides together and stitch up the sides. Make a pocket for the ½ inch ribbon and sew that up. Feed the ribbon through and turn the cash purse right side out.

The ribbon can be tightened to close the wallet and prevent spillage in a large purse or bag. It’s cute, unique and keeps all credit cards, cash and coins neatly organized. Even better, you can make a bunch and give them as gifts or sell them at craft fairs or on Etsy.

Fabric Stash Rag Clowns

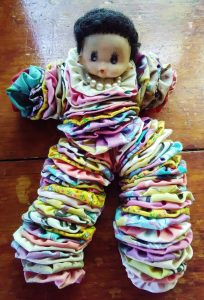
Fabric Stash Rag ClownsTo give credit where it’s due, this is an idea I’m stealing from my great-grandmother. Right up until the day she died, just shy of 100, she made these adorable clowns. They were all over her apartment and each of the grandkids and great-grandkids had at least one. I’m not completely sure how she did it, but the basic idea is this.

Cut a circle of scrap fabric, fold it in on itself so that the edges meet in the center and sew it into the now smaller circle. Make a bunch of these and then string them on wire to create clown legs, arms and body. Add a pre-purchased head and voila! So cute! For extra fun you can add bells on the ends of the arms and legs and/or an accessory like a necklace. Sure to be a hit with any children in your life, at craft fairs, and likely a best seller on Etsy.

What other ideas do you have?

Pressing Forward – A New Idea

Pressing Forward – A New Idea

As I was organizing my new sewing room, I thought about what components I could use to make sewing organized and efficient. Sewing is my favorite part but keeping things in order can become a challenge.

Sewing is my favorite part but keeping things in order can become a challenge.

Sewing is my favorite part but keeping things in order can become a challenge.

Of course, quilting takes a few more supplies that some hobbies, but I was thinking specifically about how I can make the pressing of quilt squares and fabric as part of my desk area rather than an ironing board and standing each time I had to press.

I made an ironing table on my counter top which has an insulated pad so I could sew and turn my chair to iron. It works fairly well but needs to be adjusted at times, as the pad wriggles around, and I thought there has to be something better.

I have to say that ironing is NOT my favorite past time with all the laundry we have, but somehow when I am making quilt squares, it is not too cumbersome. I use a fabric stabilizer when I iron that smells nice when it is heated so it, it gives me ambition to sew my squares and press them neatly to look professional as I go along. I have been thinking that an investment in a Home Pressing system will be beneficial.

Thinking back, actually, when I was a little girl, my Mom had what she called a “Mangle” Iron. I have not seen those again until recently in this website. I always wanted to help her press the sheets and pillow cases and my Dad’s handkerchiefs when she set up the what seemed to be an “ancient” machine. In fact, this type of machine was first used to wring out clothes by washer women beginning in 1843. Mom had hers in the late 1950’s, and used it often.

Sheets, tea towels, table cloths and fabric scraps would be so easy to run through the iron and save time to enable more sewing.

So, with that in mind, I have been researching Pressing Systems. I have come across some great reviews on the Magic Steam Press ESP2 Electronic Iron, and the Miele B990E Rotary Ironing Board. Check out the other brands here as well. The first is a small table model and the second is a rotary iron on a stand capable of ironing most everything. This is easy to use by sitting and makes ironing a breeze! Just be careful about the buttons and zippers, please!

I think these models would be particular good for bonding interfacings and stabilizers to fabric and to make quilt squares, totes, curtain panels and much more. Sheets, tea towels, table cloths and fabric scraps would be so easy to run through the iron and save time to enable more sewing.

Check out the irons on this website, and consider using a Pressing System for your sewing and ironing needs.

The reviews are helpful to see how valuable and what a time saver these systems are.

My next purchase will be to order for one of these products. With time saved and beautifully pressed quilts and clothes, it is an investment well worth the money with energy to spare! Press forward, and enjoy ironing! See you next time!