Repurposing Flannel Baby Wipes to A Snuggle Blanket

Repurposing Flannel Baby Wipes to A Snuggle Blanket

Hello there! I’ve been playing with something I would like to share with you.

Stitch the right sides together on all 4 sides, leaving a small space open on the last side.

Stitch the right sides together on all 4 sides, leaving a small space open on the last side.

Let me warn you, it is rather novel, as I haven’t seen this done before in sewing blogs or other instructions, but it works pretty well I think.

Recently, I several kinds of small baby wipes made from soft, warm flannel. Rather than 1 layer of flannel, and just a simple serger stitch, I designed them to be thicker and have no fraying edges when washed. Each square is approximately 9″ x 9″ finished as below.

So, I used 2 pieces of the fabric, and I stitched the right sides together on all four sides, leaving a small space open on the last side to place my hand inside and pull the fabric’s right sides to the outside. What? (I heard you thinking there!)

Think of throwing a pillow case in the dryer with the inside seams showing. When dried in the dryer and smelling like Snuggle, you put your arms inside, find both far corners of the pillow case, and pull them forward to you drawing the right sides of the pillowcase to the outside or the top side. So then, I carefully ironed the edges down so I could put top-stitching about one-quarter inch from the edge of the wipe. Finished product soft, bright, cuddly wipe.

BUT WAIT! There’s more

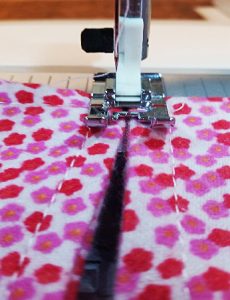
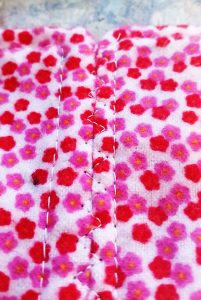
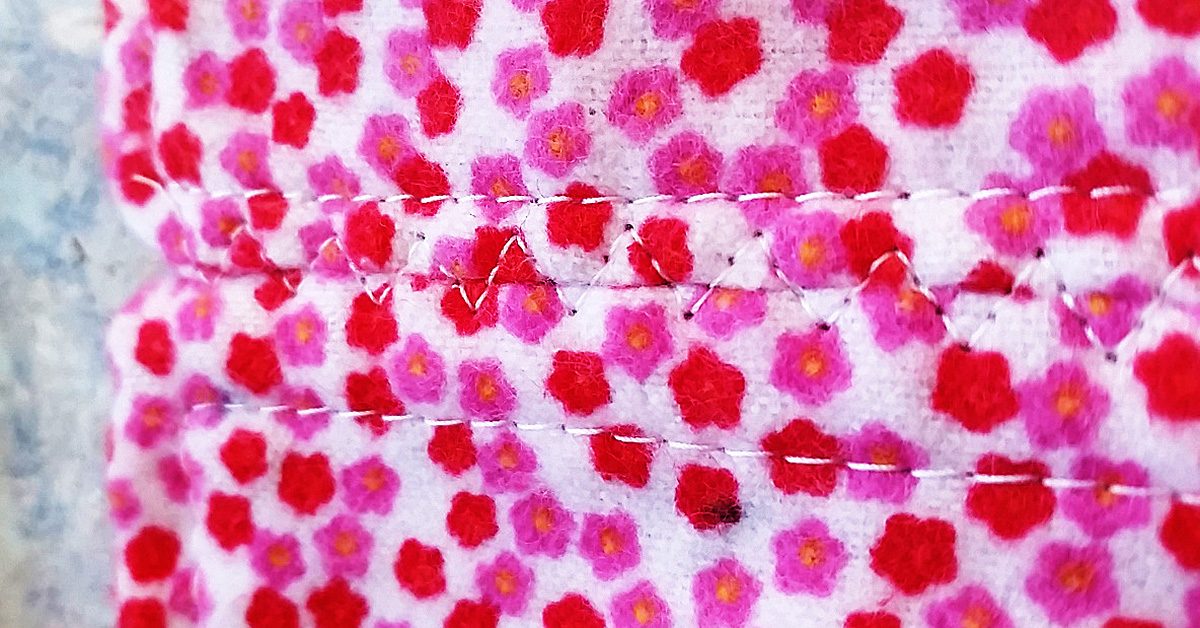
This shows how the seam was done, & it is sturdy like seam made in the traditional way.

This shows how the seam was done, & it is sturdy like seam made in the traditional way.

I thought why can’t I repurpose these cloths into something larger. It’s a small baby print, and with soft flannel on both sides, I brainstormed about how I can piece the two squares together without having to take the stitching apart of one side of each square to join them. That would involve doing all the squares accordingly, and would destroy my top-stitching.

This shows how the seam was done, and it is sturdy like seam made in the traditional way. This finished end to end seam reminds me of flat feld seams as used in my Pojagi pieces, although not quite. It also could be an alternate seam method for quilts without using a backing. A piece of batting could be added to each square to give a more padded feel to this alternate way of quilting, (like rag quilts but no raw edges or fringe.)

I hope you enjoyed my blog today, and I hope to see you again soon. I always welcome your experiences in sewing. After all, what would we do if we didn’t sew?

Take care for now.

Pretty Little Things

Pretty Little Things

I was thinking about all the things you can make with fabric. Depending on your sewing skills and your motivation, you could make just about anything your heart desires.

Let’s see. My first sewn article was a red twill skirt in high school. My efforts had very good intentions, but I remember getting frustrated when I could never use the “best” sewing machine in the classroom. I had to rush to finish it so the teacher gave me a “C” grade on it. I couldn’t believe I put the zipper in the back just perfectly. (I’m still scared of zippers, by the way). But the hem of the skirt was about 3 inches in the back and maybe and 1 inch in the front, and very irregular. That was long before the days of the high-low hem which arrived on the scene by stylish fashion designers in the twenty-first century. Oh my, I’m dating myself now.

I learned it from watching you

I watched my Mom sew clothes for me as child, so when I got off on my own, I asked my Dad for a sewing machine. I picked one out from Sears, a basic machine with a couple of stitches. I made a knit T shirt out of multi-striped material and fell in love with stretch fabrics.

My dad called it my “$150.00 T-shirt.” I knew he was thinking I would be done with sewing after finishing that comfy, wearable T-shirt. I proved him wrong.

I went on to make dresses, suits with vests, skirts with zippers, a strapless bathing suit, and other clothes that were worn with pride when I thought, “I did this- I made this jacket”.

So fast forward today, after several years of non-sewing, I have found my passion again with other types of articles. The last couple years, I have made quilts, bed runners, napkins, baby articles and even Korean Quilting called “Pojagi”.

And now for something completely different

Today, I want to share with you my latest project. First off, I love the Victorian Era.

Laces, satins, silks and velvet. I have accumulated many boxes of vintage lace, ribbons, and trims and struggle to find ways to use them. So, I am trying to bring back something that were used by ladies of old. It is something that is considered vintage, or antique, but I still feel the idea is a good one. Many stores carry things similar like paper envelopes filled with lavender seeds, or other dried herbs, but I wanted to design something that was original to appeal to women who love frilly little things like me.

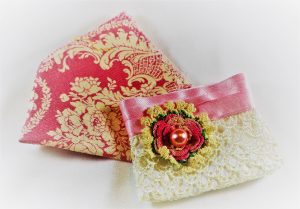
When I made these, I thought the Mother of the Bride & Groom may need the hankies to wipe away their tears during the wedding ceremony!

When I made these, I thought the Mother of the Bride & Groom may need the hankies to wipe away their tears during the wedding ceremony!

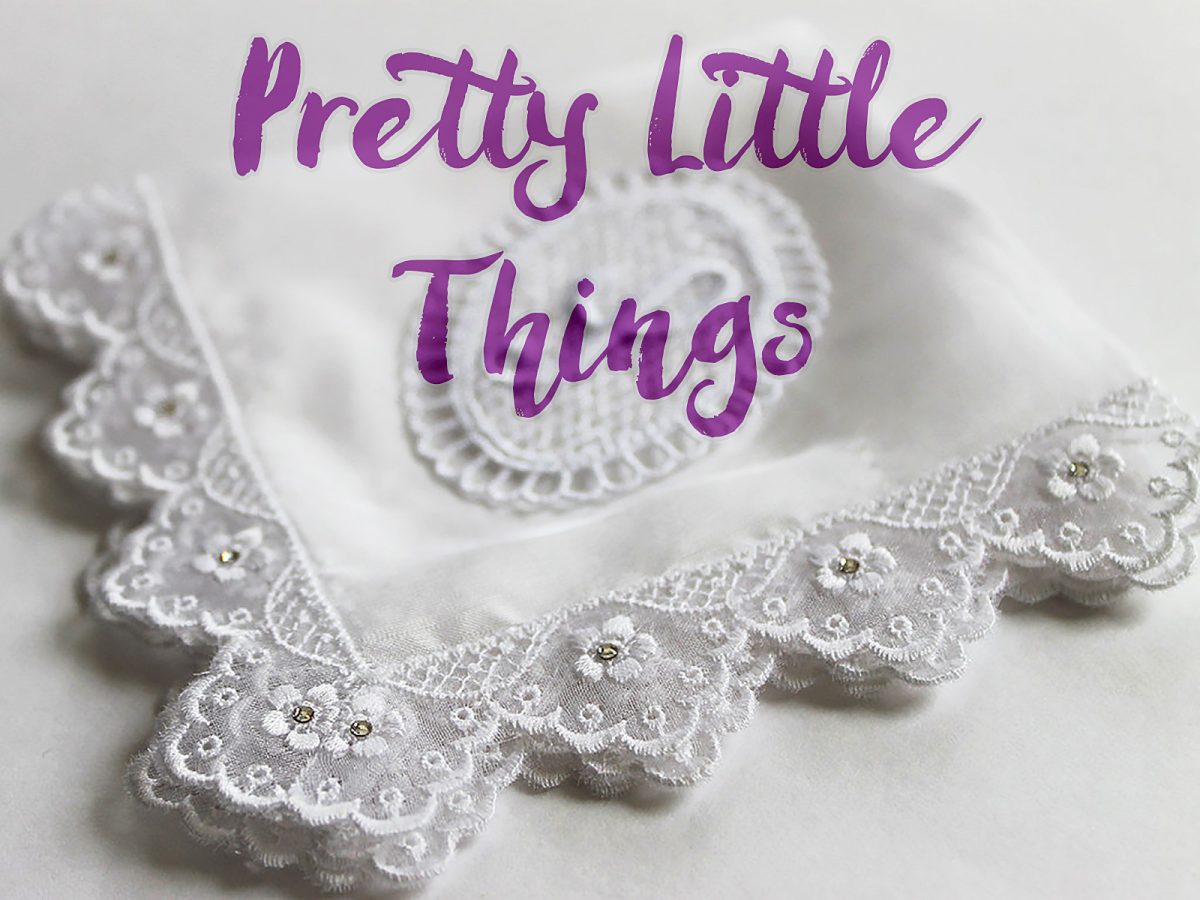
So, I designed a Handkerchief Sachet. The idea is to spray the handmade handkerchief with your favorite cologne or perfume, or fragrance oils. Place it in dresser drawers, on the bath counter top, or even your handbag, so you can enjoy your favorite scent as aromatherapy.

I thought these could be used as a keepsake bag for a special piece of jewelry, a lock of baby’s first haircut, or just a place for a tube of lipstick in your handbag. Just a little frill to enjoy & remember a special time or event.

I thought these could be used as a keepsake bag for a special piece of jewelry, a lock of baby’s first haircut, or just a place for a tube of lipstick in your handbag. Just a little frill to enjoy & remember a special time or event.

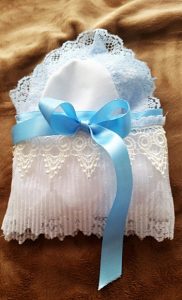
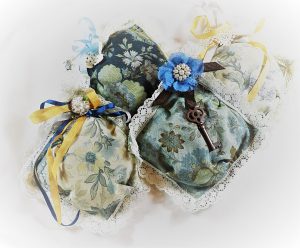
The last picture is the third set of sachets I made with 5” squares, lace, silk ribbon, and some metal vintage ornaments. These are stuffed with eco-friendly snow filling and will absorb your desired scent. Just respray when the scent fades and enjoy!

The last picture is the third set of sachets I made with 5” squares, lace, silk ribbon, & some metal vintage ornaments.

The last picture is the third set of sachets I made with 5” squares, lace, silk ribbon, & some metal vintage ornaments.

Whereas, the handkerchief can be washed if necessary if a change of scent is desired, these can also be utilized as a pin cushion in your sewing room. Who knows, you may fall in love with Victorian Vintage as I did.

All seams were sewn by machine except for adding flowers and ribbon, these items can be found at NaturaDomani on Etsy.
Pojagi - The Art Form of Korean Quilting

Pojagi – The Art Form of Korean Quilting

I have always had a fascination with brightly colored things. The beauty of the sun shining through the trees, through the clouds, and even through the window gives such a warm feeling and the appreciation of nature and our surroundings. I especially love the beauty of stained glass windows in the ancient churches and buildings in Germany and Italy. The sun shining through the color seemed to draw me into the grace of the house built so long ago and so carefully maintained as to not disrupt the aura it was intended to project.

One time, not so long ago, I was intrigued by some pictures that were like stained glass, but made with mostly irregular blocks and random shapes of fabric.

Pojagi

Sometimes referred to as “Bojagi”, this is a highly improvisational project to do what you feel!

Sometimes referred to as “Bojagi”, this is a highly improvisational project to do what you feel!

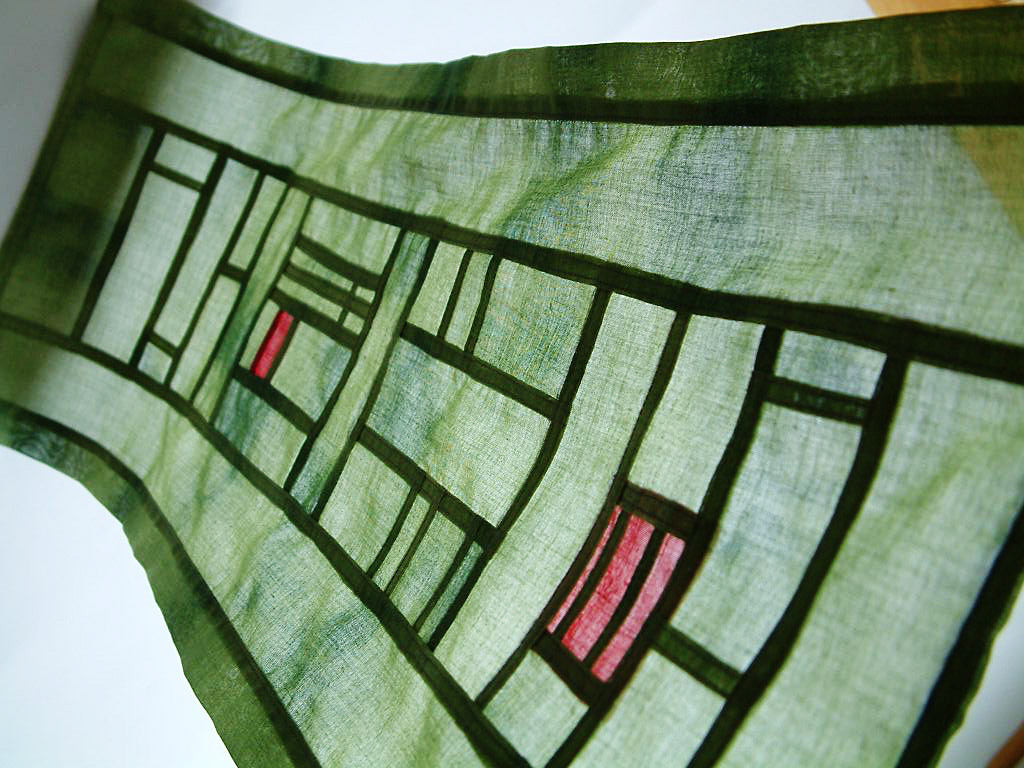
Light can be seen through the block which shows outlines of the seams around them, as well as diffused color of the fabric in each block. The interesting part is some were made with one color or neutral colors, and as I researched, I found many others were pleasing to the eye with multiple colors.

The art form I was seeing was called “Pojagi”, which was started about 2000 years ago in Ancient Korea. Pojagi was made by hand stitching fabrics like ramie (which is similar to hemp or (linen), cotton, and silk formed into 14” squares to wrap and carry things. Even today, it is said the Korean parliament uses Pojagi to transport documents.

Tools of the trade

Women took old clothes and repurposed them into these wrapping cloths. It was a highly creative way to do improvisational designs from old clothes, scraps, and multiple fabrics, using only what was available to them. They would turn down the fabric from the top ¼ inch and crease it with a Clover Hera Tool.

I was interested to learn that a Hera tool was a sharp piece of hard plastic, that when pressed on fabric, makes a visible crease on both front and back of the fabric. How convenient would that be rather than measuring with a ruler and ironing that edge?

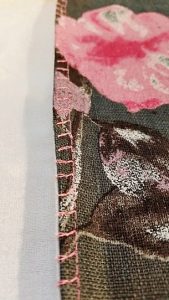
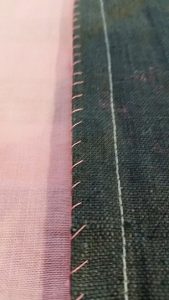
The left side is machine stitched with an Overcast stitch. The right side is hand stitched. Both have no raw edges showing on either side.

The left side is machine stitched with an Overcast stitch. The right side is hand stitched. Both have no raw edges showing on either side.

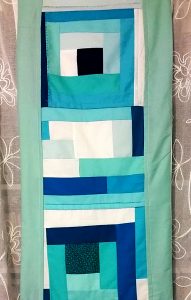
This example is a “work in progress” of mine. I started making panels to cover a closet opening, and quickly decided I needed more fabric than I have. So it is one more thing I have on my project list to complete.

This example is a “work in progress” of mine. I started making panels to cover a closet opening, and quickly decided I needed more fabric than I have. So it is one more thing I have on my project list to complete.

When the crease was made all the way across the fabric piece, the top is picked up folded inward and hand stitched. Then hand-stitching is done along that fold. From the side, the seam is folded down toward each other. The result is what we call “Flat Fell Seams”. The best way to describe them is they are a row of 2 seams with no fraying edges, finished both inside and outside. (Like the seams on your jeans!)

Although it was used by all economic classes in Korean history, Pojagi had categories based on the fabric and who the recipient of the cloth would be. For instance, a princess would receive a lined Pojagi possibly made with silk, where as a commoner may be something coarser like ramie or hemp. They were called different names by type as well.

Modern use

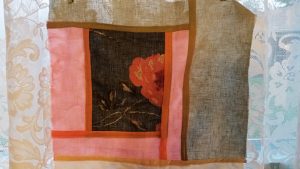
This is a portion of my closet screen hung in the window. I love that you can see the flat fell seams like outlines around the fabric, and the soft colors showing the fiber. There is lace behind that panel so it is makes it interesting!

This is a portion of my closet screen hung in the window. I love that you can see the flat fell seams like outlines around the fabric, and the soft colors showing the fiber. There is lace behind that panel so it is makes it interesting!

Today, pojagi is used as screens, curtains, wall hangings, or sometimes fabric sewn on top of each other, irregular shapes and sizes, even repurposed clothing. Pojagi is a great improv project to do whatever design appeals to you.

No measuring and using scraps, even sometimes fabric sewn on top of each other, irregular shapes and sizes, pojagi truly brings out your creativity.

No measuring and using scraps, even sometimes fabric sewn on top of each other, irregular shapes and sizes, pojagi truly brings out your creativity. It takes time to sew by hand, however, sewing by machine made me feel that I was cheating myself of the real Korean experience. I did complete this one panel for my closet, however. It is lined at the back with cotton duck type material for strength.

I hope you will be inspired to research this unusual art form and make a square or two. You may decide the freedom of expression is something you were missing all along.

I would love to hear your comments or see your designs in Pogaji!