Happy Spring! The Joy of Warmer Weather and Beautiful Flowers

Happy Spring! The Joy of Warmer Weather and Beautiful Flowers

Hi! Good to see you again!

Hi! Good to see you again!

Today, I wanted to share what I have been doing these days. It know it has been awhile since I wrote, however, I have been away from my favorite past time for other “pressing matters” (i.e. ironing hubby’s shirts, not quilt squares) and other important tasks!

Scrappy leftovers

I have an enormous collection of scraps in my sewing studio. Since I have been reorganizing in preparation to move our home, I have to make a strong effort to release some things I have collected to make packing a little easier. Well, packing is never easy, but psychologically, it forces you to consider the value of all the things you think you absolutely needed to have, right? And also, without saying, it alerts you to some of the things you want to make this hobby more efficient. No wonder it takes forever to pack and with sewing, I always think if I throw it away, I will want it later. Tough decisions, aren’t they?

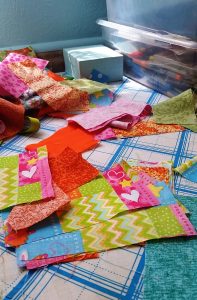
So, I started with a pile of disorganized scraps, which I have previously cut for something else, some time ago. I don’t even remember what I had in mind at the time, but I need to throw them away or use them. This is just part of the large amount of fabric and bright colors I have to work with.

This is just part of the large amount of fabric & bright colors I have to work with.

This is just part of the large amount of fabric & bright colors I have to work with.

Improv isn’t only for comedians

Recently, I have been learning about “improvisational” sewing. It is interesting to me because I like doing things that are unique to my creativity. However, it takes you out of your comfort zone. The experts say, it reveals your creative side by working with no specific pattern, no color guidelines, no measurements, just picking up random pieces of fabric, basically scraps, and sewing them together without a pattern. It reminds me of the dreaded “improvisational” speeches required in college speech classes.

I know there are many patterns and helpful information about quilting that give exact instructions and even kits that you can complete. So, this is an adventure to test your creativity for sure.

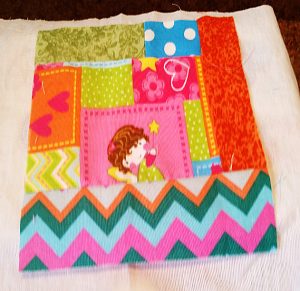
So, now I have my scraps and the easiest way to explain how this came together is: I took a medium sized scrap, and added to others to make an approximate square about 7 x 6 inches. I didn’t measure at all, just found several squares which had in this case, a little girl with a magic wand. I used the “fairy girl” as my focal fabric.

It was not too difficult because the pattern of the fabric was already woven like patchwork.

It was not too difficult because the pattern of the fabric was already woven like patchwork.

It was not too difficult because the pattern of the fabric was already woven like patchwork.

So, I just added like-colored fabric to make an extension of the pattern. No true measurements, pieces were just trimmed to fit inside the square, and the princess would appear somewhere on each one. I used the square as a template and compared the rest to the template, and then trimmed them to be the same size as close as possible. NOW… Comes my favorite friend in the WORLD while quilting! My IRON! And I need a NEW ONE at that (please refer to great wishlist choices from SewingMachinesPlus.com).

Finishing touches

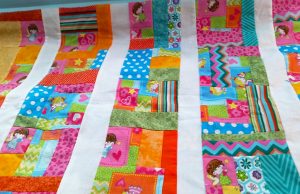
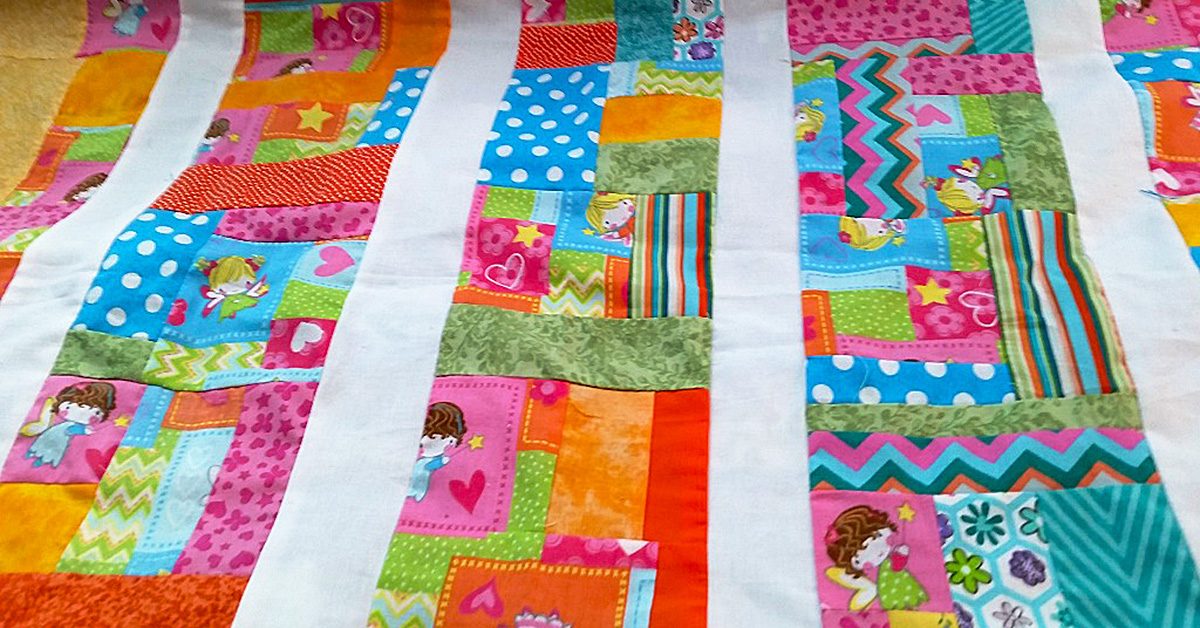
So finally, I was feeling pretty good about how my unplanned, off the top of my head, quilt top was coming along. So I sewed the pieces together in 5 rows and 5 squares each. Then added white jelly roll strips between each row of 5. I had to trim it only a little to make it a true measurement all around.

“Improvise” a cheerful quilt or smaller project & smell the beauty of your creation this spring.

“Improvise” a cheerful quilt or smaller project & smell the beauty of your creation this spring.

I still need to finish the border, batting and binding, but here’s what it looks like now. It was really fun to do, because I didn’t know how it would turn out. I should say I learned that I need solid color between busy patterns to give a quilt top a cohesive, unified look so each quilt patch is recognizable from the next. Do you mix plain fabric among many different prints?

I think you would enjoy this truly personal form of expression with fabric.

“Improvise” a cheerful quilt or smaller project and smell the beauty of your creation this spring.

Better yet, know that even without a plan, or a pattern, you can turn scraps into something as personal as you are! Then, please reply to this blog with pictures. I would love to see them. Until next time, when I will tell you about how I am repurposing handmade flannel wash clothes into a sweet little blanket and stitched without a seam. Carpe diem!

Ironing out the Ironing Details

Ironing out the Ironing Details

Random fact: My family does not like ironing.

We’re the type of people who, if something is wrinkled, minutes in the dryer are the way to work on the issue.

We’re the type of people who, if something is wrinkled, minutes in the dryer are the way to work on the issue.

Seriously. We’re the type of people who, if something is wrinkled, minutes in the dryer are the way to work on the issue. That being said, my hobby/profession of sewing is a bit contradictory for such an I-don’t-love-irons approach because an iron can be such a significant part of the sewing process.

Pressing seams, for instance, could add to the professional look of your project, and ironing your fabric before you sew can help to create more equal blocks and pieces. All in all, if you don’t iron, your product might look less impressive than you want it to, and with all the work you invest, taking the small steps to create a wonderful product could be worth the effort!

I come from an anti-iron family.

I come from an anti-iron family.

But given that I come from an anti-iron family, the idea of embracing the step can be daunting. Even picking an iron could pose a problem because there’s such a range of options. When you literally have thousands of options to choose from, selecting that right one could be a complex process. Do I get the pretty blue one, or should I pay the extra $50 for that name-brand one? What kind of features do I need, and what ones will I never use? Is this iron going to break in a month, or will it last me for years? These are the kinds of things worth considering should you choose to buy a new — and fitting — iron for your sewing.

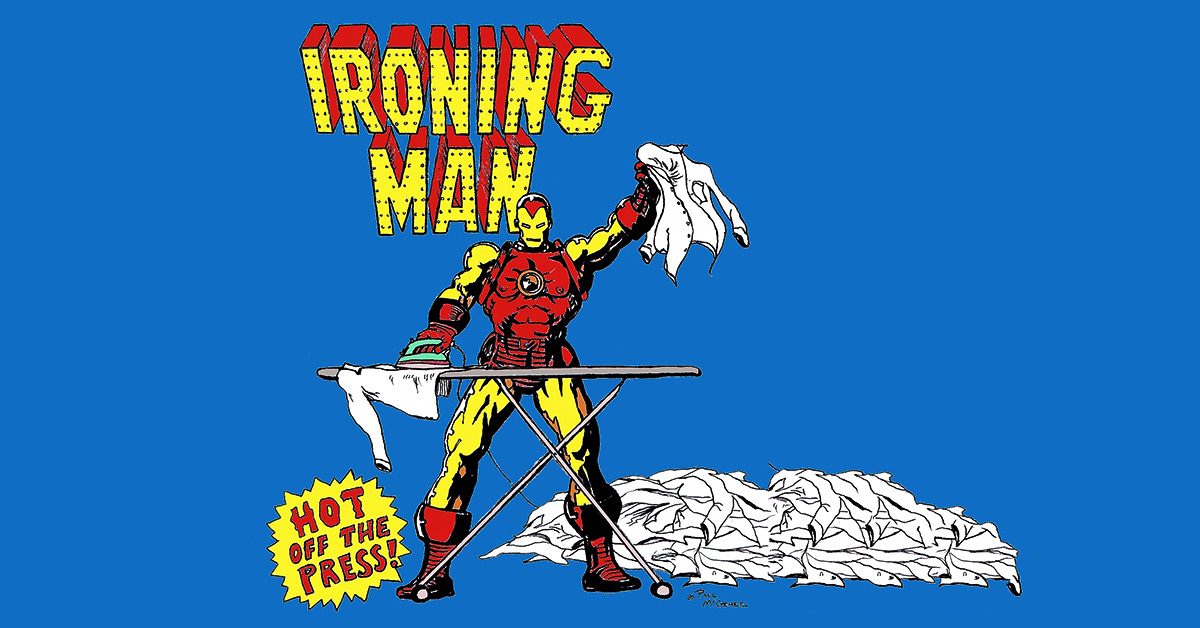
Note: With my nerd interests, all of this anti-iron business could potentially be overlooked if I owned an Iron Man iron like the one seen here.

Note: With my nerd interests, all of this anti-iron business could potentially be overlooked if I owned an Iron Man iron like the one seen here.

Anyway. I did some research this week on iron-related topics, and I came up with a list of what I felt were the most important qualifications for an iron and the preferred method of selecting that sewing tool.

Price

Hey, remember me? I’m the cheapskate who blogs about saving money on sewing projects! Of course — of course — cheaper isn’t always the overriding criterion for an iron because sometimes things are cheaper for a reason. Maybe the $10 iron has no special functions to help you. Maybe it’s made of bad materials and will leave an imprint on your fabric. Maybe it’ll fall apart in five minutes. The point is that this is NOT the only detail worth considering, but if you can find an iron that suits your purposes for $30, why pay hundreds?

Functions

As I said, price can be overshadowed by functions that your iron can bring to the ironing board. For sewing, I don’t know that there’s a more important function than releasing steam to better tackle wrinkles in fabric. Basically, if you see an iron that doesn’t release steam, you might want to keep looking! Another detail you might want to think about is if your iron automatically shuts itself off after a span of time. While this might be an aspect that doesn’t concern you in the least because you’re so careful with your iron, if there’s a chance you’ll forget and leave your iron going, I would recommend trying for an iron that’ll automatically shut off. That choice could prevent a fire, after all!

Build

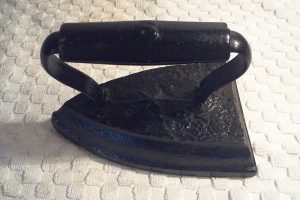
More than one source that I found mentioned older irons — “vintage” or “antique.”

More than one source that I found mentioned older irons — “vintage” or “antique.”

In a world where smaller technological devices can steal the spotlight, believe it or not, heavier can be a good thing for an iron when it comes to pressing seams! More than one source that I found mentioned older irons — “vintage” or “antique.” And it makes sense because that extra weight could make it easier to smooth out your seams with a smaller amount of effort. So should you completely fall back on your grandma’s iron from the 1800s? Not necessarily! Remember what I said about steam? But that doesn’t mean that a secondary iron for this purpose can’t benefit you, especially since you can buy used ones for such small prices (like, less than $10). For a brand new iron though, thinking about that extra weight could lead you to the right iron, as could other details like whether or not it uses a cord. As a person who can forget something is plugged up and trip over a cord fairly easily, I think cordless might be a good option for me!

And, now that we’ve labeled some of the most important traits for an iron, the situation comes down to how you can find that perfect iron even after you narrow down your options by price, function, and build. My main recommendation for this step would be to read customer reviews and try for something that received a high average rating. You might also want to look at how many reviews the product has since a 4.5 rating over 5000 reviews provides more credible feedback than a 3.0 rating out of 2 reviews. Why? As an example, a 5.0 rating could’ve been lowered by a 1.0 rating from someone who was criticizing the seller rather than the product.

Look for irons that have a lot of reviews, read through them for details that fit your needs, and pay very real attention to the average ratings. If you do, you could have the right information to find the perfect iron for your products.

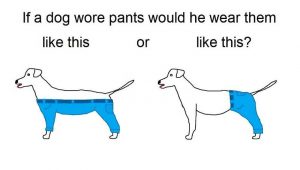
Pressing: Side or Open?

Pressing: Side or Open?

Once upon a time, I had an extended conversation (argument?) with a friend as we — as adults — threw all of our cards on the table in regard to the matter of who had it worse: Pluto or Goofy.

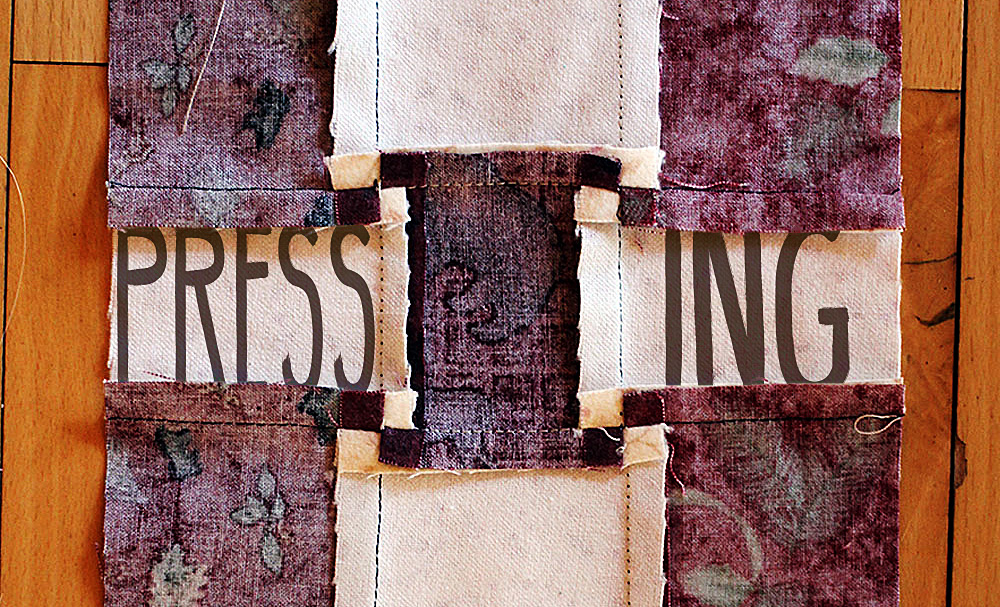
The point of referencing this conversation is that sometimes some of the smallest details can be points of major debate, and that idea is as true in the sewing world as it is for preferred cartoon characters. For instance, pressing your seams while sewing is a common thing, but there are two methods that are seemingly at odds among seam-pressers: side pressing and open pressing. It’s a small detail, but both sides have very real support! Don’t believe me? Do some Googling!

Some of the smallest details can be points of major debate.

Some of the smallest details can be points of major debate.

I’m not sure I personally lean too heavily in either direction, so let’s go through them and see if we can come up with a winning method! The competition will be based on a point-gained system, and it will include the understood sewing project of a quilt for reference. Sound good? Then let’s go!

Let us begin

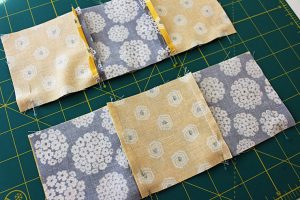
How about we start with the to-the-side method?

How about we start with the to-the-side method?

How about we start with the to-the-side method? One advantage would be that it’s easier to push the material to a single side for ironing than to force the pieces apart and iron openly. That’s something that, to me, a general consideration of the matter would support. You don’t have to hold both pieces of fabric in separate places like you might with the open method, so one point for side pressing!

Another benefit would be that, as a certain source pointed out, open pressing would logically weaken your product. With that technique, you would have an easier time seeing your stitches after the pressing because there isn’t that barrier of fabric to snuggly nestle them. Stitches are more protected with material covering them, and with the effort you put into your quilt, simple things to keep it intact are good! So, two points for the to-the-side notion!

One nice aspect about pressing to the sides is once you start pinning it's much simpler than pinning fabric pressed in the open fashion.

One nice aspect about pressing to the sides is once you start pinning it’s much simpler than pinning fabric pressed in the open fashion.

One other aspect about pressing to the sides is that, should you need to pin things following the pressing, doing so is much simpler than if you attempt it once it’s been pressed in the open fashion. Since I’ve been known to take a straight pin to the finger anyway, this advantage seems very tempting! Side pressing 3, open pressing 0!

Let’s open up

The open method isn’t altogether a bad idea.

The open method isn’t altogether a bad idea.

But, then again, the open method isn’t altogether a bad idea. For one thing, you don’t have to concern yourself with what direction you’re pressing your material. There’s no need to go back and see how you pressed a nearby seam because you can just assume it was open, like the rest. The uniformity is already there without having to come up with a pattern. Point one for the open strategy, then!

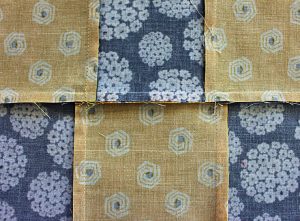
Another detail worth mentioning about this open approach is that you might find that you have a less lumpy final product. Again, this is logical. If you press your material to the right, then on the right, you have both sides of the seam and the fabric it’s laying against. That situation makes for three layers of fabric on the right for every pressed seam (not including batting and backing) while the left side — the one you pressed away from — would only have one. And that’s not counting places where your seams would overlap with other seams. Now, of course, the open approach doesn’t make everything equal across the quilt as not every piece of overlying material would have a seam pressed behind it. Still, for the areas where those seams would be present, having two pieces of material on one side and two on the other would be a more balanced situation and could lead to a smoother quilt (though as one source pointed out, “smooth” might not be your goal). So, one more point for this method!

The open approach doesn’t make everything equal across the quilt as not every piece of overlying material would have a seam pressed behind it.

The open approach doesn’t make everything equal across the quilt as not every piece of overlying material would have a seam pressed behind it.

An additional benefit of open pressing is that it’s more convenient when dealing with different colors of fabric, particularly if you’re pairing a dark one with a light one. If you press them to the side, there’s the chance that you’ll end up seeing darker fabric through a lighter one if you don’t plan and choose the correct side to press to. If you’re pressing them openly though, each color could be behind its own pattern, potentially hiding your dark fabric behind the same type of dark fabric. Seeing as how noticing a different pattern through the top of your quilt might not be aesthetically pleasing, I think the open method gets one more point in this contest!

And the winner is…

That makes the score three-to-three. So, what’s the tiebreaker?

Preference! I can toss all kinds of facts and details at you, but in the end, your quilt is, in fact, yours! Work with what makes you feel the most comfortable for these aspects. For some people, habit might lead the way. For others, it might be a logical deduction of what seems best. In the end though, there’s not an across-the-board right or wrong answer to this dilemma. Either/or, sometimes this one and sometimes that one… Sewing is a world of opportunity, and this small factor is one of the many to choose from!