Sewing with Confidence

Sewing with Confidence

Whether you’re a beginner or an advanced sewer, there will always be projects that seem too tough, that are hard to feel completely confident about taking on. Without a way to approach projects confidently, it can be tempting to skip doing them all together. What a shame it is when we miss out on making something special simply because it seems too hard. Instead, try using these tips to build your confidence and get that project done.

self-confidence-2121159_1280

Break it Down

Often, I find myself feeling overwhelmed by a project if I try to look ahead at all the directions. With simpler projects, I can do that and picture the whole thing coming together in my mind. With more complex projects, reading ahead sometimes makes me feel like it’s too hard. I won’t see the project. Instead, I get lost in the words of it and panic at the sight of terms I’ve not seen before.

The simplest and quickest way to overcome my fears and boost my sewing confidence is to take it one step at a time. Instead of reading through the whole thing, I only focus on the step I’m currently working on and the move on to the next. This makes it easy to look up any terms I’m not familiar with and complete each step successfully. And, of course, doing this generates more confidence. I have a hunch it will be the same for you. Give it a try and let me know how it goes.

Ask for Help

Although sewing is largely a solo hobby, that doesn’t mean you have to work through every project on your own. If you’re stuck, bring your fabric and the pattern to your local fabric or sewing machine store and ask their experts to help you out. They may be able to give you an explanation that’s easier to understand than the one written in your pattern instructions. Also, having the corresponding fabric pieces may help to show you a way to pin or cut the pieces to match what the instructions are asking you to do. And once you’ve learned it, you can apply it, confidently, to future projects.

These two tricks have helped me tackle everything from a sundress to a wedding dress with confidence and wind up with gorgeous completed projects that I’m proud to wear. The next time you’re feeling overwhelmed by a project, don’t fret. Try these two tips and get the confidence you need to complete the project without stress.

May the 4th Be with Your Sewing Projects

May the 4th Be with Your Sewing Projects

Not every holiday has to be one that leaves the shelves of stores stocked with accessories and baking supplies that are that-holiday-themed. Some of them can pass by with a lot less glitz and glamour, with only those people who are interested and aware of said holiday embracing it on their own terms. National Talk Like a Pirate Day, anyone?

Pirate talk included, one of my absolute favorite holidays of that category is one that embraces a very real part of my nerdy heart: Star Wars Day.

That’s right. May the 4th is a good day for me! In fact, for this Star Wars Day, I’m planning on trying to introduce my youngest niece to the first movie of the original trilogy. Here’s hoping she loves Chewbacca as much as her Aunt Connie does!

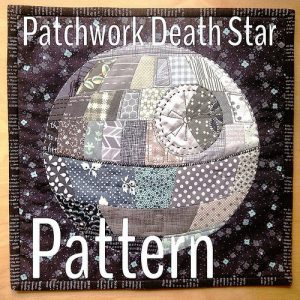
There are a number of options for this kind of product, but one that really stuck out to me was this Death Star quilt.

There are a number of options for this kind of product, but one that really stuck out to me was this Death Star quilt.

And there are plenty of sewing projects that are fitting for the day. Of course, it’s a little late in the game to make these for this Star Wars Day, but they’re ideas to keep in your head for 2018!

For instance, you could make a Star Wars blanket or quilt. There are a number of options for this kind of product, but one that really stuck out to me was this Death Star quilt. I absolutely love the collage element that makes up the Death Star in this project, and the galaxy-esque material it’s on is a perfect fit for the theme. It’s dark and looming, just like the Death Star should be! I, personally, would be proud to be the maker of such an interesting take on the empire’s weapon!

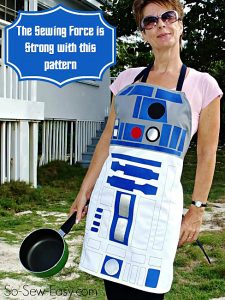
For a person — like me — who adores baking, making a character-inspired apron like this one feels like a wonderful option!

For a person — like me — who adores baking, making a character-inspired apron like this one feels like a wonderful option!

But if you’re feeling a little more Jedi/Rebel Alliance-inclined, maybe you’d rather embrace a concept from their side of things — like R2-D2. For a person — like me — who adores baking, making a character-inspired apron like this one feels like a wonderful option! Since I may or may not have a series of Star Wars kitchen supplies on an Amazon wish list, this would be a wonderful addition to the mix. I could totally see myself wearing an R2-D2 apron and oven mitts while my R2-D2 oven timer buzzes…

Oh, & remember how I said I loved Chewbacca? Imagine your little one decked out in this Chewbacca costume!

Oh, & remember how I said I loved Chewbacca? Imagine your little one decked out in this Chewbacca costume!

Oh, and remember how I said I loved Chewbacca? Imagine your little one decked out in this Chewbacca costume! This one could double as a Star Wars Day project and a Halloween one since this would make an adorable costume for trick-or-treating time! It would include a number of pieces — like ammo belt details — so you might want to make sure you start early enough to tend to all of these aspects!

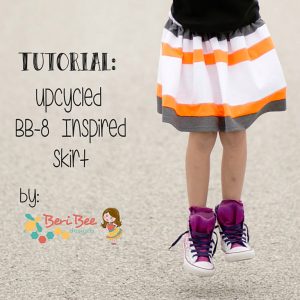
Another Star Wars project that you could make for your little one is this BB-8 skirt.

Another Star Wars project that you could make for your little one is this BB-8 skirt.

Another Star Wars project that you could make for your little one is this BB-8 skirt. It’s a nod to the more recent Star Wars movies with one of the two awesome droids that have come to the surface through them. Seriously! I adore BB-8, and K-2 is so awesome! This skirt would be something that could be worn any other day of the year as well since while it’s a nod to BB-8, it’s basic enough that it doesn’t necessarily have to be a skirt that’s Star Wars themed. It could easily just be a skirt with stripes, which isn’t day-specific! Essentially, with this product, you could have a perfect piece of clothing to wear through the day that’s general enough to wear again and again, regardless of the day.

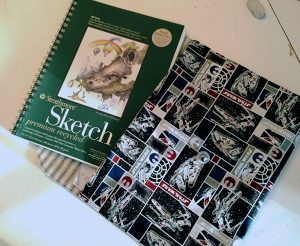
One last project applies to anyone in need of carrying around documents & such — whether that something to carry is the sketch pad shown or a stack of papers that you, as a teacher, graded!

One last project applies to anyone in need of carrying around documents & such — whether that something to carry is the sketch pad shown or a stack of papers that you, as a teacher, graded!

One last project applies to anyone in need of carrying around documents and such — whether that something to carry is the sketch pad shown or a stack of papers that you, as a teacher, graded! Now, obviously, you might want to make sure that this project is okay with your employer before you carry it into a formal meeting, but if you get a thumbs-up, there’s something awesome to me about the idea of carrying a Star Wars case into said meeting with your company-important documents. This could also be used for things around the house, like keeping your receipts or pictures in, and it’s a small enough project to easily manage between today and May 4, 2018!

This is the perfect day, in my opinion, to embrace your inner nerd and run with your sewing projects! It’s for what could be labeled the epitome of Sci Fi/Fantasy movies, and there’s plenty of room to work these mentioned projects into your May the 4th schedule. Need proof? Here you go: You could grab that Star Wars quilt and the baked goods you made while wearing your apron, toss that quilt over you and your kids in the Chewy costume and BB-8 skirt, put your distractions in your carrying case, and watch some Han Solo!

Master Your Serger with Tote-Making Class

Master Your Serger with Tote-Making Class

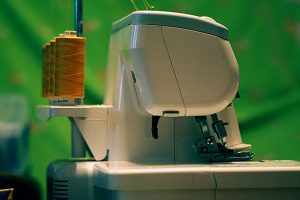
Sewing Machines Plus in San Marcos, CA has the perfect class to help you master your serger, use your fabric stash & walk away with a fabulous tote bag!

Sewing Machines Plus in San Marcos, CA has the perfect class to help you master your serger, use your fabric stash & walk away with a fabulous tote bag!

If you’ve been using your serger machine for a while now, you’ve probably mastered many of the basics. And if you’re like me, you’re completely in love with your serger! But you’ve probably also noticed there are a lot of features you’ve never used. Some of them you may not need, but wouldn’t it be cool to at least know a few of them? I think so too.

Sewing Machines Plus in San Marcos, CA has the perfect class to help you master your serger, use your fabric stash and walk away with a fabulous tote bag!

Serger Class Details

This class is 2-hours a day for three consecutive Wednesdays in May. May 17, 24 and 31 from 3:30 – 5:30. You’ll need to bring you serger including the power cord, foot pedal and cord. You’ll also need a variety of serger feet, including standard, cording, lace applicator, cover and chain, ruffler, elastic and clear. If you don’t have all of these serger feet, don’t worry, you can buy them at SMP before class.

Don’t forget the fabric! You’ll need at least 7 coordinating fat quarters or scraps and one yard of Soft and Stable.  To go along with the fabric, you’ll also need to bring thread, zipper, buttons, piping and cording. Full class supply list and registration instructions available here. It’s a fun, affordable way to learn the ins and outs of your serger, connect with other stitch aficionados and make an adorable tote bag project.

When your serger tote bag is done, it’ll be great for you or as a gift for a graduating student. Plus, you’ll have a much greater understanding of your serger machine and all its features and accessories.

Are there other classes you’d like to see offered? Let us know! We’ll do our best to accommodate and provide classes of interest.

Dr. Seuss Quilt

Dr. Seuss Quilt

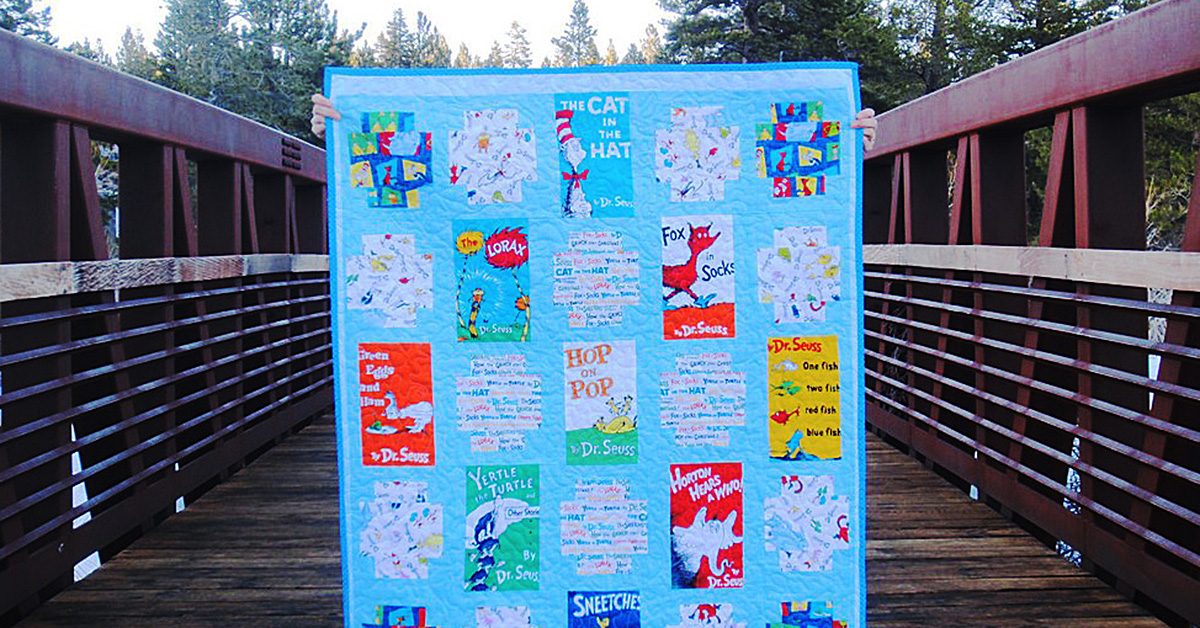
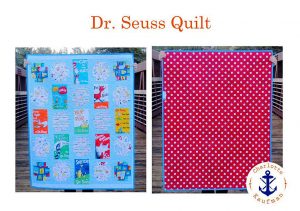
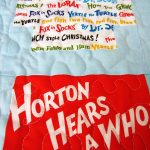
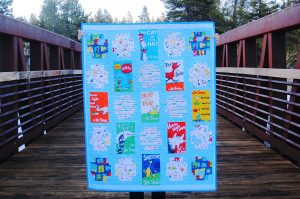
Have you ever bought a quilt kit? I buy them sometimes when the inspiration strikes, or when I’m looking for the convenience of having all the fabric I need for a pattern already provided for me. This kit came out in 2015 and is called Celebrate Seuss by Robert Kaufman Fabrics.

This kit came out in 2015 & is called Celebrate Seuss by Robert Kaufman Fabrics.

This kit came out in 2015 & is called Celebrate Seuss by Robert Kaufman Fabrics.

Start Cutting

Quilt kits do NOT mean that the fabric is precut into the shapes you need. Nope. They’ll send the amount of fabric you need but you will need to cut everything to size before you start sewing.

Quilt kits do NOT mean that the fabric is precut into the shapes you need.

Quilt kits do NOT mean that the fabric is precut into the shapes you need.

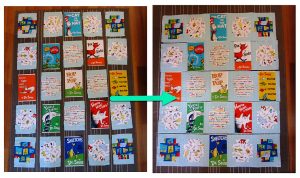
I actually started this kit last spring in San Diego. First I got all the individual blocks set up and then put them into rows. Once the rows were sewn into a full panel, I packed this project away. It wasn’t until almost 12 months later that I was ready to finish it.

Once the rows were sewn into a full panel, I packed this project away.

Once the rows were sewn into a full panel, I packed this project away.

Make your Project Your Own

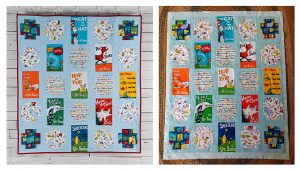
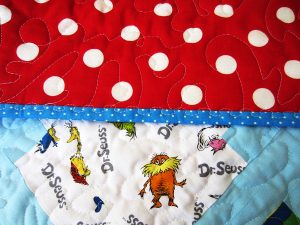
On the left you’ll see the finished photo advertised in the kit. Do you notice how the top and bottom center column run directly into the binding? That drove me crazy, so I amended the pattern. I added a 2” strip of blue polka dot fabric to the top and bottom and a 1” strip of the same fabric to the left and right.

See the right photo? Much better, no? I feel like the whole quilt is better framed.

Lesson learned

It’s okay to deviate from a pattern and a kit. Make your project your own.

Make your project your own.

Make your project your own.

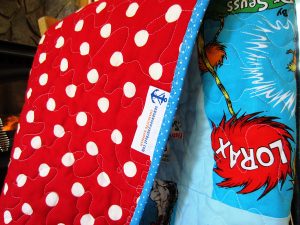
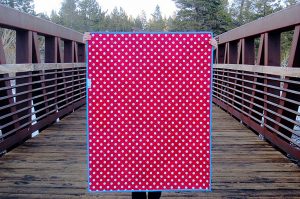
For the back fabric I went with a classic, large white polka dot on red that was very much in keeping with Dr. Seuss’ style.

For the back fabric I went with a classic, large white polka dot on red.

For the back fabric I went with a classic, large white polka dot on red.

Method of Quilting

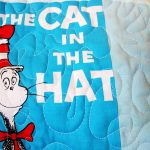
I’m extremely proud of the free motion quilting (FMQ) I did on this quilt. After years of being afraid to try FMQ, I’ve finally embraced the methodology. It took watching a lot of YouTube video tutorials and a lot of practice, but I’m very happy with the results. I used a relaxed, free-motion, jigsaw pattern for this quilt.

After years of being afraid to try FMQ, I’ve finally embraced the methodology.

After years of being afraid to try FMQ, I’ve finally embraced the methodology.

Binding Your Quilt

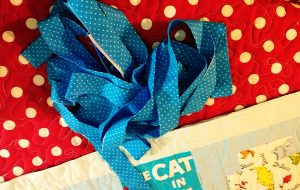
Another way I deviated from the kit was in choosing a different fabric for the binding then what they provided. The true-red colored fabric they sent clashed with the classic orange-red Dr. Seuss colors in the front panel. Instead I chose a cornflower blue and white polka dot fabric.

I chose a cornflower blue & white polka dot fabric.

I chose a cornflower blue & white polka dot fabric.

There a numerous ways to bind a quilt. I would suggest learning several methods. I made a 2.75” strip of fabric and then ironed that strip in half and sewed the binding onto the back of the quilt first. I pressed it away from the seam (towards the outside of the quilt) and then pressed it around over the front of the quilt. My 4 year old handed me my favorite red Wonderclips as I clipped the binding in place around the front.

https://www.sewingmachinesplus.com/brew-cl3156.php

I used a decorative stitch to sew the binding to the front.

I used a decorative stitch to sew the binding to the front.

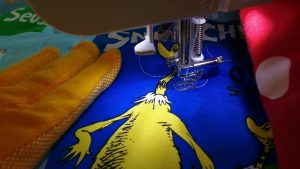
I used a decorative stitch to sew the binding to the front. Machine sewing your binding is faster and more secure than hand sewing and I recommend it if you know the quilt will get heavy use and washes or be used by children.

When adding your binding, don’t forget to sew in your quilt tag if you have one.

Don’t forget to sew in your quilt tag if you have one.

Don’t forget to sew in your quilt tag if you have one.


All in the Details

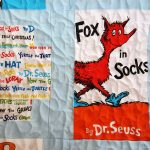
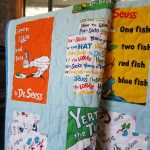
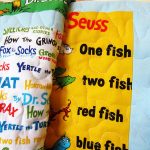
Here are close ups of the finished quilt and my free motion stitching. SewingMachinesPlus.com has an amazing assortment of sewing machines that do free motion quilting. Check out their machines here:

https://www.sewingmachinesplus.com/domestic-sewing-machines.php


Grand Finale

Taking some final pictures of your finished quilts is worth your effort. Think of how much time you put into each quilt and then grant yourself enough time to wait for the right, natural lighting and find a beautiful location to memorialize your quilts.

A Good Cause

Although it will be hard to part ways, this quilt is being donated to a fundraiser for our local elementary school. Have you ever donated your work to a good cause?

This kit came out in 2015 & is called Celebrate Seuss by Robert Kaufman Fabrics.

Have you ever donated your work to a good cause?

———————————————————————————–
Charlotte Kaufman is a writer and sewist in Mammoth Lakes, California. She specializes in marine and home interiors and continues to fall more and more in love with quilting. You can follow her at charlottekaufman.com.
How to Make a Hidden Button Placket

How to Make a Hidden Button Placket

Last week, I waxed on about all the endearing qualities of my Industrial Juki straight stitch machine and I promised that, next, I’d write a little bit about my other favorite sewing machine, a vintage tan and white Singer 401K.

But then, this week at work, I spent a couple days making women’s button front cotton shirts for the character of Zapata on Blindspot. I’ve made her quite a few shirts over the course of this season. I created the pattern from her measurements and referencing how she liked the fit of a few off the rack shirts. She doesn’t fit into any brand without altering (she has a very small waist but is still curvy) so the costume designer and I decided we might as well make custom shirts for her.

So far it seems to be turning out quite well:

http://www.imdb.com/title/tt4474344/mediaviewer/rm2804286976

http://www.imdb.com/title/tt4474344/mediaviewer/rm3758241792

Shirt making

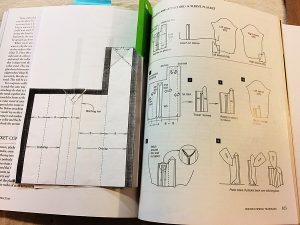
I am not, by any means, a master shirt-maker (those do exist like the man who wrote Shirtmaking, developing skills for fine sewing). His name is David Page Coffin and he is definitely a shirt-making master. His book is filled with many helpful tips and suggestions. I reference it now mainly for the sleeve placket instructions and pattern. For some reason, no matter how many times I make a shirt, I always need a little reminder as to which way to begin a proper sleeve placket attachment.

Sleeve placket instructions from David Page Coffin’s book.

Sleeve placket instructions from David Page Coffin’s book.

Never feel bad if you need to look something up, especially if it’s a technique you don’t do on a regular basis. There are always new things to learn (or remember).

Concealed buttonhole placket

Another element of shirt making that took me awhile to be able to do without looking up a reference picture was making a concealed buttonhole placket. I’ve finally got it etched in my brain though – at least I think so.

The first step is to decide how wide you want to finished placket to be. I use an inch (1″) for ladies’ shirts but some people do an inch and ¼ (1 ¼”) or an inch and ½ (1 ½”).

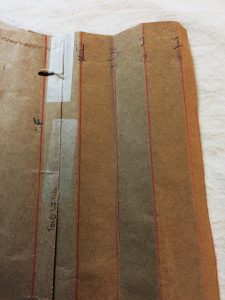
Next mark out your fold lines on your pattern or fabric. You’ll need an extra four to six inches past the center fold/finish line.

Fold lines marked a numbered on pattern piece.

Fold lines marked a numbered on pattern piece.

Starting out from the center fold line, measure out ½” and draw a parallel line. This is the seam allowance line. Many commercial patterns use 5/8″ as a standard seam allowance so if you’re adding a hidden placket to a store bought pattern, check to see what they’ve used and do the same.

Then draw three more lines, each 1″ apart. Finally, mark your cutting line ½” from the last line (or whatever seam allowance you’re using).

To help explain and keep track of your folds, number your lines starting with the outermost one: 1, 2, 3 and 4.

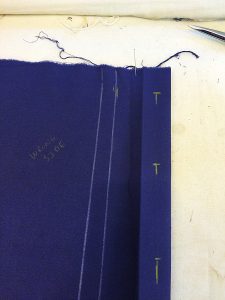
Press lines 1 and 2, wrong sides together. This is the part that will get the buttonholes. You can mark and do them now or, as I usually do, you can wait until you’ve got everything pressed and secured. I also press the 1/2″ outer seam allowance but do not leave it folded under – it’ll get caught inside the seam once you’re done.

Almost there

Fold along lines 1 and 2.

Fold along lines 1 and 2.

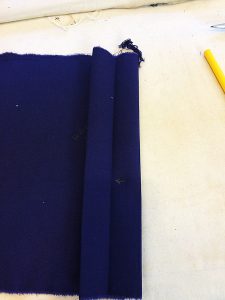
Next, accordion fold the remaining fabric. Fold along line 3, right sides together, then line 4, wrong sides together. Press.

Once you’ve done this, open the placket up so that its double wide with the seam allowance toward the front edge of the shirt. Topstitch along line 3 (which will be 1″ or however wide your placket is from the fold center fold line).

Open the placket up to topstitch.

Open the placket up to topstitch.

Once you’ve done your button holes, you’ll need to sew small hand tacks in between each hole to keep the placket from opening up (and essentially defeating its purpose of being hidden).

Voila!

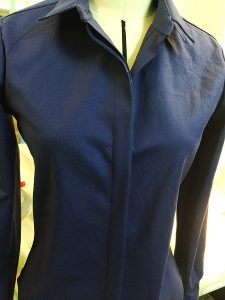
Shirt almost finished in dress form.

Shirt almost finished in dress form.

And next week, unless something more interesting comes up, I’ll continue on with my favorite sewing machine ruminations.