Tutorial: More Kinchaku Japanese Drawstring Bags

Tutorial: More Kinchaku Japanese Drawstring Bags

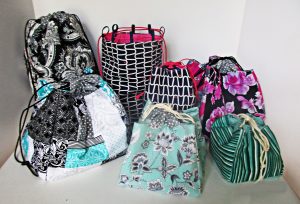
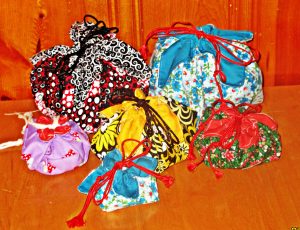
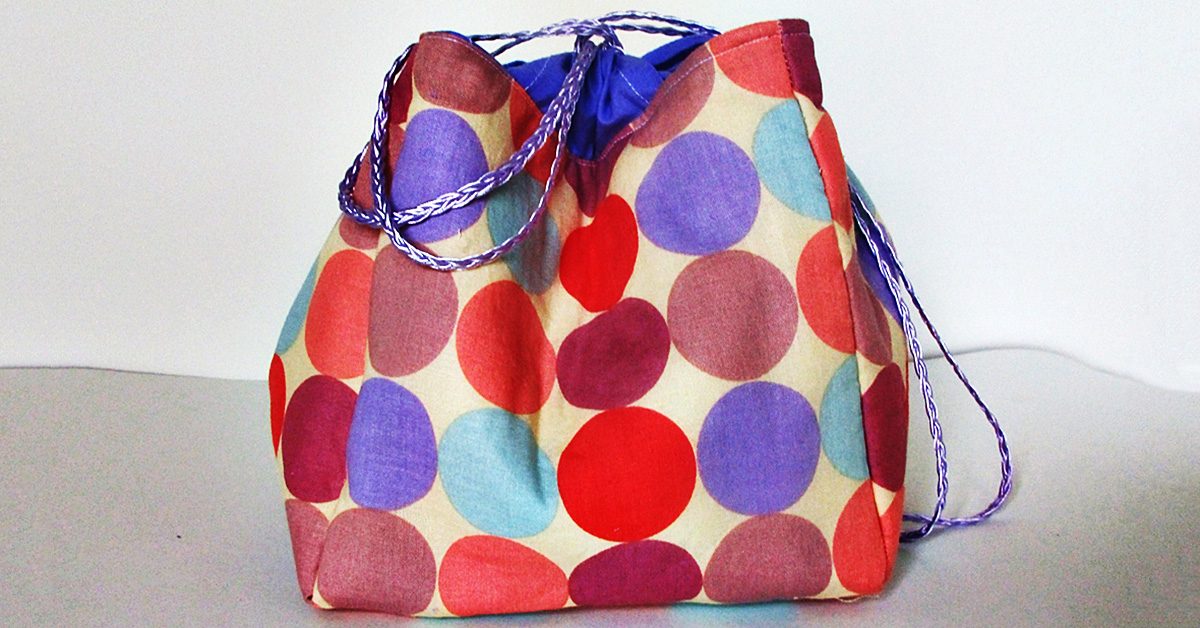
We made lotus shaped kinchaku drawstring bags here on the blog a couple of weeks ago. I told you then that there are other ways to make kinchaku, too. So let’s look at these now.

Kinchaku are purse or lunch sized drawstring pouches. They were traditionally made with chirimen, which are kimono fabrics. They are most often made with a round or square bottom.And they are and were extremely popular with ladies in Japan, both now and in history.

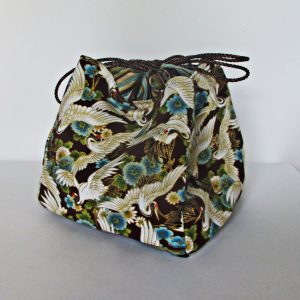
I didn’t have any chirimen fabric, but I did have a piece of Robert Kaufman Tranquility fabric with a crane motif and hints of gold shimmer.

kinchaku tutorial

Square kinchaku, fabric by Robert Kaufman

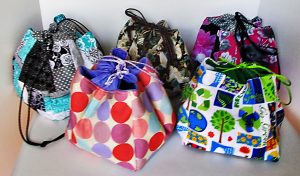
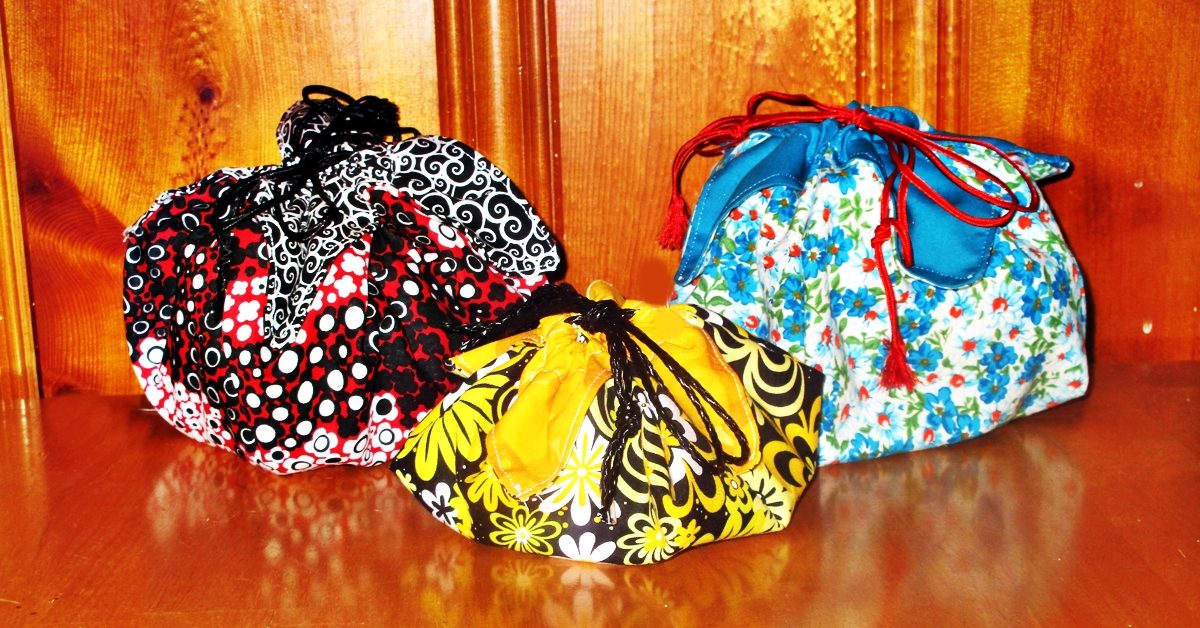
I started with this Japanese inspired print, and then I made these in all sorts of other prints, too.

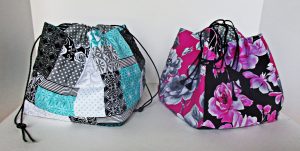
kinchaku Japanese bag tutorial by Millie Green

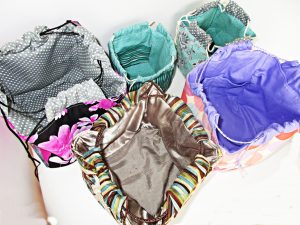
These are reversible, by the way, when you make them the way I’m showing you.

How to sew kinchaku

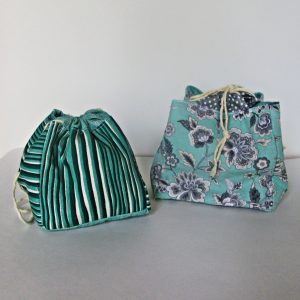
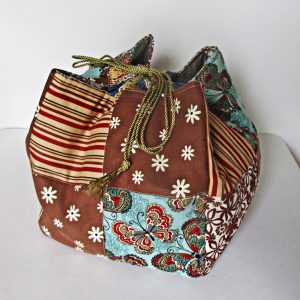
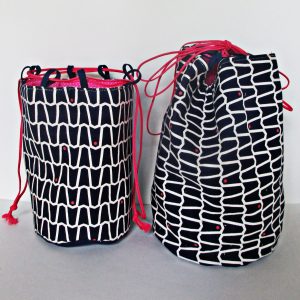
You can make your kinchaku with a square  or a round bottom.

Kinchaku tutorial by Millie Green

Small kinchaku made from five and six-inch squares

You can make them any size that you like.  Use three or four inch squares and add pockets inside to make a small pouch for carrying jewelry. Or use eight or nine inch squares to make a large purse. I think seven and a half inch squares are the perfect size for lunch bags.

I made one that’s ten inches all around, but once you make these that large or bigger, then they become komebukuro. We’ll save those for another post.

Make them sturdy

You will want to prepare your fabric squares before sewing these together in order to create a nice sturdy bag. You have choices here, and I recommend you make your choice based on the wise old principle of using what you have.

Prepare your squares using any combination of:

  • Batting and backing
  • Fusible fleece
  • Midweight interfacing
  • Heavyweight interfacing
  • Felt
  • Canvas
  • Duck
  • Denim

I like to use fusible fleece on five of the squares and midweight interfacing or sturdy duck or denim for the other five. Felt works nicely in place of fusible fleece.

For canvas, felt, or anything other than fusible type interfacing, you can baste the sturdier fabric to the back of a lighter weight cotton if you are using this for your outer fabric. To baste, just sew these together with a scant 1/8” inch allowance all around.

Or make a miniature “quilt sandwich” by layering your outer fabric over a layer of wadding (batting) and a backing square. Then quilt these together. You can have fun with this and do some fancy or decorative quilting. Or you can keep it simple.

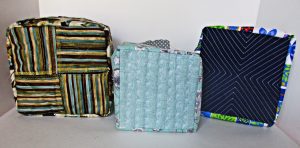
Kinchaku tutorial by Millie Green

I had some fun quilting on the outer base square for these kinchaku.

You can add pockets to some or all of the lining squares, too. Do this now, after you interface the pieces and before you sew them together.

Of course you should feel free to construct your fabric pieces by patchwork. Simple four-patch works nicely here, or use your imagination and go wild.

large kinchaku

Ten inch square bags (made here from four- patched five-and-a-half inch squares) are a great size for a project bag for knitting or other take-along crafts.

To make square kinchaku

Kinchaku sewing tutorial

You will need five squares of outer fabric and five lining fabric squares, prepared (as discussed above).

For the exterior, I like to use a contrasting square, possibly of the lining fabric, for the bottom piece. In this case, I cut four of the outer fabric and six of the lining.

Take the bottom piece, and sew the other four pieces to the four sides of this bottom square,right sides together,  starting and stopping a seam allowance width from the edges.

Then, sew these four squares to each other, creating the side seams. Now use your fingers and eyes to check and make sure there are no openings in these seams. Fix this now if you missed any spaces.  You can turn it right sides out and look at it now if you want. Then repeat with the remaining five squares.

Skip to the next section to finish your square kinchaku.

To make round kinchaku

Round kinchaku tutorial

You need two circles for the outer and lining bottoms, and a piece of each fabric that is as tall as you’d like your round kinchaku to be by the circumference of your circle, plus seam allowance. You can use a compass or trace a dish or other round object to make your circles.

Prepare your fabrics as discussed above. Then, simply sew the other piece right sides together around the circle and then sew the side seam. It’s easy to sew the circle, just go slowly and carefully guide your fabric to keep your seam allowance uniform.

You can clip little slits in the seam allowance all around if you like, but if your seam allowance is narrow you won’t need to clip much if at all. Check the bottom and side seam with your eyes and fingers to make sure everything is connected and you didn’t accidentally miss a spot. It is easy to fix these mistakes now. Turn right sides out, if you like. Then repeat for the lining piece and base.

To make the drawstring casing

For either square or round kinchaku, you have options in constructing your drawstring casing.

You can make tabs from matching or contrasting fabric, grosgrain or other ribbon, or bias binding. You can make several evenly spaced  tabs or just choose one wide tab centered on each of the four sides.

I like to use contrasting fabric. To make the tabs like I have done for most of the kinchaku pictured here, cut four same sized rectangles. Cut them between three and four inches wide by a length that is anywhere between one-third and five-sixths of the width of your squares. Turn and press a narrow hem on all the short sides, then sew these down. Now fold along the long edge, and center it along the top edge of one of the squares with the raw edges of the folded rectangle aligned with the raw edges of the square. Baste down with a one-eighth inch seam allowance. Repeat for the other three tabs.

You could do the same thing with shorter squares rather than rectangles and space two or three tabs along each square. If you use narrow bias binding, cord, or ribbon, you will want to use more tabs.

You can use contrasting fabric, even satin for the lining, and add pockets if you choose.

You can use contrasting fabric, even satin for the lining, and add pockets if you choose.

To finish your kinchaku

Place the inside and outside bag pieces right sides together, with the casing or tabs sandwiched between the two layers. Sew together, leaving an opening big enough to turn. Turn right sides out. Pull the tabs and push the lining down into the bag.

Sew the opening closed and continue top-stitching all the way around the top of the bag. Pull down on the lining and straighten the top seam as you sew.

Now thread a cord or ribbon through all tabs and tie the ends together. Then thread another cord of the same length starting and ending on the opposite side of where you started and ended the first cord. Tie the second drawstring and your bag is complete. You can tie the cords in a bow or use them as handles to carry your bag.

These are addictive

kinchaku tutorial

I can’t stop making these bags! They go together so quickly and are so cute and sturdy; sewing them is addictive. That’s good because these will make great gifts. Try this quick easy project and I bet you can’t make just one either.

Happy sewing!

Lotus drawstring pouch make great gift bags.

Lotus Drawstring Pouch Gift Bags and Purse Tutorial

Lotus bags are a pretty Japanese style of drawstring pouch

We started looking at Japanese style bags last week, when I showed several ways to sew azuma bukuro, or bento bags. I mentioned that bento bags make great gift bags, but these are not the only style of Japanese bag that works well for this purpose. This week, let’s look at an even prettier way to make an origami style reusable gift wrap bag, this time a lotus shaped drawstring pouch.

Use them for gift bags and more

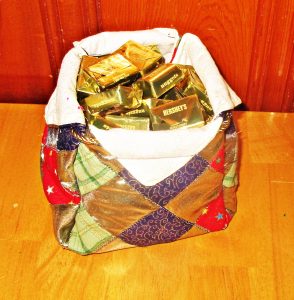
With such a pretty wrapper, even a humble gift becomes wow-worthy. Present a hostess or friend with one of these drawstring pouches you custom created to suit their style, and fill it with just cookies, candies, even a candle, to transform such consumable gifts into something memorable and continually useful.

Lotus bags make a lovely gift of candy.

Lotus bags make a lovely gift of candy.

I made a small one from a poinsettia print to both wrap and store the poinsettia flower pins I made as holiday gifts. Besides gift wrap, these pretty bags with their handy drawstring handles can be used as a purse, to carry lunch, as project bags for holding knitting supplies or a patchwork project on the go, or for travel organizers, to carry jewelry or cosmetics.

These would make sweet favors for a bride to share with her bridal party, baby shower gifts, stocking stuffers, goody bags, and more. You could even make one from satin, lace, or bead it to make a gorgeous purse for evening or for a bride.

If I had boy and girl children and I sent them to school, I’d make bento bags for the boys and pretty drawstring pouches like these for the girls.  I bet you can think of more uses for them, too.

The best thing about these pretty pouches is that they are incredibly easy to sew; you can make one in just a few minutes.

How to sew a lotus drawstring pouch:

You will need 2 same sized squares of fabric, one for the outside of the bag, and one for the lining. You will also need 2 pieces of cord, ribbon, or yarn for the drawstrings.

Use any size of square to make these. An 18” square makes a nice medium sized drawstring pouch. To make a bag large enough to carry lunch, I suggest using squares that are at least 20”. A 10” square is nice for a small pouch for travel or a small gift. I have made these smaller, with 8” squares, to make a tiny drawstring pouch for giving handmade jewelry. And I’ve made one much larger, too. I reused a baby wblanket I made long ago for one of my boys to make an extra large drawstring pouch for a scraps bag. It’s also fun to make these like a tiny quilt, using a small piece of patchwork for the outside square.

Small pouch to hold a gift of handmade bracelets and earrings, made from 8" squares.

Small pouch to hold a gift of handmade bracelets and earrings, made from 8″ squares.

You might like to affix fusible fleece or interfacing to one of your squares if you are making a larger lotus bag or one to use as a lunch bag or purse.

Place the two fabric squares right sides together and sew around all four sides, leaving an opening for turning. Clip the corners, turn right side out, and press. Then topstitch to close the opening, continuing the topstitching all the way around the square.

Fold up the corners

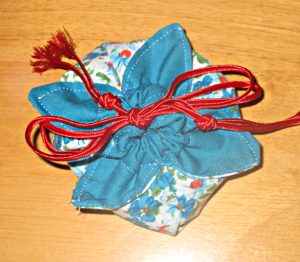
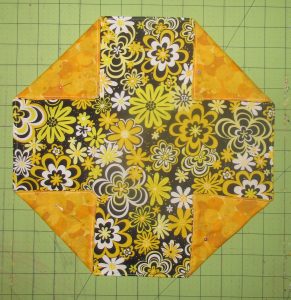
Now lay the finished square on your table with the exterior fabric facing up. Fold the four corners of the square back to show the lining fabric. I fold these back three, four, or five inches, depending on the size of the bag.

Make sure all four corners are folded back evenly.

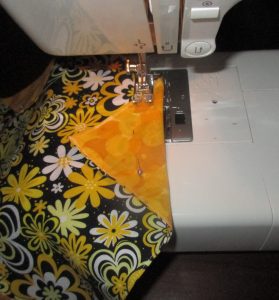
You can use your ruler and cutting mat to be sure all sides are even. Pin these in place, then sew a straight line across each of these corner folds, 5/8” from the fold. This creates the channels for the drawstring.

Place the folded edge at the 5/8" mark on your machine, and sew straight across.

Place the folded edge at the 5/8″ mark on your machine, and sew straight across.

Now sew the bag together

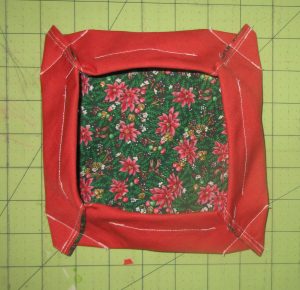
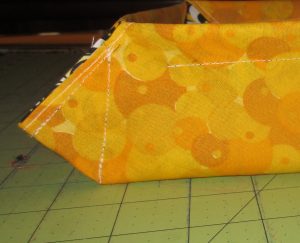
The next step is to sew the four seams that will transform the lined fabric into a bag. Start on any side, and fold the straight edge between two corner folds in half, with the outside fabric facing together. Sew this short seam on the lining side, beginning your seam just beneath the drawstring channel you previously sewed. In other words, don’t sew all the way, or you will not be able to pull your drawstring through. Do this on all four sides. I like to use a 2/8 inch seam here, but you can make this wider, if you like. Just be sure to sew all four sides using the same seam allowance, whatever it is.

You can turn your bag right side out now if you’d like to create a flat, square bottomed bag with corners that jut out. Or you can choose to box the corners.

To box the corners

You can box the corners by either sewing straight across the four corner seams like this:

lotus4

Or you can sew a seam from top to bottom, creating an upright triangle, like this:

lotus5

Now turn right side out.

Insert the drawstring

Cut two same sized lengths of cord, narrow ribbon, twine, or yarn. For all but the smallest of drawstring pouch, I cut both to the length of my arm from shoulder to fingertip. I cut them a bit shorter for tiny bags.

Attach the cord to a bodkin or safety pin, then insert it through all four flaps of the bag. Then tie the two ends of this cord together. If you like, you can add some beads to the ends of your cord before tying.

Now take the other cord and use your bodkin to insert it at the opposite side of the bag from where you inserted the first cord. Pass this one through all four flaps as well, add beads or not, then tie both ends of this cord together. Now you can pull both cords to pull your drawstring pouch closed and open.
If the drawstring pouch is for gifting, you can tie the cords into a bow.

This drawstring pouch is only one way to make a kinchaku

When carried, a Japanese drawstring pouch is called kinchaku. However, this is only one of many styles and ways to make kinchaku. We’ll look at other ways to sew kinchaku here soon, too.

This style, the lotus bag, is a particularly pretty shape of drawstring pouch that can be used in many ways. Perfect for gift bags, they are so easy to make and so pretty that you’ll want to make at least a few. This is a great way to use up scraps while making a useful project.  Won’t you like to make some today?

Easy to sew lotus drawstring pouch make great gift bags.

Happy sewing!

Butterfly Bag, Small and Large, and Blue Patchwork Purse

Butterfly Bag, Small and Large, and Blue Patchwork Purse

Reversible butterfly tote.

Reversible butterfly tote.

I have been making lots of bags lately, and I have a few tutorials and different bag patterns coming up here soon. This week, though, I’m showing a couple examples of butterfly bag and another variation of a simple tote bag purse.

First, I used my crazy patch butterfly appliqué blocks to make two different sizes of bags recently.

I made a butterfly bag tote as a gift for my niece’s sixth birthday. It’s a reversible tote big enough to carry coloring books and crayons to the ball park, where her brother plays nearly every day. There’s also room for a small quick quilt I made that she can use to sit on the bleachers or the ground while she’s there.

Baylee quilt, caption, I made this quick scrap quilt in only about an hour & a half.

Baylee quilt, caption, I made this quick scrap quilt in only about an hour & a half.

Here are the step-by-step instructions for making a reversible tote like this. You can use the strip piece method linked as a video below for making the patchwork straps.

Butterfly bag small purse

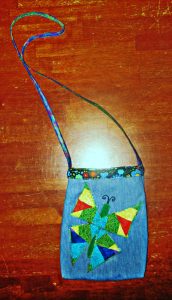
Then I found a single stray rainbow strip pieced block at the bottom of my scrap bin and I decided to make a small denim bag with a butterfly, too.

This will be a gift for a teenage girl.

This will be a gift for a teenage girl.

I used a rainbow variegated thread in the needle for the butterfly appliqué and also the strap and topstitching for this bag. This is probably my favorite decorative thread, and I have used it in a lot of projects.

To show off the lining fabric, I sewed the bag and lining together without straps, then folded over the top. I sewed the strap to the outside, with the raw edges under the fold. Then I used two rows of topstitching around the whole bag. I made the strap with a wider blue and narrower green piece of bias tape, covered by wide zigzag stitches up and down about five times.

Blue patchwork tote purse

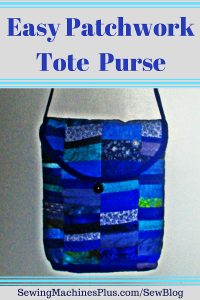
Here is a purse I made for myself last week. It is just a simple tote with the addition of a curved, bias- edged flap at the top. I quilted the patchwork using horizontal rows of a wavy decorative stitch that reminds me, like these blue fabrics, of the ocean.

This one is mine.

This one is mine.

To make the flap, just quilt together a rectangle of patchwork with batting and your lining fabric. Make it about an inch narrower than one side of the bag. Then you can fold it in half and cut the corners into curves. Then bind the curved edge and short ends with bias binding.

I used half of a thick turquoise ponytail elastic and a half-ball style button for a closure. I just sewed down the elastic to the lining side of the flap when I attached the bias edging. It also has a large zippered pocket inside, with patch pockets for cards inside that larger pocket.

Just baste the flap to the bag, and then tuck it between the bag layers when you sew the bag and lining together.

If you don’t know how to make this strip style patchwork, which I also used for the straps on the large butterfly tote above, here’s a video of me explaining how to do this.

I actually made this piece of patchwork some time ago. The blue quilt pattern I showed here was for my baby’s crib, and I made bumper pads, too. We didn’t really use these, so I decided to reuse the patchwork to make bags. This is the first one I have done; I plan to do a bigger laptop tote or backpack with the next one.

Like Amish quilts, these bags include mistakes!

I have to say that each one of these bags includes some little issue that I am not happy with. For example, the lining I chose for my blue bag is a gorgeous midnight blue print. But, especially with the flap, too, it is pretty impossible to see what’s in my bag without shining a light. It’s not a huge issue, since I usually just stick my hand in my bag and grab what I need by feel, anyway.

I boxed the corners too deeply on my niece’s butterfly tote and gave it a different shape than I intended. But this worked out, because the unintended bucket shape of the bag is what inspired me to make the quilt that I otherwise might not have included with this gift. And while I probably won’t ever make a strap like the one I made for the rainbow butterfly bag again, it is interesting and different looking and it works just fine.

The Amish include mistakes in their quilts on purpose. My mistakes were more accidental. The thing is though, all these little issues are lessons learned. I’ll never use a dark fabric as a bag lining again. Maybe I’ll make a post about more of these kinds of lessons I have learned the hard way soon. I’d be happy to save someone from making some of these mistakes.

In the meantime, I hope you will join me in bag making. Happy sewing!

DIY: Reversible Tote Bag Tutorial

DIY: Reversible Tote Bag Tutorial

It is easy to sew a reversible tote bag; even beginners can make this project.

It is easy to sew a reversible tote bag; even beginners can make this project.

It is easy to sew a reversible tote bag; even beginners can make this project.

You can make these in any size. My three examples are each sized slightly differently.

To make one reversible tote bag, you need 2 different bag fabrics. Depending on the sturdiness of your fabrics, you may also need medium weight interfacing or fusible fleece. You can make your bag handles from long rectangles of one or both of these fabrics, or you can use grosgrain ribbon, as I have here.

Reversible tote bag step one: cut bag pieces

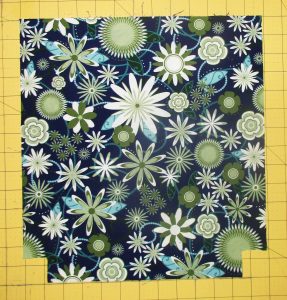
Measure & mark 1.5” from both sides of the bottom corners & cut these little squares out.

Measure & mark 1.5” from both sides of the bottom corners & cut these little squares out.

Cut two squares or rectangles of each fabric to your preferred dimensions. I made these using 13” x 14”, 14” x 15” and 13” x 17” rectangles, and I have made them both much smaller and much larger.  The 13” x 17” is big enough for my laptop. But ribbon handles aren’t a good idea for a laptop bag; follow the directions for making stronger fabric handles if you plan to carry your computer.

Then measure and mark 1.5” from both sides of the bottom corners and cut these little squares out. Do this for all four pieces of your bag fabric.

Step two, optional: interfacing

If you choose to make your reversible tote bag from home decor fabric and/or canvas, you won’t need to use interfacing.

If you are using quilter’s cottons or similar lightweight fabrics, cut fusible fleece or interfacing to fit two of the bag pieces. Follow package directions to fuse fleece or interfacing to the wrong side of both pieces of one bag fabric.

Step three, optional: pockets

You can make pockets on one or both sides of your reversible tote. The easiest way to make pockets is to start with a rectangle, fold it right sides together, and sew all around, leaving an opening for turning. First topstitch the opening closed, then pin and sew the bottom and sides of the pocket to the bag.

You can make a long rectangular pocket that stretches the full width of your bag, or make square patch pockets and sew them in the middle of one or more of the bag pieces.

Step four: sew two bag bodies

Take both pieces of one of the bag fabrics and sew along the bottom and side seams with right sides together. Press seams open. Now, miter the corners by lining up the side and bottom seams you just sewed at the middle of the new seam you will form from the square cut out. Sew these seams.

Repeat with the pieces of the second bag fabric.

Step five: handles

Use a soft measuring tape or even a string hung over your shoulder to determine how long you want your straps to be. I like long shoulder straps, so I usually cut mine about 30 inches long. If you prefer to carry your tote on your arm, cut yours shorter. You need two.

I saved time making these bags by using grosgrain ribbons to make easy straps. To do this, just cut two pieces of ribbon to your desired length.

To make fabric handles, cut two long rectangles to your desired length measurement by twice your desired strap width. Apply interfacing to the wrong side of your fabric if you like.  Fold lengthwise right sides together and press. Sew along the long open edge, then turn. Press again.  Now top-stitch along both long sides.

There is no need to finish the short ends as these will be concealed between the two sections of the bag.

Step six: assembly

They are handy for carrying books, notebooks, your computer, clothes for overnight or the gym.

They are handy for carrying books, notebooks, your computer, clothes for overnight or the gym.

Insert one bag into the other, with right sides together. If your placed pockets on one side of each bag body, insert them together so that the pockets are on opposite sides. Push down the corners to make sure both bag pieces are lined up well at the bottom. Then line up the side seams from both pieces and pin these together.

Take one strap and hold one end in each hand so that the loop hangs down. Be sure it isn’t twisted and insert it between the two bag parts on one side. Measure in from the pinned side seams on each side to be sure the straps are centered. About three inches in is a good guideline, but eyeball your bag to decide on exact strap placement. Just measure the distance between strap and side seam on both sides to be sure they are even. Pin, then repeat on the other side with the other strap.

Now sew together along the top edge.  You will have to leave an opening big enough for turning; I sew across all the straps and leave the opening on one side.  Turn everything right sides out. Both sides of the reversible tote will be pointing out.

Stick your hand into the opening and poke all the corners out from the inside. Then push one bag body into the other so that it becomes a bag with handles at the top. Return to your ironing board and press. Pay attention to the edges still open from turning; you want to press the raw edges inward and neatly align for top-stitching this opening closed.

Now stitch all the way around the top of the bag and you’re done.

Make more!

Reversible tote bags are easy to sew in a hurry & the possible variations are endless.

Reversible tote bags are easy to sew in a hurry & the possible variations are endless.

Reversible tote bags are easy to sew in a hurry and the possible variations are endless. Make them in different sizes and try different fabrics and trims. Use tie-dye, quilting, appliqué, fabric paints, or any other embellishment you like.

They are handy for carrying books, notebooks, your computer, clothes for overnight or the gym. You can use them as a shopping bag, your purse, or for handmade gift giving. Pick out some pretty fabrics and make a bunch. Happy sewing!

Fabrics and Textiles in San Miguel de Allende, Mexico

Fabrics and Textiles in San Miguel de Allende, Mexico

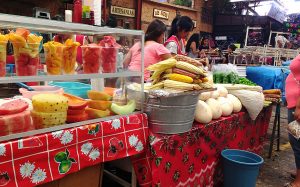
San Miguel de Allende, in the state of Guanajuato, Mexico.

San Miguel de Allende, in the state of Guanajuato, Mexico.

I recently traveled to San Miguel de Allende, in the state of Guanajuato, Mexico for a five day writer’s retreat with two friends. Although famous in Mexico proper, many gringos have not heard of San Miguel, located the mountains at 6,200 ft. elevation, at approximately Mexico’s center (200 miles north of Mexico City and about 600 miles from the Texas border).

Although famous in Mexico proper, many gringos have not heard of San Miguel.

Although famous in Mexico proper, many gringos have not heard of San Miguel.

I’m a sewist and a writer and while I was there to work on my book, I could not tear my eyes away from the gorgeous colors of the city and the beautiful fabrics & textiles I found there.

I could not tear my eyes away from the gorgeous colors & textiles of the city.

I could not tear my eyes away from the gorgeous colors & textiles of the city.

Even the city itself reminded me of a patchwork quilt.

Even the city itself reminded me of a patchwork quilt.

Even the city itself reminded me of a patchwork quilt.

Mexico is not afraid to use color, in fact it embraces bright, vibrant colors in both private and public buildings, art, and culture.


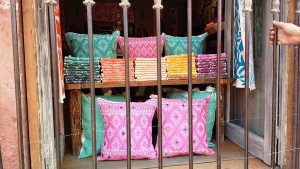
Locals claim that the birthplace of the serape is San Miguel de Allende and I was inundated with options.

Locals claim that the birthplace of the serape is San Miguel de Allende.

Locals claim that the birthplace of the serape is San Miguel de Allende.

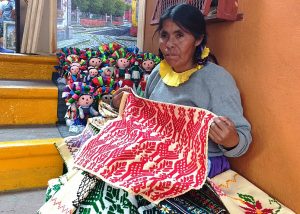
Other items on display were rugs, pillowcases, bedding sets, purses, bags, belts, guayaberas, and embroidered and woven fabrics.

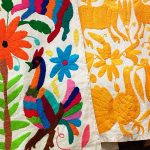
The hand embroidery I found particularly compelling. I bought a bright yellow bag with hand embroidery and my girlfriend, Lizz, bought a hand embroidered panel she plans to hang on her wall at home.

This is the panel she purchased (photo taken with permission).

This is the panel she purchased.

This is the panel she purchased.

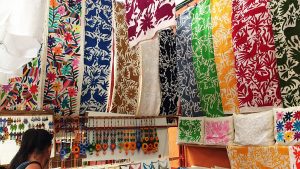
This booth was my favorite. It was located in El Mercado de Artesanías. I was so inspired that I had my pencil and paper out and took notes to plan out quilts I’d love to make with the huge, hand-embroidered panels.

This booth in El Mercado de Artesanías was my favorite.

This booth in El Mercado de Artesanías was my favorite.

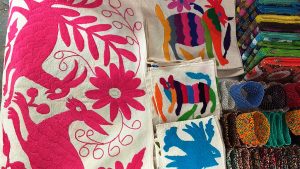
They sold smaller squares too, similar to charm packs and layer cakes. I’ve worked these into some upcoming designs as well.

I’ve worked these into some upcoming designs as well.

I’ve worked these into some upcoming designs as well.

Mexico also has the best selection of oil cloth fabrics. Make sure to pick up a few yards for your stash whenever you visit.

Make sure to pick up a few yards for your stash whenever you visit.

Make sure to pick up a few yards for your stash whenever you visit.

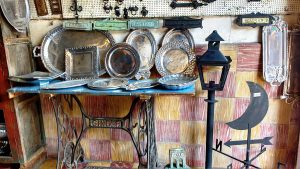
After a long day in el centro, I spotted this Singer sewing table used for display at a local tienda. Sewing is everywhere.

Sewing is everywhere.

Sewing is everywhere.

Here I’m enjoying a hard earned beer after a long day of writing, but it’s the bag in the foreground I want you focus on. Check out that embroidery and the stunning color!

Check out that embroidery & the stunning color!

Check out that embroidery & the stunning color!

I cannot wait to go back. Have you ever visited San Miguel? Did you buy any fabric while you were there? Share with us your finds in the comments.

I cannot wait to go back.

I cannot wait to go back.

(All photos were taken with permission)
———————————————————————————–
Charlotte Kaufman is a writer and sewist in Mammoth Lakes, California. She specializes in marine and home interiors and continues to fall more and more in love with quilting. You can follow her at charlottekaufman.com.
Gifts to Sew for Mom

Gifts to Sew for Mom

Are you looking for ideas to sew for Mom?

Moms come in all types. But most appreciate handmade gifts, especially the ones you make. Whether your mom is glitzy or sporty, a homebody or a world traveler, we’ve got you covered.

For Mother’s Day, her birthday, holiday gifts, or just because you love her, here are lots of fun project ideas you can sew for mom.

Zip bags

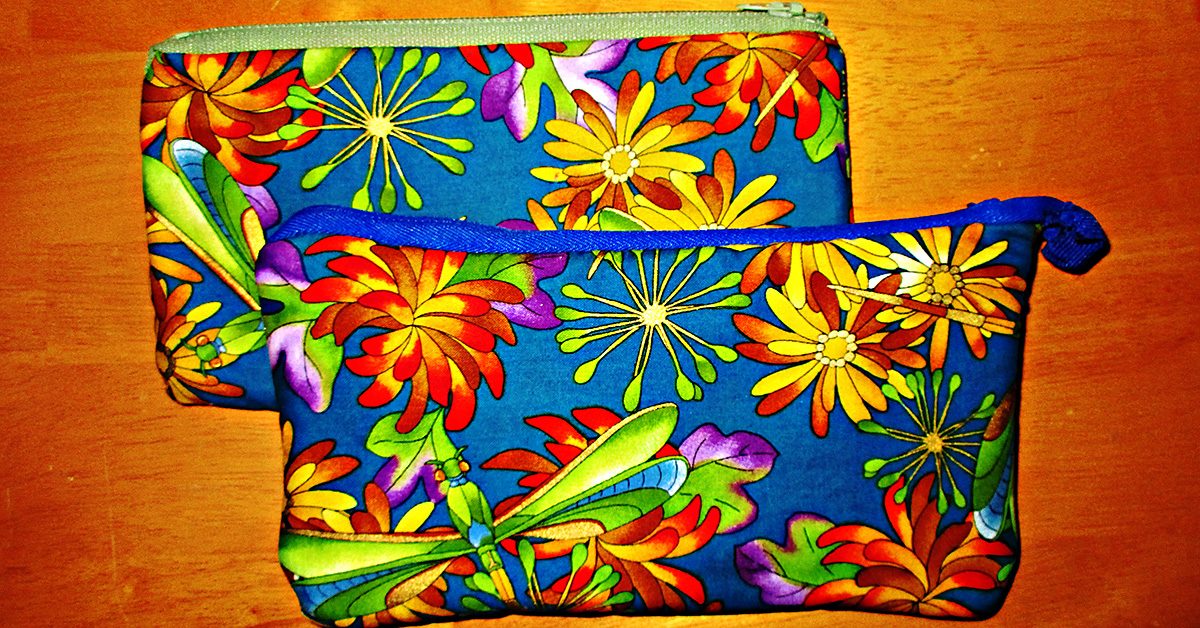
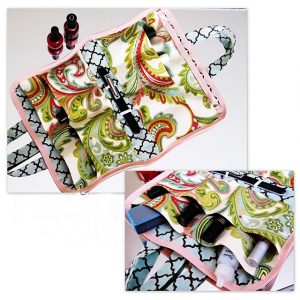
There are so many uses for these that zippered cases are always a good gift idea. She can use one for a cosmetics bag for her purse or travel, to hold pencils or art supplies, or anything else. I once made a matching set of these in several sizes for a gift for my mom.

She can use these to hold anything.

She can use these to hold anything.

Quilt

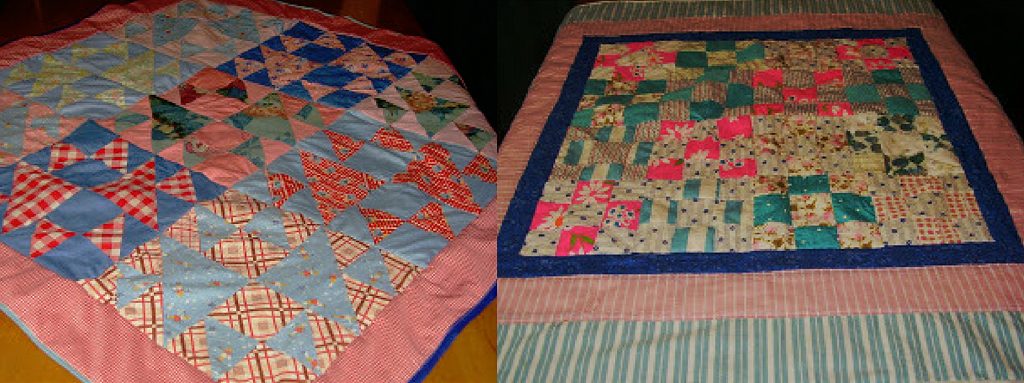
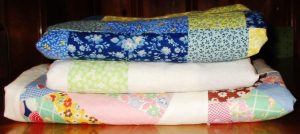
Whether she likes to get comfy in her favorite chair or she babysits grand-babies, a lap quilt is a perfect choice to sew for mom. Make one in her favorite colors, to match her décor, or choose a special pattern.

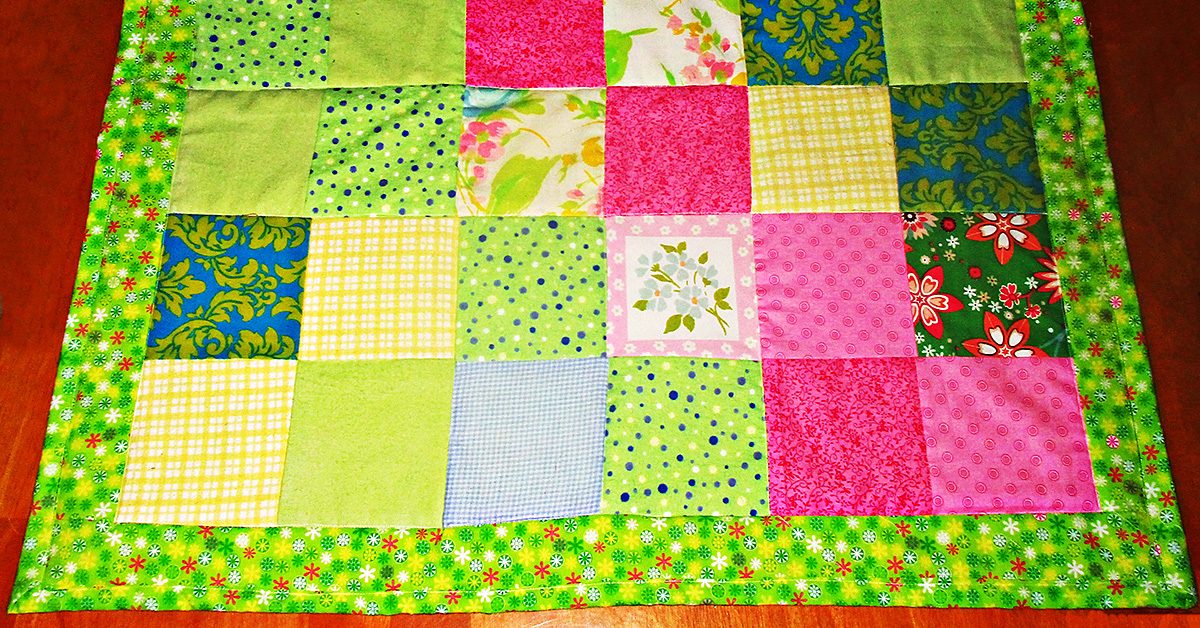
The blocks in these quilts were pieced by my mother's and my husband's grandmothers. I found them in their sewing boxes & put them together with borders to make these lap quilts for our moms to share with their grand babies.

The blocks in these quilts were pieced by my mother’s and my husband’s grandmothers. I found them in their sewing boxes & put them together with borders to make these lap quilts for our moms to share with their grand babies.

And speaking of grand kids and special quilt patterns, you could get the kids involved and make a handprint quilt for their grandmother.  You can make a handprint quilt using washable fabric paint and the kids’ hands as stamps. Or you can have them trace and then cut out their hands and use these as appliqué patterns.

Handbag

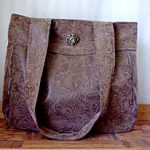
Most ladies will appreciate a beautiful new handbag. Depending on your mom’s style, you could make her a clutch, a wristlet, a structured bag, or a casual cross-body purse or messenger bag.

The possibilities are endless here. Choose suede, an elegant stamped faux leather or other fancy fabric, a distinctive or wildly patterned print, or build her a bag based on a small piece of patchwork created just for her.

Totes

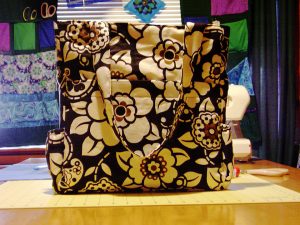
She can’t have too many tote bags since these are endlessly useful.

She can’t have too many tote bags since these are endlessly useful.

She can’t have too many tote bags since these are endlessly useful. Make her a stylish and sturdy tote bag for her library books, groceries, or other shopping and she will appreciate it endlessly.

Make a gorgeous XL tote in a special fabric and she will be thrilled to use it as a stylish everyday bag. Especially if you add in ample pockets and/or smaller zip bags for organizing contents.

You can make a reversible tote bag in any size and give her two bags in one.  Make a canvas tote with ample pockets inside and out to create a custom beach bag she will love. Or make her a few of these cute shopping bags that collapse into their own pocket.

And consider smaller totes, too. Here is one as pretty as a purse meant for toting her tablet.

Pillowcases

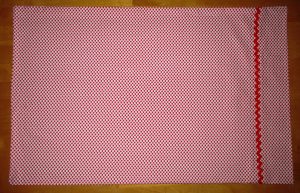
You can’t buy pillowcases as pretty as the ones you can sew. Make her a luxe pair trimmed in vintage lace. Choose a colorful patterned fabric to dress up her bed or a special motif she adores. Whether she loves owls,  Star Trek, or her favorite sports team, you can make her a pillowcase from a yard of any novelty print.

You could make a pillowcase covered in hearts to remind her how much she is loved.

You could make a pillowcase covered in hearts to remind her how much she is loved.

Sew a bouquet

A bouquet of flowers is a standard Mother’s day gift. You can sew her a bouquet of flowers that will never wilt and fade away.

Here are a lot of different ways to make fabric flowers.

Rice Pack

Whether she suffers from pains in the neck, back, tummy, or general monthly pains, an oversized microwavable rice pack heating pad will be a welcomed gift of comfort.

Slippers

There are lots of ways to sew slippers, here are some slipper sewing tutorials to choose from.

Pajamas

You can sew cozy pajamas from silk, cotton, flannel, or fleece. Make them ultra feminine with batiste and lace, or pure fun in a funky print. Start with an easy pattern from Simplicity, McCall’s, or Butterick, or use one of these tutorials.

Easy robe

Like pajamas, you can sew a robe from a lightweight or dressy fabric or from something heavier and more cozy. Robes are easy to sew. You can buy an easy robe sewing pattern or here’s a great tutorial showing how to make your own pattern using rectangles.

Apron

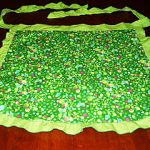
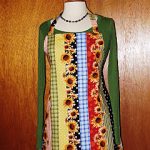
There are so many ways to sew aprons.  You can make her a pretty half apron from just a fat quarter of fabric plus trim, a full coverage bbq style apron from a yard, a reversible apron, or a garden or craft apron.

  • Oven mitts/ pot holders
  • Table runner
  • Placemats
  • Napkins

Travel bags

If your mom travels a lot, there are a lot of great gifts you could sew to help her

Project link at Positively Splendid.

Project link at Positively Splendid.

Pareu

I got this idea from the book Travel Gear and Gifts to Make, by Mary Mulari. She says that a pareu (pa-ray’-oo) is actually a colorful Polynesian wrap skirt. But it can also be used as a shawl, head cover, scarf, swimsuit cover up, light blanket, picnic blanket, or even a knapsack for carrying stuff.

This is probably the most used and loved gift I have ever made for my mom, and it is also the simplest. She travels a lot as a car passenger, and she likes to nap with a light blanket while riding.

A pretty pareau works perfectly for that plus more.

To make one, you just hem a square or rectangle. You can make one from a 44″ or a 60″ square. Since I knew she would use it as a blanket, I made my mom’s in the larger size. And I sewed a small matching tote with a strap, for storing the pareau rolled up while not in use. I bet it has been over ten years since I made it for her, and she still raves about and uses this gift all the time.

Needlebook

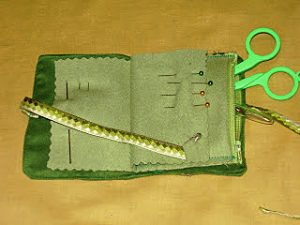
If your mom sews a lot or even just a little, she will certainly treasure a needle book you make with love just for her. You can make a simple one from felt or create a patchwork cover and include a zippered “page” for holding small scissors and other supplies.

I like to make needle books with a zippered page inside.

I like to make needle books with a zippered page inside.

Fabric necklace or bracelets

Jewelry is another go-to gift for moms, but have you ever sewn jewelry? Here are some ideas you could try:

I hope this list gave you some good ideas. What will you sew for mom?

Groovy Projects for Groovy Buttons

Groovy Projects for Groovy Buttons

One of my absolute favorite parts of life is being an aunt, and my youngest niece as at the adorable age where hitting cookie tins like drums is an awesome-good time. She also adores books, and as an author, I think that’s a good thing! In fact, I spent a decent amount of time last week reading (and re-reading) her the same story, Pete the Cat and His Four Groovy Buttons. I had a suspicion that her appreciation of the book was linked to the interesting painted look of the illustrations, but whatever the reason, her focus on the book was real.

I spent a decent amount of time last week reading (and re-reading) her the same story, Pete the Cat & His Four Groovy Buttons.

I spent a decent amount of time last week reading (and re-reading) her the same story, Pete the Cat & His Four Groovy Buttons.

During the book, Pete the Cat has — you might’ve guessed — four groovy buttons that are on his coat, but they pop off one at a time until he’s left with just his belly button. He was cool with it though and “kept on singing his song” (Litwin, 2012, p. 23).

Just keep singing your song!

Just keep singing your song!

Precious Moments

It would be easy to write off these kinds of moments with my niece as just sentimental, but inspiration for creativity can be found in them as well. For instance, Pete the Cat has buttons, and if there’s one element of old clothes that you can keep and re-use for a number of reasons, it’s a button! Right now, as a matter of fact, I have something in need of a button replacement, and if I’d been keeping the buttons from old clothes like I could’ve been doing, I would’ve had one at my disposal to do the repair.

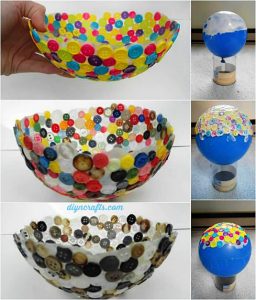
Something about these details — Pete the Cat’s buttons and needing a button for repair — mingled with my brainstorming for this post to lead to creative territory in regard to using buttons for sewing projects. You see, you don’t just have to use them for structural purposes. Pretty easily, they can be used for décor on a number of projects. And for whatever reason, this button-detail seems to have become its own trend to the point where you can buy button stickers for scrapbooks and projects, and there are plenty of artistic endeavors outside of sewing that use buttons.

There are plenty of artistic endeavors outside of sewing that use buttons.

There are plenty of artistic endeavors outside of sewing that use buttons.

Needle and thread

Since this is a sewing blog though, we’ll focus more on the projects that the lost, but still groovy, buttons of Pete the Cat could’ve gone to in the world of needles and thread.

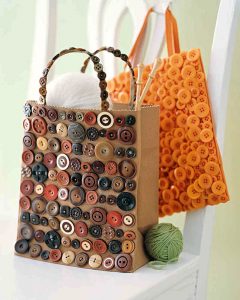
This button purse idea in particular stuck out to me as a possibility.

This button purse idea in particular stuck out to me as a possibility.

I mentioned before that I would like to make a purse, so this button purse idea in particular stuck out to me as a possibility. Simple fabric could be used to make the purse itself, and the buttons could be the stand-out quality of its appearance. Of course, I’d need a lot of buttons, but it would be an interesting take for a first-purse experience! Also, if I messed up my sewing, a well-placed button might hide my mistake!

Fashion statement

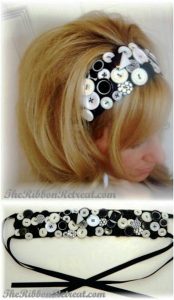
Since headbands are small projects, making one for the sake of a button endeavor might not be too hectic of an idea!

Since headbands are small projects, making one for the sake of a button endeavor might not be too hectic of an idea!

Other options for using buttons include fancying up jackets, shirts, pants, dresses, skirts, and even shoes! Honestly, if someone had been following Pete, that sewing fan or crafter could’ve been assembling the materials for an interesting project, like breadcrumbs leading to a prize.

Opportunity of abundance

And two wonderful details about this scenario are that buttons are easy to come by and easy to store! A simple jar could hold dozens of buttons that you collect as you go through your clothes to see what you’re going to toss. If you’re in too big of a rush to assemble your button stash this way, you can buy new ones and still keep them in a way that won’t take up too much room. They’re just buttons, after all! You could have the means to fancy up your projects in a bowl that’s waiting by your couch!

Would I have thought of exploring this so thoroughly, and in this way, if I hadn’t spent so much time reading about Pete losing his groovy buttons? Who knows! But it goes to show that inspiration can come from anywhere, and it pays to keep your creative mind open from day to day to see what ideas simply living life brings to mind.


Reference: Litwin, E. (2012). Pete the Cat and His Four Groovy Buttons. New York: Scholastic.
How to Sew Valentines: 33 Project Ideas to Show Your Loved Ones How Much You Care

How to Sew Valentines: 33 Project Ideas to Show Your Loved Ones How Much You Care

Sew valentines this year

I challenge you to sew valentines this year to show your love.

I challenge you to sew valentines this year to show your love.

I challenge you to sew valentines this year to show your love. Anyone can buy trinkets, but making something with love infuses more meaning into even simple gifts. Heartfelt gifts don’t need to be elaborate to mean a great deal.

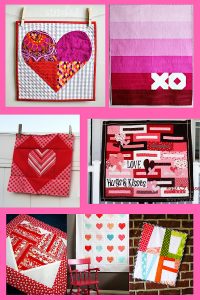
From simple sewn hearts to labor of love quilts, the web is full of fun ideas that you could use to sew valentines this year. You can make a little something for every person you love. And there is nothing wrong with sharing a little love with people you just like, too. From your sweetheart to your grandma to your neighbor or teacher, everyone who you bless with a handmade gift will appreciate that you spent time making something just for them.

Sew valentines: my simple ideas

I’ll start by sharing three simple ideas of my own that I’m using this year to sew valentines for my family and friends, including an easy way to add a homemade touch to candy I’ll pick up at the store.

Felt or fleece hearts

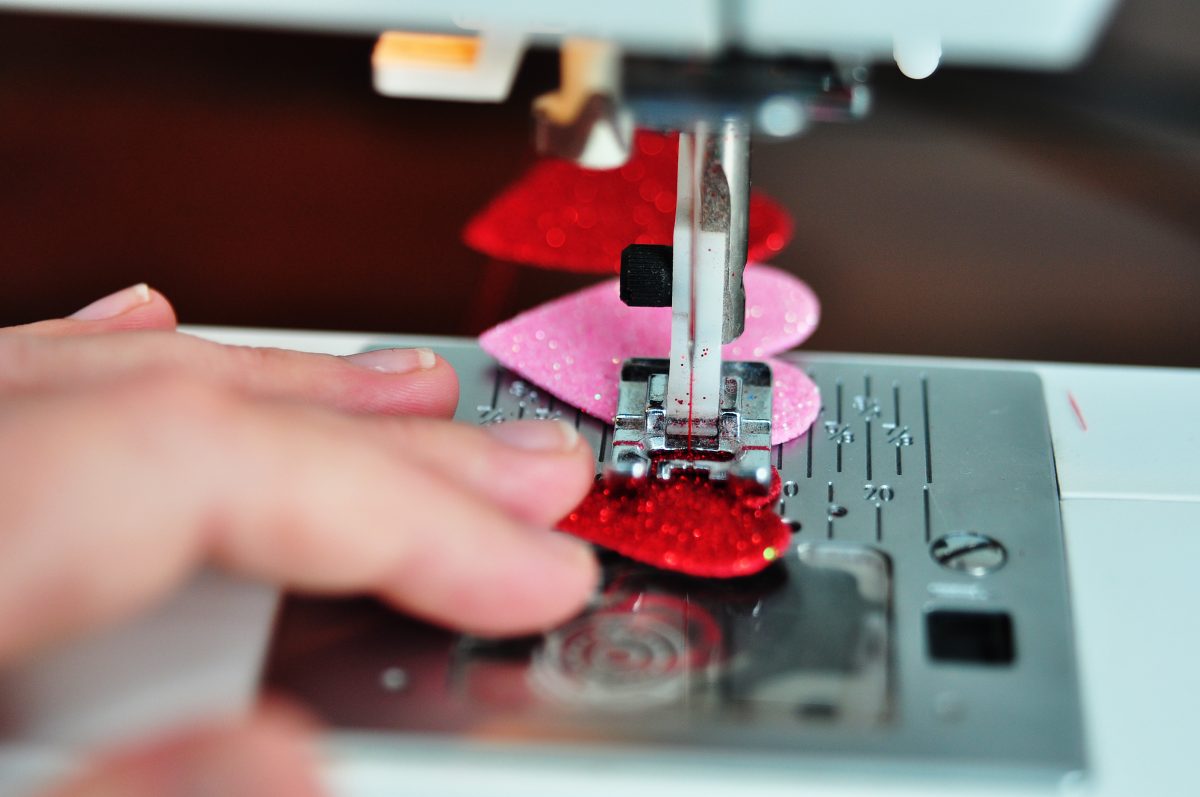
These couldn’t be simpler to make. Just draw a heart pattern on paper, cut out, and pin to two layers of fleece or felt. Cut these out, then sew them with right sides together, leaving an opening for turning. Stuff, and then sew the opening closed. I’m stuffing them with dried lavender flowers to make simple sachets for my friends. I once made a pair of these and filled them with baking soda to stuff in my gym shoes, and this worked well to eliminate odor. You could also use lentils and make a set of heart bean bags for a game for your kids.

You could also use lentils & make a set of heart bean bags for a game for your kids.

You could also use lentils & make a set of heart bean bags for a game for your kids.

Valentine novelty fabric pillowcases

There is nothing easier to make from a yard of cute fabric than a pillowcase. To make one, hem across one long side. Then fold the fabric widthwise, with right sides together, and sew or serge the other two sides. Turn right side out. That’s it! Of course, you can dress these up with decorative trim. But choose a cute enough fabric and there’s no need to dress it up further.

Attach trim after hemming, before sewing together.

Attach trim after hemming, before sewing together.

Simple gift bags

Use the pillowcase instructions above in miniature form to create simple gift bags to fill with chocolates or other candy from the store. Or for children, include dollar store trinkets such as small toys. Tie with a ribbon. You could amend the directions slightly to make drawstring bags instead.

Use the pillowcase instructions above in miniature form to create simple gift bags.

Use the pillowcase instructions above in miniature form to create simple gift bags.

I’ll also be making some projects that I have collected from all over the web. Follow these links to find the perfect projects to sew valentines for everyone that you love:

Sew valentines: more easy ideas

I might make one for myself!

I might make one for myself!

  • Fabric Heart Bookmarks: Here is another project so easy that you can whip up several in mere minutes. This is the kind of sweet gift that most anyone could use. I might make one for myself!
  • Felt Heart Ornament and Garland: I plan to make a couple of these ornaments to share as gifts, and the garland for my house.
  • Warm Heart Coffee Cozy: Here is another simple idea that makes a nice gift for most anyone.
Warm heart coffee cozy.

Warm heart coffee cozy.

Sew valentines: cards

Here’s how to incorporate your love for sewing by hand while making paper cards.

Here’s how to incorporate your love for sewing by hand while making paper cards.

Sew valentines: a game and a toy

There are lots of ideas for softies to sew, but none are as cute as this sweetie.

There are lots of ideas for softies to sew, but none are as cute as this sweetie.

Sew valentines: bags and purses

This change purse includes a key ring.

This change purse includes a key ring.

Sew valentines: pillows

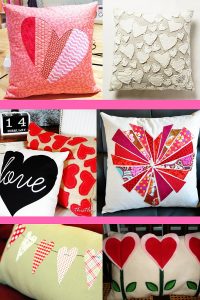
This pattern features reverse appliqué.

This pattern features reverse appliqué.

Sew valentines: quilts

Valentine quilt roundup.

Valentine quilt roundup.

Whichever projects you choose, I hope you have a happy Valentine’s Day!

Sewing Bucket List

Sewing Bucket List

Have you made your sewing bucket list yet?

A sewing bucket list is a fun list to make for the New Year, or anytime. I only set one resolution for each New Year, but I invest my list-making enthusiasm into creating a new bucket list of exciting possibilities and things to do each year instead. Here’s my sewing bucket list for this year. Use my categories for your list or just use these to get you thinking of what you want to include on your own sewing bucket list.

52 Project Challenge

This first item could fill a sewing bucket list, as well as help ensure every other item on the list gets checked off. The challenge is to complete a project every week for the year. I have completed this fun challenge several years, but I decided not to do it last year. I missed it, and so I’ll be doing it again this year. Now I recommend you accept this challenge, too; just think how many things we will collectively make if lots of us join in!

Finish UFOs

Are unfinished objects piling up in your project room? I have three quilt tops that need quilting, one of which is an inherited UFO that my husband’s grandmother died before quilting herself. I also have more inherited UFO projects to complete. Hopefully I won’t die anytime soon, but whenever I do, I really do not want to leave any UFOs behind. So I try to stay on top of these, but just now I do have quite a pile to finish before I start too many new projects. What UFOs do you need to complete before another year gets away?

I have quite a pile of UFOs.

I have quite a pile of UFOs.

Use up the Fabric Stash

I decided a couple of years ago to let the fabric live at the store, but I still have too much fabric, including scraps, stashed. I’d really like to use it all up to free up some space and not store so much stash. If I can, I’ll like to complete all my projects using stash fabric and not spend money on fabric when I can avoid it this year. This means I can have fun making scrap quilts and patchwork items. Can you use up or at least halve your fabric stash this year?

Sew wardrobe pieces

Thank you, I made it myself.

Thank you, I made it myself.

Thank you, I made it myself.

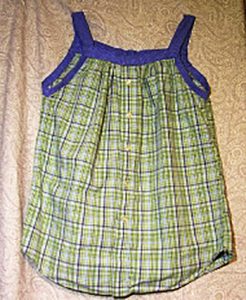
For my wardrobe this year, I will like to design several new tops, especially for Spring and Summer, from my husband’s large button downs, which I’ll make over to be more feminine. I’d also like to make a colorful new patchwork maxi skirt for the warm seasons. And I need yoga pants; I’ll like to refashion these from my husband’s large T-shirts. What is your closet lacking? If you haven’t started sewing garments yet, make this the year you do. It makes you feel great to be complimented on your clothes and be able to say, “Thank you, I made it myself.”

Add skills

This goes with the previous bullet point, for me. I’ll like to both increase my pattern-making skills, and work with more patterns. I have collected many more patterns than I have found time to make yet. It is time for me to increase my confidence and skills by tackling more challenging patterns with greater design details. I also want to learn machine embroidery and digitizing. What new skills will most help you? Do you need to learn to make buttonholes or want to learn quilting? Learning these new skills might be the most important entries to add to your sewing bucket list.

Make more quilts

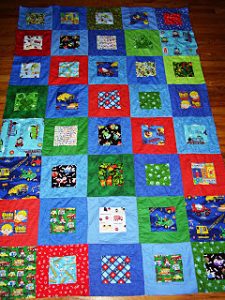
Among the quilt blocks I inherited from my great-great grandmother was one odd square that I want to replicate and build on to create a design I have never seen before. I’ll call it Grandmother’s Garden. I’m also very anxious to start on my first landscape quilt design, which I’ve been thinking about and sketching for a while now. I could make a whole separate sewing bucket list just for quilts I want to make. There are a few traditional patterns that I want to play with as well. But first, I want to make a toddler sized I-Spy quilt for my youngest, to match the twin sized version I designed for his brother. I bet your list of quilts to make is long, too.

A toddler sized I-Spy quilt I want to make for my youngest.

A toddler sized I-Spy quilt I want to make for my youngest.

Christmas in July

Don’t you hate feeling rushed in your Holiday sewing? This year, I want to get a great head start by focusing on Christmas in July. If we do this during both June and July, then we could do craft shows and sell some of our handmade gifts. At the very least, I want to sew quite a few gifts for my giving list, so that I can devote the holidays themselves to festivities and family, rather than risk having any last minute sewing from not being prepared. I’ll like to plan gifts I can handcraft in small batches, and get a Santa’s factory vibe going in my sewing room this Summer, how about you?

Plenty of purses and bags

Santa brought me a beautiful yard of printed duck that I want to turn into a fabulous new tote. I also have been saving a yard of embossed, vegan faux leather for a pretty purse for me. And I need to make myself a new laptop sleeve and a travel case for my ukulele. Purses and bags will be my projects for the 52 project challenge on several different weeks, I bet. I will love to make a new patchwork purse design this year, too. Couldn’t you use a new handbag or two, too?

Purses and bags are my favorite projects to sew, I'll make a few this year.

Purses and bags are my favorite projects to sew, I’ll make a few this year.

Home projects

I need to make new un-paper towels. I won’t buy disposable paper towels or products for my busy kitchen, so we heavily use a lot of kitchen cloth. The unpaper towels that I made have been in use for several years now and are starting to look dingy and worn; replacing these will be one of my first projects for this year. How about sewing for your home, do you need new curtains? FYI, pretty pillowcases are a perfect project for both reducing your fabric stash and also super easy winners for the 52 project challenge on otherwise busy weeks.

New machines

I am perfectly happy with my favorite sewing machine and my mechanical model back-up machine, as well as my serger. But I will sure love to expand my capabilities by adding two new machines. First I want to add a Janome Coverpro coverstitch, and then an embroidery machine, to my lineup. I didn’t think these would be in my budget this year, but Sewing Machines Plus‘ offer of financing and monthly payments has me wondering if I can swing these sooner rather than later. I bet you could do cool stuff with a new machine or two, too; which sweet new baby will you most like to add to your collection?

That’s my sewing bucket list; writing it has me excited about all the fun projects I will make this year. What do you want to sew this year? Will you do the 52 project challenge? Have you made a sewing bucket list of your own yet? If not, I encourage you to start one now.