One Day Sewing Projects

One Day Sewing Projects

one-day-sewing

Sometimes I don’t want a big sewing project. If I’m pressed for time or simply need to fill an afternoon or one day out of the weekend, I don’t necessarily want to start a project that will take days, weeks, or months to complete. Nor do I want the hassle and expense of shopping for supplies for a larger project. I just want to sew for a couple of hours and have something to show for it. If that’s ever happened to you, these sewing projects you can do in a day are the perfect solution.

Circle Skirt

Make this for yourself or your daughter…or making a matching mother/daughter pair. This circle skirt can be done in just a couple of hours and it’s perfect for whirling and twirling when it’s done. Unless you have large amounts of the same fabric on hand (cause you just buy fabrics you like when you see them, maybe?) you’ll need to hit the store for material. If you’ve got enough fabric on hand, you’re good to go.

Vendor Apron

Are you the one they ask to help out with bake sales, garage sales, and other school fund raisers? You need this vendor apron to keep your notepads, pens, and other supplies close at hand. It’s super simple to make with an old pillowcase or one you fell in love with at the thrift store and now need a use for. Make a bunch so the whole PTA will have one.

Trendy Fashion Tank

With this awesome pattern there’s no need to spend your hard earned money on brand name t-shirts and tanks. The trendy fashion tank is patterned after a popular JCrew top, but made by you. You’ll need jersey sheets or another source of that same material to make this pattern. Flat jersey sheets can be bought at discount stores for around $7, so it’s well worth the investment to make this shirt yourself.

Hair Bows

Not only do these work up fast, they’re a great way to use up your scraps. Hair bows never really go out of style, so make a bunch. Give them as gifts or sell them at craft fairs. Depending on the material you choose they can be vintage, modern, or anything in between. No matter what, they’re sure to be a hit!

The next time you’re looking for a quick project, try one of these projects. They take a day (or less in most cases) and leave you with a great finished piece, a feeling of accomplishment, and instant gratification. Many of these projects are also great for sew sewers since they can quickly see the results of their efforts.

How to Sew Faster

How to Sew Faster

My job as a tailor on a television show often requires me to complete an alteration in a seemingly impossible amount of time. Not to be overly cocky or self-congratulating but, I can be pretty fast when needed. People frequently ask me how I’m able to do something so quickly.

Don’t hesitate. Just, do.

Honestly, I don’t think so much about it anymore: its pretty much second nature at this point. But, I suppose if I were to break it down, the process would go something like this:

First, don’t panic. Whatever you do, don’t panic. If you do, you could find that suddenly you’re unable to thread a needle, or your needle breaks, or the thread tangles.

Second, don’t hesitate. Just, do.

As you’re working, think about the next step. Plan ahead.

Concentrate fully on what you’re doing. Don’t listen to the conversations going on around you. Pay no mind to whatever random chaos might be happening in another part of the room. Just focus your full attention on the one thing you are doing. That is all that is important.

Whatever you do, don’t thread mark. I know that’s what they teach in sewing school but there is no reason to have to thread mark a pant hem.

A few tips on how to sew faster:

Do as much as you can without stopping to iron.

If I’m really pressed for time, I tend to leave all the ironing until the very end (pun intended).

Learn how to eyeball measurements. Think about it, if you’ve been sewing long enough, you know what a ½” looks like. You honestly do not need to mark every single little line. If you want to measure, go ahead, put use your pins to mark the line. I often work with a metal seam gauge but rarely actually draw a new stitching line. One exception is if I’m re-mitering a suit jacket sleeve corner though I know lots of tailors that do not need to draw that line either.

Whatever you do, don’t thread mark. I know that’s what they teach in sewing school but there is no reason to have to thread mark a pant hem. I once had an additional tailor helping me on a show who insisted on thread marking the fold line on hems for cop pants. Buy some tailor’s chalk and use that to mark your hemline. It’ll disappear when ironed.

Unless you’re topstitching, you really don’t have to have your thread match exactly. Believe me. Whatever thread is in your machine is just fine. I cannot begin to tell you how many black garments I’ve altered quickly with red or yellow or whatever happened to be in the machine colored thread.

Learn how to undo a chain stitch. A lot of manufacturers use chain stitches in clothing construction. This makes it super easy to take them apart when needed. You can only unravel a chain stitch in one direction, the direction it was sewn in. Most of the time, all you need to do is insert a seam ripper and pull in that direction and all the stitching will come undone. The center back seam of men’s pants, often will have two rows of stitching so you’ll need to pull each row separately.

A couple other seam deconstruction tips:

To take apart a serged seam, use a nice sharp seam ripper and run it through the threads that wraps around the edge of a seam. After you do this, the rest of the threads will usually come apart rather quickly. Some serged seams are on a chain as well and you can undo them by pulling the thread on the straight stitch.

One of the fastest ways of taking apart a seam is to, again, use an extremely sharp seam ripper and insert it into the seam from the right side and just pull upwards through the seam. This technique takes a bit of practice (and bravery) though as the potential to accidentally slice through the fabric is ever present. There’s a knack to getting the angle of the seam ripper just right though and once you figure that out, you’re golden.

In the end, the one sure way of becoming a faster tailor is by practice. The more often you repeat the same task, the more efficient at it you become.

As you do an alteration, try to think of ways you could save time: do you really need to flip everything back right side out then inside out then right side out again? Probably not. If you sew this first, will it make it easier to sew this? Or visa versa? Experiment and try things multiple ways until you’ve figured out the quickest sequence of steps for yourself.

I love discovering a new, faster way of doing something I’ve done a million times. Sewing is kind of cool like that: there’s always something more to learn and fresh tactics to uncover.

Beginner Sewing Project: Felt Flower Pincushion

Beginner Sewing Project: Felt Flower Pincushion

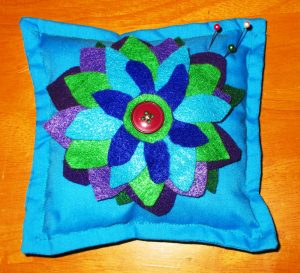
Felt Flower Pillow Pincushion

Felt Flower Pillow Pincushion

A pincushion is one of the first things you need for sewing. You will love yours if it is a pretty one and you make it yourself.  This project is super easy and it makes a perfect first project at your new machine.  This pincushion is a generous size and you won’t find one quite as nice for sale at the store.

If you are not an absolute beginner, you can whip up this pretty pincushion quickly for yourself or for a friend.  This makes a sweet gift.  You could even make these for friends who don’t sew by filling with lavender flowers instead of stuffing so that they can enjoy it as a pretty sachet instead.

Even non-beginners appreciate a fast project. Making one or a few of these might be a nice pick-me-up on an otherwise dreary afternoon.

Though it does make a pretty sachet, this project was designed as a pincushion, and it is my favorite of the many in my room. I sewed snaps on the back of mine and made a permanent place for it on my sewing room organizer curtains.

Pin it

Speaking of pins, here’s an important word to the wise: All pins are not created equal!  I highly recommend you further beautify this pincushion with head pins.  Really, I can’t stress this enough- do yourself a favor and arm yourself with this kind of pin. Pearl or flower head pins are easy to see, find, and remove from your project while sewing. Plus, they are pretty!

To make this beginner project pincushion, you need:

Two six-inch fabric squares

Felt scraps, for cutting petals.  I made mine using purples, greens, and blues.  You could make a more realistic flower using all one color of felt, or perhaps several shades of the same color.

A button for the flower center

Embroidery thread

Polyester fluff or other stuffing

To make the flower:

I cut my petals into pointy football shapes.  I tapered the petals at both ends to reduce bulk behind the button center.

Six graduated layers of six petals each make a nice, full flower.  Use the six largest petals for the back layer, stepping down to the smallest set of six petals for the front layer.  Also cut a small, one-inch circle of felt to place in front of your smallest layer of petals as the flower center.

Cut a three inch backing circle from the same color of felt as the back layer of petals and assemble all layers atop this circle and stitch them down by hand through the center.  Then place the button at the flower center and sew the button down using embroidery thread in a contrasting color.  I used a metallic silver thread in this example.

Now, set the flower aside.

Assembling the pincushion

Place the right sides of the 6″ squares together.  Sew around the square, leaving an opening for turning. Be sure to back-stitch the beginning and end of this seam.

After you’ve done that, clip off the tiny corner triangles outside of your seam, and turn the pincushion right side out. Use a point turner or other tool to push the corners out well.

Now stuff.  Stuff it nice and full, and then top-stitch to close your opening. I like to continue the top-stitching and go all around the entire square using matching thread.

Center your flower on top of the pincushion. Affix it by hand-stitching the backing circle to the cushion.  The larger petals will prevent these stitches from showing.

And now you made a pretty pincushion and completed this easy project that fast.

What will you make next?

What I Do At Work All Day (Part 2)

What I Do At Work All Day (Part 1)

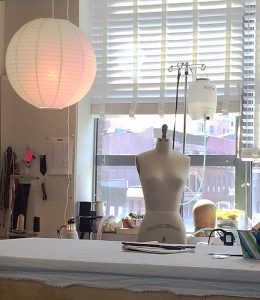
Just a view of my shop.

Just a view of my shop.

I’m currently the Key Tailor on a New York City based major network crime-procedural drama television show (Blindspot on NBC). I work mainly out of one of the Brooklyn studios with occasional on-set last minute fittings. Most of the work I do each day is for things that need to be ready for the actors to wear the next day on camera. What this means is that, over the years, I’ve become pretty fast at doing a variety of alterations (as well as patterning and constructing from thin air). In my industry, there are certainly a lot of excellent tailors but there aren’t all that many excellent and fast tailors. Here are a few of the tricks I’ve discovered along tQuhe way that help speed up some common alterations.

Shortening the Sleeves of a Men’s Suit Jacket (without fancy functioning buttonholes)

Topstitching on sleeve lining.

Topstitching on sleeve lining.

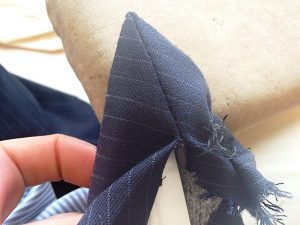
First, just go ahead and remove all the buttons. They’ll just be in your way. Turn the sleeve inside out and find the topstitching along the sleeve-lining seam. This is how the sleeve was originally put together. Open up that seam and turn your sleeve inside out. Take apart the mitered and straight corners but do not undo the lining from the rest of the hem. (Go ahead and release any stitching holding the actual hem up though.) Undo any fake buttonhole stitching that you need to. These should be on a chain stitch and easy to undo.

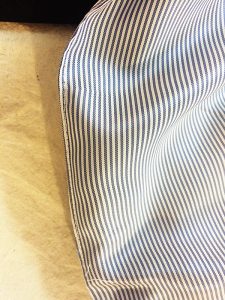
Press miter corner with point turner inside out.

Press miter corner with point turner inside out.

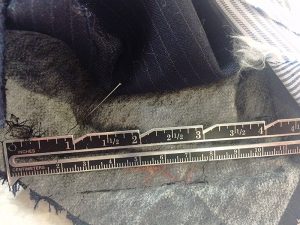
Measure up or down the distance you want to shorten or lengthen at your corners and redraw your miter line if you need it.

Re-stitch all corners at new hem marks. I flip everything back right side out at this time and press my corners and the new hemline. Use a handy point turner

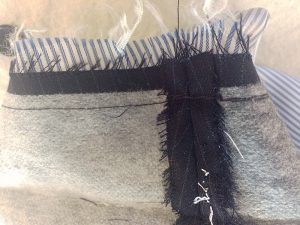
Don’t undo original stitching at hem.

Don’t undo original stitching at hem.

and please don’t trim anything away from the mitered corner. If you press inside out first with the point turner inserted the fabric will go where it needs to. No need for trimming. One of the most annoying things is to go and alter a jacket sleeve only to find that someone has trimmed the miter corner, meaning I can’t lengthen the sleeve properly.

(Still don’t unattach the lining)

Redraw miter line.

Redraw miter line.

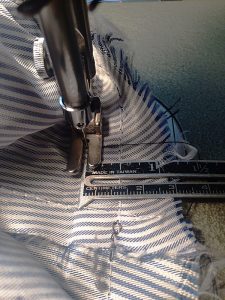
After pressing, turn inside out again. Then simply measure up or down (I use an old fashioned metal seam gauge) from the current stitching line the desired amount and sew along that line. If you are shortening, there is no need to undo the original stitching line. If you are lengthening, you will need to. Machine tack the seam allowances together at the seam to keep the hem up.

Sew new stitching line shortening hem.

Sew new stitching line shortening hem.

Turn everything back right side out and topstitch the seam of the sleeve lining closed, put your buttons back on and you’re done!

There are of course a few situations that will make this alteration a bit more challenging – such as functioning buttonholes or having to add fabric to the hem seam allowance because of lengthening. If I’m having a good day and nothing strange is going on inside the sleeve, I can usually do this alteration in 30 minutes.

Center Back or Side Back Alterations on a Suit Jacket

The time saving trick on this one is pretty simple. Open up the under vent seam and turn everything inside out through there. When done, just topstitch the vent closed again, no opening up the lining and sewing it back by hand.

Men’s Vest Alterations – Center Back or Side Seams

I’m a huge fan of bagging things out. Men’s vests are one of my favorite things because you can bag everything out through a mere 2 inches on one of the side seam linings. First, find the opening where the vest was bagged out originally, probably a small hand stitched couple inches on one of the inside side seams. If its not there (if the vest was bagged through the neck, make your own. Then pull the entire vest inside out through those two inches. It will fit.

Vest side seams are most usually put together with one stitching line through all 4 layers (fronts and backs with linings). On the side without the opening just stitch a new line taking in (or out, though most commercial vests don’t have a lot of seam allowance to let out) the desired amount. If the amount is significant, you may need to re-stitch the arms eye curve so that everything lines up properly under the arm.

If you need to take in the center back seams, undo at the neck and bottom hem, alter as desired, the re-sew what you released.

On the side with the opening, stitch in two sections, above and below the opening. In the 2 inch gap, sew through all layers except the back inside lining.

Pull everything back through your opening, press and voila!

I just topstitch my opening from the right side of the vest, hiding the stitches in the seam line.

Check out Part 2 here!

My next post will tell you about the one of the sneakier men’s suit alteration tricks – the old dart and drop! So keep a look out for the follow up and as always – keep sewing!