Raggedy Coasters

Raggedy Coasters

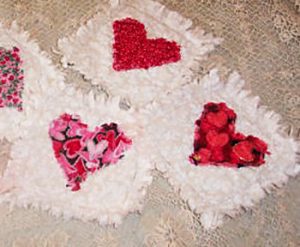
Valentine’s Day is around the corner, and as you might know from previous posts, I’m a holiday fan! In fact, I spent time researching Valentine’s Day projects for a post, and I chose one specific sewing craft that I thought was a cute idea. That concept is a raggedy coaster with a heart in the middle, which seemed simple and pretty. It was also useful since I have a Valentine’s Day party coming up with my nieces and nephew. I have plenty of leftover fabric from my latest quilt, so using it for homemade décor for the party sounded like a good notion!

That concept is a raggedy coaster with a heart in the middle, which seemed simple & pretty.

That concept is a raggedy coaster with a heart in the middle, which seemed simple & pretty.

Unfortunately though, one detail of the project did get derailed because I decided I didn’t like the Cupid cutout that I had planned to use in the center of my coaster. It looked amateur and out of place, so I made the executive decision not to use it. That meant that the coaster wasn’t very Valentine’s Day-ish since the top portion is a general floral pattern, but I was still interested to see how things would play out. And, as I’d been wanting to try a rag quilt for a while, this was a good time to test the waters. If I didn’t like the process of making one rag coaster, an entire rag quilt might not be something I wanted to dive into!

Stock up

The needed supplies are fairly minimal. All you really need are the bare essentials of a sewing project, like a needle, thread, fabric, pins, and scissors. Once you have those, you’re ready to start work on your coaster!

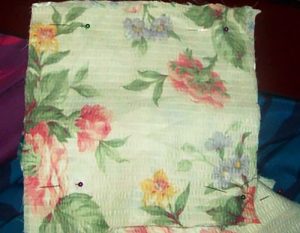
First, pick out the material you’ll use. Ideally, you would have batting in between the top and bottom layers because this raggedy craft can be, in truth, a miniature quilt sandwich. For me though, I didn’t have any batting available, so I decided to layer four pieces of fabric together. That way, there’s more thickness than what I would’ve gotten from just three pieces of thin fabric.

Let’s get started

Once you choose your material, make sure the pieces are cut into similar-sized bits that are more or less quadrilaterals. This is actually one benefit of a rag coaster or quilt. You’ll be shredding the ends anyway, so it doesn’t matter if they’re the exact same length at every point. Just make sure they’re close enough that, with the raggedy edges, they’ll look the same!

You’ll need to allow extra space beyond where you sew the pieces together for your ragged edges.

You’ll need to allow extra space beyond where you sew the pieces together for your ragged edges.

From there, you layer those fabric/batting pieces in the correct order and pin them together — but not necessarily right at the ends of the material. You’ll need to allow extra space beyond where you sew the pieces together for your ragged edges. Also, if you find after pinning that you have a bit of extra material that’s going to really stick out once your coaster has been shredded, feel free to trim off those ends.

Feel free to trim off those ends.

Feel free to trim off those ends.

Time to sew

Then you can start sewing! Remember to try for a box shape within your block of fabric, and to keep that space away from the edges. After you’ve sewn all the way around to finish that box shape, cut off the excess thread and get ready to do some shredding!
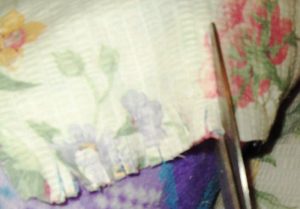
Be careful to give a decent number of cuts as you go around the fabric because the more you cut, the more thorough your raggedy quality could be!

Be careful to give a decent number of cuts as you go around the fabric because the more you cut, the more thorough your raggedy quality could be!

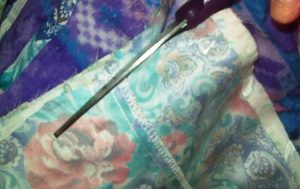
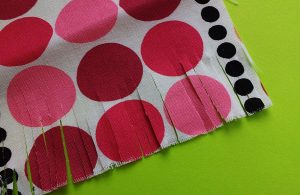
Now, shredding happens to be a bit more time consuming than I expected, but it’s a simple process! All you do is take your scissors and cut from the edges of the fabric inward, but never so far that you cut your stitches since that can seriously damage your final product! Also, be careful to give a decent number of cuts as you go around the fabric because the more you cut, the more thorough your raggedy quality could be!

Common mistake

Another tip on shredding is to make sure that you’re cutting through all layers of your coaster or quilt. I noticed a time or two that I’d left the bottom layer uncut for some of my shreds, so missing a space here or there is an easy thing to do! For a thorough job, check your results as you go along!

Once the shreds are finished, you’re ready to throw your product in the washing machine! Believe it or not, the washing and drying process makes those simple cuts attain that raggedy appearance!

What I learned from this experience is that making a rag quilt is going to be more complex than I expected. I’ll need to cut fabric, layer it, sew it, then shred it, and shredding is pretty tedious! I honestly wasn’t mentally prepared for what awaited me, and I think I have a better idea now. Although it’s different than the quilts/blankets I’ve made before, I’m still interested in making one. So, basically, the hunt for a Valentine’s Day project worked out differently than I thought — but still well!

9 Cutting Tools for your Sewing Room

9 Cutting Tools for your Sewing Room

Do you know the difference between scissors and shears? I didn’t so I looked it up and now I can edify us all. Scissors usually have equal-sized finger holes and are under 6″ in length. Shears have one hole that is bigger than the other and their blade lengths are normally longer than 6″. The terms scissors and shears are often used interchangeably and for the purposes of this article, I flip back and forth between them.

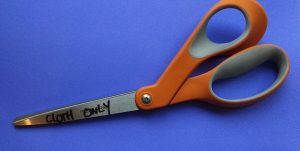
Fabric scissors

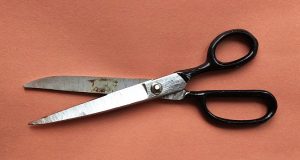
These are the scissors you hide. Or keep locked away. Or you write in Sharpie on them. DO NOT USE. CLOTH ONLY. MOVE AWAY FROM MY SCISSORS. If you haven’t convinced your family to stay away from your fabric scissors, then move to the second pair below.

These are the scissors you hide.

These are the scissors you hide.

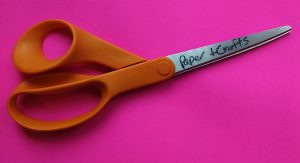
All purpose scissors

THESE are the pair you hand people who want to use your fabric scissors. Keep them sharp so no one is ever tempted to grab the pair you keep for working on your stash.

THESE are the pair you hand people who want to use your fabric scissors.

THESE are the pair you hand people who want to use your fabric scissors.

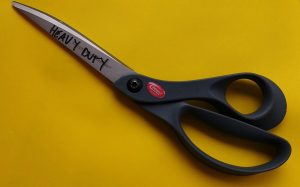
Heavy duty shears

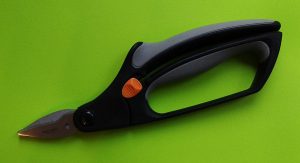
When your regular fabric scissors won’t cut it. I’ve used these to cut canvas, Sunbrella, and leather. Don’t let your friends or family use these for everyday use. They’re heavy duty. Emphasize that by saying it in a low voice, “Sorry, these are heavy duty.”

Don't let your friends or family use these for everyday use.

Don’t let your friends or family use these for everyday use.

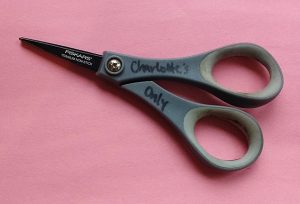
Snipping scissors

Snipping scissors, or scissors with very short, sharp blades are genius for cutting threads as you sew.

Snipping scissors, or scissors with very short, sharp blades are genius for cutting threads as you sew.

Snipping scissors, or scissors with very short, sharp blades are genius for cutting threads as you sew.

Pinking shears

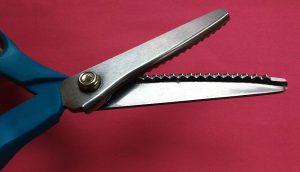
Pinking shears are what you need if you are working with fabric that ravels or if you plan to leave a cut edge exposed. Pinking shears do what zig zag stitching or serging does, they stop fabric from unraveling. They are genius. You should get a pair.

You should get a pair.

You should get a pair.

Herb cutters, fringe scissors

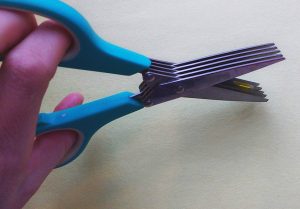
Yes, bring the kitchen into the sewing workshop. These scissors are frequently used to quickly chop up herbs, but in the sewing room they create fringe.

Bring the kitchen into the sewing workshop.

Bring the kitchen into the sewing workshop.

Perhaps you want to make some fringe-cut garland? These would be your tool. They work best when you put the fabric back towards the center of the scissors and stop cutting before you reach the tips. If you have a LOT of tiny snips like this to make, however, you’ll want to see the next pair of scissors.

If you have a LOT of tiny snips like this to make you'll want to see the next pair of scissors.

If you have a LOT of tiny snips like this to make you’ll want to see the next pair of scissors.

Rag quilt scissors

For when you aren’t messing around. Rag quilt scissors have short, sharp blades that let you snip through chunks of fabric to create the famous look of rag quilts.

For when you aren't messing around.

For when you aren’t messing around.

Pro Tip: If you get a pair, make sure to get them spring loaded. Your hands will thank you!

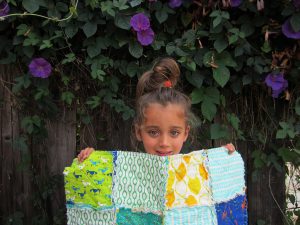
My oldest made this rag quilt with and I snipped it right up with rag quilt scissors. Just put on a TV show you can zone out to and start clipping.

My oldest made this rag quilt with and I snipped it right up with rag quilt scissors.

My oldest made this rag quilt with and I snipped it right up with rag quilt scissors.

Rotary cutter

Rotary cutters are becoming more and more popular. Once you learn how to cut fabric with them, your fabric scissors may start to see a lot less use.

Goodbye fabric scissors!

Goodbye fabric scissors!

Ye olde kitchen drawer scissors

Also known as ‘household scissors’ or ‘the scissors you can do just about anything with and mom won’t get mad.’ They are the unsung hero of your scissors quiver because they keep the rest of your tools safe.

The scissors you can do just about anything with and mom won't get mad.

The scissors you can do just about anything with and mom won’t get mad.

What types of cutting tools do you use in your sewing room? Let us know in comments!

—————————–
Charlotte Kaufman is a writer and sewist in Mammoth Lakes, California. She specializes in marine and home interiors and continues to fall more and more in love with quilting. You can follow her at charlottekaufman.com.
Five Easy-to-Do Mistakes While Sewing

Five Easy-to-Do Mistakes While Sewing

If there’s one thing I’ve figured out over my sewing ventures, it’s that I can’t ever be sure what kind of sewing experience I’m getting into when I sit down to work on a project. It could be an hour or so that goes as smoothly as sewing can go. On the other hand, it could be a terror of a sewing session where my thread keeps bunching up, and I have to wrestle it back into submission more times than I want to.

Five Easy-to-Do Mistakes While Sewing

But whether or not today’s a day that I’ll sit down to sew and have those problems, I expect that those problems will happen in the future if I continue to sew. And, as much as I wish someone would’ve personally told me more about a budget and a probable no-positive-income when publishing my first book (talk about un-fun surprises!), I think it’s beneficial to step into the sewing world with open eyes as well. Odds are, you’re going to make mistakes, and those mistakes aren’t the best of reasons to throw in the fabric! Just like a new driver, a new sewer can expect to have to learn the skill.

It happens to the best of us…

Want to know something else? Even people with miles behind them in the sewing department can still make mistakes! The point is to be aware that they’re going to happen so that maybe, should you make one, you don’t feel like tossing your fabric to the side and trashing your sewing kit!

And that, readers, is the logic behind this post — to point out simple mistakes you might make, but shouldn’t beat yourself up over! They happen, and instead of letting them get you too far down, remember you’re hardly the only person to make one. Since others potentially make these same errors and keep going, use that for encouragement to continue on as well!

Five Easy-to-Do Mistakes While Sewing

Let me count the ways

With that positive thought in place, here are some of the smaller, more embarrassing sewing mistakes you might make, but should push through:

1) Accidentally sewing your fabric to something you didn’t mean to. There are few things I’ve personally encountered in sewing that can make you feel as amateurish as figuring out you’ve sewn your project to itself in a spot you didn’t intend to (as in, your fabric was folded under itself where it shouldn’t be), or if you’re hand-sewing, that you’ve sewn your project to, say, your own clothes. But as daft as you might feel if you notice that has happened, just — as Taylor Swift might say — shake it off! Sure, you might have to redo your stitching, but it isn’t the end of the world!

2) Sewing without knowing your bobbin is out of thread. This one is particularly troublesome since you could feasibly sew for a lot of minutes on your machine without realizing the mistake. However long you invest in that flawed sewing endeavor is kind of wasted time since there’s no thread coming from the bottom to finish your stitch. So, moral of the story: Check your bobbin before you sew by machine!

Five Easy-to-Do Mistakes While Sewing

3) Threading your needle without really threading your needle. For a sewing machine project, there are a number of steps to threading your needle, and you might miss one. As humiliating as that error might be though, it’s nowhere near as ridiculous as doing this while hand sewing. I, for one, recall thinking I’d threaded my needle, and at some point, I realized that although I’d tied it off and such, the thread actually was not through the needle. Now, that is embarrassing!

4) Cutting material you didn’t intend to cut. This could be in line with the earlier idea of sewing something you didn’t mean to sew in that while you’re cutting fabric, something else could be under it. If you do have this issue, depending on how important the now-damaged material is to you, it could be a big deal! Beyond the possibility of forever ruining Great-Grandma Trudy’s sewn-by-hand quilt that has been in your family for over a century (try replacing that one!), you could also harm your current project by cutting your fabric where you don’t need to or cutting a stitch that’s necessary to your work. This is something, in particular, to keep in mind when making a rag quilt since part of the process is to shred your edges. It would be crazy-easy to shred too far and snap a stitch or two, but imagine the pain of having to re-stitch an up-turned quilt block that’s already sewn to other quilt blocks!

Five Easy-to-Do Mistakes While Sewing

5) Thinking up strategies or tackling projects that you’re not ready for. For this one, I’ll give you an example. I didn’t know anything about using a border on a quilt/blanket project, and once I’d learned about it, I labeled it a waste of time and/or not for me. To my way of thinking — and for my past strategy — simply bending the fabric used for a backing to fold over against the front would work. And, yeah, it might… If I were a better sewer! At this point, I’m not advanced enough to comfortably pull this strategy off so that the sides are one-size at all points. So, don’t be like me! Start simple and with the recommended strategies, and work your way up from there!

Even if you manage to do all of these mistakes in one sitting, don’t give up! If you can keep that determination in mind, you might have a bright sewing future ahead of you!

I Sew! You Sew! We Sew!

I Sew! You Sew! We Sew!

When I was a little girl, music was a group experience in my family. Clearly, that would be the case if we were members of a band or something, and we certainly had some musically inclined folks in our circle. I, more’s the pity, only ever learned to play a number of simple tunes on a recorder and very—very—minimal details of a guitar. With that lack of musical ability, I wasn’t exactly going to grab some drumsticks and make awesome music with anyone!

Old school—fifties and sixties, and maybe even some from the decades before those.

Old school—fifties and sixties, and maybe even some from the decades before those.

So the band element isn’t what I mean about music being a group experience. What I *do* mean is that my parents had this floor model record player, and it wasn’t all that odd for us to sit around said player while old school country and rock played from it. And by old school, I mean old school—fifties and sixties, and maybe even some from the decades before those. That idea of group music-listening continued as I grew older, taking shape in sitting around with my brother while he played 80s rock and such. In case anyone wants a reason as to why my music collection might seem outdated, I think I’ve given you a direction to consider to find the reason!

The point is that we’re the type of people who can sit and talk about music or play music together, and it’s not too weird of an occurrence. In fact, it’s kind of normal.

Back in the Day…

Even in my high school art class, working on projects was a group experience because the classroom was arranged in such a relaxed way. We were allowed to talk with one another while we worked, so we basically ended up chatting and working in small groups—and I might have broken out a Disney tune or so along the way.

Those are two artistic categories that I’ve treated with group experiences, and I recently had reason to consider making sewing a group experience as well. As of right now, if I’m around people when I sew, it’s potentially because we’re all watching TV or something, and I’m sewing while we watch. I might be in a group, but it’s definitely not group sewing!

Branching Out

This month though, I had a Facebook comment conversation with someone that got me thinking. If music is a group experience in my history, and art was a group experience in my high school class, why not sewing? I did some browsing online, and the idea doesn’t seem like a new one! Apparently, sewing clubs exist! Who knew?

Still, I happen to live in a lesser known area of my state, so the odds that there’s going to be a local sewing club are pretty low. If I want a group sewing experience, I should think about leaning toward the idea of virtually sewing in groups, which is okay because virtual sewing possibilities are evidently out there, even if we have to make them happen ourselves.

That friend I had the comment conversation with.For instance, that friend I had the post conversation with? She claimed that she, like me, wanted to make a rag quilt. Well, if we both want to make rag quilts, why not make them at the same time and compare notes online along the way? It sounds like a good idea to me, and as of right now, we’ve talked about the possibility of doing exactly that next year.

What I want to do for a pattern.

What I want to do for a pattern.

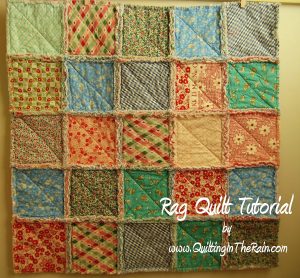
The idea is so intriguing to me!!! I even have a possible idea of what I want to do for a pattern, and it looks something like this Craftsy project, but with a more equal-block style:


Beyond my personal idea for my own quilt, I also have an idea of expanding this situation beyond just two people, or at least trying to. You see, I’ve decided that what would be even more awesome is if this could somehow become a bigger thing—like if more people decided to make a rag quilt around that time, and it became something that included dozens of people. This notion, in fact, is so intriguing that I’m putting it on my goals list for 2017. The official goal would read something like this:

Create an organized sewing project, promote it online, and hopefully engage a number of people in the endeavor.

Let’s Collaborate

Even if I only gained five people who would be willing to partake through Twitter promotion and such, that’s five people to discuss my rag quilt with beyond what I already have! That idea of comradery is hard to pass up, and it isn’t something I necessarily considered before that series of Facebook comments. Something that simple got my thought process going, and I want to run with it!

So, dear reader(s) that I hope are out there, keep an eye out for future posts regarding specifics about this event. I want to plan things out right in order to ideally get good results, so I’m not going to throw out a specific date without that proper planning. But unless things change and the plan shifts, the rag quilt virtual extravaganza is happening! And I’m looking forward to the possibilities!

What do you guys think? Interested in the event? Even if you aren’t, have you ever sewn in groups? Details, guys! Details!