Fancy-Up a T-Shirt

Fancy-Up a T-Shirt

Fancy-Up a T-Shirt

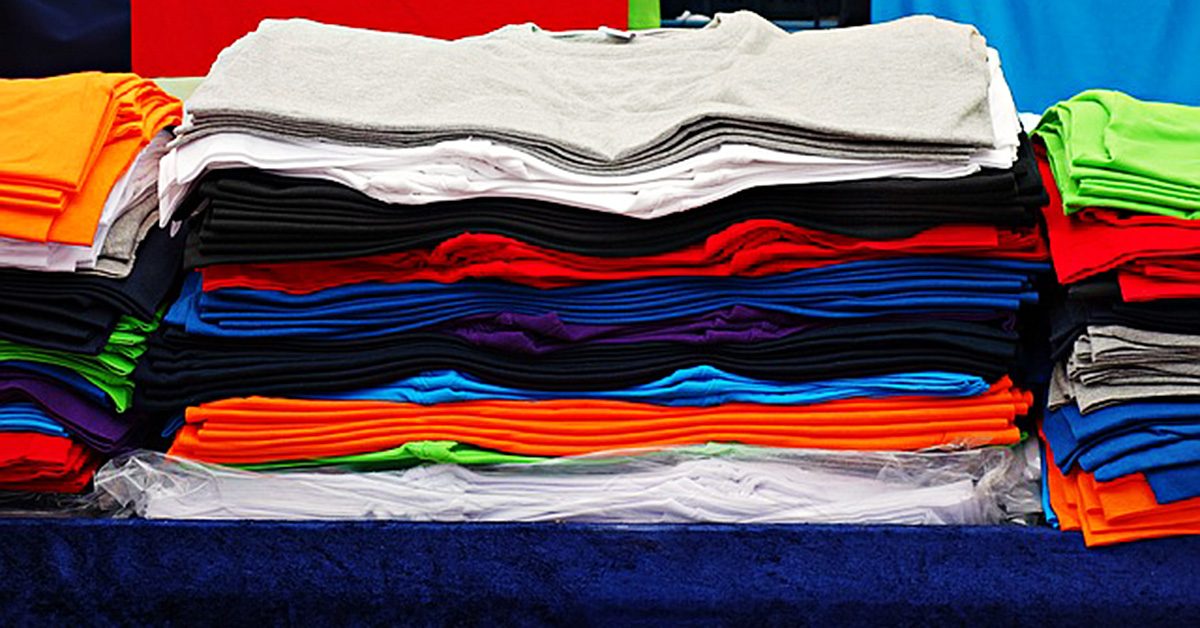
If you’re anything like me, when you find a t-shirt that fits well and is comfortable, you buy a bunch of them in a bunch of colors. Next time you do this, buy at least one more in a duplicate color. That t-shirt becomes the base for creating a fancy t-shirt that shows of your personal style. Build off it using items like lace, patches, fabric scraps, piping and beads. Or try your hand at embroidery.

Lace

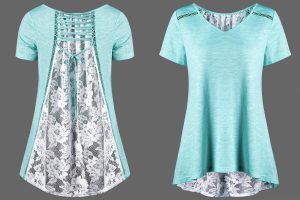
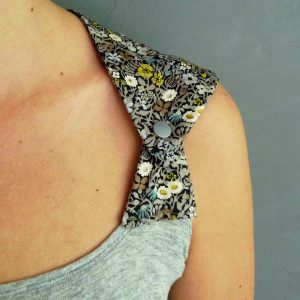
There are a couple of ways to use lace on a t-shirt. You can use full pieces of it to create a collar or edging on the sleeves or bottom. If that’s a little too vintage for you, try cutting apart lace and sewing parts of the design on the shoulder, sleeves, hem or around the neckline.

There are a couple of ways to use lace on a t-shirt.

There are a couple of ways to use lace on a t-shirt.

Patches

I’m a big fan of patches. Browse through your local craft store and find some that you really like. Place them on the sleeves, shoulders or bodice of your t-shirt to create the look you want. Even if they’re iron patches, I advise you to sew them on using either your machine or hand stitching.

I’m a big fan of patches.

I’m a big fan of patches.

Fabric scraps

Use these in a similar fashion as store bought patches. It’s a great way to use up some of your fabric stash while creating a funky, country t-shirt look. I recommend sewing the edges under to prevent fraying, unless you’re going for that look. Using a fabric marker in combination with fabric scraps can add to the country-chic look.

Use these in a similar fashion as store bought patches.

Use these in a similar fashion as store bought patches.

Piping

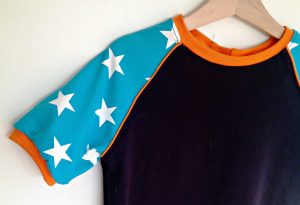
I love using piping around the bottom of the shirt and sleeves, but there are other options too. You can create a military look using piping on the shoulders or add some funk to the bodice. Get creative and use colors that contrast from the t-shirt color.

Get creative & use colors that contrast from the t-shirt color.

Get creative & use colors that contrast from the t-shirt color.

Beads

You can do a lot with beads on your t-shirt.

You can do a lot with beads on your t-shirt.

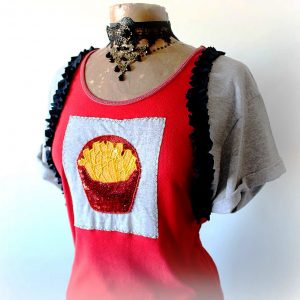
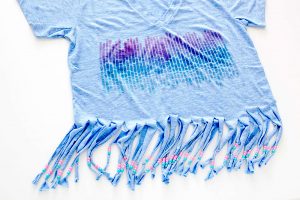
You can do a lot with beads on your t-shirt. They look great as a faux necklace around the neckline or along the edges of the sleeves or bottom of the shirt. Another option is to create a design on the front of back of your shirt using beads. I suggest using a washable marker or pencil to draw out the design before placing the beads.

Whether you use one or many of these techniques, you’ll wind up with a t-shirt that expresses your sense of style. They’re great in combination or alone. A t-shirt with even one of these creative additions would cost quite a bit in a store. Doing it yourself is both fun and cost effective. Give it a try and see what you come up with.

How to Sew a Fitted Sheet

DIY: Sew a Fitted Sheet (from a flat sheet)

My daughters have bunk beds and I like them to have at least two sets of sheets (per bed) in the event of accidents, sickness, or just in general because kids get dirty.

Our family doesn’t use flat sheets. I always feel claustrophobic when I sleep with one and I end up pulling the sheet out of the bottom of the bed and using it more like a blanket. It’s also a pain to remake the bed every morning. Instead, we used fitted sheets and loose blankets and we wash them all frequently.

Because of this, I can buy one set of sheets, a fitted one and a flat one, and turn the flat sheet into another fitted sheet. That gives me two matching fitted sheets which is perfect for when you have bunk beds.

Measure twice, cut once

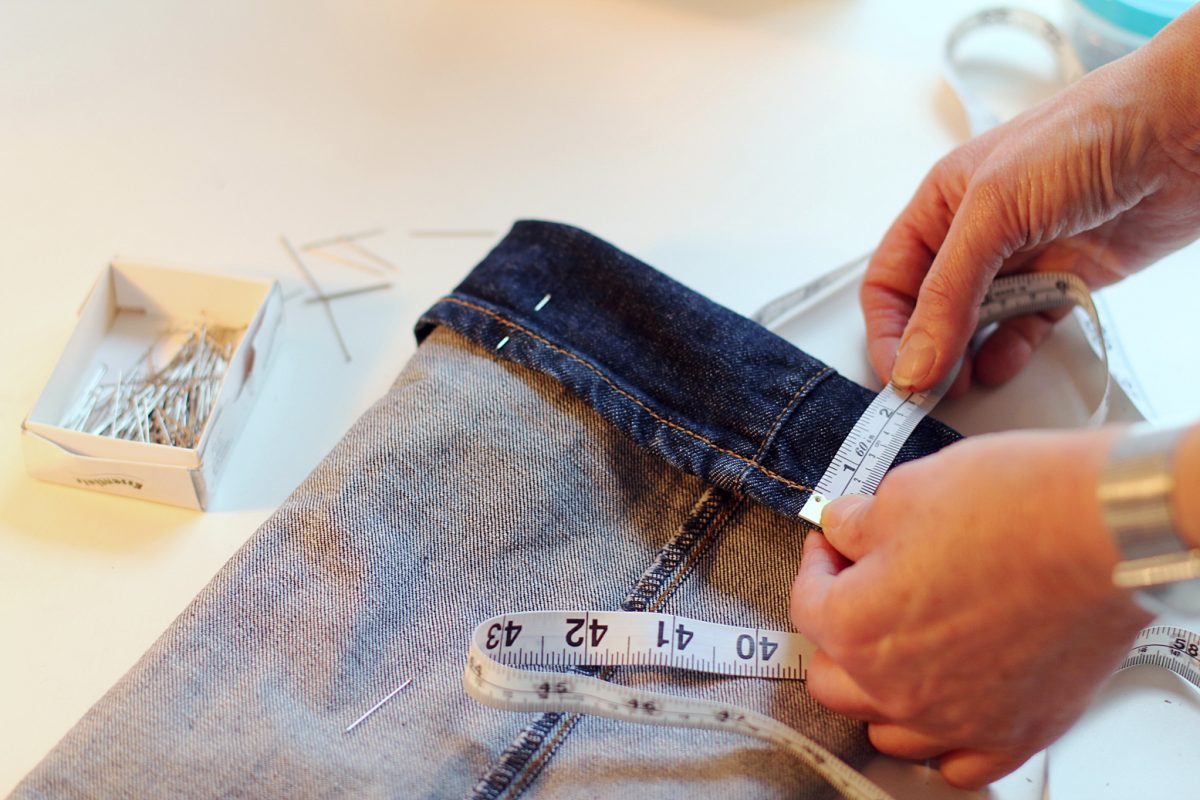
To make your own fitted sheet you need to measure the length and the wide of the top of the mattress you are using. You’ll also need to measure the sides.

This mattress is 38” x 75” and the sides are 7”.
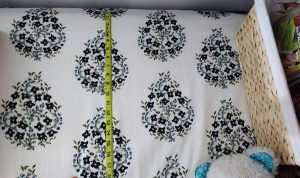
To make your own fitted sheet, first measure the sides, length & width of the top of the mattress you are using.

To make your own fitted sheet, first measure the sides, length & width of the top of the mattress you are using.

To determine the rest, you need to add enough fabric to wrap around under the mattress plus seam allowance. I like anywhere between 3-4” for the bottom fabric (it may depend on the size of flat sheet you are working with) and I allow 1” on all sides for seam allowance. I fold the fabric over ½” and then again another ½”.

Your final equation to determine the size of rectangle you’ll need is:

Seam allowance + bottom fabric + length of side + width (or length) of top of mattress + length of other side + bottom fabric on other side + seam allowance on other side.

Repeat the same process for the length if you started with the width.
I had to take out the top folded seam in order to have a large enough rectangle to meet my measurement requirements.

I had to take out the top folded seam in order to have a large enough rectangle to meet my measurement requirements.

For this flat sheet, I had to take out the top folded seam in order to have a large enough rectangle to meet my measurement requirements. After I took out that seam, I ironed (after having prewashed before I got started).
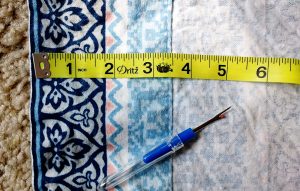
I had to take out the top folded seam in order to have a large enough rectangle.

I had to take out the top folded seam in order to have a large enough rectangle.

I love it when a plan comes together

Sometimes I love how the universe works. The particular measurements on this flat sheet made it so I didn’t need to calculate seam allowance, other than for the one side I had to take the seam out of. I used all the pre-sewn hems and the measurements worked out perfectly.
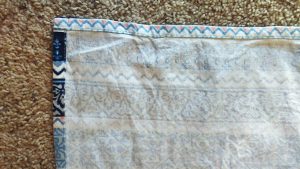
I used all the pre-sewn hems & the measurements worked out perfectly.

I used all the pre-sewn hems & the measurements worked out perfectly.

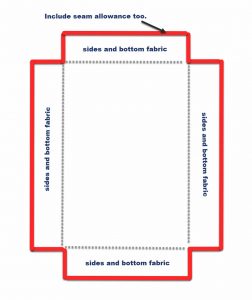
The one part that people might find tricky is cutting out the corners. Here you are going the exact measurement of where the fabric would rest on the top of the mattress, so you take into account: seam allowance + fabric on the bottom + fabric on the sides, on each corner of the square. Make the squares on all corners of your fabric and then cut.
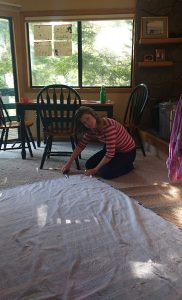
Make the squares on all corners of your fabric & then cut.

Make the squares on all corners of your fabric & then cut.

The red box shows you the exact measurements of the top of the mattress.
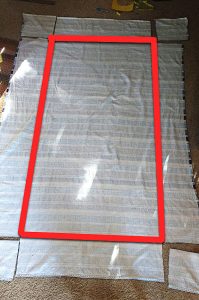
The red box shows you the exact measurements of the top of the mattress.

The red box shows you the exact measurements of the top of the mattress.

On your mark.. Get set.. SEW!

Now it’s time to sew! If it’s easier for you to pin the corners, go for it. This isn’t my first rodeo, so I just sew and go.
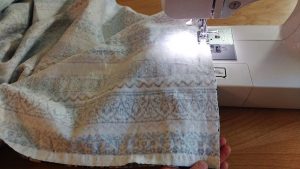
If it’s easier for you, just pin the corners.

If it’s easier for you, just pin the corners.

These corner seams ARE unfinished, so make sure you finish each of the four corners with a zigzag stitch to prevent unraveling.
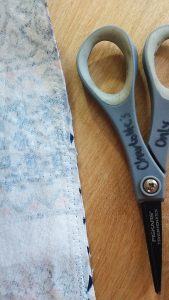
Finish each corner with a zigzag stitch to prevent unraveling.

Finish each corner with a zigzag stitch to prevent unraveling.

The next step would be to create a hem all along the sheet. I’m skipping this part because I’m using the pre-sewn ones from the flat sheet. Normally I would finger fold the fabric over a ½”, and then another ½”, and sew all around the sheet.

After you have a hem, it’s time to add elastic. Some tutorials have you create a casing when you sew the hem and then you feed the elastic through. This method has never spoken to me. I just sew my hem and then sew the elastic directly on.

Making it stretch

If I had enough elastic I would sew it on the entire hem, all the way around. I didn’t in this case so I measured out 16” from each corner and sewed my elastic around each corner.
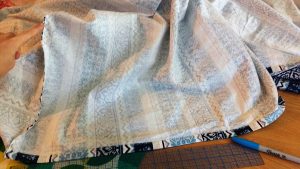
I measured out 16” from each corner & sewed elastic around each.

I measured out 16” from each corner & sewed elastic around each.

Be careful not to pull your elastic too taught. You want it to have enough give that you can get it over the corners of your mattress without snapping any of your threads.
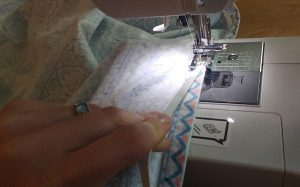
Be careful not to pull your elastic too taught.

Be careful not to pull your elastic too taught.

Looking good.
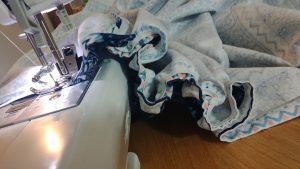
Looking good.

Looking good.

You’ve made your bed – now sleep on it

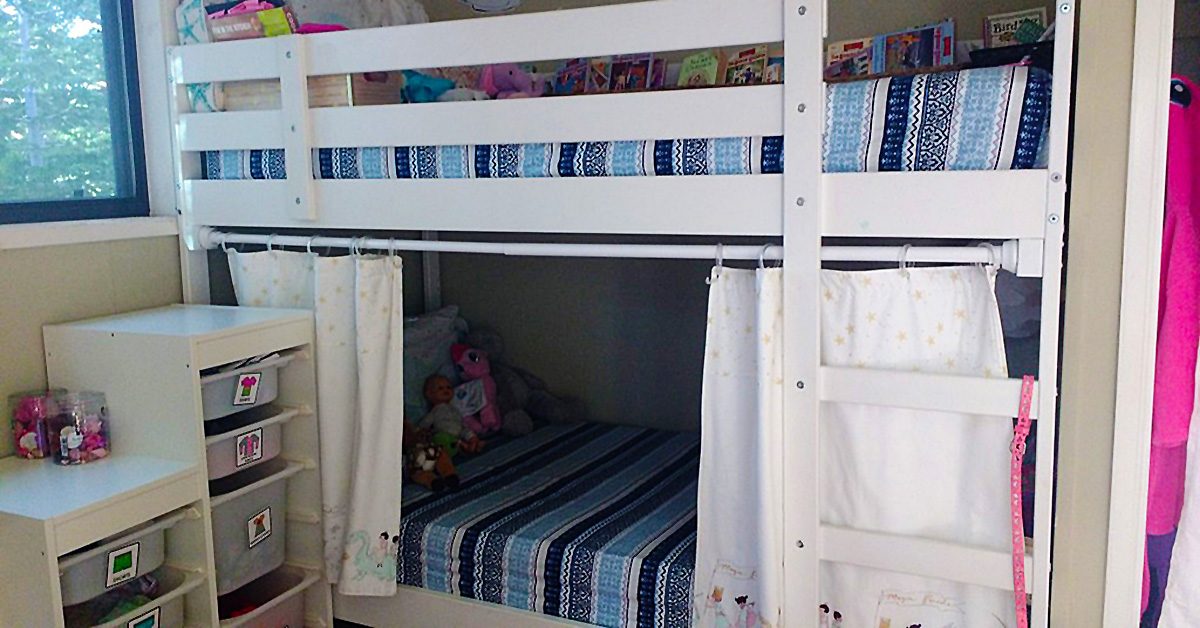
Moment of truth. Here it is on the top bunk. It looks great!
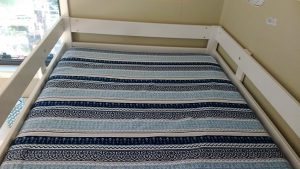
Here it is on the top bunk.

Here it is on the top bunk.

It even looks good from the bottom bunk looking up at the bottom of the mattress.
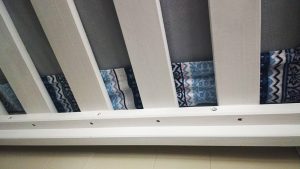
It even looks good from the bottom bunk looking up.

It even looks good from the bottom bunk looking up.

Added value

The best part is that these two fitted sheets are now interchangeable between the bottom and top bunk and I only had to buy one set of sheets to get matching bedding!
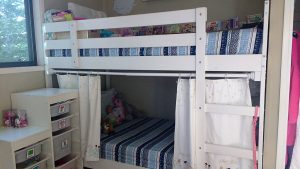
The best part is that these two fitted sheets are now interchangeable.

The best part is that these two fitted sheets are now interchangeable.

Do you make your own fitted sheets? What is your favorite method?

———————————————————————————–
Charlotte Kaufman is a writer and sewist in Mammoth Lakes, California. She specializes in marine and home interiors and continues to fall more and more in love with quilting. You can follow her at charlottekaufman.com.
Repurposing Flannel Baby Wipes to A Snuggle Blanket

Repurposing Flannel Baby Wipes to A Snuggle Blanket

Hello there! I’ve been playing with something I would like to share with you.

Stitch the right sides together on all 4 sides, leaving a small space open on the last side.

Stitch the right sides together on all 4 sides, leaving a small space open on the last side.

Let me warn you, it is rather novel, as I haven’t seen this done before in sewing blogs or other instructions, but it works pretty well I think.

Recently, I several kinds of small baby wipes made from soft, warm flannel. Rather than 1 layer of flannel, and just a simple serger stitch, I designed them to be thicker and have no fraying edges when washed. Each square is approximately 9″ x 9″ finished as below.

So, I used 2 pieces of the fabric, and I stitched the right sides together on all four sides, leaving a small space open on the last side to place my hand inside and pull the fabric’s right sides to the outside. What? (I heard you thinking there!)

Think of throwing a pillow case in the dryer with the inside seams showing. When dried in the dryer and smelling like Snuggle, you put your arms inside, find both far corners of the pillow case, and pull them forward to you drawing the right sides of the pillowcase to the outside or the top side. So then, I carefully ironed the edges down so I could put top-stitching about one-quarter inch from the edge of the wipe. Finished product soft, bright, cuddly wipe.

BUT WAIT! There’s more

This shows how the seam was done, & it is sturdy like seam made in the traditional way.

This shows how the seam was done, & it is sturdy like seam made in the traditional way.

I thought why can’t I repurpose these cloths into something larger. It’s a small baby print, and with soft flannel on both sides, I brainstormed about how I can piece the two squares together without having to take the stitching apart of one side of each square to join them. That would involve doing all the squares accordingly, and would destroy my top-stitching.

This shows how the seam was done, and it is sturdy like seam made in the traditional way. This finished end to end seam reminds me of flat feld seams as used in my Pojagi pieces, although not quite. It also could be an alternate seam method for quilts without using a backing. A piece of batting could be added to each square to give a more padded feel to this alternate way of quilting, (like rag quilts but no raw edges or fringe.)

I hope you enjoyed my blog today, and I hope to see you again soon. I always welcome your experiences in sewing. After all, what would we do if we didn’t sew?

Take care for now.

Spicing It Up! DIY Skirt Alteration

Sometimes, there are things in life that are pretty fantastic, but a bit of extra effort could make them even more so. That mentality can lead to furthering an education or moving to a different city…

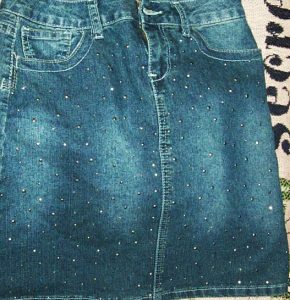
This skirt belongs to one of the nieces & the sparkly glam is enough to make me jealous!

This skirt belongs to one of the nieces & the sparkly glam is enough to make me jealous!

Or adding fabrics. What looks remarkable in and of itself can take on a whole new level of beauty with a bit of thought or creativity. Example? This skirt. It belongs to one of the nieces, and the sparkly prettiness is enough to make me jealous that I don’t have a skirt like this one. What I do have though is material from my own clothing that zipper-made holes ruined, and the color scheme was kind of perfect to go along with the niece’s pretty, sparkly skirt.

Well, there was no sense in throwing away usable material that could be a sewing project, right? This might or might not have been my logic before diving into said project.

So, let’s break this down, shall we?

Let’s begin! Step-by-Step

The mission: Use the zippered-up material on the already wonderful and sparkly skirt.

The process: Simple, but effective!

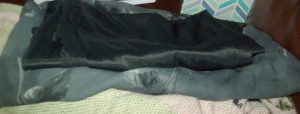
Step 1: Cut the zippered-up material into usable pieces. To do this, I first cut away the zipper territory, then cut along the clothing’s seam. That seam was easier to follow than an imagined line, so there was less chance of me getting waaaaay off in my cutting. The results weren’t small enough to use at this point, but they were flat enough to help me gauge what I needed to do for the future.

Cut off the underlining black fabric from my ripper-ruined clothing.

Cut off the underlining black fabric from my ripper-ruined clothing.

Step 2: Cut off the underlining black fabric from my ripper-ruined clothing. This way, it was completely separate from the pattern I wanted to use, and it was handy for an underlining detail for the skirt. Win/win, right?

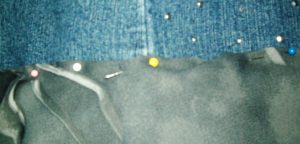
Step 3: Pin the underlining material to the skirt using straight pins. Luckily, it didn’t matter (since I didn’t think about it) if the line from my sewing matched to any line in the skirt because the floral pattern would cover it anyway. I just needed to make sure I stayed in the vicinity of the skirt’s already-present hem in order to not go so off-base with my sewing that the end result looked crooked.

Step 4: Hem the underlining fabric and make sure it came together when it needed to overlap at the end of its line. Again, it’s a good thing no one is supposed to see this piece of material because the section I used needed an extra piece sewn on to make it all the way around. That random addition might stick out, but who knows if I don’t tell them, right? Hey! You live and learn! I also made sure to cut away extra bits of material after I’d sewn so that there wasn’t excess falling well below the hem I’d created.

Step 5: Move on to the patterned fabric! After I looked over my options with the material I had, I decided on the piece that was at the bottom of the underlining black material so I could make use of the manufactured hem of the fabric. In addition, the material would already be set up for equal enough proportions since it began and ended in generally the same way from start to finish. All I needed to do was follow the same lines of the material to get a decent look for the skirt.

It's time to straight pin the skirt!

It’s time to straight pin the skirt!

Step 6: Once I’d selected the fabric I would use, it was time to straight pin it to the skirt! I kept it loose enough that the skirt didn’t bunch (if you pin it too tightly, you might end up with a pinched look you don’t care for) and made sure the fabric was being sewn above the underlining material. I also considered, this round, where my seam would be since A) I actually remembered, and B) it mattered since people would be able to see it. While the seam isn’t in exact line with the skirt’s side seam, at least it didn’t randomly show up in the front or something!

Almost there…

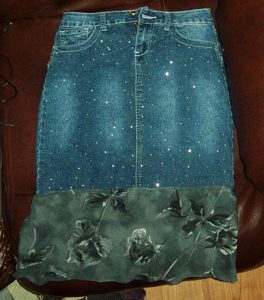
The final step of the process!

The final step of the process!

Step 7: Sew along the general area of those straight pins, and to piece together the floral fabric itself at the right moment when the sides would overlap. I did, however, have to make sure that the edges at the very bottom of that overlap would even out by adding a small hem. Since the overall hem was already there from the original clothing’s design though, that would be the final step of the process!

And, there you go! A pretty, sparkly skirt that has been upgraded into a pretty, sparkly skirt with matching material as an accessory!

What do you think?

The Deconstruction (And Reconstruction) of Hello Kitty

Let’s same I’m thrifty, shall we? I like shopping at the Goodwill, and I’ve been known to make my way over to the clearance section in the clothes department of a non-Goodwill store. It’s a theme that’s pretty easy to spot if you look through my posts from the past. I reuse material, and updating my sewing supplies is something that I found reason to put on my 2017 goals list because I haven’t invested too much into it. I can be a bit of penny-pincher if the situation calls for it, so it’s no real shock that so much of my sewing experience involves reusing and repurposing.

Today, I offer you yet another example of that reusing and repurposing.

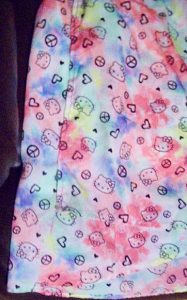
The bottom half in particular caught my interest.

The bottom half in particular caught my interest.

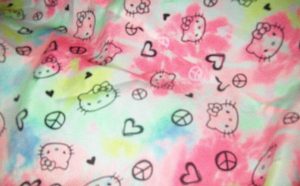
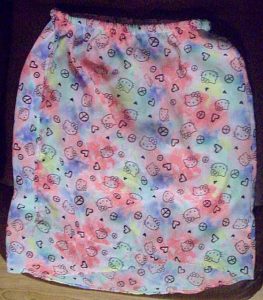
You see, I have a niece who had this Hello Kitty dress. Personally, I don’t get the interest in Hello Kitty—I’m more of a Tinker Bell kind of girl—but after the dress ended up getting ripped, my thoughts got to rolling about what could be done with the material that was left over. The bottom half in particular caught my interest. Even if I don’t particularly care for Hello Kitty myself, the material was colorful enough and in good enough shape, if you overlooked the rip, that it seemed a waste to just toss it out. My niece, after all, deserves her Hello Kitty attire!

In the end, the answer seemed simple. If the bottom half of the dress was salvageable, then a skirt was the perfect option! The white material underneath it was still in decently good shape, so I could use that like it’d been used for the dress itself. All I needed to do was plan, cut, figure, and reassemble.

Cutting was relatively easy when it came to the bottom half because I didn’t worry too much about getting straight edges. If I needed straight edges, I could do a touch-up job later. As it turned out, I wouldn’t I have to because the material was designed in a way that there wasn’t one side that specifically needed to be on the top or the bottom. See how Hello Kitty is in two different directions in the earlier picture? I could just use the more raggedy-edged side to fold over the elastic I would eventually use, and no one would see it anyway. The bottom part of the dress could be the actual line that was company-given by design.
The raggedy edges where the tear had been, I felt, could use hemming, so I saw to that. I wasn’t sure if I actually needed both sides to be hemmed, but since I was figuring it out as I went along, it seemed better to be safe than sorry! Once both sides were hemmed, I was ready to pin the Hello Kitty material onto the underlying fabric.

I opted to tack the end of the colored material to the section of Hello Kitty material beneath it.

I opted to tack the end of the colored material to the section of Hello Kitty material beneath it.

So I did! But as I’d already noticed, there was a bit of a design issue that would require an executive decision. You see, this Hello Kitty material was asymmetrical, meaning if I pinned it evenly at the top of the white material, the bottom of the Hello Kitty piece wouldn’t be even. My options then included either hemming the bottom for a symmetric look, or embracing the quirkiness of the not-so-symmetric hem.
In the end, I decided to go with the easier but more distinguishable option of letting the hem be asymmetric. I also made another executive decision to not cut off the extra side-to-side material once the white material had been completely covered. Instead, I opted to tack the end of the colored material to the section of Hello Kitty material beneath it, so the final result would seem more like a wrap-around skirt.
Once that step was finished, the top looked something like this.

Once that step was finished, the top looked something like this.

Once I’d made those decisions, sewn the raggedy edges where the tear had been on the dress, sewed all layers of material at the top, and tacked the material for that wrap-around look, all I had to do was add in the elastic. The process involved a one-section-at-a-time strategy of folding the top portion of material over the elastic, sewing so that the material overlapped the entire width of elastic, then moving to the next section—bit by bit, and at times pushing and pulling the elastic and/or fabric so that the entire top portion of the skirt was encasing that tiny piece of elastic. Once that step was finished, the top looked something like this.

And there you have it!

And there you have it!

And with that step completed, the skirt was done!

And there you have it! A Hello Kitty skirt from the remnants of a Hello Kitty dress! I still have the top portion of the dress that could be used for something, but who knows? Maybe it’ll become a part of a project, and maybe it won’t 🙂

What do you guys think??? Like? Hate? Something in between? Let me know!

Reuse and Recycle...Material!

Reuse and Recycle…Material!

I had this piece of clothing that really wasn’t my style.

I had this piece of clothing that really wasn’t my style.

I’ve heard stories about my grandmother recycling material and such for the sake of future sewing projects. And, no, I’m not going give you a how-to of how to cut up your couch for the reusable material and filling! But the overall idea is a part of the general theme of today’s post: Reusing material for a new purpose.

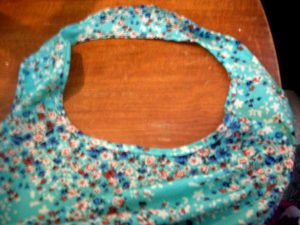
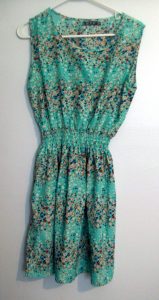
I had this piece of clothing that really wasn’t my style. It’s the green, flowery one in the picture, and it wasn’t something I felt was *me* enough to wear in public. BUT, it did get the gears in my head turning with possibility. Even though I didn’t want to wear this as a top or a dress, I was convinced it could make a fairly good apron. I decided to keep the material for future cutting/sewing use.

I think it was last week that I got around to working on the project, and the process wasn’t all that difficult. In fact, there’s a tip for new sewers: Keep an eye open for projects that wouldn’t be overly difficult to build your sewing skills. What I had in the beginning with this piece of material just looked like it could be an apron, with the style and the fabric. And, when thinking through how I’d go about turning the clothing into an apron, I realized the steps wouldn’t be that numerous. If you can catch enough finds like this one—things you might have around your house that you’re maybe planning on throwing away—you can reuse material, make projects for little to no money, and improve your sewing with what could amount to baby steps! Sounds like a win to me!

One side of the clothing had the seam along it, so I only had to follow the outline there.

One side of the clothing had the seam along it, so I only had to follow the outline there.

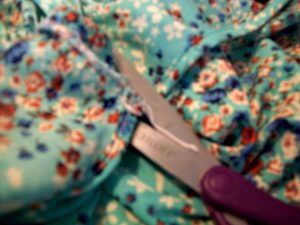
So what were the baby steps for this project? Well, they started with cutting, since I don’t know that I’ve ever seen an apron with a full back on it. One side of the clothing had the seam along it, so I only had to follow the outline there. The other side depended more on my judgment, but I do have a sewing mat and a rotary cutter now to hopefully help make more accurate cuts. Yay, sewing tools!

The material circling the neck could stay in place though, since aprons attach there anyway. That particular curve required a secondary round of cutting, which I’ll blame on my lack of experience with apron-making. I don’t usually have to make the right-place cuts for loops to go around my neck, so I won’t think too harshly about myself for going overboard on the first try. In the end, if you try for an apron, remember the loop should probably be no more than one inch thick once your sewing is finished, and make sure you’re keeping with the same general width range throughout your cutting. Otherwise, your backing might seem bulky overall, or just in parts. Neither is necessarily a good option!

Remember the loop should probably be no more than one inch thick once your sewing is finished.

Remember the loop should probably be no more than one inch thick once your sewing is finished.

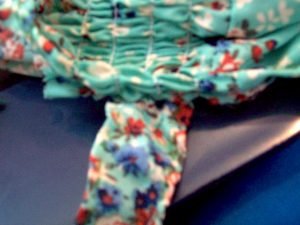
Once I was finished with the cutting, I sewed hems along the edges where I’d cut, and used some of the material I’d cut off for straps that I could use for the ties to attach to the waist. Honestly, that task was kind of frustrating since the straps were so small, and the thread kept bunching or wrapping around the fabric. Lesson I could potentially take from this experience: Tiny material should maybe be reserved for later use, like after I’ve gained more experience with sewing!

I sewed hems along the edges where I’d cut, and used some of the material I’d cut off for straps that I could use for the ties to attach to the waist.

I sewed hems along the edges where I’d cut, and used some of the material I’d cut off for straps that I could use for the ties to attach to the waist.

Possible lesson you could take from this experience, if you’re an early sewer: If you’re going to make an apron, start with thicker straps to go around the waist—maybe two inches or a bit more. As far as appearance goes, it might be better for those straps to be a little bulky than for them to have confusing thread patterns. As far as process goes, saving yourself the annoyance of fighting with your thread might be worth the extra material.

One more tip for the road: If you do a project like this one, make sure that when you can, you make use of the hem on the original clothing. It might seem like cheating, but saved effort and thread is saved effort and thread!

All in all, keep an eye out in your own house for things to recycle into sewing projects. You can learn to be a better sewer without breaking your bank account!